Building an AWS DevOps Pipeline for Databases
The first time you try to automate a database deployment using any of the available flow control tools, all the moving parts makes the task look insanely difficult and this is not any different within the AWS Developer Tools. However, after you get over that initial shock, the processes are not nearly as difficult as they seem. Yes, there are quite a few moving parts. Getting them all communicating with one another requires more than a little initial work. Once you’re past those first steps though, the entire process just becomes one of defining what you need and building it. Let’s walk through a simple example of a deployment in support of a Continuous Integration (CI) process using AWS.
Assumptions
I’m not going to walk through signing up and setting up your AWS account. There is plenty of documentation out there on how to do this. I’m also not going to get into the weeds on the security of your AWS account. Again, there is documentation available on this. Same assumptions go for setting up your database. I’m going to be using Flyway inside a Docker container as a part of the process. If you need some help on setting up your Flyway configuration file to use a container, again, I’m going to point you to other documentation.
CodeCommit
We’re going to start with source control. I’m going to use AWS CodeCommit as my source control for the deployment process. I could use anything from my own hosted repository, to GitHub, to just about anything. However, putting everything into AWS and using AWS tools for AWS deployments simplifies a lot of things. CodeCommit is a hosted, highly scalable, flavor of a Git repository. You can connect to it using pretty much any tool that supports a standard Git connection. This simplicity in connection means I can do my development locally and then store my code in a shared environment in the cloud.
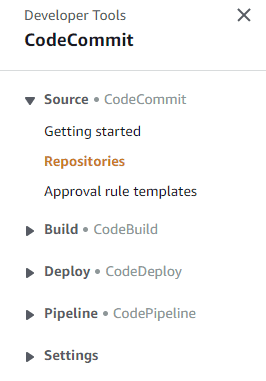
To get started with CodeCommit, we go first to the Developers Tools page where the AWS DevOps tools live:
From there, we’ll select “Source” which is the CodeCommit software. Then we’ll select Repositories so that we’re now looking at this on the left of the screen:
It’s possible to do all this through the AWS CLI as well. The commands will follow the same steps as we’re performing through the AWS Console. Once you’re to the Repositories page, you’ll be presented with the following choices:
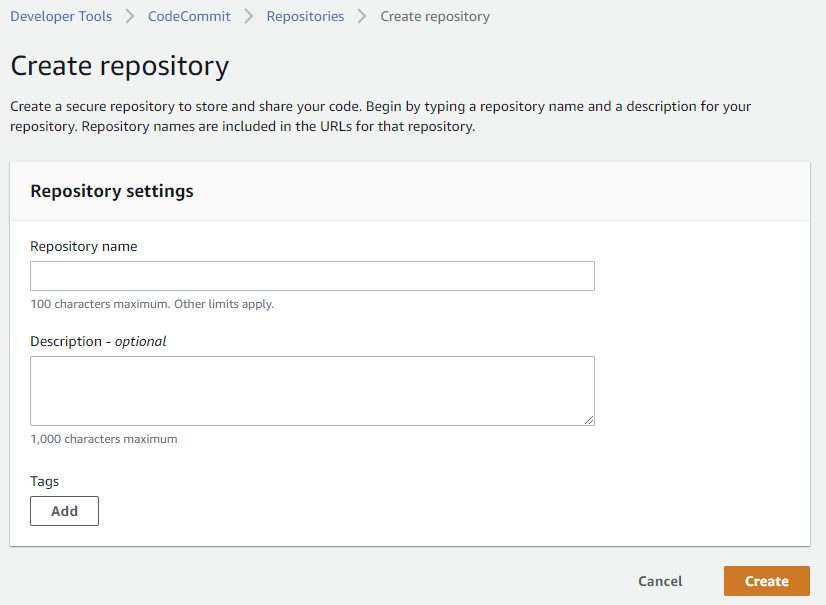
Obviously, we’ll be selecting “Create repository” since this is our first time through the process. There’s actually not much to this. After clicking the button, you’ll see the following:
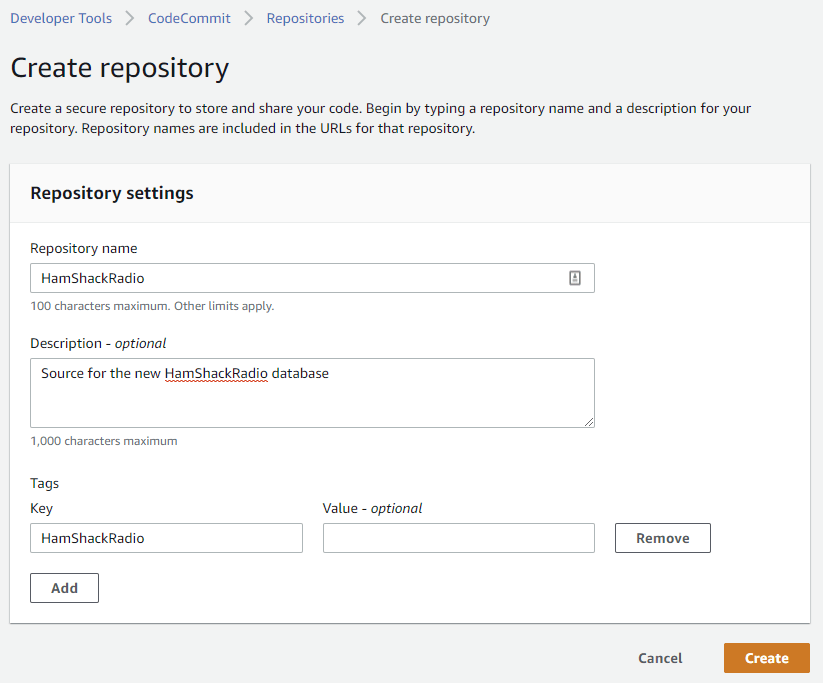
All we must do is supply a Repository name. However, I’d suggest that you also start adding Tags to all your AWS services that are associated with one another. Tags provide a way for you to aggregate and track services. They can also be used to search for services and provide a handy mechanism for removing all services for a particular Tag value. I’d also suggest you provide a description, but that’s not nearly as important as putting Tags to use. My new repository looks like this:
Clicking Create will make our new repository. At this point, it’s completely empty. The next step is to clone the repository and begin to load files into it. You can set up connections through the commands provided to you in the Console:
This is my new repository. On the right hand side, you can see the column, Clone URL. Depending on how you define your security, you simply click on the appropriate method to get the clone URL location. In my case, I’m just using HTTPS and a secure login. Clicking on that choice simply copies this location:
|
1 |
https://git-codecommit.eu-west-3.amazonaws.com/v1/repos/HamShackRadio |
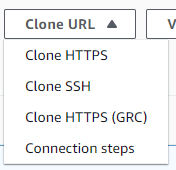
However, if I wanted to, I could also get the fill command. Select the repository in question by click on the radio button on the left. This enables all the command buttons across the top of the console. Clicking on the Clone URL drop down, you get the following:
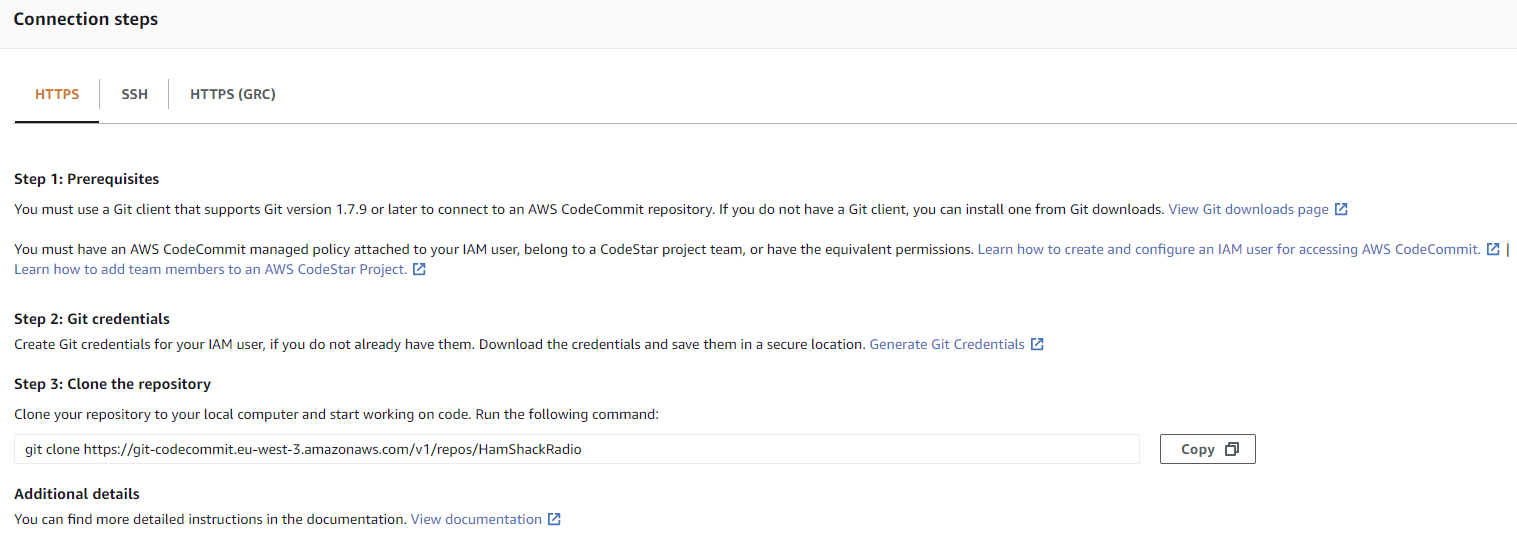
The first three options are just the same as the Clone URL column options. However, the bottom command, opens a new window which will walk you through the details of using the URL appropriately. This will even include showing you exactly the command you must run in Git in order to clone your repository:
Here’s where you’re going to need to do some additional work. First, you have to have the appropriate Git client installed. AWS redirects you to a place to get that. Then, you have to have an IAM login and that login must have the AWS CodeCommit policy. There’s a link walking you through those steps as well.
Next, you have to create a set of Git credentials and put them on your client. Once more, a link takes you to the details for this process. Finally, you receive the specific Git command to clone your repository, including the URL we outlined above. Mine looks like this:
|
1 |
git clone https://git-codecommit.eu-west-3.amazonaws.com/v1/repos/HamShackRadio |
I simply have to pick a location on my local machine where I want to create my local Git repository. Then, run the clone command from that location. That’s all the prep work. You have a local Git repository where you can version and branch your code. It’s connected to central repository within AWS CodeCommit. You can push your changes to the central repository after you test them locally.
At this point, I set up Flyway within my repository. This means a folder for storing the SQL statements that define the database and a folder for storing my Flyway configuration file. That configuration file has to have your license key and your file system definition. That’s all. You can add more to take advantage of all sorts of Flyway behaviors, or, you can issue Flyway commands to change configuration settings, such as supplying the connection to a database. You can read more about all that here.
With the repository in place, we’re going to create a CodePipeline.
CodePipeline
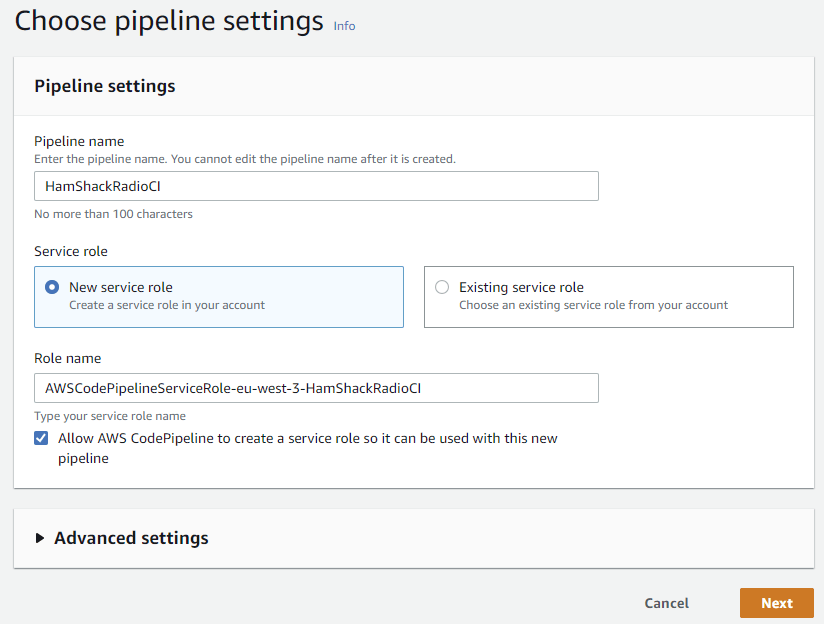
Creating a CodePipeline is how we can start the process of setting up a Continuous Integration (CI) process. We can make this extremely complex if we choose. However, for this example, we’re going to keep things as simple as possible. Clicking on the Create Pipeline command from the main DeveloperTools page or from the CodePipeline page, we’ll be presented with the following:
Let’s walk through each of these settings.
First, the Pipeline name is simply a descriptive name for you pipeline to set it apart from the other pipelines in the system. In my case, I’ve chosen to name the pipeline after the database and define what this pipeline is doing: HamShackRadioCI.
Next, you have to determine a role for the service. You may already have defined the appropriate role, in which case you choose to use an existing role that exists on the account. However, in this case, we’re creating our first pipeline, so no roles exist. The easy way to do this, is to take the default of a new service role. Whether or not you take the default of the supplied role name is on you. You can see that AWS is being very specific in it’s descriptive name for the role. First, AWSCodePipelineServiceRole defines exactly what this role is intended to do. Next, eu-west-3, shows the data center where I’m creating my work. Finally, it’s using the name I supplied for my pipeline. I’m leaving the “Allow AWS CodePipleine…” box checked so that it will create my role for me.
There’s no need to mess with the advanced settings in this example, so we’ll just click next.
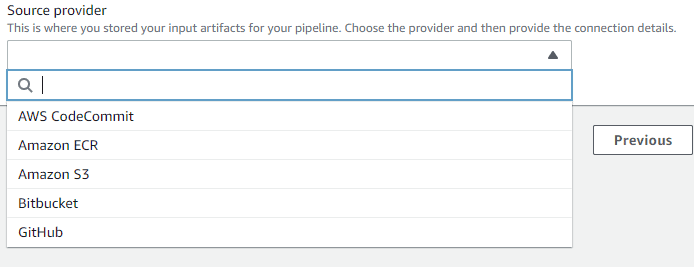
This brings up Step 2, adding our source code. The first choice is the location of our repository. Click on the drop down you get the following choices:
Obviously, in our case, we’re picking the AWS CodeCommit since we just set up a repository there. However, you can see that several other possible sources for your repository exist.
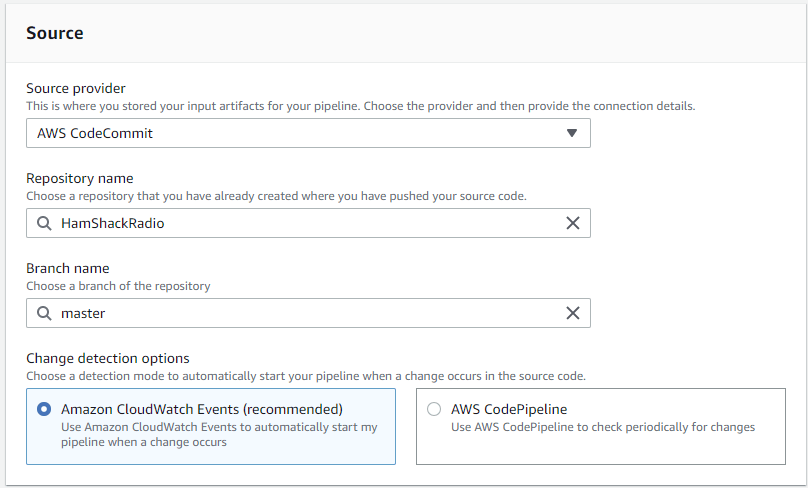
I’ve gone ahead and picked the repository we created above and the main branch supplied when we created the repository. Finally, we have to decide if we’re going to use the event driven CloudWatch as a trigger for our pipeline, or if we want to set up the Pipeline to simple check periodically for changes. This is both a process and a pricing choice. Every time the pipeline runs, it goes against your bill. Will your process, and wallet, work better with the CloudWatch events, or, with the intermittent checks from CodePipeline? You’ll figure that one out. For me, the CloudWatch means that I’ll see the Pipeline run automatically after I push changes into the main branch.
Next, we have to define the build stage. We’ll get into all the details of the CodeBuild definition in a separate section below. However, let’s address a few details of the build stage here. First, the build stage itself is optional. Your pipeline may only use the deploy stage. You don’t have to have both a build and a deploy stage. It completely depends on what you’re attempting to accomplish. In our case, with a CI process, I’m going to implement that process within the build stage itself, and instead skip the deploy stage. I can, within a single build stage, create an environment to run my CI process from, run the process, and then throw it all away again. No deployment is necessary here.
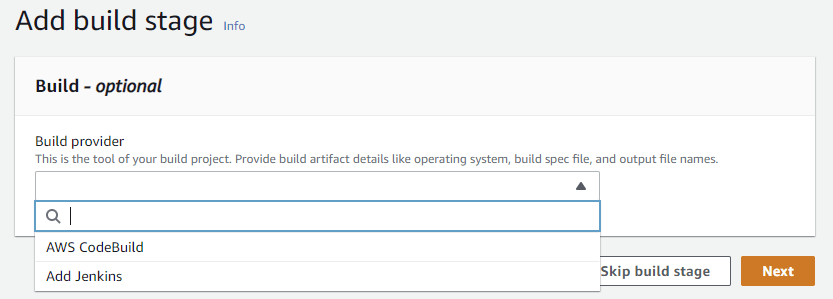
Let’s step through part of the CodeBuild here. First, you have to select the build provider:
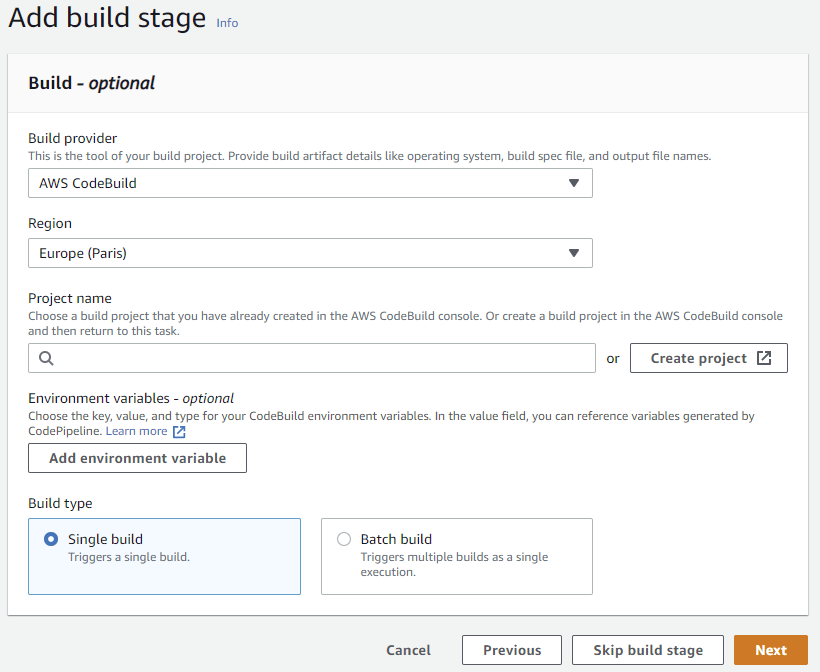
You can choose either Jenkins or AWS CodeBuild. In our case, we’re going to use CodeBuild. Selecting that changes the window:
Most of this should be relatively clear. You have to decide on a region. I’m going to use the one where my code, and all the other settings we’ve done so far, lives. Then, you can create a project or use an existing one. We’ll need to create a project and we’ll go through that below. You can define environment variables if they’re needed. We won’t need any here. Finally, you can have more than one build project run through this build step. Again, here, we only need the one project, so we’ll be fine.
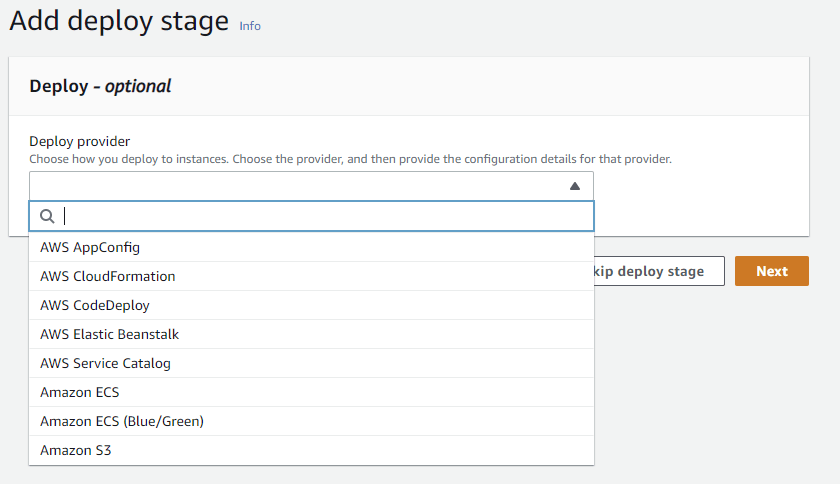
Next, if we were defining a deploy stage, we would do so. We can skip this entirely. However, if you needed a deploy stage, these are the choices you have for deployment:
As you can see, there’s a lot to it.
Clicking Next we arrive at Step 5, the review. This lets us look through all the choices we’ve made up to now in order to determine if it’s correct. It is, and we can click on the Create pipeline button to finish the process.
Now, let’s look at what we defined as our CodeBuild stage.
CodeBuild
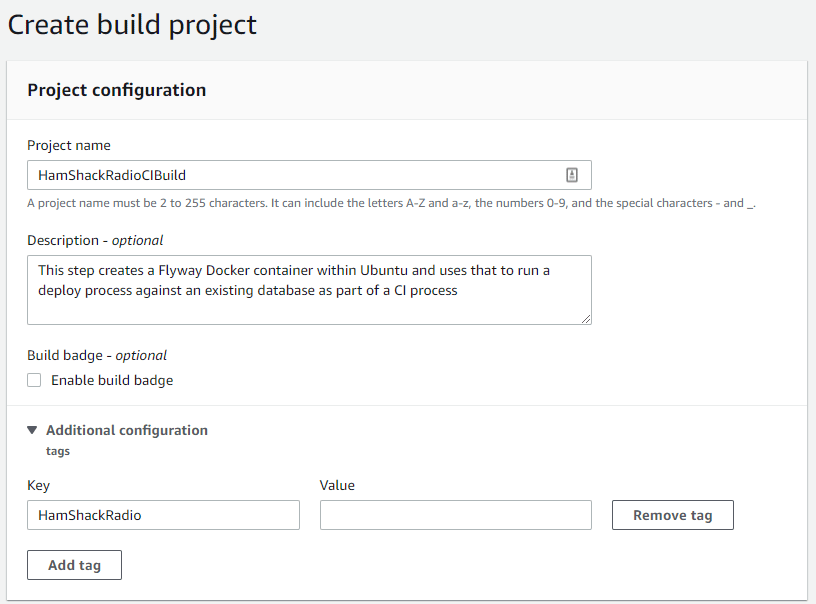
The CodeBuild is where you can define steps to either run commands, or create artifacts that are later consumed by CodeDeploy. You can even do both. It all comes down to how you define your CodeBuild stage. There are a number of settings we have to provide in order for CodeBuild to function. Let’s get started. You can, as I did, create the CodeBuild stage as part of creating the CodePipeline. You can also just create a CodeBuild stage and then select it when you’re defining your CodePipeline. Either way, here’s the first section:
You have to provide a name. I’d make it descriptive and clear so that others know what you intended this build process to do. I’d also take advantage of the description to outline the expected behavior of the build process. Finally, any opportunity to supply tags within AWS helps you with management.
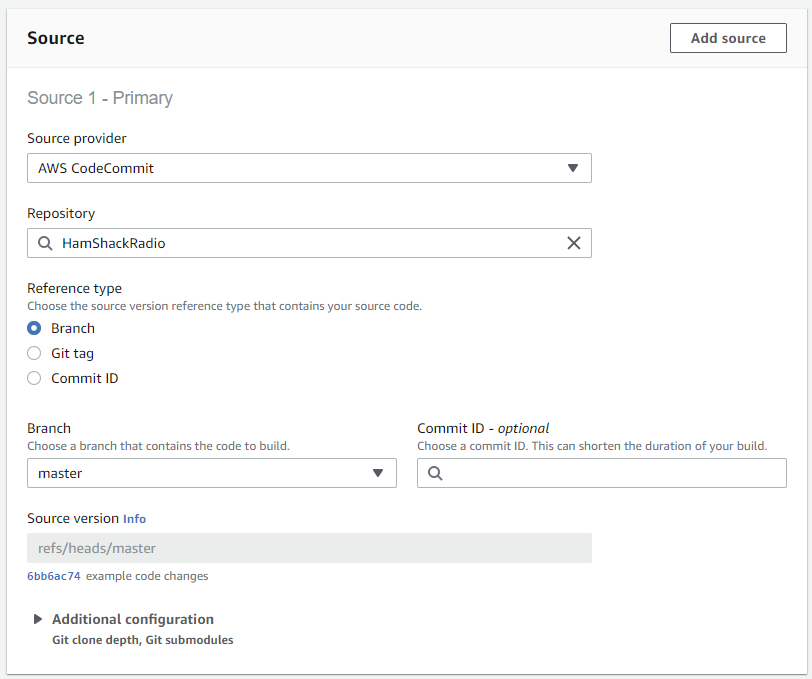
Just as you needed to define the source code repository for CodePipeline in order to supply the trigger for our CI process, we need to define the repository for CodeBuild so it knows where to get the code it’s using:
I’ve chosen my provider, repository and Branch. Obviously, you can use git tags or even ID values to perform the build. This should all be pretty straight forward at this point in the process.
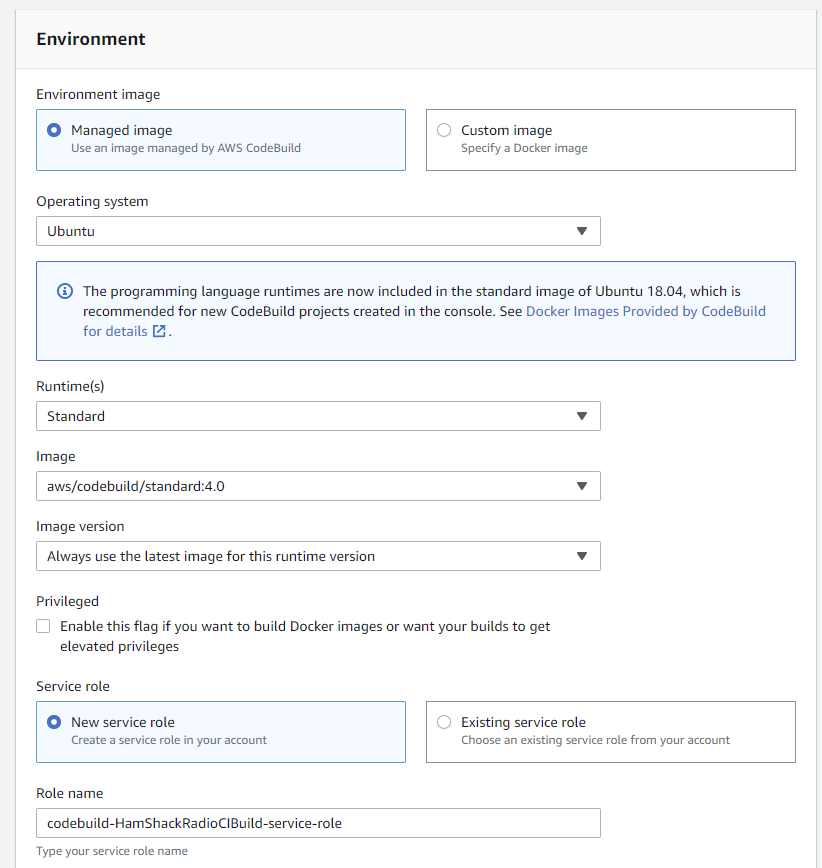
Next, I have to create a server on which to run my build commands. Here, there are lots and lots of options. You’ll have to work through which is going to be best in your environment and for your needs. You may even have to create and supply your own Docker image. However, I can run what I need for this CI process using the following configuration:
To start with, I don’t need a custom Docker image. I can use one supplied by AWS. I’m choosing to use their Ubuntu OS images because I’m more familiar with Ubuntu than I am with other Linux flavors. I can use the Standard runtime and don’t need any special configurations. I’m using the latest image available currently, and, if they update the image, I’ll get the new one automatically. In my testing, I sometimes used the elevated privileges, but realized after a while that wasn’t necessary since I’m just creating a Docker container within this image and issuing commands to it. Finally, you do need to supply or define a service role.
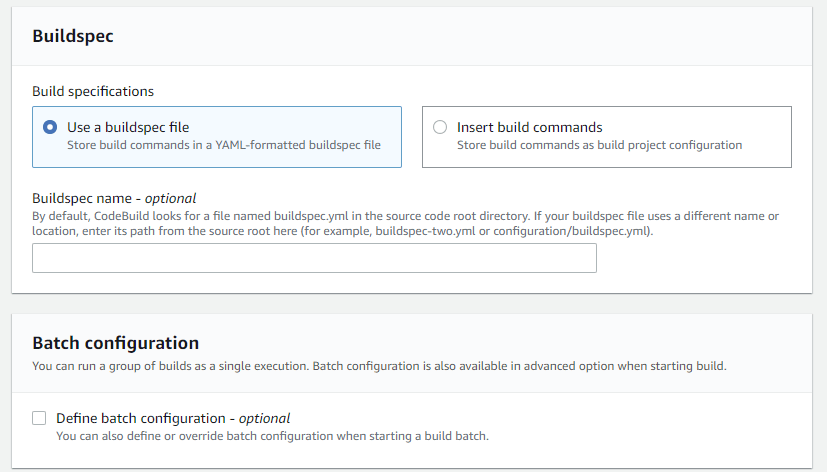
Next, we have to define exactly what this build stage is going to do. This means either providing a buildspec file, or supplying commands:
I’m going to supply a buildspec file. The reason for this is not because I couldn’t do this using commands, in this case, I could. It’s mainly because, I know I’m going to proceed to add more steps to this CI process, additional tests, etc., so I may as well start with a buildspec file which gives me a lot more control and flexibility.
I’m also not creating a batch build process, so no need to perform the optional step.
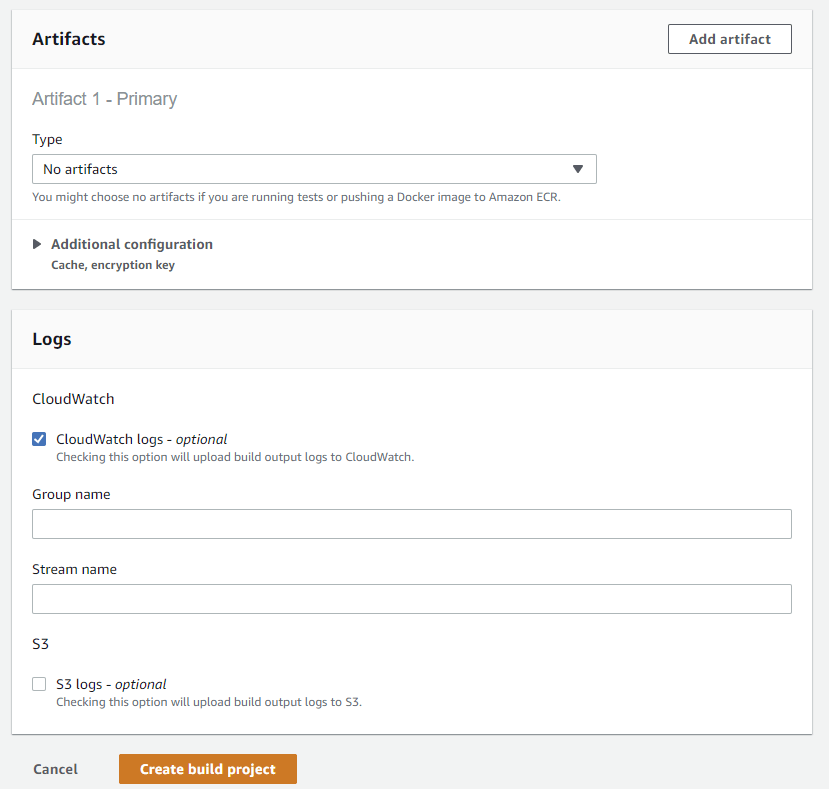
Finally, I have to define my artifacts, if any, and where they’re going to go, and any logging I want to include:
I don’t have any need for artifacts at the moment, so I can skip those settings by simply telling it that there isn’t one. If there were an artifact, I’d have to define where within S3 storage I’d like that artifact to live. Finally, I’m letting the default remain in place, selecting CloudWatch as a place to keep my logs.
With that I can create the build stage and use it within my CodePipeline process. However, the first thing I need to add to source control is my buildspec.yaml file so that I’m taking control of the build process, otherwise, any code changes added will cause the CodePipeline to fail.
buildspec.yaml
This is where we finally take direct control of the actions being performed. The buildspec.yaml definition can be extremely complex and is defined here. You can provide variables, parameters, credentials. The steps can include an install, a pre-build, build, and post build step. Each of these steps can use multiple commands. You can define reporting within the build process. Finally, you can detail exactly how the artifacts are generated and where they go.
It’s also possible to have a fairly simple set of command to start with:
|
1 2 3 4 5 6 7 8 9 10 |
version: 0.2 phases: build: commands: #- docker run --rm -v $(pwd)/SQL:/flyway/SQL -v $(pwd)/conf:/flyway/conf flyway/flyway -enterprise clean #- docker run --rm -v $(pwd)/SQL:/flyway/SQL -v $(pwd)/conf:/flyway/conf flyway/flyway -enterprise validate - docker run --rm -v $(pwd)/SQL:/flyway/SQL -v $(pwd)/conf:/flyway/conf flyway/flyway -enterprise migrate |
I’m only running a single command. It’s to create a Flyway docker container and issue it the ‘migrate’ command. All the other necessary information is stored in my Flyway configuration file. You can see when I was experimenting with this, I started first using the ‘clean’ command which removes all the database objects, allowing for a clean deployment. I also experimented without a database at all using just the ‘validate’ command to ensure that my Flyway files were configured correctly.
This is an incomplete CI process. Yes, I can get my database code changes out of source control and ensure that they get deployed, the first test in any CI process. However, I need to add some additional testing steps. I’ll do this through more commands in the build process, or, by adding a post-build phase and issuing commands there.
Either way, this is all that’s needed to do the heavy lifting, after we’ve set up the environment using the CodeBuild stage in our CodePipeline process.
Conclusion
While there are a lot of moving parts to this process, after you walk through it a few times, you’ll see that it’s actually not terribly complex. Like any complex problem, break it down, focus on each individual step. With this outline, you should be able to begin the process of learning AWS DeveloperTools and putting Flyway to work within them.

