Automatic Provisioning of Developer Databases with SQL Provision
Steve Jones shows a simple way to provision full size databases for developers, using production like data that has been masked automatically as part of the provisioning process.
The GDPR, and other regulations, requires that we be careful in how we handle sensitive data. One of the easiest ways to avoid a data breach incident, and any accompanying fine, is to limit the sensitive data your organization collects, and then restrict the ‘exposure’ of that data, within your organization. Many high-profile incidents in the last few years have been caused by sensitive data leaking out of database copies held on test and development servers, which are typically less well protected than the production servers.
If you want to avoid being mentioned in the news for lax security, then a good start is to ensure you keep PII, and other sensitive data, away from any less secure environments. One way the GDPR recommends we do this is by pseudonymizing or anonymizing sensitive data, before it enters these insecure systems.
While developers often want to work with data that looks like real, production data, they don’t necessarily need to have the actual data. In this article, I’ll show a simple way to build developer databases and fill them with ‘real’, but sanitized, data. I’ll be using SQL Provision, which integrates SQL Clone and Data Masker for SQL Server, to copy a database from a production system, remove sensitive information, then automatically build a few databases for our developers.
Protecting data outside production
When developers write database code, they can often experiment, and develop their queries, with fake data, and a limited number of rows in each table. Individual developers can often create a few pieces of data, manually, though ideally a standard set of data would be available to the team. This lightweight approach is ideal during the early development phases, allows the team to start work quickly with new tables and columns, and add data, as needed, to determine if their approach is valid.
Once they decide to move forward, however, developers often want to apply their changes and additions to a full-scale database, often a copy of production, to test if exposure to real data volumes and real data values, including edge cases, causes bugs, or reveals a gap in their approach.
The common approach is to restore a production backup to a shared database that all developers can access, which often contains sensitive information. When dealing with just a single database development environment, it is relatively easy for a DBA to manage security, and set up a process to mask sensitive data, even if it’s a manual one. However, while a shared database can be helpful in ensuring changes work with larger data sets, it can also cause problems. It increases the risk of making conflicting changes to objects, or one developer overwriting changes made by others A single shared database also means that only one branch of changes can be tested on this system at once, with later changes delayed until development and testing are complete. This creates conflicts between developers and slows the process. Ideally, we would like to ensure that each developer can work on their own, isolated copy of a database that mimics production, but without sensitive data.
We can do this be ensuring that our provisioning process automatically masks data from production before any databases are used in development or test environments. We can use data virtualization technology to allow each developer to have a full, sanitized copy of production without the storage issues that come with making multiple copies of large databases.
Working with SQL Provision and PowerShell
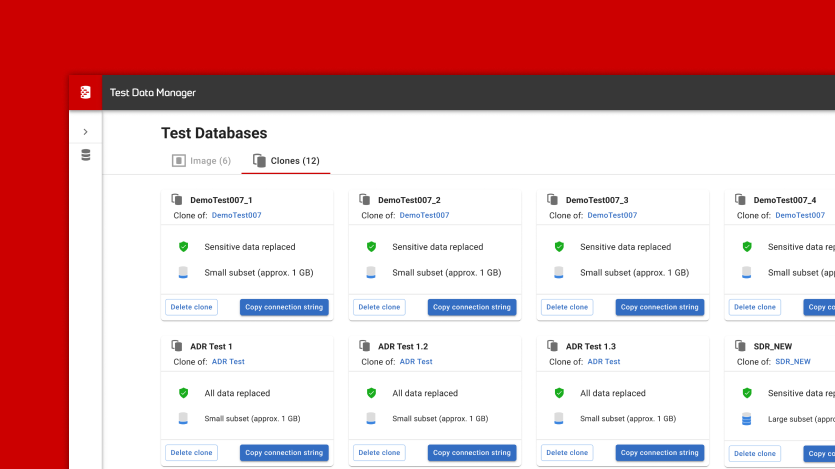
Within SQL Provision, we have SQL Clone, a product that allows us to create an image, which is a point-in-time representation of your source database (up to 64TB). From this image we can then create multiple clones, for deployment to the development and test instances. Each developer works on a clone database that uses minimal disk space, but appears to be a full-size database.
SQL Clone also provides a built-in T-SQL script runner, which allows an administrator to run a set of custom scripts to mask sensitive or personal data, or to modify security and other configuration settings, prior to creating a clone.
However, SQL Provision makes this whole process much easier, since it fully integrates Data Masker for SQL Server. This allows us to define a set of data masking rules for our tables, and an order in which they run. With SQL Provision we can incorporate our masking rules directly into the image creation process.
Data Masker provides several sample data sets, which we can use to replace sensitive data with realistic, but random values. There are different types of rules for various situations, including dealing with primary and foreign key replacements, internal and between table synchronizations, and rules to enable or disable objects.
The end-to-end database provisioning process, including image creation, data masking and clone deployment, can be built using PowerShell.
Preparing for data masking
The process of masking information in our database follows the flow of discover, classify, protect, and monitor. As this relates to the GDPR, or other regulation, following this process will ensure we don’t accidentally move sensitive data into environments, where consent has not been given for its use, or where it is not properly secured.

The first steps in any masking project are discovery and classification; we must analyze and understand what information is stored in each table, and classify the sensitive data so that we know what data needs to be changed, and how.
The GDPR requires that we ‘delink’ any data from individuals through anonymization or masking, which can be a complex and time-consuming task. A set of tools from Redgate offers other tools in addition to Data Masker, such as SQL Estate Manager, that simplify this process as they can be applied in an iterative fashion. However, this doesn’t remove the need to determine what data to mask and how to alter this data.
Finally, on an ongoing basis, we monitor, to be sure that our masking is working correctly, as well as ensure that we don’t have new data that needs masking.
Configuring masking rules
Data Masker for SQL Server allows us to build a set of rules that will execute in a defined order to mask our data. We may choose to use multiple types of rules that change and alter data, and include random or known data sets in our masking to ensure that our application continues to work as expected.
In this article, we will configure a simple data masking set, consisting of just a couple of sample rules. We will use a substitution rule and a row-internal synchronization rule to mask names in a table, which would be considered sensitive data under the GDPR regulations.
The name data in my table looks like this. There are other columns in the table, but I’m not showing them in this query.

Note that the email address consists of the first initial of the customer_firstname column, the customer_lastname, and some .com domain. This is a sample database, and these are potentially real email addresses. While we certainly wouldn’t want this data released in a development environment, we also wouldn’t want to accidentally send an email to someone from a test system.
Substitution rules
Let’s start by masking the customer name columns. I’ll use a substitution rule that will randomly replace all first and last names with random names from a data set in Data Masker for SQL Server.

Here, we are applying the “Names, First Names, Female” data set to the customer_firstname column, and using the “Names, Surnames” data set to replace the values in the customer_lastname rows. If we run this, every customer will have a female first name. While this might not be a problem, we can avoid this by adding a second substitution rule that replaces those rows where the customer_gender is ‘M’ with male names.
To do this, we need to add a second substitution rule to our masking set. In this case, we’ll choose just the customer_firstname column and the “Names, First Names, Male” as the data set.

I’ll then click on the “Where Clause and Sampling” tab and enter a T-SQL WHERE clause that will limit this masking to those rows where the customer_gender is set to male.

‘I set the second rule to run after the first one. You can see both rules in the image below.

The row internal sync rule
Once I have these two rules, I’ll add a row internal sync rule to fix the email addresses, so that they’re constructed from the substituted values from the first and last name columns.
In the image below, you can see the configuration for this rule. I use a concatenation to get the values from the name fields, and the parameter data sets to build an email. The parameter data sets will generate random domains, none of which are valid. The concatenation is configured at the top of the “Columns & Datasets” tab. I’ve entered T-SQL to get the first initial and last name. This code isn’t visible in the image, but here it is in full:
|
1 |
SUBSTRING(customer_firstname,1,1)+'.'+customer_lastname+'@'+DMSPARAM1+DMSPARAM2 |
I use the SUBSTRING function with the period and @ symbols to construct the user part of the email address. For the domain, I use two parameters, DMSPARAM1 and DMSPARAM2. These are built using Data Masker datasets. In the image, you can see the DMSPARAM1 is populated using random words from the dictionary dataset. These will give me domain names. DMSPARAM2 is populated from a customized set of top level domains that are invalid, such as “.redgate“, “.example“, and “.test“.
This configuration will ensure that I get email addresses in the format that humans and most applications expect, but that will be invalid if they are sent to an actual email server.

Setting the rule running order
We cannot update email addresses until the names are changed, which means I need these three rules to run in a dependent order. You can see that in the image below with the indentation signifying the dependency of a rule on the line above.

Save the data masking set
I will save this masking set as redgatedemo.dmsmaskset for use in my provisioning process. I can edit and change this set at any time, adding, editing, and removing rules as needed to ensure that I’ve anonymized all sensitive data. This gives me a consistent process that I can easily change and share with others. The masking set description is also stored in an XML format, so this can be added to a version control system and compared with other versions.
Automating image creation with SQL Clone and PowerShell
SQL Clone is a great tool for quickly building databases for developers, while ensuring the build process is always consistent, and the deployed database never contains any sensitive data. In this example, we will use PowerShell to automate a two-stage database provisioning process. The first stage creates the image, in this case from a live connection to a production database, and applies our data masking set as part of the image build. The second stage deploys a clone of this sanitized image to each of our developer’s machines.
The PowerShell code to execute both stages is shown below.
# Connect to SQL Clone Server
Connect-SqlClone -ServerUrl 'YOUR CLONE SERVER URL HERE'

# Set variables for Image and Clone Location
$SqlServerName = 'Plato'
$SqlInstanceName = 'SQL2016'
$SqlDevInstanceName = 'SQL2016_qa'
$ImageName = 'DataMaskerBase'
$Devs = @("Steve", "Grant", "Kathi")

# Get the Clone instance for the source and dev environments
$SqlServerInstance = Get-SqlCloneSqlServerInstance -MachineName $SqlServerName -InstanceName $SqlInstanceName
$SqlServerDevInstance = Get-SqlCloneSqlServerInstance -MachineName $SqlServerName -InstanceName $SqlDevInstanceName
$ImageDestination = Get-SqlCloneImageLocation -Path 'E:\SQLCloneImages'
$ImageScript = 'e:\Documents\Data Masker(SqlServer)\Masking Sets\redgatedemo.DMSMaskSet'

# connect and create new image
$NewImage = New-SqlCloneImage -Name $ImageName -SqlServerInstance $SqlServerInstance -DatabaseName DataMaskerDemo -Destination $ImageDestination -Modifications @(New-SqlCloneMask -Path $ImageScript) | Wait-SqlCloneOperation

$DevImage = Get-SqlCloneImage -Name $ImageName

# Create New Clones for Devs
  $Devs | ForEach-Object { # note - '{' needs to be on same line as 'foreach' !
      $Image | New-SqlClone -Name "DataMasker_Dev_$_" -Location $SqlServerInstance | Wait-SqlCloneOperation
  }
This code will create the image, using the New-SqlCloneImage cmdlet. The DataMaskerDemo database is the source, and SQL Clone reads this database and makes copy in the image file. Before writing the image file, it applies the masking set.
Once the image has been created, the script then uses the New-SqlClone cmdlet to build a set of development databases from the image. These are deployed to a different instance of SQL Server, in each case with the name “DataMasker_Dev_name“, where name is replaced by the name of the developer.
Once this script runs, I will see that I have an image on my SQL Clone server and three new clone databases deployed to my development instances. Note that the original database is a 100MB database, but each of the individual databases for developers is only 46MB.

If I connect to my developer instance and run the same query in one of the developer databases, you will see that my data has been masked. Compare the results below with the first query shown above. The names have been changed and the email address matches up with the new, masked names. Note that the email domains are invalid test domains.

Conclusion
This article shows a simple proof-of-concept workflow that allows an organization to provision full size databases for developers, using production like data that has been masked automatically as part of the provisioning process. This uses SQL Provision and PowerShell to automate the process. The Data Masker for SQL Server component defines the method used for masking data.
Any organization that needs to comply with GDPR or other regulation can use this to ensure that their test and development environments mimic production closely, but with sensitive data changed to prevent potential data leaks.
Find out more about SQL Provision and grab your 14-day fully functional free trial.
Tools in this post
SQL Provision
Provision virtualized clones of databases in seconds, with sensitive data shielded


