Security and compliance
Ensure data security and compliance with data masking, monitoring, and change traceability
Ensure data security and compliance with data masking, monitoring, and change traceability
Monitor and understand your databases with full visibility into performance and change
Build, test, and deploy database changes with confidence
Simplify and speed up database development workflows
Prepare reliable data foundations for AI initiatives
Simplify and secure database modernization across platforms
Control costs and boost efficiency in database operations
Simplify and speed up cloud database transformation
Schema Compare for Oracle has been designed to provide a fast and accurate way to compare and update instances of your database.
The worked example below will take you through the process of comparing two schemas, identifying differences, deploying changes, and verifying that the two environments are in sync after migration.
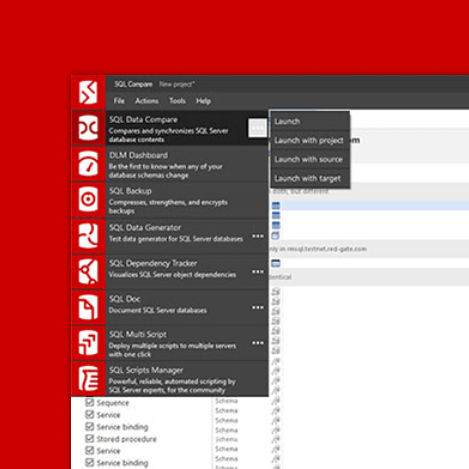
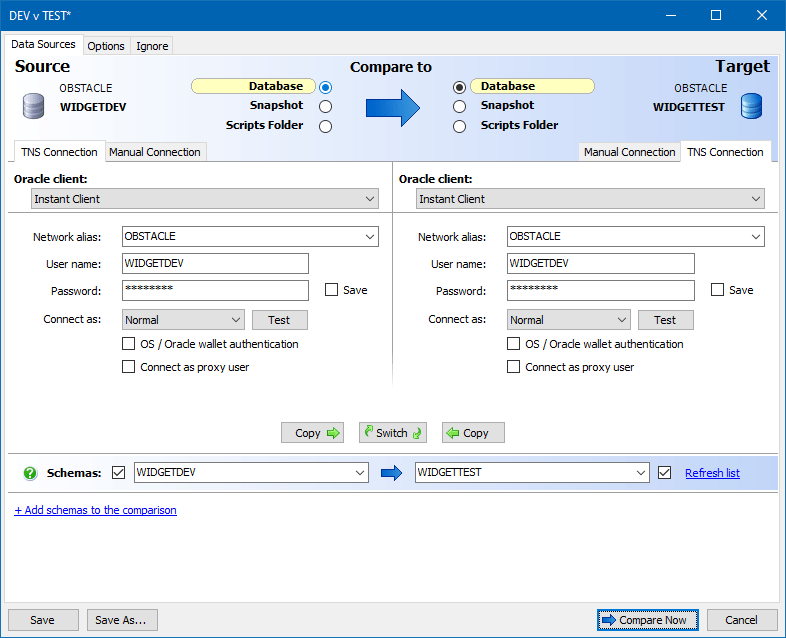
When you run Schema Compare for Oracle, you will be presented with a screen to connect to your databases.
Figure 1 shows a connection to a single Oracle database with two different schemas.
You can compare schemas on the same database or connect to two different databases.
In this example imagine you're looking to move any changes that you think are relevant from your development schema (WIDGETDEV) into your test environment (WIDGETTEST).
When you have connected to your databases, Schema Compare for Oracle goes off and retrieves the schema information from both of those instances, builds up a picture of all the objects that are in the schemas and identifies any differences.
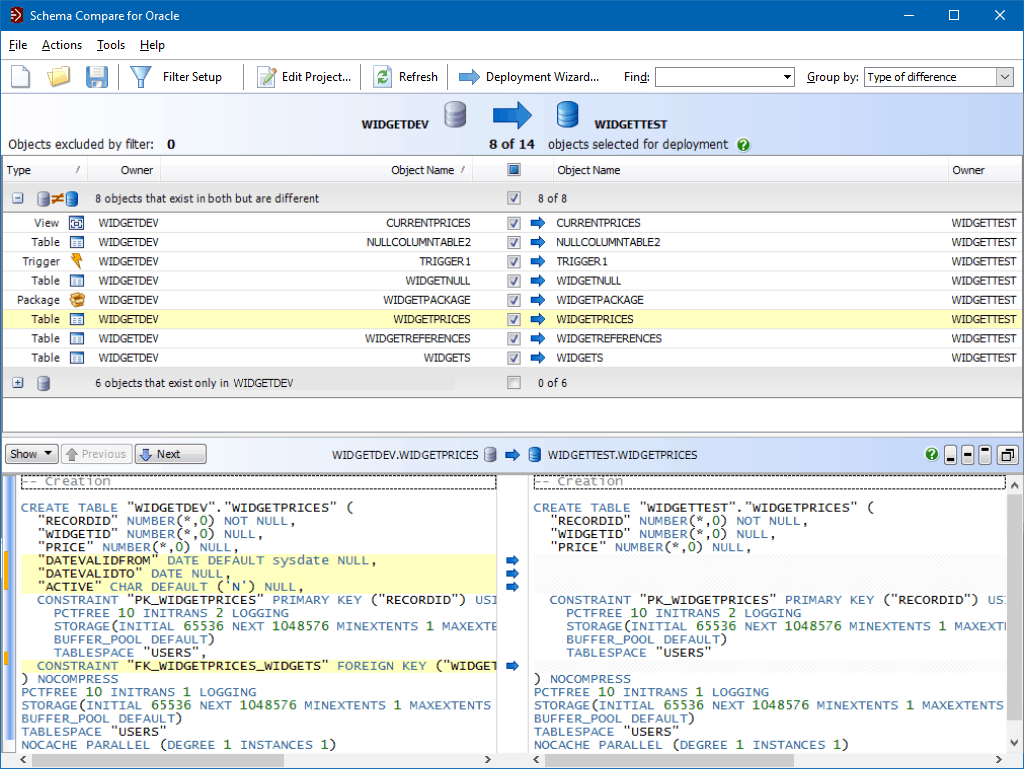
At the top of the screen in Figure 2 you can see a summary of the states of the two different instances.
On the left is the development schema and on the right is the schema in the test environment, and you can see that there are a number of objects — a view, some tables, a trigger and a package — that exist in both instances that are different.
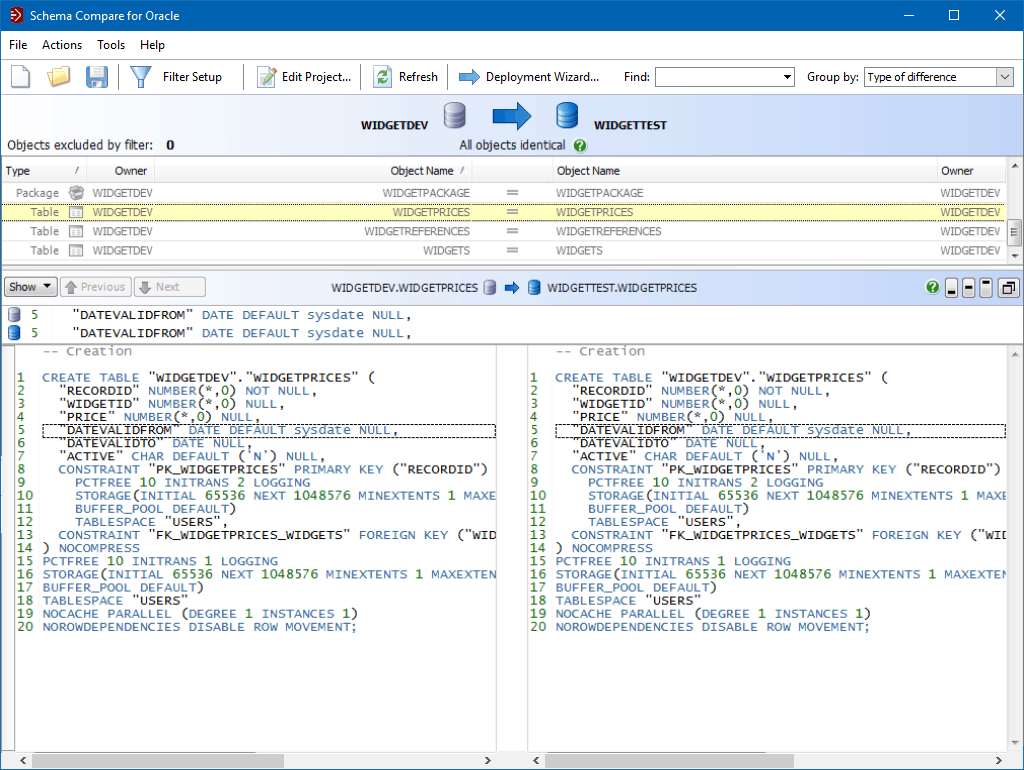
If you click on an object you can see the DDL for that object in both environments in the bottom window (Figure 3).
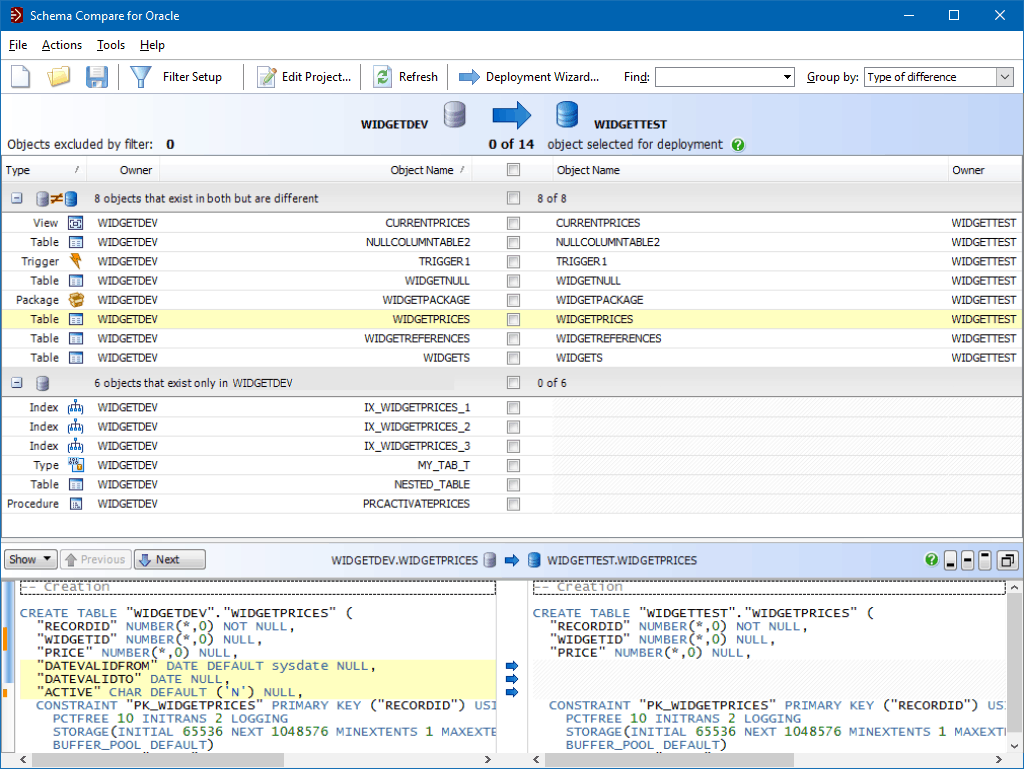
Any differences are colour coded, line numbered, and highlighted. For example, there's a column called ‘DATEVALIDFROM' which only exists in the development environment (WIDGETDEV) for the selected table (WIDGETPRICES).
The side-by-side diff view makes short work of identifying differences in Oracle schemas.
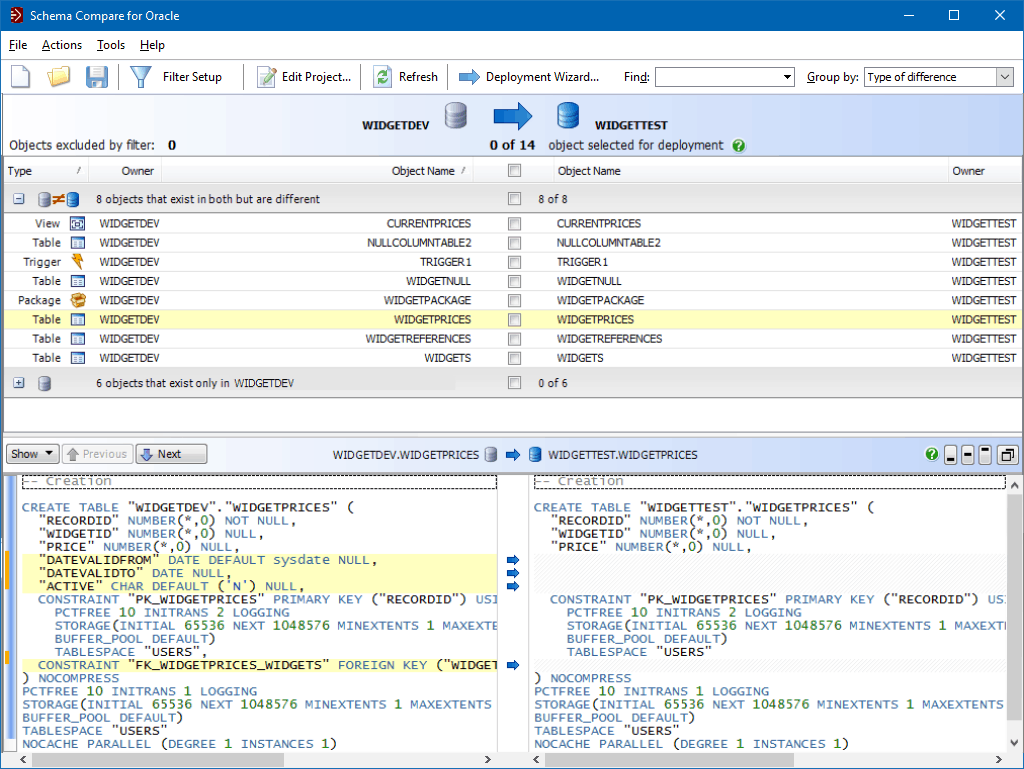
To automatically update the test environment with the development version of that table, all you need to do is select the table in the top window to put it in the set of objects that will be included in the deployment (Figure 4).
Once you've selected the set of objects to deploy you simply run the Deployment Wizard.
This allows you to automate the creation of your deployment script — which as highlighted earlier can be very time consuming to do manually — and, if you choose, manage the actual task of migrating the schema changes across.
The first step in the wizard gives you the option of deploying the changes through Schema Compare for Oracle or creating a deployment script which you can export and run through your IDE (Figure 5 and Figure 6)*.
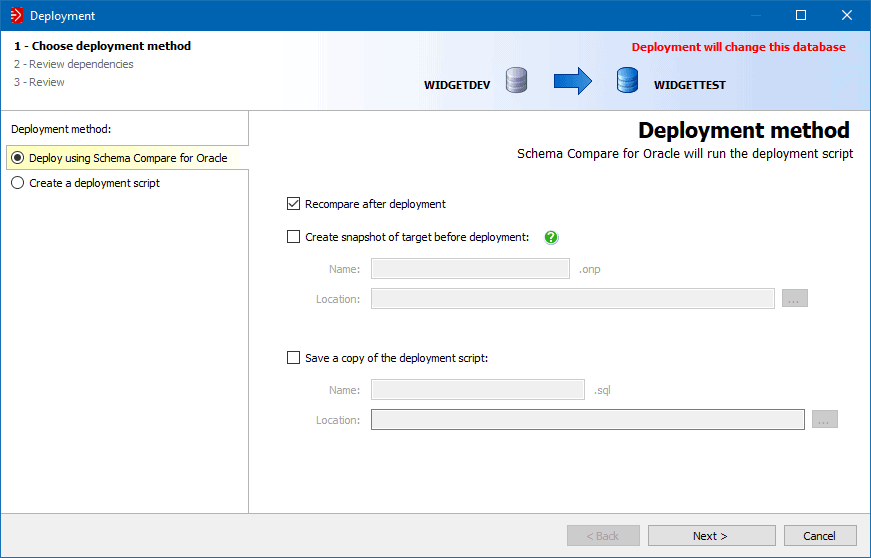
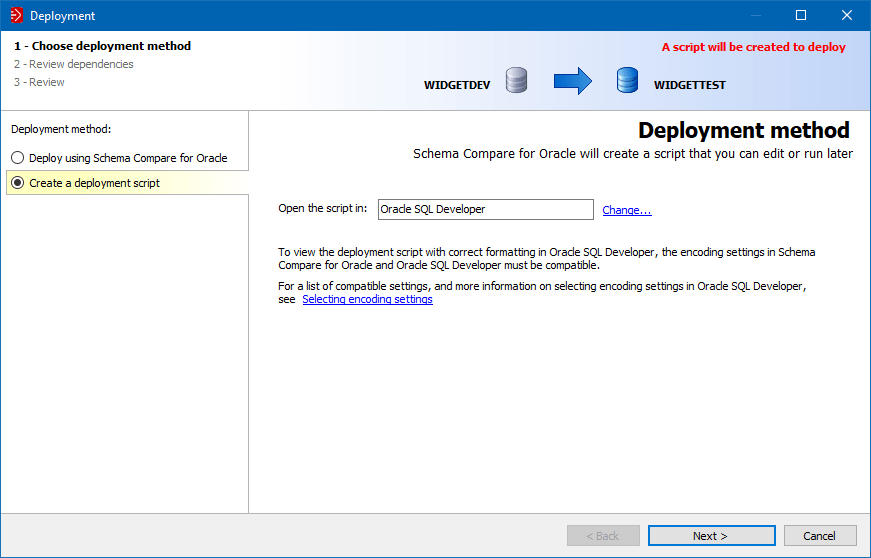
For this example imagine you have chosen to use Schema Compare to automate updating the changes to your schemas.
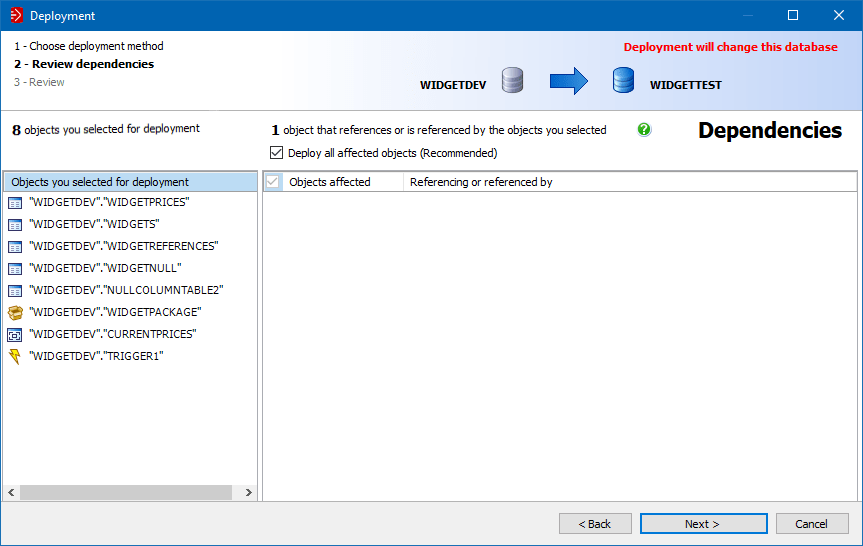
Before the tool generates the update script, you will be prompted to review any dependencies (Figure 7).
The migration script is then generated extremely quickly.
Figure 8 shows the script for the objects selected above.

It's a relatively simple example but you can see a good 50 lines or so of fairly intricate SQL has been created.
You can see the very first line shows adding the column called ‘DATEVALIDFROM' to the test schema, which was identified above.
As you read down the script you can see the other objects that were included in the deployment.
There's lots of nice functionality included in the Deployment Wizard: you can see a summary of what the script does if you don't want to read all the SQL (Figure 9); and if anything odd is going to happen Schema Compare for Oracle will warn you (Figure 10).


There could be situations where the data could get truncated, e.g. if you're reducing the size of a column, and the tool will warn you that the data will be truncated.
If you want to use Schema Compare for Oracle to manage the deployment for you automatically, you simply select the “Deploy Now” button. The software will bring up a final warning that the changes you have asked it to make will go ahead. You also have the option to open the deployment script in your chosen IDE e.g. Oracle SQL Developer or PL/SQL Developer, to review or execute.
When a deployment has completed you can go back to the main screen and see that both instances of the database are in sync based on the changes that were made (Figure 11).
This example shows how you can eliminate writing schema update and comparison scripts by hand, speed up your deployment process, and gain greater visibility of your schemas' structure across your environments by using Schema Compare for Oracle.
*You can run deployments directly from the UI or save deployment scripts for later use with the command line. If you wish to use Redgate's command line tools as part of a Redgate Pipeline (an automated database change delivery process), a Redgate Flyway Enterprise license is required. For more information, see theProduct Specific Terms.
Get started with Schema Compare for Oracle
Download a 28-day trial of Schema Compare for Oracle.

If you'd like any help, or have a question about our tools or purchasing options, just get in touch.