The series so far:
- Azure and Windows PowerShell: The Basics
- Azure and Windows PowerShell: Getting Information
- Azure and Windows PowerShell: Using VM Extensions
I often write about Windows PowerShell on Simple-Talk. I write to help readers to automate day-to-day tasks as you can see in my previous series:
I believe that almost everything can be done using Windows PowerShell. It is possible to perform just about any task you want assuming you have some scripting skills. That being said, I would like to introduce a new series on Simple-Talk about Azure. I will not explain what Azure is and what it is not, because you can read many great articles on the internet about this topic. Here, I’ll focus on what can be done with Azure and, of course, I will often use Windows PowerShell to describe how to configure and use all the Azure services. Even If you don’t work with Azure, I advise you to give it a try because curiosity is the key for every IT professional. Azure becomes more important and widely used as it grows every day, so understanding the benefits and limits of Azure can help you in your IT career.
Some companies are already working with Azure because they must put their workload into the cloud. Other companies are experimenting with Azure. There are also many companies that can’t jump to the cloud, or simply don’t want to, and may have many good reasons. I hope that this new series will encourage these companies to give a Azure a try. Since I work exclusively with Azure, I can’t compare features between Azure and Amazon AWS, but there are very good comparisons available on the internet. Maybe Azure is not the better choice for your business, so feel free to try Amazon AWS.
Many articles on the internet explain how to deploy or create a Virtual Machine on Azure with Windows PowerShell. This is interesting and useful for beginners but there are so many other services in Azure that must be described.
Another key point about Azure is the ability to automate most tasks. Sometimes, you will not be able to choose between using the Azure Portal or Windows PowerShell because Microsoft doesn’t implement all the action in the Azure Portal. Although conversely, not all tasks can be automated, so it is essential to work with Azure Portal as well. Almost everything can be automated which will save a lot of your time and help you to jump into the cloud!
Please note that you can work with Azure using the following methods:
- Azure Portal: The portal allows you to browse resources, modify settings, create new resources, and monitor your resources.
- Azure Windows PowerShell: The Azure PowerShell Module will help you to manage your Azure resources. You can use it on your local machine or in your web browser.
- Azure CLI: Azure CLI (command line interface) is the next generation multi-platform command line experience for managing Azure resources. You can use it on MacOS, Linux and Windows. You also can use it in a web browser.
- Azure REST API: Representational State Transfer (REST) APIs are service endpoints that support sets of HTTP operations (methods), which provide create, retrieve, update, or delete access to the service’s resources. Note that I will not cover this method in this series.
As you can see, Windows PowerShell is not the only method available to work with Azure. In this series, I will also provide Azure CLI commands when it’s possible. Azure CLI is simpler than PowerShell but the main advantage of PowerShell is the community. You will notice that there are many PowerShell script examples available for Azure.
Before going deeper into Azure services, this first article will cover the basics by describing how to login to Azure and how to configure your scripting environment. I hope you will find this series interesting and helpful.
Using the Azure Cloud Shell
Azure Cloud Shell is one method to manage your Azure resources that are available without installing anything on your local system. It provides secure terminal access to a virtual machine without the need to install and maintain the machine yourself. In fact, the virtual machine is created and deleted as needed. Azure Cloud Shell can be accessed within a web browser through the Azure Portal, and you can use it with both PowerShell and Azure CLI commands. With Azure Cloud Shell, you always have the most up-to-date version of the tools available and you don’t have to install or update it. Azure Cloud Shell requires an Azure File Share to persist files, so Azure will create a new storage account for you and this will incur a small monthly cost. First, login to the Azure Portal https://portal.azure.com as shown in Figure 1 and click on the Cloud Shell icon.

Figure 1 – Azure Cloud Shell icon
Wait a few seconds and a PowerShell console will appear. It will take a minute or to authenticate as shown in Figure 2, but authentication is automatic
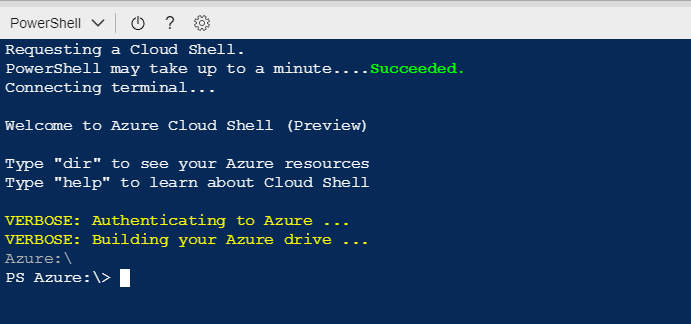
Figure 2 – Azure Cloud Shell using Windows PowerShell
Note that you can select PowerShell or Bash from the shell drop-down list to manage your Azure resources. Figure 3 shows the Bash option. Azure Cloud Shell gives you the flexibility of choosing the shell experience that best suits the way you work. If you are a Linux user, then you can opt for a Bash experience, while Windows users can opt for Windows PowerShell. Remember that Azure Cloud Shell is designed to be a flexible and cross-platform tool.
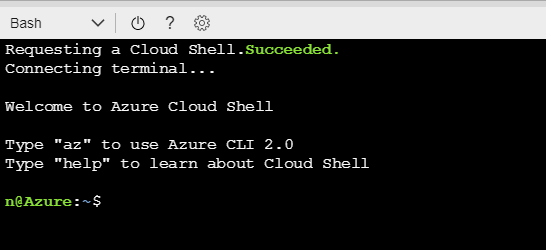
Figure 3 – Azure Cloud Shell using Bash
In my case, I will always use the PowerShell console instead of the Bash console. From this console you can use the Azure PowerShell Module or Azure CLI. Run the following PowerShell command to get the subscription ID, subscription name, and home tenant for the subscriptions that the current account can access.
|
1 2 3 4 5 6 7 8 |
Azure:\ PS Azure:\> Get-AzureRmSubscription Name : Visual Studio Enterprise Id : xxxxxxxx-xxxx-xxxx-xxxx-xxxxxxxxxxxx TenantId : yyyyyyyy-yyyy-yyyy-yyyy-yyyyyyyyyyyy State : Enabled |
You can also use Azure CLI to get the same information by running the following command:
|
1 2 3 4 5 6 |
Azure:\ PS Azure:\> az account list --output table Name CloudName SubscriptionId State IsDefault ------------------------ ----------- ------------------------------------ ------- --------- Visual Studio Enterprise AzureCloud xxxxxxxx-xxxx-xxxx-xxxx-xxxxxxxxxxxx Enabled True |
Configuring the Local Scripting Environment
The other option, and possibly the most common, is using the local computer to write and run scripts. Let’s start by installing Azure CLI. You can install Azure CLI on MacOS, Linux, and Windows.
To run Azure CLI on your workstation, you must download the MSI from: https://aka.ms/InstallAzureCliWindows. Once the installation is completed, open a PowerShell console and type the following command to confirm that Azure CLI is available:
|
1 2 3 4 5 6 7 8 9 10 11 12 13 14 15 16 17 18 19 20 21 22 23 24 25 26 27 28 29 30 31 32 33 34 |
Windows PowerShell Copyright (C) 2016 Microsoft Corporation. All rights reserved. PS C:\Users\Nicolas> az /\ / \ _____ _ _ __ ___ / /\ \ |_ / | | | \'__/ _ \ / ____ \ / /| |_| | | | __/ /_/ \_\/___|\__,_|_| \___| Welcome to the cool new Azure CLI! Here are the base commands: account : Manage subscriptions. acr : Manage Azure Container Registries. acs : Manage Azure Container Services. ad : Synchronize on-premises directories and manage Azure Active Directory resources. appservice : Manage your App Service plans. batch : Manage Azure Batch. billing : Manage Azure Billing. cdn : Manage Azure Content Delivery Networks (CDN). cloud : Manage the registered Azure clouds. cognitiveservices: Manage Cognitive Services accounts in Azure Resource Manager. component : Manage and update Azure CLI 2.0 components. configure : Configure Azure CLI 2.0 or view your configuration. The command is interactive, so just type `az configure` and respond to the prompts. consumption : Manage Azure Consumption. container : (Preview) Manage Azure Container Instances. […] Note that output has been truncated. |
One thing to notice is the Azure CLI version. Run the following command to check the installed version:
|
1 2 |
PS C:\Users\Nicolas> az --version azure-cli (2.0.16) |
There are two main versions of Azure CLI in use. If you are using the classic Azure Service Manager (ASM) deployments, you will need Azure CLI 1.0. In version 1.0, the commands start with azure. If you use, instead, the newer and preferred Azure Resource Manager (ARM) deployments, you will use Azure CLI 2.0, and the commands begin with az. If you want to know more about the key difference between ASM and ARM, please read this guide.
Now let’s install the Azure PowerShell module. I think using the PowerShell Gallery is the easiest and fastest way to install it. Open your PowerShell console as an administrator and use the following PowerShell command :
|
1 |
PS > Install-Module AzureRM |
Let’s confirm if the module is installed:
|
1 2 3 4 5 6 7 8 9 10 11 12 13 14 15 16 17 |
PS C:\WINDOWS\system32> Get-Module -ListAvailable *Azure* Directory: C:\Program Files\WindowsPowerShell\Modules ModuleType Version Name ExportedCommands ---------- ------- ---- ---------------- Script 0.5.0 Azure.AnalysisServices {Add-AzureAnalysisServicesAccount,.. Script 0.4.2 Azure.AnalysisServices {Add-AzureAnalysisServicesAccount,.. Script 4.0.2 Azure.Storage {Get-AzureStorageTable, New-.. Script 3.2.1 Azure.Storage {Get-AzureStorageTable, New-.. Script 0.6.0 AzurePSDrive Script 5.1.1 AzureRM Script 4.2.1 AzureRM {New-AzureRmAnalysisServicesServer,.. […] Note that output has been truncated. |
Remember to update the Azure PowerShell module on a regular basis using the Update-Module cmdlet.
Login to Azure
You can now begin scripting your Azure tasks! The first thing to do is to be able to login on Azure. The easiest way to perform this task is to use the Login-AzureRMLogin cmdlet. With no other parameters provided, this will pop up a login box where you can enter your Azure credentials. Then, it will create an authentication context for your PowerShell Session:
|
1 2 3 4 5 6 7 8 9 |
PS C:\WINDOWS\system32> Login-AzureRmAccount Environment : AzureCloud Account : mail@domain.com TenantId : yyyyyyyy-yyyy-yyyy-yyyy-yyyyyyyyyyyy SubscriptionId : xxxxxxxx-xxxx-xxxx-xxxx-xxxxxxxxxxxx SubscriptionName : Visual Studio Enterprise CurrentStorageAccount : |
If you are using it against the classic Azure Portal you can use the Install-Module Azure command and then use the following command to login: Add-AzureAccount.
To view some details about your session, run the Get-AzureRmContext cmdlet.
Automating Azure Login with PowerShell
After few days of working with Azure, you will notice that the login step is boring. Fortunately, you can automate this step by saving your Azure RM context in a JSON file. The Save-AzureRmContext cmdlet saves the current authentication information for use in other PowerShell sessions. Running this cmdlet has security implications for your Azure environment, so you need to be sure that your context file is stored in a safe location.
First you must run the Login-AzureRmAccount cmdlet and next, run the following command:
|
1 |
PS > Save-AzureRmContext -Path "C:\AzureProfile.json" |
Thanks to this JSON file, you can now login to Azure very quickly. I will first check that I am not logged in to my Azure subscription:
|
1 2 3 4 5 6 7 |
PS C:\Users\Nicolas> Get-AzureRmVM Get-AzureRmVM: Run Login-AzureRmAccount to login. At line:1 char:1 + get-azurermvm + ~~~~~~~~~~~~~ + CategoryInfo : InvalidOperation: (:) [Get-AzureRmVM], PSInvalidOperationException + FullyQualifiedErrorId : InvalidOperation,Microsoft.Azure.Commands.Compute.GetAzureVMCommand |
The error message shows that I’m not logged in. Now I can use my JSON file using the Import-AzureRmContext cmdlet:
|
1 2 3 4 5 6 7 8 9 |
PS C:\Users\Nicolas> Import-AzureRmContext -Path "C:\AzureProfile.json" Environment : AzureCloud Account : mail@domain.com TenantId : yyyyyyyy-yyyy-yyyy-yyyy-yyyyyyyyyyyy SubscriptionId : xxxxxxxx-xxxx-xxxx-xxxx-xxxxxxxxxxxx SubscriptionName : Visual Studio Enterprise CurrentStorageAccount : |
Done! Now, I can list my Azure Virtual Machines available in my subscription:
|
1 2 3 4 5 6 |
PS C:\Users\Nicolas> Get-AzureRmVM ResourceGroupName Name Location VmSize OsType ProvisioningState ----------------- ---- -------- ------ ------ ----------------- NICO-RG01 Win10-1709 westeurope Standard_D2_v2 Windows Succeeded NICO-RG02 Win2016-1709 westeurope Standard_D1_v2 Windows Succeeded |
The Login-AzureRmAccount cmdlet is an Alias for Add-AzureRmAccount cmdlet, so they both do the same thing. The Add-AzureAccount cmdlet is the old service management (classic) command for accessing Azure, which you would use if you needed to access classic resources. The Login-AzureRmAccount cmdlet is used for access to the new ARM services.
Here is another important point to notice. If you try to run the following command it will bring up a Windows login dialog in which you must enter your Azure credentials:
|
1 2 |
PS > $cred = Get-Credential PS > Login-AzureRmAccount –Credential $cred |
You may get the following error:
|
1 2 3 4 5 6 |
Login-AzureRmAccount : Sequence contains no elements At line:4 char:1 + Login-AzureRmAccount -Credential $cred + ~~~~~~~~~~~~~~~~~~~~~~~~~~~~~~~~~~~~~~ + CategoryInfo : CloseError: (:) [Add-AzureRmAccount], AadAuthenticationFailedException + FullyQualifiedErrorId : Microsoft.Azure.Commands.Profile.AddAzureRMAccountCommand |
If you get this error, it means that you probably used your Hotmail or Live account. Unfortunately, this is a platform limitation because Microsoft accounts cannot be used in the non-interactive flow. You must use a work/school account, but if you don’t have one, the advice for automating you login is to use your JSON file to automate the login processor or to create an Azure RM service principal using the New-AzureRmADServicePrincipal cmdlet. I will cover this point in the next article.
Conclusion
This first article in this series described very basic tasks such as:
- Login on Azure
- Automating the login process
- Installing the Azure PowerShell Module.
The basics are important in order to start working with Azure, and that is the reason why I selected this topic to begin this new series. For those of you who are wondering which method they must use to manage Azure resources, well that’s a good question because “it depends”. It depends on your preferences and your scripting skills. I would advise you to use the Azure PowerShell Module because, in my point of view, it’s easier to work with Azure and PowerShell. If you usually work with PowerShell in your job, you will save time. On top of that, as PowerShell is the Microsoft Shell created to manage Microsoft products, I think it is reasonable to use it with Azure as well. Of course, you have many good choices, so feel free to use your preferred method.

Load comments