
One of the technologies that my new job brought with it was learning about all the various database platforms that are not Microsoft SQL Server. Not that I don’t still spend time learning about SQL Server, as it will happily remain one of our largest topics, but rather that I need to learn about other platforms too.
As I have dealt with other platforms, PostgreSQL has stood out to me as the platform I am most interested in because it feels like the one that is most competitive with SQL Server’s platform (Oracle is out there too, as is MySQL, and many others, but PostgreSQL feels like the balance of affordability and features that it has a similar feel enough to get started.)
There are a few high-level differences that can be confusing. A cluster is really just a server (or in SQL Server, an instance). Second, the way you execute a batch of code is very different, and sometimes this is based on the tool you are using. As you dig into how PostgreSQL works, some things will feel really normal, and some stuff will be very different from the other servers you have used.
To start this series, I am going to provide a brief tutorial on how to get set up and connected. The process hasn’t changed much since I first started this tutorial six months ago, so hopefully it won’t be different for you. The only thing that changed was that they changed the name of this to include “Flexible Server” but everything basically works the same as it did then. The flexible part of the name is basically concerning pricing, from what I understand.
Note that my goal is to get an instance created that is used by one person (multiple connections and perhaps user principals eventually, but one human, on one keyboard at one IP address). This is not a tutorial about how you might set up a production cluster.
What follows is a step by step sequence to set up your cluster and start querying it in 30 minutes or less. 10 minutes or so once you have done it a few times.
Step 1. Connection and Account
Go to portal.azure.com and login to your account. Using PostgreSQL on Azure is not free, but it is not expensive either. Later in the article I will show you where to get estimated costs.
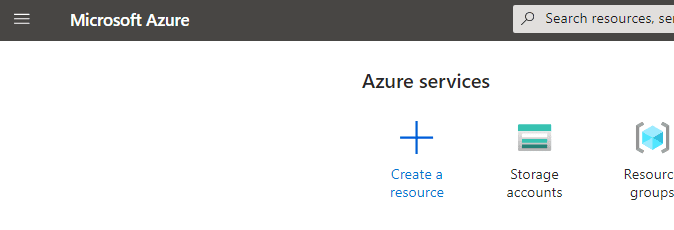
Step 2. Create your resource
Choose to create a resource. This will be on the home page for the portal:
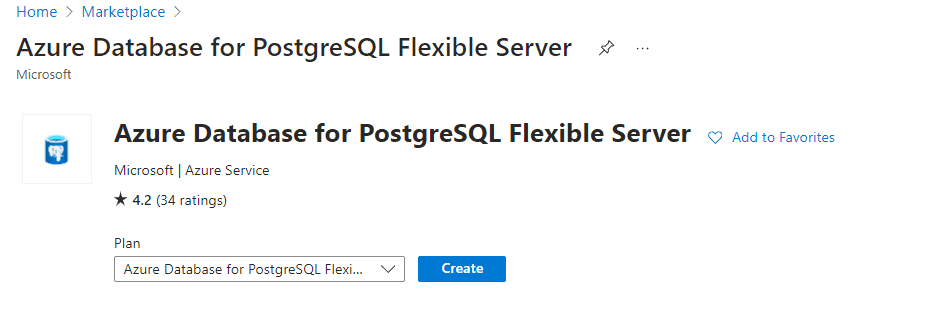
Search for “Azure Database For PostgreSQL Flexible Server” and choose that version. There are a few other options you will likely see, including one that is not suffixed with “Flexible server”, but that version will not support anything other than PostgreSQL 11.
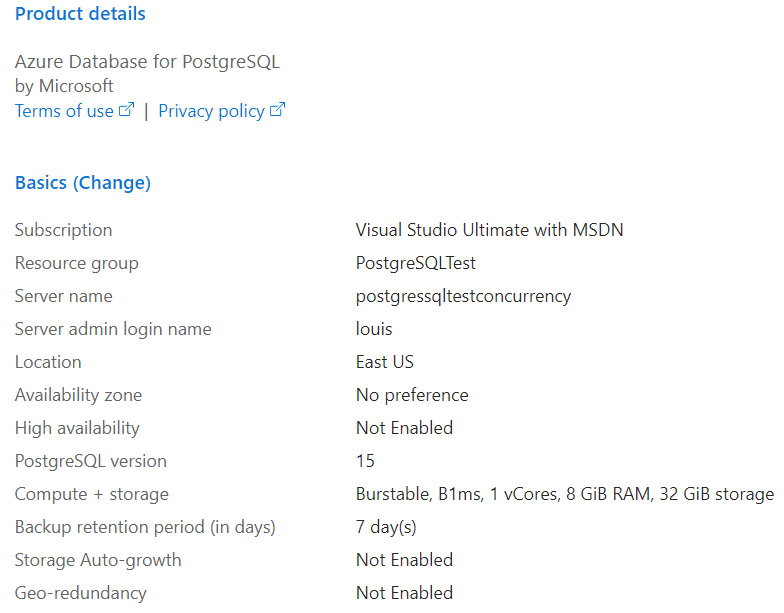
After you press create, you will be presented with a dialog to enter the server’s details. Here are the setings that I chose:
Basic configuration
- Resource group (I set up a new one): PostgreSQLTest
- Servername: postgressqltestconcurrency
- PostgreSQL version: 15 (can also upgrade later if you want to use something different.)
- Workload: Development. (Note, you will see the estimated costs to the right of the screen, the dev server is far far cheaper than the production version!)
- Enable High Availability: Off (you can’t turn it on in the Development Workload anyhow)
- Authentication method: PostgreSQL authentication only (Use Microsoft Entra if you can, but this is my own personal Azure account.)
- Admin username: louis (It is my name!)
- Password: Use something good, even in your dev instances!
When you have entered these details, check Next : Networking.
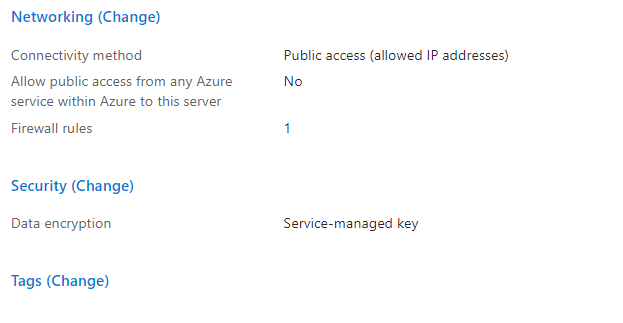
Networking
I will be configuring this with the easiest method possible. It is secure enough for dev work, especially if your password is really complex. But it is certainly not what I would consider safe enough to put any real, especially personal, data.
- Connectivity Method: Public access (allowed IP addresses)
- Add current IP address (One troubleshooting note, my IP address seems to change more frequently than I expect on my current service provider, so remember this is the first place to go to troubleshoot connection issues! A couple of times I forget then when using a VPN and I spend too much time trying to figure that out.)
Then click on Next: Security.
Security
This is mostly about the security of your data at rest and on the server. I chose Service Managed Key, as I really never plan to restore this database and I don’t care if Microsoft has access to the key either.
If you feel like you might need to do more with this server than to set this up, test with it, then throw the data away, read this section carefully. Then click “Next : Tags”, read that page to see if it pertains to you (for my needs, it doesn’t); and then finally click “Next : Review + Create”.
Final Review
The final page should show you something like the following.
It will also include a set of estimated costs:
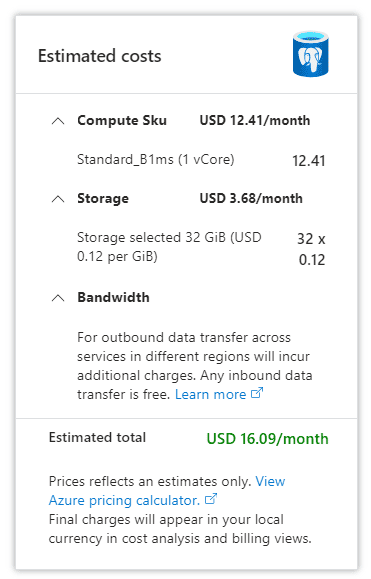
Clearly, if you are not going to be using this much, that price is very reasonable if you don’t have a machine or VM you want to install PostgreSQL on.
After you click “Create” you will get a message that it is being deployed and it will take some amount of time between a few seconds and a bit longer than that. It was a few seconds for me!
Step 3: Connecting to your new server with Azure Data Studio
If you haven’t installed Azure Data Studio, you can do that by going to the download site. It is from Microsoft, it is cross platform and there are installers for Windows, MacOS, and Linux. There are plenty of other tools you can use, and Ryan Booz just published an article on Simple-Talk about this very subject and more. I commonly use DBeaver or PGAdmin to connect to instances when I am testing someone’s code as well. I just wanted to do this with Azure Data Studio!
Next, you are going to need to set up Azure Data Studio to use PostgreSQL. It only comes with Microsoft SQL Server access installed, but the setup to connect to PostgreSQL is quite easy. I will go through the basic steps, but you can also use the following tutorial on learn.microsoft.com.
After you open Azure Data Studios, find the extensions icon on the left toolbar:
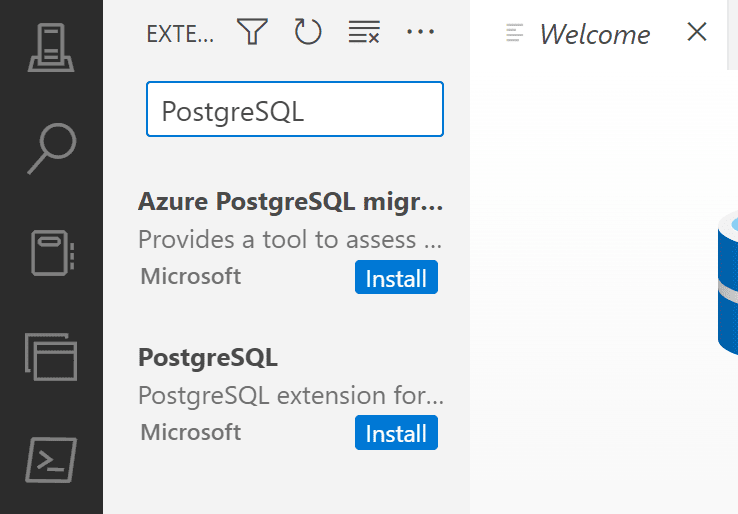
Choose that and type (or paste!) “PostgreSQL”. Choose the PostgreSQL extension:
After you click install, you will see something like the following in the output window:

You are ready to connect!
Step 4: Connect to your server
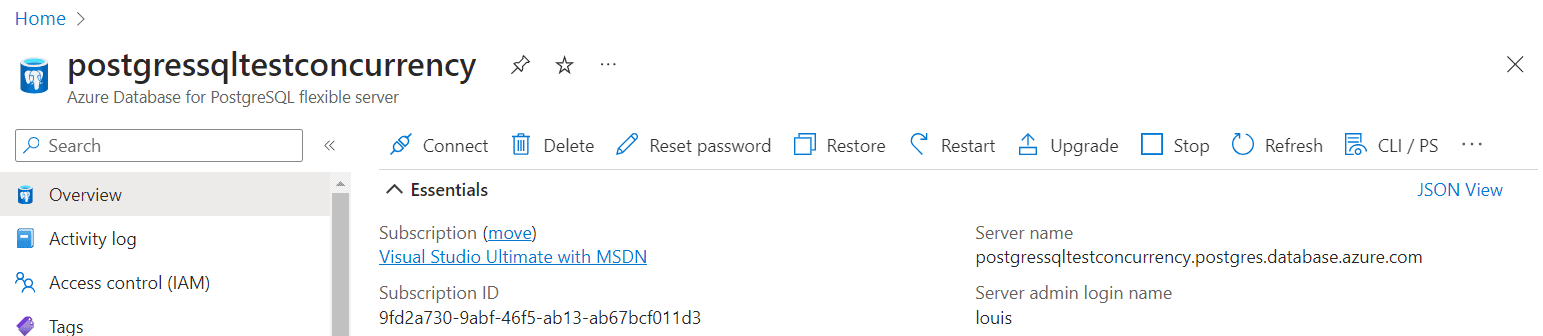
One piece of information that you probably won’t have already is the server name. You will need the entire address which (in my case) will be postgressqltestconcurrency + some address. To find it, go back to your Azure portal and click on that resource.
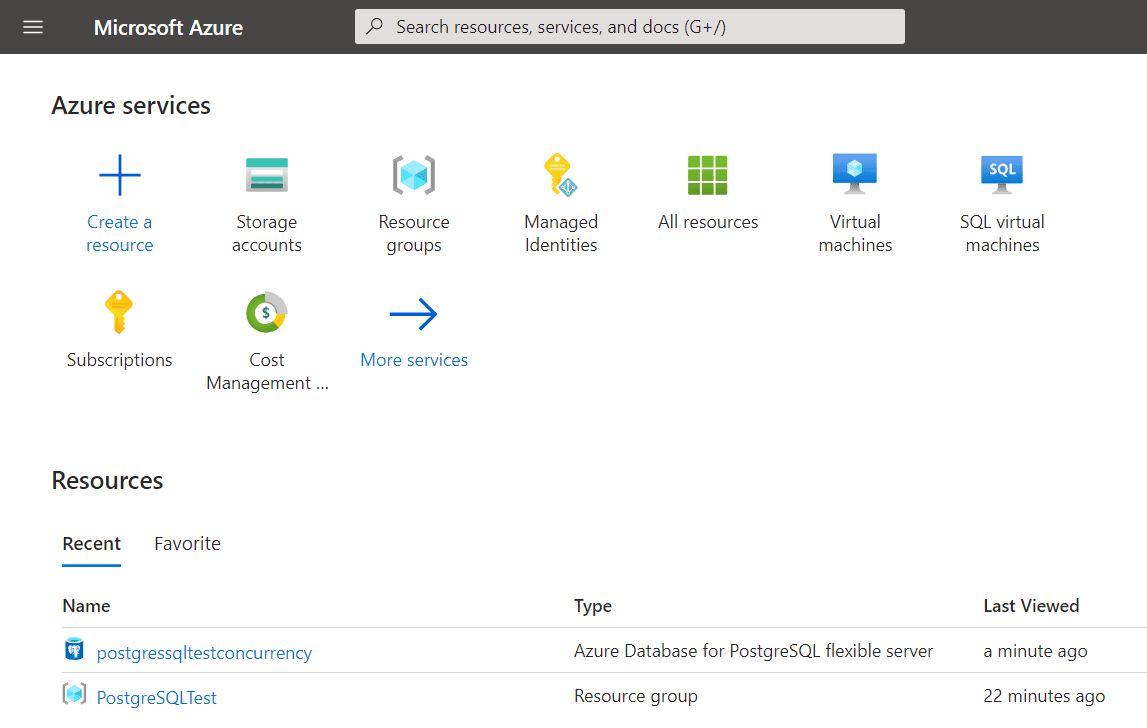
Then, once you click the resource, you will see a list of attributes. The full server name is in there.
Now you have everything you need to connect from Azure Data Studio. Enter the servername, user name, password. Then choose the postgres database (we are going to create a database as the final step in this blog).
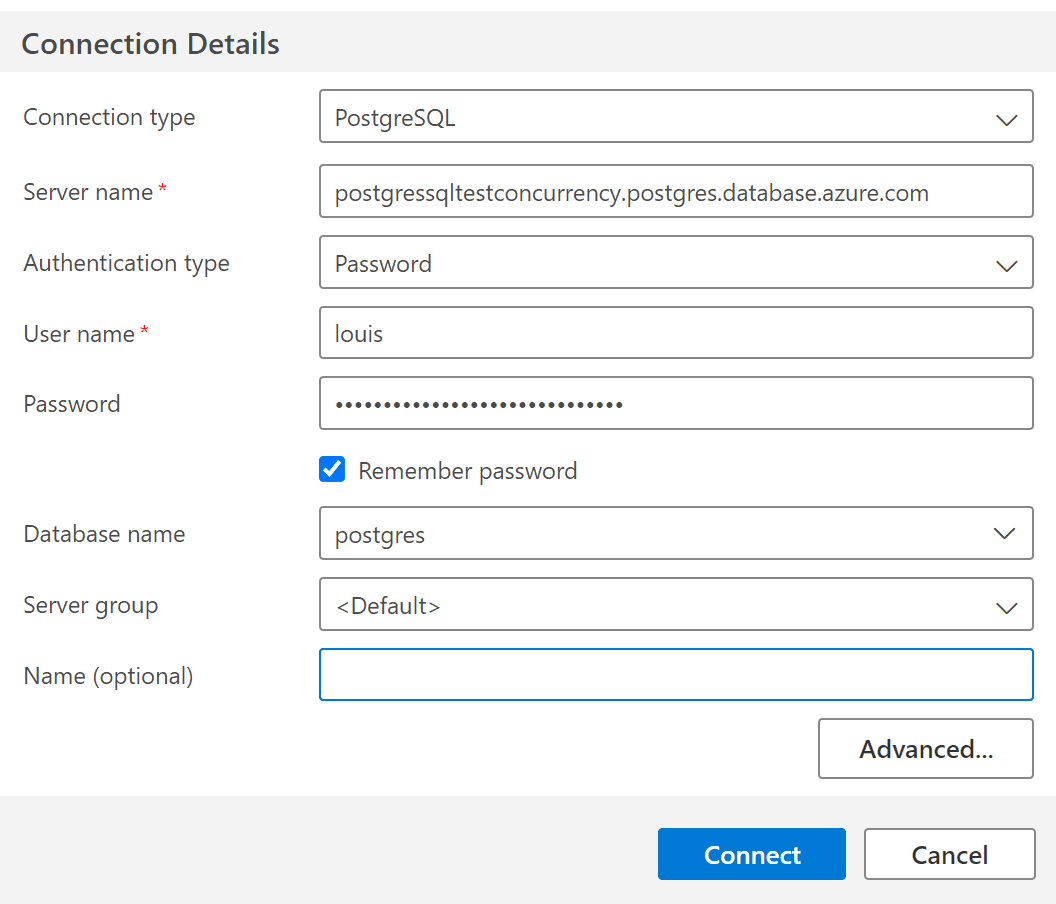
If all goes well, (and it doesn’t always!), you should be connected to your instance when you press Connect. Choose “New Query” and now you are ready to execute statements. The first should likely be creating your own database for working in.
In my case, I will create a database named TestingConcurrency using the following statement:
|
1 |
CREATE DATABASE TestingSecurity; |
And now you have a database to work with. You will probably need to reconnect (and most likely change your saved connection to now use TestingSecurity) to use the new database. There is no statement in PostgreSQL like SQL Server’s USE statement to change database contexts, but Azure Data Studio does have a drop down list of databases on the server.
Conclusion
Getting your Azure PostgreSQL Flexible Server installed, and running is not as hard as you might think, and definitely not super expensive either. If you don’t plan to use it all that much (and especially if this is being charged to a credit card!) you can stop the server when not using it and pay a very nominal fee for using the service .
This document contains proprietary information and is protected by copyright law.
Copyright © 2026 Red Gate Software Limited. All rights reserved


Load comments