




A self-hosted runner is a machine you provision and maintain yourself to run GitHub Actions workflows, instead of relying on GitHub’s managed infrastructure. Organizations typically choose this option when they need tighter security control — for example, joining a runner to Active Directory or Microsoft Entra ID — even though it comes with added setup and maintenance responsibility.
This guide walks through configuring a self-hosted runner on Windows: installing and registering it with a repository, running your first workflow on it, and removing it when it’s no longer needed. You’ll also learn how to organize multiple runners into groups for parallel execution, use tags to target specific runners, and even run more than one runner service on a single machine.
By the end, you’ll be able to decide when a self-hosted runner makes sense for your workflows and how to manage one in practice.
Introduction
My previous article guide covered GitHub-hosted runners. It detailed how to call them in the yaml code, the benefits and drawbacks, how to install software tools, and how to call a Docker container on the runner.
Many organizations prefer to use self-hosted runners when GitHub-hosted do not meet their technical or security requirements. For example, a self-hosted runner can be added to Active Directory or Microsoft Entra ID. The downsides are increased costs and management time compared to GitHub-hosted runners.
This article demonstrates how to use a Windows machine for a self-hosted runner, however, you could also use Linux or macOS.
Planning: what to consider before setting up a GitHub runner
Setting up a runner is simple. You just run provided code on the target VM or computer. Before running the code, consider these settings:
- Will the runner be specific to this repo or used at the wider organization?
- Will the runner belong to a runner group? (More about this later)
- Name of the runner
- Additional tags
- Do you want the runner to run as a service?
- If running as a service, what account will be used? Note that this is the account that will run the YAML code. If you are using integrated security to connect to a database, this is the account that will connect depending on the type of connection string you use.
How to set up a new GitHub runner
Setting up a runner is quite simple, and you can even do it on your laptop instead of a VM to try it!
NOTE: Just like the previous articles, this one has a repository with all the code shown that you can download or fork. Set up your new repository before following the steps to create the runner.
Follow these steps to create a runner that is specific to the repository on a Windows machine:
- On your proposed runner, make sure that the outbound 443 port is open
- Navigate to your new GitHub repository
- Click Settings
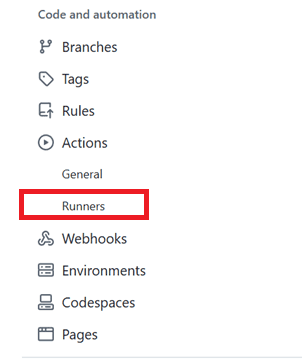
- Expand Actions and click Runners
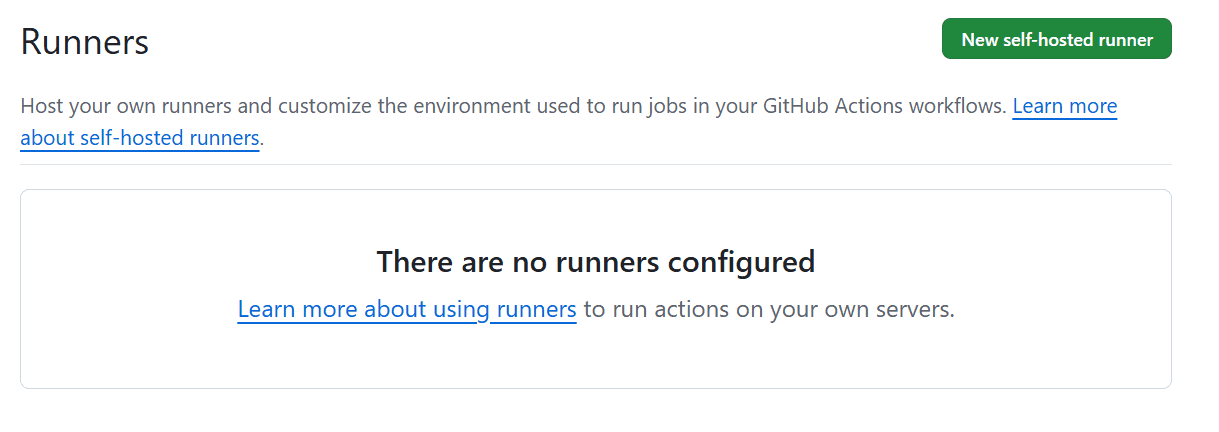
- You’ll see this page. Click New self-hosted runner
- Select the operating system and architecture.
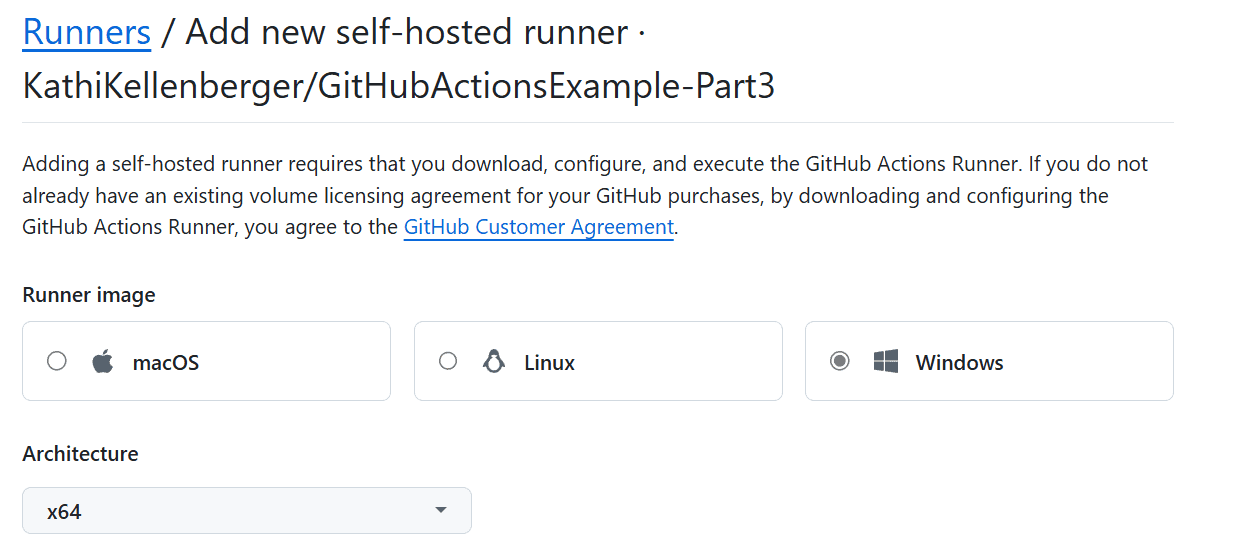
- Scroll down and view the Download code. This code is specific for your runner.
- Open a
cmdwindow as an administrator and navigate to the root. Switch it to PowerShell.
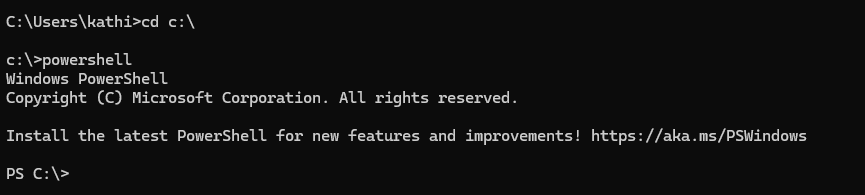
- Important! The PowerShell execution policy must be set to
RemoteSigned. Run this code if it’s more restricted:
|
1 |
Set-ExecutionPolicy RemoteSigned -scope CurrentUser |
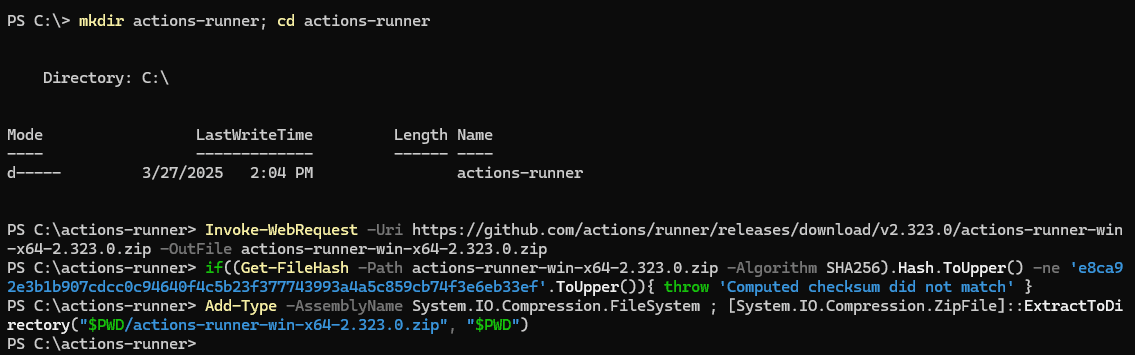
- Copy and run the script from the Download section of the new runner page one line at a time. The code will be specific to your runner.
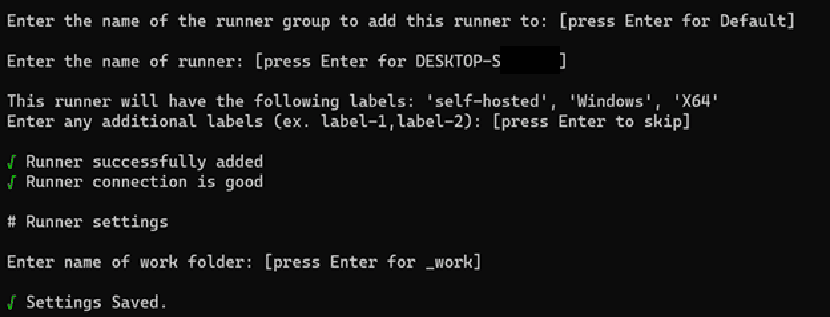
- The next step is to run the Configure commands. Again, the command is specific to your situation.
- Accept the defaults for the settings until you get to the question about setting up a service.
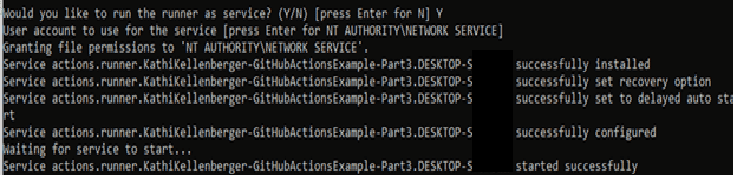
- Type Y and press enter when prompted to set up a service. For now, just use the network service account.
- Open the Services utility and scroll down to GitHub Actions to see your runner service.

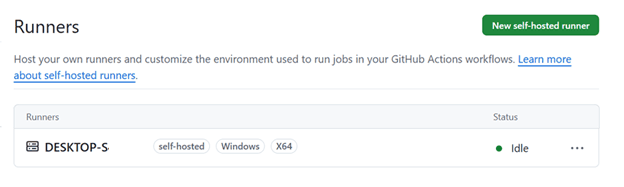
- Return to the GitHub Actions Runners configuration page to see the new runner.
How to try out the GitHub runner
If you don’t have it already, add the HelloWorld.yaml file to your repository. You can copy this file from my repository.
|
1 2 3 4 5 6 7 8 9 10 11 |
name: Hello, World # Controls when the workflow will run, in this case manually on: workflow_dispatch jobs: PrintHelloWorld: name: Print Hello, World! runs-on: self-hosted steps: - run: echo "Hello, World!" |
The only difference between this and the code from the file in part 1 of the series, is the “runs-on” line. In this case, it’s self-hosted instead of ubuntu-latest.
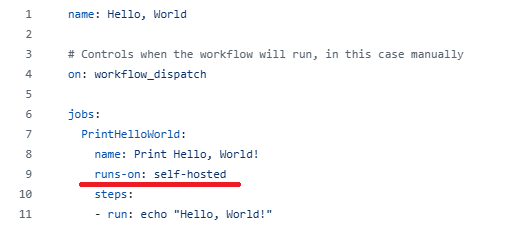
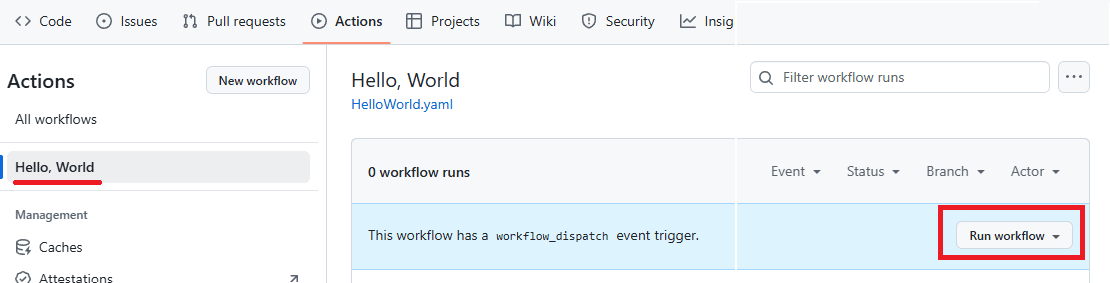
Since this workflow Is set up to only run manually, navigate to Actions and select Hello, World. Kick off the run.
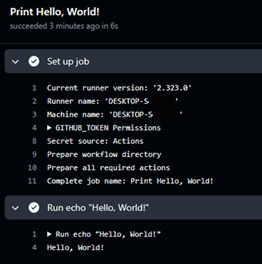
After a successful run, you should see results resembling this:
How to remove a GitHub runner
There may be situations where you need to clean up a runner. Follow these steps to remove the runner you just created.
- Navigate to the Runners page and click the ellipsis to bring up Remove Runner.
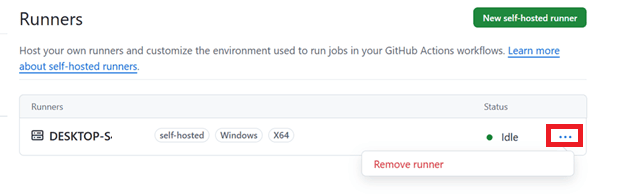
- Click Remove runner. You may be asked to provide some form of authentication and verify that you really want to do this.
- Proceed carefully here. There are two methods depending on whether the runner is still available. In this case, it is, so scroll down to Remove and clean up machine (recommended).
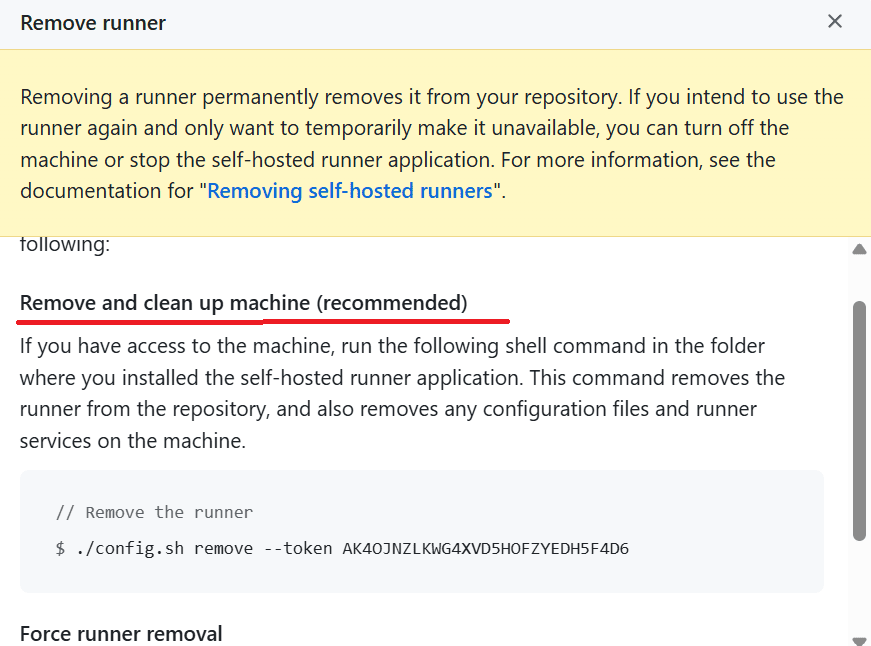
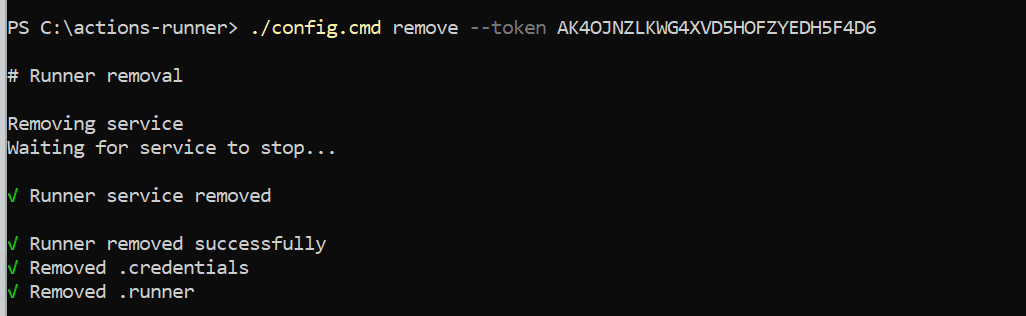
- If you are running on Windows, copy the code to a text editor and change to
|
1 |
./config.cmd remove --token <your token> |
- Delete the actions-runner directory.
This code removes the runner service as well as the runner configuration on GitHub Actions. If the runner is no longer available, you should use the Force remove method which removes the record from GitHub Actions only.
Move fast. Govern at scale.
How to organize GitHub runners into groups
During the installation in the “Setting up a new runner” section, you were prompted for the runner’s group. The group setting allows you to create a “pool” of runners, preferably with identical setups. Say for example, you have a workflow that might be called while a previous run on the same or another workflow is still active. In this case, if there were only one runner, the second call would have to wait until the first call completed. By using a group, another idle runner could take care of the second call and run in parallel with the first call.
At the repository level, you can use the default group. Here’s an example with two runners:
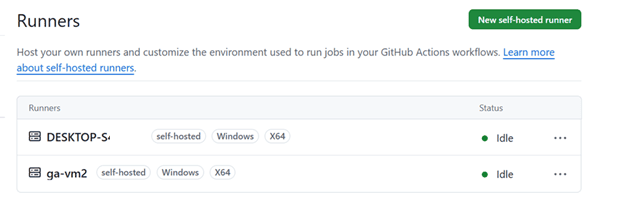
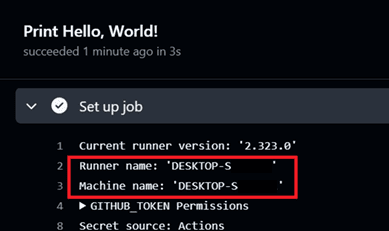
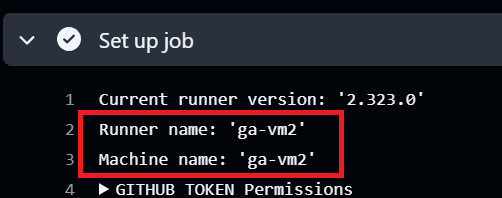
When kicking off the Hello, World workflow twice, it runs once on each runner.

When drilling into the runs, each runner is specified.
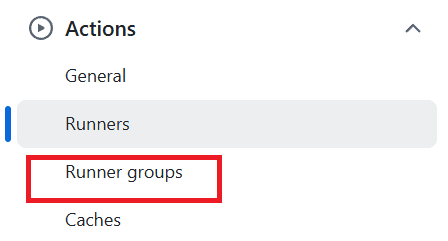
At the organizational level, you can add more groups, however, you cannot use groups unless you use a paid account. You may have a group of runners on Windows and another group on Linux, for example. Navigate to your organization’s settings where you should see an option for Runner groups under Actions.
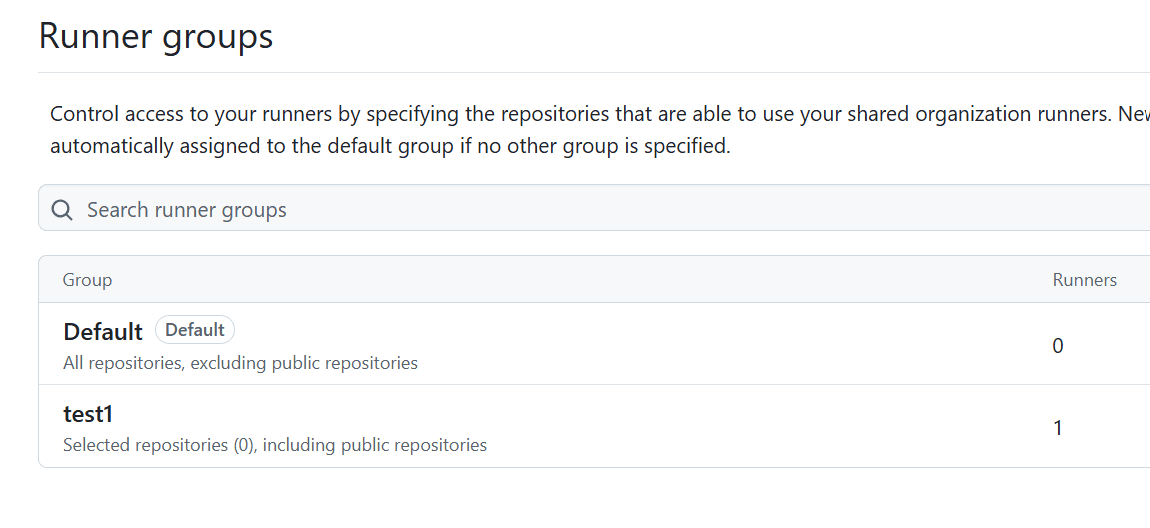
You can add a new group, then add runners at the organizational level to the groups. In this case, I removed ga_vm1 from the repository runners and added it to the organization’s runners in the test1 group. The steps are the same except that you copy the installation code from the organization page instead of the repository page (Organization 🡪 Settings 🡪 Actions 🡪 Runners).
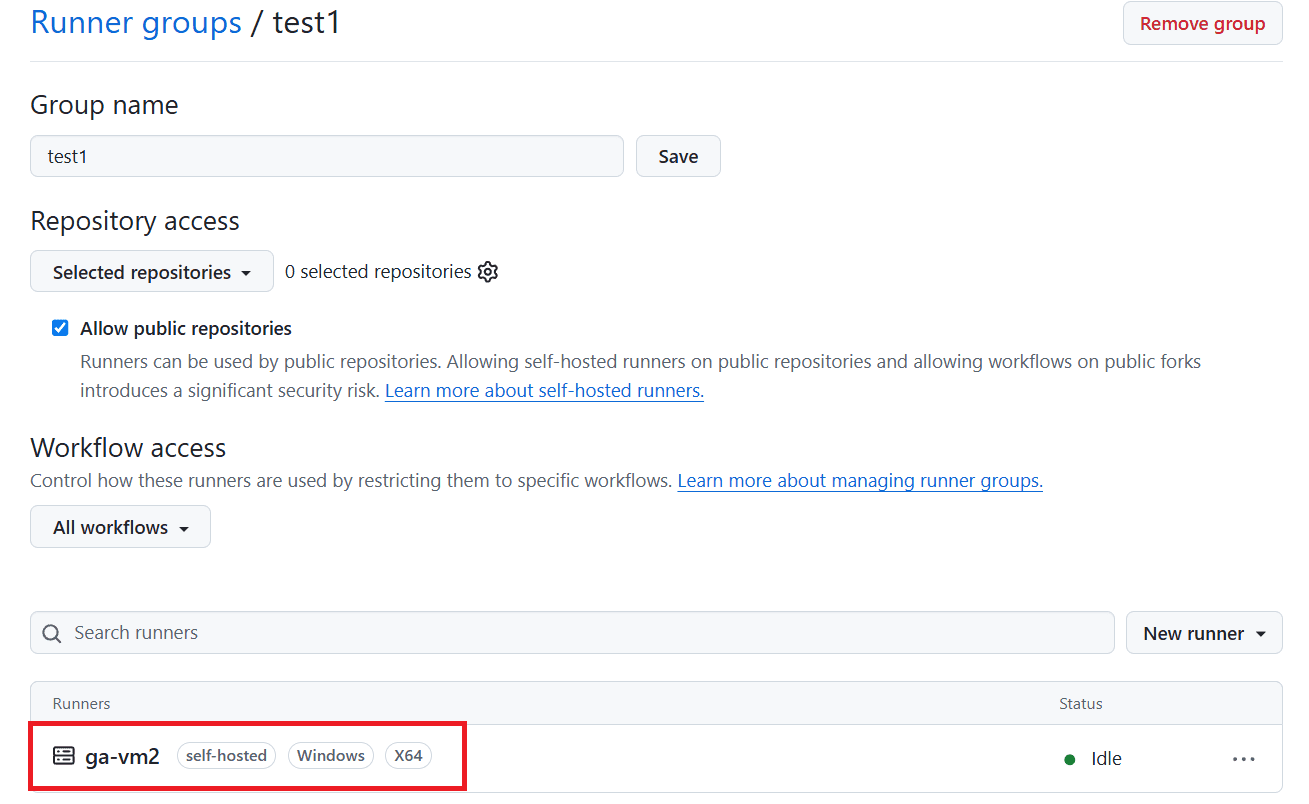
After clicking into test1, here’s the runner:
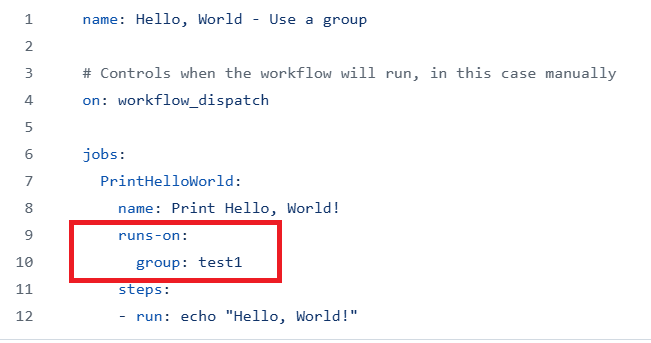
To specify the group test1 in the workflow, change the code to this, however, I was not able to complete a successful run since I’m using a free account.
|
1 2 3 4 5 6 7 8 9 10 11 12 |
name: Hello, World - Use a group # Controls when the workflow will run, in this case manually on: workflow_dispatch jobs: PrintHelloWorld: name: Print Hello, World! runs-on: group: test1 steps: - run: echo "Hello, World!" |
Using tags to control runners
You have one other option for controlling runners. I’ve found it especially helpful when using a free account, but tags will come in handy for other situations as well. These can be used at the repository level as well as the organization level.
When creating your runner, you can specify one or more tags, but you can also add tags after-the-fact by clicking on the runner name in the settings.
In this example, the runner has a new tag “forHello”.
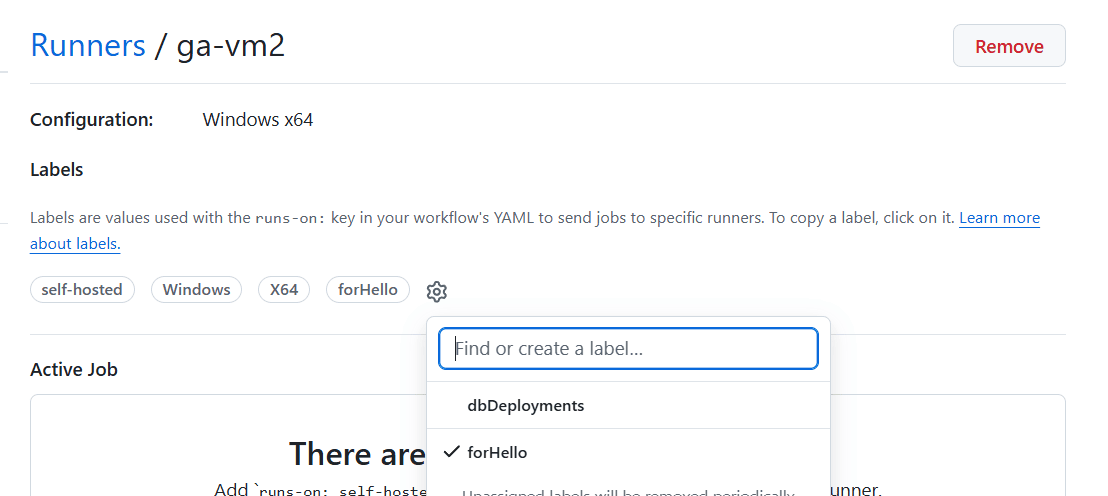
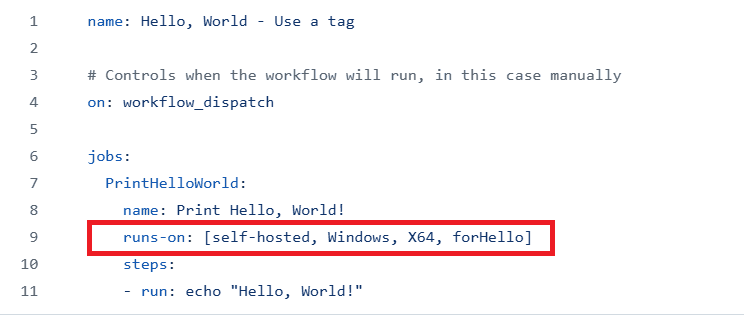
You must specify all the tags and in the correct order to use the new tag. The new code using a tag to specify the runner looks like this:
|
1 2 3 4 5 6 7 8 9 10 11 |
name: Hello, World - Use a tag # Controls when the workflow will run, in this case manually on: workflow_dispatch jobs: PrintHelloWorld: name: Print Hello, World! runs-on: [self-hosted, Windows, X64, forHello] steps: - run: echo "Hello, World!" |
Adding multiple runners to one VM
You can also set up the runner service more than once on a VM. This might come in handy when a service account must be used for certain jobs while other jobs need another service account.
Create a separate folder and follow the steps to create a runner, except provide a different name. Here, I’ve created a second runner service on the VM and added a tag:
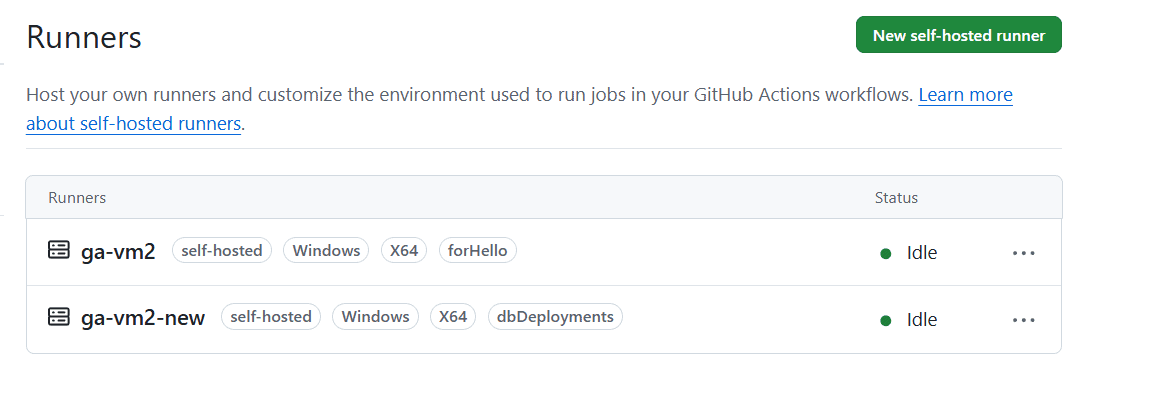
You can’t provide the name of the runner in the yaml code, but you can get around that by using a tag instead.
Conclusion
Many organizations require self-hosted runners for security or technical reasons. Runners are easy to set up and manage, but your organization is responsible for the VM costs and management. They can be organized by groups (paid accounts) or by tags to control which runner is used for a particular workflow run.
The next article will cover how to use variables and secrets in your workflows.
Simple Talk is brought to you by Redgate Software
FAQs: Self-hosted runners in GitHub Actions
1. What is a self-hosted runner in GitHub Actions?
A self-hosted runner is a machine — physical, virtual, on-premises, or in the cloud — that you set up and manage yourself to execute GitHub Actions workflows, rather than using GitHub’s own infrastructure. It’s commonly used when workflows need specific security, network, or software requirements that GitHub-hosted runners can’t meet.
2. How do I tell a workflow to use a self-hosted runner?
Set runs-on: self-hosted in your workflow YAML file instead of specifying a GitHub-hosted image like ubuntu-latest. You can also target a specific runner by adding tags, such as runs-on: [self-hosted, Windows, X64, forHello].
3. What are runner groups used for?
Runner groups let you pool multiple runners together so that concurrent workflow runs can execute in parallel rather than queuing for a single runner. Groups can be used at the repository level for free, but organization-level groups require a paid GitHub account.
4. Can I run more than one self-hosted runner on the same machine?
Yes. You can install the runner service multiple times in separate folders on one VM, which is useful when different jobs need to run under different service accounts. Since the workflow file can’t reference a runner by name, tags are used instead to target the correct one.
5. How do I remove a self-hosted runner?
Go to the Runners page in your repository or organization settings, select the runner, and choose “Remove and clean up machine” if it’s still active — this cleans up both the local service and the GitHub Actions registration. If the machine is no longer available, use “Force remove” to delete the record from GitHub only.
This document contains proprietary information and is protected by copyright law.
Copyright © 2026 Red Gate Software Limited. All rights reserved



Load comments