


GitHub is one of the most popular services on the planet for storing documents. That includes everything from PowerPoint presentations to recipes, but it’s the de facto standard for storing source code. Microsoft purchased GitHub in 2018, and despite that, GitHub has not lost any appreciable popularity among developers.
One of the main benefits of GitHub is full integration with Git. Git repositories are local and single user, but once a git repo is pushed to GitHub, a team can now share the repository and work together.
Storing source code in an online repository like GitHub is the first step. Next, most organizations will want to automate deploying application code and even the infrastructure used to test or host the application. There are many automation products available (also called CI/CD tools for continuous integration and continuous deployment) such as Azure DevOps Pipelines, Jenkins, Octopus Deploy and many more.
Shortly before Microsoft acquired GitHub in late 2018, GitHub Actions was released. GitHub Actions is a powerful CI/CD platform that can be used to automate code integration and deployment.
This article series will teach you what you need to know to take advantage of GitHub Actions, especially for deploying database code.
Prerequisites
To follow along with this article series, make sure you have:
After installing git, be sure to configure your account. Fill in the correct information and run in command line
|
1 2 3 |
git config –global user.email "your_email.com” git config --global user.name "your_name" |
Which will looks similar to this:

Image 1: Adding global configuration to local git
Create a GitHub repository
Follow these steps to create a GitHub repo.
- On GitHub.com, log in and click the + icon.
- Select New Repository.
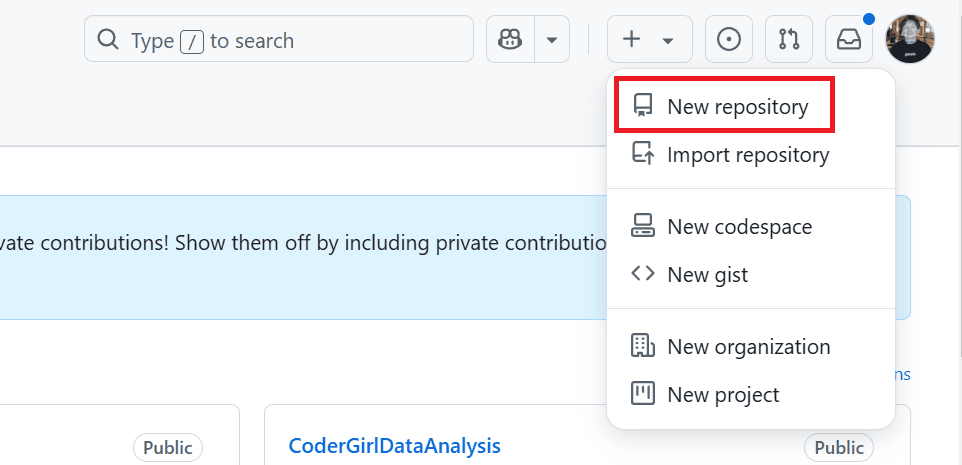
Image 2: New GitHub repository
- Type in a name for the repo (My example will use the name “
GitHubActionsExample”)
- Leave security at
Public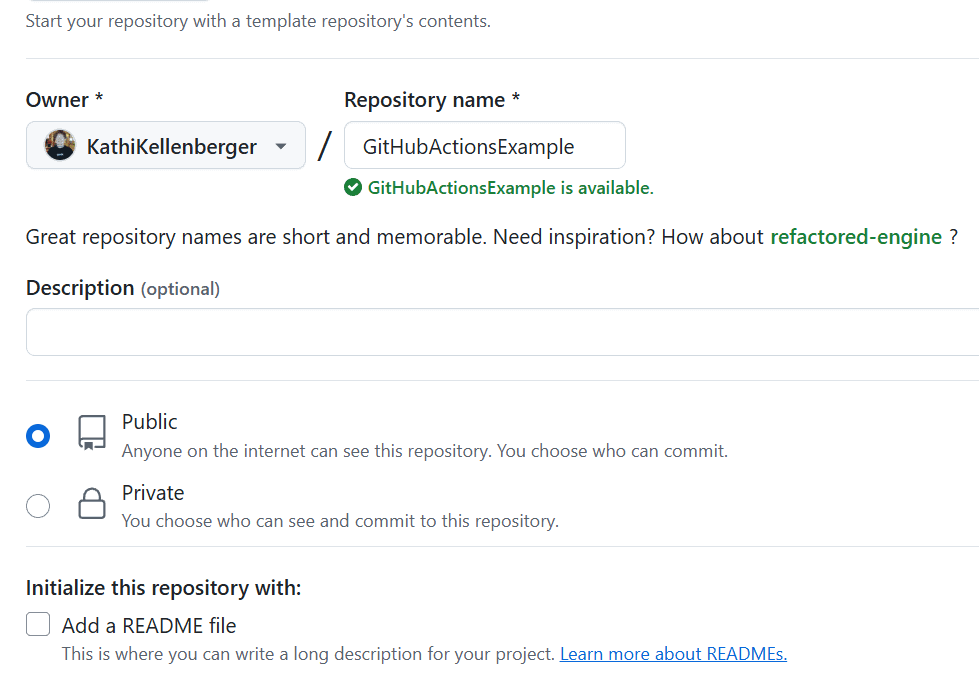
Image 3: New GitHub repository settings
- Click Create repository at the bottom of the page
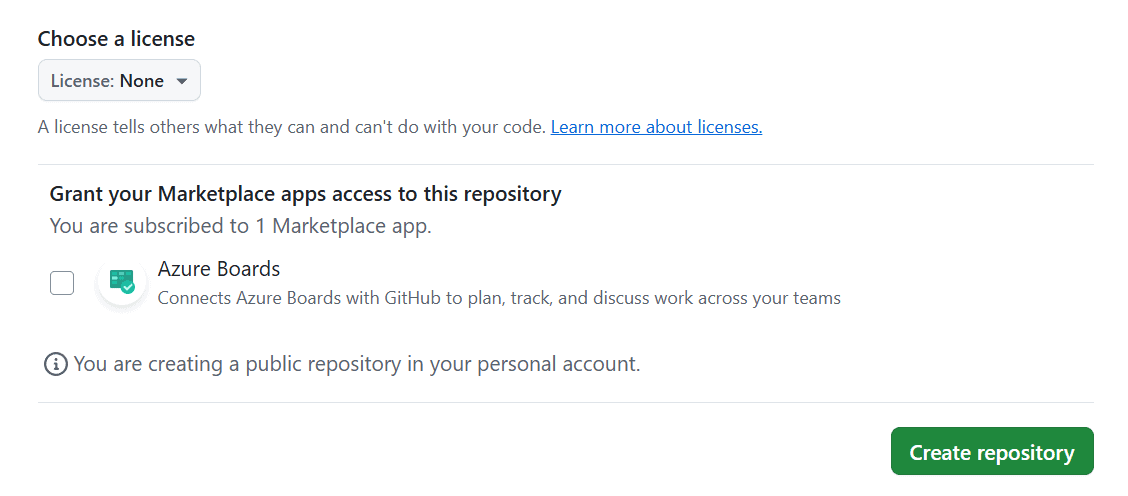
Image 4: Create the repo
- GitHub will display some options about connecting to your local git repository.
Connect the online repository to a local repository
Follow these steps to pull the repository to the local computer:
- Create a folder for your projects
- Create a folder for this specific project
- Open a command line and navigate to the new folder
- In GitHub, copy the code provided to create a local repo
echo "# GitHubActionsExample" >> README.md
git init
git add README.md
git commit -m "first commit"
git branch -M main
git remote add origin https://github.com/<your repo name>/GithubActionsExample.git
git push - u origin main
- Paste the code into the command line window (Note that you may be required to authenticate with GitHub)
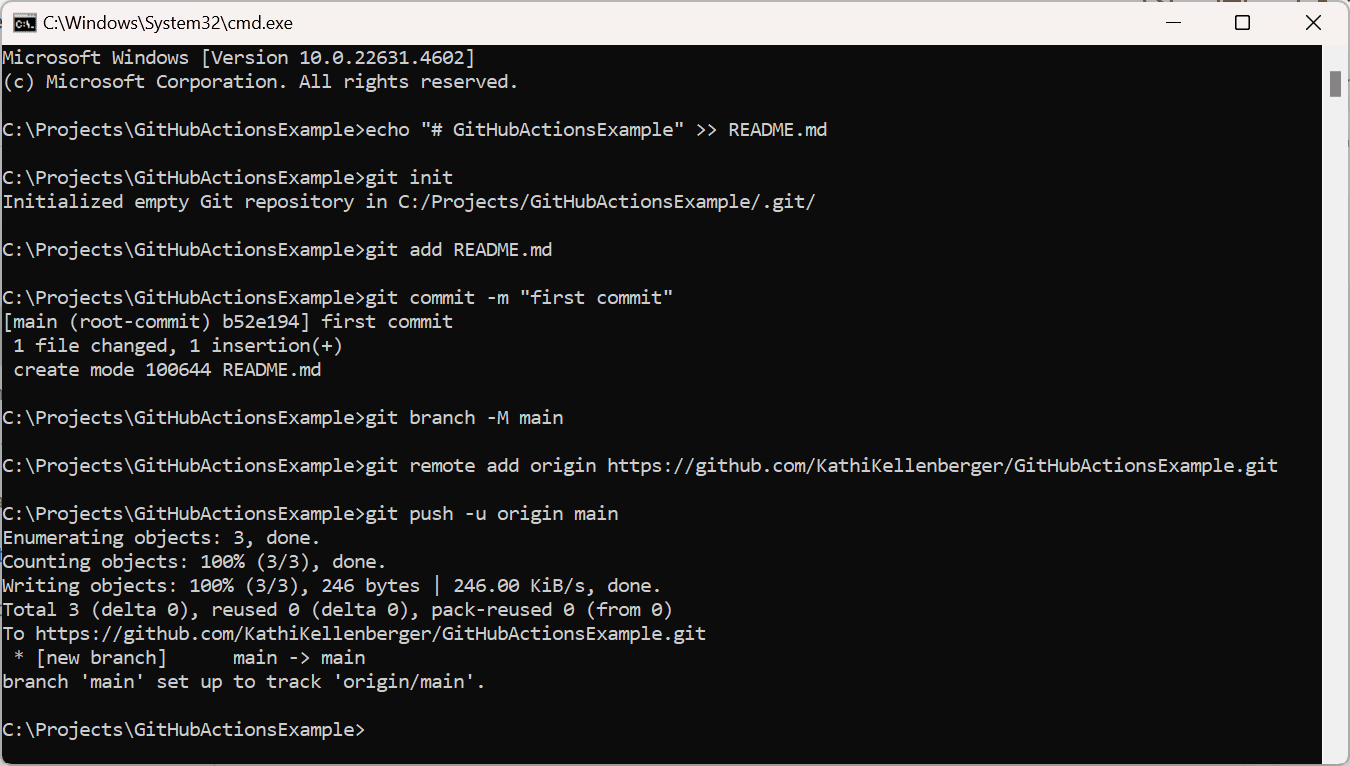 Image 5: Running the code to connect the repo
GitHub Actions structure
Automating a deployment – or anything you wish to automate – is accomplished by Workflows in GitHub Actions. For those of you who love working in code, there is no user interface. Workflow files are yaml.
Creating a new GitHub Actions file is simple. Within the repository, create this folder structure:
|
1 |
.github/workflows |
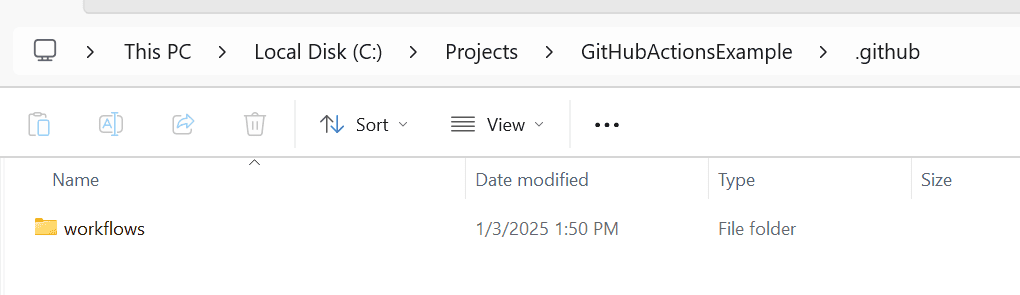
Image 6: GitHub Actions file structure
Any yaml file located in the workflows folder is automatically a GitHub Actions Workflow.
Hello, world!
This article series will cover how to create these files, but of course, the first thing to learn when code is involved is printing a “Hello, world!” message.
Open VS Code and create a new file. Save it in the new .github\workflows folder with a yaml or yml extension. Code for this article can be found here. Add this code:
|
1 2 3 4 5 6 7 8 9 10 |
name: Hello, World # Controls when the workflow will run, in this case manually on: workflow_dispatch jobs: PrintHelloWorld: name: Print Hello, World! runs-on: ubuntu-latest steps: - run: echo "Hello, World!" |
This should result in the following output:
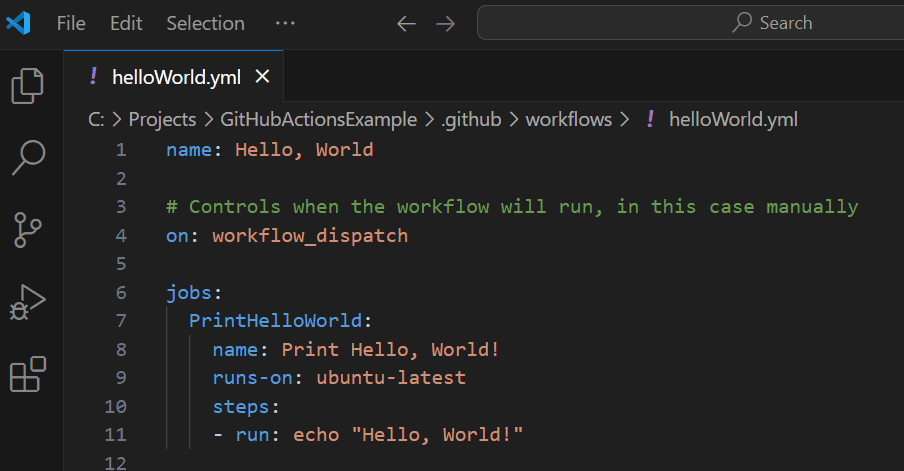
Image 7: The “Hello, World!”code in VS Code
Note that white space is critical in yaml. VS Code can help with this, but I find not getting it right is the source of most of the errors I make with yaml.
Save the file. Push to the online repo by typing this into the cmd window, with the project directory base directory in focus:
|
1 2 3 |
git add . git commit -m"Add a new workflow file" git push |
You should get output similar to the following. (note, the first statement does not have any output.)
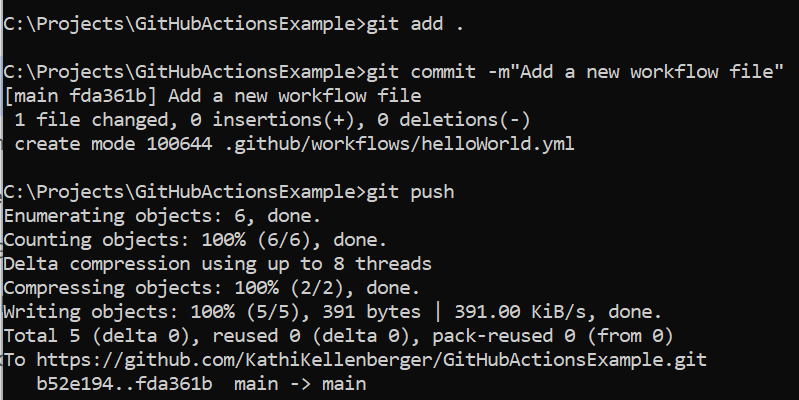
Image 8: Push the code to the online repo
If all went well, you should see the workflow in GitHub Actions in the Actions tab. The names of any workflows are listed on the left.
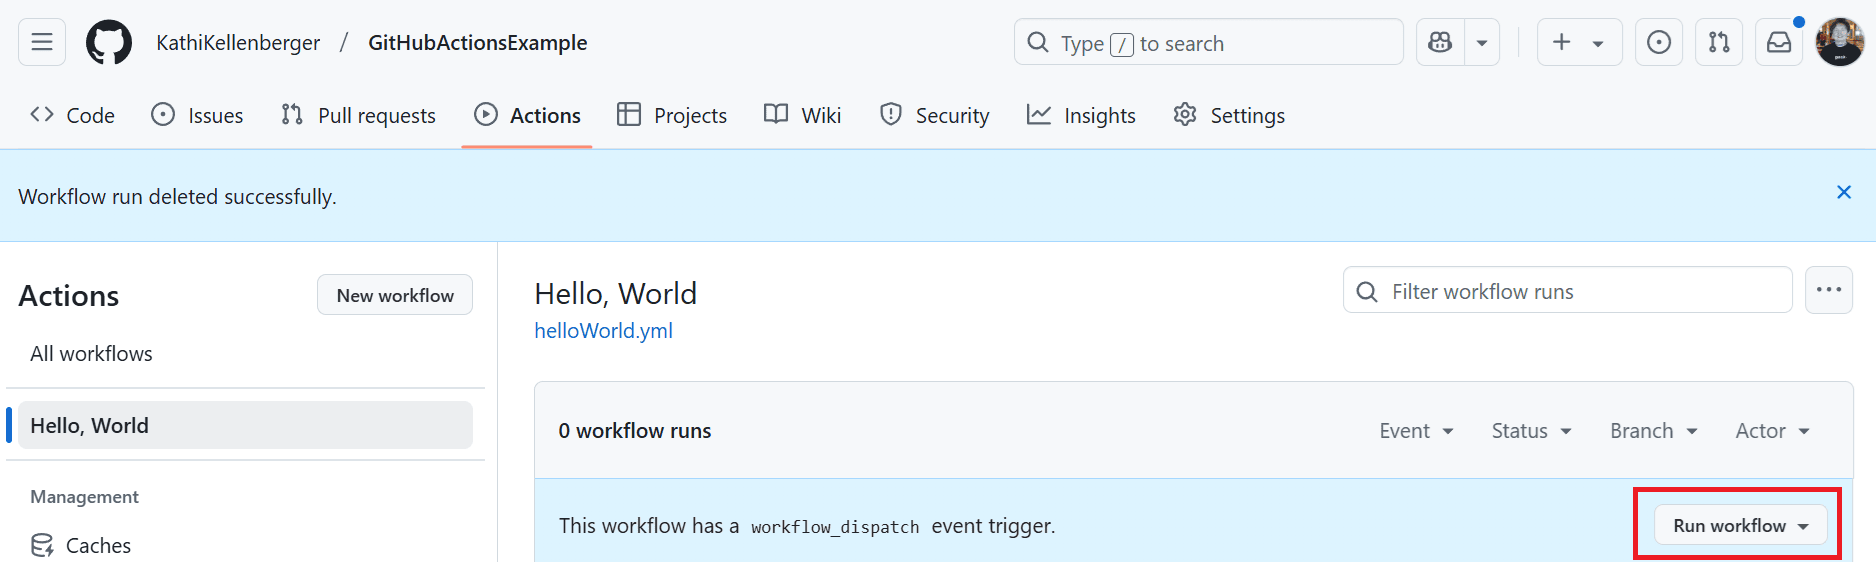
Image 9: The published workflow
To run the code, click Run workflow → Run workflow.
Within a few seconds, you should see the Workflow in progress:
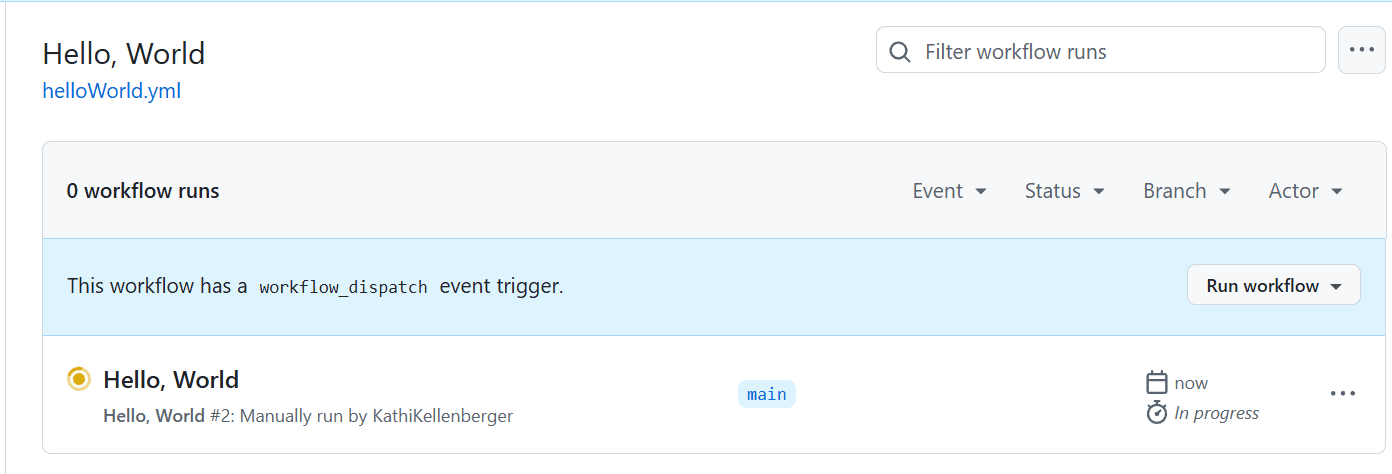
Image 10: The workflow is running
If the run is successful, then you’ll see the green checkmark icon.
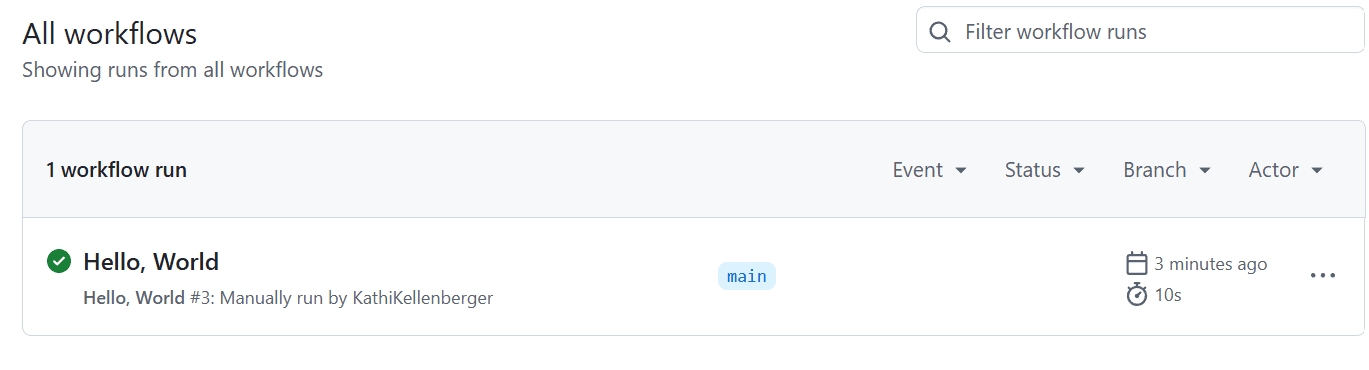
Image 11: The workflow is successful
Drill down into the run to see the message.
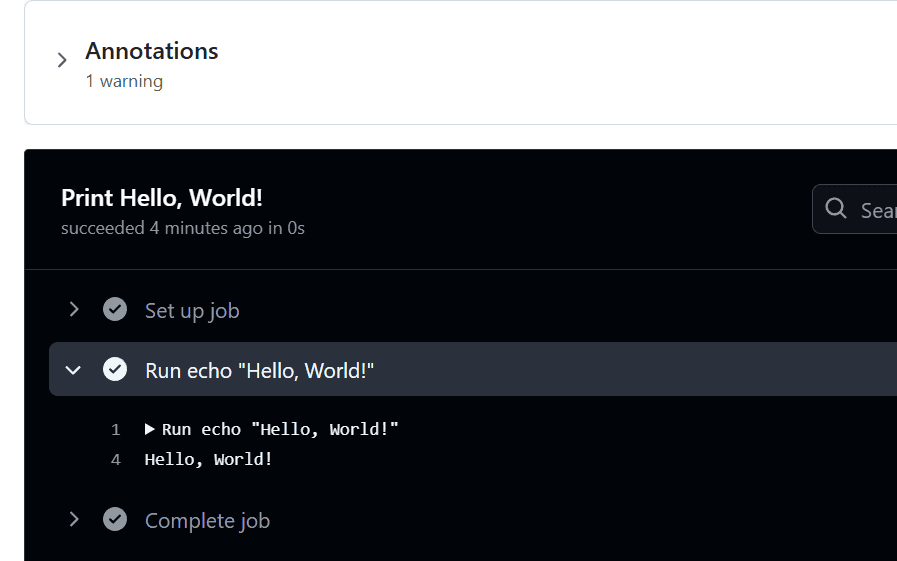
Image 12: The message
Conclusion
This article walked you through setting up and running your first GitHub Actions Workflow. One of the benefits of GitHub Actions is its simplicity. The Workflow file is simple yaml – well, until it gets complex!
Workflows must have a VM, called a runner, to run on. You can provide your own VMs or use one that is provided by GitHub. The next article in the series will cover GitHub-hosted runners.
This document contains proprietary information and is protected by copyright law.
Copyright © 2026 Red Gate Software Limited. All rights reserved


Load comments