Over the past years, “traditional” ETL development has morphed into data engineering, which has a more disciplined software engineering approach. One of the benefits of having a more code-based approach in data pipelines is that it has become easier to build metadata driven pipelines. What does this mean exactly?
Say for example you need to copy a set of tables from a source database into data lake storage. If you have 50 source tables, you don’t want to create 50 distinct pipelines manually. It’s not only very time-consuming (and boring), but it’s also hard to maintain. Suppose you need to add an audit column to each result set. This means you need to update 50 pipelines!
In the “old days” of SSIS, you could use BIML to generate your SSIS packages (you still ended up with 50 different packages, but at least you didn’t have to create them yourself). In code-based pipelines like notebooks in Spark, you can write Python to extract metadata of the source tables and use that data to dynamically extract all the source data into different data frames and dump those into data lake storage. In SQL Server, you might use dynamic SQL to generate SQL statements on-the-fly to do the transformations dynamically.
The goal of metadata driven code is that you build something only once. You need to extract from relational databases? You build one pipeline that can connect to a relational source, and you parameterize everything (server name, database name, source schema, source table, destination server name, destination table et cetera). Once this parameterized piece of code is ready, all you must do is enter metadata about the sources you want to extract. If at a later point an additional relational source needs to be extracted, you don’t need to create a brand-new pipeline. All you need to do is enter a new line of data in your metadata repository.
Aside from speeding up development – after you’ve made the initial effort of creating your metadata driven pipeline – is that everything is consistent. You tackle a certain pattern always in the same way. If there’s a bug, you need to fix it in one single location.
In this article, we will guide you through creating metadata driven pipelines in Microsoft Fabric. Pipelines are a low-code to no-code environment, but we can still implement metadata driven patterns in them using parameterization. Pipelines in Fabric are similar to pipelines in Azure Data Factory or Azure Synapse Analytics Pipelines, but there are differences.
If you want to follow along with the examples, you can get a free trial of Fabric (as long as the offer stands) and a free Azure trial. You can also create a cheap pay-as-you-go Fabric capacity in Azure, just don’t forget to pause it once you’re done to save on costs.
Copying One Single Table
When you want to create a metadata driven framework, it’s always a good idea to start easily. You create a pipeline that copies one single table and everything’s hardcoded. If you try to jump directly into the parameterization and fetching of metadata, the solution might get too complex too fast and it’s harder to debug. With a simple case, you can first validate if certain items work, like the connections to source and destination.
First, make sure you have a Fabric-enabled workspace (either by having a capacity assigned to it or by using a trial). Next, we need some sample data to read from. In the article How to Install the AdventureWorks Sample Database in Azure SQL Database it is explained how to get a small sample database in Azure. Of course, you can use any other source to experiment yourself. In this article, we’re going to write the data to a warehouse. If you don’t have one yet, you can familiarize yourself with this compute type in the article What are Warehouses in Microsoft Fabric?.
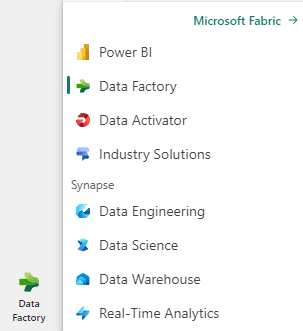
Let’s login into Fabric and switch to the Data Factory persona (bottom left corner of the screen):
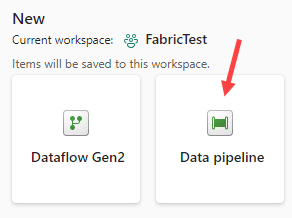
This will take you to the Data Factory experience where you can choose to create a new pipeline:
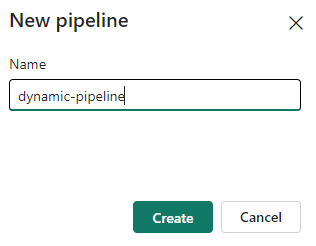
Give the new pipeline a name and hit Create.
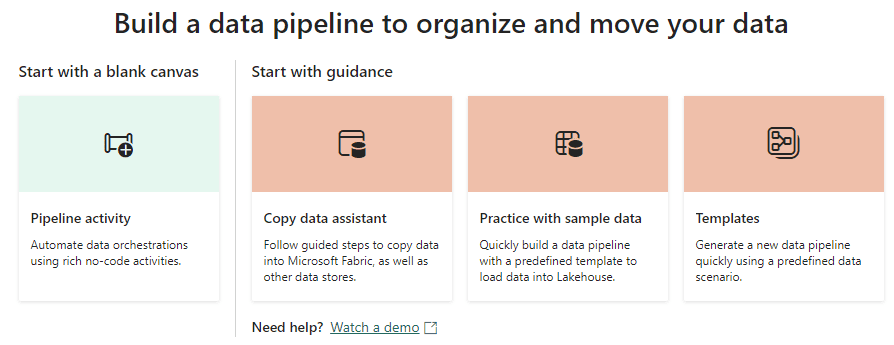
A new pipeline canvas will be opened, and four options will be presented to you: add a new pipeline activity, the Copy data wizard/assistant, the option to load sample data or using a pre-defined template.
There’s a template to bulk copy from a database (or to import files), which seems promising for our metadata driven pipeline:
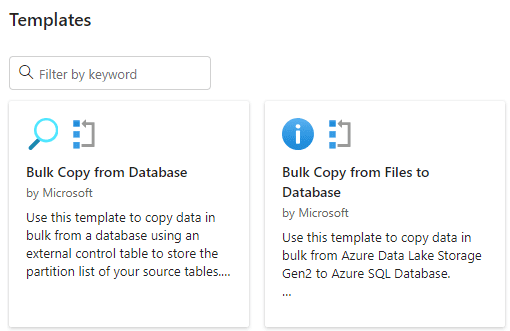
It seems to be using the pattern we’re going to implement in this article:
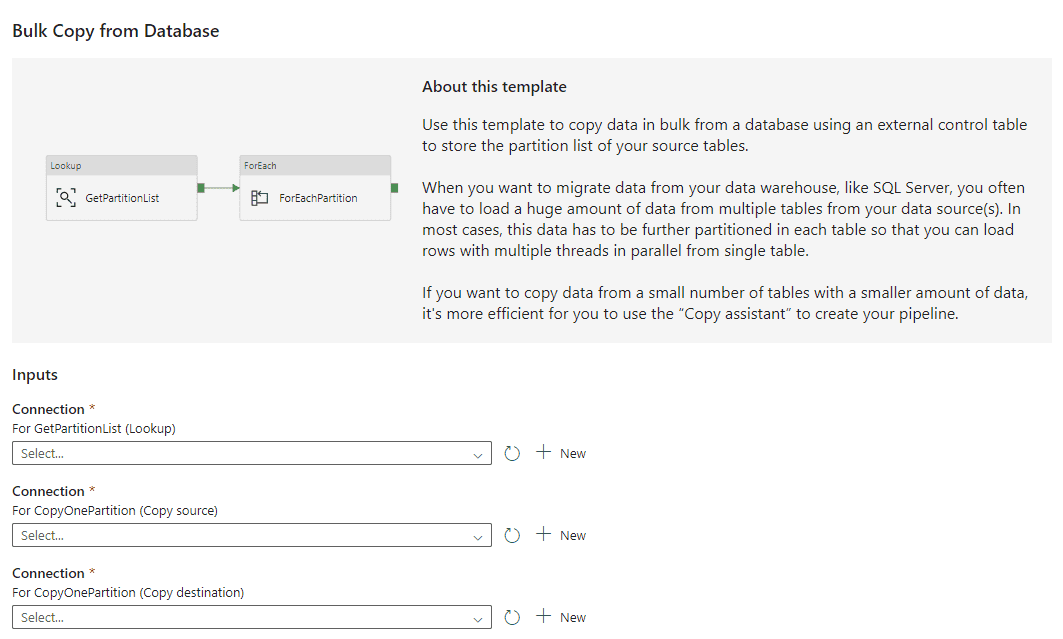
However, only the following destination are supported by the template:

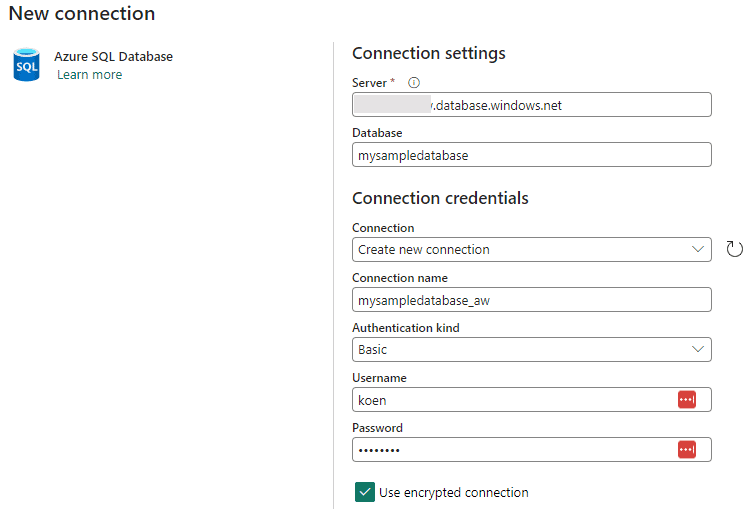
Since we want to write to a Fabric warehouse, we can’t use it. Instead, let’s start from scratch by using the first option (Pipeline Activity). We get a blank canvas where we can add a new pipeline activity to the pipeline: the Copy data activity. In the Source pane, we need to configure the source connection by either selecting an existing one, or creating a new one:
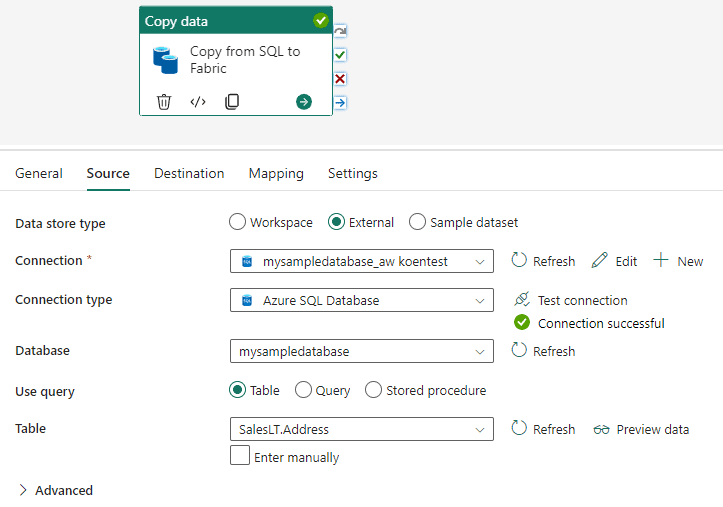
Create a new connection and choose Azure SQL DB as the connection type.
Once you’ve verified the connection, you can select a table from the dropdown list. Later, we will parameterize this. In the Destination pane (which is called Sink in ADF), choose Workspace as the data store type and select your warehouse from the list:
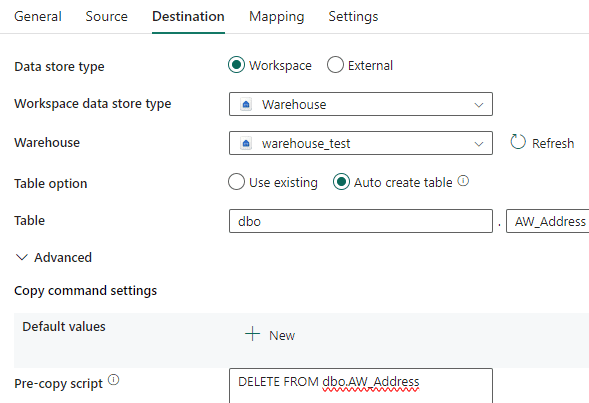
In the table option, choose the Auto create table option. To make sure we can run the pipeline multiple times, go to Advanced and enter the following SQL statement in the pre-copy script:
|
1 2 3 4 |
IF OBJECT_ID(N'dbo.AW_Address', N'U') IS NOT NULL BEGIN; DELETE FROM dbo.AW_Address; END; |
We’re using a DELETE statement since TRUNCATE TABLE is not supported for the moment. If it at some point in time it is available in the Fabric Warehouse, TRUNCATE will be the preferred option.
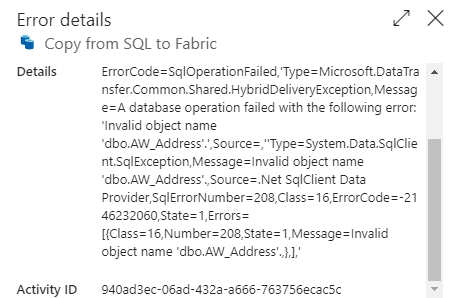
The pipeline will run the pre-copy script before it actually creates the table. If we don’t check for table existence, we get the following error:
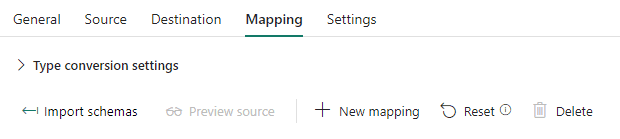
The Mapping pane stays empty, which means columns will be mapped using their name (and if that fails, by ordinal). A best practice that I’d like to introduce is that the source and destination have the exact same column names, to ensure a smooth mapping process.
In the Settings pane, make sure Enable staging is selected (otherwise the pipeline fails because it doesn’t support writing directly to the warehouse):

Once everything is configured, you can hit Run to test the pipeline. While the pipeline running, you can click on the Copy data activity name in the output pane to get a more detailed view of the performance:
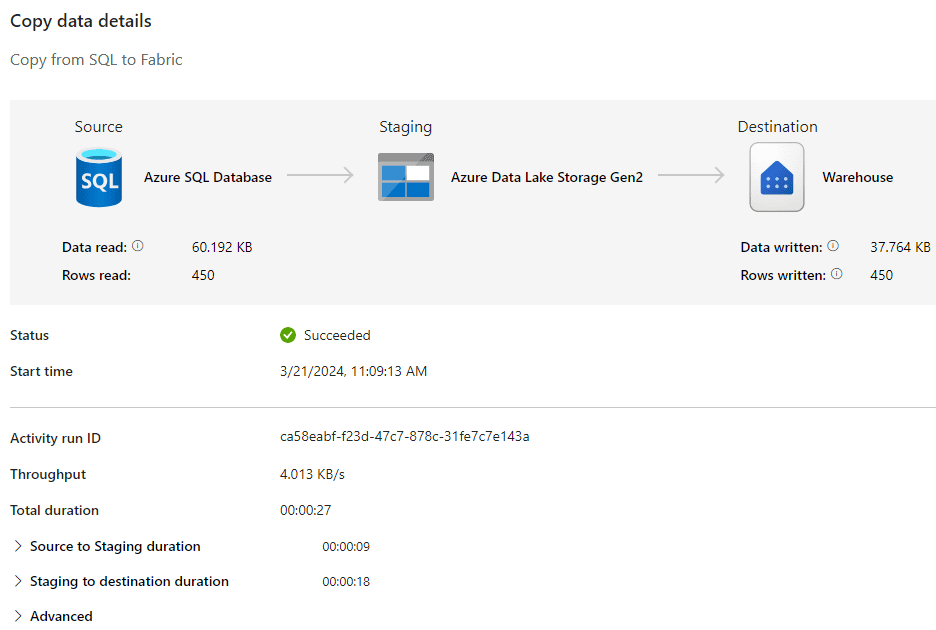
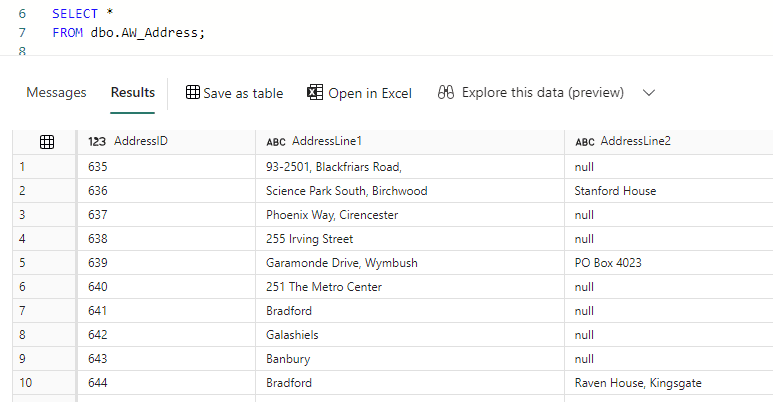
We can verify the data has landed in the warehouse by running a simple SELECT * statement:
Getting Metadata and Parameterizing the Pipeline
Once the pipeline works for a single table, it’s time to put the metadata in action and to parameterize everything. The first step is to get the metadata of which tables we want to load. You can store this in a table, but most relational databases have the INFORMATION_SCHEMA tables, which allow you to query the metadata of the database. In the source database, we can run the following query:
|
1 2 3 4 5 6 7 8 9 10 11 12 13 14 15 16 |
SELECT SourceSchema = TABLE_SCHEMA ,SourceTable = TABLE_NAME ,DestinationTable = TABLE_NAME ,DeleteStatement = 'IF OBJECT_ID(N''dbo.' + TABLE_NAME + ''', N''U'') IS ' + 'NOT NULL' + CHAR(13) + CHAR(10) /* new line*/ + 'BEGIN;' + CHAR(13) + CHAR(10) /* new line*/ + ' DELETE FROM dbo.' + TABLE_NAME + ';' + CHAR(13) + CHAR(10) /* new line*/ + 'END;' FROM INFORMATION_SCHEMA.TABLES WHERE TABLE_TYPE = 'BASE TABLE' AND TABLE_SCHEMA <> 'dbo'; |
This gives us everything we need to parameterize the Copy data activity. In the pipeline, add a Lookup activity to the canvas.

In the General pane, give the activity a decent name and set a proper timeout (we don’t want an activity hanging for hours, time is literally money with Fabric capacities).
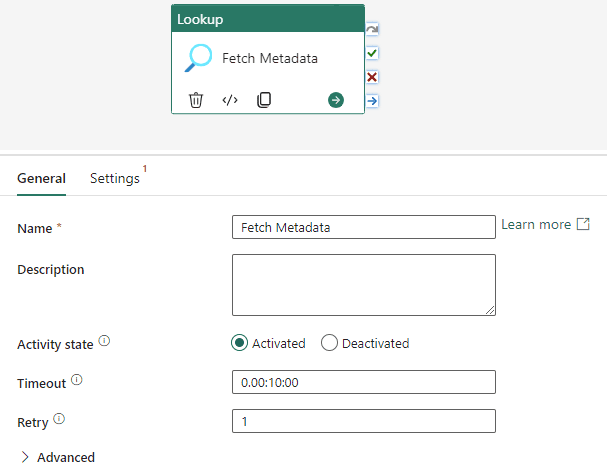
I also typically set the retry to at least one, because network failures do happen. In the Settings pane, set the data store type to External and reuse the source connection we created earlier.
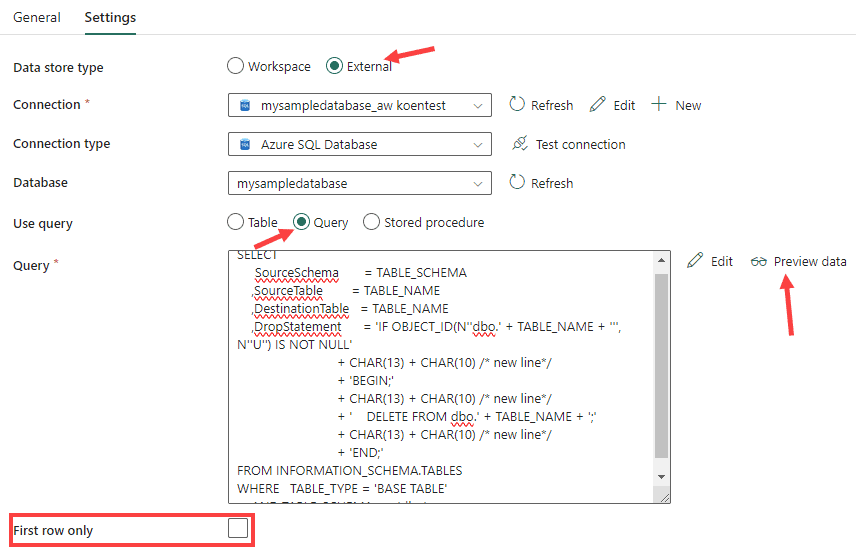
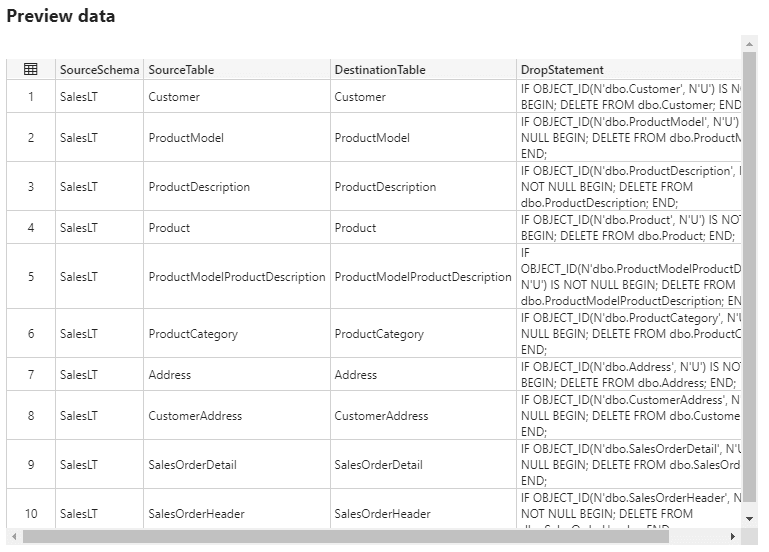
Set the type to Query and copy paste the metadata query. Make sure First row only is not selected, otherwise the metadata driven pipeline is not going to do a lot of work. Hit Preview data to ensure everything works.
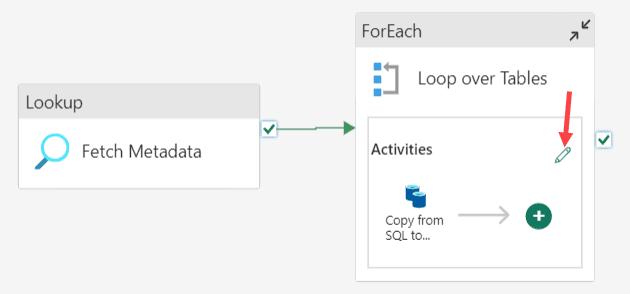
Once we have the metadata, we need to iterate over it. This means that for every row returned by this result set, we will execute the Copy activity. We can achieve this by using the ForEach activity, which can be found on the Activities tab.

Add a ForEach activity to the canvas, connect the Lookup to this activity using an On success constraint (the green arrow) and move the Copy activity to the inside of the ForEach. You can do this by cutting the activity, go to the edit pane of the ForEach and then paste it onto the new canvas of the ForEach. Finally, your canvas should look like this:
We need to tell the ForEach over which items to iterate over, which would be the output of the Lookup. We can view what this output is like by running the pipeline. Deactivate the ForEach (right-click and choose Deactivate) and hit Run. Once the pipeline is finished, you can click on the output to view the returned JSON.
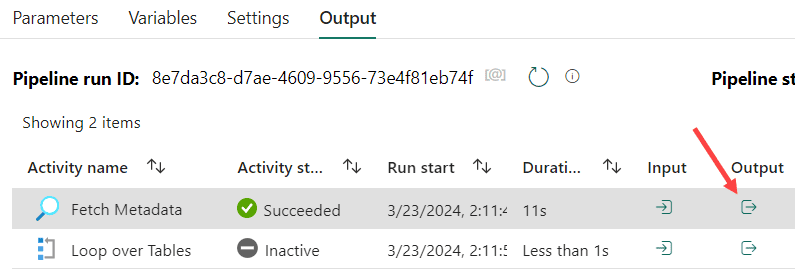
The output should look like this:
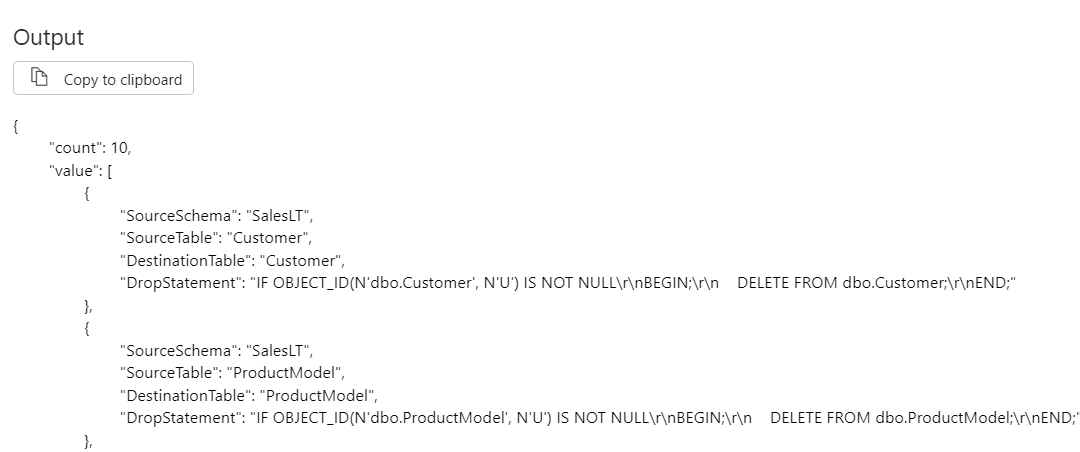
We’ve got a JSON containing an array named value of 10 items. In the settings pane of the ForEach, we’ll reference this array in the dynamic content of the Items property.
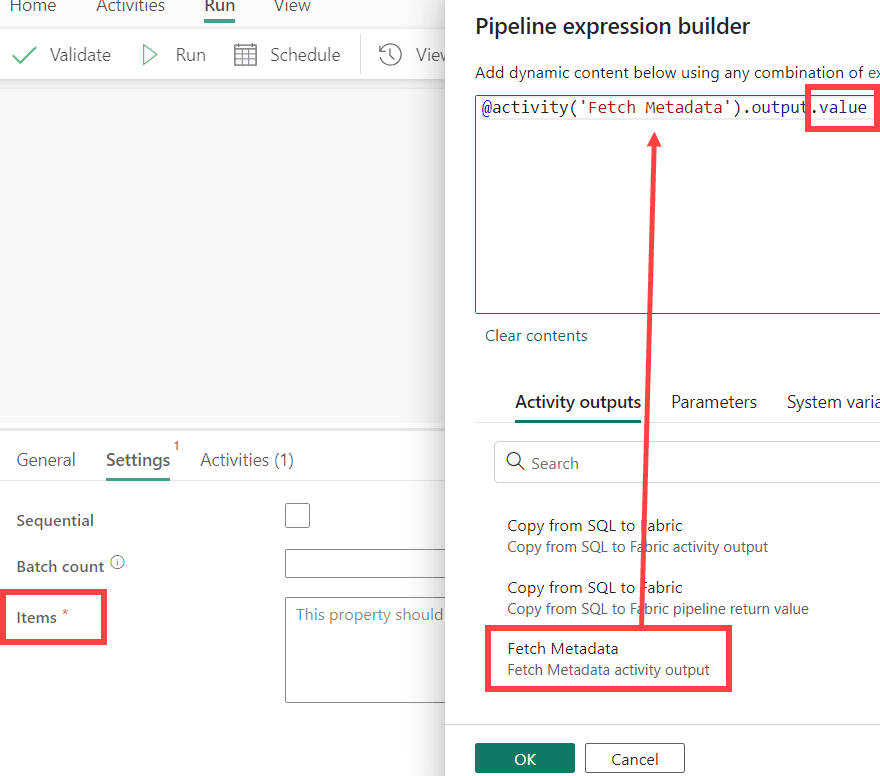
You can use the expression builder to get the output of the Lookup. Just add .value at the end to retrieve the array. By default, the ForEach will run everything in parallel. You can control the number of parallel items by setting the Batch count property. If you don’t want any parallelism, you can check Sequential. Make sure you have an ordered array to have predictable results.
All that is left is to parameterize the Copy activity itself. In the Source pane, select Enter manually in the Table settings and then use the dynamic content to set the source schema and source table name.
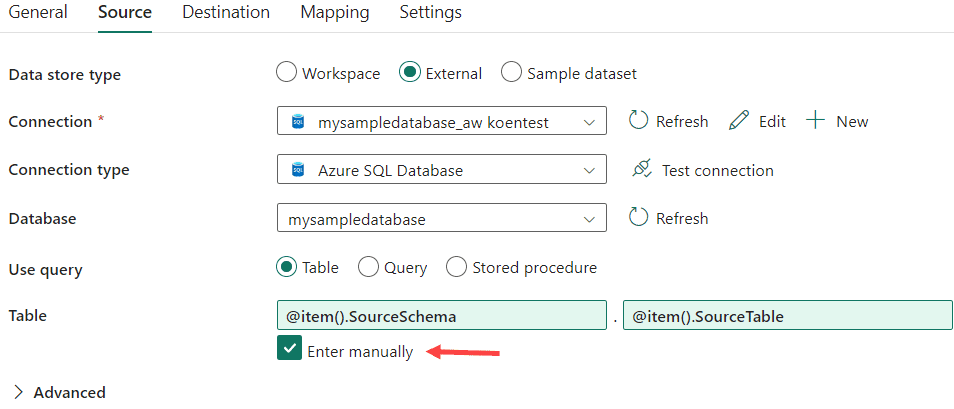
We can reference the current item of the iteration by using the @item() function, followed by the desired column name of the metadata result set. In the Destination pane, parameterize the destination table name and the Pre-copy script properties.
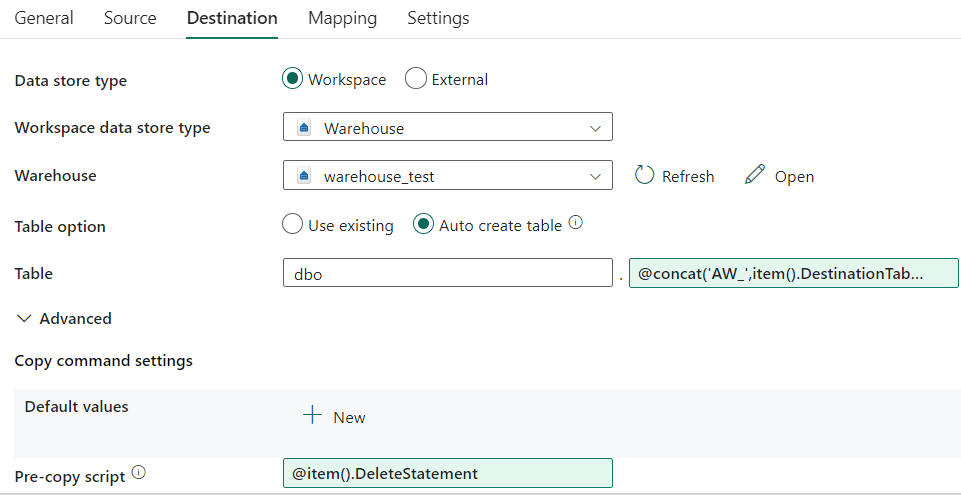
I’m prefixing the table name with ‘AW_’, which can be done with the @concat function. The entire expression:
|
1 |
@concat('AW_',item().DestinationTable) |
Like before, the column mapping stays empty. The configuration is now finished and we can finally test our metadata driven pipeline (don’t forget to activate the ForEach). In the Output pane you can observe that 10 parallel copies have been started:
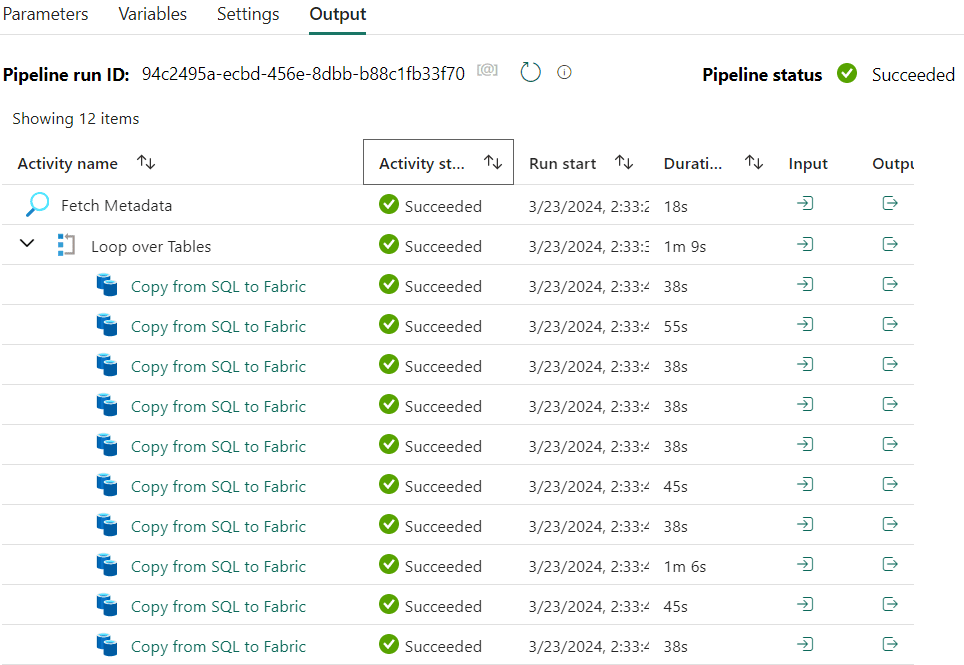
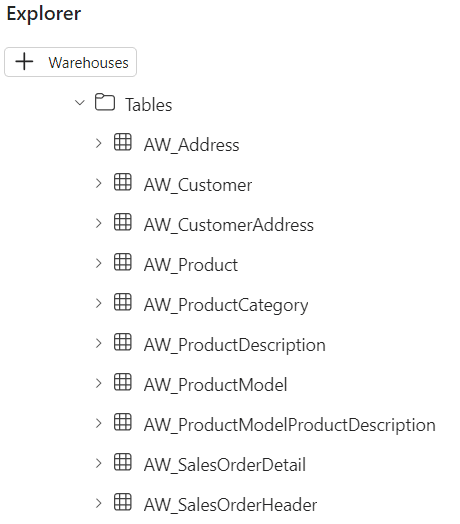
In the Fabric warehouse, the 10 tables are now created and populated with data, all with one single pipeline.
There’s a downside to the approach we used though. More specifically, the auto-create table option is sometimes a bit “generous” when it comes to sizing string data types. We can view this by again querying the INFORMATION_SCHEMA tables:
|
1 2 3 4 5 6 7 8 |
SELECT TABLE_NAME ,COLUMN_NAME ,DATA_TYPE ,CHARACTER_MAXIMUM_LENGTH FROM INFORMATION_SCHEMA.COLUMNS WHERE TABLE_NAME = 'AW_Address' ORDER BY ORDINAL_POSITION; |
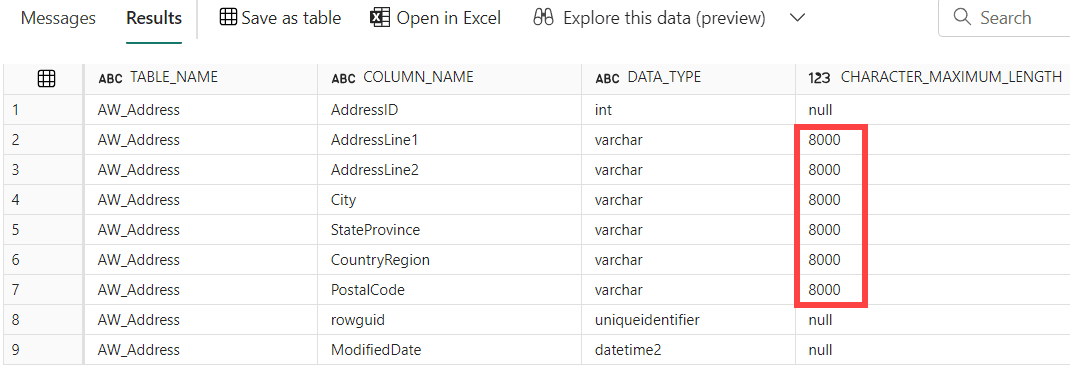
If you don’t mind that every string column is 8000 characters in length, you can leave everything as-is. If not, you can construct a CREATE TABLE statement dynamically by using metadata from the source system. This is left as an exercise for the reader.
Conclusion
In this article, we’ve shown you how you can easily set up a metadata driven pipeline to import sources external to Microsoft Fabric. All you need is metadata which you can either enter manually in some repository, or you can retrieve it from the source system if possible (like using the INFORMATION_SCHEMA tables in this example).
You can apply this pattern on most sources, such as relational databases, but also on files and REST APIs for example.
By using the metadata driven approach, you can significantly save on development time, but it also improves consistency and maintainability of your data pipelines.
Load comments