
You may have heard the term “post-processing” before, but what does that mean? In the context of images and video, it is the application of various visual effects to improve the visual elements of an image. This usually includes effects like giving lights a soft glow or tinting the image a certain color. Typically, when people think of post-processing, they think of it as a static item or something that cannot be changed once applied. In the video game space, this is rarely the case. While an app can certainly have its post-processing effects set in advance, there’s also the option to change them during runtime using C# code. This allows the developer to achieve effects such as applying a vignette under certain conditions or changing the type of film grain used. In this article, I’ll show you how to use post-processing effects in Unity.
To help you learn how to use this, a project will be created that lets the user change the app’s post-processing properties by manipulating various user interface (UI) elements. Before that, a brief description will be given of the post-processing effects used to explain what is being demonstrated. Then, the project will be created with a UI set up before getting into the code that will make the project function. By the end, you will be able to use the UI to adjust the properties of several post-processing effects, seeing the changes in real-time as you do so.
Post-processing effects
Before diving too deep into the project, it’s helpful to understand the various effects. While the project will focus on only a single property per effect, many post-processing effects have multiple properties that can all be changed in code. Here is a list of all the post-processing effects being used in this project and what they do.
Bloom: The bloom effect is what gives bright objects a soft glow, making your brighter areas stand out as a result. This is most clearly visible with light sources and is a popular effect for making an environment appear brighter and more lively.
Chromatic Aberration: Chromatic aberration disperses colors along the dark and light areas of an image. This may remind you of wearing the 3D glasses with the red and blue lenses.
Vignette: The vignette property creates a dark edge that goes all around the screen. The intensity of this effect changes how much of the edges darken.
Film Grain: Almost exactly as the name of the effect implies, this places an old-school-styled film grain over the image. You can adjust the thickness and intensity of the grains to get the exact look you’re going for.
Lens Distortion: This effect simulates real-world distortion caused by an actual camera lens. Depending on the values given, you can achieve a wider field of view. This can also be handy for creating a scene from the perspective of a fish.
Color Adjustment: This effect will be separated into three sliders that represent the red, green, and blue values. Changing any of these will tint the image color based on the values given.
Setting up the Unity project
Now that you’re familiar with some post-processing effects, it’s time to create a project that puts them to use. Start by creating a new project within the Unity Hub.
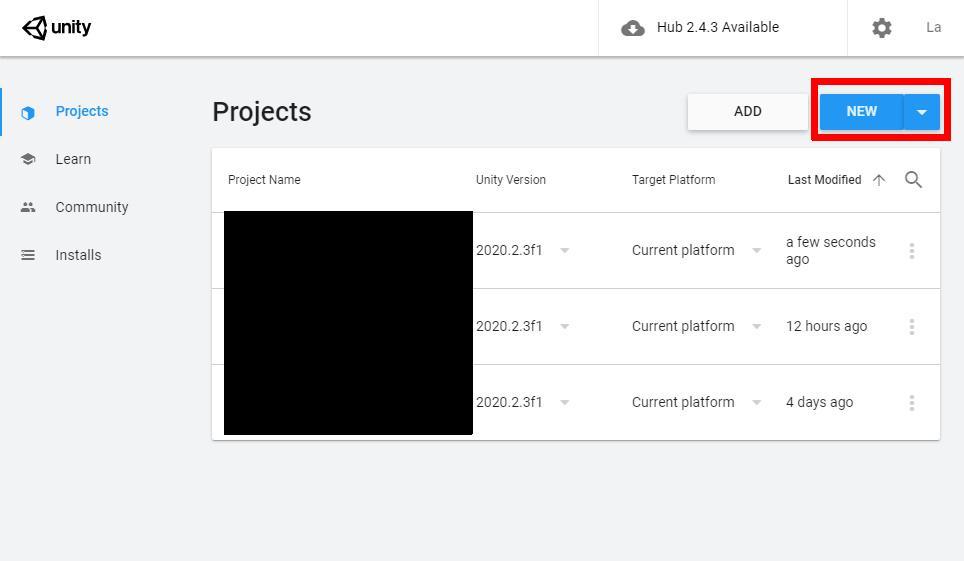
Figure 1: Creating a new project.
The Universal Render Pipeline template will be used this time because it already has a scene created and everything needed for implementing post-processing effects. Give the project a name and set a location for it, then create the project.
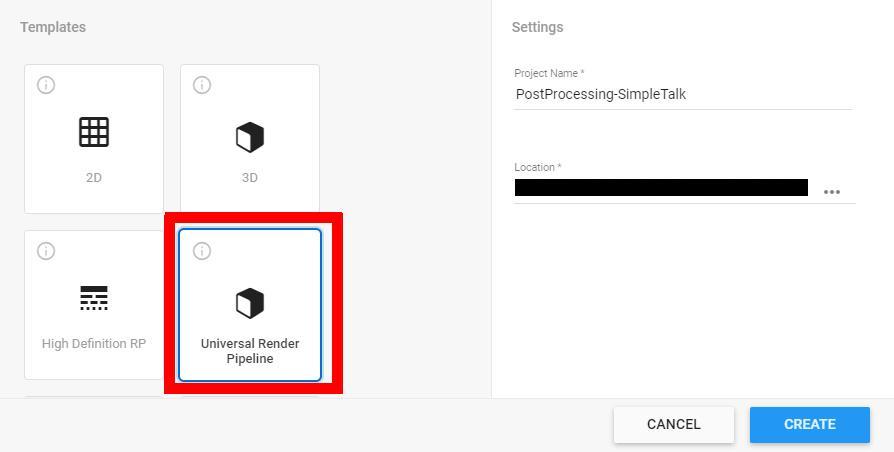
Figure 2: Using the Universal Render Pipeline template
As mentioned before, this project template comes with a post-processing volume already created for you. A post-processing volume is an object that determines the area in which post-processing effects are applied. In this project’s case, the volume has already been set to Global, meaning it will affect the entire scene regardless of your current location. Select the Post-process Volume in the Hierarchy, and look at the Inspector. There’s a button for adding an override, which means you can add to the list of post-processing effects that you control and not leave it up to the app. It already has the bloom and vignette effects added, so use this button to add Chromatic Aberration, Film Grain, Lens Distortion, and Color Adjustments. Click Post-processing to see the list.

Figure 3: Adding post-processing overrides.
It’s not enough that you add these effects to the volume, however. You also have to enable the properties you want to change. Expand each effect using the arrow icons, then enable the following:
- Bloom – Intensity
- Vignette – Rounded
- Chromatic Aberration – Intensity
- Film Grain – Type and Intensity
- Lens Distortion – Intensity
- Color Adjustments – Color Filter
If, after project completion, you decide you want to modify other values in code, make sure the corresponding properties are enabled first. Also, go ahead and set the intensity for Bloom to zero, and the intensity for Film Grain to 1.
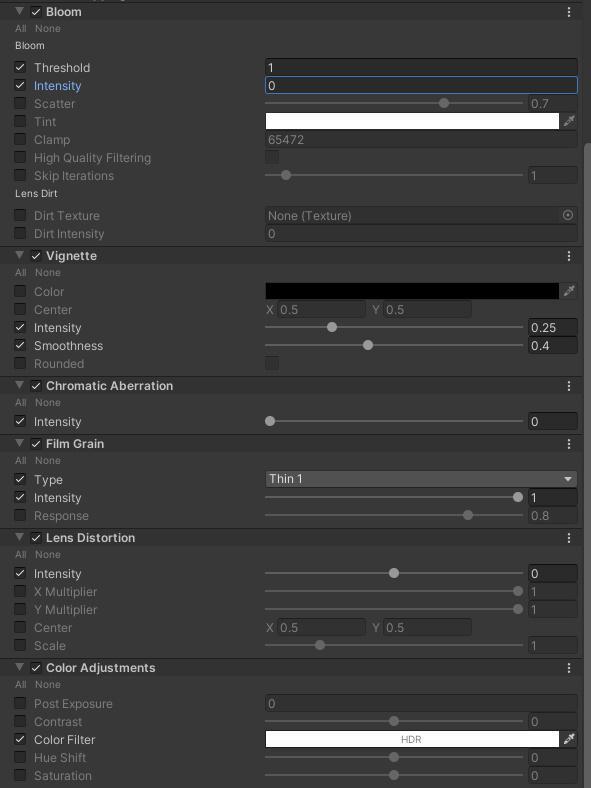
Figure 4: All default values for the post-processing volume
Now comes the process of creating the user interface that will allow manipulating the post-processing values in real-time. This has a lot of parts to it, so one object’s creation will be described in detail, with the remaining objects listed out in a table complete with the object type and its coordinates.
For this example object, create a slider for controlling the post-processing volume’s bloom value. First, in the Hierarchy window, click the Create button and choose UI->Slider. Name the object BloomSlider.

Figure 5: Creating a new slider.
If it’s not already set, change the view to 2D to more easily view and edit the UI. Then zoom out with your mouse wheel.
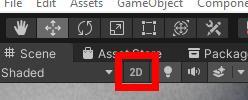
Figure 6: Changing to 2D view
Make sure the BloomSlider object is selected, then navigate to the Inspector. There will be a Rect Transform component listed, which controls the object’s location and size. Change the values seen in figure 7. Note: these values may differ based on the size of your Game window and screen resolution.
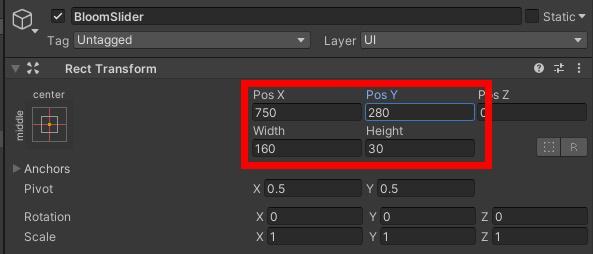
Figure 7: Setting Rect Transform values.
All the objects listed in Table 1 follow the same creation process listed above. The Text, Toggle, Dropdown, and Button objects are all found in the same UI menu when creating an object.
|
Object Name |
Object Type |
Pos X |
Pos Y |
Width |
Height |
|
BloomText |
Text |
750 |
310 |
160 |
30 |
|
BloomSlider |
Slider |
750 |
280 |
160 |
20 |
|
ChromaticAberationText |
Text |
750 |
240 |
160 |
30 |
|
ChromaticAberationSlider |
Slider |
750 |
210 |
160 |
20 |
|
VignetteText |
Text |
750 |
170 |
160 |
30 |
|
VignetteToggle |
Toggle |
750 |
130 |
160 |
30 |
|
FilmGrainText |
Text |
750 |
80 |
160 |
30 |
|
FilmGrainDropdown |
Dropdown |
750 |
50 |
160 |
30 |
|
LensDistortionText |
Text |
750 |
10 |
160 |
30 |
|
LensDistortionSlider |
Slider |
750 |
-20 |
160 |
20 |
|
ColorAdjustmentText |
Text |
750 |
-80 |
160 |
30 |
|
RedText |
Text |
665 |
-120 |
60 |
30 |
|
RedSlider |
Slider |
780 |
-120 |
160 |
20 |
|
GreenText |
Text |
665 |
-150 |
60 |
30 |
|
GreenSlider |
Slider |
780 |
-150 |
160 |
20 |
|
BlueText |
Text |
665 |
-170 |
60 |
30 |
|
BlueSlider |
Slider |
780 |
-170 |
160 |
20 |
|
ResetButton |
Button |
750 |
-250 |
160 |
30 |
Table 1: All UI objects with positions and size.
A few of these objects will need their default properties changed before creating code. You can get through this part faster by selecting all text objects at once and changing any properties to a value all objects will have. Press the Ctrl key before clicking your additional objects to modify all of them at the same time. First, in order to increase the text readability, it is advised you change the colors to black (by default they’re a grey color) and change their font size and style. This is done by selecting the text object, navigating to the Inspector, finding the Text component, and changing the various properties from there.
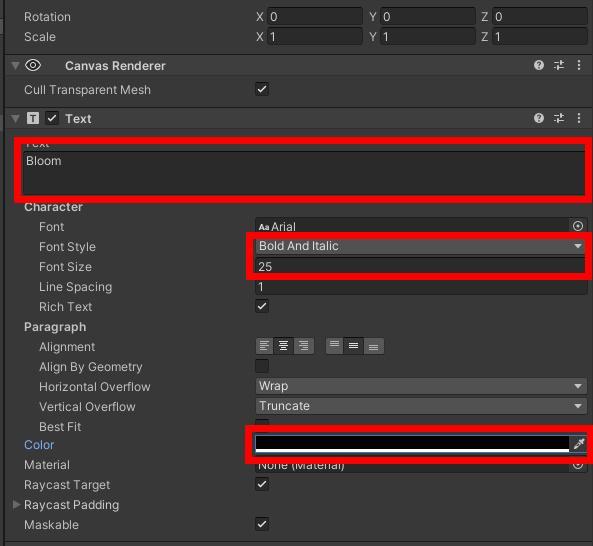
Figure 8: Setting the UI text.
The VignetteToggle has a separate child object for its text label. To edit it, you’ll need to show VignetteToggle’s child objects by expanding it in the Hierarchy. Find Label, and change the text, font style, and color from there.
Next, some sliders, the toggle, and the drop-down menu will need their defaults adjusted. The LensDistortionSlider object must have a minimum value of -1, a maximum value of 1, and a default value of 0. Set the maximum value for the BloomSlider object to 10, and the default value for the red, green, and blue sliders to 1. The VignetteToggle only needs one change; make sure the IsOn property is set to false, and the toggle will be ready.
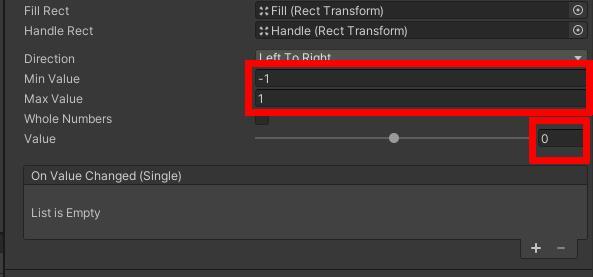
Figure 9: LensDistortionSlider default values.
Finally, you’ll need to add and edit all needed options in the drop-down menu, as seen in figure 10. Use the + button to add as many options as needed. Be sure to also change the names of those options as well to match the list available in the Film Grain override.
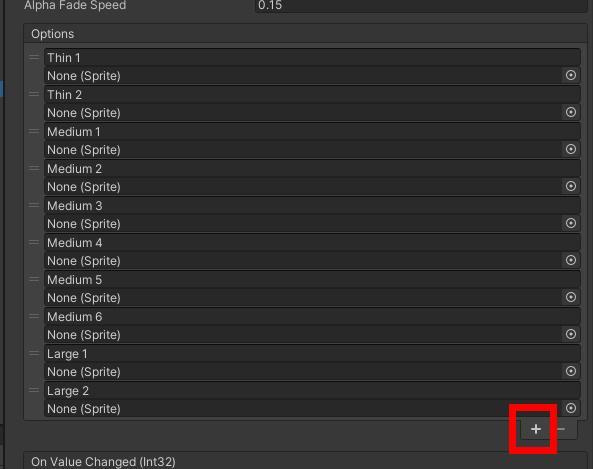
Figure 10: Full list of options for Film Grain.
The UI is finally finished and ready for use. Of course, a script will be needed in order for the UI to do anything. Navigate to the Assets window and right-click it. Choose Create->C# Script, then give it a name such as PostProcessRuntimeEffects. Double click the new script to open the script in Visual Studio.
PostProcessRuntimeEffects
To get started, making sure you’re using the following namespaces:
|
1 2 3 4 |
using UnityEngine; using UnityEngine.Rendering; using UnityEngine.Rendering.Universal; using UnityEngine.UI; |
The critical items are UnityEngine.UI and the two Rendering namespaces, with the latter helping you change post-processing effects. Next, add the following to the class:
|
1 2 3 4 5 6 7 8 9 10 11 12 13 14 15 |
public Volume vol; public Slider bloomSlider; public Slider chromaticAberrationSlider; public Toggle vignetteToggle; public Dropdown filmGrainDropdown; public Slider lensDistortionSlider; public Slider redSlider; public Slider greenSlider; public Slider blueSlider; Bloom bloom; ChromaticAberration chromaticAberration; Vignette vignette; FilmGrain filmGrain; LensDistortion lensDistortion; ColorAdjustments colorAdjustment; |
I’ll break this down a bit. First, vol is what will allow you to override the current post-processing effects with that of the user’s selection. From there, you’ll have all the different UI elements that the user can manipulate. Finally, each post-processing class object will be used to store the user’s values and then transfer that data over to the post-processing stack.
The Update method that was created automatically can be deleted, as it will not be used here. Moving on to the Start method, you’ll need to initially populate those objects with the information currently stored in the post-processing volume. Unity will acquire the volume’s profile, and then more specifically the effect you wish to get and place the found information in the corresponding object that you’ll specify.
|
1 2 3 4 5 6 |
vol.profile.TryGet<Bloom>(out bloom); vol.profile.TryGet<ChromaticAberration>(out chromaticAberration); vol.profile.TryGet<Vignette>(out vignette); vol.profile.TryGet<FilmGrain>(out filmGrain); vol.profile.TryGet<LensDistortion>(out lensDistortion); vol.profile.TryGet<ColorAdjustments>(out colorAdjustment); |
Once you’ve obtained that information, you’ll need to set up a listener for when the user adjusts any of the values presented to them in the UI. This is done by first calling each UI element’s onValueChanged function and then adding the listener from there. For the sake of simplicity, the same method will be used for all UI listeners. The method in question, PostProcessValueChange(), will be created momentarily.
|
1 2 3 4 5 6 7 8 |
bloomSlider.onValueChanged.AddListener(delegate { PostProcessValueChange(); }); chromaticAberrationSlider.onValueChanged.AddListener(delegate { PostProcessValueChange(); }); vignetteToggle.onValueChanged.AddListener(delegate { PostProcessValueChange(); }); filmGrainDropdown.onValueChanged.AddListener(delegate { PostProcessValueChange(); }); lensDistortionSlider.onValueChanged.AddListener(delegate { PostProcessValueChange(); }); redSlider.onValueChanged.AddListener(delegate { PostProcessValueChange(); }); greenSlider.onValueChanged.AddListener(delegate { PostProcessValueChange(); }); blueSlider.onValueChanged.AddListener(delegate { PostProcessValueChange(); }); |
This concludes the Start method, leaving the PostProcessValueChanged method mentioned earlier and a method assigned to the ResetButton’s onClick event. Since PostProcessValueChanged is where the app takes the user’s input and changes the post-processing settings, this will be a good function to take care of next.
|
1 2 3 4 5 6 7 8 9 10 11 12 13 |
void PostProcessValueChange() { bloom.intensity.value = bloomSlider.value; chromaticAberration.intensity.value = chromaticAberrationSlider.value; lensDistortion.intensity.value = lensDistortionSlider.value; vignette.rounded.value = vignetteToggle.isOn; FilmGrainLookupParameter filmGrainParam = new FilmGrainLookupParameter((FilmGrainLookup)filmGrainDropdown.value); filmGrain.type.Override((FilmGrainLookup)filmGrainParam); Color newColor = new Color(redSlider.value, greenSlider.value, blueSlider.value); colorAdjustment.colorFilter.Override(newColor); } |
In a nutshell, whenever the user changes any post-processing values, this function is called to update the values within the post-processing stack. For some effects, it’s as simple as calling the parameter in question and setting its value to the user’s selection. However, in this example, two of the effects being changed are a little more involved. Both the film grain and color adjustments require the Override function to, as the name implies, override the current value. Before you can do that, though, you must first create objects of the correct type, enter the data they need, and then use that as the argument for the Override function. Those with a basic familiarity with Unity development will recognize the Color class and how it constructs a new color using red, green, and blue values between zero and one. The more uncommon FilmGrainLookupParameter class is used by Unity to identify which film grain type to use from its list. All it needs is the drop-down menu’s value to search with, and then Override will handle the rest.
Now, as fun as it will be to move all the sliders around and create some wild effects, at some point a user may want to go back to the default look and start from scratch. This is where the ResetButton object comes in. Click this button, and every value will be set to its defaults.
|
1 2 3 4 5 6 7 8 9 10 11 |
public void ResetSettings() { bloomSlider.value = 0; chromaticAberrationSlider.value = 0; lensDistortionSlider.value = 0; vignetteToggle.isOn = false; filmGrainDropdown.value = 0; redSlider.value = 1; greenSlider.value = 1; blueSlider.value = 1; } |
Notice that you’re just changing the values in each UI element and not the post-processing volume directly. Remember that the PostProcessValueChanged method is called anytime a UI element’s value is changed. Not only are you still updating the post-processing volume with new data, but you’re also setting the UI elements back to how they were when the app started.
That takes care of everything on the coding side. All that remains is to tell Unity where all the UI elements and post-processing volume are, finishing the single button setup, and then the project should be ready to run. Save the code, close up Visual Studio, and head back to your Unity project.
Finishing Touches
Select the Main Camera object and attach the now finished PostProcessingRuntimeEffects script to it by clicking and dragging the script into the Inspector window. You may want to lock the Inspector window by clicking the padlock icon at the top right.
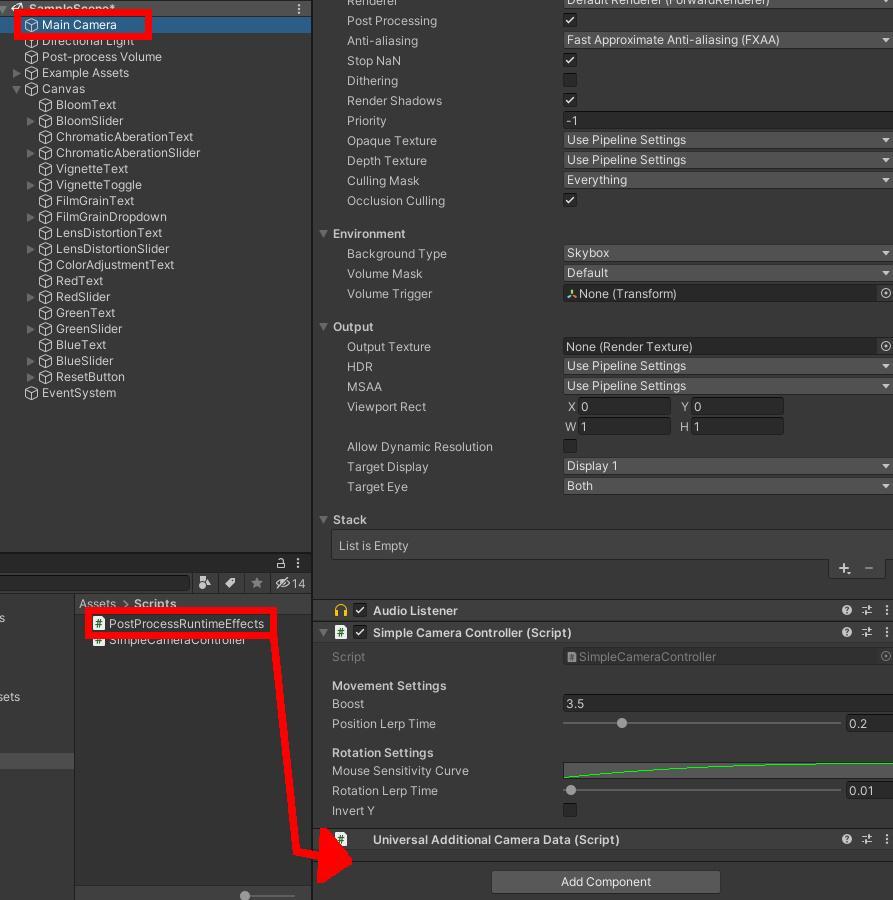
Figure 11: Attaching a script component
All the empty fields you see on the newly attached script component will need to be filled in. The Vol field is for the post-processing volume, so click and drag that object into this field.
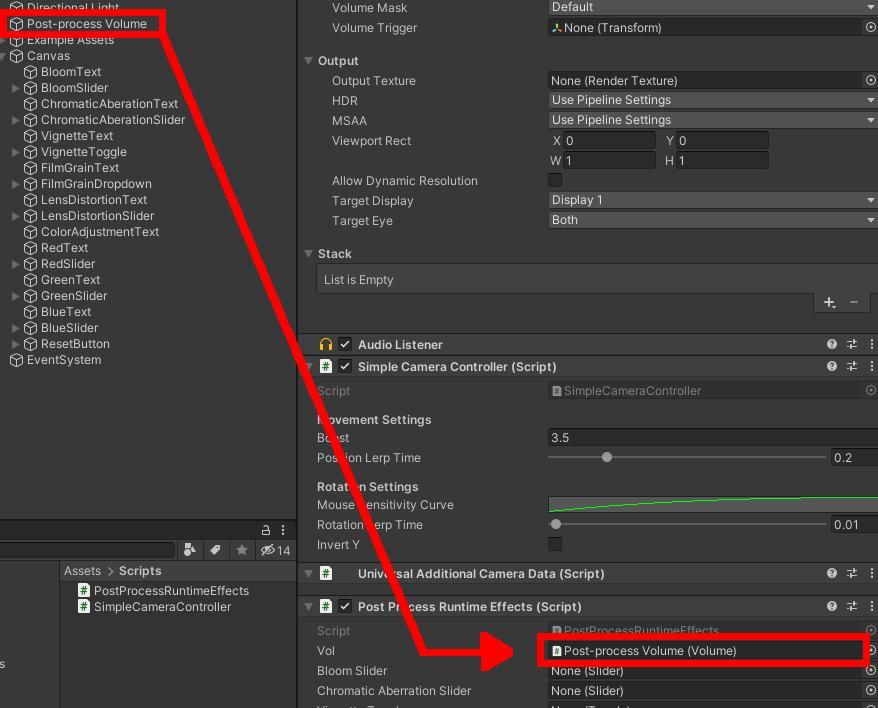
Figure 12: Adding Post-process Volume to Vol field
The previous step also applies to all the UI elements. Just click and drag all UI objects into their corresponding fields. The ResetButton and the text objects are exceptions, as the script does not work with those directly.
Once all fields are set, select the ResetButton object. Remember the ResetSettings function in the script? This function will need to be added to the button’s On Click event list. To do this, start by clicking the + button in the On Click event list. This is what will allow the button to perform your code on click.
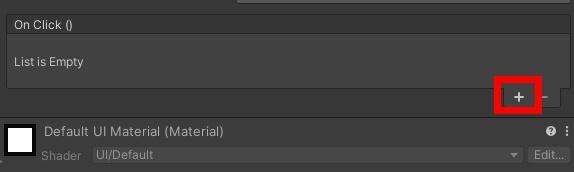
Figure 13: Adding a new On Click event.
Next, drag the Main Camera into the object field. This is for pointing the event in the direction of the object with the correct script component attached.
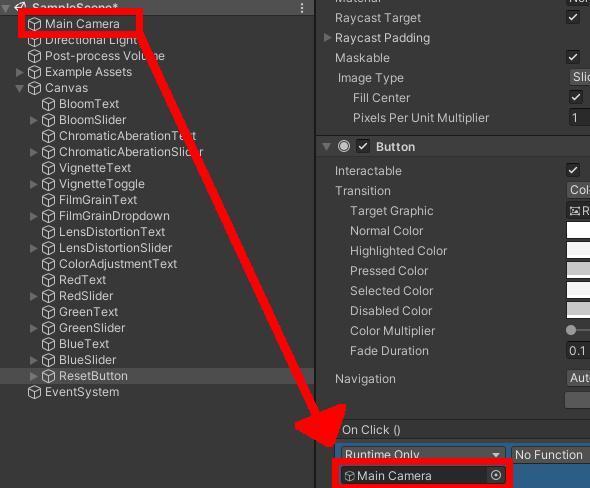
Figure 14: Setting the Main Camera as the object to find the script component from
Next, click on the No Function drop-down. Then choose PostProcessRuntimeEffects->ResetSettings. Once you have that selected, the button will know which function to perform.
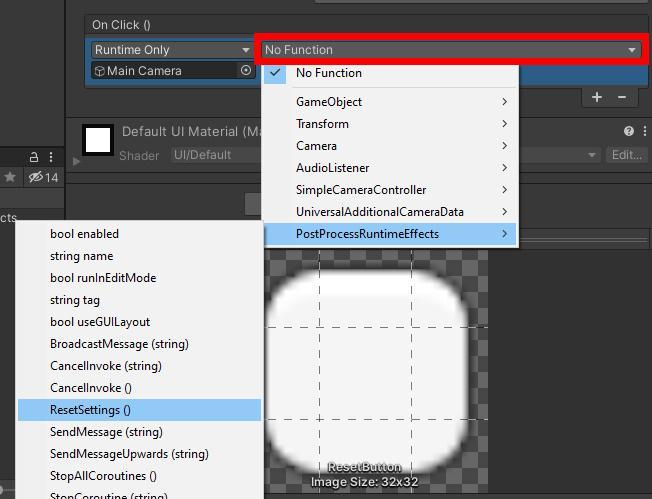
Figure 15: Setting On Click event to perform ResetSettings
That’s everything! Now you can run the project using the play button at the top of the editor, then adjust the post-processing volume to your liking. The project template that is being used also comes with basic camera controls while running the app. You can move around the scene using the W, A, S, and D keys and rotate the camera by right-clicking your mouse and dragging. You can also go up or down using the Q and E keys.
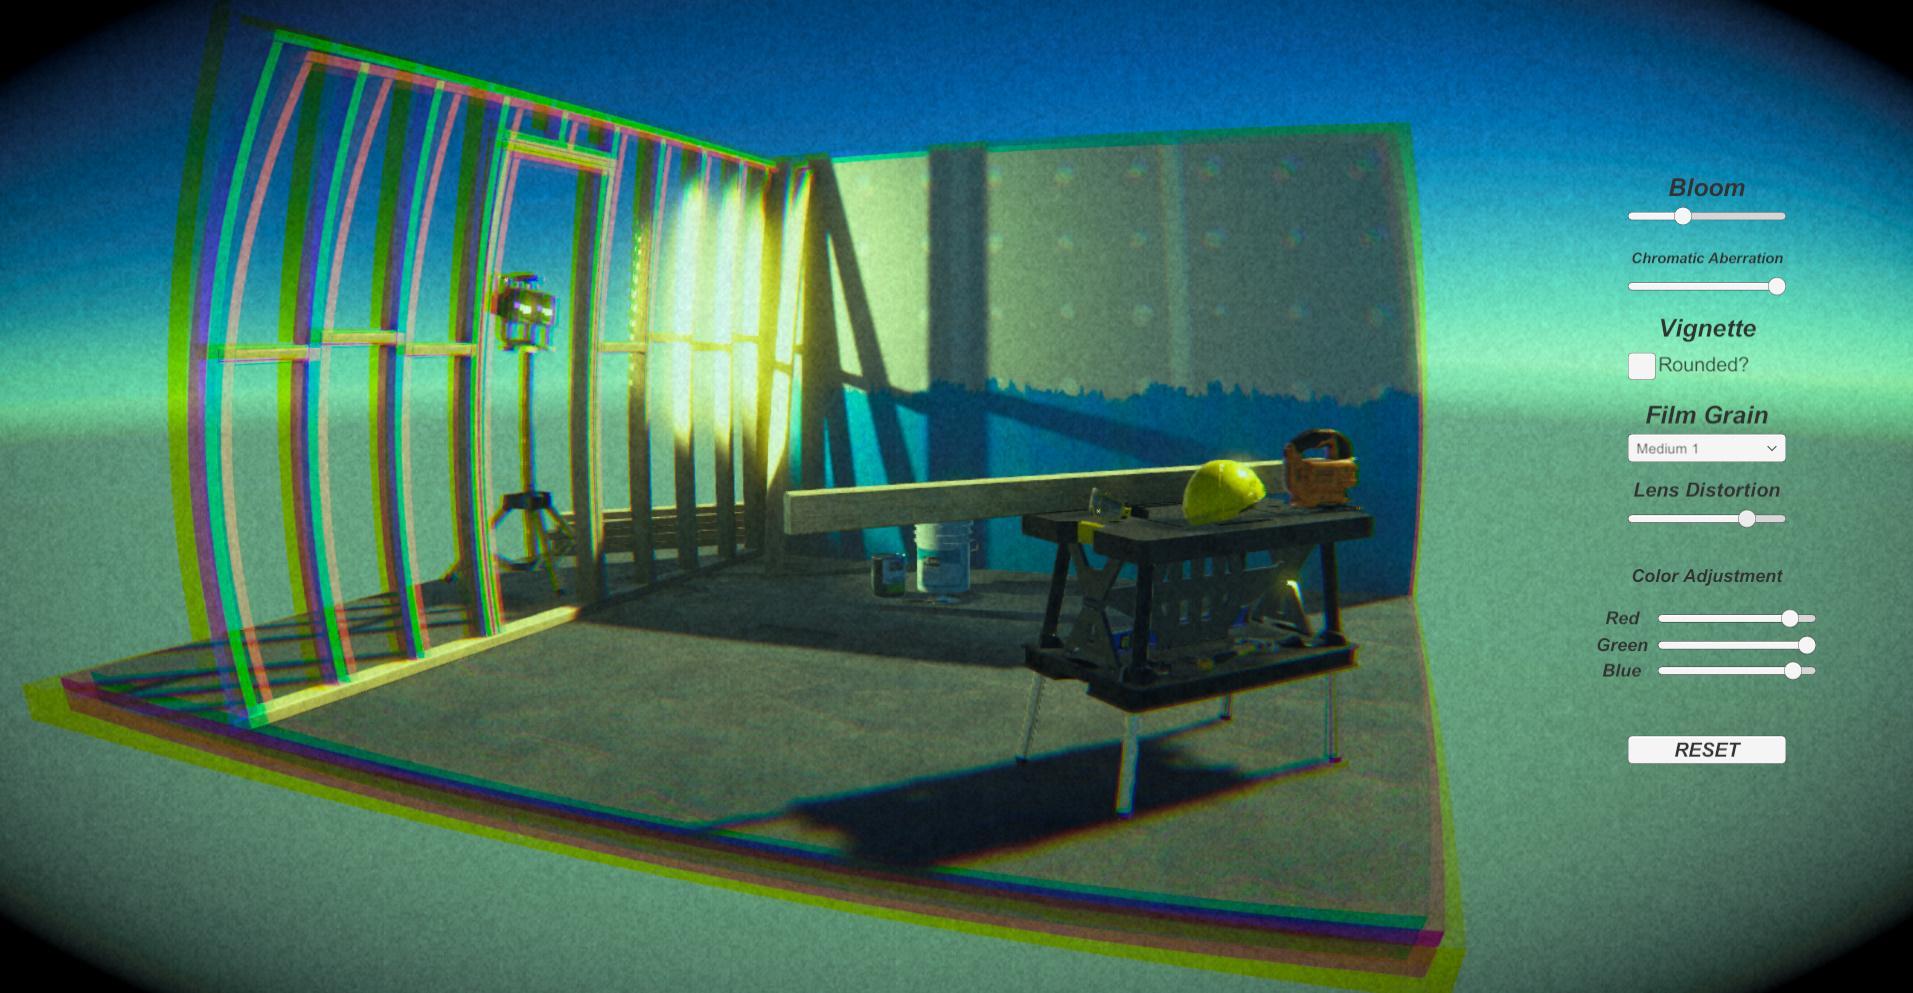
Figure 16: The app in action.
Post-processing effects in Unity
Users enjoy having options and being allowed to tweak aspects of an app to their liking. This can extend all the way to the visual elements of the application. By allowing customization, the user can make the app feel like “theirs” and can aid in creating a unique experience for the user. While the project demonstrated this application in a gaming context, the concept can be applied to various other kinds of apps. The changes allowed don’t have to be for purely visual appeal either. Designed correctly, changing these visual effects can have practical benefits as well, such as making certain colored objects more visible under a different color scheme. Either way, the ability to tweak settings to a user’s liking is something anyone can appreciate.
If you liked this article, you might also like How to Create a Settings Menu in Unity.
This document contains proprietary information and is protected by copyright law.
Copyright © 2026 Red Gate Software Limited. All rights reserved
Load comments