
Group Policy, when combined with WMI filters, allow an Administrator to dynamically apply policies. If you ever have to change a setting on just laptops or change the behavior on a specific OS, using a WMI Filter will save you hours of work.
In our previous articles covering Group Policy, we saw two main ways to deploy software by applying a Group Policy Object (GPO). GPOs, which contain our settings for either computers or users, can be linked to Organizational Units (OUs). They can also be scoped down by security groups. However, this isn’t enough to tackle the full range of selection you’re likely to be faced with. What if you need to deploy different versions of software to laptops than desktop devices, or apply different installation routines based on the OS level or for particular CPU? How would you use Group Policy to upgrade only existing installations of certain software, or do it only on certain days of the week? Fortunately, Group Policy can achieve this, though it may not appear obvious to the casual user.
There is a certain amount of versatility in using Organizational Units or security groups, and much of the work of Group Policy can be done with just these two filters. When combined, GPOs can be linked to multiple OUs and filtered to several security groups. The object (either a computer or user) must meet certain criteria to process the GPO though. The object must be in the security group that the GPO is scoped to. The object must also be in an organizational unit that the GPO is linked to.
Although it is possible to use these two levels of filtering creatively to increase the selectivity of Group Policy, applying GPOs this way has a notable limitation. It requires you, the administrator, to manage security group everything. If you want to apply specific settings to only your laptops, you would have to put every laptop in a group or into a dedicated OU. But what if there was a better way? What if you could configure clients, like a laptop, to automatically apply GPOs based on certain built-in criteria? What if the GPO could, in effect, sniff at the device to decide whether it was the right sort to have the GPO applied? When you combine the granular power of Windows Management Instrumentation (WMI) with a GPO, you can achieve this type of dynamic processing! Let’s look at an example:
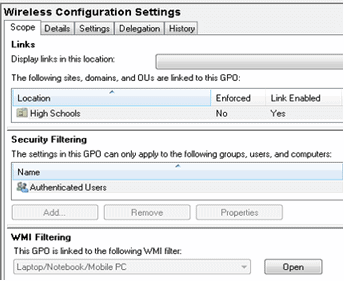
In the Group Policy report above, the GPO “Wireless Configuration Settings” is linked to the High Schools OU and applies to Authenticated Users. Due to this broad filtering, these wireless settings would normally apply to every computer under the High Schools OU – both desktops and laptops. But look a little closer!
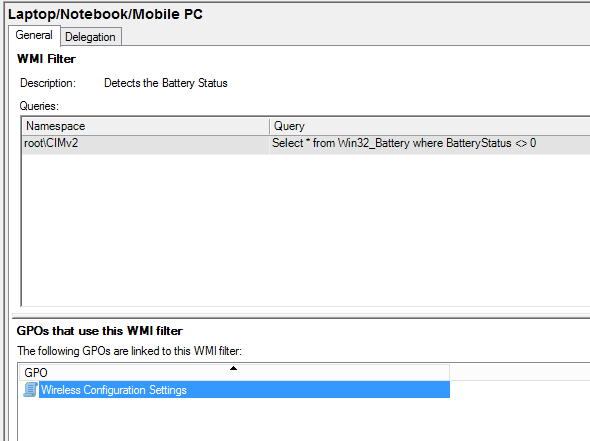
The WMI Filter, “Laptop/Notebook/Mobile PC”, is linked to this GPO. Because of this, only laptops under the High Schools OU will apply this policy. Desktops will ignore it! That is pretty cool, isn’t it! Before we start working in Group Policy, let’s wander down the WMI rabbit hole first!
What is WMI?
WMI, or Windows Management Instrumentation, is available on every modern Windows OS. It provides a standard method of accessing device data in the enterprise. It other words, it gives an Administrator a common way to extract hardware and software information! Ever wondered where inventory programs get their data, I would bet they use WMI! Let’s see a quick example that shows how powerful WMI can be.
A Basic WMI Example
On your computer, launch an administrative command prompt. If you are on a Windows 8 machine, you can easily do this by pressing the Windows Key + X, followed by A. Type wmic bios get serialnumber.

Your output should be the serial number or service tag of your machine. You can broaden this query by typing wmic bios get.
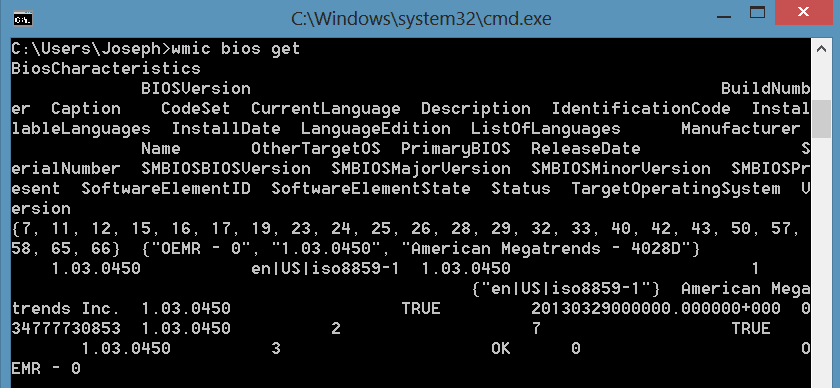
Though difficult to read, you can certainly see the power in WMI. In the screenshot above, we are able to extract information such as our BIOS Version, Install Date, and Manufacturer. These same steps can be repeated for other categories, which are called WMI Classes. For example, you could query the model of your machine by typing wmic computersystem get model.

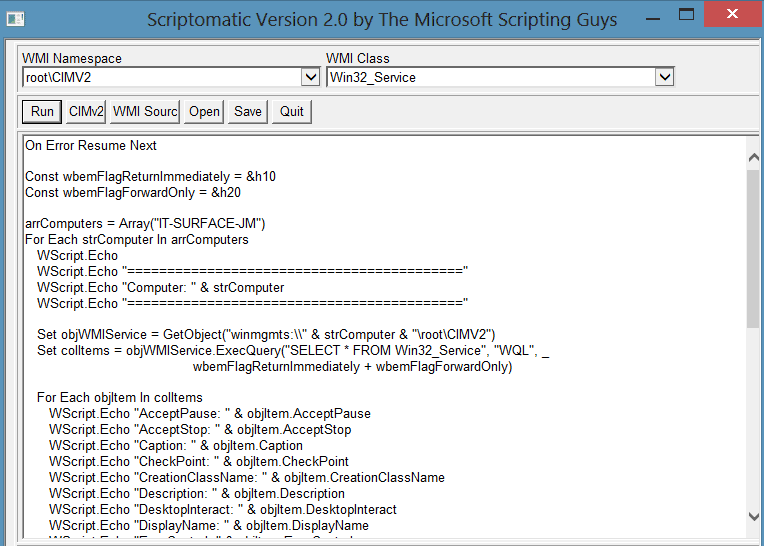
If you want to make this data a little clearer (or explore WMI a little deeper), you’ll want a structured way of doing it. Enter Scriptomatic 2.0, a free tool by the Microsoft Scripting Guys.
Exploring WMI
If you haven’t, download the tool and extract it to your desktop. Launch an administrative command prompt and browse to the extracted tool. Start ScriptomaticV2.HTA. Under WMI Class, scroll down to Win32_BIOS and select Run.
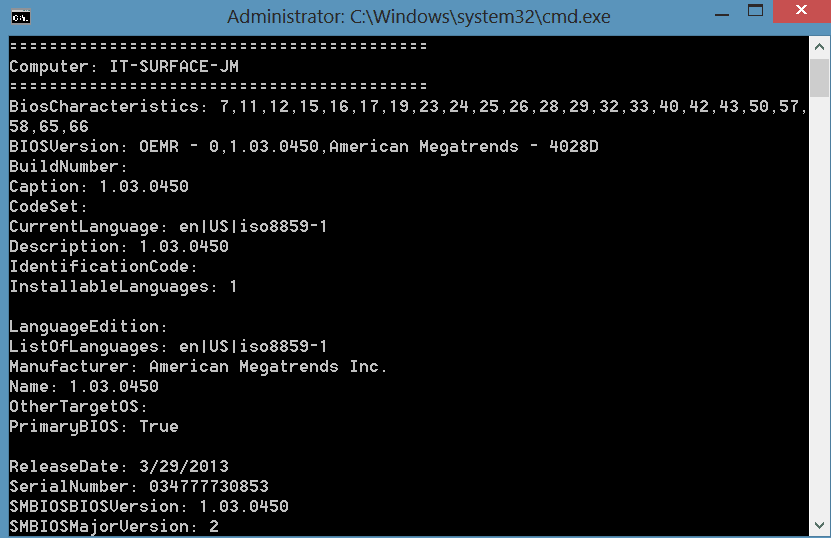
When compared to the garbled mess that wmic bios get generated, Scriptomatic’s output is neatly organized and very structured! If you are anything like me, you’ll want to spend some time exploring the different WMI Classes. For starters, take a look around Win32_ComputerSystem or Win32_Service.
Choosing your Class
Back from exploring Scriptomatic? Great! Our goal is to create a filter like our laptop example above. To achieve this, we need a common way to group laptops together. So what do laptops have in common? They have a unique chassis, have a battery, and wirelessly connect. These three attributes are the most common ways that I’ve seen to filter laptops. I’ve had the best experience by filtering on the presence of a battery.
In Scriptomatic, choose the Win32_Battery WMI class and select Run.
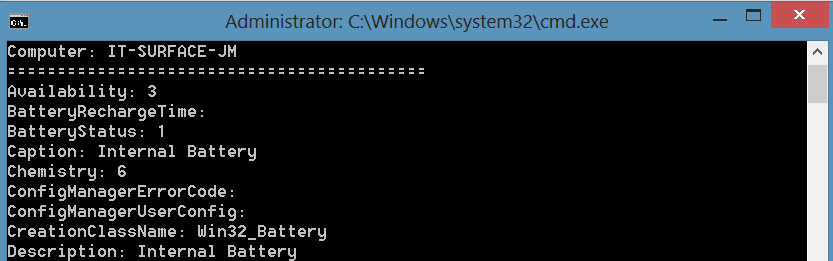
Right away, we can see several potential queries that we can build from. For our query, we are going to work withBatteryStatus.
Creating your WMI Query
If you’ve ever worked with SQL, then it will probably come natural to write WMI queries! If you haven’t, don’t worry as there are only a few rules you’ll need to remember. At its essence, a WMI query will read like this:
Select from A WMI CLASS where SOMETHING matches your input
Building on our Win32_Battery class, we could create a WMI query like this:
Select * from Win32_Battery where BatteryStatus <> 0
In the query above, we are selecting BatteryStatus from Win32_Battery. If the BatteryStatus is not equal (<>) to 0, the query will return a TRUE value. On my Surface, BatteryStatus returns a value of 1. This WMI query will evaluate to true on my device.
Let’s take what we have above and create our filter for use with Group Policy. Copy the laptop query from above. Next, launch the Group Policy Management Console (GPMC) and navigate to the WMI Filters container.
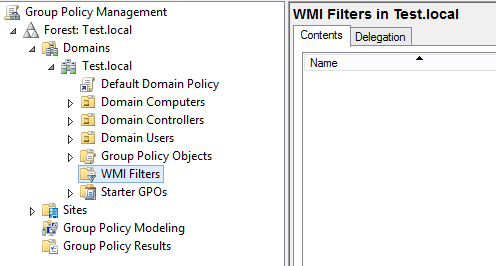
Right click on WMI Filters and select New. Name your filter and provide a description. Finally, select Add. Leave the Namespace at root\CIMv2 and paste your laptop query in the box below.
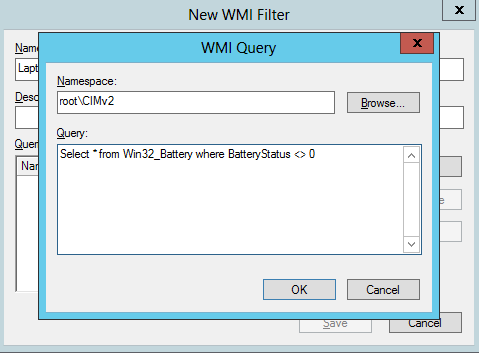
Press OK and Save. The GPMC will check the query for syntax errors. If the query checks out fine, you will see it listed under your WMI Filters container.

Linking a WMI Filter to a GPO
Our Laptop filter is currently useless! In the picture above, the Linked GPO column shows us that the filter is not linked to any GPOs.
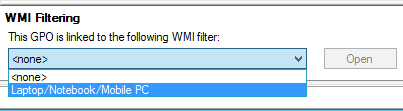
Select the GPO that needs this WMI Filter. You should now be on the Scope tab for your Policy. Under WMI Filtering, choose your newly created filter and press Yes to the confirmation prompt.
Heading back to the WMI Filters Container, we can now see that our Laptop filter is linked to Wireless Configuration Settings GPO. The term “Linked” is important to note.
Like anything in Group Policy, something that is “Linked” is essentially a shortcut. In the same way that GPOs live inside the Group Policy Objects container, WMI Filters live inside their separate container. In the same way that GPOs can be linked to multiple OUs, WMI Filters can be linked to multiple GPOs.
Imagine that you’ve created multiple GPOs that rely on the Laptop WMI filter. You have a Power Policy, an Offline Files Policy, and the Wireless Configuration Policy. You decide that you want to further filter the Wireless Configuration GPO by only allowing laptops with a certain wireless adapter to process it.
After modifying the filter, you’ve noticed that some laptops are not applying the Power Policy and Offline Files Policy. In fact, you’ve noticed that the only devices applying the GPOs are devices with a battery and with a certain wireless adapter! By changing the one WMI filter, any GPOs linked to it are effected. If we wanted a WMI filter that only applies to Laptops with a specific wireless adapter, we would need to create a new filter.
Testing Your Filters
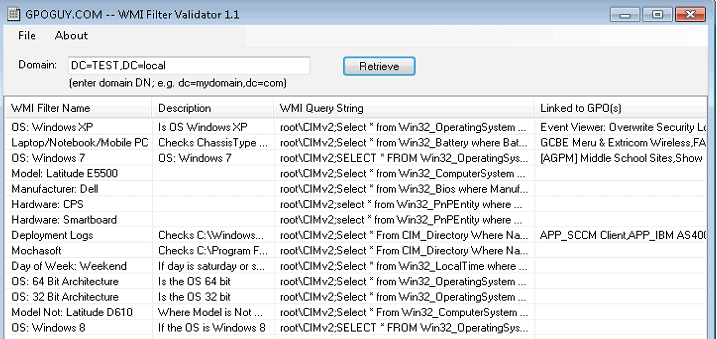
When you are creating or editing WMI filters, you will want a quick way to test them. Luckily, GPOGuy.com has a free tool that will validate your domain’s WMI filters. After launching it, press Retrieve to pull in all of the WMI Filters in your domain.
Right click on any filter and select Validate. Next, type in the computer name and select Validate Now. Validating the filter against your local machine will be slightly faster.
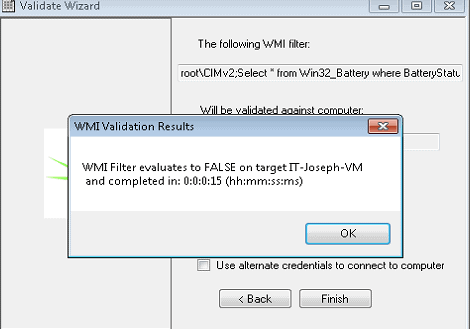
The results of the WMI Filter should now be displayed. As you can see, running the Laptop WMI filter on a virtual machine returned a False result. Any GPO using this filter will not process on my virtual machine.
Final WMI Filter Notes
WMI Filters are incredibly powerful! No other tool allow you to apply GPOs dynamically. Just in our environment, we use WMI Filters to accomplish:
- Filtering by OS (Windows 7, Windows 8, etc)
- Filtering by Architecture (X86 or X64)
- Filtering by Application (Apply this GPO is this application is installed)
- Filtering by Hardware (Apply this GPO is a particular device is present)
- Filtering by day (Apply this GPO only on weekends)
Trying to accomplish any of the items above without WMI Filters would be near impossible! What scenarios would you use WMI Filters for? Are there any particular filters you would like to see? If so, let us know in the comments below.
This document contains proprietary information and is protected by copyright law.
Copyright © 2026 Red Gate Software Limited. All rights reserved
Load comments