
Automate creation and teardown of Azure VMs using ARM templates and a C# console app. Deploy temporary VMs on demand – spin up, run workload, delete programmatically. This article covers exporting VM templates from Azure portal, AAD authentication setup, and C# code for VM lifecycle management.
Automating Azure for Resources On-Demand
- Automating Azure: How to Deploy a Temporary Virtual Machine Resource
- Automating Azure: Creating an On-Demand HDInsight Cluster
See also: Creating a Custom .NET Activity Pipeline for Azure Data Factory
In this article I will show how to deploy a temporary Virtual Machine resource in Azure by using a C# console application and an ARM (Azure Resource Manager) template. After the resource is created, we will perform a simple task and then remove the resource. This is the first step on the way of creating a very flexible infrastructure in Azure, on demand.
An overview of the steps performed:
- Set up a VM via the Azure portal and save the Parameters.JSON and Template.JSON files to a BLOB storage
- Create a batch service and pool
- Create an AAD app to be used for Service-to-Service authentication
- Create a C# console app and add the code which will create the VM
Setup a VM in the portal and save the Template JSON files
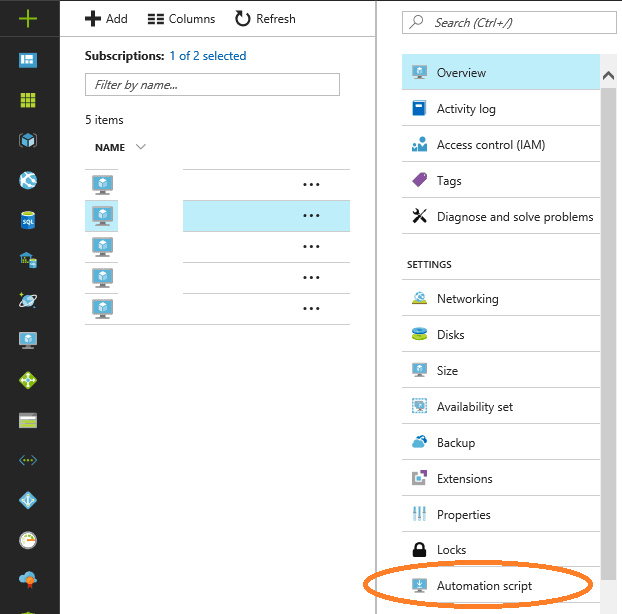
A useful aspect of Azure is that it allows the user to create scripts to automate any object in the Azure environment. If ,for example, we have an existing Virtual Machine in Azure, we would be able to go to the portal and download the automation scripts to create the exact same resource at a later time. This is very valuable for such tasks as backups, reviews or transferring objects between subscriptions.
This is possible simply by selecting the resource in the portal and clicking on the ‘Automation script’ link:
The ‘Automation Script’ blade presents us with a set of choices for deployment: there is a PowerShell Script, CLI, .NET, Ruby:
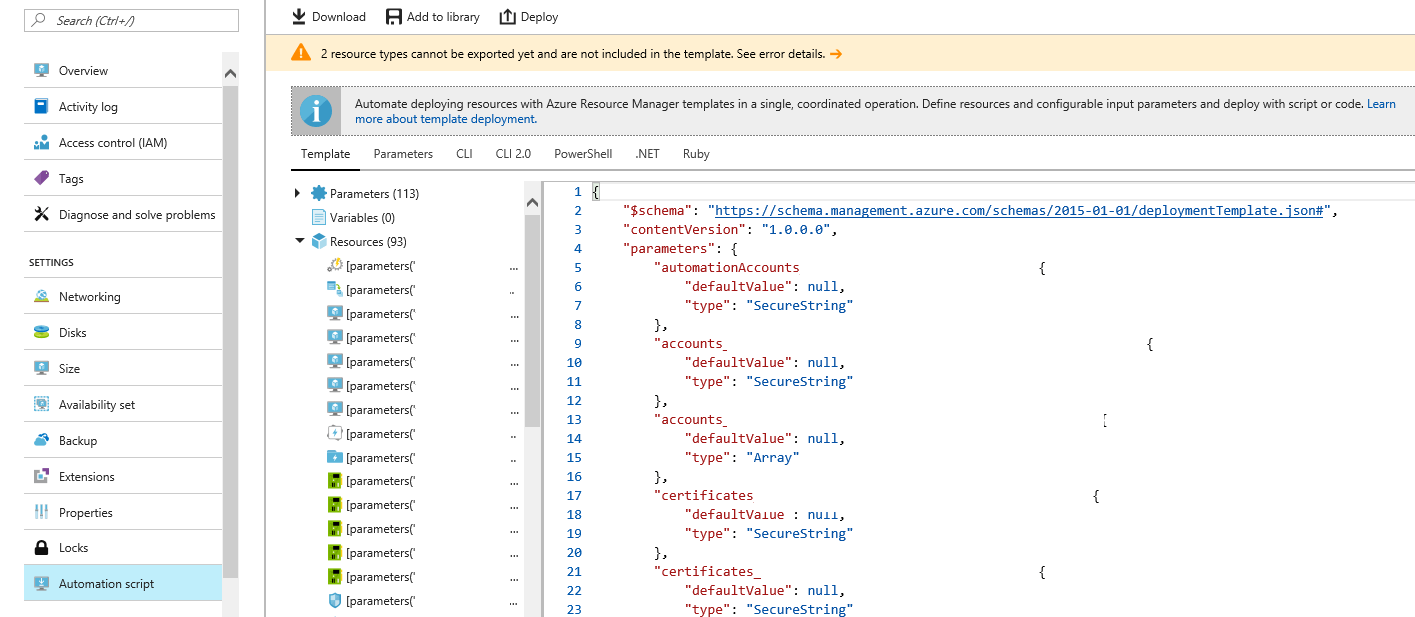
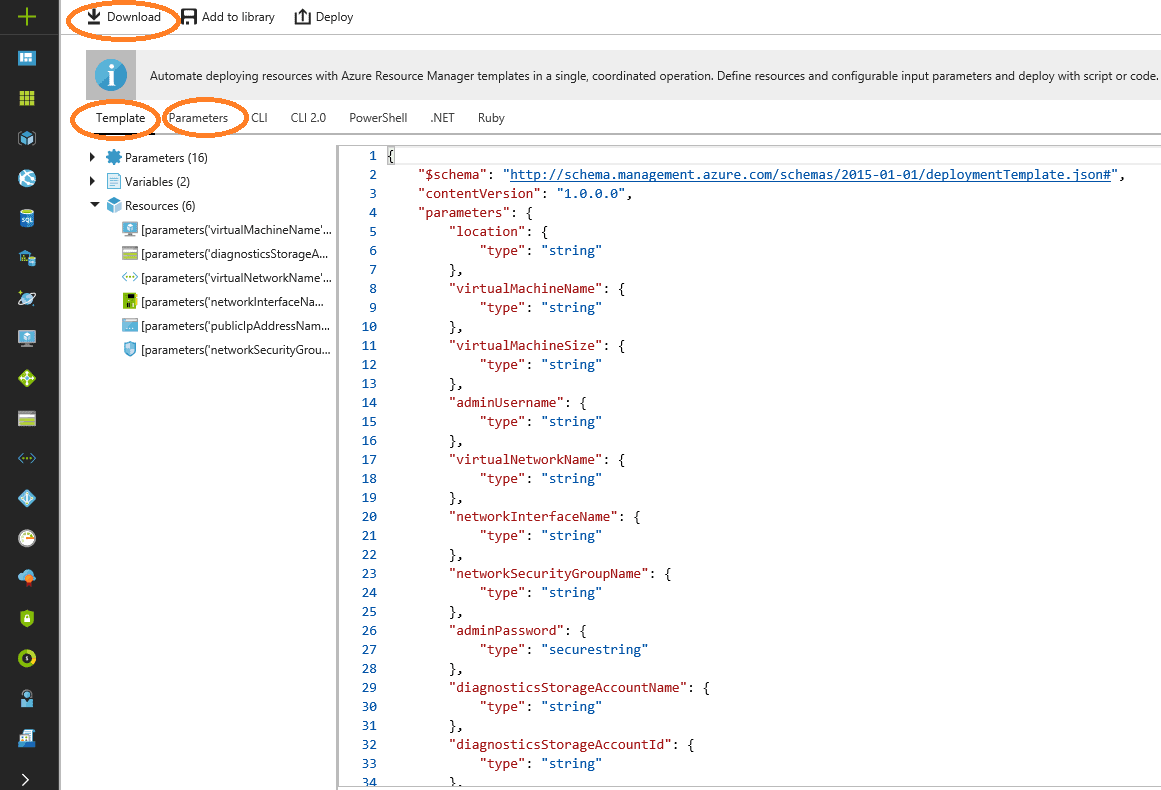
The first two tabs, ‘Template’ and ‘Parameters’ are the actual JSON script files we will be working with.
In Azure there is also the possibility to get the ‘Template’ and ‘Parameters’ JSON scripts for an object which is configured in the portal, but is not deployed yet. And this is a great shortcut for customizing the properties of an Azure resource via the portal UI, and then using the ‘Template’ and ‘Parameters’ files for an automated deployment at a later time, instead of composing the JSON code by hand.
For this article, I will customize a small Virtual Machine and take the ‘Template’ and ‘Parameters’ files before deploying it.
Let’s navigate to the Azure portal, and start creating a new Virtual Machine resource. For my example, I will be using Windows Server 2008 R2 SP1 and a Resource Manager deployment model:
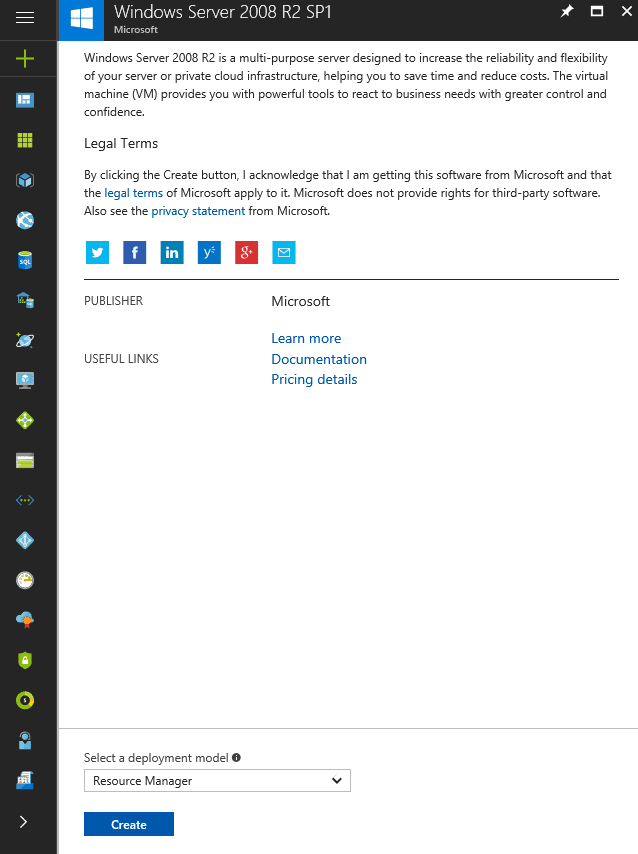
When we click on ‘Create’, we are presented with the opportunity to setup our VM:
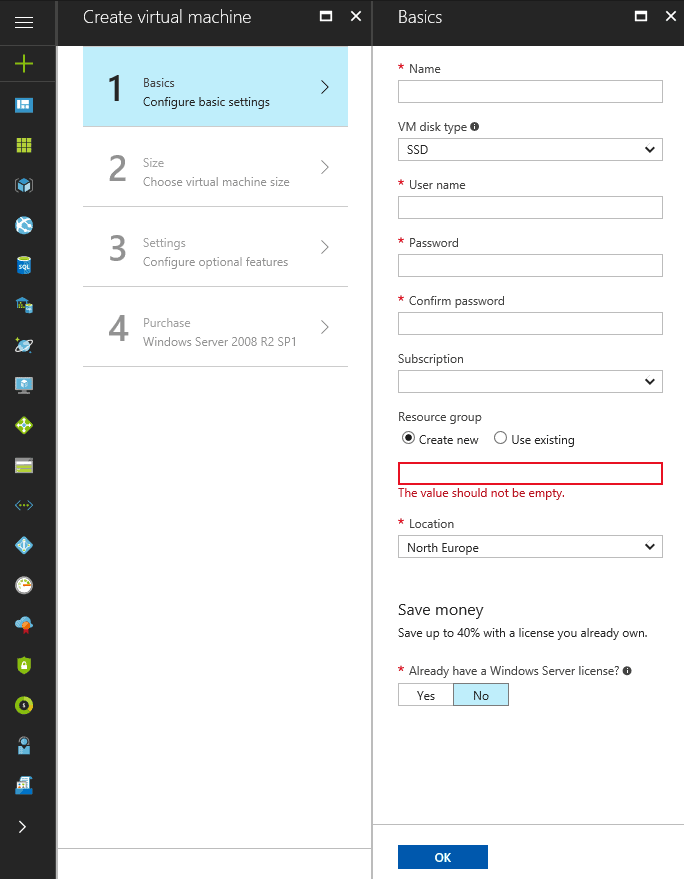
For the sake of brevity I will not follow the entire process of configuring the VM, since this is a very specific task to each user and the type of workload they will be automating. It is important, however, that the VM in this case is Windows based, and it is also important not to click on ‘Purchase’ in the last step, but to click on the ‘Download template and parameters’ link and download the templates for it.

When we click on the ‘Download template and parameters’ link, we are presented with the opportunity to download the files. Click on the ‘Download’ button and a zipped file will be saved on your machine. The file contains all deployment options, but in this case we are interested in the JSON files.
When we have the JSON files on our machine, we will upload those two files to a BLOB storage container.
Again, for the brevity of this article, I will not go through each step it takes to create a BLOB storage account and a container, since most readers already have done this step. It is important to note the URL of the BLOB storage container for later use in our code, however.
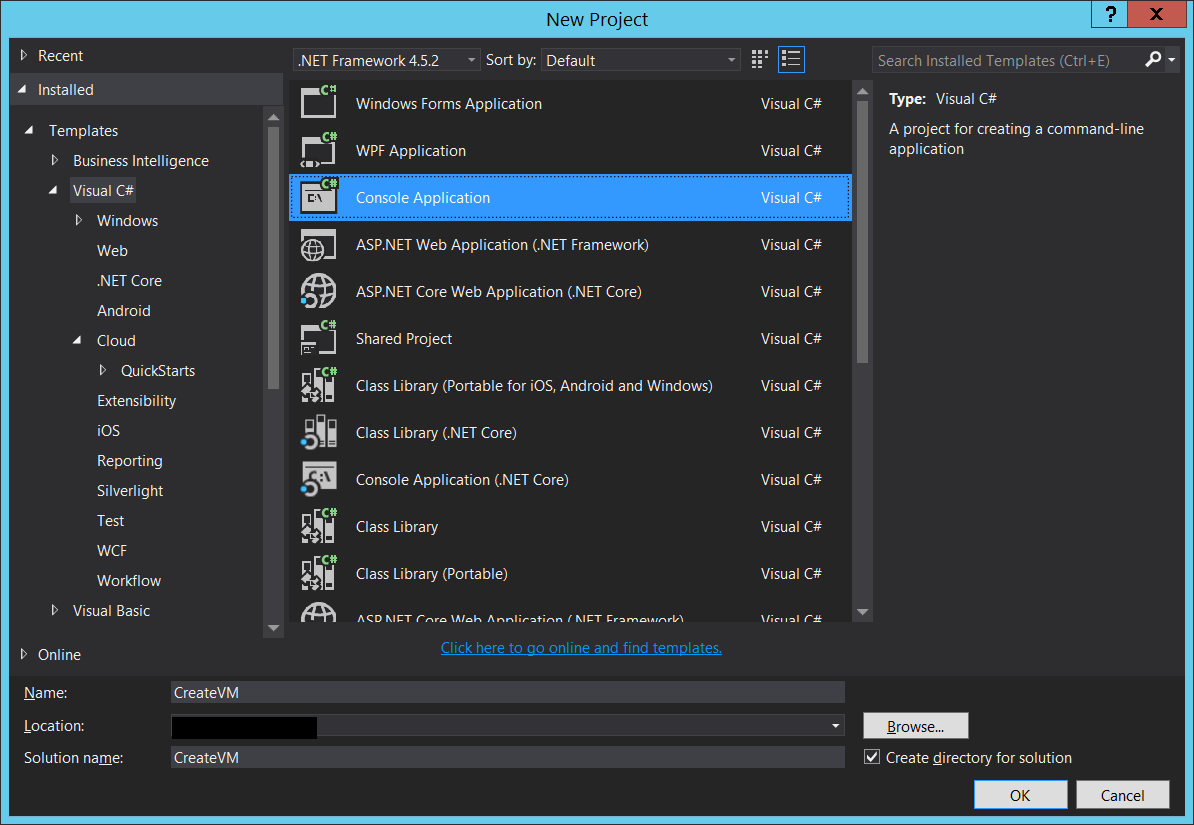
Creating the C# console app
In this step we will use Visual Studio to create a C# console app which will allow us to debug our deployment:
Now that we have the application, we have to install some NuGet packages by running the following commands in the Package Management console:
|
1 2 3 |
Install-Package Microsoft.Azure.Management.ResourceManager.Fluent -Version 1.2.0 Install-Package Microsoft.Azure.Management.Fluent -Version 1.2.0 |
After installing the packages, the following references need to be added to the C#:
|
1 2 3 |
using Microsoft.Azure.Management.ResourceManager.Fluent; using Microsoft.Azure.Management.ResourceManager.Fluent.Core; using Microsoft.Azure.Management.Fluent; |
And here is the actual C# code for deploying the template:
|
1 2 3 4 5 6 7 8 9 10 11 12 13 14 15 16 17 18 19 20 21 22 23 24 25 26 27 28 29 30 31 32 33 34 35 36 37 38 39 40 41 42 43 44 45 46 47 48 49 50 51 52 53 54 55 56 57 |
using System; using System.Collections.Generic; using System.Linq; using System.Text; using System.Threading.Tasks; using Microsoft.Azure.Management.ResourceManager.Fluent; using Microsoft.Azure.Management.ResourceManager.Fluent.Core; using Microsoft.Azure.Management.Fluent; namespace CreateVM { class Program { static void Main(string[] args) { var credentials = SdkContext.AzureCredentialsFactory.FromServicePrincipal( "" // enter clientId here, this is the ApplicationID , "" // this is the Application secret key , "" // this is the tenant id , AzureEnvironment.AzureGlobalCloud); var azure = Microsoft.Azure.Management.Fluent.Azure .Configure() .WithLogLevel(HttpLoggingDelegatingHandler.Level.Basic) .Authenticate(credentials) .WithDefaultSubscription(); var groupName = "myResourceGroup"; var location = Region.EuropeNorth; // create the resource group Console.WriteLine("Creating the resource group..."); var resourceGroup = azure.ResourceGroups.Define(groupName) .WithRegion(location) .Create(); // deploy the template Console.WriteLine("Deploying the template..."); var templatePath = "https://yourBLOBnamehere.BLOB.core.windows.net/vmtemplates/CreateVMTemplate.JSON"; var paramPath = "https://yourbkobnamehere.BLOB.core.windows.net/vmtemplates/Parameters.JSON"; var deployment = azure.Deployments.Define("myDeployment") .WithExistingResourceGroup(groupName) .WithTemplateLink(templatePath, "1.0.0.0") .WithParametersLink(paramPath, "1.0.0.0") .WithMode(Microsoft.Azure.Management.ResourceManager.Fluent.Models.DeploymentMode.Incremental) .Create(); // write machine info to log var vm = azure.VirtualMachines.GetByResourceGroup(groupName, "myVM"); Console.WriteLine("Querying the VM..."); Console.WriteLine(vm.Size.ToString()); Console.WriteLine(vm.OSProfile.ComputerName.ToString()); // delete the resource group Console.WriteLine("Deleting the resource group..."); Console.WriteLine("Press enter to delete the resource group..."); Console.ReadLine(); azure.ResourceGroups.DeleteByName(groupName); } } } |
It is important to note that we need to fill in the ApplicationId, SecretKey and TenantId for the credentials variable in the code above. We will have gotten values for these while creating our Service-to-Service authentication App. (For details on how to create an AAD app for this purpose, refer to the Azure documentation here https://docs.microsoft.com/en-us/azure/azure-resource-manager/resource-group-create-service-principal-portal )
Debugging the app
It is very unlikely that the console application will work perfectly from the first run. And when the app fails, it will give us a cryptic message like
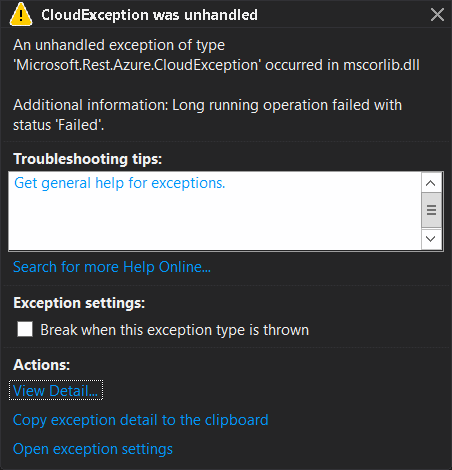
As you can see, “Long running operation failed with status ‘Failed’” does not really tell us much. For us to get more information about the failure, we have to go to the Azure portal, find and click on the resource group we just created, and there we can see a link to the failed deployment attempt:
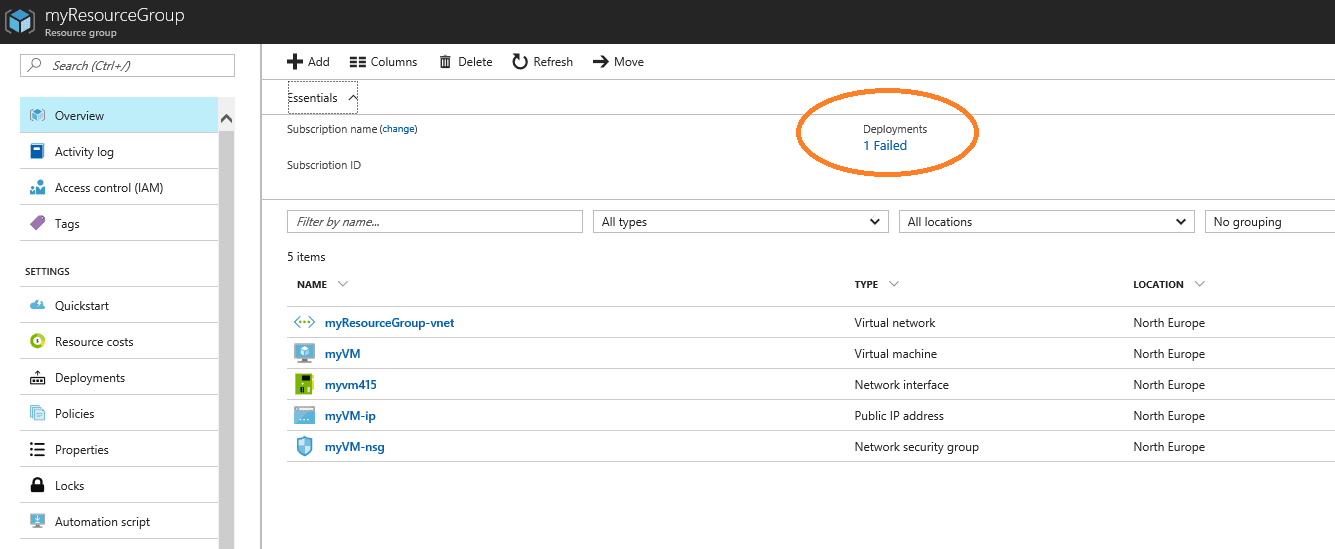
Clicking on the Failed link will take us to the Deployments tab, and there we will see the specific error:
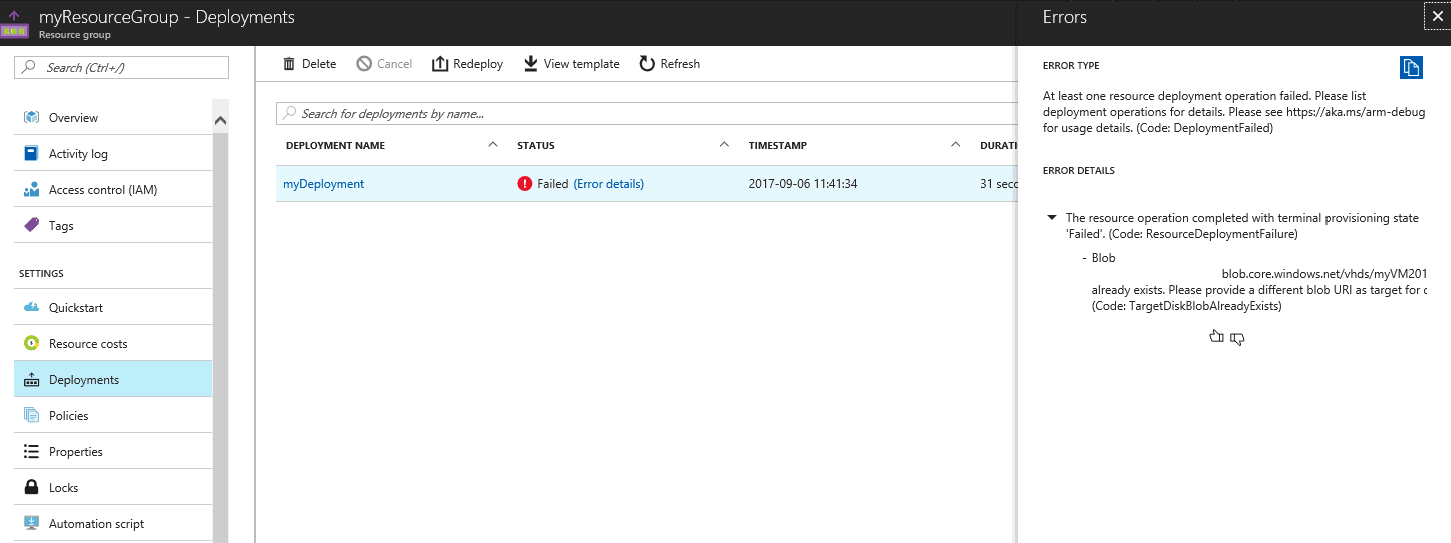
Of course, before deploying the VM again, we need to delete the resource group.
And now, when I re-run my C# application again, it creates the VM successfully and I get to print out some of the VM’s properties to the console window, i.e. the machine type and the machine name:
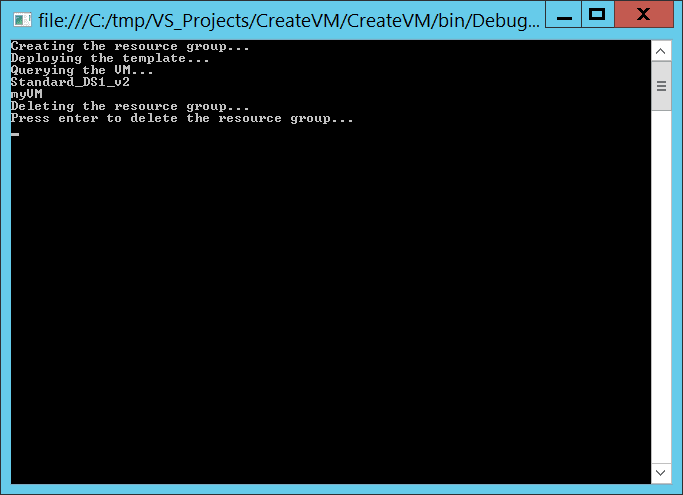
This means that the machine is up and running, and it also means that we can get a handle of the properties and the resources of the VM from our code.
Since this is a Windows machine, we can use PsExec (https://docs.microsoft.com/en-gb/sysinternals/downloads/psexec ) to run remote commands on our VM in a similar manner:
|
1 2 3 4 5 6 7 8 9 10 11 12 13 14 15 16 17 18 19 20 21 22 23 24 25 26 27 |
try { string AppPath = "\\\\myVM\\SomePath"; string strFilePath = AppPath + "someFile.bat"; System.Diagnostics.Process proc = new System.Diagnostics.Process(); proc.StartInfo.FileName = strFilePath; string pwd = "password123"; proc.StartInfo.Domain = "myDomain"; proc.StartInfo.UserName = "myUserName"; System.Security.SecureString secret = new System.Security.SecureString(); foreach (char c in pwd) secret.AppendChar(c); proc.StartInfo.Password = secret; proc.StartInfo.UseShellExecute = false; proc.StartInfo.WorkingDirectory = "psexec \\\\myVM\\SomePath "; proc.Start(); while (!proc.HasExited) { proc.Refresh(); // Thread.Sleep(1000); } proc.Close(); } catch (Exception ex) { throw ex; } |
The options from here are unlimited, and depend on each use case. For example, if this was a Linux-based machine, we would use SSH.NET library to run ssh commands on the newly created machine. (We will do that in my next article in which we will be creating an on-demand HDInsight cluster and using SSH.NET to run R scripts)
Conclusion:
In this article we explored the automation possibilities in Azure for using ARM templates and C#. Of course, this article only demonstrates the concepts of resource automation, since for the trivial activity of creating a Virtual Machine on-demand there is a Batch Service automation in Azure. In the Batch Automation service we can bring up a pool of Virtual Machines behind the scenes and carry out a workload and then discard the resources. The concepts in this article are important, however, because not all types of resources and workloads are supported by Batch Service. This means that if we are able to control resources in Azure from C#, then we can use Custom .NET Activities together with ADF automation to deploy virtually any resource and execute any workload in Azure on demand. In my next article we will do exactly this: we will create a HDInsight cluster with RServer installed on it and we will perform some R script workload, after which we will delete the HDInsight cluster.
FAQs: Automating Azure: How to Deploy a Temporary Virtual Machine Resource
1. How do you automate Azure VM deployment with ARM templates?
Create a VM in the Azure portal, export its Template.JSON and Parameters.JSON. Store in Blob storage. Use C# with Azure Management Libraries to authenticate via AAD, read templates, deploy VM programmatically. Same code deletes the VM after workload completes.
Load comments