
Data Source controls can be used to connect to and retrieve data from various types of data sources without the need to write code to perform such operations. The EntityDataSource control helps you to create data driven applications quickly and easily, and to perform Create Delete Update Delete (CRUD) operations on data based on an Entity Data Model. This article briefly introduces ADO.NET Entity Framework, and provides an example of using the EntityDataSource control in Entity Framework 4 to retrieve and bind data to data controls.
Prerequisites
To work with ADO.NET Entity Framework, you must have Visual Studio 2010 installed. You should have some previous experience with C# and Visual Studio, and knowledge of Entity Framework 3.5 would be an added advantage.
Before we delve deep into using the EntityDataSource control, let’s take a quick tour of the basic concepts of Entity Framework.
What is Entity Framework all about?
The strategies for Data Access using Microsoft technologies have changed over the years. From Remote Data Objects (RDO), Data Access Objects (DAO), to ADO.NET, there have been marked improvements to the way data is accessed. Then, Object Relational Mappers (ORMs) evolved with the view to increase development productivity, database independence, and database portability.
ADO.NET Entity Framework is a mature ORM with provisions to connect to any database as long as you have a compatible ADO.NET data provider. And, Entity Framework has lots of excellent features such as Entity Inheritance, Entity Composition, Change Tracking, Model First Development, and support for Plain Old CLR Objects (POCO)- features that you wouldn’t generally see in a typical ORM. Entity Framework runs on top of the managed environment of .NET Framework.
Why do you need Entity Framework?
When you use Entity Framework, you can concentrate more on writing application logic rather than doing database related stuff, so development time and effort is greatly reduced. You don’t need a Data Access Layer anymore. And, you can query your Entity Data Model using LINQ. Equipped with support for inheritance of types, using complex members, relationships between entities, and support for Persistence Ignorance through POCO entities, Entity Framework is an extended ORM par excellence.
The Entity Data Model
Entity Framework abstracts the logical schema of the data and presents its conceptual schema in the application. It achieves this through the Entity Data Model – an extended Entity Relationship data model which was invented in the 1970s by Dr. Peter Chen, and is concerned with the entities and the relationships between them.
You can generate an Entity Data Model either by using the EDMGen.exe command line tool or by using the Entity Data Model Wizard in Visual Studio 2010.
The Entity Data Model is comprised of three layers:
- The Conceptual Data Definition Language Layer. This conceptual layer is used to define the entities and their relationships; it is represented using CSDL files.
- The Store Space Definition Language Layer. This storage layer represents the schema of the underlying data store from which the Entity Data Model is created; it is represented using SSDL files.
- This maps the conceptual layer to the storage layer; it is represented using MSL files.
Note that the files described above are created if you use the EDMGen.exe command line tool to create your Entity Data Model. However, if you use the Entity Data Model Wizard in Visual Studio 2010, instead an EDMX file containing all three layers is created.
Working with the EntityDataSource control
Data Source controls were introduced in ASP.NET 2.0. These are controls that can be bound to external data sources such as databases, XML files, and so on. The EntityDataSource control was first introduced in Visual Studio 2008 SP1. It can be used to bind data to data controls in ASP.NET applications that use Entity Framework, by connecting to an Entity Data Model.
In the following sections, we will explore how we can work with the EntityDataSource control to bind data to an ASP.NET GridView control. So, the first thing we need to get started is an Entity Data Model.
Creating an Entity Data Model
To create an Entity Data Model, you have two options; either using the built-in Entity Data Model Designer in Visual Studio 2010, or using the EDMGen.exe command line tool. We will use the former option as it is more user-friendly.
We will use the AdventureWorks database to create our Entity Data Model:
- In the Visual Studio 2010 IDE, select the project in the Solution Explorer window.
- Right-click and select Add, New Item.
- Under Installed Templates, select Data, and then select ADO.NET Entity Data Model.
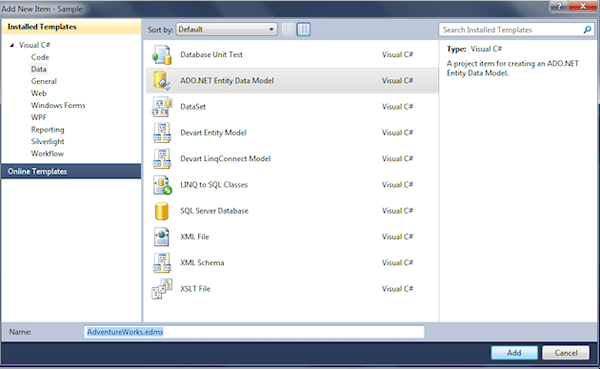
Figure 1: Creating a new ADO.NET Entity Data Model using the Entity Data Model Wizard
In Name, type AdventureWorksDataModel as the name for the model and click Add. In the Choose Model Contents window, select Generate from Database, as we will be generating our Entity Data Model from the AdventureWorks database.
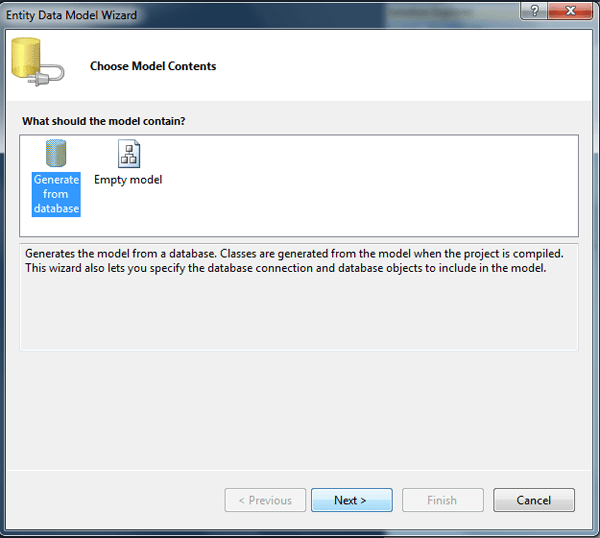
Figure 2: Specifying the source of the data for the model
Click Next. In the Choose your Data Connection window, click New Connection and specify the connection properties to connect to the AdventureWorks database. Test the connection, and if all is fine, click OK. Click Next. In the Choose your Database Objects window, select Tables and then select Store from the list of database objects.
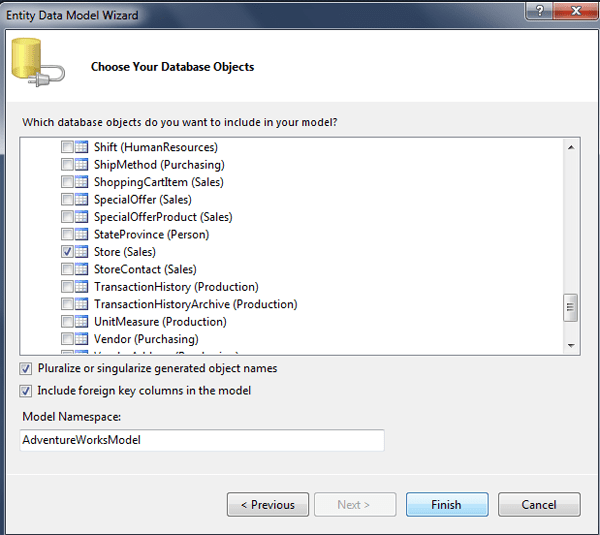
Figure 3: Choosing the database objects
Type AdventureWorksDataModel as the namespace for the model, and click Finish.
The Entity Data Model for the AdventureWorks database is created. Here’s how it looks in Design View:

Figure 4: The Model Browser window and the Entity Data Model in Design View.
Configuring the EntityDataSource control
To use an EntityDataSource control, simply drag and drop the control from the toolbox in your Visual Studio 2010 IDE. You then need to configure the EntityDataSource control to specify the connection string and the container to be used:
- Switch to the EntityDataSource control in Design View.
- Select the Configure Data Source with Wizard option for the control.
- Select AdventureWorksEntities as the Named Connection, to connect this control to the AdventureWorks Entity Data Model you just created.
- Select AdventureWorksEntities as the DefaultContainerName.
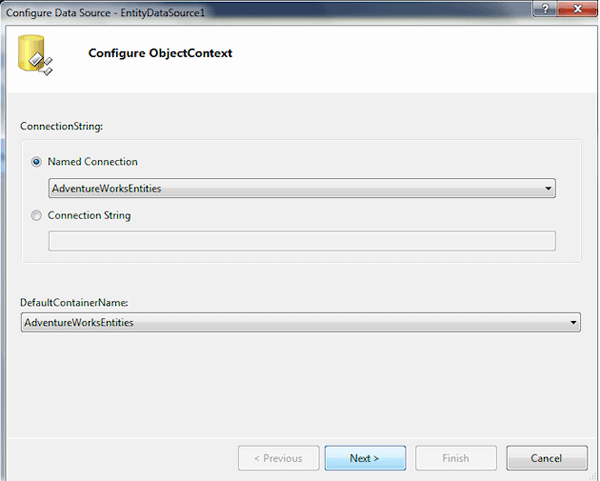
Figure 5: Configuring the EntityDataSource Control
Click Next, and then specify the fields to be retrieved from the database table; in our example, this is the Store table of the AdventureWorks database.

Figure 6: Configuring the Data Selection for the EntityDataSource Control
When you have selected the fields, click Finish.
When the EntityDataSource control has been configured, the markup code of the control looks like this:
|
1 2 3 4 5 6 |
<asp:EntityDataSource id="EntityDataSource1"" runat="server" ConnectionString="name=AdventureWorksEntities" DefaultContainerName="AdventureWorksEntities" EnableFlattening="False" EntitySetName="Stores" EntityTypeFilter="Store" Select="it.[CustomerID], it.[Name], it.[ModifiedDate]"> </asp:EntityDataSource> |
Listing 1: EntityDataSource control markup code
Configuring the GridView Data control
Now that the EntityDataSource control has been configured, the next step is to associate the DataSource property of the GridView Data control with the EntityDataSource control. You can add a GridView control by selecting it from the Toolbox in the Visual Studio 2010 IDE.
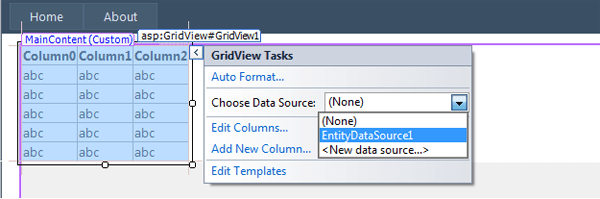
Figure 7: Associating the Data Source Property of the GridView with the EntityDataSource Control
In this example, we selected only the CustomerID, Name, ModifiedDate fields when we configured the EntityDataSource control. You can verify this by clicking Edit Columns in the GridView control menu.
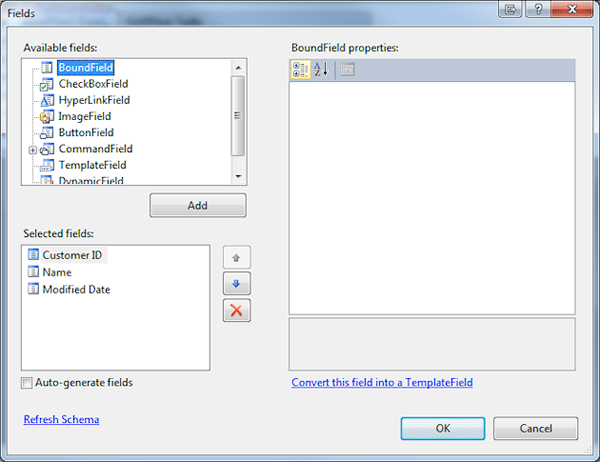
Figure 8: Verifying the selected columns
Ensure the Automatically Generate Fields check box for the GridView control is clear, and only the fields you need are selected.
When you have configured the GridView control, the markup code looks like this:
|
1 2 3 4 5 6 7 8 9 10 11 |
<asp:GridView id="GridView1"" runat="server" AutoGenerateColumns="False" DataSourceid="EntityDataSource1""> <Columns> <asp:BoundField DataField="CustomerID" HeaderText="Customer ID" ReadOnly="True" SortExpression="CustomerID" /> <asp:BoundField DataField="Name" HeaderText="Name" ReadOnly="True" SortExpression="Name" /> <asp:BoundField DataField="ModifiedDate" HeaderText="Modified Date" ReadOnly="True" SortExpression="ModifiedDate" /> </Columns> </asp:GridView> |
Executing the application
Now that you have configured the Entity Data Source and the GridView controls, press F5 to execute the application. The output looks like this:
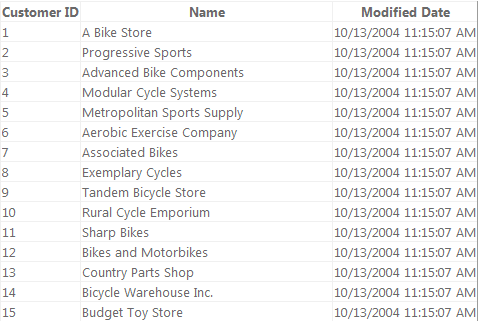
Figure 9: The Application in Execution!
Conclusion
In ASP.NET 2.0, data binding has been simplified with the introduction of Data Source controls. Data Source controls are server controls that can be used to bind data retrieved from various data sources to the ASP.NET data controls. The EntityDataSource control is one such Data Source Control; it helps you to bind data that is retrieved through the Entity Data Model.
This article has looked at the basic concepts of Entity Framework, and how we can work with the EntityDataSource control. We showed how to create an Entity Data Model from an existing database. Next, we demonstrated how to create an EntityDataSource control and configure it to retrieve data from the Entity Data Model. Lastly, we showed how we can use the EntityDataSource control to bind data to a GridView control in our ASP.NET application.
To learn more about Entity Framework, you can refer to my book entitled Entity Framework Tutorial (Packt Publishing). Here’s the link to the book at Amazon.
References
Here are a few links for further study on this topic:
Load comments