
One of the goals of DevOps is to provide faster and reliable releases. In this regard, the terms Continuous Integration and Continuous Deployment have become very popular. Continuous Integration (CI) is a software development practice that requires developers working on the project to integrate code into a shared repository. For the CI process to be a success, the build, unit tests, integration tests, acceptance tests should be successful. This article explains how to configure CI/CD in Azure DevOps.
Continuous Delivery (CD) is an extension of CI that enables you to ship software faster, continuously. Continuous Delivery is achieved through Continuous Testing. Automated testing is integrated with the CI/CD pipeline. This ensures that all changes flowing through the pipeline are validated. Here’s the entire CI/CD workflow in a step by step manner.
- The developer checks in the source code to the code repository
- The build process is triggered
- All automated tests (unit tests, acceptance tests) are run
- If any of the tests fail, the build process terminates abruptly
- The release process is only triggered if the build process is successful
- If a release is successful, the application is deployed
This article presents a discussion on how CI/CD can be configured in Azure DevOps.
The Goals
In this post, I will show you how to:
- Create an Azure DevOps Project
- Edit a build pipeline (this pipeline will be created automatically)
- Edit a release pipeline (this pipeline will be created automatically)
- Clone the Code Repository
- Explore the CI/CD pipelines
- Trigger the CI/CD process
The Prerequisites
In this article, you’ll be using Visual Studio 2019 and .NET Core.
If you don’t have Visual Studio 2019 installed in your system, you can get a copy from here. If you don’t have .NET Core installed in your system, you can download a copy from here. You should also have an Azure account. You can create an Azure account for free. If you don’t have an Azure account, you can create one from here.
Creating an Azure DevOps Project
Azure DevOps Project facilitates an easy setup of the continuous integration (CI) and continuous delivery (CD) pipeline in Azure. You can use your existing code or use the example code from the sample application that is created by default when you create a new Azure DevOps Project in Azure.
To create a new Azure DevOps project, follow the steps outlined below:
- Select the + Create Resource icon in the left navigation bar (refer to Figure 1)
- Select DevOps from the Azure Marketplace
- Click on DevOps Project in the list
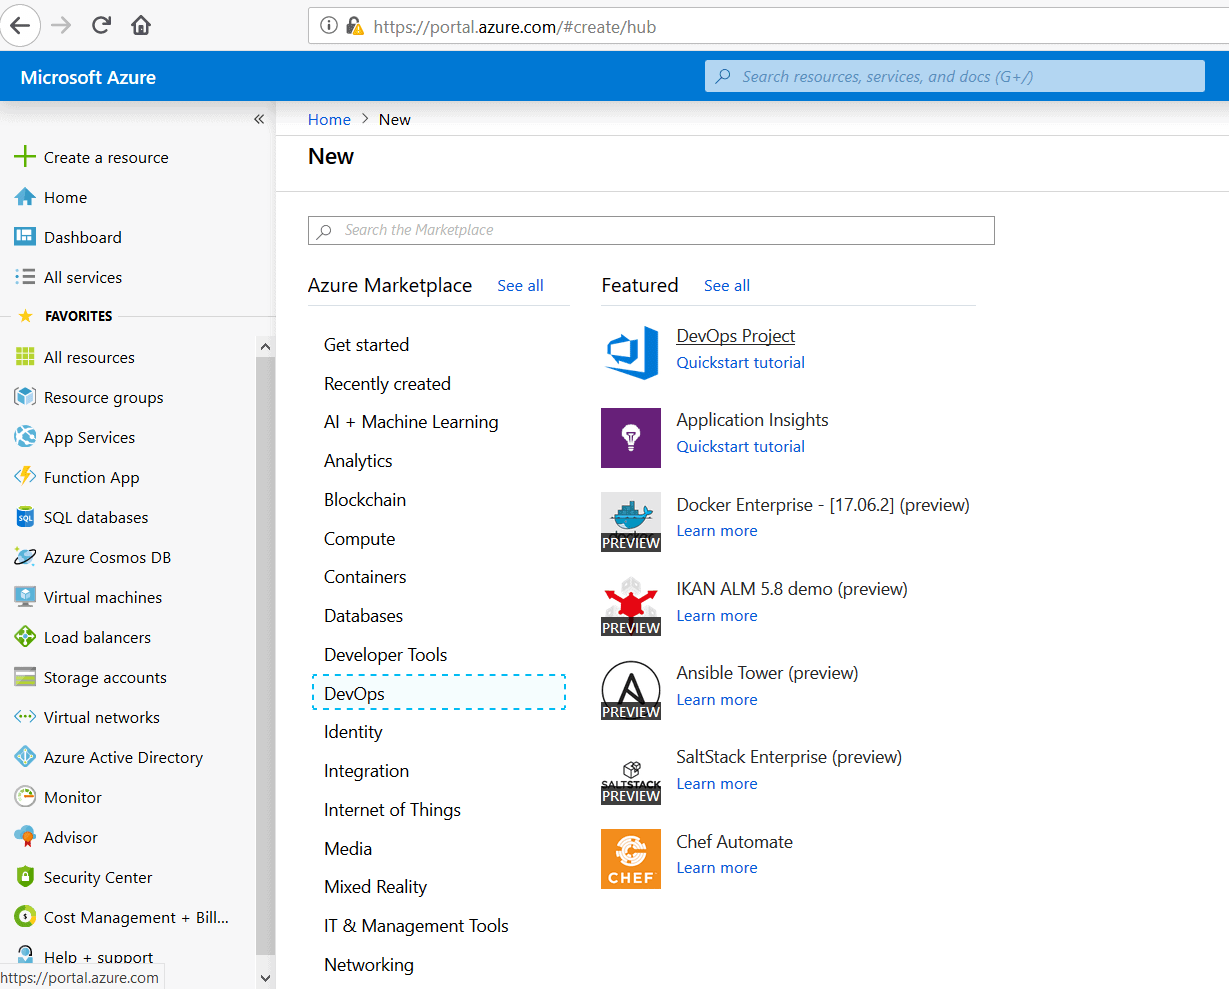
Figure 1: The Azure DevOps Marketplace
- In the next screen, select .NET shown in Figure 2 and click Next.
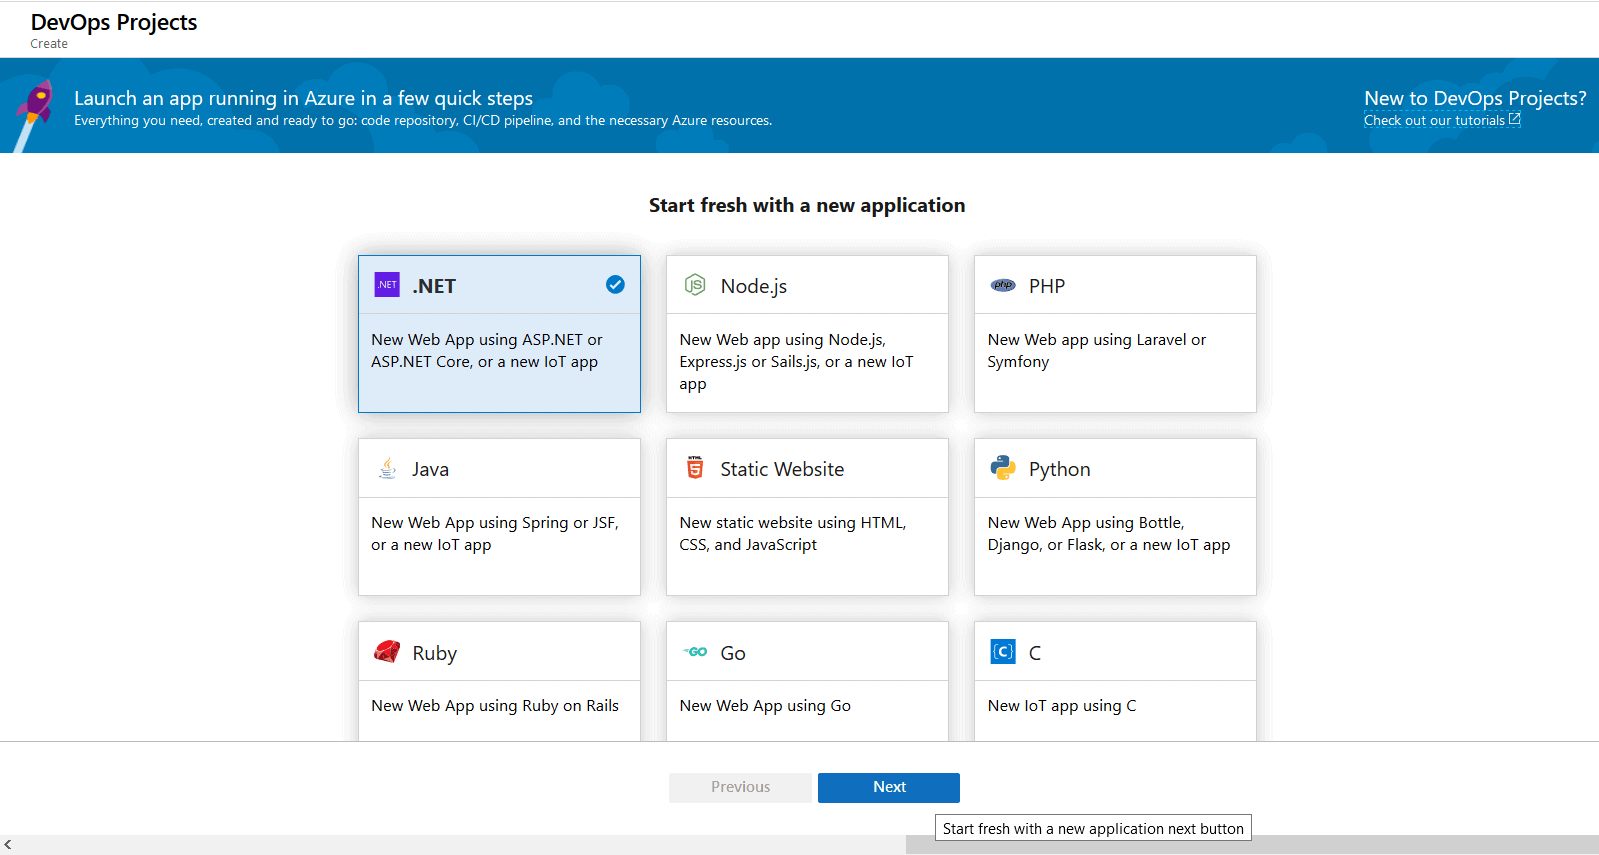
Figure 2: Choose the technology to be used
- In the next screen, select ASP.NET Core as the application framework, as shown in Figure 3. Since this example does not use a database, you can ignore the Add a database option for now.
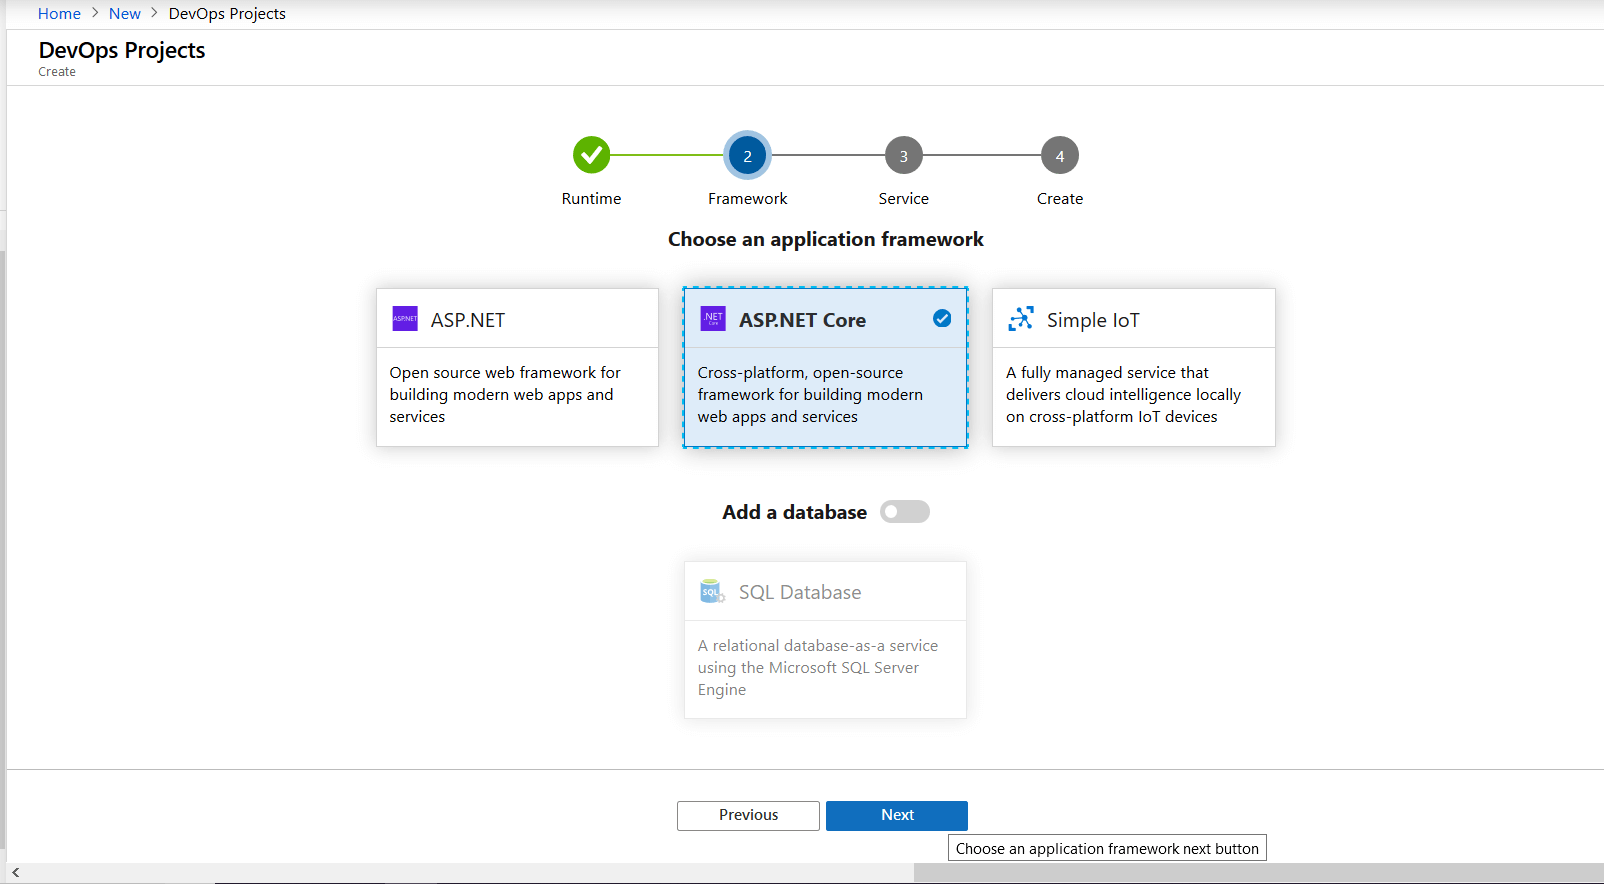
Figure 3: Choose the application framework to be used
- Click Next
You can deploy your application to Virtual Machines, Windows App Service, Azure Kubernetes Services (AKS), Azure SQL Database, and Azure Service Fabric. In this example, you’ll deploy the sample application to Windows App Service.
- Specify Windows Web App as the type of the Azure service to be used, as shown in Figure 4.
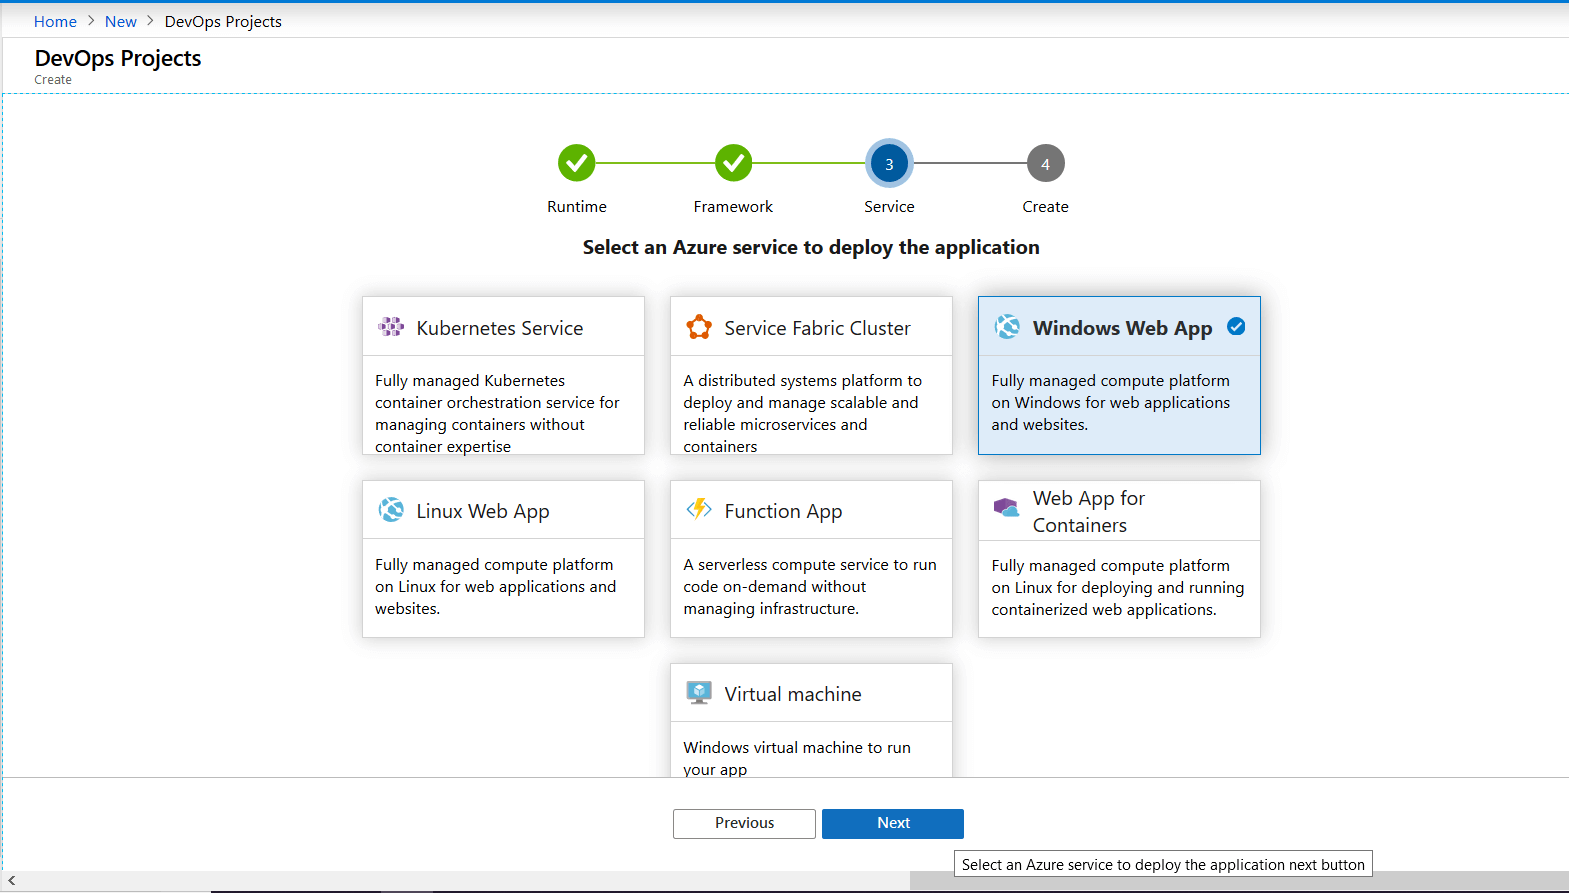
Figure 4: Select the Azure service to deploy the application
- Click Next
- In the next screen, specify the project name and the name of the Azure DevOps organization, as shown in Figure 5.
- Select the Subscription you would like to use
- Fill in a Web app name. Note that the name must be unique across Azure.
- Select your Location.
Note that you can change the default pricing tier being used by clicking on Additional settings and selecting the Pricing Tier from the drop-down control. The screen should look similar to Figure 5.
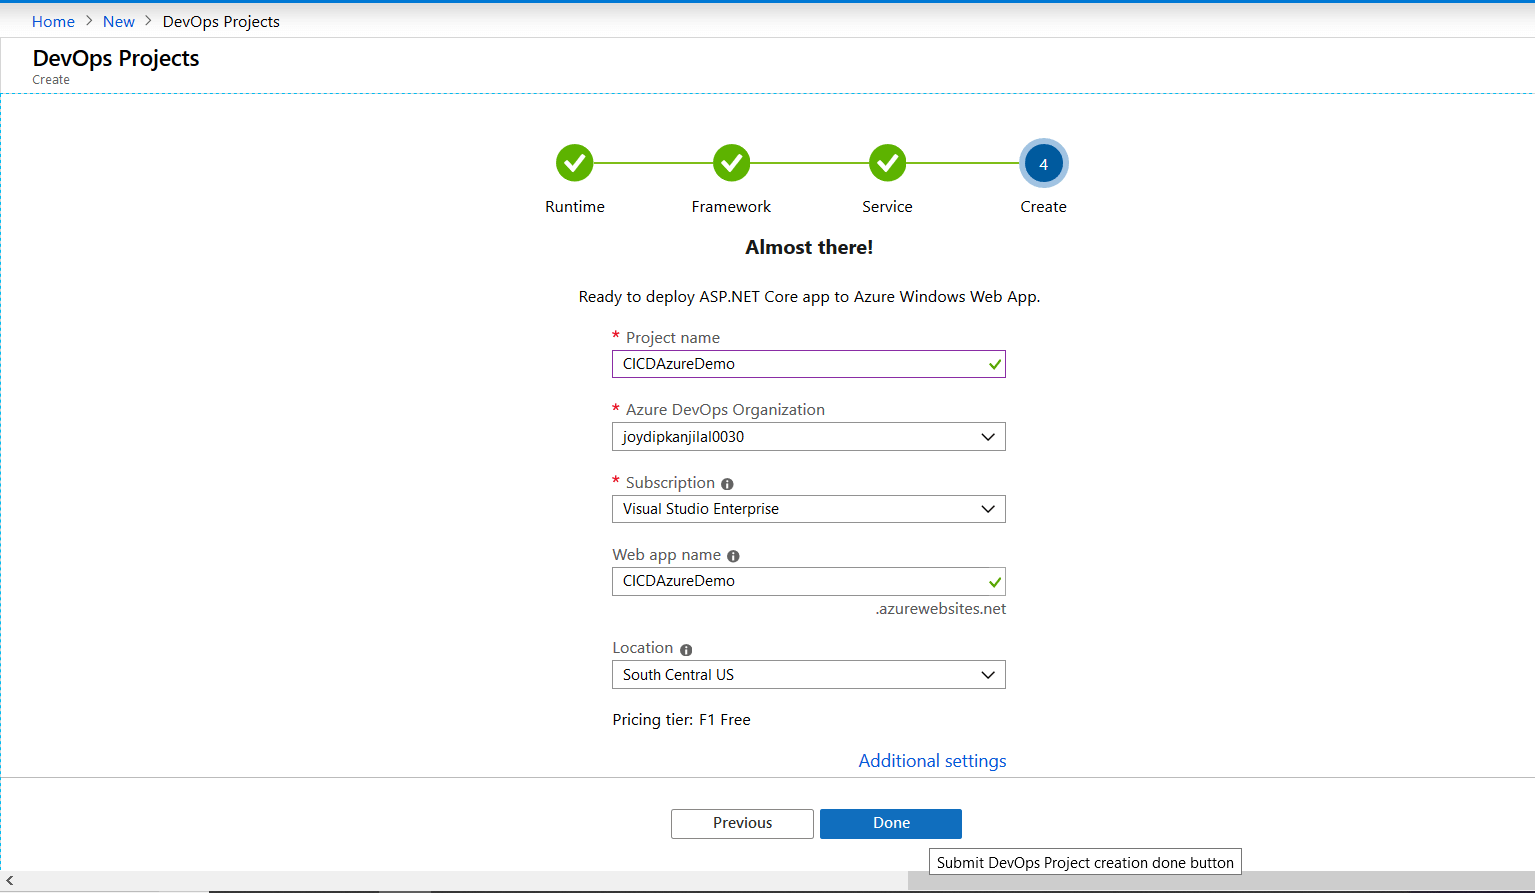
Figure 5: Specify the basic details
- Click Done to complete the process
- Once the deployment is complete, click Go to resource to view it.
A new DevOps project will be created. Figure 6 shows how the Azure DevOps project dashboard looks. Note that you will have to wait several minutes for the Build process to complete, and until then the Azure resources details will not be filled in.
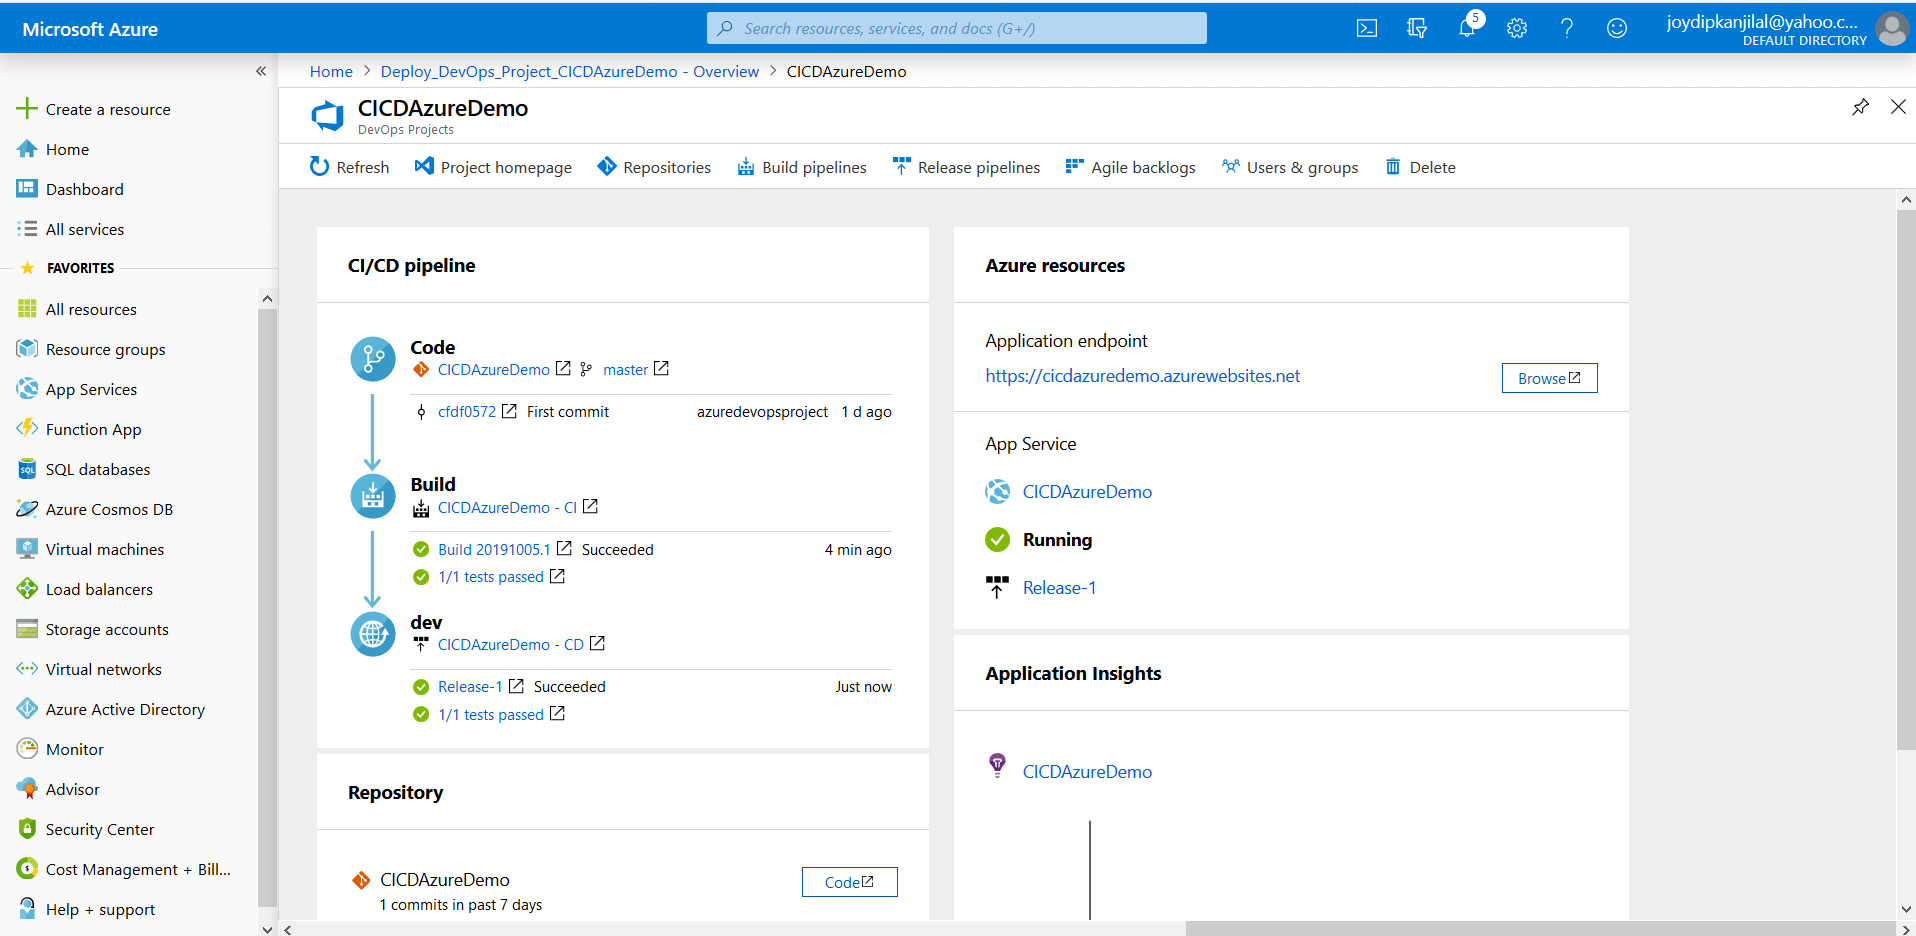
Figure 6: The Azure DevOps Dashboard
Click Browse (refer to Figure 6) to view your application in the web browser. Figure 7 below shows how your application should look in the web browser.
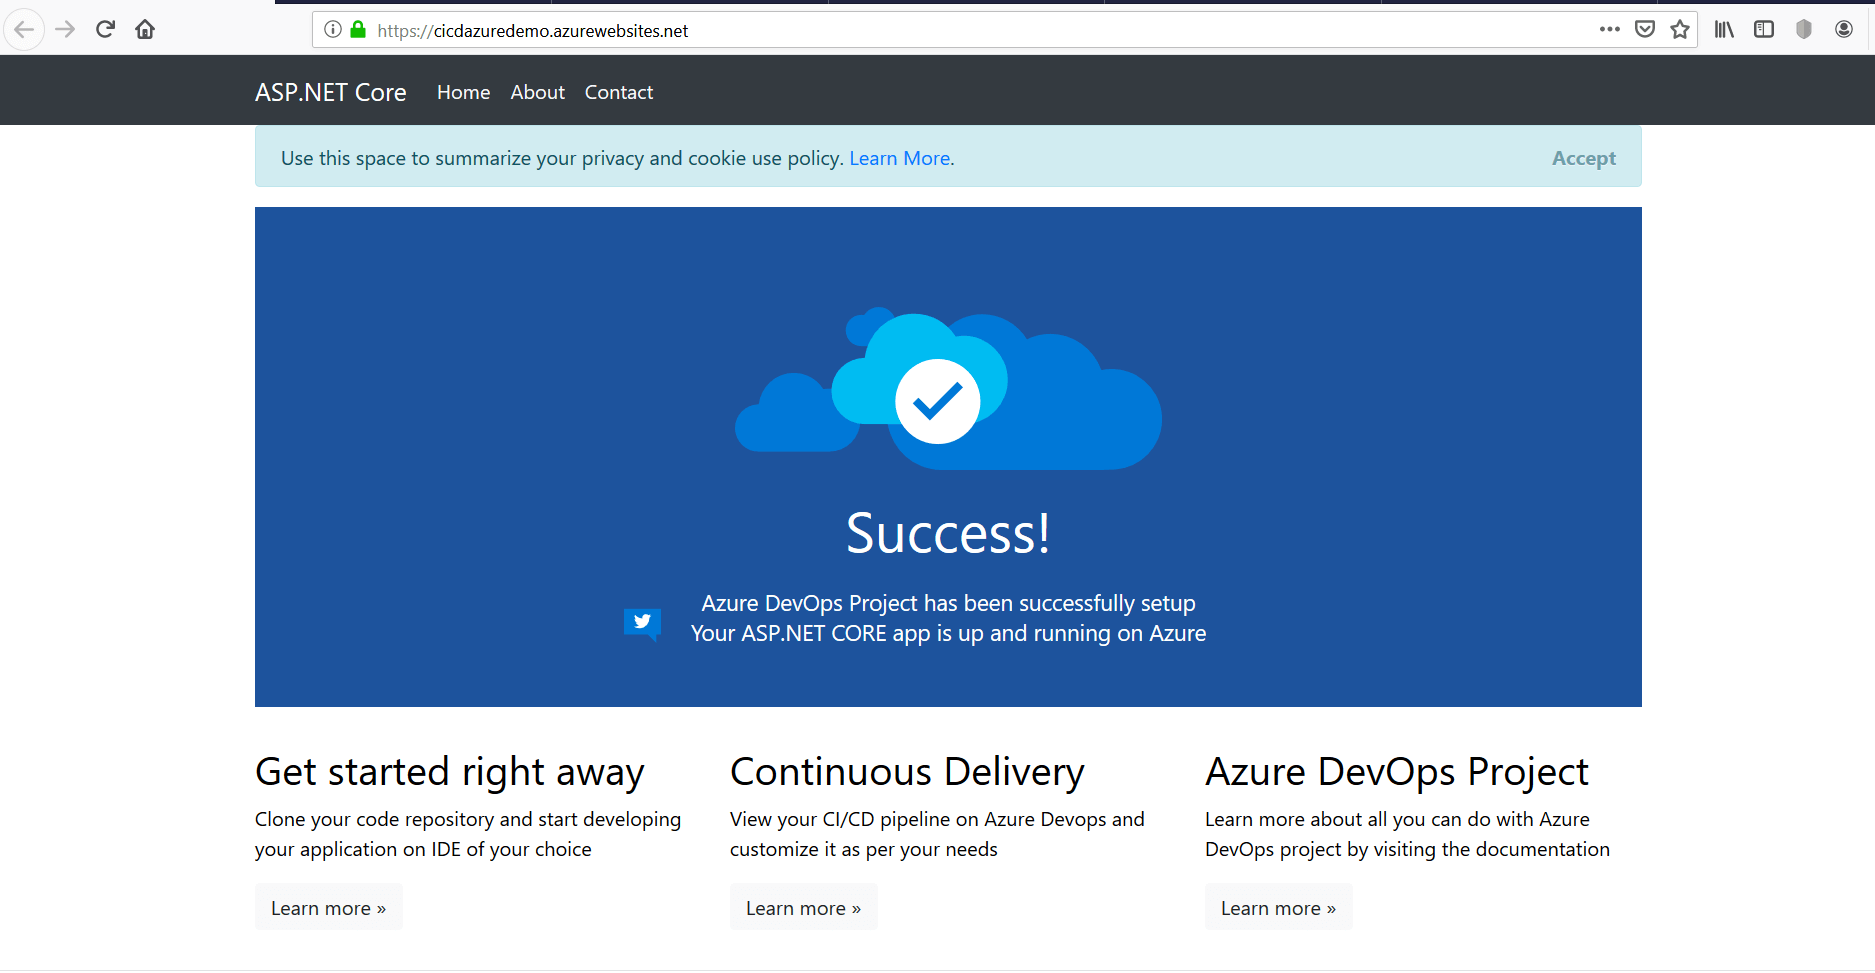
Figure 7: The Web Application in execution!
Cloning the Code Repository
In the Azure DevOps project dashboard (refer to Figure 6), click on the name of your application under Code. Figure 8 shows the code repository in the web browser. Click Clone and then copy the Clone URL as shown in Figure 8 and proceed to the next step.
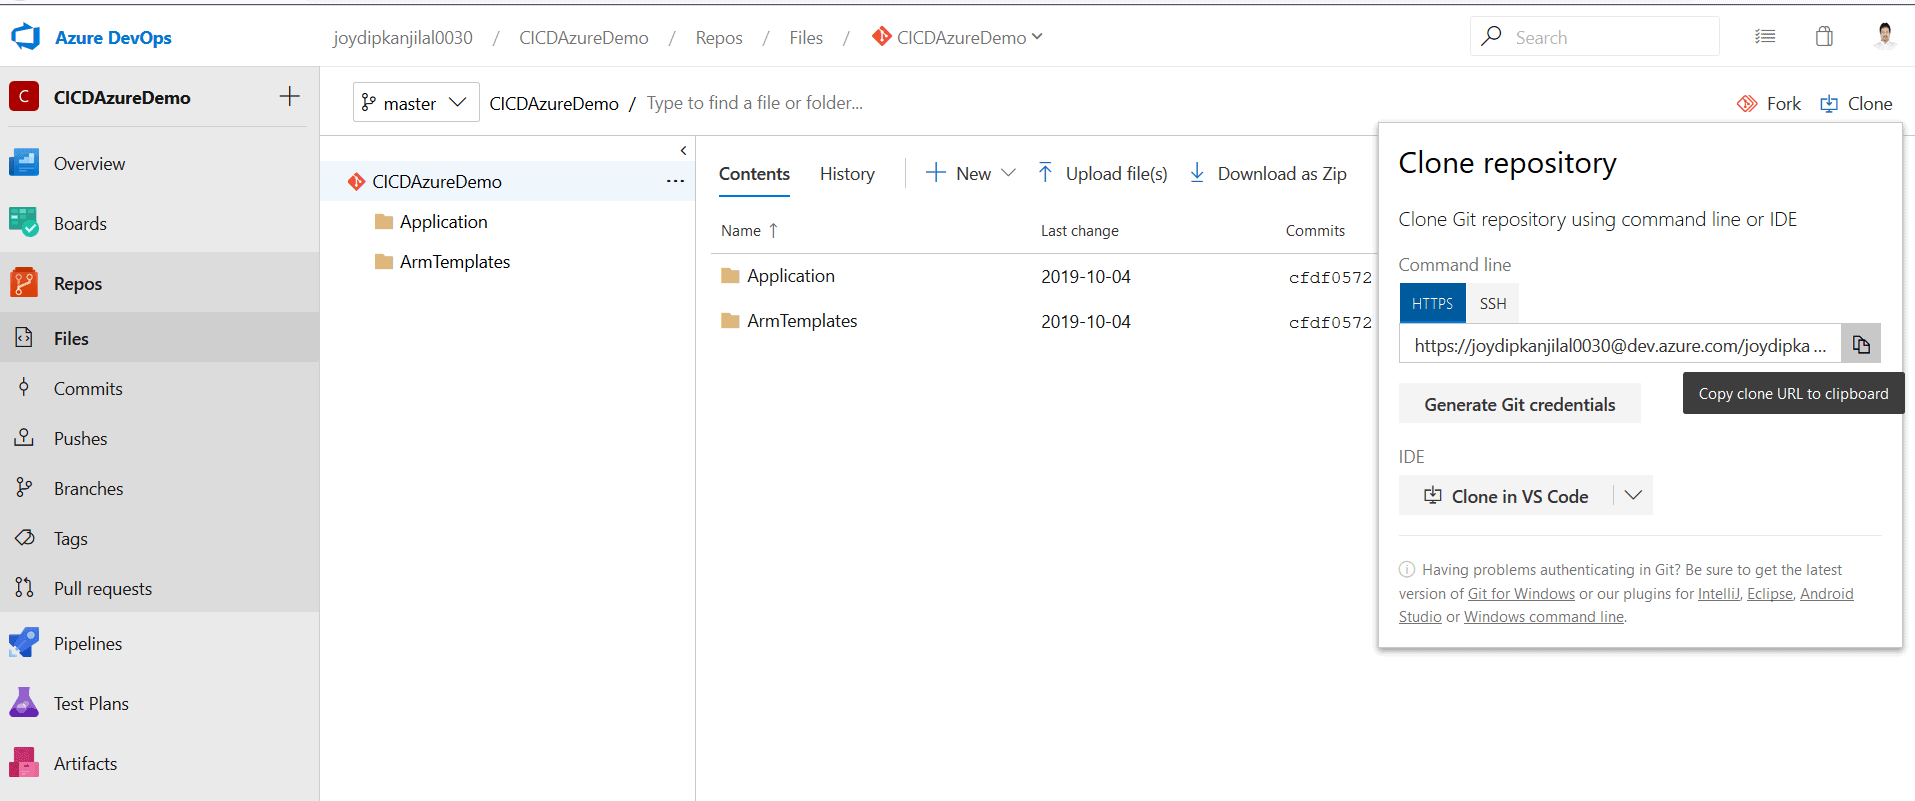
Figure 8: Clone the repository
Now follow the steps given below to clone the repository in Visual Studio 2019.
- Open the Visual Studio 2019 IDE
- Click Continue without code as shown in Figure 9 below
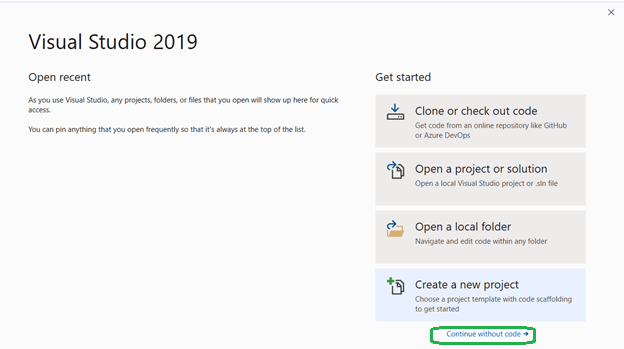
Figure 9: Continue without code
- In the Visual Studio 2019 IDE, click on View Team Explorer from the menu.
- Click Clone in the Team Explorer window.
- Specify the Clone URL and the path to the local folder where the repository will be cloned like Figure 10.
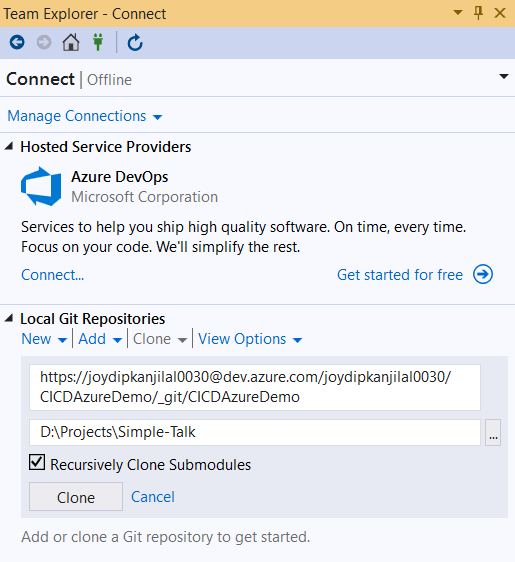
Figure 10: The Team Explorer
- Click Clone to start the process
Once the repository has been successfully cloned, you can view the source code in the Solution Explorer. You can even make changes to the code if needed. Note that once you commit these changes to the code repository, the build process will be automatically triggered. After switching to the Solution view, the project should look similar to Figure 11.
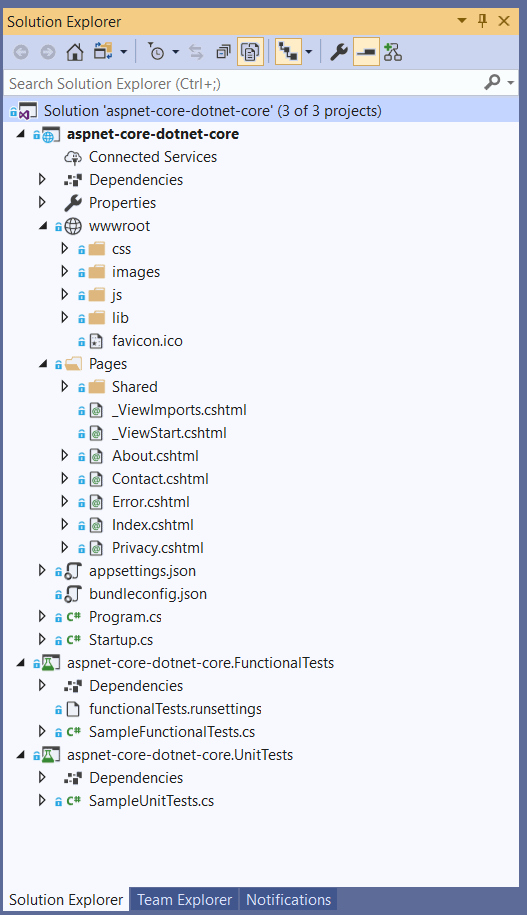
Figure 11: Solution Explorer
Examining the CI/CD Pipelines
A full CI/CD pipeline will be automatically configured for you. You can explore the pipeline and even customize it if need be. At the top of the Azure DevOps project dashboard, you’ll see menu options for both Build pipelines and Release pipelines as shown in Figure 12.
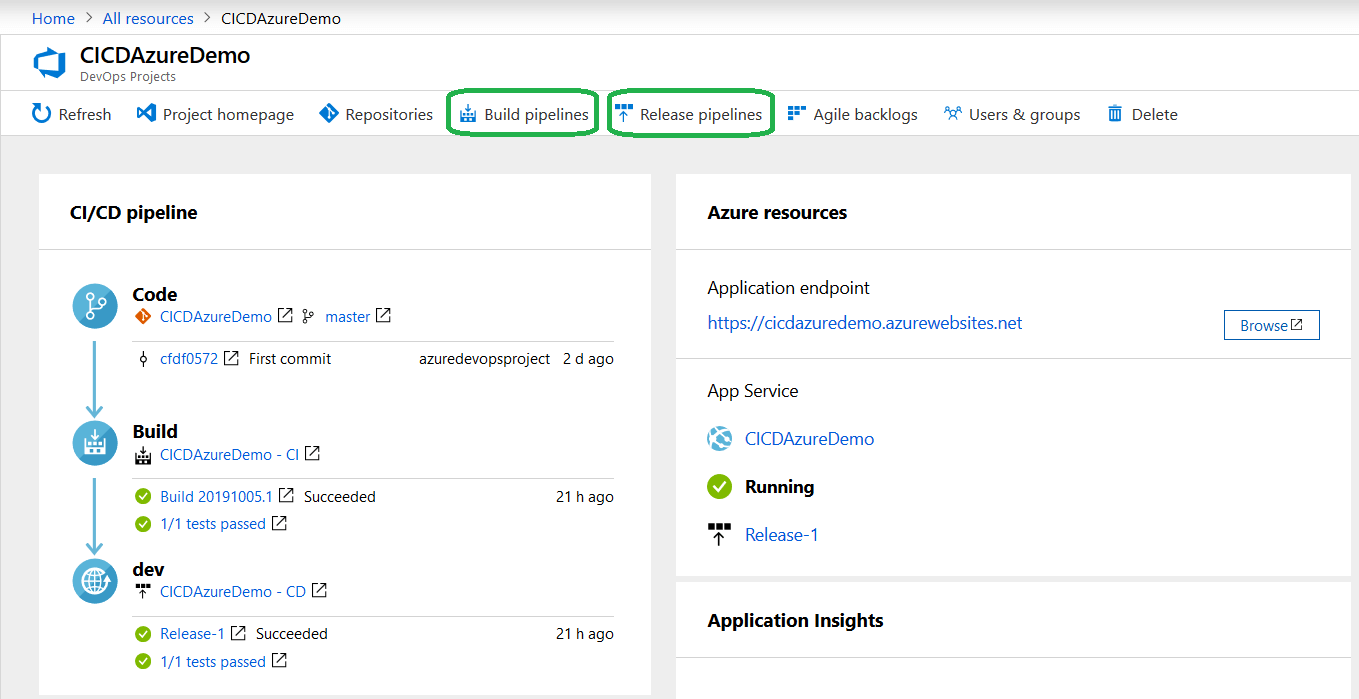
Figure 12: The build and release pipelines
Build Pipelines
Click Build pipelines to load the build pipeline(s) for your application in the web browser, as shown in Figure 13 and then click Edit.
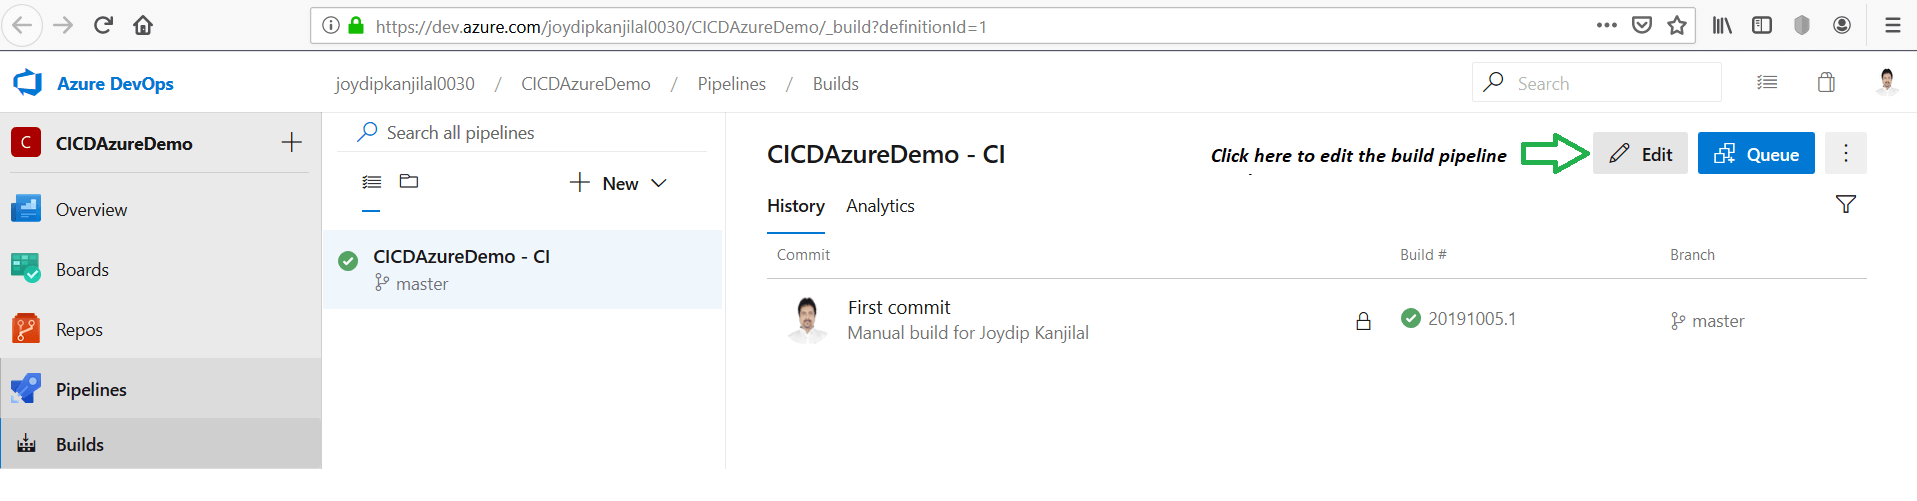
Figure 13: Edit the build pipeline
The build pipeline performs the following tasks.
- Retrieves source code from the code repository
- Restores the project’s dependencies
- Builds the application
- Runs all the automated tests
- Publishes the outputs
Figure 14 illustrates the various tasks performed by your build pipeline.
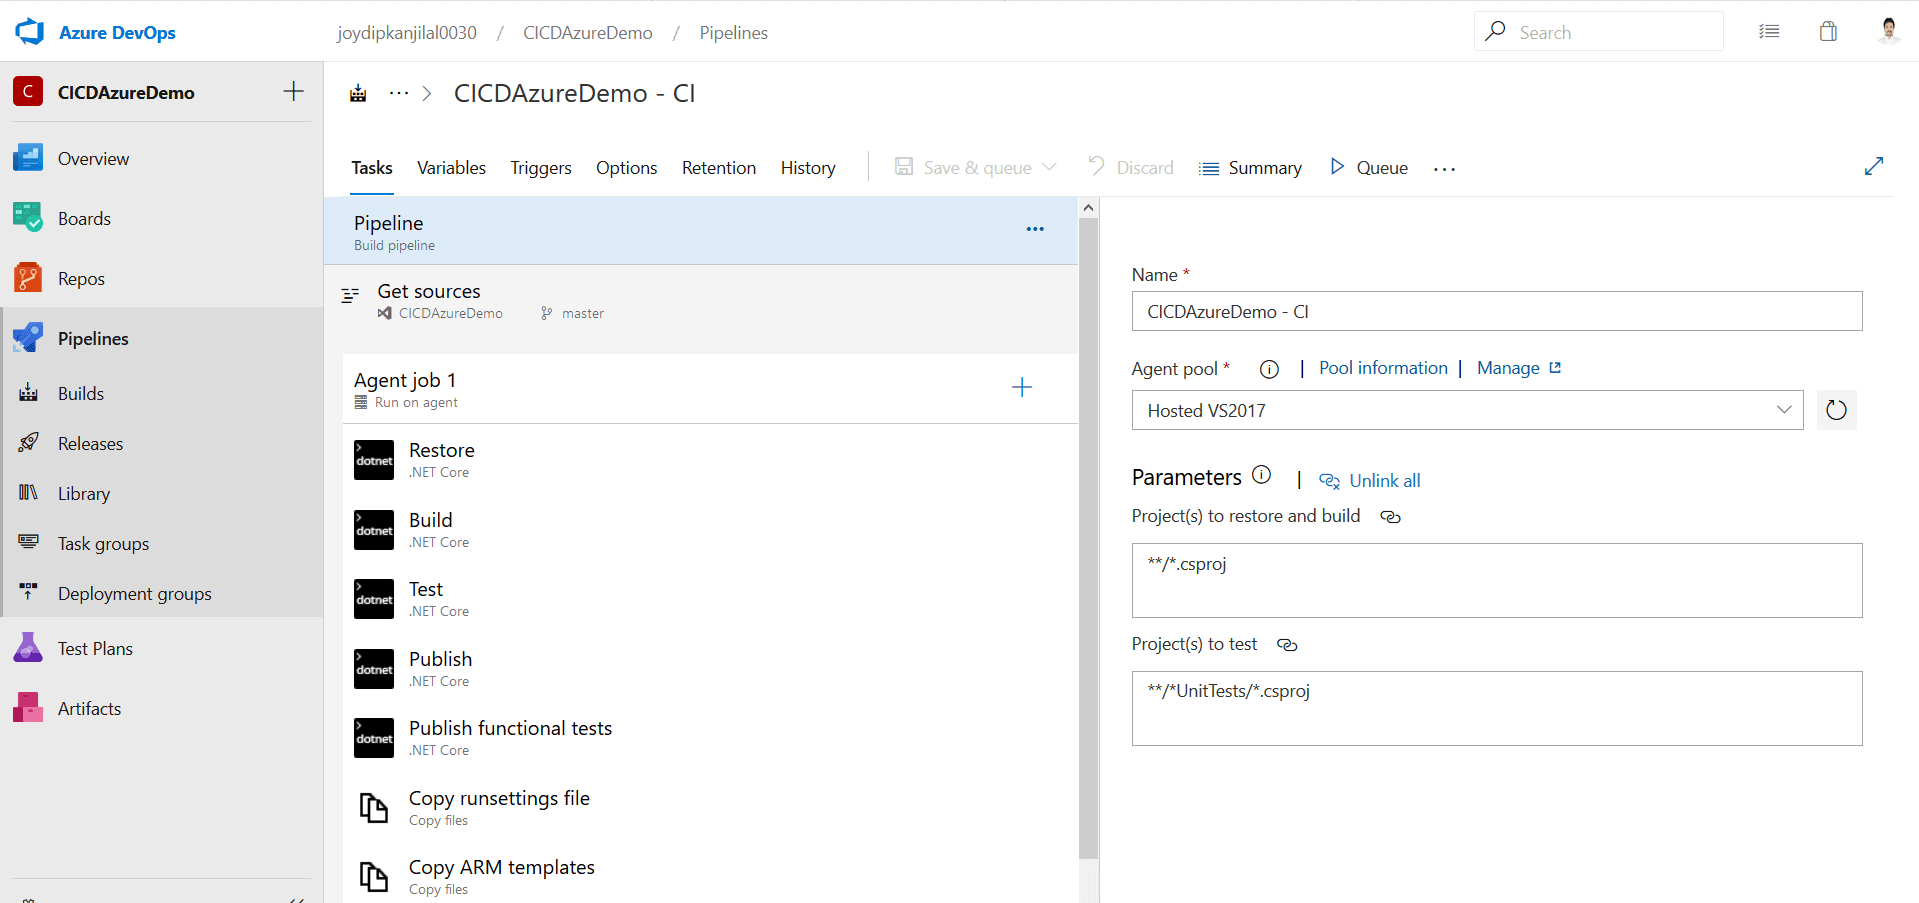
Figure 14: Tasks performed by the build pipeline
If you click on the History tab, you’ll be able to see a history of the changes for the build. When you click on the Triggers tab, you’ll be able to see the triggers that have been configured for the build as shown in Figure 15. The Azure DevOps project created CI triggers by default when you created the project.
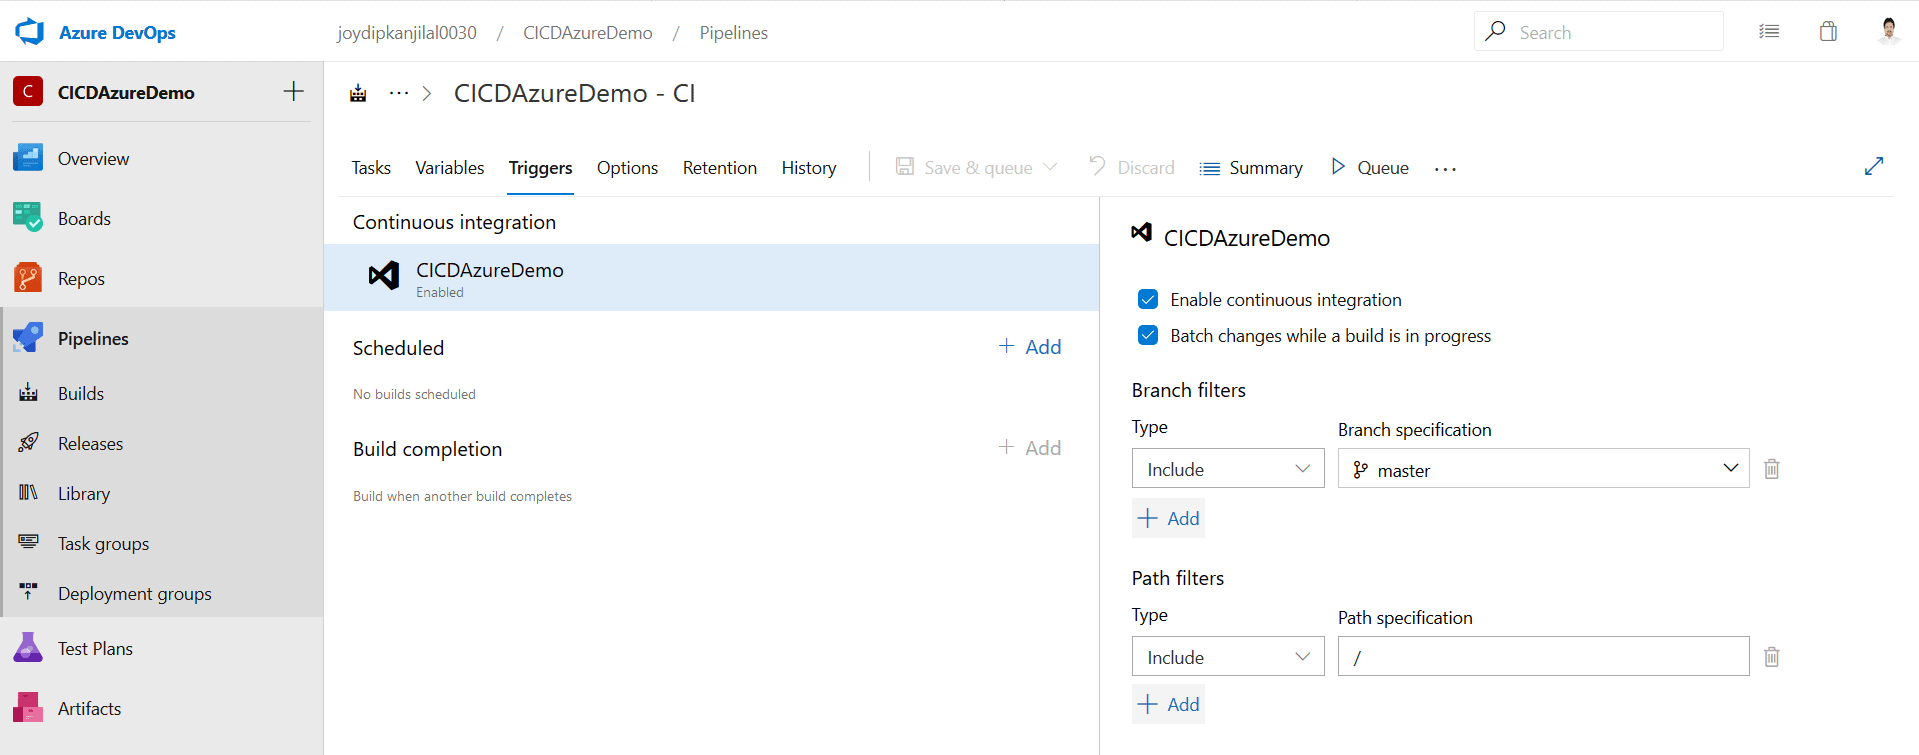
Figure 15: CI Triggers
Optionally, include or exclude branches from the build pipeline. Note that the Enable continuous integration checkbox is checked. This would ensure that for every commit to the repository, a new build will be initiated.
Release Pipelines
Click Release pipelines in the Azure DevOps project dashboard to load the release pipelines for your application in the web browser, as shown in Figure 16 below.
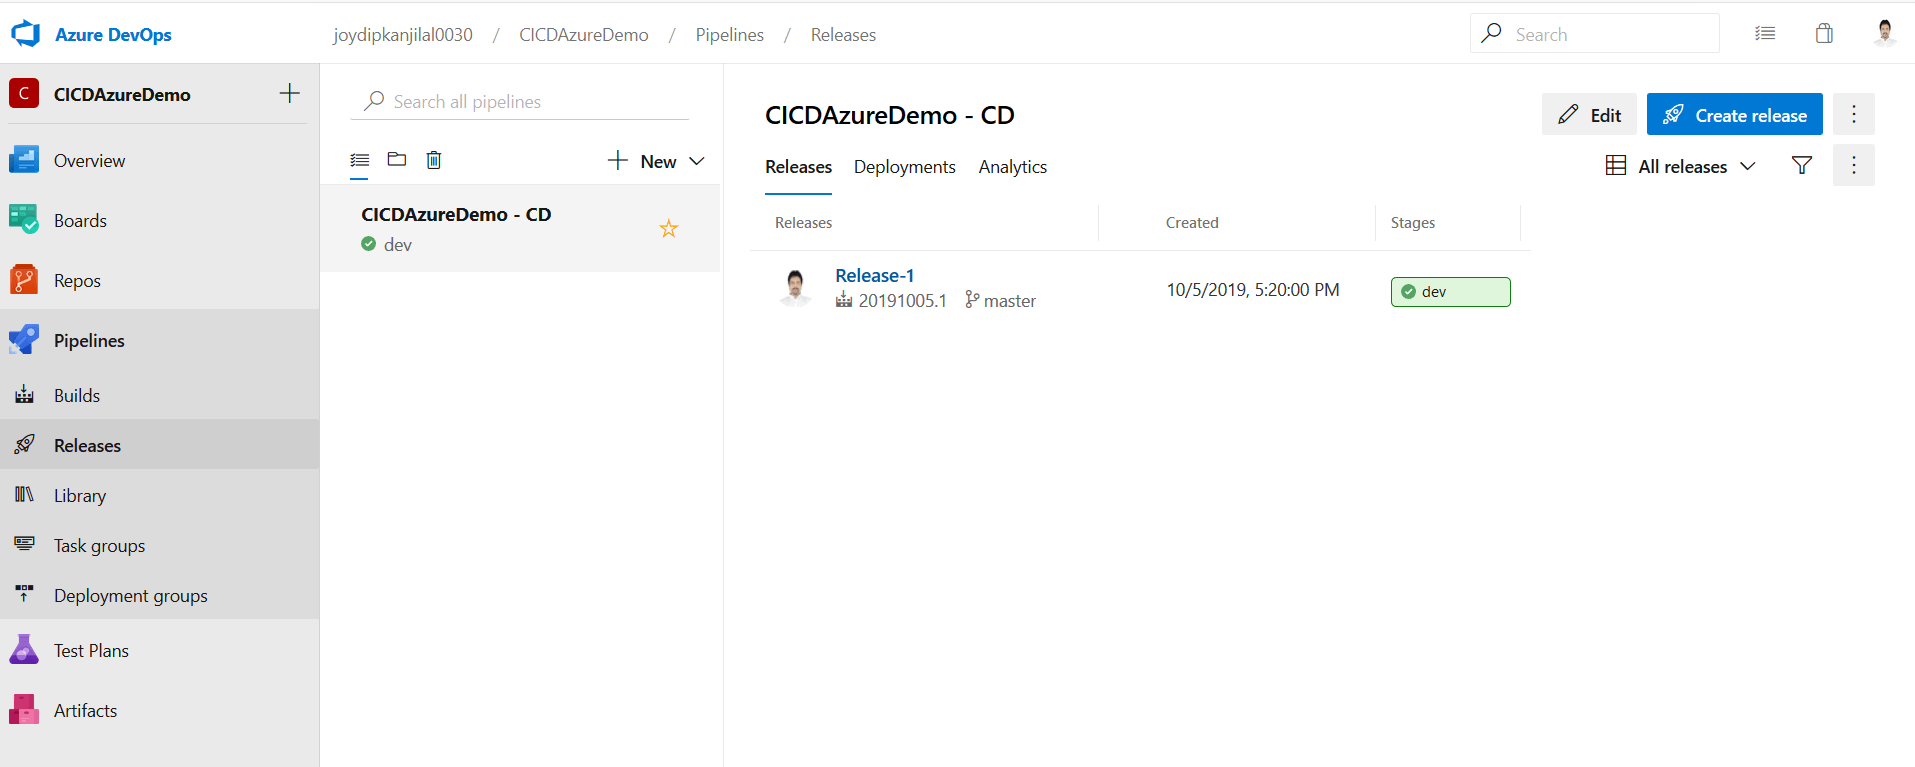
Figure 16: Edit the release pipeline
Click Edit to edit the release pipeline. Figure 17 illustrates the release pipeline in edit mode.
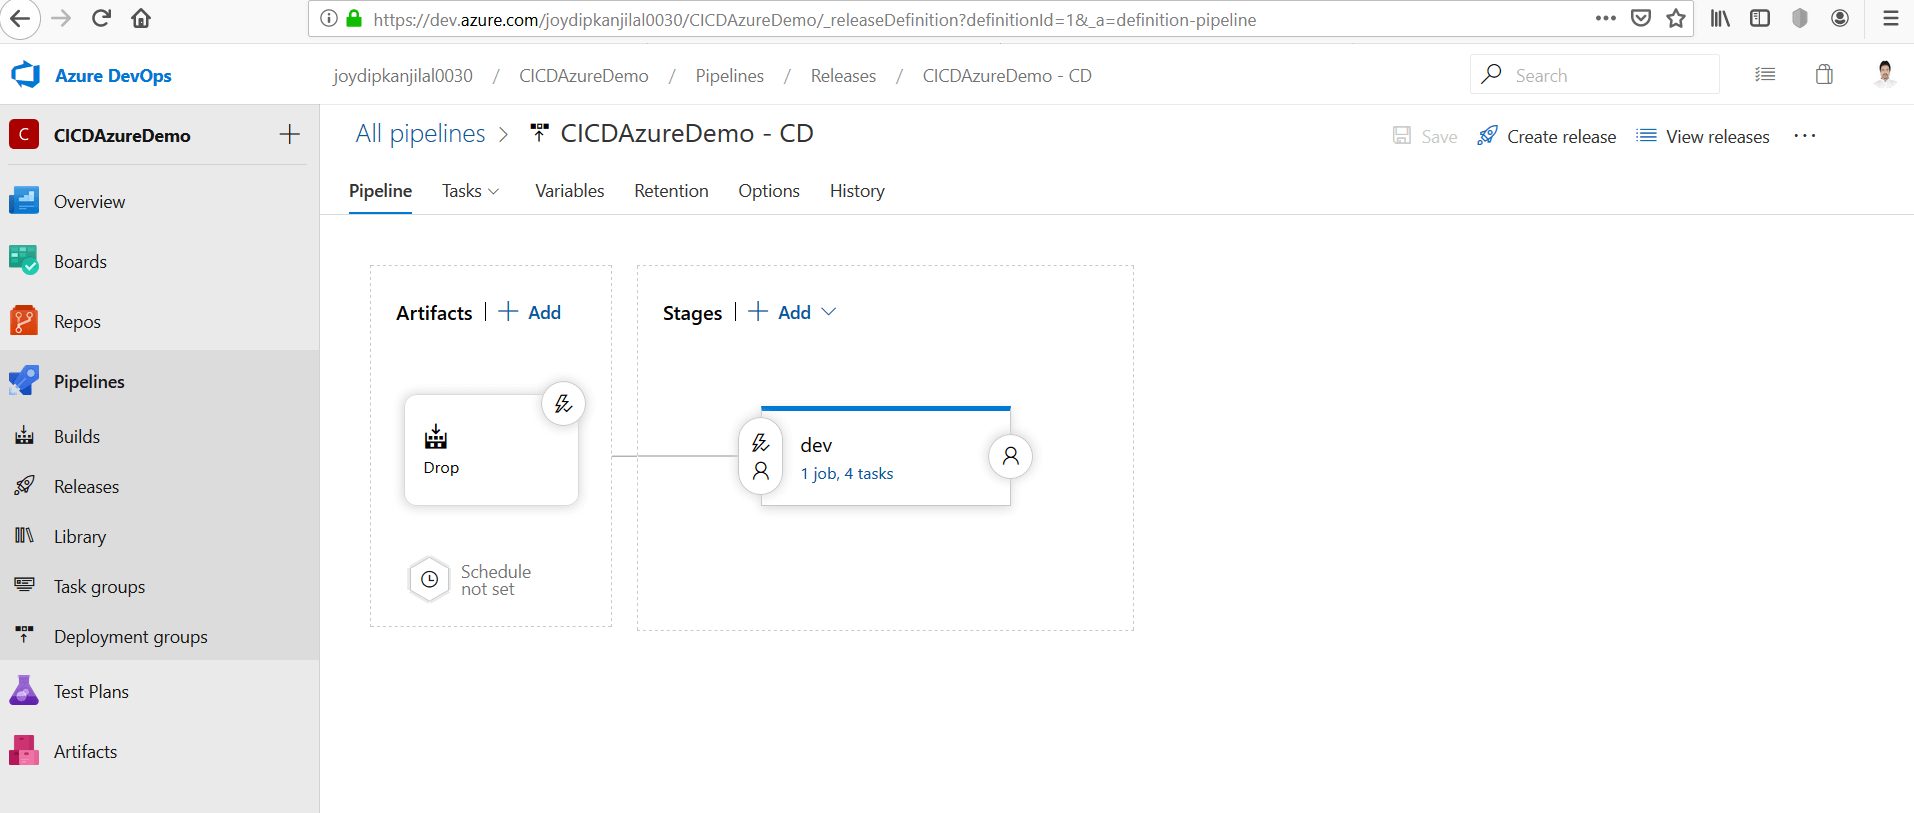
Figure 17: Release pipeline in edit mode
Select Drop from the Artifacts option. Click on the icon to the top-right corner of the Drop icon to view the continuous deployment trigger shown in Figure 18 that has been configured for the application.
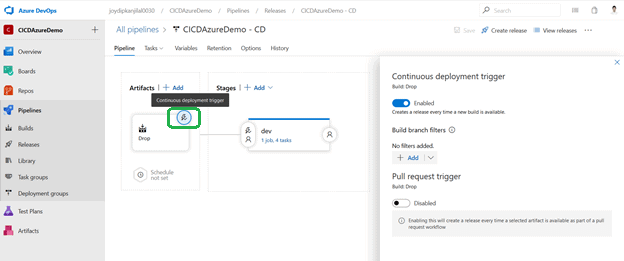
Figure 18: View continuous deployment trigger
Note that the continuous deployment trigger creates a release whenever a new build is available. When you click on Tasks, you’ll be able to see all the tasks and activities that your release pipeline executes, as shown in Figure 19.
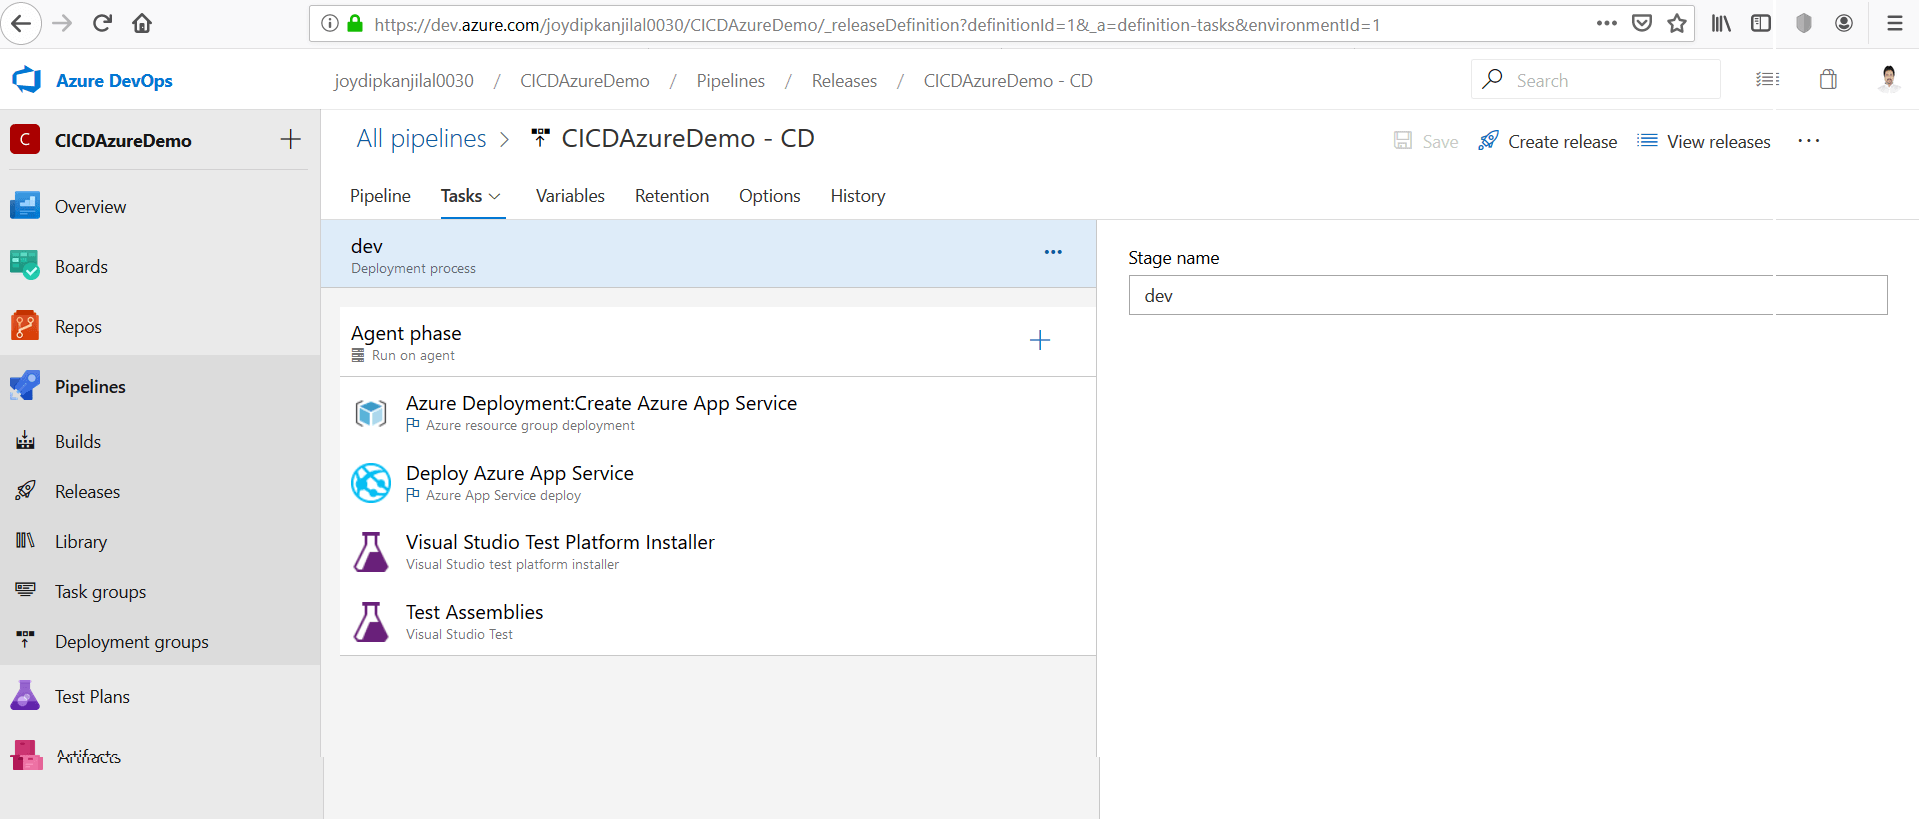
Figure 19: Tasks and activities
To see a list of all the releases, you can click on View releases as shown in Figure 19.
Triggering the CI/CD Process
There are two ways (automatic and manual) in which the CI/CD process can be triggered. The build process will be triggered automatically once you make changes in the source code and commit those changes to the code repository. It is during this phase that the tests are run automatically. If any of the tests fail or the compilation process is not successful, the build fails. If the build is not successful, the release process is not triggered.
An alternative to this is by triggering the build process manually. To do this, first, select the Builds section and click on the Queue button, as shown in Figure 20. When you do this, a new build will be queued up.
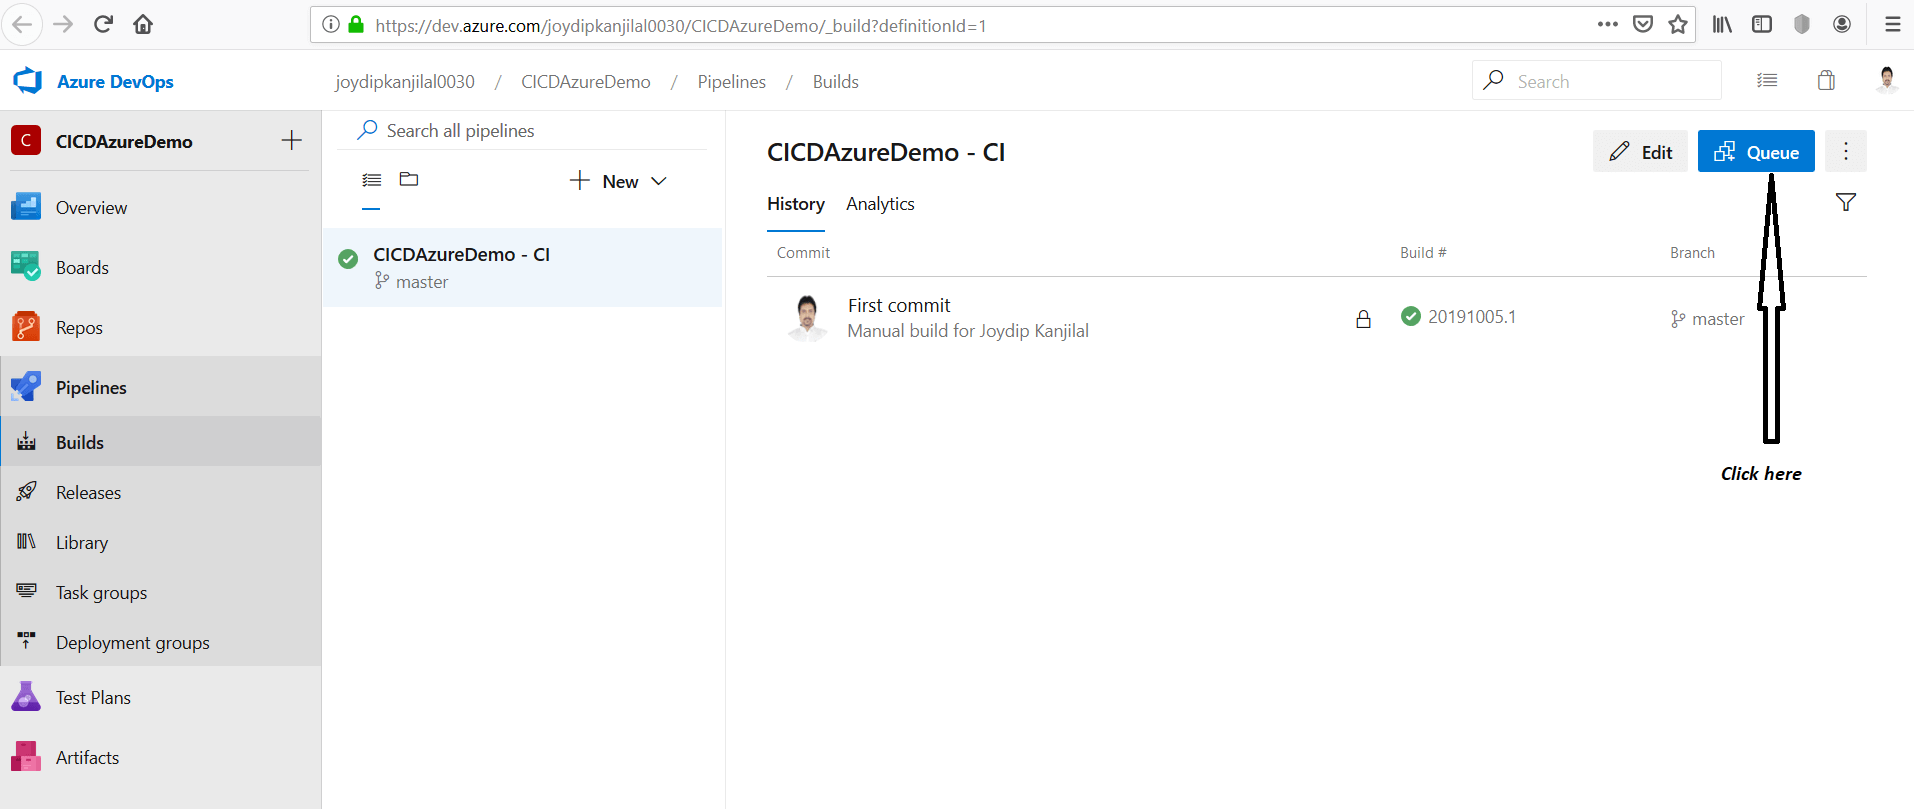
Figure 20: Queue the build
In the next screen, click on Run (see Figure 21) to trigger the build process manually.

Figure 21: Run the build pipeline
This will trigger the build process, as shown in Figure 22.
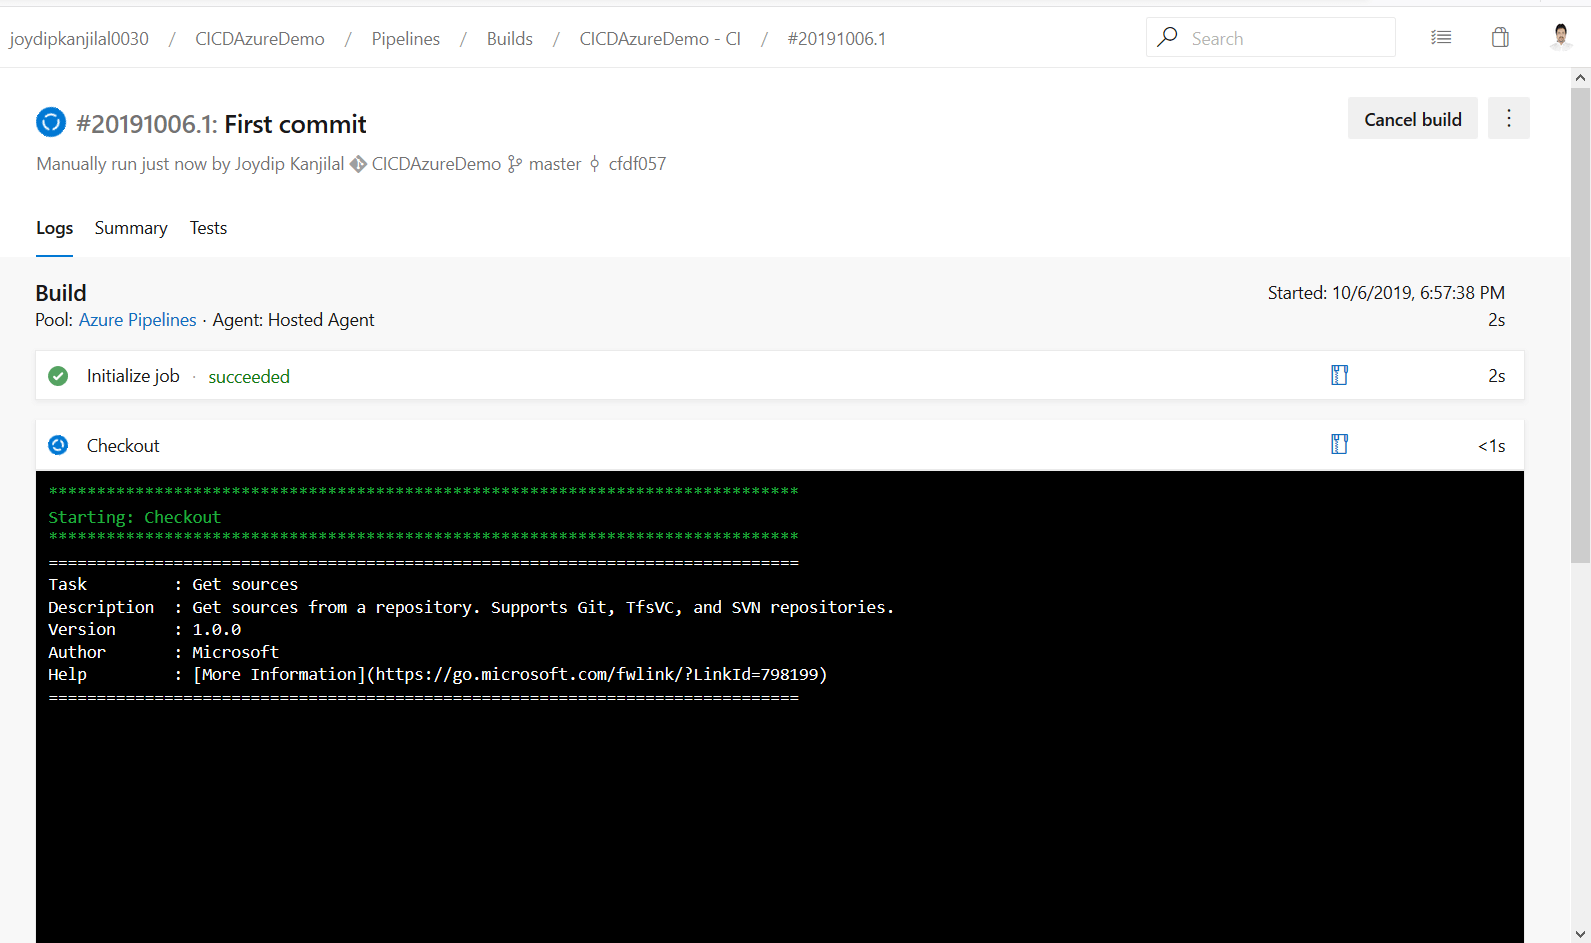
Figure 22: Build process started
Like the build, you can also trigger a release process manually. To do this, switch to Releases and click on Create release, as shown in Figure 23.
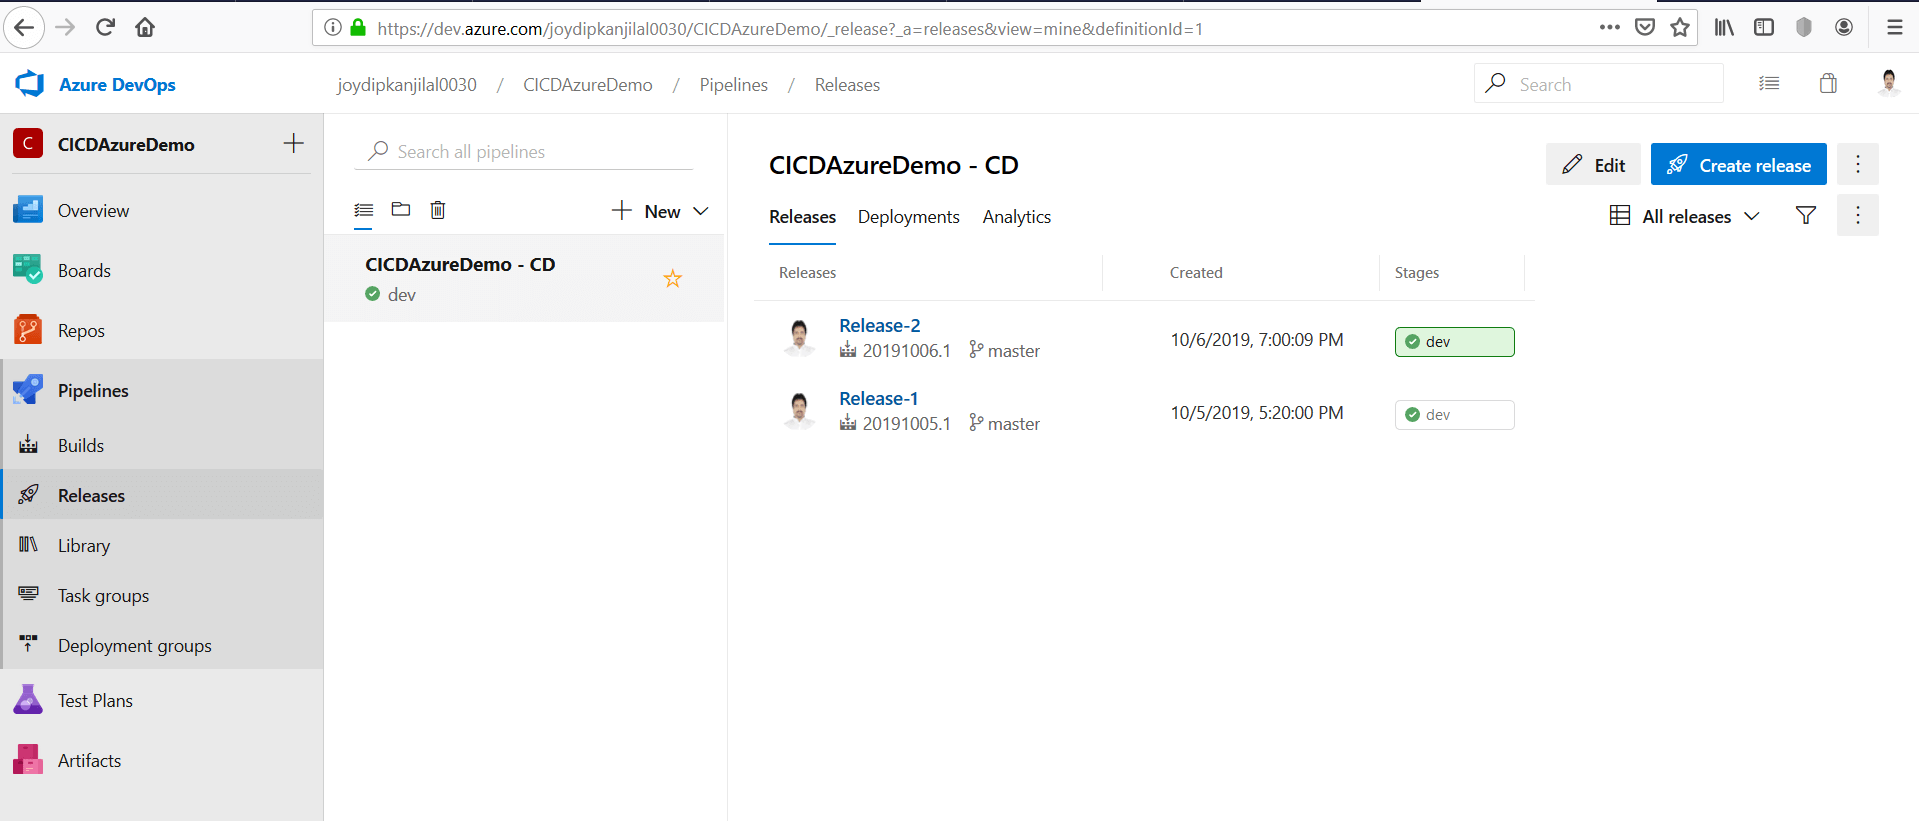
Figure 23: Trigger the release process
In the Create a new release screen shown in Figure 24, specify the build definition you would use to generate the release.

Figure 24: Specify the build
Click Create to start the release process.
Re-triggering the CI/CD Process
Now it’s time to change the source code and see how this change flows through the pipeline. To do this, follow the steps outlined below.
- Double-click the Index.cshtml file to open it. Add a line of text, as shown in Figure 25 below.
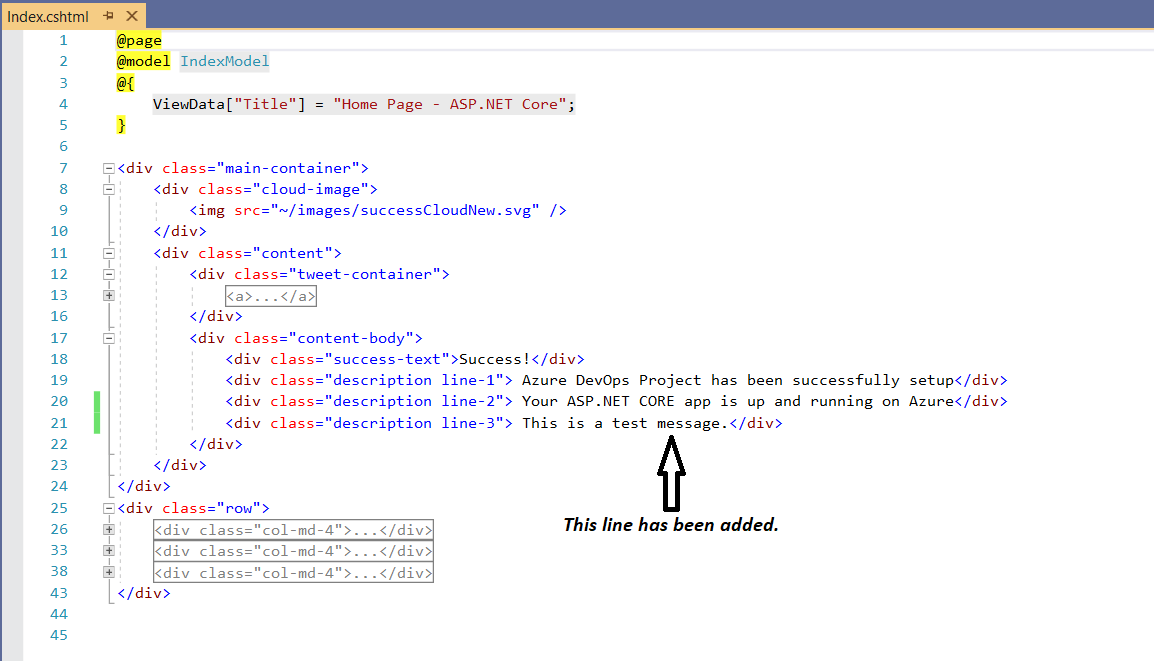
Figure 25: Adding a line of code
- Right-click on the solution in the Solution Explorer window and click Commit… to check-in the code.
- Specify a comment as a reason for the commit and click on Commit All.
- Click Sync to synchronize the changes with the server.
- Finally, click Push to send the changes from the local repository to the remote repository
- The build process starts automatically, as shown in Figure 26.
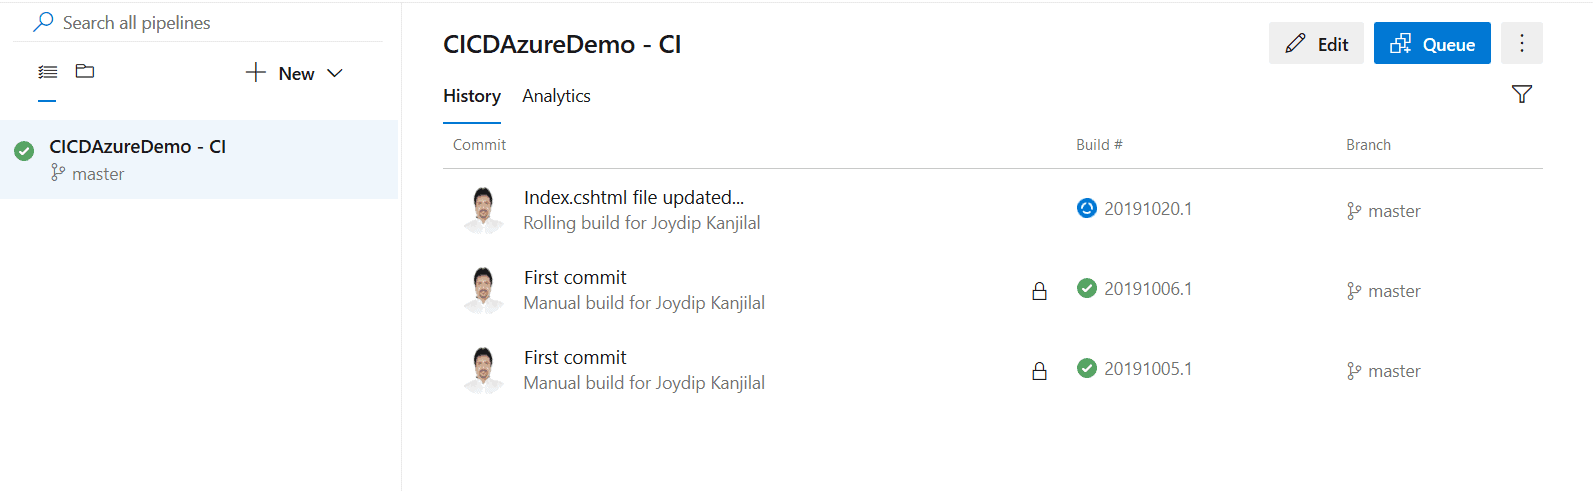
Figure 26: The build process starts
Once the build process is successfully completed, the release process starts automatically as shown in Figure 27 below.

Figure 27: The release process
After successful completion of the release process, the application is re-deployed to the same application endpoint, i.e., https://cicdazuredemo.azurewebsites.net. (Your URL will be different since the application names must be unique across Azure.)
When you browse this endpoint in the web browser, here’s how the output will look. Note the text This is a test message as shown in Figure 28.
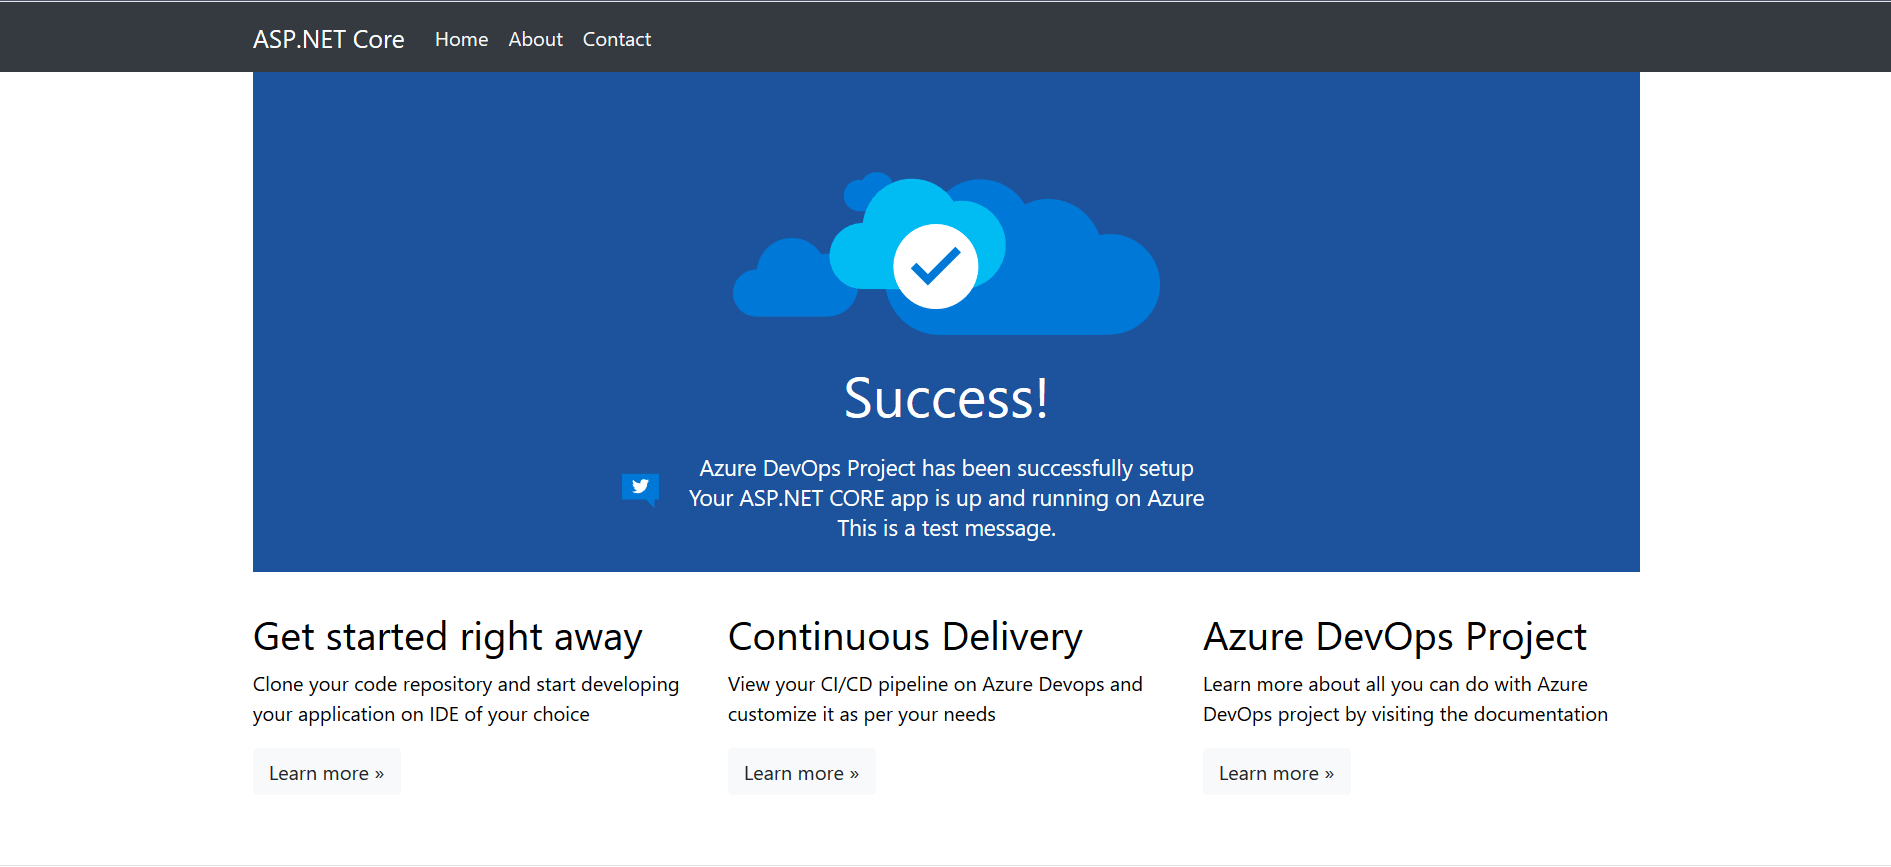
Figure 28: The output with the change
Configure CI/CD in Azure DevOps
Continuous Integration and Continuous Delivery together can help your organization build great software with faster time to market releases. You can take advantage of CI/CD to automate your builds and deployments and be more productive. Both CI and CD help in automating the software delivery process. It should be noted that CI can happen several times a day – it all depends on the number of times the source code is committed.
If you liked this article, you might also like Azure DevOps: Getting started – Simple Talk (red-gate.com)


Load comments