
The series so far:
- Introduction to Game Development with Unity and C#
- Using C# Functions in Your Animations
- Procedural Generation with Unity and C#
- Pathfinding with Unity and C#
- Extending the Unity Editor with C#
- Using Unity UI and C# to Create a Tic-Tac-Toe Game
Pretend for a moment that you’re working on your game, and you need to have monster characters placed throughout your scene. Now suppose that in another scene you need the same monster objects from the first scene, but they need different properties from the monsters in the previous scene. For example, they may need to be a different size than the previous monsters. Typically, you only have two methods of changing an object’s properties. One way to change an object is through scripting, but there’s a problem with that method; all objects that use the same script will apply those same properties. From one scene to the next, they’ll all be the same.
Another method is to alter the values of variables in the Inspector window in Unity, but this would require going to each individual object and changing whatever values you would like changed. This can be very tedious and time consuming if you have a lot of objects to change at once. Surely there’s another way to do the same task. Fortunately, there is a third option available thanks to Unity extensions, and of course the process of creating your own extensions is made relatively simple. In this project you’ll create a simple Unity extension that will gather all objects of a certain tag and set both a random color to each individual object as well as allow you, the user, to change the size of the objects all at once in just a couple clicks.
Setting Up
To begin, launch Unity and click the New button to start a new project as shown in Figure 1.
 Figure 1: Starting the new project
Next, name the project Extending Unity and be sure to set it as a 2D project. While this same concept can be used in 3D projects just as easily, this particular project will be using 2D objects to accomplish its goals. Figure 2 shows what your project setup window should look like before creating the Extending Unity project by clicking the Create project button.
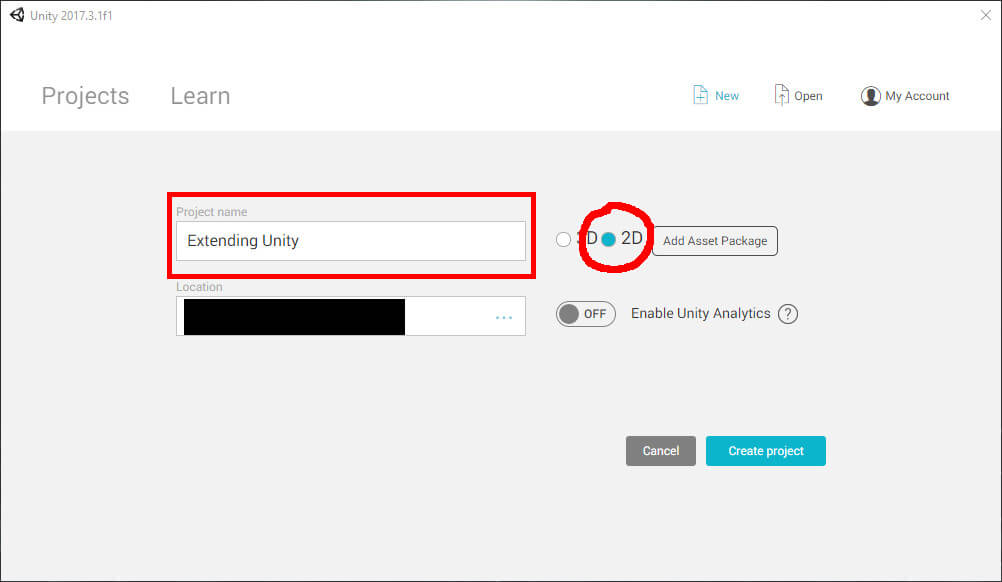 Figure 2: Project creation screen
Once the project is created, the first task to complete is to create objects to be edited using an extension you’ll make yourself. Using the Create menu in the Hierarchy window, select 2D Object->Sprite to create a new object called New Sprite. Figure 3 shows where to find this option.

Figure 3: Creating a new Sprite object using the Hierarchy’s Create menu
Of course, it’ll be hard to see the changes your extension makes to an object if you can’t see it. Assign a sprite to this object by selecting the button to the far right of the Sprite field in the Inspector window like in Figure 4.

Figure 4: Selecting a new sprite image
Select UISprite as the sprite you will use for this project’s objects like in Figure 5.
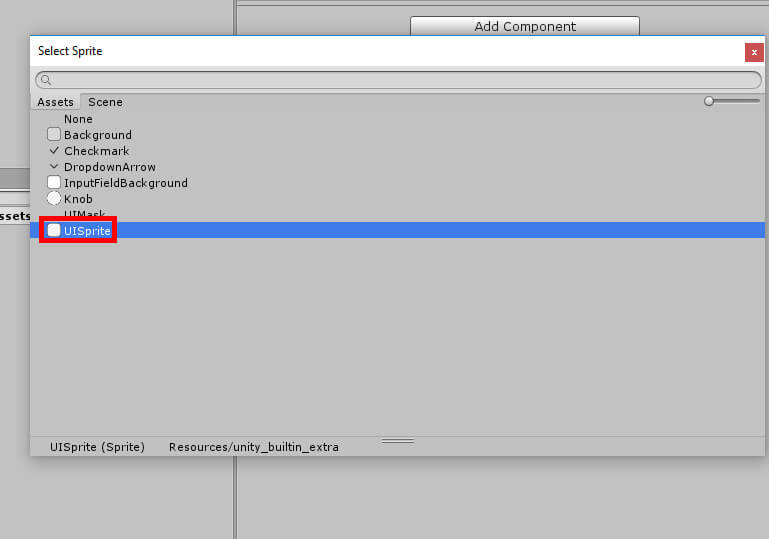
Figure 5: The sprite this object will use
In order for your extension to change New Sprite and all duplicated New Sprite object properties simultaneously, you will need to create and assign a tag to the New Sprite object. Tags help identify an object for scripting purposes. For example, using tags helps Unity decide if the player ran into an enemy or a wall and will perform whatever actions you assign it from there. To create a new tag, select the New Sprite object and open the Tag drop down menu found in the Inspector window. Then select Add Tag at the bottom of the menu. Figure 6 shows where to find these options.
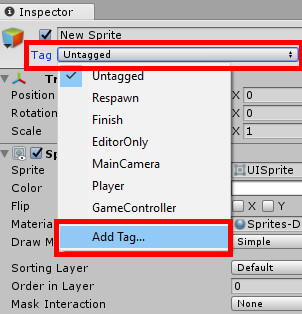
Figure 6: Opening the Tags menu
Once Add Tag is selected, your Inspector window should now look like the one in Figure 7.
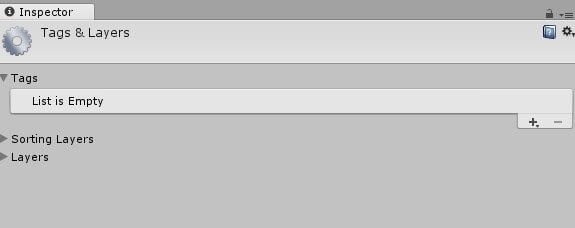
Figure 7: The Unity Tags and Layers window
To create a new tag, click the + symbol in the Tags menu. Name your new tag Sprite and click the Save button to finish creating your new tag. Figure 8 shows where to add tags.
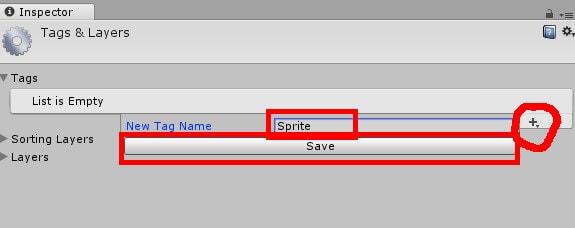
Figure 8: Creating a new tag
With the new tag created, select the New Sprite object and set the Sprite tag to New Sprite by opening the Tag menu again and this time selecting Sprite like in Figure 9.

Figure 9: Apply the Sprite tag to the New Sprite object
Finally, create eight duplicates of the New Sprite object to bring you to a total of nine New Sprite objects. To create a duplicate, select the New Sprite object and press Ctrl + D. Then change the locations of the New Sprite objects so they’re not all in the same place. Figure 10 shows an example of how the objects can be arranged within the Game window, but you may arrange them in any way you wish. To move the Sprites, modify the X and Y Position values in the Transform window. You can see them in the Game or Scene window.

Figure 10: Example arrangement of the New Sprite objects
Now it’s time to create the extension, but there’s one thing you must do in order for the extension to work. You have to create a new folder called Editor for Unity to store any extensions you make. The Editor folder is where Unity searches for any sort of extensions, whether you make them yourself or if you acquire them from the Asset Store. Create a new folder by right clicking in the Assets window and choosing Create->Folder to create the new folder. Figure 11 shows where to create the Editor folder. Remember, the folder name must be Editor for the extension to work.
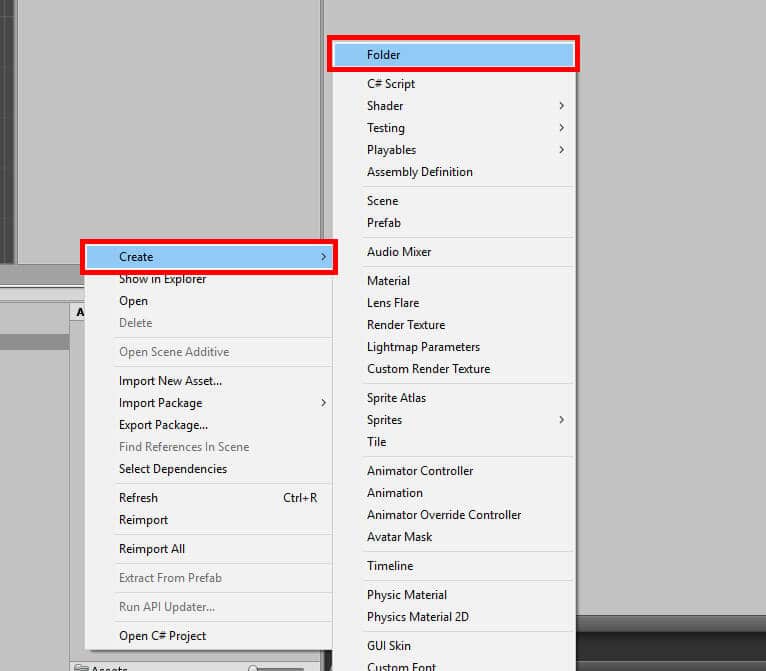
Figure 11: Creating a new folder
Within the newly created Editor folder in the Assets window, create a new script titled NewWindow by selecting Create->C# Script. Like in Figure 12, be sure this script is within the Editor window.

Figure 12: Adding a new script to the Editor folder
Once the NewWindow script is created, double click it to open Visual Studio and begin creating your Unity extension.
Adding the Code
Right away you’ll need to add a line underneath the line of code that says using UnityEngine;. To make this project work, enter the following code:
|
1 |
using UnityEditor; |
Next you should go to the class declaration and change MonoBehaviour to EditorWindow in order for our new window to appear within the Unity engine. With this change done your code should begin to look something like the code in Figure 13.
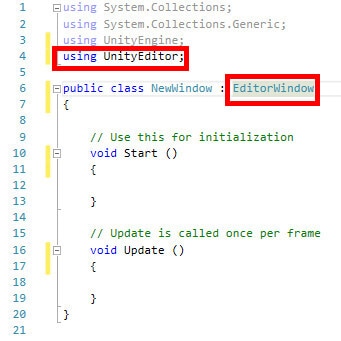
Figure 13: The code that lets Unity know this is an extension
Now it’s time to move on to the code that will make this window perform the tasks it needs to do. To begin, delete or comment out the Start and Update functions as they will not be needed for the duration of this project. Once this is done, underneath the class definition add this code:
|
1 2 3 4 |
private GameObject[] sprites; private bool changeColors = true; private float spriteScale = 1f; private string buttonString = "Get New Colors!"; |
The first line creates an empty array that will be used to store those New Sprite objects you created earlier. Later, you will use for loops to cycle through each New Sprite object to change their size and give them random colors. After this array is declared, you then create a boolean that will control if you want to give new colors to the different New Sprite objects followed by a float variable that will be used to change each object’s size. Finally, a string variable was created to be used with a button you will create shortly. Though its default value is “Get New Colors!” it can be changed to something else depending on the circumstances. At this point your NewWindow script should begin to look like Figure 14.
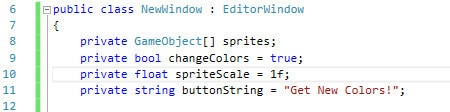
Figure 14: All variables declared
This is where the fun begins! First you must define where the user will find and open this window within Unity. Underneath the variable declarations, add the following line of code:
|
1 |
[MenuItem("Window/New Window")] |
You have now told Unity where to place the option to open your custom window, which will simply be called New Window. Later on, after completing this script and returning to Unity, you will navigate to Window->New Window to open your custom window. Of course, clicking that won’t actually show anything right now, which is where this next part comes in. A static void function will be needed to display the window to the user. Right under the previous line of code add the following function:
|
1 2 3 4 |
public static void ShowWindow() { EditorWindow.GetWindow(typeof(NewWindow)); } |
All that’s done here is to simply find an instance of the New Window window. If one does not exist, Unity will create one. Figure 15 shows the code needed to display a new window simply title New Window.
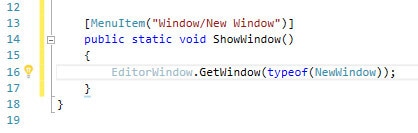
Figure 15: Coding the ability to select and display New Window in Unity
It’s now time to create the mechanics of this custom window. After all, a blank window isn’t really going to help with development in any way. Start by creating the following function:
|
1 2 3 |
private void OnGUI() { } |
In short, this function will be the one that handles all input from you, the user, and applies whatever changes you ask to the New Sprite objects. Begin by placing a label at the top of the extension window, which is done by adding this code to the OnGUI function:
|
1 |
GUILayout.Label("Sprite Settings", EditorStyles.boldLabel); |
Essentially, all you’ve done is place text at the top of the window that says ‘Sprite Settings’ and made it bold. The next line is a lot more important, as this line will collect all the New Sprite objects created earlier and store them in the array you created at the beginning. This is where that Sprite tag you created comes into play. You assigned the New Sprite objects with the Sprite tag in order to help the NewWindow script identify which objects to store into the sprites array and ultimately help the NewWindow extension you’re creating know which objects to change. With that in mind, add the following line to the OnGUI function:
|
1 |
sprites = GameObject.FindGameObjectsWithTag("Sprite"); |
Now NewWindow will be able to find all objects tagged with Sprite and add them to the sprites array for later editing. Next, go ahead and change the buttonString text depending on the value of the changeColors boolean variable:
|
1 2 3 4 |
if (changeColors) buttonString = "Get New Colors!"; else buttonString = "Change Sprites to White!"; |
Like in video games, it’s nice to have your Unity extension react to certain things you do, in this case changing the value of a boolean. The button that will later be created that assigns new colors to the New Sprite objects should have different text depending on if they’re all going to get different colors or if you want to set the color of all the objects to white. At this point, your OnGUI function should look like the one seen in Figure 16.
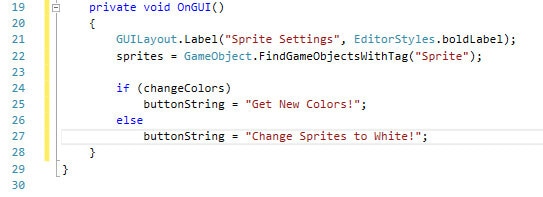
Figure 16: The beginnings of the OnGUI function
The next step is to create a toggle and a slider. You’ll be adjusting the value of the changeColors boolean by clicking on the toggle, which will then allow you to click another button and give each New Sprite object random colors or to simply set all their colors to white. After that, the spriteScale value will be altered based on a slider, which will in turn affect the size of the New Sprite objects. For the slider, the minimum value allowed will be one, while the maximum size of the New Sprite objects will be ten. To accomplish this you must add this code:
|
1 2 |
changeColors = EditorGUILayout.Toggle("Randomly Change Sprite Colors?", changeColors); spriteScale = EditorGUILayout.Slider("Sprite Scale", spriteScale, 1, 10); |
With the toggle and slider in place, create the code that will change the size of each object in your sprites array to whatever the value of the spriteScale variable is:
|
1 2 |
foreach (GameObject sprite in sprites) sprite.transform.localScale = new Vector3(spriteScale, spriteScale, 0); |
This foreach loop may seem a little weird, so I’ll break it down. Basically, the NewWindow script will cycle through each object in the sprites array. For every object (sprite), a new Vector3 variable will be created and set as the value of sprite‘s local scale, replacing the X and Y values in the Vector3 variable to the value of spriteScale. Remember that the spriteScale value is being changed by the slider created earlier. You’re not necessarily getting the value of the slider itself. Now that this step is complete, the OnGUI function should look similar to the function in Figure 17.
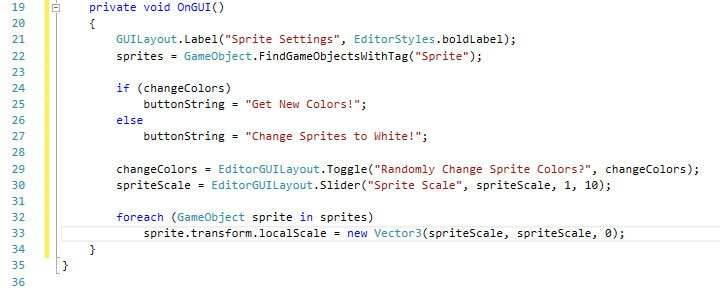
Figure 17: Creating a loop that changes the scale of all objects in the sprites array
There is now one final step in the OnGUI function creation process that must be done before this function, and by extension this script, is complete. First, create an if statement that checks to see if the user pressed a button, which will be drawn in the same statement. The code for this looks like the following:
|
1 2 3 |
if (GUI.Button(new Rect(position.width / 2, position.height / 2, 180, 100), buttonString)) { } |
The button that the user can press is specified by using the code new Rect and then specifying the location and size of the button. After that, you give the code a string to place within the button. In this case, you’ll be using the buttonString variable created at the start. After that’s done, it’s time to specify to the script what to do when the button is pressed. To accomplish this, enter the following code inside the if block:
|
1 2 3 4 5 6 7 8 9 10 11 12 13 14 15 |
foreach(GameObject sprite in sprites) { if (changeColors) { float red, green, blue; red = Random.Range(0.0f, 1.0f); green = Random.Range(0.0f, 1.0f); blue = Random.Range(0.0f, 1.0f); sprite.GetComponent<SpriteRenderer>().color = new Color(red, green, blue, 1); } else { sprite.GetComponent<SpriteRenderer>().color = new Color(1, 1, 1, 1); } } |
Similar to the previous foreach loop where you adjusted the size of the objects in the sprites array, NewWindow will cycle through each New Sprite object and change its color. If the changeColors boolean is true, it will create three float variables that will all get a random number between zero and one assigned to them. From there, the script gets the sprite object’s SpriteRenderer component and then gets the color variable within that component. It sets it to a new color with the values or red, green, and blue and sets the alpha (the transparency) to 1. However, if the changeColors boolean is false, it will simply set all sprite objects to the color white, which is 1, 1, 1 in code.
It’s important to specify in the Random.Range part of the code that the numbers available to randomly pick include decimal numbers, which is why you need to specify the .0f part of the number. Should you forget to do this, Unity will simply pick between zero and one, which will not work for assigning random colors as zero and one are the minimum and maximum values that Unity will read when it comes to colors. The if statement and foreach loop should look like the one seen in Figure 18.
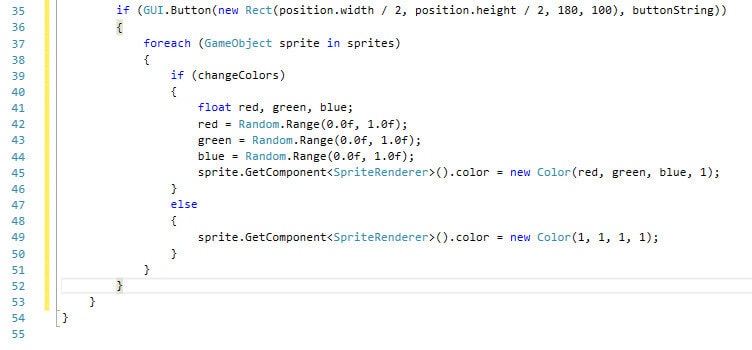
Figure 18: Completing the OnGUI function
With the code completed, you’ve not only created the OnGUI function but also the NewWindow script. Now is the time to save your code and return to Unity to test out your new extension.
Testing the Extension
Remember when you specified in the code where to open the New Window window? You coded it so that it would appear under Window in the menu and have the name New Window. Figure 19 shows where to find your extension.
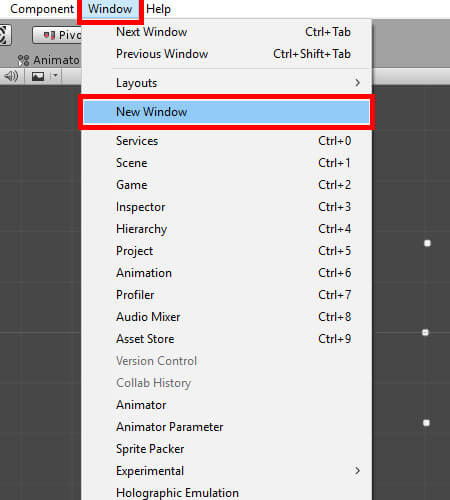
Figure 19: Opening the New Window extension
Once opened, test out your new extension. Change the Sprite Scale slider and watch as the New Sprite objects change as you adjust the slider. Toggle the Randomly Change Sprite checkbox to true and click the Get New Colors button to change all New Sprite colors. Set them back to the color white by setting the toggle to false and pressing the button again. Figure 20 shows an example Game screen of the final project.
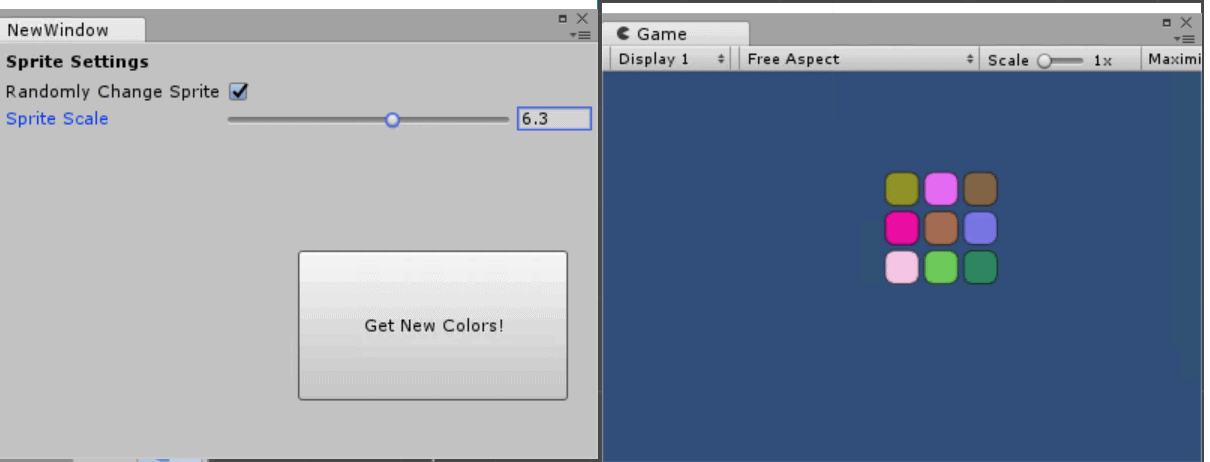
Figure 20: The New Window extension in action
Reusing the Extension
If you wish, you can also save the extension for later use in a different project in an object called a ‘package’. To do this, go to your Assets window and right click the Editor folder. Then, select Export Package like in Figure 21.
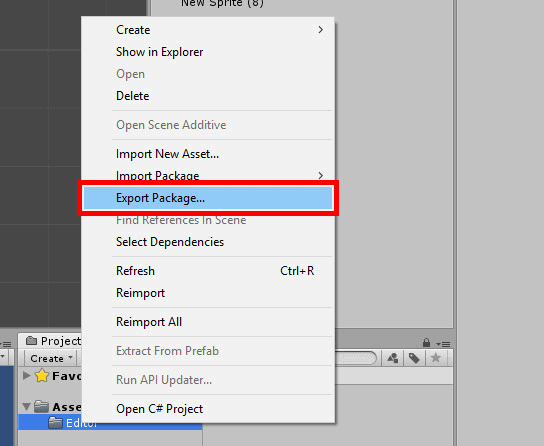
Figure 21: Exporting the package
A new window will appear showing what assets will be included inside the package you’re about to make. Be sure to have everything selected for exporting. Here, the only thing that will be exported is the folder Editor as well as the NewWindow script you created. When you’re ready, click the Export button near the bottom of the window as shown in Figure 22.
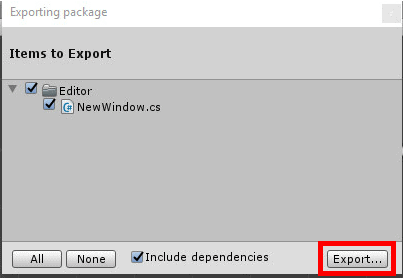
Figure 22: Exporting the extension
Save your Unity package to any location you desire on your computer and give it a name. In this example the package has been named extension package but it can have whatever name you wish. Once you’ve saved it, create a new project in Unity. Then, with the project currently open, find the package on your computer (Figure 23) and double-click it.
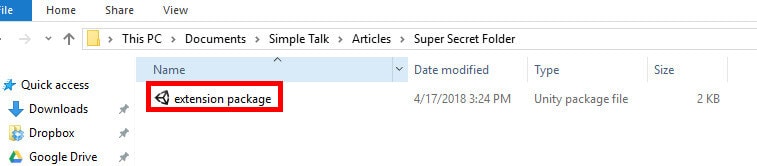
Figure 23: Selecting the package file to be imported into a new project
You’ll see a new window open appear in your new Unity project. In this window you can see the Editor folder and NewWindow script you created in the Extending Unity project. It is here that you can also decide to omit certain scripts from the import but considering there’s only one script in this extension you don’t need to make such changes. Like in Figure 24, click the Import button near the bottom of the window to bring these assets into your new project.
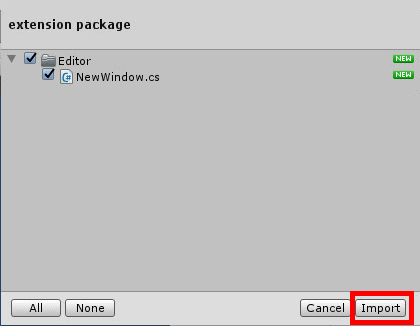
Figure 24: Importing the extension
Once Unity has finished importing the package you’ll see in your Assets window the very extension you made in the Extending Unity project! In this case, to actually use the functionality, you will need to add some Sprites to the new project.
Conclusion
It’s almost guaranteed that at some point when using any program, whether it be Unity, Photoshop, or Visual Studio, that extensions will be desired, perhaps even needed. In the case of Unity, you can easily create your own extensions that will be tailored specifically to your needs. There’s certainly no harm in browsing Unity’s Asset Store for extensions. In fact, it is often worth checking to see if there’s anything that can help with whatever you’re developing. However, odds are they will not be the perfect fit for your project. Even the most general-purpose extensions you can find may not work with your project exactly like you want it to.
Therein lies the beauty of creating your own extensions; you’re in control of how they function. You can have them do as much or as little as you need them to. They’ll be made specifically with your needs in mind. At the end of the day, nobody knows your needs as well as you do. The Unity engine arrives out of the box with a lot of tools and features, but, should you wish, you can easily add to Unity’s functionality using your own code.
This document contains proprietary information and is protected by copyright law.
Copyright © 2026 Red Gate Software Limited. All rights reserved
Load comments