
The series so far:
- Introduction to Game Development with Unity and C#
- Using C# Functions in Your Animations
- Procedural Generation with Unity and C#
- Pathfinding with Unity and C#
- Extending the Unity Editor with C#
- Using Unity UI and C# to Create a Tic-Tac-Toe Game
The practice of using procedural generation in games to create an infinite number of maps for the player to explore dates back all the way to the 1970s with games like Akalabeth: World of Doom and Rogue. It’s still in use today, serving as a major aspect in newer games like Minecraft and Darkest Dungeon. Developers have often used procedural generation to offer infinite gameplay to a potential player, citing that the game is often never going to be the same from one play session to the next. As you can imagine, building such a system can be quite complex to develop.
Procedural generation is defined as a method of creating data via an algorithm instead of manually creating it. You are essentially giving the computer a set of rules to create a level with. These rules can consist of many items, such as how large a level is, how many of a certain object can be created in a level, and so on. Creating a game like this has many benefits beyond simply offering the player infinite replay value for their game. If you’re making a game with several levels, procedural generation can help you save time and even money. You can also use procedural generation to mix and match various gameplay styles in a way that asks the player to play the game in a unique way every time, further adding to the infinite replay value.
You do have to be careful with procedural generation though, as you can accidentally let the computer build a room with no way to exit, or drop too many enemies into a given space. The possibilities for something bad to happen are almost as infinite as the possible map layouts you can make using this technique. Today you’ll learn how to make a basic procedural map generation system that makes a few rules to avoid some of these pitfalls. There will be specifications given to the computer as to how these levels should be built, such as where to place an exit, how big to make the starting area, and more. It should be noted that the system made here shouldn’t necessarily be used for a complete game, but it can help you begin work on your own procedural map generation system.
Setting up the Unity Project
First you need to create a new project to work in. Open Unity and in the top right corner select New like in Figure 1.
 Figure 1: Creating a new project
Call the project Procedurally Generated Map and make sure that it’s a 3D project. Finish creating the project by specifying its file path and clicking Create project near the bottom. Figure 2 shows what the project set up screen should look like before clicking Create project.
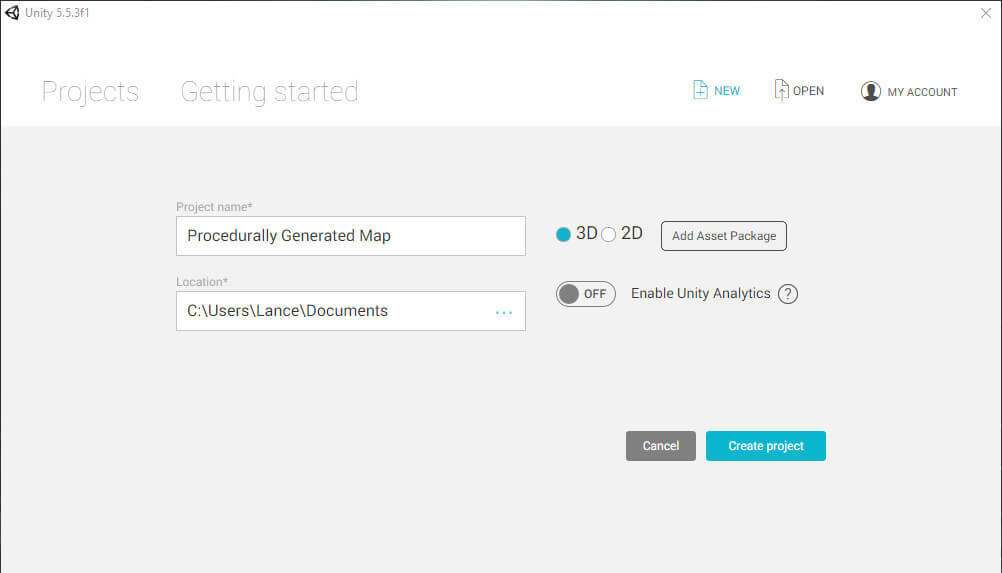 Figure 2: Project setup
Once Unity has finished creating the project your screen should look like the one seen in Figure 3. If you don’t see screens similar to this, select Window –> Layouts –> Default from the menu.
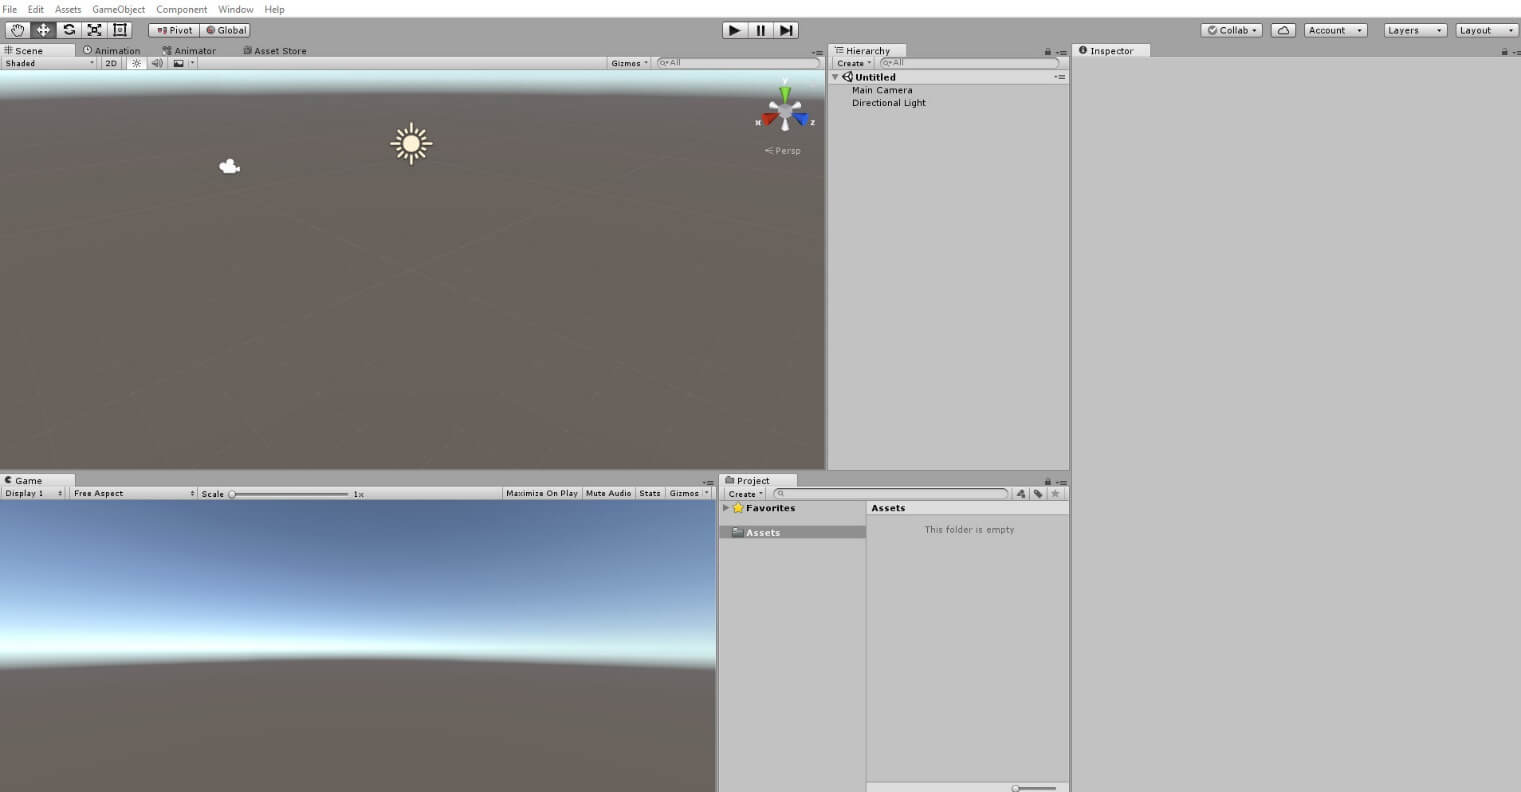 Figure 3: New 3D Unity project
Before you begin making any objects or code, you’ll want to make two folders in the Assets window near the bottom. Go to the Assets window shown in Figure 4 and right click to open a menu. Go to Create and then select Folder.
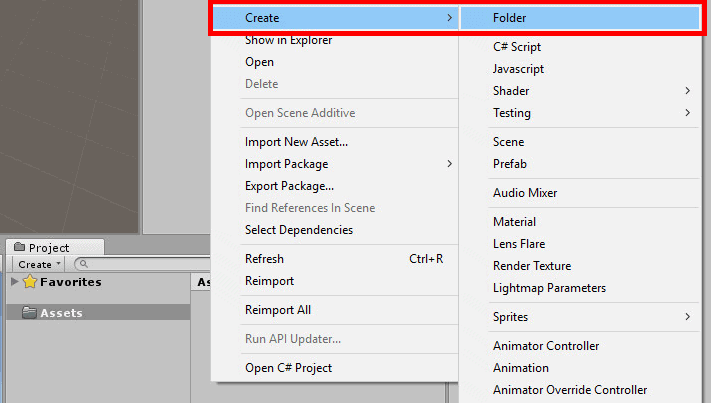
Figure 4: Creating a folder in the Assets window
Name this first folder Tile Objects. Create a second folder and name it Materials. These two folders will be used to help organize the tile objects and the materials we’ll be using on these objects. Figure 5 shows what your Assets window should look like when finished.
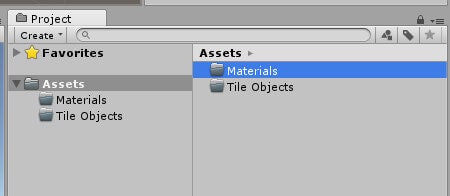
Figure 5: Your new assets folder
Now it’s time to create some objects in your project. Start by going to the Hierarchy window and clicking the Create button. Hover your mouse over 3D Object and then choose Cube to create a cube in the world. Figure 6 shows how to create the cube object.
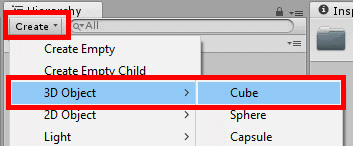
Figure 6: Creating a new cube object.
Using the Transform component in the Inspector window to the right, set the Y value under Scale to 0.1 as shown in Figure 7.
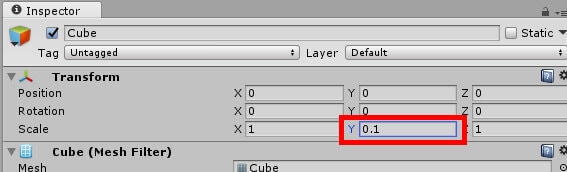
Figure 7: Setting the Y Scale of the cube object.
Rename the object WhiteTile by using the name field near the top of the Inspector window as shown in Figure 8.
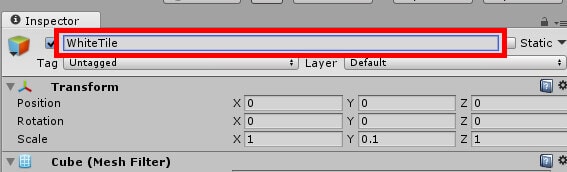
Figure 8: Renaming the object.
With the WhiteTile object selected, press Ctrl + D four times to duplicate the object. You should now have five WhiteTile objects in your Hierarchy window like in Figure 9.
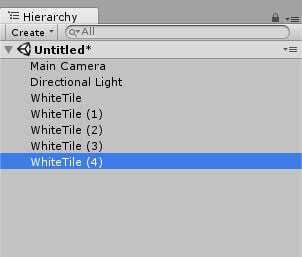
Figure 9: Your new Hierarchy window.
It’s time to take a break from these tiles and move on to creating materials. Materials are items used in games that give an object its appearance. Examples of materials in games include the bark on trees or wood on a table, though those examples have a little more to them than what you’ll be using in this project. In this project, you will use materials to change the color of the tile objects you have created. In the Assets window, double click the Materials folder you created earlier and right click in the Assets window again to bring up the same menu as before when you created the folders. This time go to Create and select Material.
Give the name White to the new material you have created. Figure 10 shows your Assets window with the new material created.
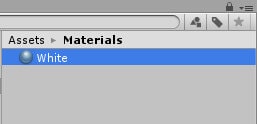
Figure 10: The newly created material.
There’s nothing more to be done with this material, so go ahead and select the material and press Ctrl + D to make a copy of it. Click on the name of the newly created material to rename it. Call this material Green like in Figure 11.
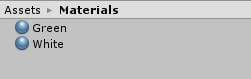
Figure 11: The Green and White materials.
Of course, it doesn’t make much sense to call this material Green if it’s not actually green. With the Green material selected, go to the Inspector window and select the color picker towards the top as shown in Figure 12.
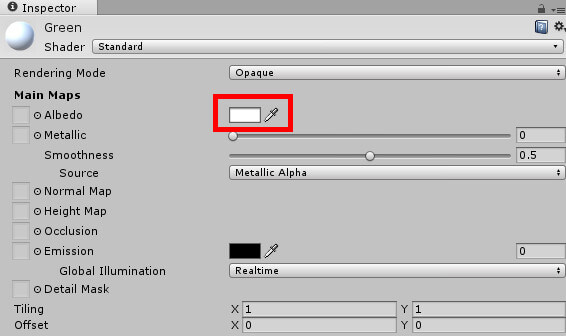
Figure 12: Selecting the color picker. Note that there’s two options. You’ll want the white box.
You’ll be greeted with Unity’s color picker. This is where you will set the color of the material. Give this material the RGB value of 0 red, 255 green, 0 blue, and 255 alpha (lowering the alpha will give you an invisible material, which won’t be helpful for this project). Figure 13 shows how to set the color of the Green material.

Figure 13: The Unity color picker.
Once the color has been set, select any of the two materials created so far and make three duplicates, bringing you to a total of five materials. Each of these materials will need their own name and color set for each. Table 1 shows the name of each material in alphabetical order and the RGB values for each one.
Table 1: All materials and their RGB values
|
Material |
Red Value |
Green Value |
Blue Value |
Alpha Value |
|
Blue |
0 |
0 |
255 |
255 |
|
Green |
0 |
255 |
0 |
255 |
|
Red |
255 |
0 |
0 |
255 |
|
White |
255 |
255 |
255 |
255 |
|
Yellow |
255 |
255 |
0 |
255 |
With all the materials created, go back to the Hierarchy window and give one of the following names to each WhiteTile copy you made earlier.
- BlueTile
- GreenTile
- RedTile
- YellowTile
After giving your objects their new names your Hierarchy window should look like the one shown in Figure 14.

Figure 14: Renamed objects in Hierarchy window.
Now we need to set each object’s material. This way the object’s appearance will match its name. Start with the BlueTile object and go to the Inspector window. Under the component Mesh Renderer select Materials to bring down more information about the object’s material. Figure 15 shows where to find Materials.
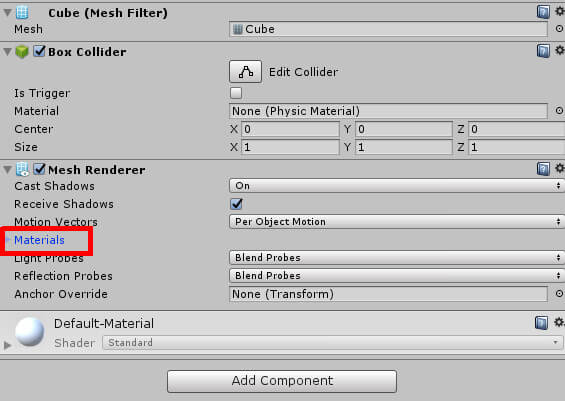
Figure 15: Locating Materials in the object Inspector window.
Here is where you set the color of the object using the material you created earlier. Since the BlueTile object is selected you will want to give it the Blue material. In your assets window, click and drag the Blue material into the Element 0 field as shown in Figure 16.
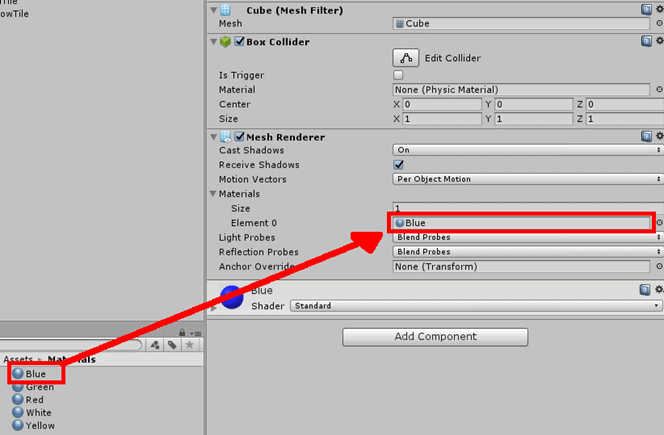
Figure 16: Setting the Blue material for the BlueTile object.
The same process must be applied to every tile object in the Hierarchy. Table 2 shows each tile object and which material to set it to.
Table 2: All tile objects and their respective materials
|
Object |
Material |
|
WhiteTile |
White |
|
BlueTile |
Blue |
|
GreenTile |
Green |
|
RedTile |
Red |
|
YellowTile |
Yellow |
In the Assets window, select the Tile Objects folder created at the beginning. Figure 17 is a reminder as to where to find this.
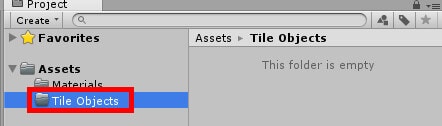
Figure 17: Locating the Tile Objects folder in the Assets window.
With the Tile Objects folder select, click and drag each tile object from the Hierarchy window into the Assets window to make what’s known as a prefab for each object. Later on in the project, you will tell the computer to procedurally generate a map using these tiles, and the best way to do that is to create a prefab for each. A prefab is essentially a copy of an object created earlier that can be used in any place you want simply by either dragging it into the Hierarchy or, in this case, instantiating (creating) an object through code. Once you’ve dragged each tile object into the TileObjects folder your assets window (with the TileObjects folder selected) will look like the one seen in Figure 18.
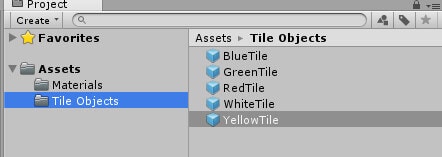
Figure 18: All tile prefabs needed for the project.
You now have a copy of each tile that you can bring into the game world at any time in your assets, so you may now delete each of the tile objects in your Hierarchy window. With the objects deleted, create a new object in the Hierarchy window by clicking the Create button in the Hierarchy window and this time select Create Empty. Figure 19 shows where this option is.
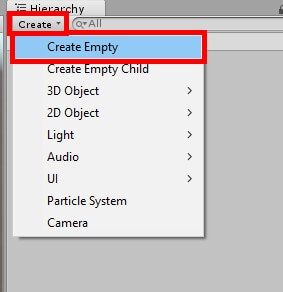
Figure 19: Creating a new empty object.
Give the newly created object the name Map Generator. Once you’ve changed the name go to the Inspector window and select Add Component as seen in Figure 20.
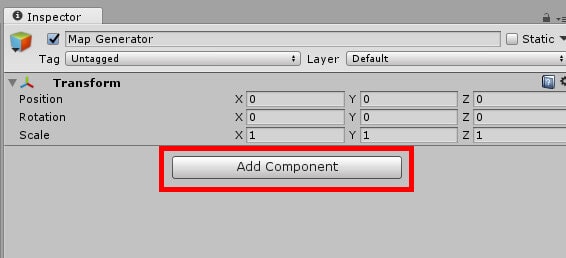
Figure 20: Adding a new component to the Map Generator object.
Search for New Script using the search bar in the box that appears. When you’ve found it, select the New Script option. You will then be asked to give the new script a name and set the language. Give the script the name MapGenerator and be sure that the language is set to C Sharp. When finished, click Create and Add to create the new script and add it as a component to your Map Generator object. Figure 21 shows the script creation window.
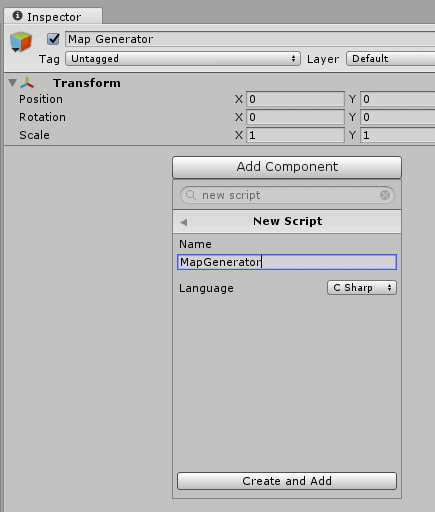
Figure 21: The script creation window.
Finally, open the new script by double clicking the Script field in the newly created MapGenerator component. Figure 22 shows where to click to open the new script in Visual Studio.

Figure 22: Selecting the MapGenerator script and opening Visual Studio.
Writing the Code
This script is going to create your map for you whenever you start the game. You will also have the program destroy the current map and make a new one whenever you press the mouse button. Along with the simple map creation process, you will also give the map generator some basic rules for how it should build out the map. Some of these rules are coded directly in the script, while other rules will be set from within the Unity editor. Above the Start function but below the class declaration, begin by declaring the following variables:
|
1 2 3 4 5 6 7 8 9 10 11 12 13 14 15 |
public GameObject[] tiles; public int columns; public int rows; public int maxBlue = 100; public int maxRed = 100; public int maxYellow = 100; public int maxGreen = 5; public int howManyWhite = 30; private int whiteTileCount; private int greenTileCount; private int redTileCount; private int blueTileCount; private int yellowTileCount; private int tileToGenerate = 0; private int resetHowManyWhite; |
There’s a lot of variables declared right from the start. Some of them will seem simple to understand such as rows and columns while others are a little odd at first. The very first variable, the tiles array, will store the different tiles created earlier. After defining columns and rows, you’ll have created several variables that will control how many of a certain tile you’ll allow Unity to create in the map. This value can be changed from within the Unity editor, which you will do later. Beyond that comes the private integers, starting with the tileCount integers. These variables will be used to track the number of corresponding tiles created in a map. Finally, tileToGenerate will have its value changed to a random number whenever we create the next tile. Depending on the number Unity gets from a range you provide it, Unity then creates whichever tile that corresponds with that random number. The last variable, resetHowManyWhite, exists to assist when resetting the howManyWhite variable later on.
With all the required variables created, it’s time to create the first function needed for the map generator. Below the Update function that Unity created, make a new void function called LoadMap().
|
1 2 3 |
void LoadMap() { } |
Now inside the LoadMap() function write the following code:
|
1 2 3 4 5 6 7 8 9 10 11 12 |
greenTileCount = 0; whiteTileCount = 0; redTileCount = 0; blueTileCount = 0; yellowTileCount = 0; for (int x = 0; x < rows; x++) { for (int y = 0; y < columns; y++) { } } |
The first thing being done whenever the map is loaded is to reset the tile counts. This will be especially useful when creating new maps from a mouse click while playing the game. After that a for loop will be entered that will go through the X and Y coordinates of the map. It will cycle through this loop based on what you have set rows and columns to in the Unity editor.
Before continuing to develop the LoadMap(), function you will need to create another function that LoadMap() will call. This function will take the tile the game was about to create and check the maxColor variables created at the start. If the tile the game is about to create would exceed the maximum number of allowed tiles in this map, then it will instead create a white tile. You can pretend that the white tiles represent ‘basic floor’ for this project. Below the LoadMap() function create the following code:
|
1 2 3 4 5 6 |
void CheckTile(int randomTile) { switch (randomTile) { } } |
Begin with the CheckTile() function. Whenever this function is used in the LoadMap() function you will pass in the tileToGenerate variable as CheckTile()‘s sole parameter. Then it will look at what this number is and check for a case that matches the value. For this project, this function will have five different cases, one for each type of tile, and a default case in case something goes wrong. Within the switch block and starting with case 0, enter the following code:
|
1 2 3 4 5 6 7 8 9 10 11 12 13 14 15 16 17 18 19 20 21 22 23 24 |
case 0: if (greenTileCount >= maxGreen - 1) { tileToGenerate = 1; whiteTileCount++; howManyWhite--; break; } else { if (howManyWhite <= 0) { greenTileCount++; howManyWhite = resetHowManyWhite; break; } else { tileToGenerate = 1; whiteTileCount++; howManyWhite--; break; } } |
Case 0 is used when Unity is going to create a green tile. For this project pretend that a green tile is an exit for your map. First it looks to see if the number of green tiles already created is greater than or equal to the maximum number of green tiles minus one. You’re subtracting one from maxGreen in this instance since you’ll be setting up a rule later that forces a green tile to be created in a specific X and Y location on your map, and you don’t want more green tiles than allowed. If the number of green tiles is greater than the maximum green tiles minus one, then it will instead spawn a white tile by setting the tileToGenerate variable to one and then adding one to the whiteTileCount variable.
From there, one is subtracted from the howManyWhite variable. However, if this is not true, the game asks another question. Is the howManyWhite variable less than or equal to zero? If so, then it’s okay to instantiate a green tile. Otherwise, create a white tile like before. The variable howManyWhite is in place to tell the game “before you create any green tiles, have you at least created this many white tiles?” If the answer is yes, then while it creates a green tile it will reset the number of white tiles to be created before permitting the game to create another green tile using the resetHowManyWhite variable.
The next case is much simpler than case 0. Following the first case in our CheckTile() function, enter the following:
|
1 2 3 4 |
case 1: whiteTileCount++; howManyWhite--; break; |
If the tileToGenerate is equal to one, this will mean that the game is creating a white tile. Since for this project you’re pretending the white tile is a basic floor, we don’t need to do anything more. Increase the whiteTileCount variable by one and decrease howManyWhite by one.
All the remaining cases follow a similar structure from here. Enter the following code after case 1:
|
1 2 3 4 5 6 7 8 9 10 11 12 13 14 15 16 17 18 19 20 21 22 23 24 25 26 27 28 29 30 31 32 33 34 35 36 37 38 39 |
case 2: if (redTileCount >= maxRed) { tileToGenerate = 1; whiteTileCount++; howManyWhite--; break; } else { redTileCount++; break; } case 3: if (blueTileCount >= maxBlue) { tileToGenerate = 1; whiteTileCount++; howManyWhite--; break; } else { blueTileCount++; break; } case 4: if (yellowTileCount >= maxYellow) { tileToGenerate = 1; whiteTileCount++; howManyWhite--; break; } else { yellowTileCount++; break; } |
These cases are like a simpler version of case 0. They all check to see if its respective tile count has exceeded its corresponding maximum tile count. If so, you make the tileToGenerate variable equal one to create a white tile. Otherwise, we add one to the color’s tile count and continue from there.
There’s one last case to make before this function is complete. If you do something wrong when setting the random range of numbers, you’ll have a default case to fall back on. This default case does the same thing as case 1. Below case 4 you’ll enter the following code:
|
1 2 3 4 |
default: whiteTileCount++; howManyWhite--; break; |
With this final case created, your CheckTile() function is now complete. Figures 23 and 24 show the complete code for CheckTile().
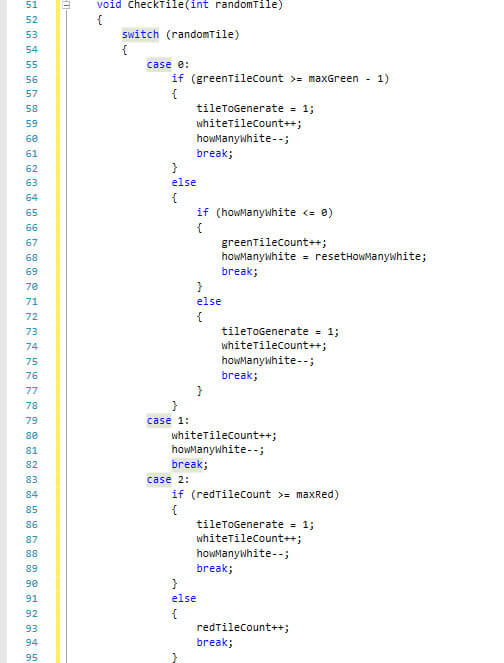
Figure 23: Part of the CheckTile() function.
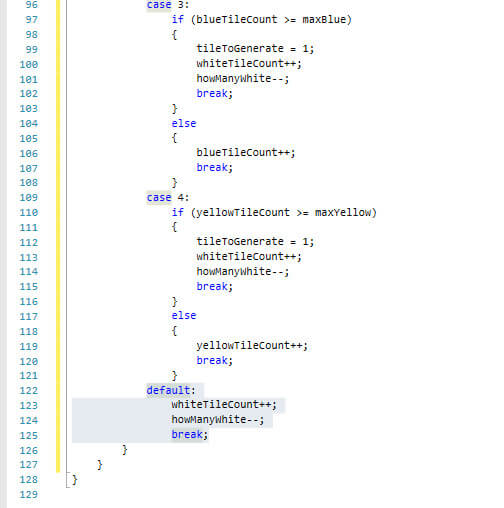
Figure 24: Remainder of CheckTile() function.
It’s time to complete the LoadMap() function. Within the second for loop, enter this code:
|
1 2 3 4 5 6 7 8 |
if (x >= 0 && x < 3 && y >= 0 && y < 3) { tileToGenerate = 1; CheckTile(tileToGenerate); GameObject obj; obj = Instantiate(tiles[tileToGenerate], new Vector3(x, 0, y), Quaternion.identity); obj.transform.parent = transform; } |
This is one of the first rules you establish in your map generator. Simply put, this if statement will check the current coordinates. If they are within 0 and 3, it will place a white tile. You still use the CheckTile() function to handle adding to the number of white tiles created. Finally, you make that tile a child of the map generator object. This will make it easier to create a new map on mouse click when you add that functionality.
The next few rules that will be set up for your map generator are as follows: first, there will be a rule that states that if the generator is on the very last tile, it will be forced to make it a green tile. Remember that you’re pretending the green tile is an exit tile, and a map is going to want at least one way out. This guarantees that there will be at least one exit in the map in a certain position every time a new map is loaded. After that, the next rule states that there will be a number of white tiles surrounding the last green tile the game instantiates, similar to the first rule where you tell the generator to start by making some white tiles. The final rule simply states to spawn a random tile in the X and Y location given to it. Below is the code for these different rules, beginning right after the if statement made earlier:
|
1 2 3 4 5 6 7 8 9 10 11 12 13 14 15 16 17 18 19 20 21 22 23 24 25 |
else if (x == rows - 1 && y == columns - 1) { tileToGenerate = 0; greenTileCount++; GameObject obj; obj = Instantiate(tiles[tileToGenerate], new Vector3(x, 0, y), Quaternion.identity); obj.transform.parent = transform; } else if (x >= rows - 3 && y >= columns - 3) { tileToGenerate = 1; CheckTile(tileToGenerate); GameObject obj; obj = Instantiate(tiles[tileToGenerate], new Vector3(x, 0, y), Quaternion.identity); obj.transform.parent = transform; } else { Vector3 pos = new Vector3(x, 0, y); tileToGenerate = Random.Range(0, 5); CheckTile(tileToGenerate); GameObject obj; obj = Instantiate(tiles[tileToGenerate], new Vector3(x, 0, y), Quaternion.identity); obj.transform.parent = transform; } |
Outside the for loop, near the bottom of the LoadMap() function, you will tell Unity to create a debug message informing you of how many of each type of tile the game has created. To do this you simply enter the following code:
|
1 2 3 4 5 |
Debug.Log("white tiles = " + whiteTileCount); Debug.Log("red tiles = " + redTileCount); Debug.Log("green tiles = " + greenTileCount); Debug.Log("blue tiles = " + blueTileCount); Debug.Log("yellow tiles = " + yellowTileCount); |
Now that you have Unity printing out debug messages to you, your LoadMap() function is complete. Figures 25 and 26 shows the completed code for LoadMap().
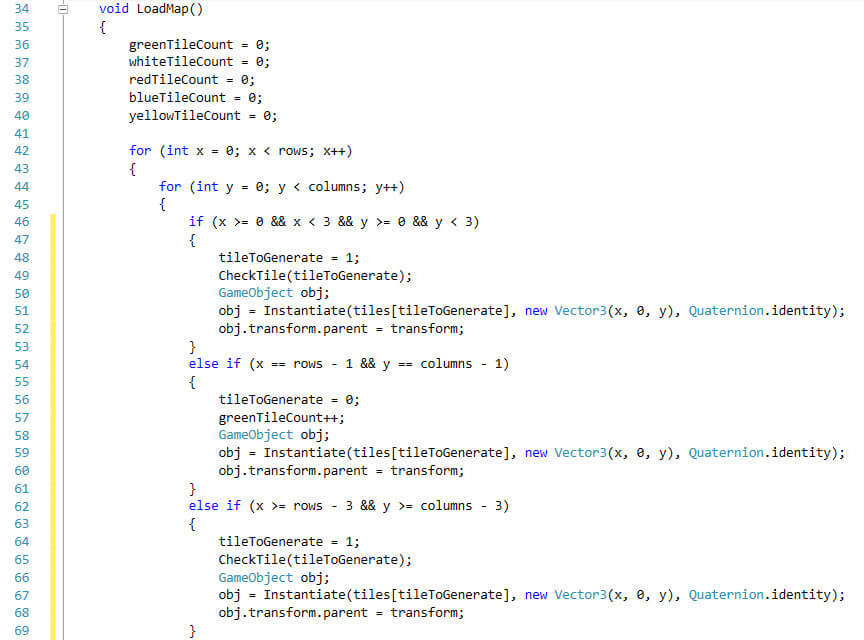
Figure 25: LoadMap() laying down rules for map generations
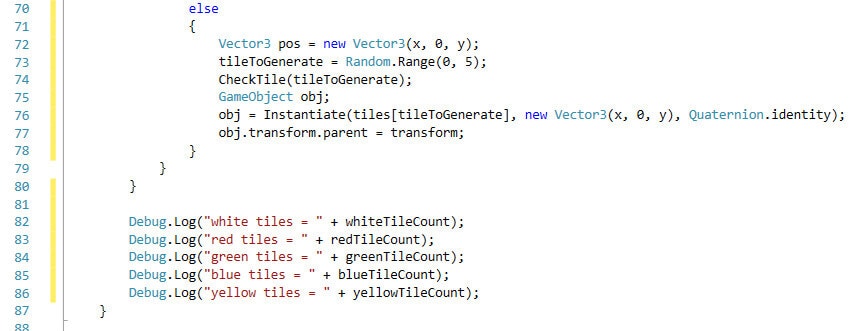
Figure 26: The final rule of LoadMap() and setting up the debug messages.
Two small things must now be done before the code is complete. Add the following two lines of code to the Start() function:
|
1 2 |
resetHowManyWhite = howManyWhite; LoadMap(); |
All this does is set the resetHowManyWhite variable to the value of howManyWhite, which will be useful when needing to reset the number of white tiles to be spawned before creating a green tile. Next, the game will create a new map. Both of these happen from the start of the game since we are using the Start() function. Now, in the Update() function add the following code:
|
1 2 3 4 5 6 |
if (Input.GetMouseButtonDown(0)) { foreach (Transform child in transform) Destroy(child.gameObject); LoadMap(); } |
This will check if the left mouse button has been pressed, and if it has it will get each tile and destroy them. It does this by getting every child of the map generator object (remember that when we spawn new tiles we set them as children of the map generator) and destroying them from the game. It will then proceed to create a new map. Figure 27 shows the completed Start() and Update() functions.
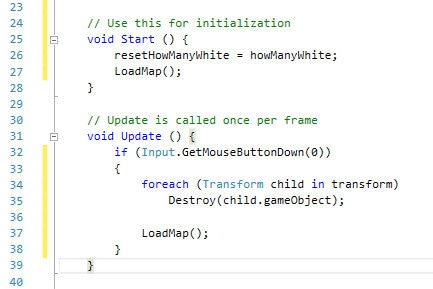
Figure 27: Completed Start() and Update() functions.
A few things need to be set up in Unity before you can try out your new map generator. Save your code and go back to Unity.
Finishing Up
With the map generator complete, you will notice that the MapGenerator component in the Inspector window has several new fields. These have appeared because we declared these variables public. Figure 28 shows these new fields.
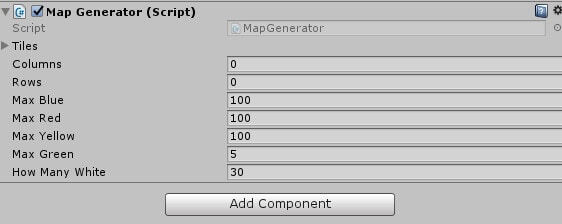
Figure 28: The newly created fields for you MapGenerator component.
First, you need to define what the tiles are. Click on the Tiles field in the MapGenerator component. Clicking it will reveal a new field called Size as seen in Figure 29.
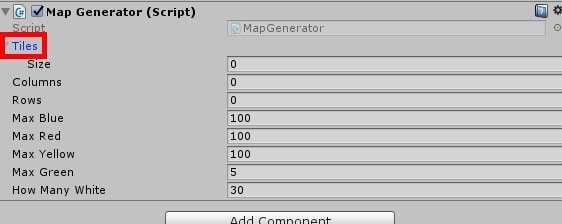
Figure 29: Opening the Tiles field to reveal Size.
Set Size to 5. When you’ve done this five more fields will appear. Figure 30 shows these new fields.

Figure 30: Setting the Size field to create five new Element fields.
These fields are where you will define your tile prefabs. Select the Tile Objects folder in the Assets window to find the tile prefabs created earlier in the project. The WhiteTile and GreenTile prefabs must be set in specific fields for your code to work as intended. Place GreenTile in the Element 0 field and WhiteTile in Element 1 like in Figure 31.

Figure 31: Setting the GreenTile and WhiteTile prefabs to Element 0 and Element 1 respectively.
The remaining Element fields can take any tile in any order, so place them into the Element fields as you like. Figure 32 shows the completed Tiles list.
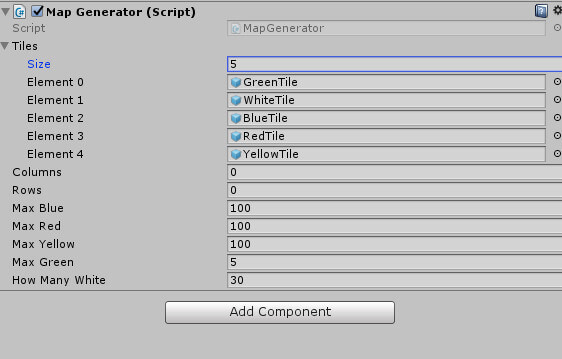
Figure 32: The completed Tiles array.
Now you should specify how many columns and rows there will be in your map. Go ahead and set Columns and Rows both to 20 like in Figure 33.

Figure 33: Setting the Columns and Rows variables.
All the other fields can be left at their default values for this project, but feel free to play with them later and see what sort of results you get. Finally, you need to readjust the camera to better view your map in the Game window. Select the Main Camera object from the Hierarchy. Then within the Inspector window you will change Position X to 10, Position Y to 26, and Position Z to 10. Finally, change Rotation X to equal 90 so that the camera is facing downward. Figure 34 shows where all these fields are.
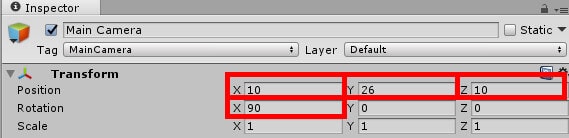
Figure 34: Adjusting the camera position and rotation.
Running the Game
Everything is now complete! Press the play button at the top of the Unity editor and watch Unity create a brand new map for you! While playing, press the left mouse button in the Game window to get a brand new map. Figure 35 shows an example map from the completed project.
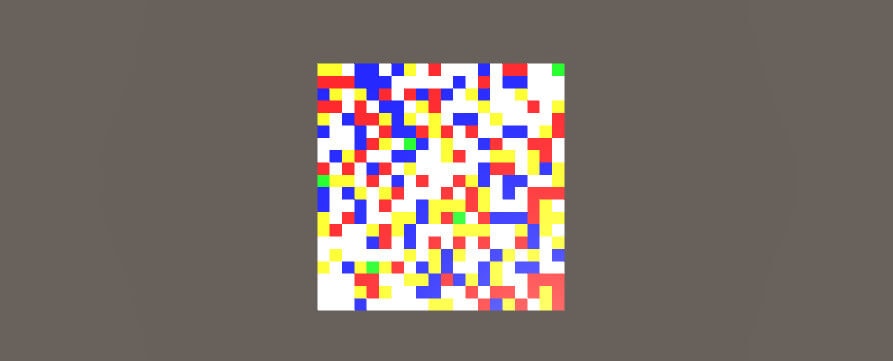
Figure 35: Example map created from the map generator.
If you click near the bottom of the Game window like in Figure 36 you can also bring up the Debug Log which will display how many tiles of a certain color were created in a given map.
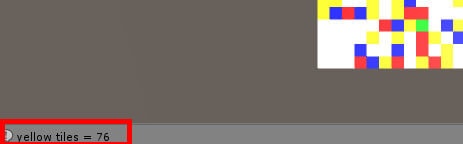
Figure 36: Where to click to open the Debug Log.
Conclusion
You’ve been pretending throughout this project that white tiles are basic floor and green tiles are exit. In this example you could also imagine red tiles being walls or danger zones, yellow tiles being coins, and blue tiles being water. With this in mind, you can see the large variety of maps at your disposal. Change some of the values within the MapGenerator component and you will get different maps. If you wish for the player to get a lot of treasure in a certain level, up the number of yellow tiles and decrease the red and blue tiles. The possibilities are virtually endless!
As mentioned before, it is not advisable to use what you’ve created today to make a full game. It is instead encouraged to use this as a starting point and make your own map generation system from there. There are many different additions you can make such as including more types of tiles, setting additional rules for when a certain tile should be created, and much more. What you do with it is entirely up to you.
Load comments