
You’ve spent hours putting together a killer PowerShell script that is going to automate a task in your workplace. The task is currently a significant challenge for your organisation. It’s not you, though, that needs to run the script; it’s a colleague who won’t touch the command line, or an IT helpdesk who can’t have access to the servers where PowerShell is installed to run the script. So how do you solve this problem?
The answer is to supply a graphical front end to your PowerShell scripts. In this article we will look at three third-party tools, PowerGUI, PrimalForms, and SQL Scripts Manager, which each provide a means for you to do this, but using three quite different approaches.
Some Example Functions
We need some examples so that we can create a graphical front end to demonstrate how to use the three candidates. To keep things simple, I will use the four functions shown below. The functions are not something you would typically use in an Enterprise environment; rather, they are here to illustrate how to use the tools.
The functions connect to an external web service to obtain currency conversion rates for British Pounds, Euros, and US Dollars, and then convert supplied values from one currency to another.
|
1 2 3 4 5 6 7 8 9 10 11 12 13 14 15 16 17 18 19 20 21 22 23 24 25 26 27 28 29 30 31 32 33 34 35 36 37 38 39 |
Function ConvertTo-GBPEuro { param ([int]$Pounds) $Currency = New-WebServiceProxy -Uri http://www.webservicex.net/CurrencyConvertor.asmx?WSDL $GBPEURConversionRate = $Currency.ConversionRate('GBP','EUR') $Euros = $Pounds * $GBPEURConversionRate Write-Host "$Pounds British Pounds convert to $Euros Euros" } Function ConvertTo-EuroGBP { param ([int]$Euros) $Currency = New-WebServiceProxy -Uri http://www.webservicex.net/CurrencyConvertor.asmx?WSDL $EURGBPConversionRate = $Currency.ConversionRate('EUR','GBP') $Pounds = $Euros * $EURGBPConversionRate Write-Host "$Euros Euros convert to $Pounds British Pounds" } Function ConvertTo-GBPUSD { param ([int]$Pounds) $Currency = New-WebServiceProxy -Uri http://www.webservicex.net/CurrencyConvertor.asmx?WSDL $GBPUSDConversionRate = $Currency.ConversionRate('GBP','USD') $USD = $Pounds * $GBPUSDConversionRate Write-Host "$Pounds British Pounds convert to $USD US Dollars" } Function ConvertTo-USDGBP { param ([int]$USD) $Currency = New-WebServiceProxy -Uri http://www.webservicex.net/CurrencyConvertor.asmx?WSDL $USDGBPConversionRate = $Currency.ConversionRate('USD','GBP') $Pounds = $USD * $USDGBPConversionRate Write-Host "$USD US Dollars convert to $Pounds British Pounds" } |
PowerGUI
First, let’s look at PowerGUI. This tool is available in both a free Standard version and a paid for Pro version. In both versions, the tool ships in two parts: a PowerShell IDE, and a graphical tool that uses PowerShell code bundled up into what is known as PowerPacks. The Pro version adds more advanced features such as Version Control and Mobile Shell which provides administrators with the flexibility to execute scripts remotely from any mobile device.
In this article I am going to use the latest release, 3.0, which contains some useful additional new elements.
To create a graphical front end for your scripts in PowerGUI, you need to create a PowerPack. PowerGUI 3.0 ships with standard built-in PowerPacks: Local System and Network. Others can be included as part of the installation, such as Active Directory and VMware, and many more are available for download from the PowerGUI.org website.
A PowerPack contains nodes made up of PowerShell cmdlets or more complex scripts. You can maintain a flat structure of these nodes or organise them into groups using folders. Figure 1 shows some of the standard PowerPacks and the nodes contained within them.
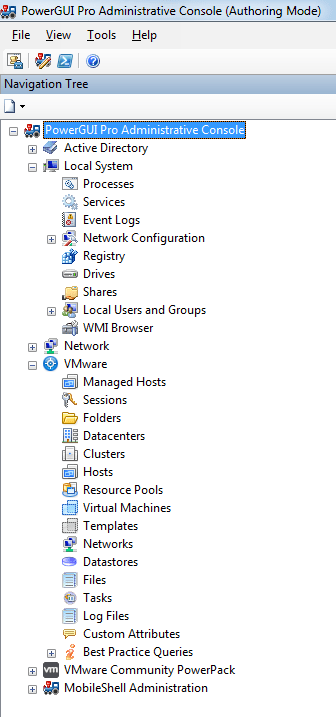
Figure 1. PowerGUI Standard PowerPacks
So to create a graphical front end for our currency conversion functions, we first need to create a new PowerPack.
Tip: Make sure you open PowerGUI 3.0 from the Administrative Console (Authoring Mode) link otherwise you will have only read-only access to the PowerPacks – more on this subject later.
First, create a top level folder to store the script nodes you are going to create by selecting New, Folder (Figure 2).
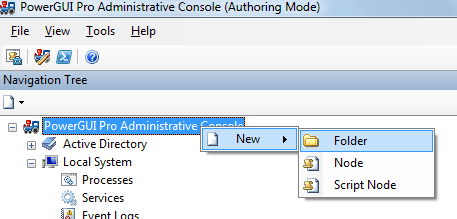
Figure 2. Creating a new folder in PowerGUI
When the New Folder dialogue box is displayed (Figure 3), you will see that there is an option to add a custom icon. I recommend that you do this to make your PowerPack look more professional. Icons need to be supplied in the *.ico format. There is a great website, Convertico.com, which will convert *.png image files into *.ico files for you if you cannot find icon files. (Note: don’t be confused that the dialogue box in Figure 3 is titled New Node, this is a bug and should display New Folder)
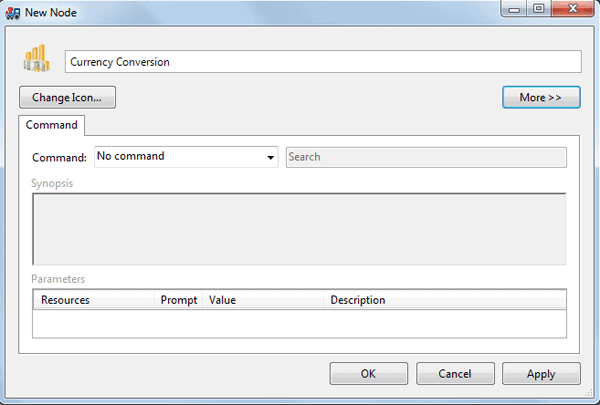
Figure 3. Creating a new folder with a custom icon
Now that we have a folder to store our content in, let’s create a script node for our first function, ConvertTo-GBPEuro. Right-click the Currency Conversion folder and choose New, Script Node. Give the script node the same name as the function, ConvertTo-GBPEuro. Again you will see that it is possible to supply a custom *.ico for this node.
Next, copy and paste the ConvertTo-GBPEuro function into the code section as shown in Figure 4.
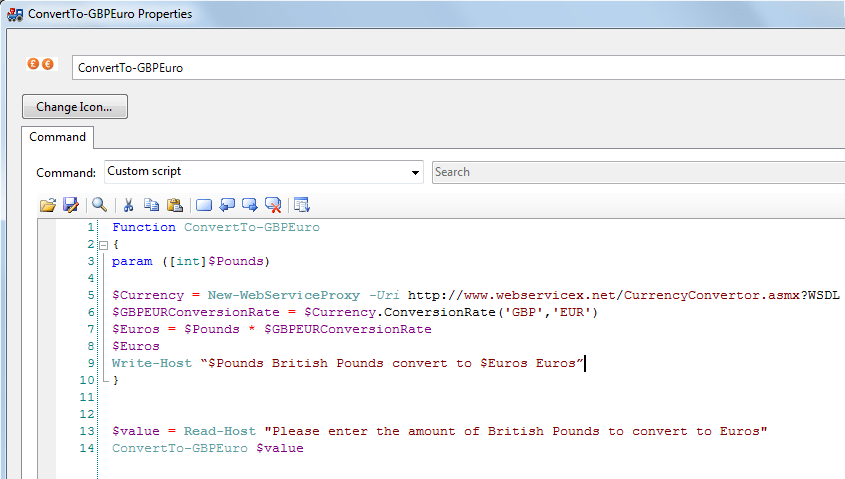
Figure 4. The ConvertTo-GBPEuro function in a script node
Observe that it is possible to edit this code, and that we get syntax highlighting. We need to make three additions in this instance:
- The original output of the function was a message to the screen via Write-Host. In PowerGUI, a message will output at the bottom the output window. Better, though, is to output an object that will be displayed in a grid format in the output window. In this example, only a single value will be output, but typically you will be more likely to create output with multiple properties so displaying them in a grid format will work nicely. The addition of the $Euros variable output (line 8 in Figure 4) will see that results appear in the grid.
- Remember that the purpose of this exercise is to provide a graphical front end to these Currency Conversion functions, so we need to implement a friendly way for the user to supply an input value. For this, we use the Read-Host cmdlet (line 13) to prompt the user for input.
- Finally, we execute the function based on the input value: ConvertTo-GBPEuro $value (line 14).
Clicking on the ConvertTo-GBPEuro script node will execute it, and the user will be prompted with the dialogue box shown in Figure 5.
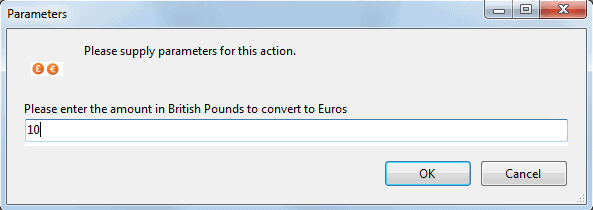
Figure 5. Dialogue box displayed when the ConvertTo-GBPEuro script node is executed
The results of entering an amount and clicking OK are shown in Figure 6.
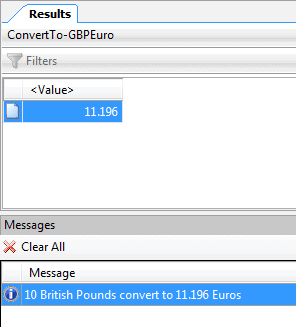
Figure 6. ConvertTo-GBPEuro script node results
Now, create three additional script nodes in similar fashion for the remaining conversion functions. Figure 7 shows the PowerPack taking shape with the four example conversion nodes.
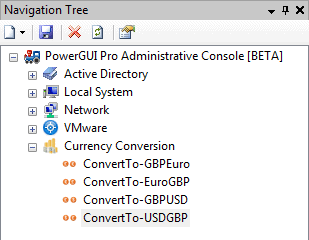
Figure 7. The Currency Conversion folder with a script node for each function
Whilst you might think you are finished at this point, there is one further step to follow to turn your work into a fully fledged PowerPack. Right-click the Currency Conversion folder and choose Create New PowerPack (Figure 8).
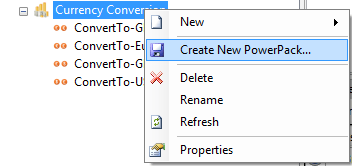
Figure 8. Selecting Create New PowerPack
You are presented with the dialogue box shown in Figure 9. PowerGUI helpfully handles the versioning for you each time you make a change to the PowerPack and update it. You can provide description information, and make particular PowerShell snapins or modules a requirement in order to be able to use the PowerPack. Finally, you can provide optional links to a location to download the PowerPack and an informational web page. If you supply the web link to the PowerPack, it is possible to get PowerGUI to check for updated versions of the PowerPack for your users to automatically download.
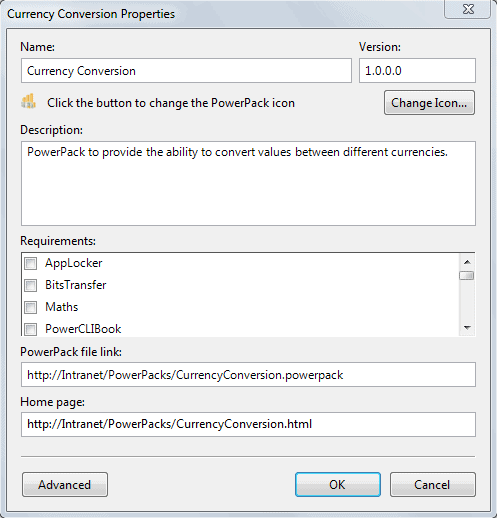
Figure 9. The PowerPack Properties
Once you have created the PowerPack, it is possible to manage it via File, PowerPack Management (Figure 10).
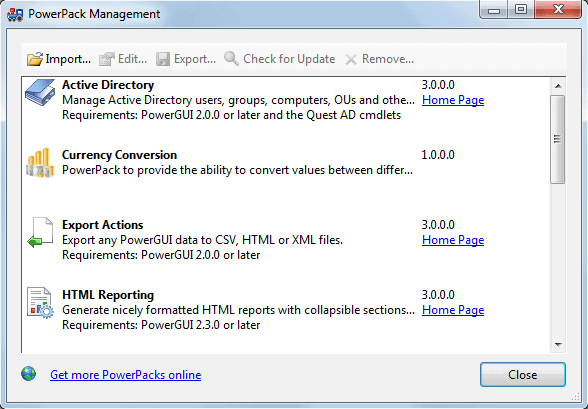
Figure 10. PowerPack Management
From this window, you can edit the PowerPack to change any settings configured when it was originally created, or export it so that you can make it available for distribution. It is also possible to check for an updated version of the PowerPack; if a link to the PowerPack location was specified in the properties, PowerGUI can check the version number to see if an update is required and, if so, download and install it.
Tip: PowerGUI is configured by default to check all PowerPacks for updated versions on startup. This feature can be disabled from Tools, Options if necessary.
Figure 11 shows how to export the PowerPack. Notice that PowerGUI will increment the version number of the PowerPack each time you export it. The exported PowerPack file can be copied to a file distribution share or onto the PowerGUI.org website and shared with the community.
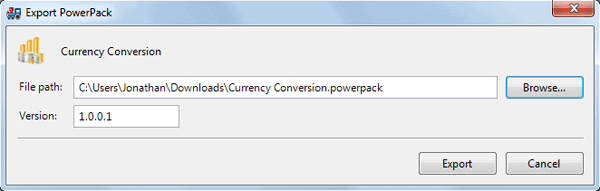
Figure 11. Exporting a PowerPack
The exported PowerPack for our example is provided with this article for you to import and examine.
Once you have distributed your PowerPack, if it is for internal use you may wish to lock it down so that users are unable to change it. Customizing PowerGUI Configuration on the PowerGUI.org website is a very useful document detailing the procedure for doing this.
PowerGUI 3.0 includes a new Authoring/Read-Only mode. This enables you to present different application startup icons for PowerGUI. For example, you can open PowerGUI in Authoring mode so that you are able to create and update PowerPacks, while your PowerPack users can be given the default icon which will open PowerGUI in Read-Only mode.
Another addition to PowerGUI 3.0 is the ability to compile your scripts into executable files. This may make sense for certain use cases where you wish to distribute a script, but don’t want to explain how to run it from PowerShell – simply executing the file will run the script. To achieve this, open PowerGUI 3.0 Script Editor and edit your script. Select Tools, Compile Script and you will be presented with the options shown in Figure 12.
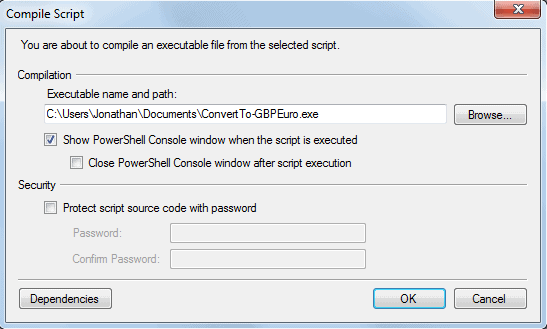
Figure 12. Exporting a script to an executable file
Running the executable file will display the window shown in Figure 13; a quick and easy way to provide straightforward input for users.
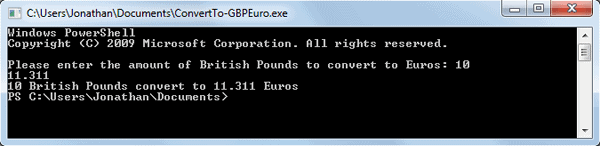
Figure 13. Running the exported executable file
Finally, it is also well worth considering the MobileShell component of PowerGUI Pro, which allows you to execute PowerShell commands from a browser or Mobile Device. With this feature, you can provide a web interface for PowerShell commands, and PowerGUI Pro 3.0 takes this one step further, enabling you to publish your own PowerPacks to mobile users. So with very little extra effort it is possible to provide a graphical interface for your PowerShell scripts to all kinds of mobile devices! Figure 14 gives an impression of how this might look.
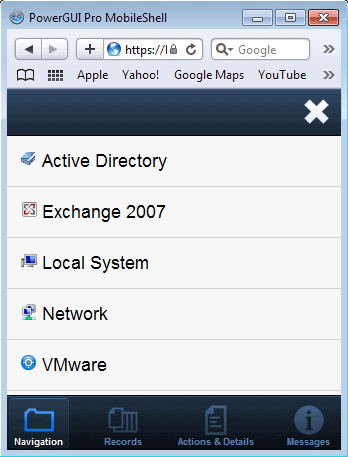
Figure 14. A PowerGUI Pro 3.0 Beta MobileShell example interface
Primal Forms 2011
The second tool that we are going to look at in this article is Sapien’s Primal Forms 2011. This tool is a paid for only product; however there is a trial version available with 45 days to check it out, which should be more than enough time to discover whether it is the tool for you. At the time of writing, Primal Forms 2011 has not long shipped as the latest version of this product. While its original principal aim was producing Windows Forms via a Designer and exporting them to PowerShell scripts, there is a now a fully-featured PowerShell Script Editor and PowerShell Console Integration.
In this article we will be focusing on the creation of Windows Forms using this tool. In some senses Windows Forms are to PowerShell as HTML Applications (HTAs) were to VBScript, i.e. it is possible to create fairly basic looking forms using a scripting language to generate the form. Whilst you can write these natively in the programming language, a tool like Primal Forms 2011 makes the task much simpler.
Let’s look at the process of creating a form in Primal Forms 2011 to make our Currency Conversion functions available to users without having to introduce them to a PowerShell console.
After opening Primal Forms 2011, create a new form and you will be presented with a number of template options (Figure 15). In this example, we will create a very basic form using the Empty Form template, but it is worth you investigating the other shipped templates since they may already meet some of your requirements.
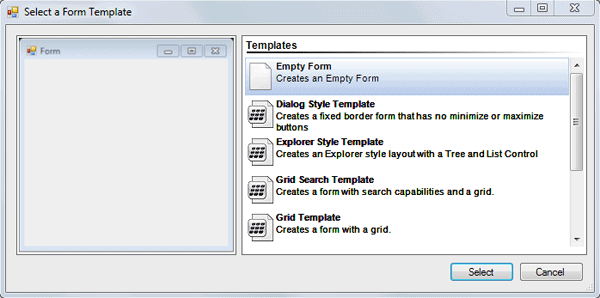
Figure 15. Primal Forms 2011 templates
If you have used a form designer before, the layout of this tool will be pretty familiar to you; a visual design window in the centre, properties of the selected design item to the right and a toolbox of available controls to the left (Figure 16). Since this is a PowerShell based tool, the PowerShell console is at the bottom, along with other related tools.
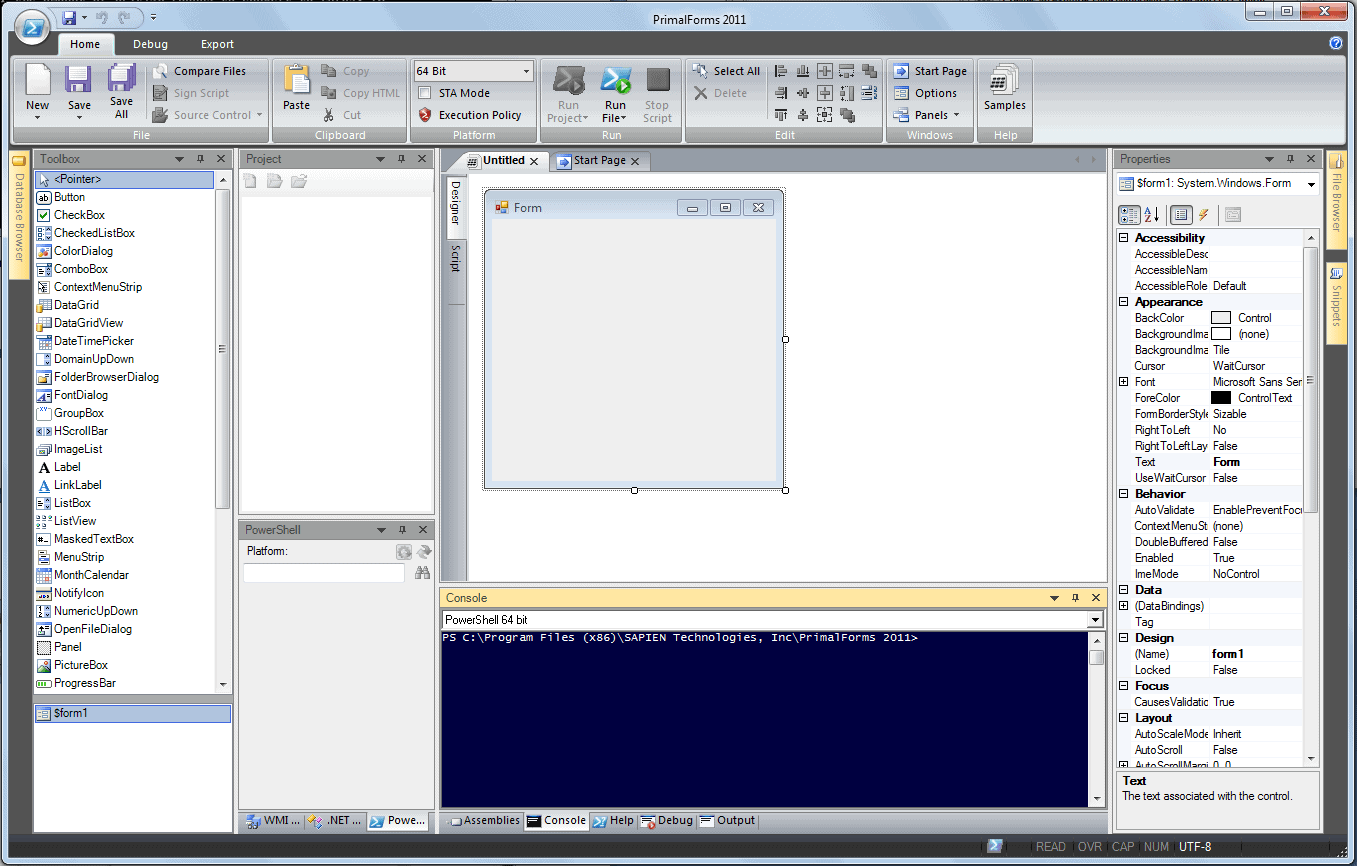
Figure 16. Primal Forms 2011 basic view
The first task we are going to take on is to customise the look and feel of our form. By changing the Text property from Form to Currency Conversion, we change the title bar of the form. We can then give the form a nice background by supplying a jpg or other image format file to the BackGroundImage property – Primal Forms 2011 will convert that file to binary data when exporting the form to a PowerShell script file.
Our form already looks as shown in Figure 17.

Figure 17. The Currency Conversion form with a background image
The next step is to add two Textboxes to provide a title and an area to display the results of running the functions. Simply drag and drop them onto the form and add some text to the first Textbox as a title (Figure 18).
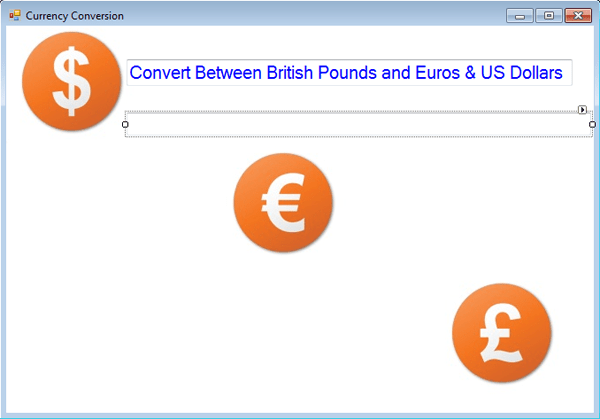
Figure 18. Adding Textboxes to the form
Next, we add a button for the user to execute a Currency Conversion function (Figure 19).
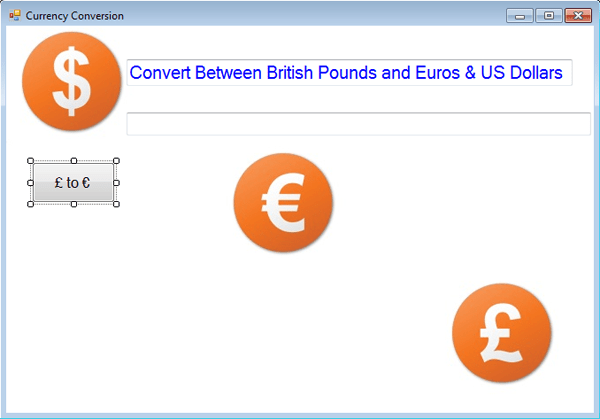
Figure 19. Adding a button to the form
Now the trick is to make the button actually do something when it is pressed… Double-clicking on the button will take you to a script view where you can insert the code you wish to run (Figure 20).
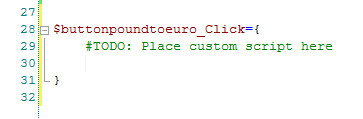
Figure 20. Insert Button Code Here!
For convenience, I decided to place the four functions at the top of this script section, so that I can reference them where necessary in the button code. At this point, it is also useful to pick up some basic Windows Forms scripting. The first three lines of code below prompt the user to enter an amount to convert, run the function, and generate the result.
|
1 2 3 |
$Pounds = Read-Host "Please enter the amount in British Pounds to convert to Euros" ConvertTo-GBPEuro $Pounds $Result = "$Pounds British Pounds convert to $Global:Euros Euros" |
To display the result in the Textbox, it’s helpful to know that the Textbox is an object with methods and properties that can be called or set. So we set the Text property of the $textbox1 object to be the result of executing our function with some additional text. The final step is to execute the Refresh method of the form so that the result is updated for the user to view:
|
1 2 |
$textbox1.text = "$Result" $formCurrencyConversion.Refresh |
So the code for the button being clicked appears as per Figure 21.
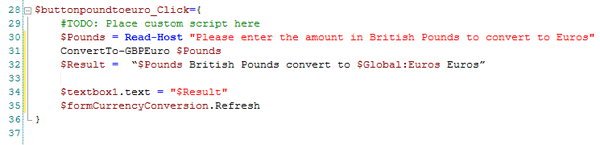
Figure 21. The button click code
Carry out a similar process for the other three functions and the final result is the form shown in Figure 22.
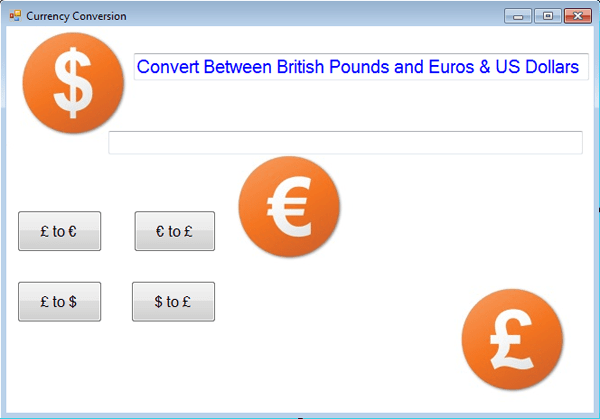
Figure 22. The completed form
Executing the form and clicking one of the buttons will see the user prompted in a separate dialogue box for the amount to convert – the result is then displayed, as shown in Figure 23.
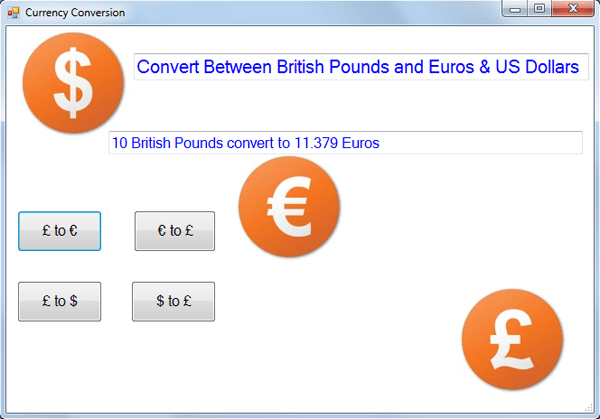
Figure 23. The results of clicking a form button
4
Now that you have designed and tested your form, it’s time to export it to PowerShell code for distribution. Primal Forms makes this very simple for you. On the Export tab, there are four options:
- Export to File creates a *.ps1 PowerShell script file.
- Export to Clipboard copies the PowerShell code generated by the form to the clipboard, enabling you to paste it into another Script Editor or document.
- Package File creates an executable file so that it can be used without executing PowerShell first.
- Package File and Run creates an executable file as above, and then immediately executes it.
Once you have chosen your export option, you can then distribute it as you wish. The Primal Forms file for this example is provided with this article.
This has only been a brief introduction to Primal Forms 2011, but illustrates how quick and simple it is to build Windows forms for your PowerShell scripts using this tool.
SQL Scripts Manager
SQL Scripts Manager is a free tool from Red Gate Software. It evolved from a “Down Tools Week” project, in which development teams are free to work on their own projects to see what they might come up with. The tool essentially allows you to: manage SQL, PowerShell, and IronPython scripts from a central location; execute the scripts from a GUI interface; and produce graphical results.
A couple of excellent introductory articles can be found on the Simple-Talk website:
In SQL Scripts Manager, PowerShell scripts are stored inside XML files, typically located in C:\ProgramData\Red Gate\SQL Scripts Manager as *.rgtool files. The way the script is presented is defined by the rest of the content within the XML file; the best way to figure out what is required is to look at some of the examples in that folder, and also to read the Support Center Learning topic: SQL Scripts Manager XML Schema.
So let’s take a look at how we could implement the ConvertTo-GBPEuro PowerShell function using SQL Scripts Manager.
I created the XML file CurrencyConversionGBPEuro.rgtool, shown below, based on the example scripts and information from the documented XML schema.
|
1 2 3 4 5 6 7 8 9 10 11 12 13 14 15 16 17 18 19 20 21 22 23 24 25 26 27 28 29 30 31 32 33 34 35 36 37 38 39 40 41 42 43 44 45 46 47 48 49 50 51 |
<?xml version="1.0" encoding="utf-8"?> <tool version="1"> <description name="Currency Conversion GBP - Euro" icon="view" version="1"> Currency Conversion GBP - Euro This script connects to an external web service to return a currency conversion rate, then converts the inputted value from GBP to Euro </description> <author name="Jonathan Medd" url="http://jonathanmedd.net" twitter="jonathanmedd" img="JonathanMedd.jpg" /> <tags> <tag>Currency Conversion</tag> </tags> <ui> <output displaytype="Grid" /> <block> <control type="text" id="value" label="Amount of Pounds to Convert to Euros"> <multiline>false</multiline> <maxlength>1024</maxlength> <width>250</width> </control> </block> </ui> <script type="PowerShell"> <![CDATA[ Function ConvertTo-GBPEuro { param ([int]$Pounds) $Currency = New-WebServiceProxy -Uri http://www.webservicex.net/CurrencyConvertor.asmx?WSDL $GBPEURConversionRate = $Currency.ConversionRate('GBP','EUR') $Euros = $Pounds * $GBPEURConversionRate #Write-Host "$Pounds British Pounds convert to $Euros Euros" $progress.RowValue('Pounds', $Pounds); $progress.RowValue('Euros', $Euros); $progress.RowFinish() } ConvertTo-GBPEuro $value $progress.TableFinish() $progress.Success = $true ]]> </script> <signature /> </tool> |
The first part of the XML file comprises data that will be displayed in SQL Scripts Manager. <description> contains information about the script, and is followed by some author details within <author>. The <tag> section enables you to tag scripts with keywords, and then in <ui> you specify how the user interface is to be presented. In this case, the output will be in a grid format and we will display an input box to allow the user to enter how many pounds they wish to convert. Finally, the <script> is set to type = PowerShell, and the PowerShell script follows.
Note: There is an add-on tool available, SQL Scripts Manager’s Script Generator, which will help you generate the XML file via a GUI based tool rather than needing to do this manually. More information can be found in the Simple Talk article Fast and Free; SQL Scripts Manager’s Script Generator.
Once you have created the XML, copy it to C:\ProgramData\Red Gate\SQL Scripts Manager along with the author image if you have specified one. Then open SQL Scripts Manager to view available scripts. You can find your script either by the tag you have set or by the author. Figure 24 shows the Currency Conversion GBP – Euro script having been tagged as Currency Conversion.
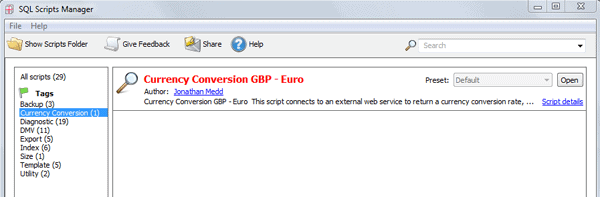
Figure 24. Viewing the Currency Conversion GBP – Euro script in SQL Scripts Manager
From here it is possible to view the script details to get a better idea of what it does. Figure 25 shows the extended description when the Script details link has been clicked.
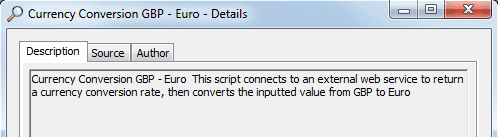
Figure 25. Viewing the extended description of the Currency Conversion GBP – Euro script
The Source tab displays the Script section from the XML file (Figure 26).
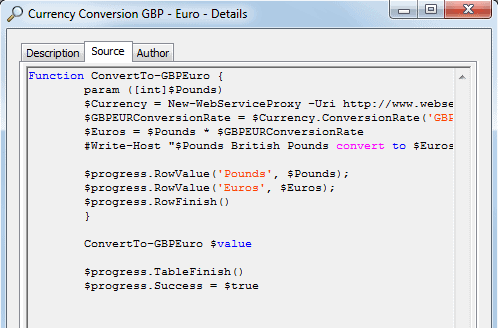
Figure 26. Viewing the source of the Currency Conversion GBP – Euro script
Finally, the Author tab displays author information from the XML file, so a great way for users to be able to feedback to the author of the script (Figure 27).
Tip: As previously mentioned, to have a photo displayed, copy an image file to the same folder as the XML files, C:\ProgramData\Red Gate\SQL Scripts Manager and reference it in the XML file.)
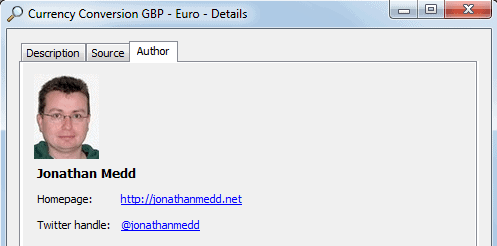
Figure 27. Viewing the author information of the Currency Conversion GBP – Euro script
OK, so now you have seen the information about the script, it’s time to actually run it. Back in the SQL Scripts Manager main window, click Open, and you will see the form presented to the user requiring some input, and buttons at the bottom for viewing the script and running it (Figure 28).
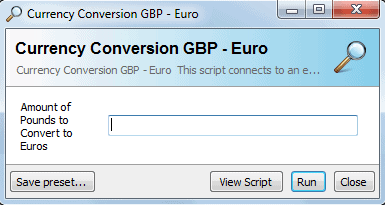
Figure 28. Opening the Currency Conversion GBP – Euro script
Let’s enter 10 as a value to convert, and then run the script. While the script is running we are presented with the dialogue box shown in Figure 29.
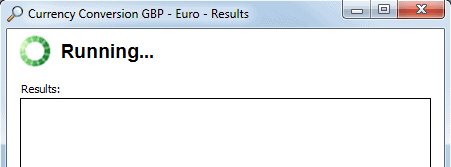
Figure 29. Running the Currency Conversion GBP – Euro script
Once complete, we are presented with results in the grid format that we specified in the XML file (Figure 30).
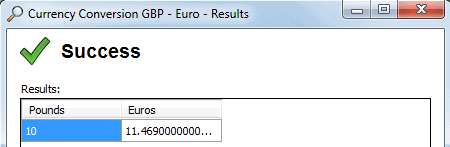
Figure 30. Results of the Currency Conversion GBP – Euro script
With SQL Scripts Manager tool, you have seen how it is very straightforward to create GUIs for your scripts and also have a tool for managing them in one area. I highly recommend checking out SQL Scripts Manager XML Schema and looking at examples of the $progress object to get up to speed with this tool quickly.
Another Possible Approach
The three tools discussed in this article are graphical tools to create graphical front ends for scripts. However, there are other alternatives for those wishing to write the actual code to create the interface. This is beyond the scope of this article, but it is worth being aware of as an alternative.
The ShowUI project is a PowerShell module merging two previous Windows Presentation Foundation PowerShell projects; PowerBoots from PowerShell MVP Joel Bennett, and WPK from James Brundage of Start-Automating.
Described on http://showui.codeplex.com as “a PowerShell module to help build WPF [Windows Presentation Foundation] user interfaces in script. ShowUI makes the complicated world of WPF easy to use in PowerShell. You can use ShowUI to write simple WPF gadgets, quick front ends for your scripts, components, and full applications.”
Summary
In this article, we have considered three tools for creating graphical front ends for your PowerShell scripts: Quest’s PowerGUI Pro 3.0, Sapiens’ Primal Forms 2011, and Red Gate’s SQL Scripts Manager, all of which take completely different approaches to this task. We’ve also mentioned a fourth approach, ShowUI. If you have a need to present PowerShell script based solutions to users without giving them a PowerShell console, they are all approaches that are well worth considering. Each tool provides a very simple way to effectively achieve this and I recommend that you check out all of them to discover which best meets your needs.
Load comments