
I have published videos and articles before about Lakehouse maintenance. In this article I want to address a missing point for a lot of Fabric administrators: How to do maintenance on multiple lakehouses that are located in different workspaces.
One of the videos I have published explains the maintenance of multiple lakehouses, but only addresses maintenance in a single workspace. Is it a good idea to keep multiple lakehouses in the same workspace? Probably not.
The main maintenance tasks you would generally execute on Lakehouses are VACUUM and OPTIMIZE. I already went in details about them on the videos and articles linked below.
In the future, depending on Microsoft Fabric advances on the enterprise, many more maintenance tasks may also become needed.
Notebooks can’t be used for this maintenance because of one principle of the technology at the moment:
Notebooks can’t loop through lakehouses in different workspaces
This principle was explained on the article ”SQL Endpoints and Lakehouse UI Differences and Access Secrets”
Keep in mind I’m not talking about cross-lakehouse queries, which end up linking lakehouses. This is a subject of another video.
I’m talking about making a simple loop through multiple independent lakehouses executing a maintenance task.
Some creative solutions could be built, like making mounts in notebook code (we will talk about mounts later in this article), or directly accessing the Power BI API, but these would be very “low level” solutions or something like trying to fit a square in the hole for a circle.
Hence in this article I am going to discuss how to use a Spark Job to do these maintenance tasks across different workspaces. For reference, here is a comparison of some of the characteristics of Notebooks and Spark Jobs:
|
Notebooks |
Spark Jobs |
|
Can be developed in the portal |
We can’t edit the code in the portal |
|
Ipynb extension |
Can use .py , .jar or .r |
|
Can contain multiple languages in the same notebook, on different code blocks |
A file uses a single language |
|
Can be edited in VS Code |
Can be edited in VS Code |
|
Uses a pre-defined session |
Don’t have a pre-defined session |
|
It is tied with a single workspace (the one of the default lakehouse) |
It can access lakehouses in multiple workspaces |
It’s not possible (at least not yet) convert a notebook to a Spark Job or vice versa.
If you aren’t yet familiar with maintenance in Fabric, Some articles I already published about common maintenance needs
- About OPTIMIZE and V-ORDER: https://www.red-gate.com/simple-talk/blogs/microsoft-fabric-checking-and-fixing-tables-v-order-optimization/
- About VACUUM: https://www.red-gate.com/simple-talk/blogs/microsoft-fabric-and-the-delta-tables-secrets/
As well as some videos I already published about common maintenance needs:
- About Optimize and V-ORDER: https://www.youtube.com/watch?v=HwhPZrHpMWU
- About VACUUM: https://www.youtube.com/watch?v=BluZJxfwfCM
- Maintenance on a single workspace: https://www.youtube.com/watch?v=See6XZ-vx0s
The best solution for multiple lakehouse management is to use Spark Job Definitions, and I will show you how to use these in this article.
Creating a Spark Job
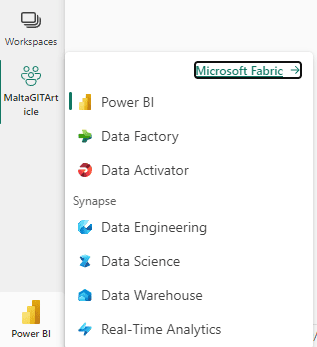
Spark Jobs are available for creation on the Data Engineering experience, in the same way as notebooks.
In order to reach Data Engineering Experience, use the button on the bottom left of the window. When you click it, you see the available experiences for you.
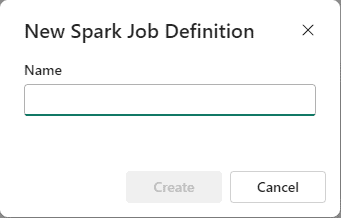
We select the option to create a new one and provide a name.

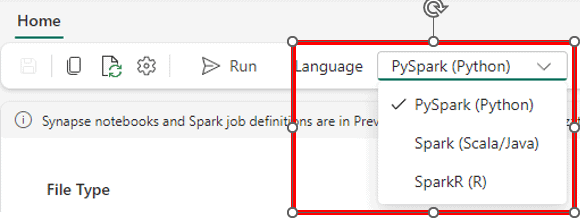
Selecting the Language
Once we open the spark job just created, we have the option to select the language to use on the top bar of the window.
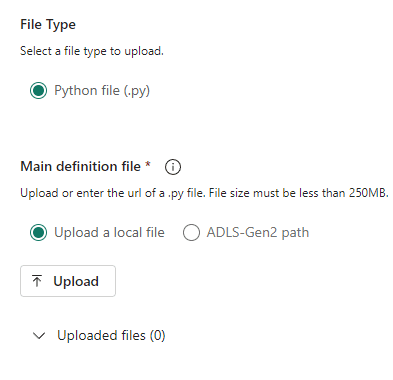
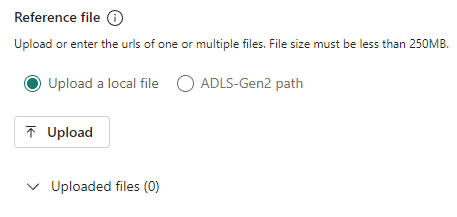
Uploading the Code
We can’t develop a spark job on the portal, but we have the option to upload it as a file. The type of the file we can upload changes according to the language we choose.
It’s also possible to point to a file in a storage account on Azure.
We don’t need to develop the entire code in a single file. If we break the code between multiple files, the additional files can also be included in a separated option, as reference files.
Spark Jobs and Multiple Lakehouses
Spark Jobs allow us to link them with multiple lakehouses. We can choose lakehouses from different workspaces without any problem.
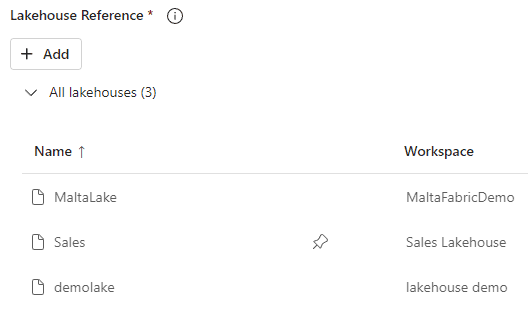
One of the linked lakehouses is chose as the default lakehouse. All the other ones are included as spark properties with their address as the property value.
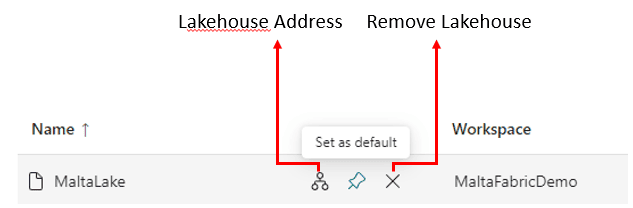
Beside each lakehouse there is a hidden menu with 3 buttons which only appear when we hover the mouse over a lakehouse. We have the option to change the default lakehouse, check the lakehouse address or remove the lakehouse from the spark job.
Spark Job, Default Lakehouse and the Mount Concept
The default lakehouse is automatically mounted for the Spark Job. This means the default lakehouse is accessible as a file path in the operating system while the job is in execution.
This is the concept of mounting a lakehouse: once we have the lakehouse address, we can mount it, making it accessible with a file path.
This brings to us a process we can use for the maintenance job: The lakehouse addresses are stored as spark properties. We can loop through them, mount each one of the lakehouses and execute the maintenance work.
Spark Job and the Session
Unlike notebooks, the Spark Job doesn’t use a pre-defined session. This means the session doesn’t come automatically as it does for the notebook, it needs to be created and configured in the way we would like.
The following code is used to create the session:
|
1 2 3 4 |
from pyspark.sql import SparkSession spark = SparkSession.builder \ .appName("maintenance") \ .getOrCreate() |
On this example, “maintenance” is the name defined for the app. In most cases, it doesn’t matter at all, you can use any name.
Looping through Spark Properties
We need to loop through the Spark properties to retrieve the lakehouses names and addresses.
The first step is to retrieve the set of properties. We can do this with the following statements:
|
1 2 |
conf=spark.sparkContext.getConf() for p in conf.getAll(): |
Each property returned on the variable “p” is an array with two values: The name and the value of the property.
It requires some testing for us to discover the difference between the lakehouses properties and the additional Spark properties. A simple print of the property names can help:
|
1 2 3 |
conf=spark.sparkContext.getConf() for p in conf.getAll(): print(p[0]) |
After executing and checking the log (We will go in more detail later in the article) we can notice the property values on the image below:
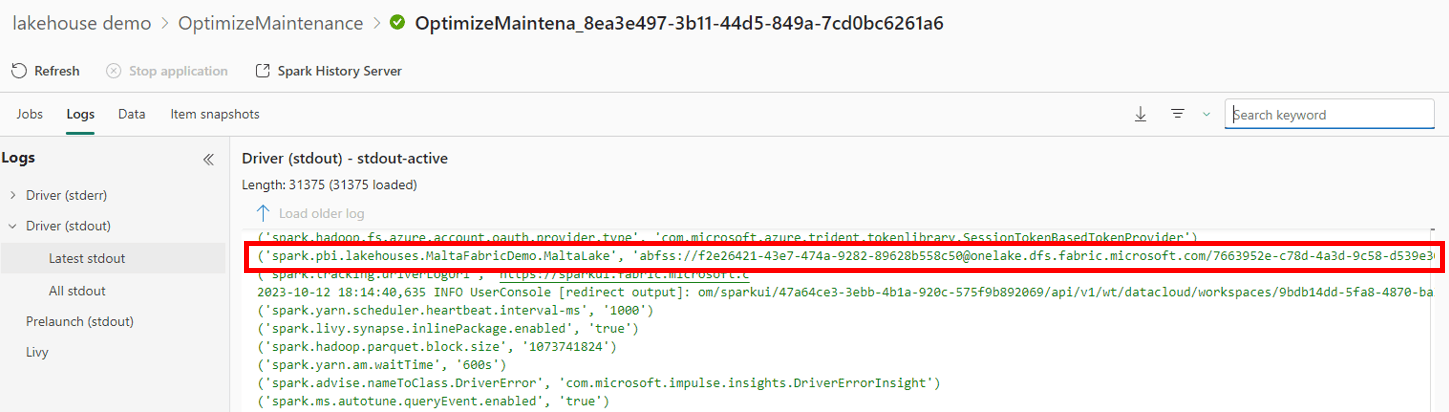
The lakehouse properties always start with “Spark.PBI” and the last part of the property name (after the last “.”) is the name of the lakehouse. This is the information we need to complete the code.
Using this information, we can build a function which will return an array of properties with the lakehouse name and their address
|
1 2 3 4 5 6 7 |
def listlakes(): lakehouse_list = [] conf=spark.sparkContext.getConf() for p in conf.getAll(): if (p[0].startswith("spark.pbi")): lakehouse_list.append({"name":p[0].rsplit('.')[-1], "value": p[1]}) return lakehouse_list |
Additional details about this code:
- We are generating an array as a result
- We use the function startswith to filter the properties
- Each array element is a composed JSON object with properties name and value
- We use rsplit function to extract the name of the lakehouse
- The index -1 on the resulting array return the first element from the last array item.
Mounting the Lakehouses
In order to access the lakehouse to do the maintenance, we need to mount the lakehouse. In this section I will describe how the mount process needs to happen and then see how the code will be.
This process is done using a library called mssparkutils. We need to add the import to this library.
|
1 |
from notebookutils import mssparkutils |
The first steps are to call the function to list the lakehouses and make a loop through the result.
Inside the loop, we need to define a name for the mount, which can be the name of the lake, starting with “/” to mark its position on the file system.
Finally, we can mount the lake, using the name and the address retrieved together the spark properties.
Once the mount is complete, we can call another function cleanlake. We haven’t built this function yet. It will be responsible to loop through the lake tables and execute the maintenance.
The cleanlake function will need the system path for the lake. The system path for the lake needs to start with “file://” and we can use one of the mssparkutils functions to retrieve it correctly. It’s also important to notice the lake has “Files” and “Tables” and we are trying to access the “Tables”. We need to add “Tables” to the path.
The code ends up in this way:
|
1 2 3 4 5 6 7 |
lakes=listlakes() for l in lakes: mountname="/" + l["name"] mssparkutils.fs.mount(l["value"],mountname) mountpath="file://" + mssparkutils.fs.getMountPath(mountname) cleanLakehouse(mountpath + "/Tables") |
Looping through the lakehouse tables: Cleanlake function
This function will already receive the path for the mounted lakehouse. We need to loop through this path to get a table list.
Instead of using regular OS library, we will be using the msspartutils library to list the folders. The result is slightly different, resulting in an object for each folder.
For each table, we need to call the function cleantable. We haven’t built it yet, if will be responsible for the maintenance of each table.
This is the code of the cleanlake function:
|
1 2 3 4 |
def cleanLakehouse(lakepath): full_tables = mssparkutils.fs.ls(lakepath) for table in full_tables: cleanTables(lakepath + '/' + table.name) |
Table Maintenance: The CleanTable function
We have the path for the table. On our example, we will be executing the VACUUM and OPTIMIZE. We need to adapt the syntax to work with folder path.
The code is basically the execution of both statements and a PRINT.
|
1 2 3 4 5 6 |
def cleanTables(delta_file_path): spark.sql(f'OPTIMIZE \'{delta_file_path}\' VORDER') spark.sql(f'VACUUM \'{delta_file_path}\' RETAIN 0 HOURS'); print(f'\nTable {delta_file_path} OPTIMIZE and VACUUM sucessfully') |
Additional missing points
- We need to configure the property spark.databricks.delta.retentionDurationCheck.enabled to allow the VACUUM retention to be 0 or use another valid retention.
- The default lakehouse is already mounted. We need to call the function cleanlake once for the default lakehouse before the loop through the other ones.
You can find these two additional details on the final code included below.
Final Code
This is the following code is the code that we have built and will be used to clean up the table in our multiple lakehouses.
You can save this code locally with any filename using the .PY extension. What’s important is upload the file with this code as the main definition file, as explained on the section Uploading the Code
|
1 2 3 4 5 6 7 8 9 10 11 12 13 14 15 16 17 18 19 20 21 22 23 24 25 26 27 28 29 30 31 32 33 34 35 36 |
from pyspark.sql import SparkSession from notebookutils import mssparkutils def listlakes(): lakehouse_list = [] conf=spark.sparkContext.getConf() for p in conf.getAll(): if (p[0].startswith("spark.pbi")): lakehouse_list.append ({"name":p[0].rsplit('.')[-1], "value": p[1]}) return lakehouse_list def cleanLakehouse(lakepath): full_tables = mssparkutils.fs.ls(lakepath) for table in full_tables: cleanTables(lakepath + '/' + table.name) def cleanTables(delta_file_path): spark.sql(f'OPTIMIZE \'{delta_file_path}\' VORDER') spark.sql(f'VACUUM \'{delta_file_path}\' RETAIN 0 HOURS'); print(f'\nTable {delta_file_path} OPTIMIZE and VACUUM sucessfully') spark = SparkSession.builder \ .appName("maintenance") \ .getOrCreate() spark.conf.set ("spark.databricks.delta.retentionDurationCheck.enabled", "false") cleanLakehouse('Tables') lakes=listlakes() for l in lakes: mountname="/" + l["name"] mssparkutils.fs.mount(l["value"],mountname) mountpath="file://" + mssparkutils.fs.getMountPath(mountname) cleanLakehouse(mountpath + "/Tables") |
Executing the Spark Job
After uploading the code files correctly, as explained on the section Uploading the Code, we can execute the spark job to test the execution. It’s simple: just click Run button on the top bar on the Spark Job.

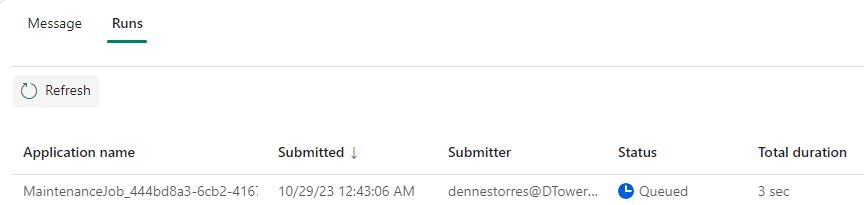
Once we start the execution, we can select the Run tab on the lower side on the screen and click the Refresh button to see the status of the most recent execution.
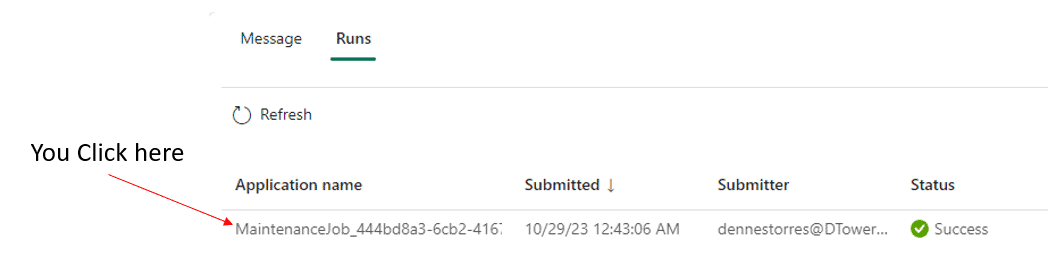
Once the execution completes, either with success or failure, you can click the Application Name column to check the details of the execution.
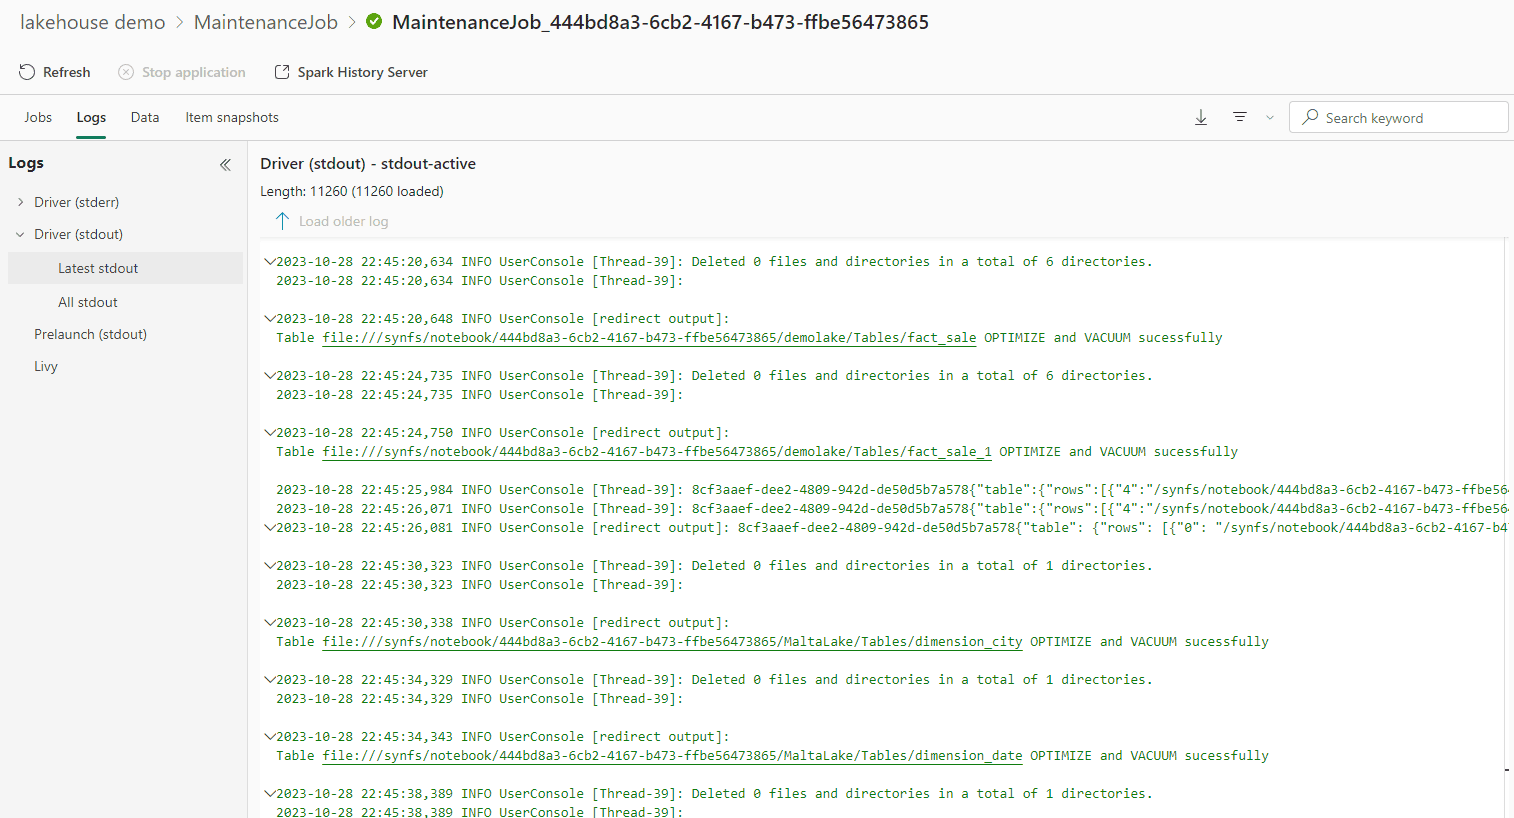
The log of the execution is very detailed. The first place I check is the Logs tab, Driver (stdout) tree item -> Latest StdOut
On our example, the expected result are the prints with successful VACUUM and OPTIMIZE executions in different lakehouses, like on the image below.
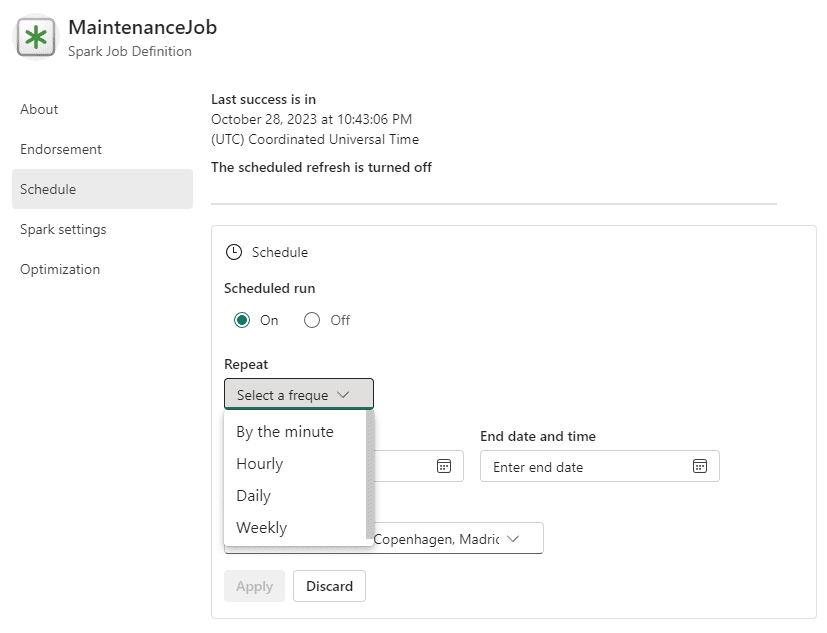
Scheduling the Spark Job
Once the execution is successful, we can use the Settings button on the top Spark Job tab to schedule its execution.

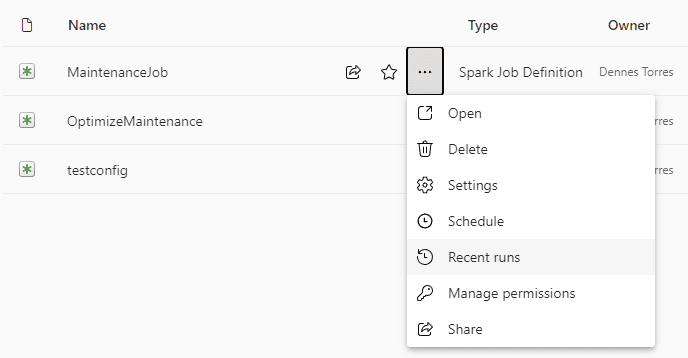
On the workspace, outside the Spark Job, we can use the context menu item Recent Runs to check the recent executions of the job and follow its success or failures.
Summary
The development of a Spark Job is different than a notebook, but we can use it to make executions across multiple lakehouses in any workspace.
This becomes fundamental in an enterprise environment to allow a single centralized team to ensure all lakehouses in the portal receive the same basic maintenance defined on Enterprise level.
In the future, more maintenance needs will likely become common, and the Spark Jobs will become the base for their execution. For example:
- Document the existing lakehouses in the company and their structure
- Check for broken shortcuts on the lakehouses
- Enforce enterprise wide standards
This document contains proprietary information and is protected by copyright law.
Copyright © 2026 Red Gate Software Limited. All rights reserved


Load comments