
The series so far:
- ASP.NET Core with GitOps: Dockerizing an API on AWS EC2
- ASP.NET Core with GitOps: Deploying Infrastructure as Code
- ASP.NET Core with GitOps: Orchestrating Your Containers with Kubernetes
Imagine the following scenario: you have an API developed in ASP.NET, that serves a large number of requests every day. Performing updates on it can be tricky: you want to minimize the time that your server is inaccessible since even a couple of minutes of maintenance could frustrate your clients. You also want to reduce the risk of your developers making mistakes that result in downtime, such as forgetting to copy the development server settings to the production one, and you want to be able to deploy your application anywhere.
This series will guide you through the solution to this problem:
- Containerizing your API with Docker, so it is always running on a machine with fresh settings;
- Creating a Kubernetes cluster and deploying multiple instances of your API behind a load balancer, so the server’s downtime is kept to a minimum;
- Performing rolling updates on your API, so your clients do not have to experience issues every time you need to deploy a new version;
- Building a CI/CD (Continuous Integration/Continuous Deployment) pipeline that updates your application on all instances, every time you push something to your master branch in Git;
All these will be done by following the GitOps principles – using the Git repository as the single source of truth for both the application and the infrastructure that creates the Kubernetes deployment.
Choosing the Right Platform?
This series covers a subject under the “cloud” umbrella, so it is natural to ask yourself which platform you should use to build a Kubernetes cluster: Google Cloud Platform, Amazon Web Services or Microsoft Azure?
Covering all three of them in one series would be too confusing, and it would not benefit many people: after all, you are only going to use one of them. Of course, picking the right one should be one of the first steps for your organization, and you should consider aspects like pricing, support and future expansion. You can find an in-depth comparison of the three platforms’ implementation of the Kubernetes service here.
The present series will follow the process using AWS. If you are already set on using Azure or GCP, then this will probably not be very valuable to you. But if you are just learning about Docker, Kubernetes and GitOps, this series will help you understand the underlying process, and you will be able to replicate it on other platforms too.
First Step: Creating the Dockerized Application Manually
This first article will look into creating a server on Amazon Web Services (AWS) and running the ASP.NET Core application inside the Docker container. This process will be handled manually in the beginning in order to understand each step and be able to replicate it in an automatic setup.
To follow this tutorial, you need:
- An AWS account – which you can create here;
- A Docker Hub account – which you can create here;
- A little bit of Linux experience;
- Some .NET expertise, if you want to build your own application; however, a sample one will be provided, and no changes need to be made;
Setting up the EC2 instance
Once logged into AWS Management Console, search for EC2 in the Find Services box, and click on the first option:

EC2 (Elastic Compute Cloud) is a service used to launch virtual servers with customizable options when it comes to memory, vCPUs, storage type, etc., and that you can use to host your web applications – in this case, an ASP.NET Core Web API.
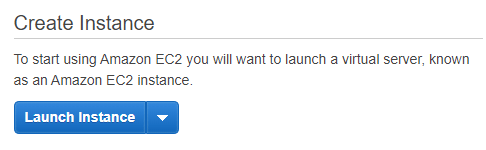
Inside EC2, press the Launch Instance button that appears on the first page:
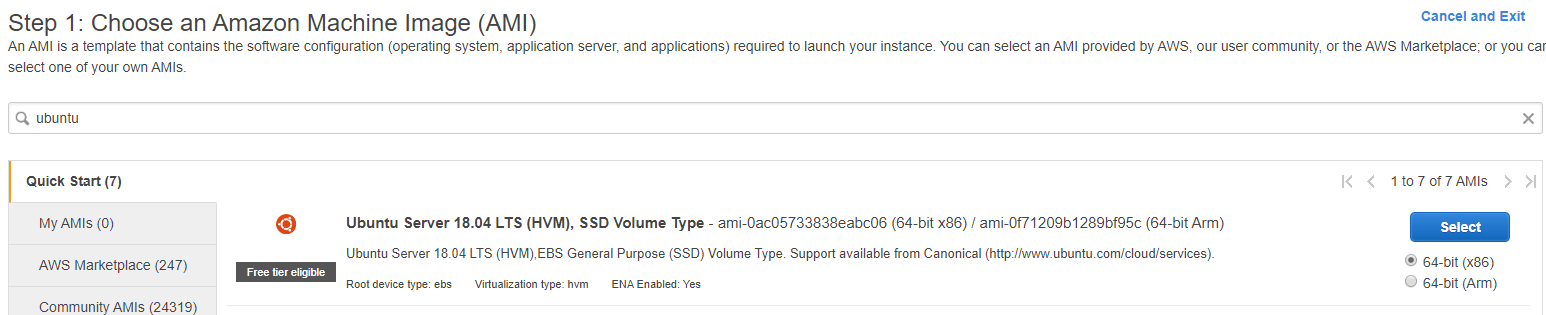
The first step for creating an instance is to choose the machine image; for this tutorial, type Ubuntu into the search box and pick the first option that appears:
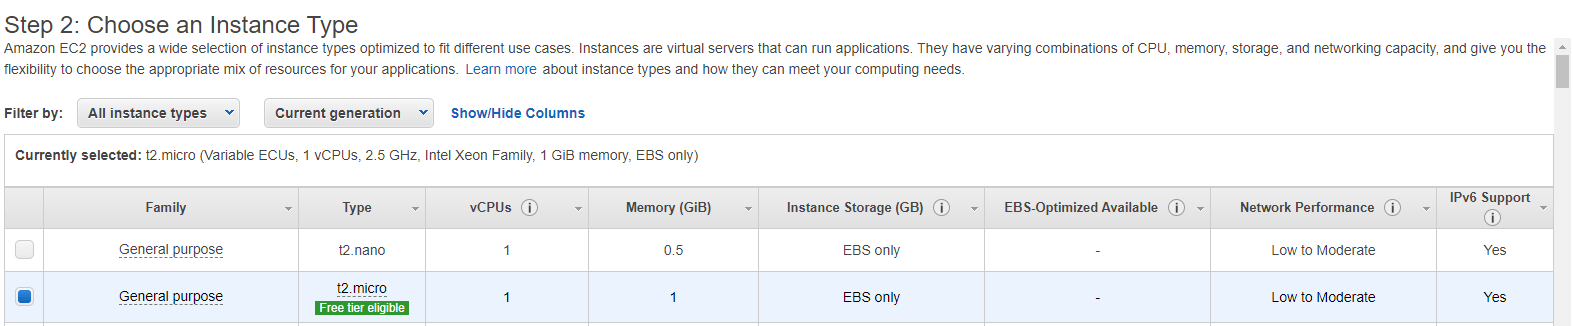
The second step is about choosing the instance type; this controls the storage type, vCPUs number, memory and other properties. For this tutorial, keep the default of t2.micro, since you can run it on the free tier.
Press the Review and Launch button at the bottom of the page, and then the Launch button again.
The final step is creating a key pair that allows you to securely connect to the server through SSH, which is how you are going to run bash commands on the instance. Select Create a new key pair and choose a name for the key pair, download the file and make sure to not lose it, as you will not be able to connect to the server without it. Then press the Launch Instances button.

It might take a couple of minutes for the instance to be created; meanwhile, you can click View Instances. Once you see the list of instances, click the Name column and choose an appropriate name for the instance, as to not confuse it with others. Once the Instance State column value is running, you can press the Connect button.

The small window that appears shows a guide on how to connect to the instance through different methods. If you are using Linux or macOS, you can do it through Bash; on Windows, you have two options: using PuTTY or installing Ubuntu Bash – I am using the second option throughout the series.
To connect, copy the command shown under Example and paste it in Bash; it will look similar to this, but you will need to include the path to the file if it’s not in the current directory:
|
1 |
ssh -i "dotnet-docker-keypair.pem" ubuntu@ec2-3-120-98-108.eu-central-1.compute.amazonaws.com |
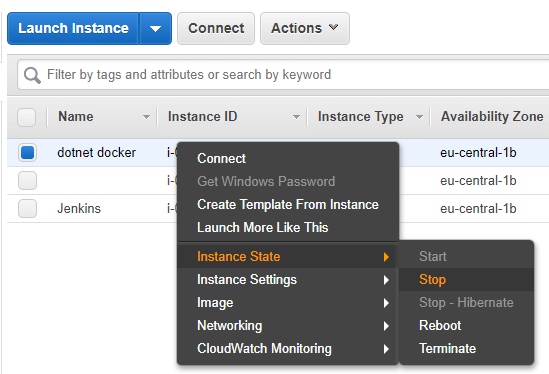
Tip: If you are taking breaks while following the series, do not leave the instance running for long periods of time, since you have a limited amount of running time on your free AWS tier. You can right click on the instance and select Instance State Stop, and then Start it again when you continue working.
Cloning and Understanding the Sample API
Once inside the instance, it is time to get the API code and set up the Docker container. You can get the sample application made for this tutorial by running:
|
1 2 |
git clone https://github.com/Mirch/docker-dotnet-api.git cd docker-dotnet-api/ |
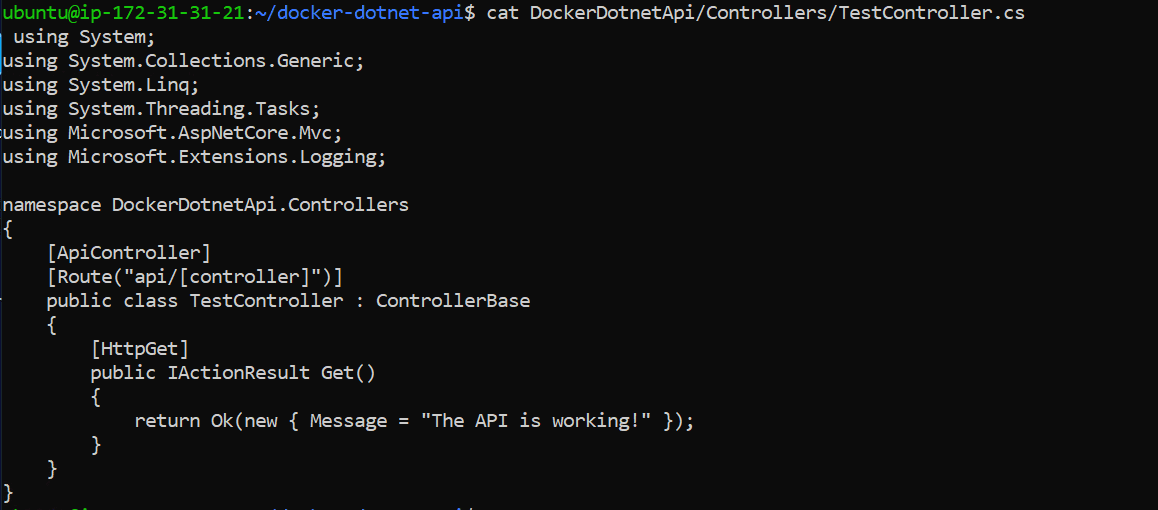
This repository includes a solution with an ASP.NET Core WebAPI project, as well as a Dockerfile that will be used to build the Docker image. The API contains a single endpoint, which can be called as verification that everything is working as expected. To check the endpoint, run the following command:
|
1 |
cat DockerDotnetApi/Controllers/TestController.cs |
You should see something like the figure below:
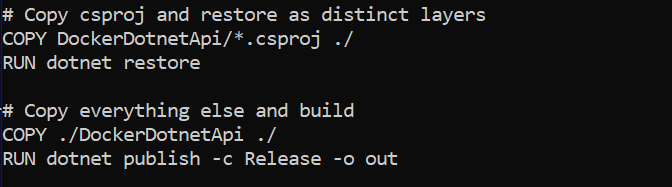
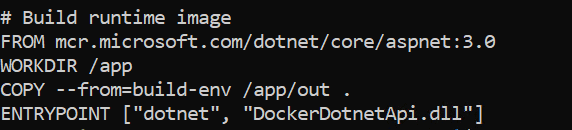
The other part of the project is the Dockerfile; you can read it by running:
|
1 |
cat Dockerfile |
This contains the steps to build, publish and run the API inside the Docker container; it’s easier to understanding by breaking it down. The first line, shown below, clones the official .NET Docker image for the .NET Core 3.0 SDK and sets the work directory to /app; this image is used to build the project.

Next up, the project files are copied from the main directory to the /app directory that was just created, and then the application is published by running dotnet publish. This has the result you would expect when running this command in any environment – the application and its dependencies are compiled and deployed into a folder. In this case, the main artefact will be a .dll file, which is placed in the /out/ folder.
Finally, the ASP.NET Core runtime image is cloned – this is needed to run the application, as opposed to the SDK image that was previously used to build it. The work directory is set again to /app, the published artefacts are copied from the build-env image, and the image’s entry point is set to run the .dll.
Running the Docker Image
Before being able to start the Docker container, the docker.io package needs to be installed on the machine:
|
1 2 |
sudo apt update sudo apt install docker.io |
After this, building the Docker image containing the API is done by running the following command:
|
1 |
sudo docker build -t {username}/dotnet-api . |
The image’s tag is set to {username}/dotnet-api, but you can change it to whatever name you want, as long as it is preceded by your Docker Hub account name. Tagging the image is essential, as this will be later used to push it. The output of the command should show all the steps that were described in the Dockerfile – in this case, ten total steps, with the final one being the ENTRYPOINT command.

And finally, running the Docker image is created with the following command:
|
1 |
sudo docker run -d -p 80:80 {username}/dotnet-api |
The command specifies the image that needs to run, while the -p (port) parameter maps port 80 of the Docker host (the Ubuntu instance) to the container’s port 80 (the API).
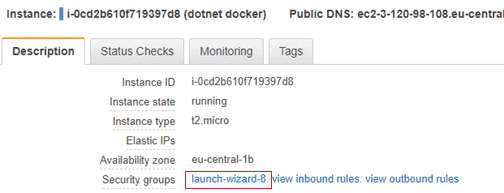
Now the API can be accessed through the instance’s IP/DNS on port 80. You can see the DNS by going back to EC2 and clicking on the instance:

To access the single endpoint of the API, run a browser and connect while appending /api/test/ to the DNS. However, doing this does not return the expected result – instead, the application does not seem to be running. This is because port 80 is not open on this instance. To fix this, click the Security group of the instance and click launch-wizard.
Then select Inbound. Click the Edit button and add HTTP to the list:
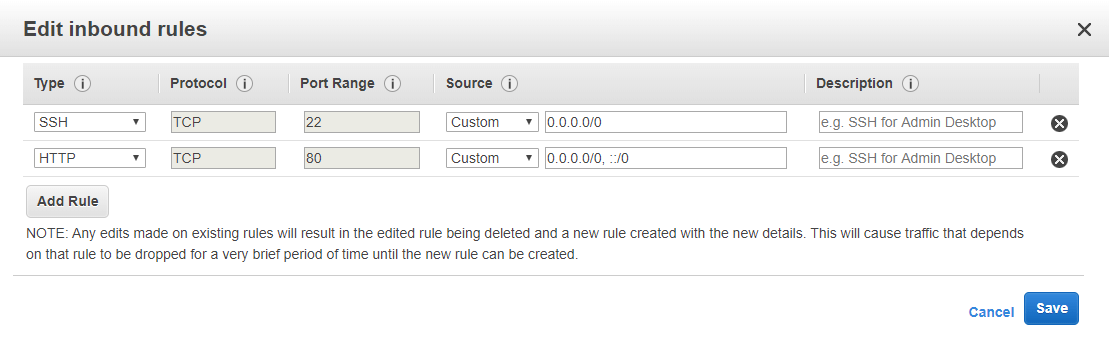
Click the Save button and then try accessing the endpoint again. The following message should be returned:

What about .NET?
As you can notice, installing .NET Core on the Ubuntu server was not necessary during the process: everything happened inside the container. This is one of the main problems solved by Docker, as well as Infrastructure as Code (as you will see in later tutorials); your infrastructure and machine settings are all defined by code, and they can be deployed anywhere without any need for additional setup. This reduces the risk of situations like “this worked in the development environment, but it breaks in production” from happening since there is no manual interference when it comes to setting up the servers.
Pushing the Image to Docker Hub
As mentioned at the beginning of the article, the purpose of the series is to be able to deploy a Kubernetes cluster consisting of Docker images of the API. Up to this point, you managed to manually build the Docker image and serve the API through it, on the EC2 instance. However, if you need to deploy the image to multiple instances (3, 10 or 100), this process would create some difficulties: you would have to pull the Github repository, build the Docker image, and then run it for each instance – every time the application is updated.
Instead, it is possible to build the image once, push it to a remote hub, and then pull the image and run it from any machine. One of the services that allows you to do that is Docker Hub.
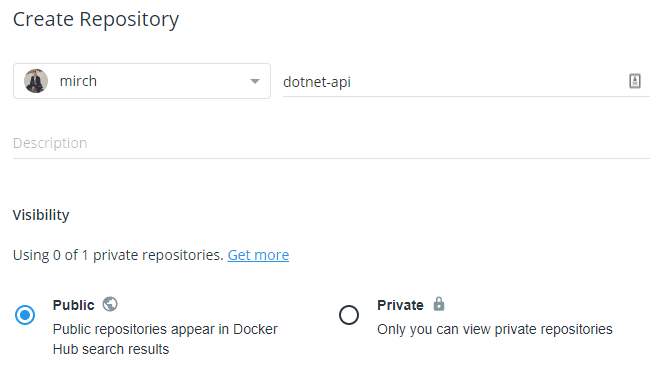
Once you sign in to Docker Hub, click Repositories and then press the Create Repository button from the main dashboard:

Select a name – make sure it is the same as the local image you created – and the Public option; you can also link a GitHub or Bitbucket repository, so that you get a new Docker image with each push to the git repository (this is not part of this tutorial, but it is an option for building your CI/CD pipeline). Finally, press the Create button at the bottom of the page.
On the right side of the new page, you can see the command that you can use to push to the repository; it should look similar to this:
|
1 |
docker push mirch/dotnet-api:tagname |
Going back to Bash, you now need to login to Docker Hub through the command line, and then push the image, which can be done with the following commands:
|
1 2 |
sudo docker login sudo docker push docker.io/{username}/dotnet-api:latest |
The image is now uploaded to Docker Hub, and can be pulled on any other machine by running:
|
1 2 |
docker login docker pull docker.io/{username}/dotnet-api:latest |
To view the images that you have pulled on your machine, you can run:
|
1 |
docker image ls |
Cleaning Up
This first tutorial was a demonstration of how you can build a Docker image that runs your ASP.NET Core Web API; however, in future tutorials, this process will be automated, so you can stop Docker from running on this instance. To do this, you first need to retrieve the container ID by running:
|
1 |
sudo docker container ls |
The first column should be an ID, similar to this: e8000f918764. You can run the following commands to stop and remove the container:
|
1 2 |
sudo docker container stop {container ID} sudo docker container rm {container ID} |
If you are not planning to use this EC2 instance for anything else, you can stop or terminate it, as described earlier in this tutorial. Otherwise, you can keep it as a “workspace” for the rest of the series, if you prefer that to using your personal computer.
What is Next?
Now that you have a Docker image that you can pull and run anywhere, it is time to automate the creation of your instance, as well as getting the image up and running on it. In the next tutorial, you will learn how to write Infrastructure as Code (IaC) and start a server running your Docker image by using a single command.
Load comments