
Part of the power of Visual Studio lies in the many templates it offers when you are about to start a new project. Just as every journey begins with a small step, any software project, regardless of the final size, begins with a new project. For ASP.NET MVC in particular, what would be the ideal content for a default project template?
Every new version of ASP.NET MVC comes with some new templates; and project templates also exist online both as Visual Studio pluggable templates and as starter kits. My feeling is that a starter may contain some good code but is aimed at starting you up on something specific. I feel the same about project templates which are not as complete as starter kits but still tend to offer some scaffolding to meet specific capabilities.
Project templates and starter kits are not the same thing; I tend to prefer project templates because, most of the time, I just need a template of an application that I can flesh out my own way. With starter kits, a lot of decisions are, anyway, made by the author; if you don’t like some part, then unpicking it can be as hard as starting from scratch.
In this article, I have aimed at building a project template. More exactly, I’ll discuss the custom project template I use for my own ASP.NET MVC projects as a replacement for the one that comes with ASP.NET MVC. (See Figure 1.)
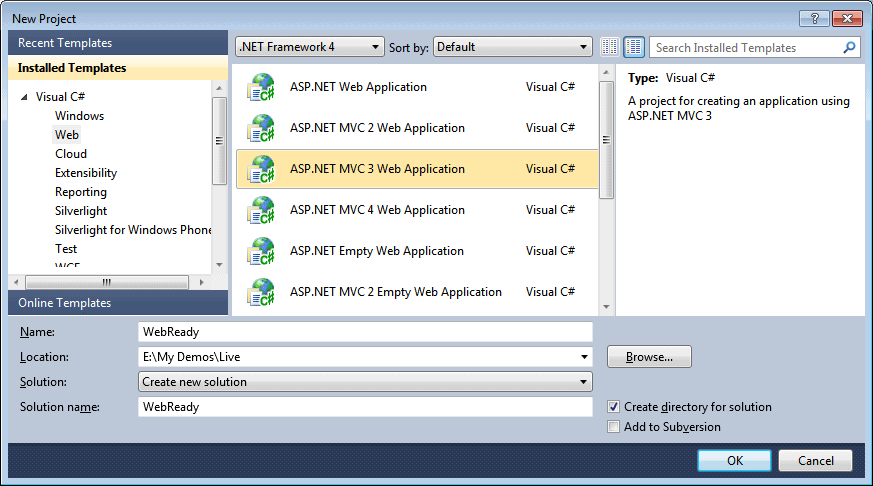
Figure 1: The ASP.NET MVC default (and only) project template.
The sample project template that goes with this article illustrates a few patterns and practices that I heartily recommend. More importantly, it provides both the scaffolding and a ready-to-use infrastructure that then just needs to be extended. I’ll focus on three main areas-resources and localization, view models, and worker services within controllers.
Resources and Localization
Although not all web sites initially need be localized, it may eventually cost you a lot of time and some annoying work if you have an infrastructure that is not easy to localize. On the other hand, planning an application to be international from day one requires some extra work and a particular mindset. I discovered from experience that, by having a template that not only gives RESX scaffolding but also uses literals from resources even in mock views (e.g., index and about) helps to promote and demonstrate the advantages of having clean, well-written, code where literals are kept entirely separate from code.
The sample project template, WebReady, contains a Resources folder where you will find a Literals.resx file. (See Figure 2.)
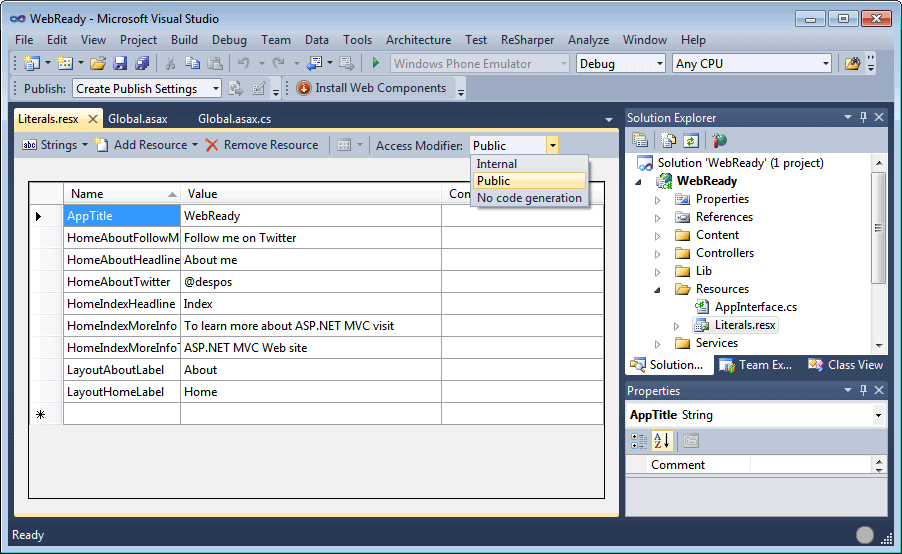
Figure 2: Resources in the sample WebReady template.
In .NET applications, the appropriate RESX files are automatically picked up on the basis of the locale set on the current thread. In .NET, you have two properties to control localization: Culture and UICulture. The former relates to the selection of date and currency formats; the latter relates to UI elements and RESX files. The two properties may be set to different values. The Literals.resx contains literals for the neutral default language. You can add new files with a locale-specific extension to add support for more languages. For example, you add Literals.it-it.resx for Italian literals.
You can add resources as separate assemblies and add new localizations on the fly by simply dropping a new DLL to the Bin folder on the production server. This works well if your application picks up a language programmatically (browser settings, system settings, geolocation) and configures the current thread accordingly. It could be that you wish your installed application to support just one language, but that language may be changed during setup. In this case, you’ll need to have resources compiled as a separate assembly, but there’s then no need to ensure that multiple resource files can live side by side.
In a nutshell, an effective strategy for localization may require more up-front work and analysis but having proper RESX files laid out and referenced from UI and code provides a very flexible solution. Here’s how you use RESX-based literals in view markup:
|
1 2 3 4 |
@using WebReady.Resources; <div id="title"""> <h1>@Literals.AppTitle</h1> </div> |
It is not really different in plain code:
|
1 |
var title = Literals.AppTitle; |
A couple of more points about this: The sample template puts all literals in a single file, and uses a naming convention to quickly locate strings based on how and where they are used. I use the App prefix for application global strings and the [Controller][Action] prefix for view specific strings. By having a common prefix to all literal names you are guaranteed to find them grouped closely when you edit the RESX file in Visual Studio. When too many strings are being used, you can easily split them to several, even view-specific, files. The distinction between global and local resources makes little sense in ASP.NET MVC and requires tricks to make it work due to the internal organization of the framework-just don’t use it.
Finally, you should set the ‘access modifier‘ of the RESX file to ‘public‘ as in Figure 2. The default value of ‘internal‘ correctly reflects the principle of keep private features of the application hidden from external assemblies, but it clashes with the organization of ASP.NET code; in the end, an internal modifier just seems out of place. The internal qualifier refers to entities that are globally visible within a single assembly. Unfortunately, resources that are used in views in ASP.NET end up being processed in a dynamically -created page assembly where resources internal to the ASP.NET site assembly are not visible! The public access modifier is therefore mandatory.
View Models
Having a class that models the data that flows in and out of view is a great approach to design. This class is usually referred to as a view-model class. I make sure of having a view-model class for each view I have in my site. On the other hand, ASP.NET is based on an implementation of the Model-View-Controller pattern that is all about having a triad to serve each request. You have a controller that takes care of that request; you have a view that produces the output of that request; why hence not have a (view) model class for that request too?
The concept of a “model” in ASP.NET MVC is very misunderstood, and this misunderstanding leads to many poor design choices. In ASP.NET MVC, the “model” should simply be the representation of the data being worked in the view. Each view will have its own (strongly-typed) model class that just models whatever data is consumed in, and by, the view. Any data the view needs to receive from the outside world should come through its model.
Note that the ViewBag (or ViewData) dictionaries serve perfectly the role of the view-model class; they just don’t allow for compile-time catch of mistyped names and subsequently herald a less-than-ideal programming approach. Using them, however, is perfectly sound architecture-wise.
Here’s I would lay out view models.
The template offers a base class called ViewModelBase defined as follows:
|
1 2 3 4 |
public class ViewModelBase { public String Title { get; set; } } |
Depending on the structure of your views you may need to have more members in this class; a string for the page title is, however, the absolute minimum you need. In general, you might want to have a view-model base class for each master page you consider. Every view that is based on a master will derive its model from the corresponding base class.
A master page (a layout page according to the ASP.NET MVC jargon) can have mixed content such as title, navigation bar, footer, header, side menus and links. Unless this content is static, the corresponding members should be added to the view-model base class for the layout. This class is also linked as the @model in the layout markup:
|
1 2 3 4 5 6 7 8 |
@model WebReady.ViewModels.ViewModelBase @using WebReady.Resources; <html> <div id="title"""> <h1>@Model.Title</h1> </div> : </html> |
The view-model class will be populated by controllers or, as we’ll see in a moment, by ad hoc services invoked by controllers. As an example, here’s a sample view-model class for the base Index view of the default project template you get with ASP.NET MVC.
|
1 2 3 4 5 6 |
{ public String Headline { get; set; } public String MoreInfo { get; set; } public String MoreInfoUrl { get; set; } public String MoreInfoTooltip { get; set; } } |
Figure 3 shows the mapping between members of this class and visual elements of the page.
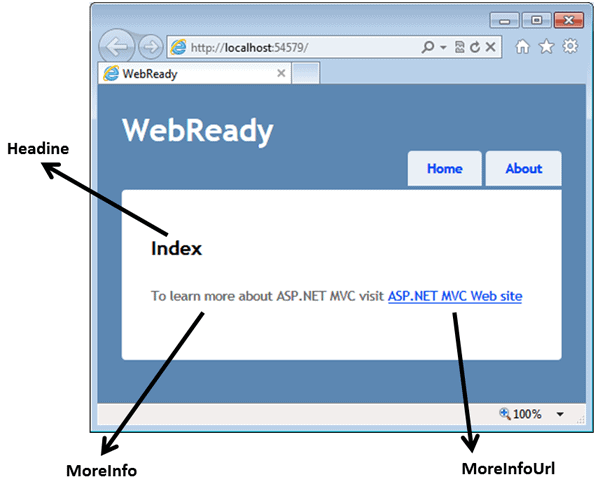
Figure 3: Members and visuals mapping on a sample view.
The naming convention of view-model classes is also relevant. The convention that I’d like to suggest is [ActionName]ViewModel; for example, IndexViewModel and AboutViewModel. I also group view-model classes under a ViewModels folder. To avoid collisions, I create one folder under ViewModels for each controller and a Shared folder if the ViewModel is shared among various controllers. It’s the same schema used for Views. (By the way, I never got the point of having a Models folder because, to me, it sounds rather confusing.)
Worker Services
I consider ASP.NET MVC controllers to be part of the infrastructure; something that’s necessary to have but not part of my code. I therefore don’t expect to have to unit-test controllers though I do expect to test them in integration mode. As a result, my controllers are extremely thin and, in the simplest case, they just limited to the task of relaying the application-specific orchestrators, or worker services, that have no dependencies at all on views and HTTP context. I covered this vision in detail in past articles you can read here and here.
In the sample project, I have a Services folder with one subdirectory for each controller where I keep worker services being used by a given controller. A Shared folder, however, will host services that multiple controllers will share. The worker service may look like this:
|
1 2 3 4 5 6 7 8 9 10 11 12 13 14 |
public class HomeOrchestrator : IHomeOrchestrator { public IndexViewModel GetModelForHome() { var model = new IndexViewModel { Headline = Literals.HomeIndexHeadline, MoreInfo = Literals.HomeIndexMoreInfo, MoreInfoUrl = "http://asp.net/mvc", MoreInfoTooltip = Literals.HomeIndexMoreInfoTooltip }; return model; } } |
Internally, the orchestrator will do any work that’s required to grab data for the view. In doing so, it may need to run database queries and talk to external and internal standalone services. More importantly, the input that flows into the orchestrator, and the output being returned by its methods, are to be view-specific. Any data that it manages internally will be domain-specific.
In a nutshell, you end up having two models; one for the view which is application specific, and one for the backend that is modeling the domain space and is potentially reusable across a variety of frontends. The view model is implemented under the ViewModels folder; the other belongs to the real backend of the application. Here’s a sample controller method:
|
1 2 3 4 5 |
public ActionResult Index() { var model = _service.GetModelForHome(); return View(model); } |
In this particular example, it may look quite minimal; but don’t expect it to be much more sophisticated anyway. This is just what I mean by saying that the controller is part of the infrastructure and needs no testing, other than integration testing.
Summary
ASP.NET MVC comes with the reputation of being a fantastic framework that produces higher quality, and more testable, code. Whilst it is technically true that the resulting code is more testable than in ASP.NET Web Forms, I see the difference between ASP.NET MVC and ASP.NET Web Forms lying more in effectiveness of writing web sites of today. This is because ASP.NET MVC gives you control over HTML, CSS theme-ability and extensive client JavaScript. To achieve a good quality of code requires a separate effort. The default project template doesn’t help much and the template I presented in this article hopefully offers a better, but still generic, starting point.
Note: Along with this article you find a VSIX to download. The file contains a Visual Studio extension that adds the sample template to your environment so that you can create ASP.NET MVC projects from a new template. You should consider this VSIX as a beta and take the time yourself to manually rename the namespace from WebReady to whatever is your project name in all of the CSHTML files: index, about and layout. Otherwise, it won’t compile! If you don’t trust the VSIX machinery, you can download the project code as an innocuous ZIP file.
Load comments