
If you already use jQuery for writing web applications, that’s fine: Hopefully we will discuss some topics to make you more comfortable and more proficient with it. If you do not, but you write web applications, then why don’t you?
jQuery supports every modern browser out there. In fact, if you are writing JavaScript and struggle with browser inconsistencies, jQuery can ease much of your pain. With it, for example, you can simplify the work of adding animations to your pages, doing DOM manipulation (add elements, change the contents or elements, change the CSS class, etc.), handling events or incorporating AJAX functionality to your page to allow you to exchange data with a server in order to update parts of a webpage without refreshing the entire page. jQuery provides more options to make a web application more interactive and more responsive.
Microsoft has quit working on building a JavaScript library and simply decided to support jQuery. When you start a new MVC project, for example, jQuery will automatically be added to your scripts folder. You can, if you wish, include a reference to any number of specific versions from CDN repositories (Content Delivery Network) hosted by Microsoft, Google and many others and reduce bandwidth on your hosting as well as potentially take advantage of a previously cached copy on the client.
There is a wide array of plugins available on top of jQuery. It can be used just like any other part of jQuery so it will work no matter what server-side scripting was responsible for generating the HTML document. A jQuery plugin is a JavaScript library that once loaded will act as if it is part of jQuery itself. It does not matter how your HTML was generated, jQuery still works. The same jQuery plugins work whether you use ASP.NET, MVC, PHP, JSP or even static HTML. You are free to use a plugin in an MVC application and then turn around and use the exact same jQuery in a PHP web site. You don’t have to search for a DotNet port of a popular plugin. In fact, in most cases, you won’t even know who the original audience was, and you truly don’t care.
Why Do I Care Again?
One of the most frustrating things about working with JavaScript has always been the differences between the browsers. Often when you try to do anything beyond trivial manipulations in JavaScript, you have to work hard to make sure that it works in all browsers, sometimes across many versions of some browsers. Yes, I am talking about IE 6,7,8,9, and 10.
jQuery shields you from many of these subtle differences. In fact, most of the time, you can probably forget about browser differences and the differences between versions of a browser. It is in your best interest to stay with the current version because they are also staying on top of the browser differences and version differences so that we don’t have to.
The code is also optimized pretty well (around 31K minified). It will also give the most performant implementation for each browser and for the active versions of each browser. If you can figure out a way to do a task without jQuery, you may still want to use jQuery just to avoid running the chance that there might be a browser issue that you are not aware of. Not to mention, unless you are pretty good with JavaScript yourself, there is a good chance that the implementation in jQuery would be at least as good as what you would come up with, probably better.
Notification Toast
As an example of how JQuery can help with JavaScript development, we’ll show you how to implement Notification Toast. Notification Toast refers to small informational windows that “pop up” on your display to let you know about key events. A nice thing about such toast is that it goes away on its own after a little bit of time. This makes them much less annoying than a traditional popup.
Such notifications are a nice way to let the user know that an update or save was successful. If you use this strategy to display an error message, make sure that you leave the toast up long enough to allow the user to note the error and take appropriate action.
Toast can easily be implemented with code similar to this:
|
1 2 3 4 5 6 7 |
function showToastNotification (message) { var toast = $("#toast"); toast.hide(); toast.html(message); toast.fadeIn(40).delay(10000).fadeOut(400); } |
If you are not familiar with jQuery, it may not be obvious what is going on here. Let’s step through the code. The first line gets a reference to the jQuery object for a div tag with the id of “toast”. The second line hides the div tag.
Without jQuery, the hide method would be implemented like this:
|
1 2 3 4 |
function hide(id) { document.getElementById(id).style.display = 'none'; } |
The next line adds our message to the contents of the div tag. This functionality could be implemented like this without jQuery.
|
1 2 3 4 5 6 7 |
function html(id, text) { var control = document.getElementById(id), text = document.createTextNode(text); control.innerHTML = ''; control.appendChild(text); } |
The next line causes our newly added content to slowly fadeIn then waits 10 seconds and fades out. The fadeIn could be implemented without jQuery with a method like this:
|
1 2 3 4 5 6 7 8 9 10 11 |
function fadeIn(id) { var control = document.getElementById(id); control.style.opacity = 0; control.style.visibility = "visible"; for (var i = 0; i < 100; i++) { setTimeout(function () { control.style.opacity = 0.01 * i; }, 200 + i); } } |
The fadeout would do the same thing just in reverse. The delay would be implemented with a timeout function call.
Hopefully, this showcases how much easier jQuery can make things.
To use this function, simply add a div tag, styled properly, to your page with an ID of toast and you are good to go. I will often add this to the bottom of my master page or _Layout. If you style it to stand out slightly and force it to be at the bottom of the page, then you will have a quick and easy way to give notification back to the user.
The HTML can be as simple as this:
|
1 |
<div id = "toast" > </div> |
The CSS definition can be as simple or as complex as you want. I get good results with the following definition:
|
1 2 3 4 5 6 7 8 9 10 11 12 13 14 15 16 17 |
#toast { height : 7em; width : 40em; border : solid 1px black; border-top : solid 1px #444; border-left: solid 1px #444; position : fixed; bottom: 1em; right : 1em; padding: 1em; background-color : #cfcfcf; box-shadow: rgba(255,255,240,.2) 0 0 200px 100px, rgba(255,255,240,.3) 0 0 40px, inset rgba(0,0,0,.8) 0 0 20px; border-radius: 30px; } |
You can show the toast with code like this:
|
1 |
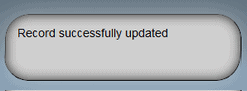
showToastNotification ("Record successfully updated"); |
You can also add variations to show different types of notifications, potentially changing how long it will be visible and how it will be styled.
|
1 2 3 4 5 6 7 8 9 10 11 12 13 |
function showToastError(message) { var toast = $("#toast"); toast.hide(); toast.html(message); toast.addClass("error"); toast.fadeIn(40).delay(6000).fadeOut(400) .queue(function(next) { $(this).removeClass("error"); next(); }); } } |
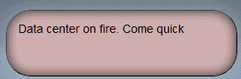
The showToastError method is used to show an error condition. We want it to be up for a whole minute or until the user explicitly closes it and by adding the CSS class “error” we make it more obvious that this is an error condition. The error class may change the background color or image, it may make the div tag larger or take other steps to make it more indicative of an error condition.
I get the following effect by simply adding the following style sheet class.
|
1 2 3 4 5 6 |
.error { background-color : #cfafaf !important; border-color : Red; color : Black; } |
Quick Introduction to Selectors
In our Toast example, we selected the #toast element in a single line. Without jQuery, browser differences would make it more complicated. jQuery provides a great range of selectors many follow similar rules to CSS selectors. For instance the following are valid selectors:
- $(“fieldset”)
- $(“.required”)
- $(“#ActiveRecord”)
You can also define more complex selectors such as:
- $(“#ancestor .descendant”)
- $(“#parent > .child”)
You can also use positional selectors such as:
- $(“ul >li:first”)
- $(“ul>li:last”)
jQuery also adds a few extensions to support some of the jQuery specific needs such as:
- $(“div:animated”)
- $(“:checkbox”)
- $(“:hidden”)
These go way beyond the rudimentary selection methods of JavaScript. This means that you can, for example, easily select every fieldset element to add a ‘panel ‘ class to it simply with:
|
1 |
$("fieldset").addClass("panel"); |
This will find all fieldsets in a page and the stylesheet class panel to them.
Or, you may want to select a specific text box to get the value from it. The val() method is handy to get the value from most input types (most notably this does not work on checkboxes, but it does work nicely for everything else.
|
1 |
var firstName = $("#ActiveRecordFirstName").val(); |
Or, you might want to access all elements with a specific class in order to format the text in it. In this case, we may want to use a plugin that will format a string as currency.
|
1 |
$(".currency").formatCurrency(); |
Naturally, the selectors can get much more complicated, but these are the basics that you will use most frequently. Selecting based on id is usually the most efficient.
Another common optimization is to store the result of the match and use it later as opposed to repeatedly invoking the selector. This is a form of caching; you are caching the parsing results. There is potentially a substantial run time difference between a badly written and well written selector.
Caching the results of running a selector and ensuring that it has to run only once is a great way to minimize the performance implications if a selector is not well written.
If you wanted to grab the value from a textbox, manipulate it in some way, then assign a new value, you would use code similar to this:
|
1 2 3 4 |
var firstNameControl = $("#ActiveRecordFirstName"); var firstName = firstNameControl.val(); ... firstNameControl.val(newValue); |
A Generic Check All Function
Any time that you have a list of checkboxes; users will often want the ability to check all, or uncheck all. We can use jQuery’s .each method in a number of ways to accomplish this:
|
1 2 3 4 5 6 7 |
function checkAll() { $(":checkbox").each( function () { $(this).attr('checked', true); }); } |
… Or …
|
1 2 3 4 5 6 7 |
function unCheckAll() { $(":checkbox").each( function () { $(this).attr('checked', false); }); } |
In both cases, the selector grabs all of the checkboxes. The each method will run the anonymous function against each match. Here we explicitly set the checked attribute for the checkbox.
For this simple example, we don’t really care about the parameters to this anonymous function, but each time it is called, we do get two parameters, index and element. The index tells us which item in the list of matches we are working on while element will be the instance of the matched item. Index will be an integer and element would be the individual checkboxes.
With a little bit of creativity, you can find all kinds of uses for this .each method. We will see a nice application later in this article.
Tracking Focus
From a usability perspective, it is good to be able to style input controls differently when they receive, or lose, focus. This is relatively straightforward with a little bit of jQuery.
Consider this brief snippet.
|
1 2 3 4 5 6 7 8 9 10 11 12 13 |
$(document).ready(function () { var inputs = $('input'); // Add the "focus" value to class attribute inputs.focusin(function () { $(this).addClass('focus'); }); // Remove the "focus" value to class attribute inputs.focusout(function () { $(this).removeClass('focus'); } ); } ); |
The ready event will be fired once the DOM is ready. Here we define an anonymous method to be run when that event is fired. Using the ready event handler is common in jQuery to ensure that all of the DOM is ready.
In this case we will grab a reference to every input control and add an event handler for the focusin and focusout events. In these respective event handlers, we simply add and remove a class to the input tag. How an item looks when it has focus depends on how the .focus class is styled.
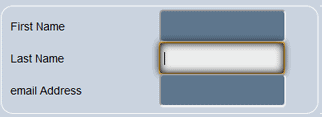
Depending on the look you are going for, you may want to change the background color, change the border color, or add a drop shadow. For instance, you may want to add a couple of drop shadows and explicitly change the background color to make it really stand out.
With this one snippet of code and a single style sheet class, you can easily add impressive focus tracking to your application.
I get this look with a style sheet class similar to this:
|
1 2 3 4 5 6 |
.focus { -webkit-box-shadow: inset 1px 1px 10px #fff; -moz-box-shadow: inset 1px 1px 10px #fff; box-shadow:1px 1px 10px #000; outline: none; } |
You can also use the same technique to create real time validation tracking. Let the event handler for focusout perform the validations, or compare the data on focusin and focusout to determine what the user changes.
Collapsible Panels
You may often find that your web page has more content that the user can readily deal with. When this happens, it can be handy to be able to collapse regions to hide content that is not readily relevant.
I often follow the strategy of using fieldsets and using the legend’s click event as a trigger to toggle visibility.
|
1 2 3 4 5 6 7 8 9 10 11 12 13 |
$(document).ready(function () { $('legend').click(function () { var $this = $(this); var parent = $this.parent(); var contents = parent.contents().not(this); if (contents.length > 0) { $this.data("contents", contents.remove()); } else { $this.data("contents").appendTo(parent); } return false; }); }); |
You’ll probably have noticed that we are not actually toggling visibility. We are instead grabbing the contents of the fieldset excluding the legend. If there is content, we store it in the legend’s data store and then remove it as content. If there is already no content, we retrieve it from the data and append it back to the parent.
So we aren’t technically toggling visibility. We add and remove the contents as needed. This allows us to easily show and hide the contents of the fieldset regardless of what it contains and still preserve the legend as the source of the trigger.
This technique will work for tag combinations beside the fieldset and legend. As long as the trigger is the first child of the parent, you are good to go. If the trigger is not the first child, it will be after the contents are expanded for the first time.
Add a Date Picker
One of the most challenging problems with usability is date entry. Dates are tough to validate. They are annoying to enter and there is not a one-size-fits-all approach that works across the board. That being said, http://jqueryui.com/ includes a very nice DatePicker widget that can easily be added to a web application to give a “one size fits most” date entry field. jQueryUI is a jQuery plugin that provides several useful widgets that all work together, have a similar API and can easily be themed together.
Any textbox can easily be converted to a date picker with code similar to this:
|
1 2 3 4 5 6 7 |
$("#DateOfBirth").datepicker({ showOn: "button", gotoCurrent: true, showAnim: 'fold', buttonImage: "/Content/images/calendar.png", buttonImageOnly: true } |
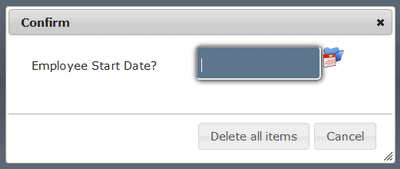
Here we are telling the datepicker to show when the user clicks a button, open to the currently selected date, using an animation called “fold” to make itself visible, we specify where to get the button image, and finally we tell it to show the image only and not put it on a button.
If you are planning more than one datepicker on the page, then you could make this more generic and just give them the same class name (‘DateEditor’ in this case).
|
1 2 3 4 5 6 7 8 9 10 |
$(document).ready(function () { $(".dateEditor").datepicker({ showOn: "button", gotoCurrent: true, showAnim: 'fold', buttonImage: "/Content/images/calendar.png", buttonImageOnly: true }); }); |
This will find every element with a class of dateEditor and apply the datePicker. With this in place, you only need to add the datePicker class to the input control and let jQuery take care of the rest.
In your markup, you only have to add the class and make it readonly.
|
1 2 |
<input type = "text" id = "startDate" class = "dateEditor" readonly = "readonly" name = "startDate" /> |
With these two pieces in place, any date field can be converted to a date picker.

jQuery UI is a wonderful addition to any web application. We will explore its uses more fully in a future article.
Data Binding a JSON Object
It is a common practice to receive JSON data back from an AJAX call. If you make an AJAX call and get back a list of JSON objects, you may also want to show these details in a table. Using reflection on JavaScript we can easily automate this data binding.
Our bindDataToTable method accepts two parameters. The first one is an array of JSON objects. The second one is the jQuery reference to the table that we will bind to.
|
1 2 3 4 5 6 7 8 9 10 11 12 13 14 15 16 17 18 19 20 21 22 23 24 25 26 27 28 |
function bindDataToTable (data, table) { table.html(""); var markup = ""; markup += "<tr>"; $.each (data[0], function (name, value) { if (data[0].hasOwnProperty(name)) { markup += "<th>" + name.replace(/([A-Z])/g, " $1") + "</th>"; } }); markup += "</tr>"; $.each(data, function (index, value) { markup += "<tr>"; $.each(value, function (propertyName, propertyValue) { if (value.hasOwnProperty(propertyName)) { markup += "<td>" + propertyValue + "</td>"; } }); markup += "</tr>"; }); table.append (markup); } |
The markup variable will contain all of the table rows that will go into the table.
We start by building out the table headers. We loop through the names of the properties in the first object. For each property, we split the name at the capital letters to make nicer headers. Note that we don’t actually “split”, instead we are using a regular expression to match the capital letters and replace them with a leading space and then whatever letter triggered the match.
After we have the header row mapped out, we are ready to add the rows for the data. The outer each loop loops through the items in the array. The inner each loop loops through the properties for that object. The calls to the “hasOwnProperty” method ensure that we are only binding properties defined at this level of inheritance. If you want to include properties defined in a base class, simply remove these conditionals. Typically there will not be any inheritance when dealing with JSON objects, but this simple method can be used for more than just JSON data.
This simple approach can be extended to accommodate a wide range of data binding needs.
To use this method, let’s start with a simple table:
|
1 |
<table id = "dataTable"></table> |
Next grab some JSON data. Typically you would probably get this from an AJAX call, but for this simple example, we will simply define some on the fly:
|
1 2 3 4 5 6 7 8 9 10 11 12 13 14 15 16 |
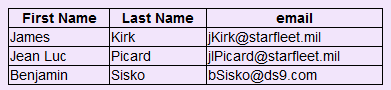
var data = [ { "FirstName": "James", "LastName": "Kirk", "email": "jKirk@starfleet.mil" }, { "FirstName": "Jean Luc", "LastName": "Picard", "email": "jlPicard@starfleet.mil" }, { "FirstName": "Benjamin", "LastName": "Sisko", "email": "bSisko@ds9.com" } |
Now we are ready to bind our data:
|
1 |
bindDataToTable(data, $("#dataTable")); |
Conclusion
jQuery is wildly popular and for good reason. Its uses for adding animation and engaging style elements are well publicized, this should give a sampling of how such magic works. You should have a better feel for some of the ways you can use it to make your web applications faster and more interactive. We will build on some of these techniques over future articles.
Practice these simple recipes. Build on them. You will find that they form the basis for some very tasty treats you can add to any application. We will build on the concepts in future articles.
Bon appétit.
This document contains proprietary information and is protected by copyright law.
Copyright © 2026 Red Gate Software Limited. All rights reserved
Load comments