
In this article I will be describing the three approaches to using Entity Framework (EF) – Model First, Database First and Code First.
I will illustrate how to use these techniques using Entity Framework 5.0, which has several performance improvements and new features which will be highlighted as part of the sample implementation. I will then go on to explain the relative advantages of each approach when designing the database.
Model First
In the Model First approach, the database model is created first using the ORM designer in Visual Studio. Once the model consisting of entities and relationships has been designed, the physical database will be generated from the model.
Walk through – Creation of Model First
In order to create the model, you should create an empty ASP.Net project in Visual Studio and add a new ADO.Net Entity Data Model, which for this example we’ll call ModelSample.
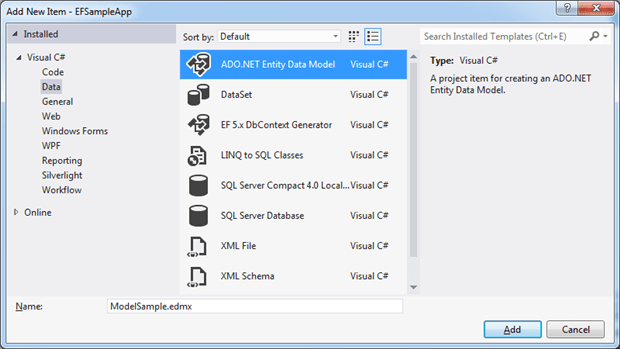
Figure 1: Add ADO.Net Entity Data Model
This will open the Entity Data Model Wizard. Select the Empty Model from the Model Contents selection.
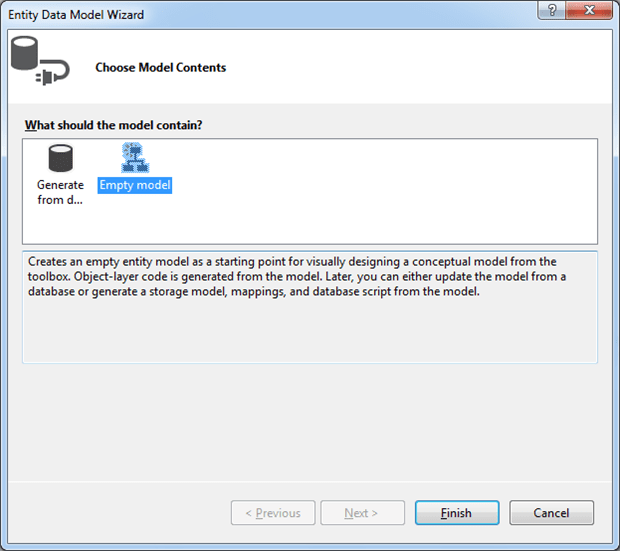
Figure 2: Choose Model Contents
This loads the entity data model designer. Add Entities from the toolbox to our entity data model designer. Link the entities using the ‘Association from‘ Toolbox to complete the model design. 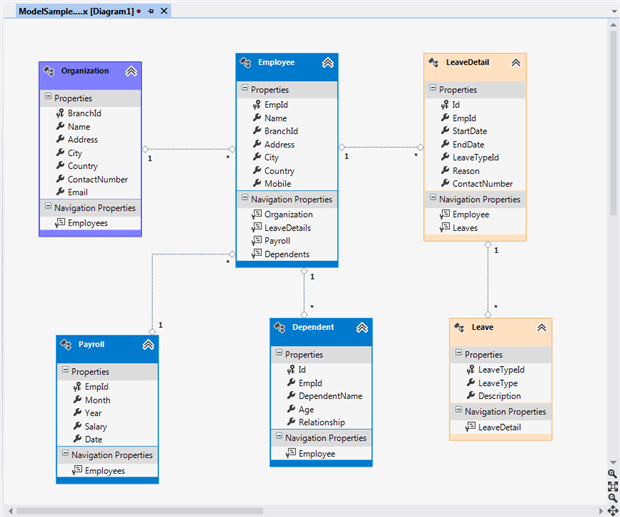
Figure 3: Sample designer with entities
New feature: Entity Color. As you can see in the above diagram, we can color the entities appropriately for better understanding and grouping. In our sample, leave-related entities are colored with orange, organization details in purple and the employee details in blue.
Once the entity model design is completed, generate the database from the model using the ‘Generate Database from Model‘ context menu. Right-click on the designer to invoke the Context menu, then select the ‘Generate Database from Model‘option.
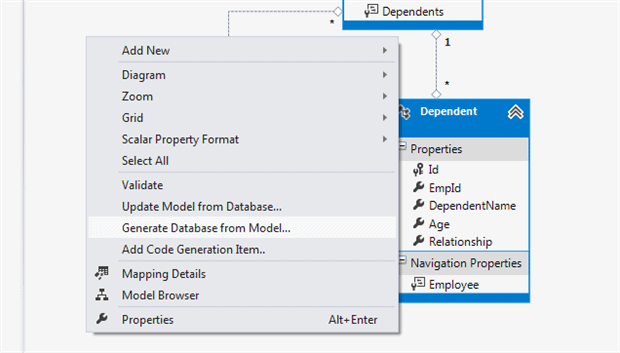
Figure 4:Generate Database from Model
Select an existing database connection or create a new connection to create the sample database from the Model. For this sample, I have used SQLExpress with the SampleDB database connection.
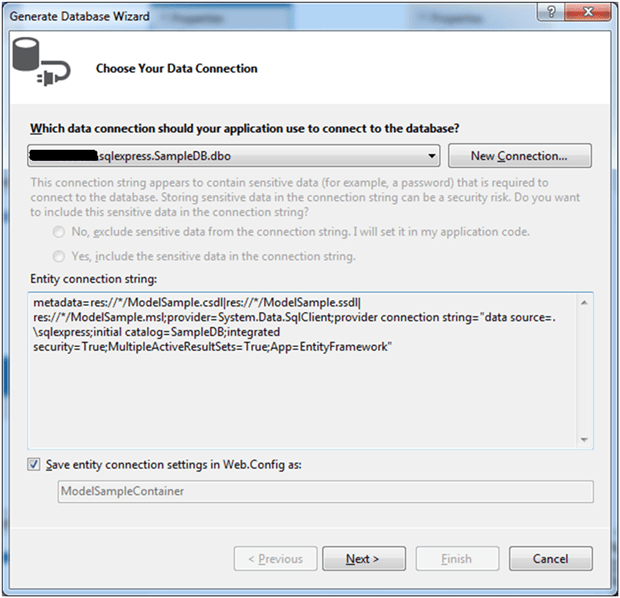
Figure 5: Choose Data Connection
This will generate the DDL statements, and the generated script will be added to the solution as a script file.
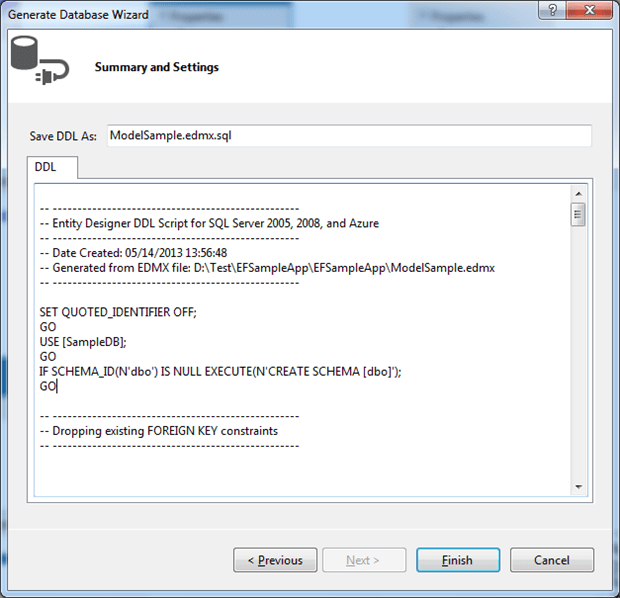
Figure 6: Specify DDL file name
The script file generated in the previous step will be opened in Visual Studio. Click ‘Execute‘in order to create the database using the generated script.
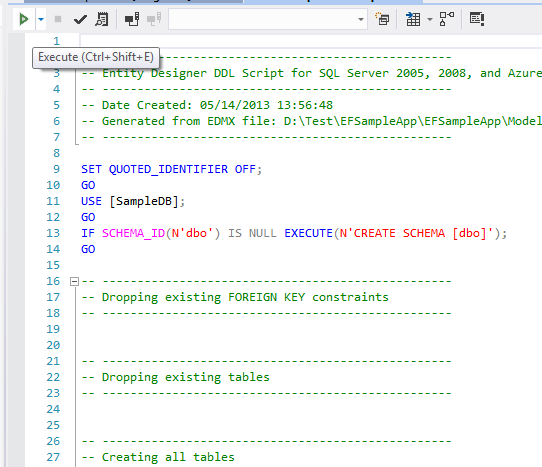
Figure 7: Execute Script
Now, the database with all tables and relationships is created in the database server. For working with the new database, generate the code using the Code Generation Strategy; set this value as “default”.
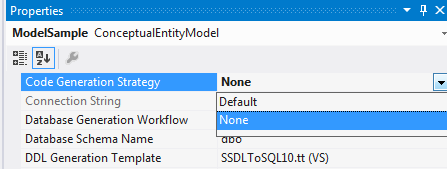
Figure 8: code Generation Strategy
This will generate the entity framework code and database context classes corresponding to the defined model. We can use these new classes from the business layer to perform various database operations. Verify the code generated under the Modelname.Designer.cs file.
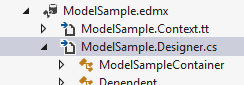
Figure 9: Designer Code
We can sync the Model with the database either way using the context menu options – ‘Generate Database from Model‘ or ‘Update Model from Database‘. You can modify the model and then invoke the ‘Generate database from Model‘ context menu option to update the database schema. Any modification in database schema can get updated to the model using the ‘Update Model from Database‘ context menu option.
New feature: Multiple-diagrams per single Model.
Another new feature introduced in EF 5.0 is to allow the use of multiple diagrams for a single model. We can move selected entities to another diagram in order to reduce the complexity of the main diagram. Select the entities by holding shift key and select the “Move to new diagram” option from the context menu.
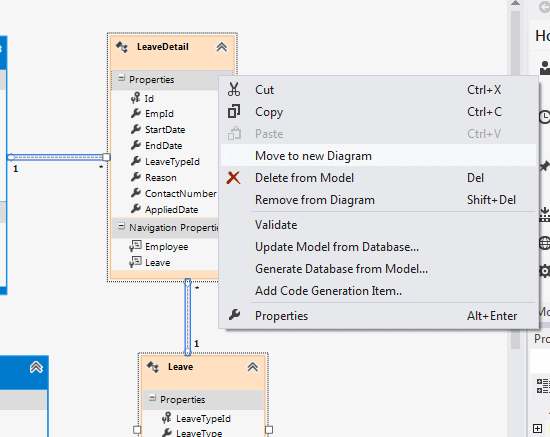
Figure 10: Move to new diagram
Let us move the entities related to leave to another diagram. This will create a new diagram with selected entities; in our case Leave and Leavedetail.

Figure 11: Multiple diagram for single Model
As you can see, the relationship between the LeaveDetail entity and the Employee entity has been removed. We can use the new ORM feature to include the related entities in the second diagram by keeping one copy of the same in the first diagram for better readability. We can include the related entities in the second diagram using “Include Related” option. This will create a copy of all the related entities in the second diagram. Select the Leavedetail entity, right-click and select the option “Include Related” to include the employee entities in the second diagram.

Figure 12: Include Related
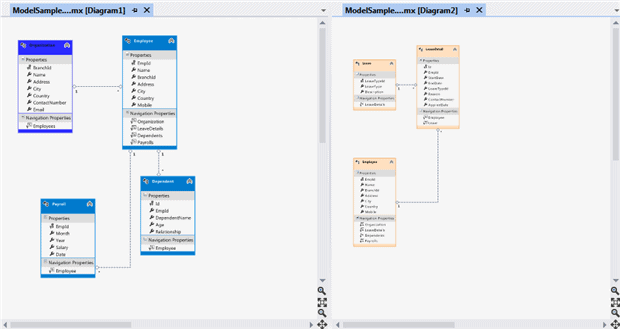
Figure 13: Multi-diagram with Include Related
Database First
The next approach supported by the Entity Framework is the database-first approach. In the database first approach, we are creating the entity framework from an existing database. We use all other functionality, such as the model/database sync and the code generation, in the same way we used them in the Model First approach.
Create the ADO.Net Entity Data model using the ‘Generate from Database’ option.
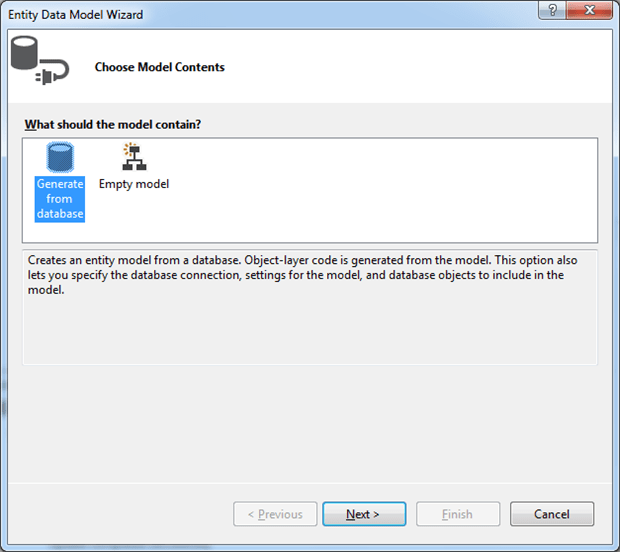
Figure 14: Choose Model Content
Select an existing connection or new connection from the ‘choose data connection‘ window. We are using the sampleDB that we created as part of our Model First sample. Now, select the database objects suitable for your project such as Tables, Views and Stored procedures, functions from the ‘Choose your Database Objects‘ window.
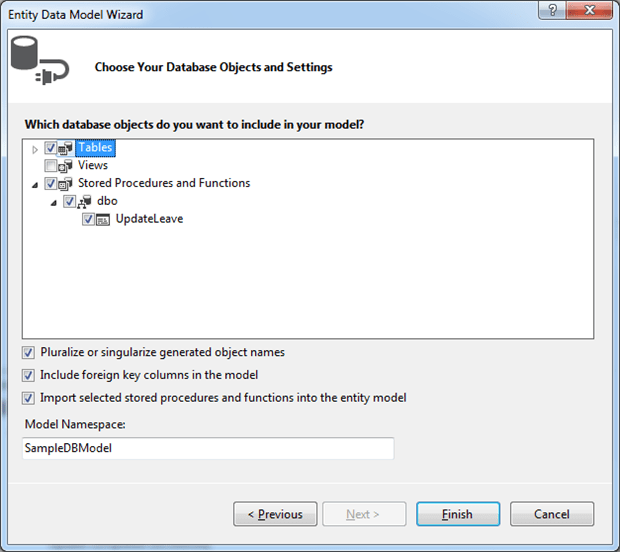
Figure 15: Choose database objects
This will generate the designer with selected entities and associations as shown below.
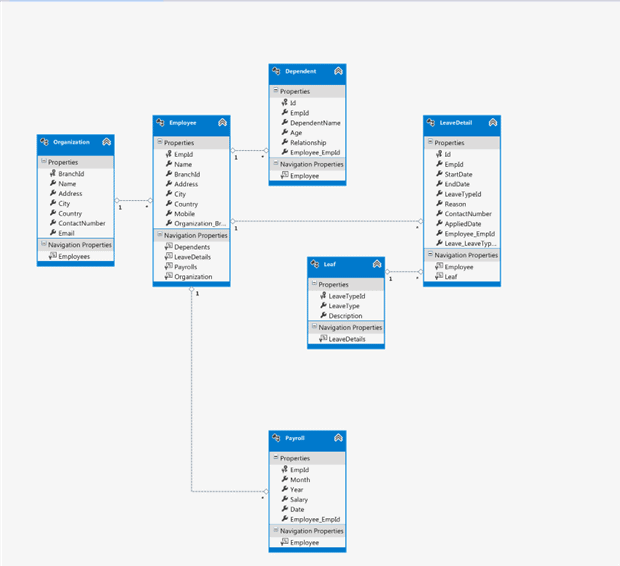
Figure 16: Entity data model designer
Create the code using the ‘Code Generation Strategy‘ property, and perform the sync between the database and model in the same way that the Model-first approach works. Any sync back to the database will recreate the database and the existing data will be lost.
New feature: There is now support for Table-valued functions. Before using the SampleDB in the database-first approach, we have added a Table-valued function called UpdateLeave to the database. You’ll notice that the new Table-valued function is added under the Complex Type region inside the Designer.cs file. Support for the Table-valued function has been added as part of Entity Framework 5.0 and is available for the database-first approach only.
New feature: Enum properties. Support for enum properties are added as part of Entity Framework 5.0. Add one Integer property, say Relationship to the entity. Right-click on the property and select the “Convert to Enum” option from the context menu.
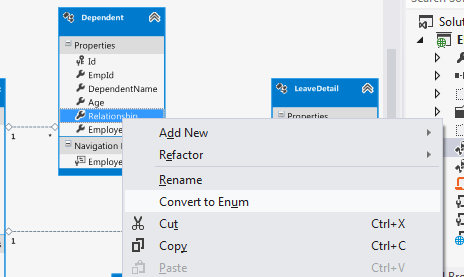
Figure 17: Convert to Enum
Add the enumeration members and values in the ‘Add Enum Type‘ window.
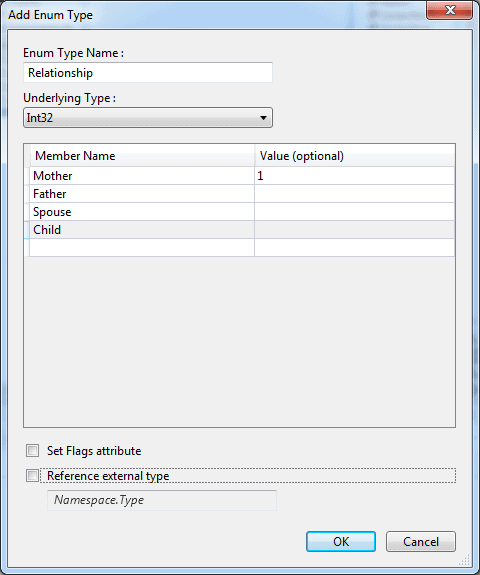
Figure 18: Add Enum Type
Instead of adding each value, we can refer an external type using the ‘Reference external type‘ option.
Here is the generated code for the new Enum added inside the Designer.cs file
|
1 2 3 4 5 6 7 8 9 10 11 12 13 14 15 16 17 18 19 20 21 22 23 24 25 26 27 28 |
[EdmEnumTypeAttribute(NamespaceName="SampleDBModel", id="Relationship"")] [DataContractAttribute()] public enum Relationship : int { ///<summary> ///No Metadata Documentation available. ///</summary> [EnumMemberAttribute()] Mother=1, ///<summary> ///No Metadata Documentation available. ///</summary> [EnumMemberAttribute()] Father=2, ///<summary> ///No Metadata Documentation available. ///</summary> [EnumMemberAttribute()] Spouse=3, ///<summary> ///No Metadat aDocumentation available. ///</summary> [EnumMemberAttribute()] Child=4 } |
New feature: Support for Geography and Geometry types. Support for the DBGeography and DBGeometry types are added as part of Entity Framework 5.0.
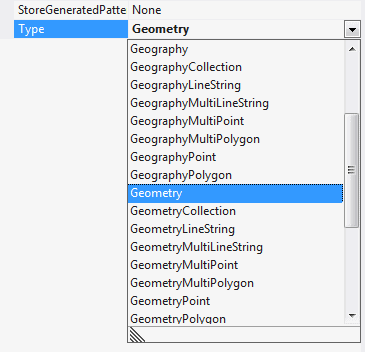
Figure 19: Geometry & Geography supports
Code First
In Code-First Approach, we create the classes first and then generate the database from the classes directly. In code first, we won’t use the Entity Designer (for editing .edmx files) at all.
First, create the classes which represent the database table. For this walkthrough I am using the Category and Product classes.
|
1 2 3 4 5 6 7 8 9 10 11 12 13 14 |
public class Category { public int CategoryId { get; set; } public string Category { get; set; } public string Description { get; set; } } public class Product { public int ProductId { get; set; } public string ProductName { get; set; } public float Price { get; set; } public int CategoryId { get;set;} } |
Now, define the custom DbContext class derived from DbContext, which defines the classes that need to be converted to database tables. Here, we have defined both category and Product classes to represent as a table.
|
1 2 3 4 5 |
public class SampleContext : DbContext { public DbSet<Category> Categories { get; set; } public DbSet<Product> Products { get; set; } } |
For performing the CRUD operations, define the data access class with proper methods. Here, we are defining only the SELECT operation, but we’ll need to define different methods for UPDATE, DELETE and SELECT options.
|
1 2 3 4 5 6 7 8 |
public class SampleDataAccess { SampleContext context = new SampleContext(); public List<Product> GetProducts() { return (from p in context.Products select p).ToList(); } } |
Add the connection string to the web.config for accessing the database at run time.
|
1 2 3 |
<add id="SampleContext"" connectionString="datasource=.\sqlexpress;IntegratedSecurity=SSPI;database=SampleDB" providerName="System.Data.SqlClient"/> |
Build the solution before adding the UI control, GridView, to display the data from the database. Then, add a data source which will point to the SampleDataAccess class. Select ‘Object‘ from the ‘Choose a Data Source Type‘ menu and specify an id for the data source.
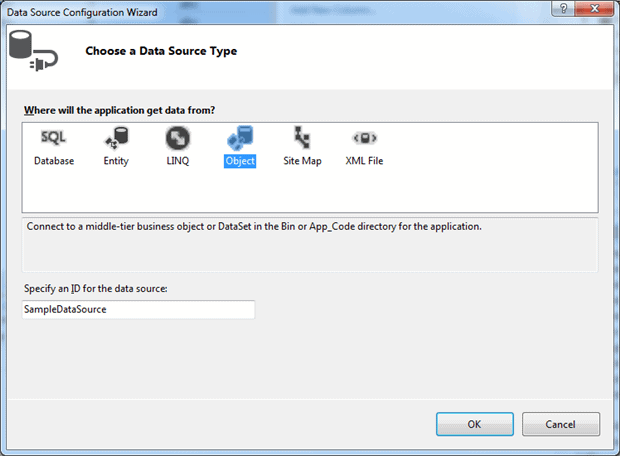
Figure 20: Choose a Data source type
Select the SampleDataAccess class from the list. If it is not displayed here, then the solution may not be built properly.
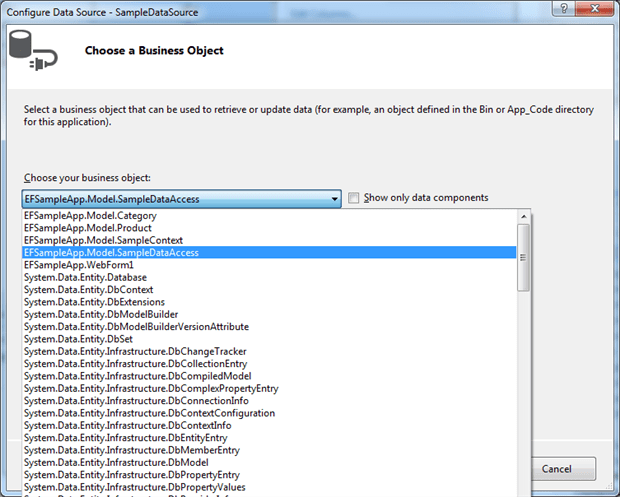
Figure 21: Choose business object
Set the methods for the CRUD operation. We have only one method selected called GetProducts().
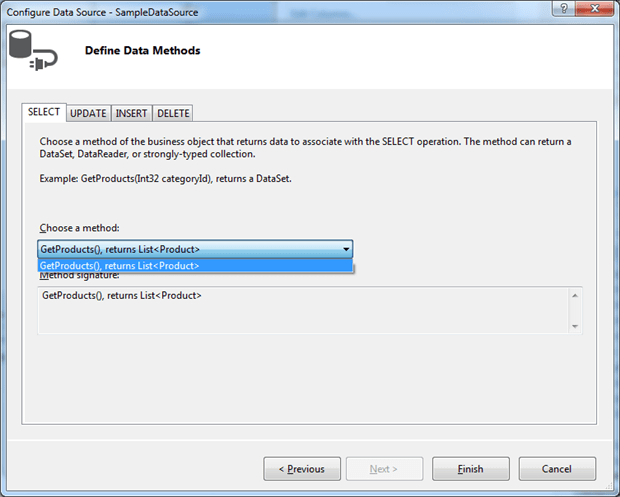
Figure 22: Define data methods
We can define the Update, Delete and Insert methods in the same way. Here are the tables available under the SampleDB database before running the application.

Figure 23: SampleDB before running app
Now, run the application, which will display a blank page. You’ll see that the new Categories and Products tables are added in the SampleDB database after running the application.
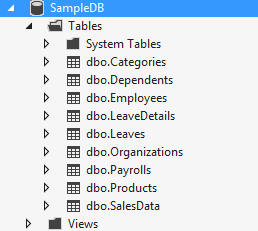
Figure 24: SampleDB after running the app
To try this out, we’ll insert few records to the database and run the application again.

Figure 25: Code First output
Comparing the Model First, Database First and Code First approaches
So when should one choose one method over the others? Here is a simple comparison of the advantages all three approaches.
Model First:
- Good support with EDMX designer
- We can visually create the database model
- EF generates the Code and database script
- Extensible through partial classes
- We can modify the model and update the generated database.
Database First:
- An existing database can be used
- Code can be auto-generated.
- Extensible using partial classes/ T4 templates
- The developer can update the database manually
- There is a very good designer, which sync with the underlining database
Code First:
- There is full control of the model from the Code; no EDMX/designer
- No manual intervention to DB is required
- The database is used for data only
The Model First approach is preferable when creating the model using the ORM designer. Powerful features of the ORM designer help in creating a model very easily. The clear representation of the model in visual form is more understandable to all stakeholders involved in product development.
If we have an existing database, like in the case of a maintenance project, we can use the Database First approach to create the Entity Framework objects out of the existing database. Any modification to the Model using the ORM designer requires syncing back to the database. Remember any changes to the model result in the deletion of the entire database so it can be re-created – all existing data will be lost.
Hardcode coders love to code the model using the Code First approach. In this approach, the database is used for storing the data only. The database structure is defined by various classes. One of the advantages of the Code First approach is the same class is used for defining the database table structure and business object. Any changes in the class affect both the business object and the database table. Also, if we have any plans to deploy the project into Azure with Azure Storage, we can reuse the classes to define the Azure Storage objects.
Conclusion
Entity Framework provides three different approaches to deal with the model and each one has its own pros and cons. Entity Framework still has its share of issues and is not widely accepted yet. We can make the Entity Framework better by contributing to the development of the next version. You can contribute to the development of new features and bug fixes of the next version of Entity Framework at “http://entityframework.codeplex.com/“. Innovative contributions to the next version of Entity Framework will make it more stable and widely adoptable.
This document contains proprietary information and is protected by copyright law.
Copyright © 2026 Red Gate Software Limited. All rights reserved
Load comments