
SQL Server has had many different methods to track changes to data. There has been old-fashioned trigger-based logging, Change Data Capture, and Change Tracking. All of these features allow you to see how data has changed with varying degrees of how far you can go back historically to see the changes. However, there has never been the ability to see how the entire table looked at any given point in time. That is what Temporal Tables do – they log every change that happens to the table. When you want to query it for any specific period of time, SQL Server will do the hard work of getting the snapshot of how the data in the entire table looked at that time.
A great introduction on how to set up temporal tables in different ways with various limitations can be found here. In this article, you will learn how to set up versioning when creating a new table and how to convert a table with an existing history to a system-versioned temporal table.
Creating a System-Versioned Temporal Table
Table versioning can be created on entirely new tables, or on existing tables. The history table, or the table where changes are logged, can be:
- An entirely new, ‘anonymous’ table with no name specified in which case SQL Server creates a table and assigns a name,
- A ‘default’ table with a name as desired by you,
- An existing table with data that you now want to use as a history log.
To get started, create an entirely new table and version it first.
|
1 2 3 4 5 6 7 8 9 10 11 12 13 14 15 16 17 18 |
CREATE TABLE [dbo].[Region] (RegionID INT IDENTITY(1,1) NOT NULL CONSTRAINT PK_Region PRIMARY KEY CLUSTERED, RegionDescription VARCHAR(100) NULL, StartDateTime datetime2 generated always as row start NOT NULL, EndDateTime datetime2 generated always as row end NOT NULL, PERIOD FOR SYSTEM_TIME (StartDateTime, EndDateTime)) WITH (SYSTEM_VERSIONING = ON (HISTORY_TABLE = dbo.Region_History)); INSERT INTO [dbo].[Region] (RegionDescription) VALUES ('North USA') INSERT INTO [dbo].[Region] (RegionDescription) VALUES ('South USA'), ('NorthEast USA') SELECT * FROM [dbo].[Region] |

It is easy to see that the column StartDateTime is populated with current date and time in UTC, and EndDateTime is the max value that can be specified for a datetime2 data type. These are not specified in the insert statements and do not have defaults defined, they get autopopulated. Notice the syntax in the CREATE TABLE statement, generated always as row start and generated always as row end.
Now take a look at what was logged in history table:
|
1 |
SELECT * FROM [dbo].[Region_History] |
This returns nothing. This is because logging is limited to updates and deletes and does not log inserts.
Now, if you run an update and then look at the history table, you will see that the previous row has been logged. The StartDateTime and EndDateTime values specify exactly when this row was active.
|
1 2 3 |
UPDATE [dbo].[Region] SET RegionDescription = 'NorthEast US' WHERE RegionDescription = 'NorthEast USA' SELECT * FROM [dbo].[Region_History] |

If you look at the main table for the same row, you can see that it has a new start date that matches the date when previous version of the row was retired.
|
1 |
SELECT * FROM [dbo].[Region] |

Deleting a row also works similarly. When the end date of the deleted row matches date when it was deleted and there is no matching row in the main table.
|
1 2 |
DELETE FROM [dbo].[Region] WHERE RegionID = 3 SELECT * FROM [dbo].[Region_History] WHERE RegionID = 3 |

Adding Versioning an Existing Table
The next scenario is to transition an existing history table to versioning. Trigger-based change tracking is still a very common and easy-to-implement process used at many places. This example explores a simple way this was implemented and how to use the same table, without changing or deleting any data to implement versioning.
|
1 2 3 4 5 6 7 8 9 10 11 12 13 14 15 16 17 18 19 20 21 22 23 24 25 26 27 28 29 30 31 32 33 34 35 36 |
IF (EXISTS (SELECT * FROM INFORMATION_SCHEMA.TABLES WHERE TABLE_SCHEMA = 'dbo' AND TABLE_NAME = 'Region')) BEGIN ALTER TABLE dbo.Region SET (system_versioning = off) DROP TABLE dbo.Region DROP TABLE dbo.Region_History END go CREATE TABLE [dbo].[Region]( [RegionID] [int] IDENTITY(1,1) NOT NULL, [RegionDescription] [varchar](100) NULL, [CreateUser] [nvarchar](100) NOT NULL default (COALESCE(SUSER_NAME(SUSER_ID()),USER_NAME())), [CreateDate] DateTime NOT NULL default getdate(), [UpdateUser] [nvarchar](100) NOT NULL default (COALESCE(SUSER_NAME(SUSER_ID()),USER_NAME())), [UpdateDate] DateTime NOT NULL default getdate() CONSTRAINT [PK_Region] PRIMARY KEY CLUSTERED ( [RegionID] ASC )WITH (PAD_INDEX = OFF, STATISTICS_NORECOMPUTE = OFF, IGNORE_DUP_KEY = OFF, ALLOW_ROW_LOCKS = ON, ALLOW_PAGE_LOCKS = ON) ) CREATE TABLE [dbo].[Region_History]( [RegionHistoryID] [int] IDENTITY(1,1) NOT NULL, [RegionID] [int] NOT NULL, [RegionDescription] [varchar](100) NULL, [CreateUser] [nvarchar](100) NOT NULL , [CreateDate] DateTime NOT NULL , [UpdateUser] [nvarchar](100) NOT NULL default (COALESCE(SUSER_NAME(SUSER_ID()),USER_NAME())), [UpdateDate] DateTime NOT NULL default getdate() ) GO |
There are two simple triggers, one for updates and one for deletes, to track changes to the table.
|
1 2 3 4 5 6 7 8 9 10 11 12 13 14 15 16 17 18 19 20 21 22 23 24 25 26 27 28 29 30 31 32 33 |
CREATE TRIGGER [dbo].[Region_Update] on [dbo].[Region] AFTER UPDATE AS BEGIN INSERT INTO dbo.Region_History (RegionId,RegionDescription,CreateUser,CreateDate, UpdateUser,UpdateDate) SELECT i.RegionId,i.RegionDescription,i.CreateUser,i.CreateDate, SUSER_SNAME(), getdate() from dbo.Region r inner join inserted i on r.RegionID=i.RegionID END GO CREATE TRIGGER [dbo].[Region_Delete] ON [dbo].[Region] AFTER DELETE AS INSERT INTO [dbo].[Region_History] ([RegionID],[RegionDescription],[CreateUser], [CreateDate],UpdateUser,UpdateDate ) SELECT [RegionID],[RegionDescription],[CreateUser],[CreateDate], SUSER_SNAME(), getdate() FROM DELETED GO --Now insert data into the main table. INSERT INTO [dbo].[Region] (RegionDescription) values ('Northeast') ,('Southwest') ,('West') ,('Southeast') ,('Midwest'); SELECT * FROM [dbo].[Region] |

Intentionally change the same records several times so that the history table has a decent volume of data. This script will take about 10 minutes to run as you are recreating a history table with several updates with different timestamps on them.
|
1 2 3 4 5 6 7 8 9 10 11 12 13 14 15 16 17 18 19 20 21 22 23 24 25 26 27 28 29 30 31 32 33 |
DECLARE @counter INT SELECT @COUNTER = 100 WHILE @counter > 0 BEGIN UPDATE [dbo].[Region] SET RegionDescription = 'NorthEast' WHERE RegionDescription = 'Northeast' WAITFOR DELAY '00:00:01' UPDATE [dbo].[Region] SET RegionDescription = 'Southwest ' WHERE RegionDescription = 'Southwest' WAITFOR DELAY '00:00:01' UPDATE [dbo].[Region] SET RegionDescription = 'Southeast ' WHERE RegionDescription = 'Southeast' WAITFOR DELAY '00:00:01' UPDATE [dbo].[Region] SET RegionDescription = 'Midwest ' WHERE RegionDescription = 'Midwest' WAITFOR DELAY '00:00:01' UPDATE [dbo].[Region] SET RegionDescription = 'MidWest' WHERE RegionDescription = 'Midwest ' WAITFOR DELAY '00:00:01' UPDATE [dbo].[Region] SET RegionDescription = 'SouthWest' WHERE RegionDescription = 'Southwest ' WAITFOR DELAY '00:00:01' UPDATE [dbo].[Region] SET RegionDescription = 'SouthEast' WHERE RegionDescription = 'Southeast ' SELECT @counter = @counter - 1 END |
Also, delete a couple of records from the main table.
|
1 2 3 |
DELETE FROM [dbo].[Region] WHERE RegionDescription = 'West' DELETE FROM [dbo].[Region] WHERE RegionDescription = 'MidWest' SELECT * FROM dbo.Region |

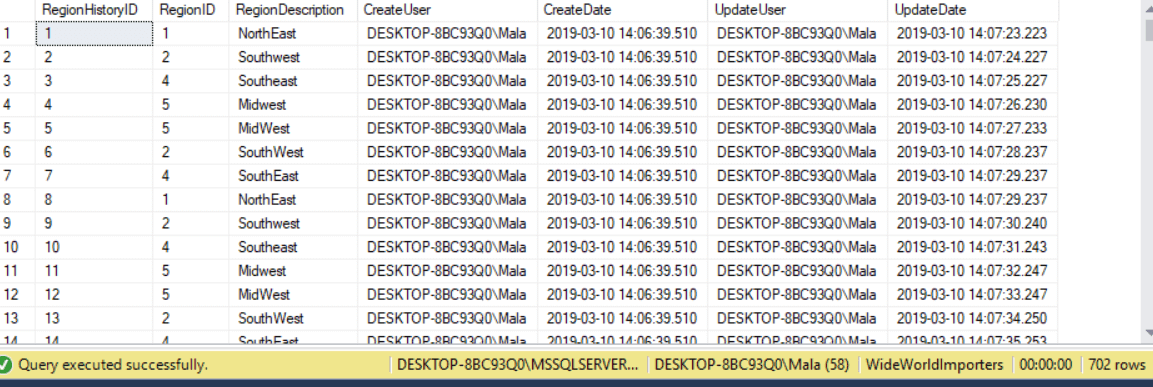
You’ll see 702 rows in the history table.
|
1 |
SELECT * FROM dbo.Region_History |
The goal is to transition these two tables to temporal tables by keeping this data intact and allowing for traditional querying as well as querying using temporal table methodology.
As a first step, add start and end dates to both tables:
|
1 2 3 4 5 6 7 8 |
ALTER TABLE dbo.Region ADD [StartDate] [datetime2] NOT NULL DEFAULT (getdate()), [EndDate] [datetime2] NOT NULL DEFAULT (convert(datetime2, '9999-12-31 23:59:59.9999999')) ALTER TABLE dbo.Region_History ADD [StartDate] [datetime2] NOT NULL DEFAULT (getdate()), [EndDate] [datetime2] NOT NULL DEFAULT (convert(datetime2, '9999-12-31 23:59:59.9999999')) |
The structures of the history table and main table must be identical for turning versioning on. Since there is one column, regionhistoryid, in the history table that is not in the main table, you can either get rid of it in the history table or add it to the main table. Getting rid of it will mean the history table has no key per the older method. This is not ideal if you want to query older data with that method. Instead, add it to the main table. You won’t be using it, just add it to ensure conformance for this purpose.
|
1 |
ALTER TABLE [dbo].[Region] ADD RegionHistoryId int; |
The next step is to add the period to connect two new fields in the main table and then attempt to enable versioning.
|
1 2 3 4 5 |
ALTER TABLE dbo.Region ADD PERIOD FOR SYSTEM_TIME ([StartDate], [EndDate]) ALTER TABLE dbo.Region SET (SYSTEM_VERSIONING = ON (HISTORY_TABLE = dbo.Region_History, DATA_CONSISTENCY_CHECK = ON)) |
This returns an error as shown below:

SQL Server will not allow identity columns in a history table. The identity property must be removed, but the data in this column is needed. To solve this, create another column, move data there, drop this column and rename the new column to the old name.
|
1 2 3 4 5 6 7 8 9 |
ALTER TABLE [dbo].[Region_History] ADD RegionHistId int; GO UPDATE [dbo].[region_history] SET regionhistid = regionhistoryid; GO ALTER TABLE [dbo].[region_history] DROP COLUMN regionhistoryid; GO EXEC sp_RENAME 'dbo.region_history.RegionHistid' , 'RegionHistoryID', 'COLUMN'; GO |
Now that the identity column is removed from the history table, try to turn versioning on again. This time you’ll get another error.
|
1 2 3 |
ALTER TABLE dbo.Region SET (SYSTEM_VERSIONING = ON (HISTORY_TABLE = dbo.Region_History, DATA_CONSISTENCY_CHECK = ON)) |

The data consistency check runs DBCC CHECKCONSTRAINT under the hood and comes up with issues if constraints do not validate. The default value of the new EndDate column is the maximum date of the system which, of course, is in the future.
There are several ways to resolve this problem. One way is to enable versioning but to skip the checks. Don’t run this code, but here it is for your reference:
|
1 2 3 |
ALTER TABLE dbo.Region SET (SYSTEM_VERSIONING = ON (HISTORY_TABLE = dbo.Region_History, DATA_CONSISTENCY_CHECK = OFF)) |
This essentially means the data that is currently in the history table cannot be queried on with methods used to query temporal tables. You may also run into issues with querying any new data because older data is bad and has time period overlaps. This method is not recommended since it carries a lot of risk.
Instead, it is better to fix the data for time periods to match what is expected when using temporal table methodologies. Each history record must have a start and end date in the past during which the row was valid. The start date of each history record must match the end date of the one before it and the end date should be the start date of the next one and so on. The start date of the main table record should equal the last end date of its history. Cleaning up the data in this way will ensure that there are no time gaps.
To perform the cleanup, follow these three steps:
Step 1: Find the first history record for each row in the main table and set start date to equal the create date and end date to equal update date.
|
1 2 3 4 5 6 7 8 9 |
UPDATE dbo.region_history SET startdate = createdate, enddate = updatedate --select a.regionid,a.regionhistoryid,b.slno FROM dbo.region_history a INNER JOIN (SELECT regionid,regionhistoryid, RANK() OVER (PARTITION BY regionid ORDER BY regionhistoryid) AS slno FROM dbo.region_history) b ON a.regionid = b.regionid AND a.regionhistoryid = b.regionhistoryid AND b.slno = 1 |
Step 2: Find the records that are dated after the first one, and update them in sequence, the start date of each record should be equal to end date of the previous one.
|
1 2 3 4 5 6 7 8 9 10 11 |
UPDATE dbo.region_history SET startdate = b.priorupdatedate, enddate = a.updatedate --select a.*,b.priorupdatedate, b.slno FROM dbo.region_history a INNER JOIN (SELECT regionid,regionhistoryid,updatedate, LAG(updatedate) OVER (PARTITION BY RegionId order by updatedate) AS priorupdatedate, RANK() OVER (PARTITION BY regionid ORDER BY regionhistoryid) AS slno FROM dbo.region_history) b ON a.regionid = b.regionid AND a.regionhistoryid = b.regionhistoryid AND b.slno > 1 and b.priorupdatedate IS NOT NULL |
Step 3: The last date of the very last history record should equal the start date in main table of the same record. Remember that you have old triggers still enabled, so any changes you make to the main table will be logged again. So first, you have to drop those triggers. You also have to temporarily remove the period.
|
1 2 3 |
DROP TRIGGER [dbo].[Region_Delete] DROP TRIGGER [dbo].[Region_Update] ALTER TABLE dbo.region DROP PERIOD FOR system_time; |
Then, run an update to bridge the history on the history table and main table.
|
1 2 3 4 5 6 7 8 9 10 |
WITH RegionCTE AS ( SELECT RegionID, maxupdatedate = MAX(updatedate) FROM dbo.Region_History GROUP BY regionid ) UPDATE dbo.region SET startdate = b.maxupdatedate, enddate = '9999-12-31 23:59:59.9999999' --select a.*,b.priorstartdate FROM dbo.region a INNER JOIN RegionCTE b ON a.regionid = b.regionid |
You may, if you choose to, drop the columns createuser, createdate, updatedate, updateuser, and regionhistoryid from both tables at this point. If you have older queries using these columns, though, this might not be desirable to do.
Now, when you add the period back in and set versioning on, it works like a charm. You have also covered all time gaps involved so that querying using both the older method and the new method in versioning will work the same.
|
1 2 3 4 5 6 7 |
ALTER TABLE dbo.Region ADD PERIOD FOR SYSTEM_TIME ([StartDate], [EndDate]) ALTER TABLE dbo.Region SET (SYSTEM_VERSIONING = ON (HISTORY_TABLE = dbo.Region_History, DATA_CONSISTENCY_CHECK = ON)) SELECT * FROM dbo.Region FOR SYSTEM_TIME AS OF '2019-03-10 14:07:29.2366667' ; |
Gives results as below:

|
1 2 3 4 5 6 7 8 9 10 |
DECLARE @ADayAgo datetime2 SET @ADayAgo = DATEADD (day, -2, getdate()) /*Comparison between two points in time for subset of rows*/ SELECT D_1_Ago.[RegionID], D.[RegionID], D_1_Ago.[RegionDescription], D. RegionDescription, D_1_Ago.[StartDate], D.[StartDate], D_1_Ago.[EndDate], D.[EndDate] FROM [dbo].[Region] FOR SYSTEM_TIME AS OF @ADayAgo AS D_1_Ago JOIN [dbo].[Region] AS D ON D_1_Ago.[RegionID] = [D].[RegionID] AND D_1_Ago.[RegionID] BETWEEN 1 and 4 ; |
(The results returned may depend on when you run this query – in comparison to when the data was created, so use the right date for the variable @Adayago).

Converting Your Data
Cleaning up the data to make it conform to the system-version temporal tables can be quite tricky, and your scenario may be even more complex. Here are a few things to keep in mind:
- The start date should always be less than the end date in both tables.
- If you have multiple history records for a single parent record in main table, the start and end dates should also be sequential in ascending order with no period overlaps.
- The end date for the last row in the history table should match the start date for the active record in the parent table.
Deleting data that does not obey these conditions is also a possible solution. Since this destroys the purpose of even having an existing table converted to history, this is not recommended. Instead you could keep that table as is and use a brand-new table to store versioning history.
It is also noteworthy that table versioning does not capture who made the change. That is something you may have to do manually, if you have a need to get this information. This trigger based workaround suggested by MVP Aaron Bertrand is a good way to incorporate this.
Removing Versioning
Eventually you may have e a scenario where you need to drop the tables or remove versioning entirely. Reasons might be that the table is gathering too much history or the footprint is not affordable.
To do this, you need set system versioning off and drop period for system_time. You can remove the date columns too since they are not of much relevance if the table is not using them but this optional.
There are a few steps to go through for this process and the following script can come in handy.
|
1 2 3 4 5 6 7 8 9 10 11 12 13 14 15 16 17 18 19 20 21 22 23 24 25 26 27 28 29 |
DECLARE @DefaultConstraint nvarchar(200) DECLARE @Tablename nvarchar(200) DECLARE @startdatecolumnname nvarchar(200) DECLARE @enddatecolumnname nvarchar(200) SELECT @Tablename = 'dbo.Region' SELECT @startdatecolumnname = 'SysStartTime' SELECT @enddatecolumnname = 'SysEndTime' EXEC('ALTER TABLE ' + @Tablename + ' SET (system_versioning = off)') EXEC('ALTER TABLE ' + @Tablename + ' DROP PERIOD FOR system_time;') SELECT @DefaultConstraint = Name FROM SYS.DEFAULT_CONSTRAINTS WHERE PARENT_OBJECT_ID = OBJECT_ID(@Tablename) AND PARENT_COLUMN_ID = (SELECT column_id FROM sys.columns WHERE NAME = @startdatecolumnname AND object_id = OBJECT_ID(@Tablename)) IF @DefaultConstraint IS NOT NULL EXEC('ALTER TABLE ' + @Tablename + ' DROP CONSTRAINT ' + @DefaultConstraint) EXEC('ALTER TABLE ' + @Tablename + ' DROP COLUMN IF EXISTS ' + @startdatecolumnname) SELECT @DefaultConstraint = Name FROM SYS.DEFAULT_CONSTRAINTS WHERE PARENT_OBJECT_ID = OBJECT_ID(@Tablename) AND PARENT_COLUMN_ID = (SELECT column_id FROM sys.columns WHERE NAME = @enddatecolumnname AND object_id = OBJECT_ID(@Tablename)) IF @DefaultConstraint IS NOT NULL EXEC('ALTER TABLE ' + @Tablename + ' DROP CONSTRAINT ' + @DefaultConstraint) EXEC('ALTER TABLE ' + @Tablename + ' DROP COLUMN IF EXISTS ' + @enddatecolumnname) |
Summary
Data Versioning is complex and there are no two ways of versioning that work exactly the same. There are many situations you may run into if you are transitioning from an older method to temporal tables. Knowing what SQL Server expects would help this transition to happen smoothly. Temporal tables are a great feature and very easy to use, once we cross the hurdle of setting them up.
Load comments