
Starting with SQL Server 2012 it is possible to use the newly-introduced Project Deployment model for SQL Server Integration Services. The new model promises to provide deployment flexibility, improved configuration options and easier monitoring and maintenance.
Up until SQL 2012 the SSIS deployment was package-based, i.e. each SSIS package had to be deployed separately, and the deployed packages could be stored either on the file system or in a system database repository. The new Project Deployment model uses its own designated database (called SSISDB) and the deployment is performed via a single ispac file, which contains all packages and configuration variables (Project/Package Parameters, Environments, Environment variables).
This article covers the process of deploying the project, including the setting-up of the SSIS Catalog and creating the project. In the next article, ‘SSIS 2012 Projects: Deployment Configurations and Monitoring’ I cover the configuration and management of environment variables, and explain how to monitor individual packages.
Setting up the Integration Services Catalog
Before we can deploy any projects to a SQL Server instance, we first need to create the Integration Services Catalog. Think of this catalog as the container for all deployed projects, their settings and historical versions.
There is only one Catalog per SQL Server instance; it is represented by a separate SQL Server database called SSISDB, which contains the deployment’s versioning, settings, and even statistical performance data. It uses SQL Server encryption; This is why we are asked, during the catalog creation, to provide a password, which will be used to create the database master key which will be used to encrypt sensitive data.
In order to use the Project Deployment model, SQLCLR needs to be enabled on the SQL Server instance. Here is a script which enables the SQLCLR:
|
1 2 3 4 5 6 7 8 |
sp_configure 'show advanced options', 1; GO RECONFIGURE; GO sp_configure 'clr enabled', 1; GO RECONFIGURE; GO |
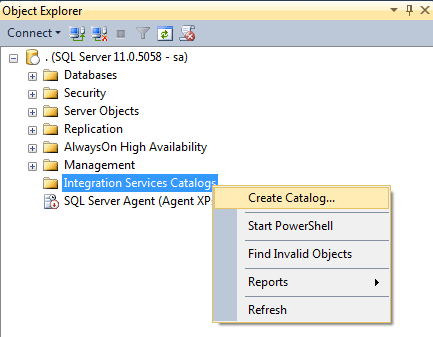
In order to create the catalog, we need to connect to the SQL Server instance and right-click on the ‘Integration Services Catalogs‘ and click ‘Create Catalog‘.
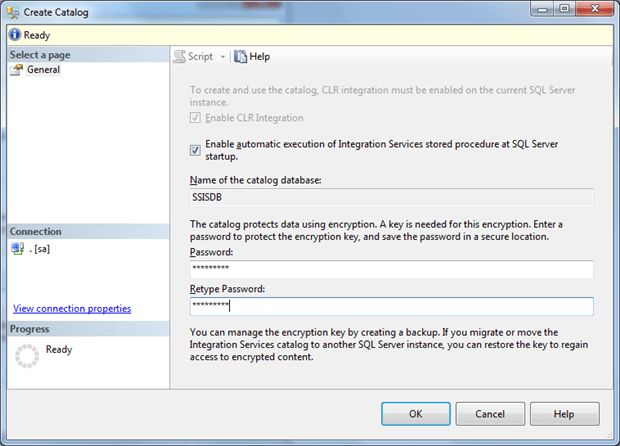
In the next screen we are asked for the encryption password and whether we would like to run the Catalog.startup procedure every time the SQL Server instance starts (the Catalog.startup stored procedure fixes the status of the packages in the catalog if there were packages running when the SQL Server instance went down):
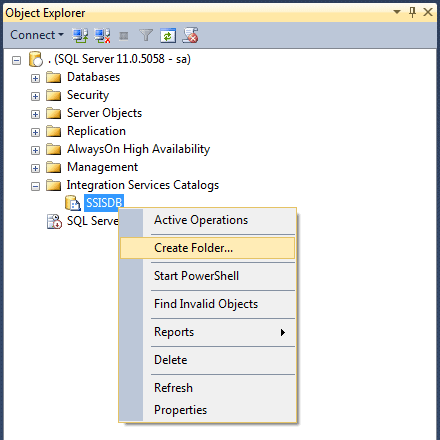
After we have created the Catalog, we can create a new folder under it, which will contain our first project. To create the folder, simply right-click on the SSISDB catalog and click ‘Create Folder‘:
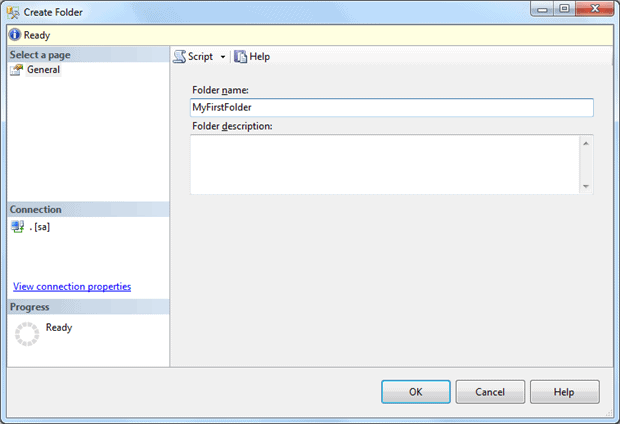
Then we are presented with a dialog to enter the folder name:
Under every newly-created folder we have two sub-folders: ‘Projects‘ and ‘Environments‘.

The ‘Projects‘ folder will contain the deployed SSIS project and the ‘Environments‘ folder will contain the different sets of environment settings we will be creating later on. These will include such things as the settings for Development server, for Test server, Production server.
Creating the SSIS project
The process for the creation of development projects in BIDS has not changed, except for the fact that the default setting in SQL 2012 onwards is the Project Deployment model. There is, of course, a way to right-click on the project solution and convert it back to the Package Deployment model.
For the purpose of this article, however, I will create a database ProjectDeployment_Test and two tables called InfoSource and InfoDest.
Here is the script for creating the objects:
|
1 2 3 4 5 6 7 8 9 10 11 12 13 14 15 16 17 18 19 20 21 22 23 24 25 26 27 28 29 30 31 32 33 34 35 36 37 38 39 |
CREATE DATABASE [ProjectDeployment_Test] CONTAINMENT = NONE ON PRIMARY ( NAME = N'ProjectDeployment_Test', FILENAME = N'D:\Databases\ProjectDeployment_Test.mdf' , SIZE = 4096KB , FILEGROWTH = 1024KB ) LOG ON ( NAME = N'ProjectDeployment_Test_log', FILENAME = N'D:\Databases\ProjectDeployment_Test_log.ldf' , SIZE = 1024KB , FILEGROWTH = 10%) GO ALTER DATABASE [ProjectDeployment_Test] SET RECOVERY SIMPLE GO USE [ProjectDeployment_Test] GO CREATE TABLE [dbo].[InfoSource]( [id] [int] NULL, [SomeData] [int] NULL ) ON [PRIMARY] GO CREATE TABLE [dbo].[InfoDest]( [id] [int] NULL, [SomeData] [int] NULL ) ON [PRIMARY] GO INSERT INTO [dbo].[InfoSource] ( id , SomeData ) SELECT 1 , 12345 UNION ALL SELECT 2 , 134545 UNION ALL SELECT 3 , 4576467 |
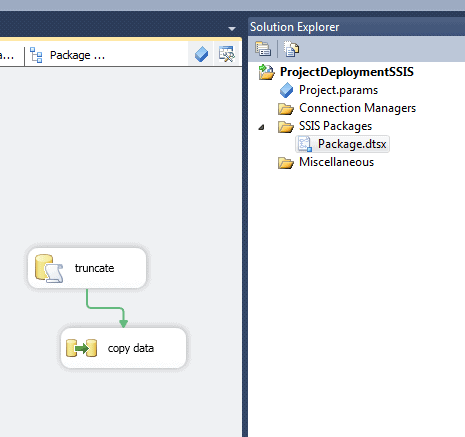
After I have created the database and the objects, let’s create a simple SSIS package in our project. The package will truncate the destination table and copy the data from the InfoSource table to the InfoDest table.
The package and project look like this:
Now let’s create a project parameter by double-clicking the Project.params. The newly created parameter looks like this:
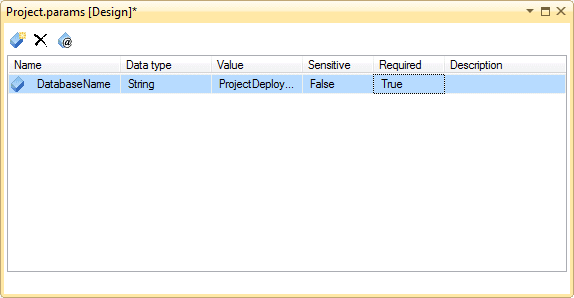
Project parameters are accessible by any package in the project and are very useful for dynamic configurations of the deployed projects.
I will go in detail about how to use project parameters in the next article on Project Deployment: Configuration and Management of the SSIS, but for now all we need to do is to put this project parameter in use.
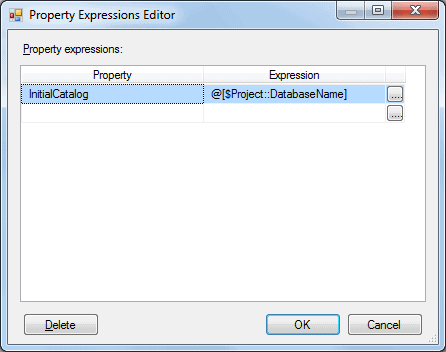
We can do this by clicking once on the connection in our SSIS package and then editing the Expressions in the Properties:
Deploying the project
Now let’s deploy the project to our SQL Server instance. By right-clicking on the project solution in BIDS and clicking Deploy, we get to the following wizard:
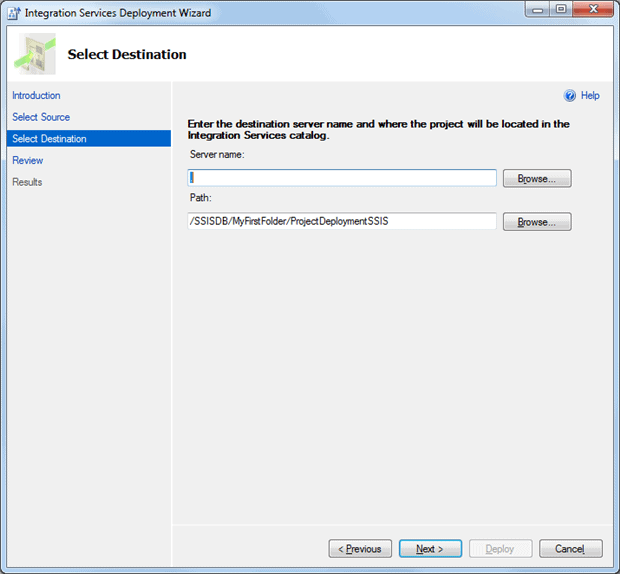
We have to fill in the Server name, in my case it is the localhost. Then we click ‘Next‘and then ‘Deploy‘.
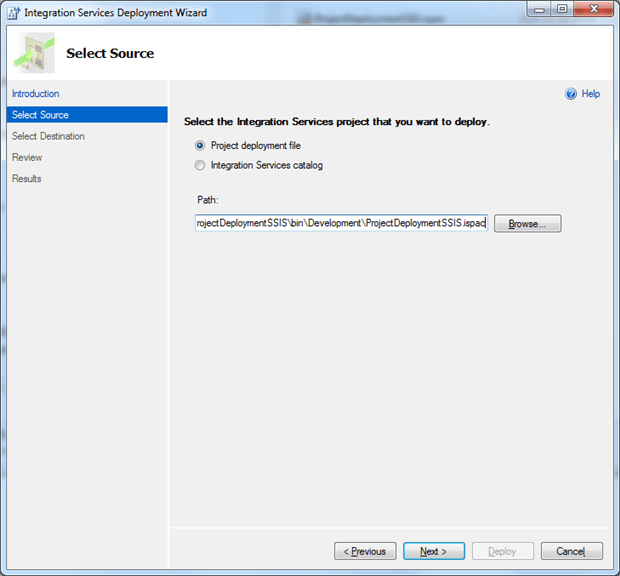
Another way to deploy our project, if we do not have sufficient rights to do so, is to go to the bin folder of our SSIS project after we have built the solution and deliver the *.ispac file which is found there to a system administrator who can deploy the project for us. (in this case my file is called ProjectDeploymentSSIS.ispac)
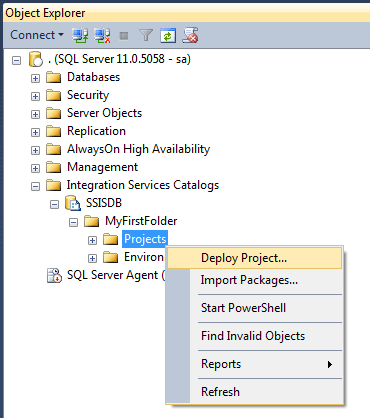
The system administrator then has to login to the SQL Server instance, go to the SSIS Catalog, right-click on the Projects folder in the correct folder and click ‘Deploy Project‘:
Then the following wizard appears:
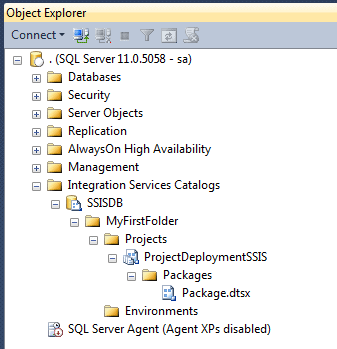
The deployed project now looks like this:
If you encounter an error “A .NET Framework error occurred during execution of user-defined routine or aggregate “deploy_project_internal“: System.ComponentModel.Win32Exception: A required privilege is not held by the client“, then make sure that the SQL Server service account is added to the Local security policy “Replace a process level token” in ‘User Rights Assignments‘ in the secpol.msc console. A restart of the SQL Server service is required to change the permissions.
From this point on, we can execute the deployed package by scheduling an SQL Server Agent Job and using the package in it.
Here are a few caveats of the Project Deployment model:
- keep in mind, that in the project deployment model there is no way to deploy only changes to a single package. Instead, the entire project has to be deployed every time.
- The SQLCLR is used to deploy the packages to the SSIS catalog, but not needed further on for running the packages. So, even in organization with strict security policies, the SQLCLR can be enabled while setting up the SSIS catalog and while deploying, after which it can be disabled again
- Finally, if you are using Transaction Option: Required in your SSIS packages, you might run into trouble with the permissions of the MSDTC. Here is a very useful article on how to solve the problems with the SSIS and the distributed Transactions Coordinator: Troubleshooting MSDTC Permission Issues when a Distributed Transaction Starts
Conclusion:
So far we have seen how easy it is to deploy packages by using the new Project deployment model. This really speeds up the deployment of large scale environments (in large organizations there may be 100s of SSIS packages per project).
In the next article of the series ‘SSIS 2012 Projects: Deployment Configurations and Monitoring’, we pay special attention about dynamic configurations, the use of environment variables and large scale deployments. I’ll also explain how easy it is to monitor the packages.
Load comments