
NOTE: Microsoft has changed gears on this tool. Instead, they have released Azure Data Studio for Windows, macOS, and Linux. You can download it here.
As a data person you’ve likely looked, with some envy, at the cool new multiplatform tools Microsoft has released for your developer coworkers. Visual Studio Code, or VS Code, is an open source application which will run on Windows, macOS, and Linux, allowing software development for a variety of languages. You’ve probably thought, “Hey, where’s OUR multiplatform tool for working with data?” Well, have I got good news for you!
Microsoft has just released SQLOPS – SQL Operations Studio – in preview mode. Built on top of VS Code, it is designed to manage your SQL Server from multiple platforms. SQLOPS runs on Windows, macOS, and Linux. Best of all, it is absolutely free to use.
Downloading SQLOPS
Before you rush off and download it, there is a word that needs to be stressed. PREVIEW. The tool is essentially in beta. This means there will be features that might not be quite complete, and you will likely encounter bugs. You are using this at your own risk, and you should expect frequent updates to the product. As a result, installation on your production systems is probably not a good idea.
As you will see, there are some features that make it worth looking at now. Using the tool is simple, and low risk, as technically there is no true install. You simply download it, extract the files, and start using it. To download, just go to https://docs.microsoft.com/en-us/sql/sql-operations-studio/download or you can use the shortcut http://bit.ly/sqlops. When you do, you’ll see this on the page:
From here, select the version appropriate to your operating system. Once it’s downloaded, installation is very simple.
Installation on a Mac
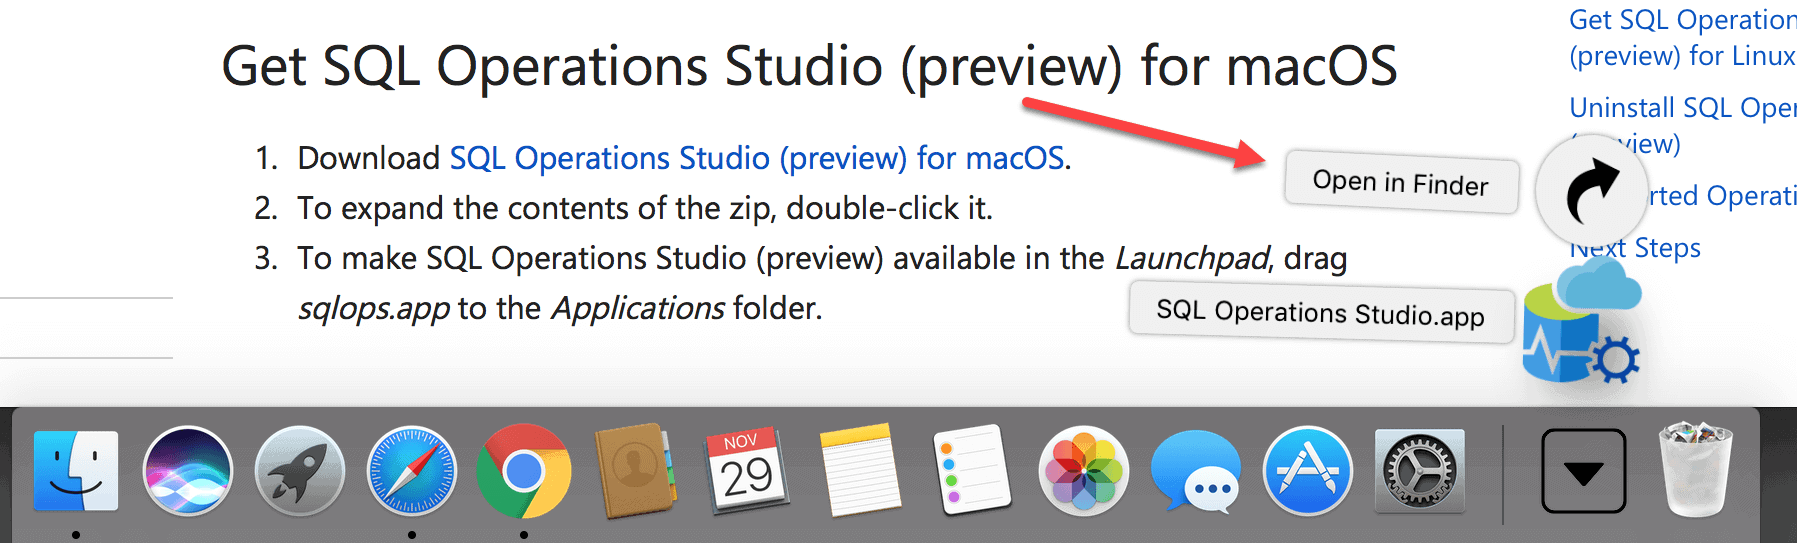
To install on a Mac, be sure to navigate to the site and download the file. Once the file is downloaded, simply select Open in Finder and unzip the file.
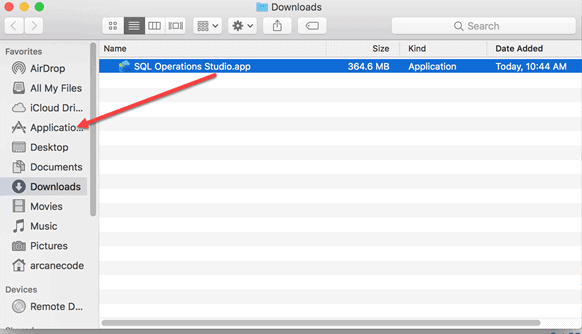
With the downloads folder open, simply drag and drop (or copy and paste) into the Applications folder.
Then, just double click on the SQL Operations Studio icon to open it. (Note this Mac has the Show file extensions option enabled, yours may not show the .app extension at the end. It’s still the same program.)
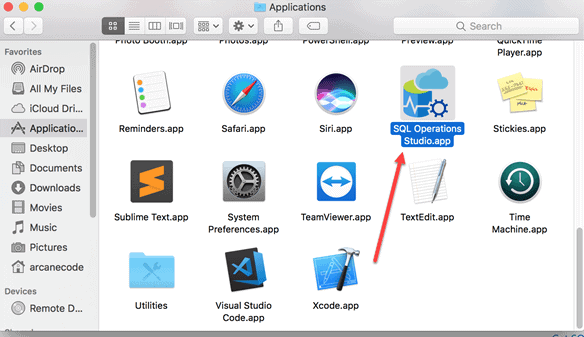
And there you go, you are ready to connect to your SQL Server!
Installation on Windows
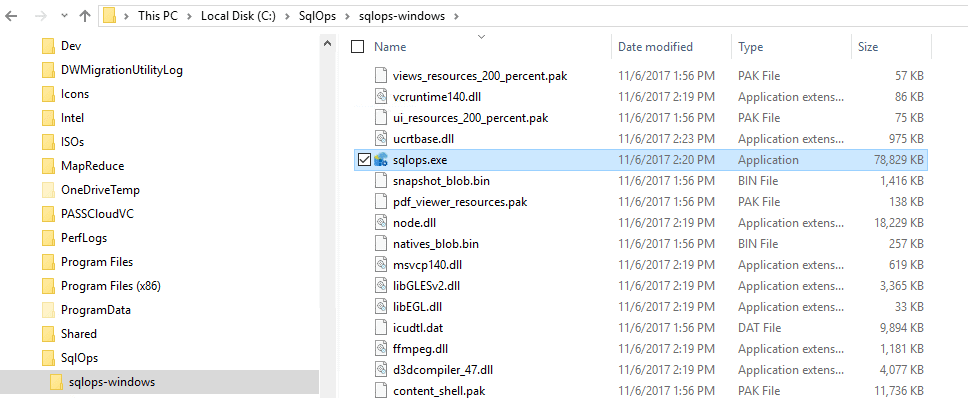
Installation on Windows is even simpler. First, you will create a folder on your hard drive that will hold the application. Unlike most windows applications, SQLOPS does not have a traditional installer. On this Windows installation, C:\SqlOps was created.
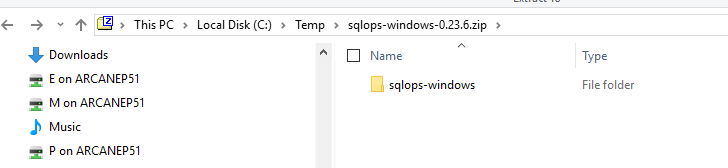
Once you have it downloaded, just go to your downloads folder. Double click on the sqlops-windows-0.23.6.zip file (note the file name will change as new versions are released, use the file name that you downloaded). It will open another folder with the contents of the ZIP file.
Drag and drop (or copy and paste) the sqlops-windows folder to your C:\SqlOps (or wherever you created your target folder). Once there, navigate to the sqlops-windows folder.
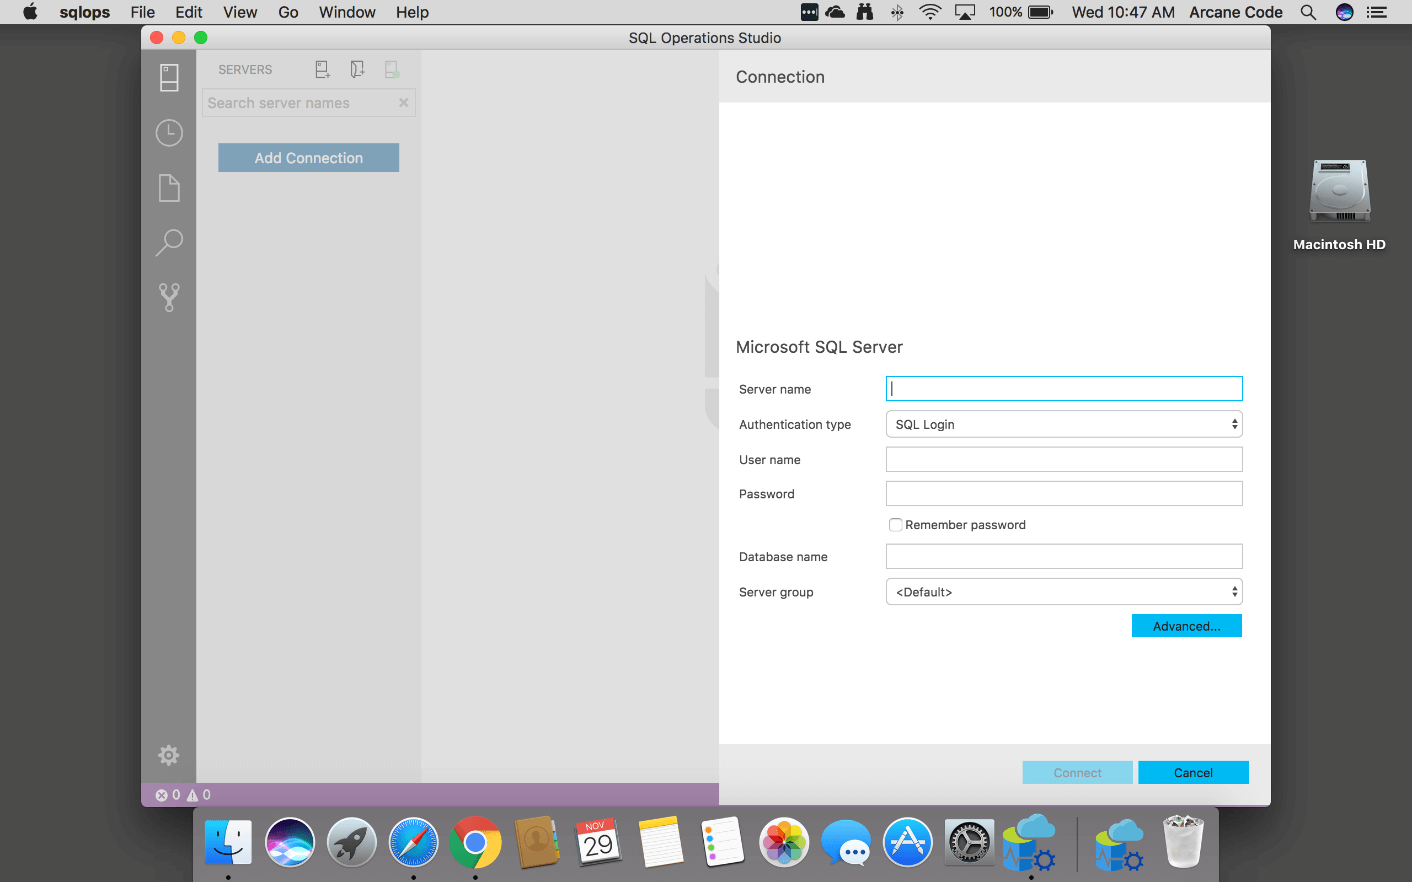
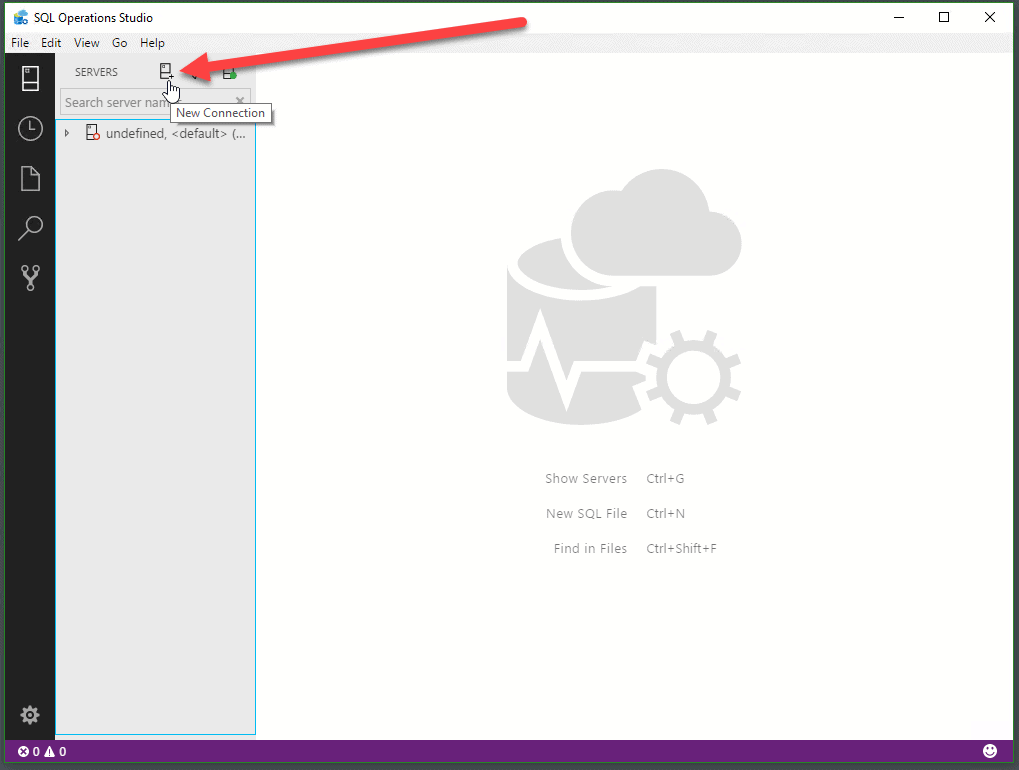
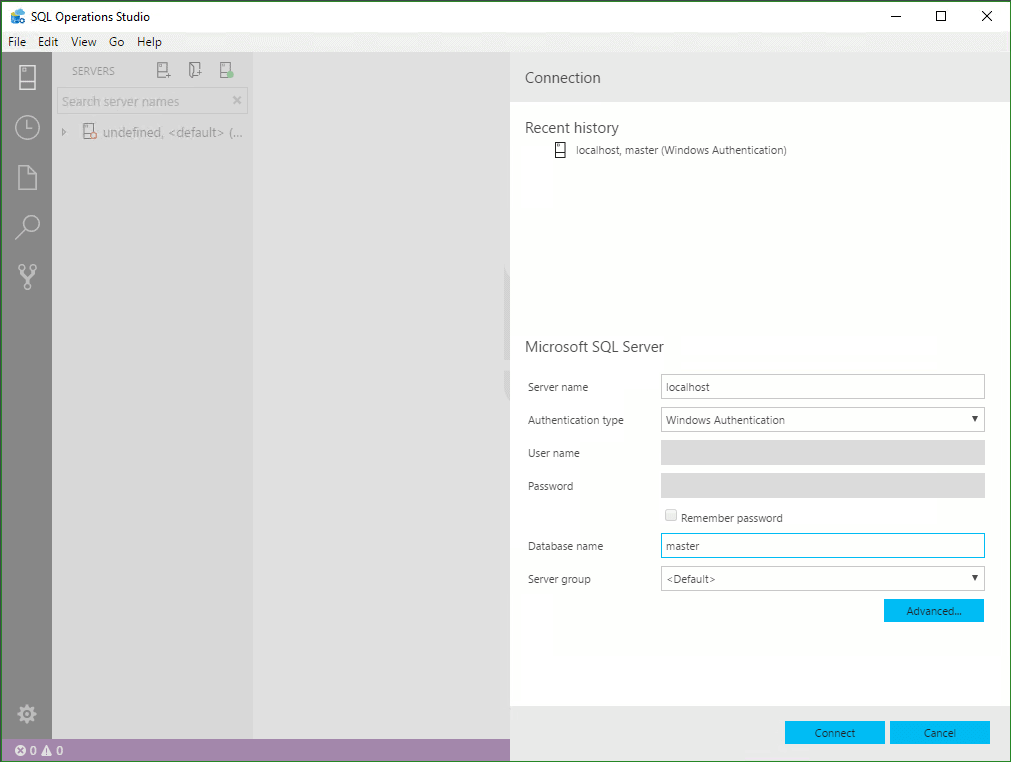
Double-click sqlops.exe to run it. If the connection window doesn’t appear when you open SQLOPS, simply click on the New Connection icon.
Fill out the connection information and click Connect. Unlike other tools, this version doesn’t provide a dropdown list of databases, so you must type in a valid database name.
Installation on Linux
Installation on Linux turns out to be almost as simple. The download page has a bash script you can run to extract the files once they have been saved to your system. Be aware that depending on the version of Linux you run, there may be additional dependencies you have to install. Due to the wide variety of Linux distributions there are too many combinations to attempt to document here; just follow the instructions on the download site for your version of Linux.
The SQLOPS Interface
By this point, you’ve installed SQLOPS on your operating system and have filled out the connection information. Once you are connected to your server, you should see something like this (note the numbers were added to enable discussion of the layout):
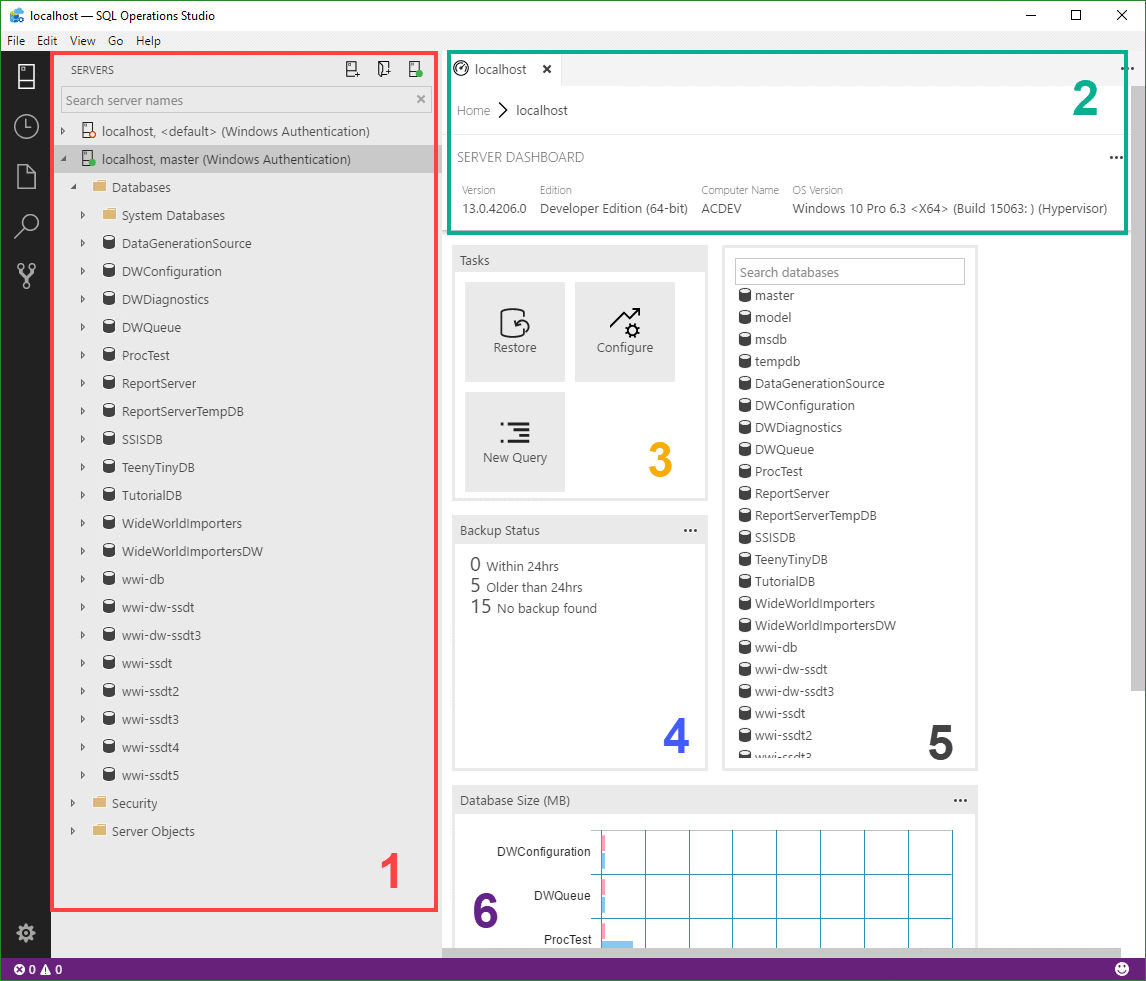
The area denoted by the red number 1 is the Servers pane, also known as the Object Explorer in some online documentation. Expanding the server branch (in this example localhost), then Databases, will present a list of the databases. The Object Explorer serves the same function here as it does in SSMS (SQL Server Management Studio). It provides a way to navigate the various objects on your SQL Servers, drilling down and providing menus to launch other operations like editing data or executing queries.
In SSMS, when you connect to a server the area to the right is empty. With SQLOPS though, you can see a nice dashboard. The area in green, number 2, is the dashboard header. It gives an overview of the server including the SQL Server version, edition of SQL, computer name, and OS (Operating System) version.
The next area, number 3, are shortcuts to common tasks. At the server level, the three most common tasks are restoring a database, configuring your server, and creating a new query. As later versions of SQLOPS are developed, you may see other tasks in this area as new functionality is brought to the application. Below the tasks pane is area 4, which shows the backup status of your various databases.
To the right is area 5, the search pane. This provides a quick way to find various objects on your server. Just begin typing and it will narrow the list of databases to match what you are keying in.
Finally, the very bottom is area 6. This shows a graph comparing the sizes of your various databases. This screen capture is cut off due to size limitations, but it just allows you to get a quick at a glance comparison of size between your various databases.
On the very left is a big gray bar with some icons. Let’s take a quick look at it.
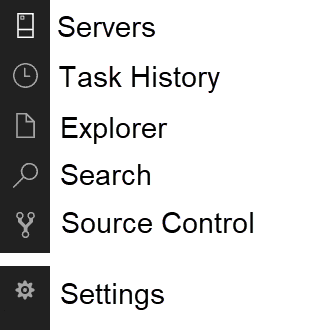
The top brings up the panel you’d already seen, the Servers (aka the Object Explorer). The next button down is the Task History. If you had performed any backups, restores, or other similar tasks you could reference them in this area. Below this is the Explorer pane. The Explorer pane has a list of all open files in the SQLOPS editor. It offers some useful options, so let’s take a closer look at it.

The Explorer pane contains list of all open files. To the right of the file name is the full path to the file. Right clicking on the file provides a rich context menu. Most of the options, such as Save and Close, are pretty obvious in their functionality but a few do warrant further explanation.
Open to the Side opens the file in split screen, so you can compare two files side by side in SQLOPS. Reveal in Explorer opens up an Explorer window in your computers operating system. Open in Terminal opens up a terminal window in the lower half of the SQLOPS application, by default it is PowerShell, but it can also be changed to a Command Prompt (CMD), or a BASH terminal. This may vary by operating system, for example on macOS you wouldn’t have the option for a CMD window. You can also open a terminal window by using the View menu in the toolbar, and selecting Integrated Terminal.
The Search pane brings up a pane that can be used to search, or search and replace, text in the current editor window. Below this is the Source Control pane, this allows you to manage your various files within your source code control system.
Way down at the bottom is a big gear icon. This allows you to alter the various settings of SQLOPS, such as the keyboard shortcuts, color theme, and more.
Running Queries
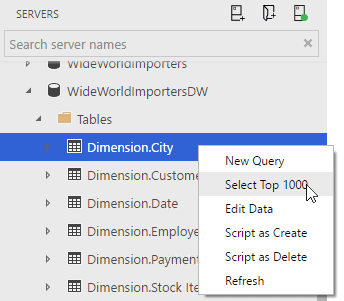
At this point you should have a good overview of the SQLOPS interface. Let’s start doing some actual work and do one of the most common things, running a query. From the Servers pane, expand your databases, then expand one database, then the tables for that database. For this example, I’ll be using the WideWorldImportersDW database.
NOTE: WideWorldImporters is a new sample database introduced with SQL Server 2016. If you don’t have it, you can download the backup file or source code from GitHub. There are multiple databases as part of the sample, for this article we’ll be using the data warehouse version (WideWorldImportersDW).
Right click on a table, and chose the Select Top 1000 option.
If you’ve worked with SSMS, the following screen should look familiar. Like SSMS, the query is at the top, and the results at the bottom. Unlike SSMS, which has the Results and Messages on separate tabs, SQLOPS places the messages just below the results. From here you can make changes to the query and re-run it, save your query, and perform other actions you’d normally do with a SQL file. There are two areas though that should be called out. The first is the Explain button, highlighted in red in the above image.
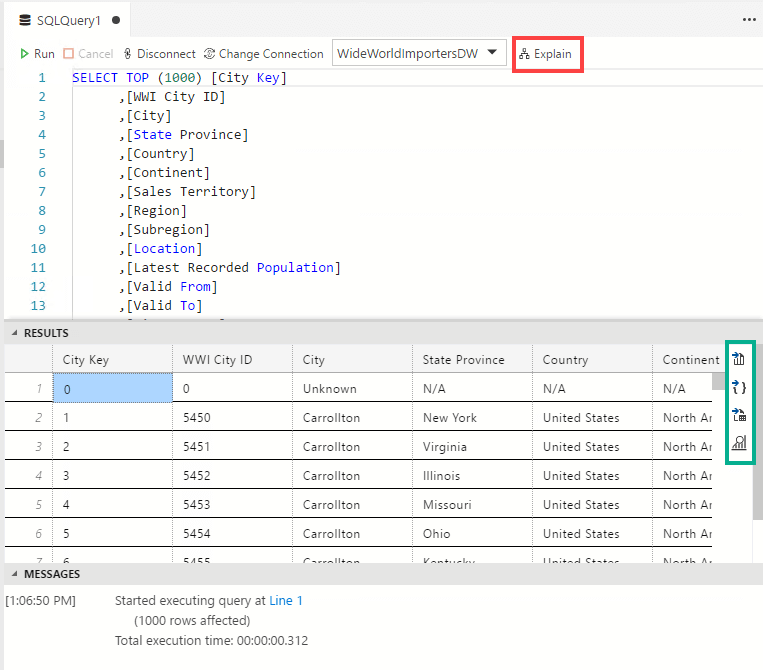
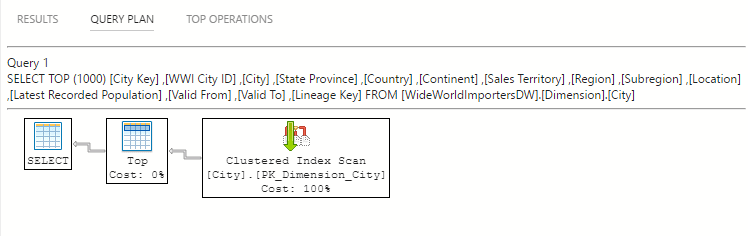
Clicking Explain brings up the query plan. While this is of course possible in SSMS, SQLOPS makes it much more convenient to run. Hovering over any item in the query plan brings up more details about that item.
The other area you should notice is to the right of the results, highlighted in green in the image showing the query results. From top to bottom, the first three are Save as CSV, Save as JSON, and Save as Excel. This is a great addition, allowing you to easily save your data for other purposes.
The final option is View as Chart. For the data in the previous SELECT 1000 query the option won’t provide anything meaningful, so let’s look at an example that will. In the Servers pane, right click on your database and pick New Query. Then, paste in the query below, assuming you are using the WideWorldImportersDW sample database.
|
1 2 3 4 5 6 7 |
SELECT d.[Calendar Year] , SUM(s.[Total Including Tax]) FROM [WideWorldImportersDW].[Fact].[Sale] s JOIN [WideWorldImportersDW].[Dimension].[Date] d ON s.[Invoice Date Key] = d.[Date] GROUP BY d.[Calendar Year] ORDER BY d.[Calendar Year] |
Run the query, and view the results at the bottom. Now press the chart button, as indicated by the giant red arrow.
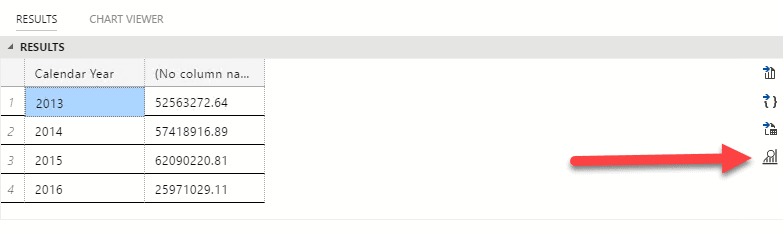
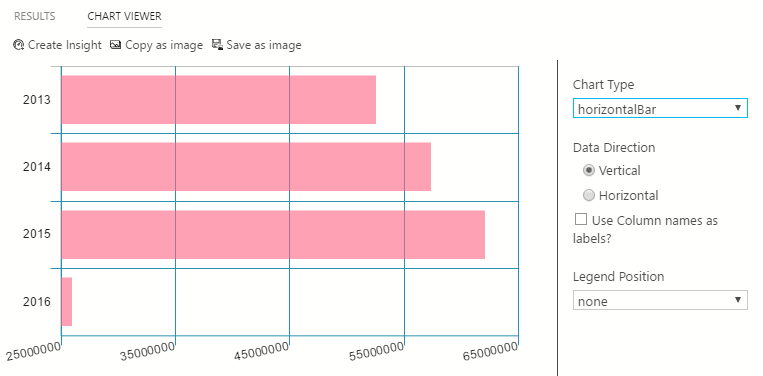
Ta-da! A chart which neatly summarizes the results of your query appears. If you expand the Chart Type on the right, you’ll see many different charts are available. Play with it to see what the results are for the various types. One thing to be aware of, the chart viewer works best when there are a limited number of categories, as in this example, the years. If you have a lot of categories, for example hundreds of customers, the chart will be unreadable and not very useful.
Help Writing Your Queries
All of us have SQL syntax we use on a regular basis. But what about times when you are writing SQL queries that you don’t normally run? Often, you wind up doing internet searches to remind yourself of the correct syntax, or hunt for previous scripts where you used a similar query. Well SQLOPS has a great tool to help you out. Return to the Server pane, right click on your database, then pick New Query. In the empty editor, type sql, and see what pops up!
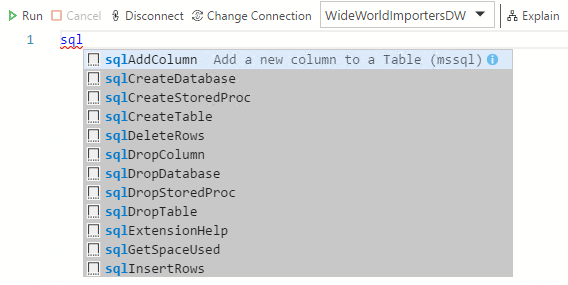
SQLOPS has an extensive library of snippets built in. A snippet is a code template that has the basics for a command. Let’s narrow it down some, keep typing adding Se after the code you have already typed.
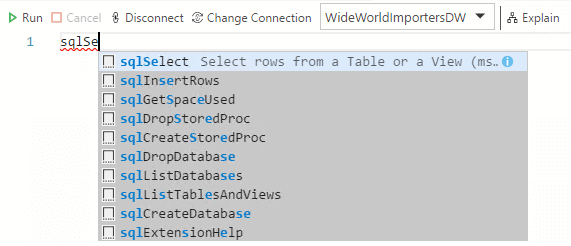
As you can see, the snippet popup narrows itself down to those options with SE in the name. Since sqlSelect is already highlighted, just hit the TAB key on your keyboard.

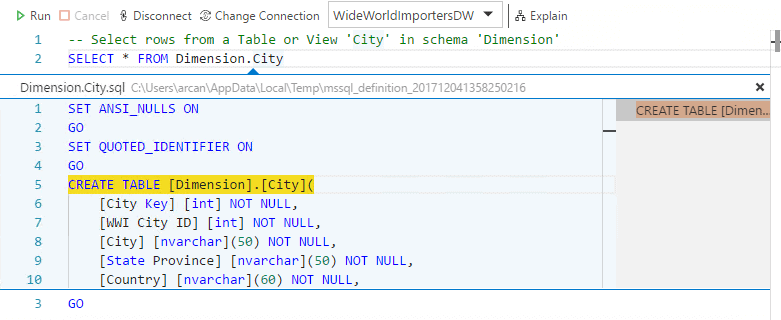
You’ll see TableOrViewName is highlighted. Just type City, and you’ll see it updates both the TableOrViewName in the comment, as well as in the query itself. Hit the TAB key, which will highlight SchemaName. Simply type in Dimension, and it will also update both the comment and the query. From here you can edit your query normally, adding to the WHERE clause (or removing it), adding a GROUP BY, and whatever else you’d like to do. Then, you can run your query. This provides a very efficient way of writing your queries, especially for query types you don’t work with on a regular basis.
Peeking into Your Database
When writing queries, a common need is to know more information about the objects you’re working with. Let’s return to the previous example, where we generated a SELECT * query. Now you want to limit the query to a few columns. Sure, you could jump over the Server pane, and navigate down to the database, then the table, then the columns. It would be much more efficient though if you could jump right to the definition of the object. That’s where the peek functionality comes into play.
In the query editor, put your cursor on the table name, and right click. On the menu, pick Peek Definition.

A small window opens under the item you peeked. The definition for the table appears within. You can copy columns out of the window, as well as review the definition. Peek works for more than just tables, it can also be used with stored procedures, functions, and other similar objects. To close the peek window, just click on the x in the upper right of the peek window.
The other option is Go to Definition. This will open a new tab with the definition of the object (in this example the City table). From there you can alter, run, or anything else you’d normally do in a SQL window.
Summary
In this article, we explored SQLOPS – SQL Server Operations Studio. SQLOPS is the new open source, multiplatform tool for working with SQL Server. We began by seeing how easy it is to install, then showed the interface. Next, we looked at some common tasks such as editing queries, then reviewed the cool snippets feature. Finally, we looked at how to ‘peek’ into your database. Although still in preview, SQLOPS already has many features that make it a worthy addition to your toolkit.
If you’d like to see the actual code behind SQLOPS, you can get it from Microsoft’s github site, https://github.com/Microsoft/sqlopsstudio
This document contains proprietary information and is protected by copyright law.
Copyright © 2026 Red Gate Software Limited. All rights reserved
Load comments