
PowerShell, Chocolatey, and Boxstarter.
Almost two year ago now I started a small open-source project, Boxstarter, designed to make “Box Starting,” a Windows box, a simple and repeatable process.
The idea of creating Boxstarter came to me when I had a SSD die and I had to repave my machine. This shortly followed by installing several Windows 8 revisions from Consumer Preview to RTM. I’d already used PowerShell to automate a fifty-page deployment document when I worked in Microsoft’s MSDN org. If I could use it to automate the installation of AppFabric, network shares, multiple web apps and other infrastructure settings, surely I could script the build of my own PC.
Chocolatey
Then I found Chocolatey. Chocolatey is written in PowerShell and built on top of Nuget packaging. Chocolatey differs slightly from Nuget. Instead of maintaining library packages for your development projects to be easily consumed in Visual Studio and Build environments, it manages machine-wide software package installations from the command-line; even Windows applications as complex as such as Visual Studio, SQL Server Express or Office 365. You can compose these packages to build out everything a server needs. The packages are entirely PowerShell-based, so anything that you can do in PowerShell (in other words, pretty much anything) can be captured in a package. Here are just some of the advantages of Chocolatey:
- It will install or update Visual Studio, Office 365, ITunes and over 1500 other applications in a single command.
- It simplifies installations that can be tedious to install on your own. Instead of hunting around the internet for the download page, forgetting to uncheck the tool bar download and waiting three minutes to click the next button, just type CINST <your app> and be done with it. When next it’s time for a huge Visual Studio install session, save yourself time and frustration and use
CINST VisualStudioExpress2012Web. - Updating what Chocolatey installs is simple. Whatever you installed with Chocolatey can be updated simply by typing CUP ALL.
- You can install all of your apps in one go if you create a “meta-package” or
package.config
Boxstarter builds on top of Chocolatey and is tailored specifically for fresh machine installs. These machines can be either bare metal or Virtual Machines. Boxstarter also offers deep integration with Hyper-V and Windows Azure VMs. Boxstarter provides an environment for running Chocolatey packages that can gracefully manage reboots, remote installations, windows-specific settings and Windows Updates to provide reliable and repeatable installs. Boxstarter takes Chocolatey and targets its use specifically for automated tasks involving the setup of a Windows environment from scratch. It is available as an open source project in CodePlex, under an Apache 2.0 license.
To illustrate how versatile Boxstartercan be, we’ll use it to automate the process of creating a new TFS server from scratch, along with such obvious dependencies as SQL Server. Although I’ll start by doing it on a new Azure VM, I will also show you how you can apply the install package to an on-premise server or a Hyper-V VM as well.
We’ll start by installing Boxstarter and the Windows Azure PowerShell tools. Then we’ll create a Windows Azure VM, and, with a single command, deploy a Chocolatey package that will
- connect to our VM
- install Sql Server 2012 Express with SP1
- install Team Foundation Server 2013 Express,
- configure the TFS server to connect to the database
- create a default collection
- configure and start build services
You will then be able to launch a browser or Visual Studio and connect to your VM on port 8080 to access these services. Because the entire install and configuration is encapsulated in a Chocolatey package, you can repeat this on as many servers as you like, over and over and over again.
Preparing your deployment environment
Before you can begin to actually deploy your Chocolatey package to build your TFS Server, we will install the Boxstarter core modules and its Boxstarter.Azure module and configure our Azure subscription account to be managed by the Windows Azure PowerShell toolkit. This is a one time step that should only need to be performed once on an individual machine that uses Boxstarter.
There are two key prerequisites to running the software and commands in this tutorial:
- PowerShell V 3 or higher. This ships with Windows 8/2012 and higher. Windows 7 and server 2008 R2 can be upgraded with the latest Windows Management Framework.
- A Windows Azure subscription. If you have an MSDN subscription, you can get one for free!!!
Getting Boxstarter
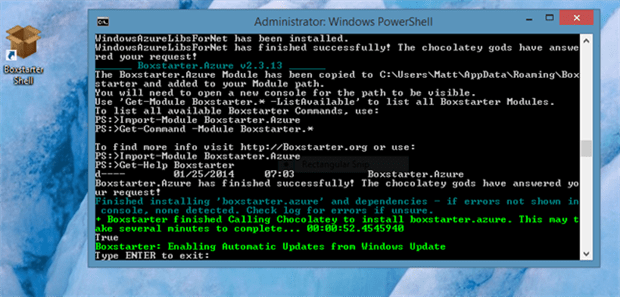
Getting Boxstarter is easy especially because you can use Chocolatey to fetch and install it. If you do not already have Chocolatey installed (if you do, just CINST Boxstarter.Azure), this is a no brainer. Simply direct IE, or any browser that supports click once apps, to http://boxstarter.org/package/nr/Boxstarter.Azure. This invokes a ‘Click Once’ app that will bootstrap Chocolatey and install all Boxstarter modules including the new Boxstarter.Azure module. As I already mentioned, this is all built on top of Nuget packaging which supports package dependencies. So along with the Boxstarter.Azure package, Chocolatey will download and install the Windows Azure .Net libraries and Windows Azure PowerShell tools. If you do not have the .Net 4.5 framework, you get that too.
Note that the /nr/ in the URL you used to kick off the Boxstarter install tells Boxstarter not to reboot your machine. Without that, if Boxstarter detects a pending reboot at any time during the install, it will reboot, and automatically log you back in and restart the install. Any install packages already installed will be skipped. Most Boxstarter packages and prerequisites should not require a reboot to run but the .Net framework version 4.5 may be an exception. So if you do not have that, you may want to remove the /nr/ from the above URL or you can manually rerun the install if you receive an error during the install.
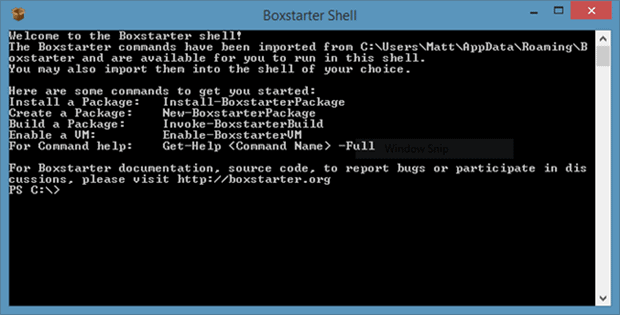
The Boxstarter Shell
Although you can use any PowerShell console to load the Boxstarter modules and run its commands (see this page for details on running Boxstarter commands), you can launch the Boxstarter Shell shortcut instead, thereby ensuring that all modules are loaded and printing some “getting started” text when the shell first loads.
Due to the improved module auto-loading in PowerShell version 3, this is not as much of an issue as it is in PowerShell 2 environments (which are not supported for the Azure integration features in Boxstarter). That said, if you are not familiar with PowerShell and want to use Boxstarter’s core commands in a PowerShell 2 environment, you may find it better to use the Boxstarter Shell.
Importing your Azure subscription details
Before you can create Virtual Machines or interact at all with your subscription resources via the Azure PowerShell commands, you need to import your Azure subscription and authentication certificate so that the PowerShell commands can properly associate you with your account. The easiest way to establish this association is by running:
|
1 |
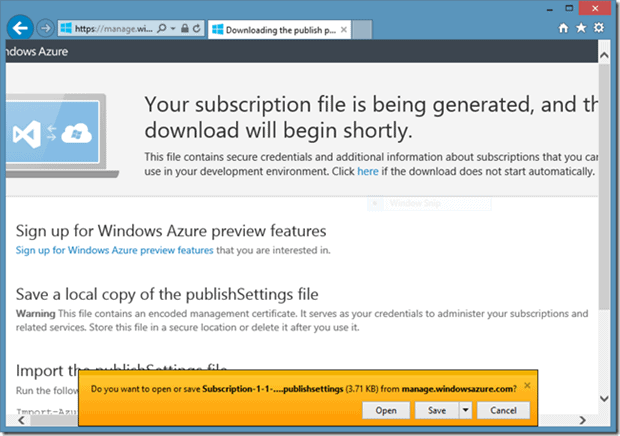
Get-AzurePublishSettingsFile |
This will launch your default browser and, assuming that you have not recently logged into the Azure management portal, you will find yourself at a Microsoft Account login screen. Once you successfully authenticate with your account, your publisher settings file will begin downloading.
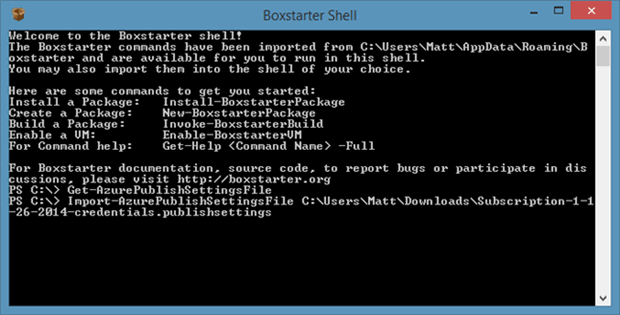
Choose to Save these settings. Then after the download completes, click the “Open Folder” link and note the location where the recently downloaded publish settings file was saved. Then run Import-AzurePublishSettingsFile and pass the path of the file. My import command looks like this:
The final step to get all of your subscription settings properly configured is to set the Storage Account to be used for all operations invoked with the Azure PowerShell tools which Boxstarter uses to access your VM. If you already have an Azure VM you plan to use for your TFS server, Boxstarter can set this on its own, but we are going to assume that is not the case and create a new VM. So we will need to set this value. To find all of your current Storage accounts, if any, run:
|
1 2 3 4 5 6 7 8 9 10 11 12 13 14 |
PS C:\> Get-AzureStorageAccount StorageAccountDescription : Implicitly created storage service AffinityGroup : Location : West US GeoReplicationEnabled : True GeoPrimaryLocation : West US GeoSecondaryLocation : East US Label : portalvhdslwf0p2qrfyt34 StorageAccountStatus : Created StatusOfPrimary : StatusOfSecondary : ... |
This is a snippet of the first of my storage accounts which is the one I will use. So I now run:
|
1 2 |
Set-AzureSubscription -SubscriptionName Subscription-1 ` -CurrentStorageAccountName portalvhdslwf0p2qrfyt34 |
Subscription-1 is the name of my subscription. Creative I know. If you do not have a storage account, you can create one either using the Azure PowerShell commands or using the Azure management portal. Using PowerShell, one can create a new account using:
|
1 |
New-AzureStorageAccount -StorageAccountName newaccount -Location "West US" |
One detail not to be missed here is that the StorageAccountName must be only lowercase letters or numbers. The Location must be a valid Azure data-center location. You can find all of them using the Get-AzureLocation command.
Understand that everything we have done up until now has been a one-time setup process that we should not need to repeat on the same machine if you plan to use Boxstarter again.
Creating the Azure VM
You can now create an Azure VM in a single command. We will use the New-AzureQuickVM command. Because this command expects an Admin user name and password, and we will need these same credentials when provisioning the VM with Boxstarter, we will want to store the credentials once in a variable:
|
1 2 |
$secpasswd = ConvertTo-SecureString "1276Tfs!" -AsPlainText -Force $cred=New-Object System.Management.Automation.PSCredential ("TfsAdmin", $secpasswd) |
Now lets create the VM:
|
1 2 3 4 |
New-AzureQuickVM -ServiceName MyTfsVMService -Windows -Name tfs1 ` -ImageName 3a50f22b388a4ff7ab41029918570fa6__Windows-Server-2012-Essentials-20131217-enus ` -Password $cred.GetNetworkCredential().Password -AdminUsername $cred.UserName ` -InstanceSize Medium -Location "West US" -WaitForBoot |
This will create a new VM named tfs1 and, since I do not have an Azure Cloud Service named MyTfsVMService, it will also create a new Cloud Service in which the VM will run. You can run multiple VMs in a single cloud service. Note that the cloud service name must be unique not only to your account but to all azure. This is because the service name forms the DNS name by which the VMs are reached. All VMs created inside of MyTfsVMService will be accessed via MyTfsVMService.Cloudapp.net. Multiple VMs are accessed through a different port. Of course now that I have created the service, you may not reuse the name unless I delete it, which I will likely do very soon. If you have an existing cloud service that you would like to reuse, you may specify that service. If you do, make sure to omit the -Location argument since the VM will use the location assigned to the service. Finally, if you are supplying a brand new service, use the same Location as the one used by the Storage account you chose above.
I need to point out a couple other things here. For our TFS server, specify an instance size of AT LEAST Medium. While I tend to use smaller VMs for my personal use, you are likely to have a much better trial experience with TFS and SQL Server together if you use the Medium size with 3.5GB of RAM as opposed to 1.75 in the Small-sized instances. Of course you pay more for the larger VMs. This is one reason we are using a Windows Server 2012 R2 image as opposed to an image prebuilt with SQL Server. Since the SQL Server image costs include the additional SQL licensing costs, they are considerably more expensive. We will be installing the SQL Express SKU which will be quite sufficient for out purposes (and free). Furthermore, the Server 2012 R2 images, according to the current Azure pricing information at the time of writing, is provided at the lower Linux rates.
Since we specified the -WaitForBoot argument, the command will not complete until our VM has completed its build cycle and is ready for connections….Oh look!…Its ready!

Provisioning with Boxstarter
Now that we have our VM, the next logical thing to do is install our software. So what does that look like with Chocolatey packages run through Boxstarter?
Package Composition
There are several ways to approach package creation. There is a page devoted to this topic in the Boxstarter documentation. Boxstarter provides some convenient commands to make package creation easy and sometimes altogether unnecessary. We will use a Github Gist to compose the package script. So the next logical question is “What is a package and what can/should we include in the script?”
As already stated, Chocolatey packages are based on, and completely comply with, the Nuget packaging specification. In the common Chocolatey scenario, the package consists of two files:
- A Nuspec file which is an XML formated manifest with metadata describing the package. This includes key things like the package name, its version, what other packages it depends on and what files are included. There is more but this covers the basics.
- The ChocolateyInstall file. This is a PowerShell (.ps1) file that actually performs the installation. The beauty of this file is that it can contain absolutely any valid PowerShell which gives us a lot of flexibility and power. When this script is executed inside of Chocolatey, it has access to the many commands that Chocolatey exposes to cover lots of common install scenarios like downloading, unzipping, and silently installing MSI files. There are commands for creating shortcuts, installing windows features, and more. When running with Boxstarter, there are even more commands covering scenarios around initial environment setup such as installing critical Windows updates.
You can supply more files. For example there may be config files specific to the applications you are installing that you might want to include in the package. All files in the package are zipped up into a single .nupkg file. This is the file that the underlying Nuget infrastructure unpacks.
Lets take a look at what our ChocolateyInstall script looks like:
|
1 2 3 4 5 |
cinst VisualStudioTeamFoundationServerExpress2013 cinst MsSqlServer2012Express $tfsConfig="$env:ProgramFiles\Microsoft Team Foundation Server 12.0\Tools\TfsConfig.exe" .$tfsConfig unattend /configure /type:standard .$tfsConfig unattend /configure /type:build ` /inputs:collectionurl=http://localhost:8080/tfs`;ServiceAccountName="LOCAL SERVICE"`;ServiceAccountPassword="pass" |
This uses the Chocolatey Install command CINST to first install two packages: TFS 2013 Express and SqlServer 2012 Express. Both of these packages have their own dependencies. SQL Server depends on the .Net framework version 3.5 and TFS depends on version 4.5. Since we are installing on to Windows Server 2012 R2, we already have .Net 4.5 but R2 does not come pre-installed with v. 3.5 so that will be installed as well.
Once these are installed we will configure TFS with a standard server configuration. This will use the local default named sql instance for the TFS configuration and collection databases and create both of them. That creates a server capable of hosting source control and work item tracking. Next we configure Build services so that now we can add Build controllers, agents and Build definitions to be executed.
Our goal is that when these commands complete, we can navigate to http://MyTfsVMService.CloudApp.net:8080/tfs from our local machine and see the web portal of our TFS collection.
Package Consumption
So how do we package up this script so that we can execute it and configure our VM? One answer is: we don’t need to. Boxstarter can take a file path or http URL and as long as they resolve to a raw text resource, Boxstarter will convert them to a temporary package and run them. This is very convenient for one-off installs where you do not want to go through the trouble of composing a manifest and packaging process. Not that it is so onerous of a process. The down side to this approach is that if you plan to consume the same package again and again, a raw gist URL is very awkward to type and nearly impossible to memorize.
Let’s say that we intend to use this package repeatedly and therefore want to invoke the package using a reasonably short and easily-remembered label. Boxstarter provides a command that can create a minimal package from our gist.
|
1 2 |
New-PackageFromScript ` -Source https://gist.github.com/mwrock/8576155/raw/3edd9c39bed40b2398e6158062a1e05f4b4c5dff/gistfile1.ps1 ` -PackageName TfsServerWithBuild |
This just created a TfsServerWithBuild.1.0.0.nupkg file in our “local package repository”. This is a special location on disk in which Boxstarter looks for packages before attempting to fetch the package from a remote nuget feed. By default, this is a folder in the same directory where the Boxstarter modules live, but you can configure Boxstarter to store them elsewhere. The local repo is great for personal use but isn’t likely to be accessed let alone discovered by others. The best way to share your package with others is to publish the package to a feed.
Package Publishing
There are many options to consider when it comes to publishing your package. If you think that the package provides value to a broad range of users and include those outside of your organization, the Chocolatey.org feed is likely the best place. In fact this is where the TFS and SqlServer packages reside that our package will install. If the package is likely to only have value for yourself or your own organization, then a feed provider such as MyGet.org works great. You can create one or more of your own feeds on Myget. These can even be private and require authentication which is desirable especially when there is sensitive information contained inside of your package.
I’m going to publish this package to a Boxstarter Community feed on Myget.org. By default, Boxstarter will include this feed in the feeds it scans to find packages. Here is how we publish:
|
1 2 3 |
PS C:\> ."$env:ChocolateyInstall\ChocolateyInstall\nuget" push C:\Users\Matt\App Data\Roaming\Boxstarter\BuildPackages\TfsServerWithBuild.1.0.0.nupkg <My Own KEY> -Source https://www.myget.org/F/boxstarter/api/v2/package Pushing TfsServerWithBuild 1.0.0 to 'https://www.myget.org/F/boxstarter/api/v2/package'...Your package was pushed.PS C:\> |
Note that as with any Nuget based package feed, you always push using an API key that identifies you as the publisher. You can sign up for a free personal account at Myget and do not have to pay for creating and publishing to feeds. Here we see our feed show up:

Installing the Package
Finally we are ready to kick off our install. Here it goes:
|
1 2 3 4 5 6 7 8 9 |
PS C:\> Enable-BoxstarterVM -Provider azure -CloudServiceName MyTfsVMService -VMName tfs1 -Credential $cred -CheckpointName BareOS | Install-BoxstarterPackage -PackageName TfsServerWithBuild Boxstarter: Locating Azure VM tfs1... Boxstarter: Installing WinRM Certificate Boxstarter: Configuring local PowerShell Remoting settings... PowerShell remoting is not enabled locally. Should Boxstarter enable PowerShell remoting?PowerShell remoting is not enabled locally. Should Boxstarter enable PowerShell remoting?[Y] Yes [N] No [?] Help (default is "Y"): Boxstarter: Enabling PowerShell Remoting on local machineBoxstarter: Testing remoting access on mytfsvmservice.cloudapp.net...Boxstarter: Creating Checkpoint BareOS for service MyTfsVMService VM tfs1 at |
Here we see the beginning of the Boxstarter output. We are issuing two commands really – piping one to the other. The Enable-BoxstarterVM performs a VM-specific implementation for finding the DNS name and WinRM port for connecting to the VM. It may also do some preparatory work to ensure that a connection can be made. In Azure’s case, this includes downloading the certificate from the VM and installing it into our root certificate store so that we can communicate with the VM using HTTPS, which is the protocol PowerShell remoting is using here.
VM Checkpoints
Also note that just before the install begins, a checkpoint is taken that we label “BareOS.” This is optional but convenient in the event something goes wrong with our package as a result of a mistake in our authoring. We can then Restore this checkpoint, fix the package and retry from the exact same state we had when we began without needing to wipe out and create a new VM. You will not find these Checkpoints in the Azure management portal. Boxstarter uses Azure Blob Snapshots to create an implementation of checkpoints similar to what you would find in Hyper-V or other VM technologies.
If the BareOS checkpoint already existed when we ran our command, instead of creating the checkpoint, Boxstarter would have restored it. So if we were to run the above command without any changes all over again, our VM would be restored to its original state first.
Boxstarter exposes some additional commands for listing, creating, restoring and deleting checkpoints. You can check out the Boxstarter Azure documentation for details.
Substitute “HyperV” for the “Azure” provider argument and remove the CloudServiceName argument and Boxstarter would look for a Hyper-V VM named tfs1 and provision it. With Hyper-V, Boxstarter may mount the VM’s VHD file to configure it for remote connectivity. That’s often not necessary.
You don’t think you could run this in a Hyper-V VM because you would need another Windows Server licence? Not true. You can get evaluation VHDs for free and they can legally be “reevaluated.” See my blog on the Boxstarter Hyper-V functionality that touches on this point and where you can find them.
Adding an Endpoint for port 8080
By default, TFS listens on port 8080 for requests to its web services. We need to provide an endpoint to our Azure Service that will forward all 8080 traffic to the same port on our VM. By default, when you create a new VM in Azure, it will automatically create endpoints for Remote Desktop and PowerShell remoting. Adding an endpoint is fairly straight forward. Here is the command we will use:
|
1 2 3 |
$vm = Get-AzureVM -ServiceName MyTfsVMService -Name tfs1 Add-AzureEndpoint -Name tfs -Protocol tcp -LocalPort 8080 -PublicPort 8080 -VM $vm | Update-AzureVM |
Lets check out or new TFS server
First let’s take a look at the last bit of Boxstarter output:
|
1 2 3 4 5 |
Errors : {} ComputerName : mytfsvmservice.cloudapp.net Completed : True FinishTime : 1/26/2014 12:18:04 AM StartTime : 1/25/2014 11:47:21 PM |
This is exactly what we want to see. Our installation completed with no errors. This means no exceptions were thrown and the final Exit Code was 0.
So let’s see if we can create a new project in Visual Studio.
First we need to connect to our server:
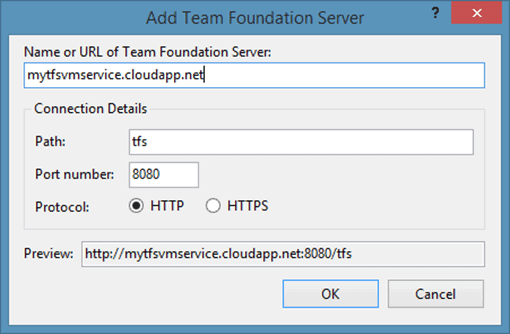
You will be prompted for a user name and password. Provide the same credentials that you provided earlier when creating the VM admin account. Now lets create a new project:
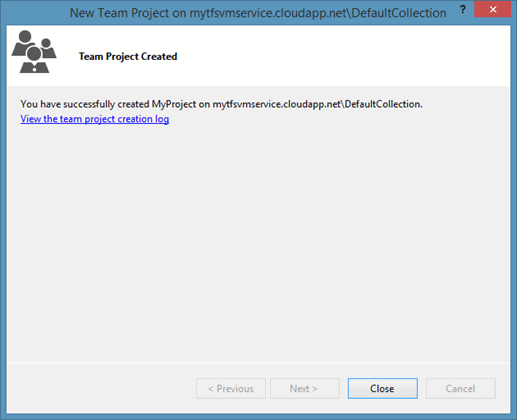
This looks good so far. Now let’s go to the web portal and create a work item.
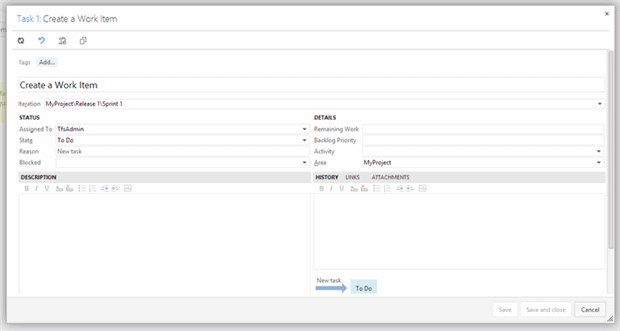
Now THAT is what I call a work item.
On Premise Install (aka physical machine install)
Boxstarter can install anywhere. We just saw Boxstarter work on an Azure VM and I mentioned how to accomplish the same with Hyper-V. As long as PowerShell Remoting or at least remote WMI is enabled on a machine, the Boxstarer user has admin rights and its available on the network, Boxstarter can be used to provision any physical or virtual machine using Install-BoxstarterPackage:
|
1 |
Install-BoxstarterPackage -ComputerName MyMachine.MyDomain.com -Credential $creds -PackageName MyPackage |
If you are actually on the local machine, just as we did at the beginning of this post to install the Boxstarter modules, you can use the click-once launcher from IE or any Click-Once enabled browser (extensions exist for both Chrome and Firefox). If your default browser can run click-once apps, you can even launch the installer from a command line:
|
1 |
START http://boxstarter.org/package/MyPackage |
Happy Boxstarting!
Load comments