
A common goal in software development is to reduce complexity, and there are measures and software built to help reduce complexity and development time. One of these methods is serverless databases; they provide a database system without creating a server for it, hence the tag “serverless”. Serverless databases help improve productivity and reduce build time, allowing focus on the core functionality of the software.
This article builds a simple application utilizing one of these serverless/cloud-hosted databases. Specifically, it demonstrates integrating Firebase(Modular SDK) Firestore into a React app. To continue with this article, you need to have node installed and basic knowledge of Reactjs and typescript.
You can find the complete source code in this Github Repo and a live version deployed on Netlify here. The article focuses on the most important parts throughout with the repo filling in any remaining code that’s missing.
What is Firebase?
Firebase is a SaaS platform that provides developers with many services to improve productivity and reduce build time. Firebase is a cloud service backed by Google. Some of the services offered on Firebase are, but are not limited to, authentication, Firestore(cloud/serverless database), and Realtime database.
Firebase Modular SDK (Version 9)
There was a recent release by Firebase; this current version came with some syntactic changes compared to the previous version. This current version primarily focuses on the modular library, although it still has a compact version with syntax similar to the prior version of Firebase. The modular version of Firebase comes with a couple of advantages, including a reduced app size and split functions to ease the readability of code. One significant difference between version 8 and the recent Modular SDK changes to the API surface is how you use the API changed. Through this article, I will walk you through how to use the new API.
Getting started with the Firebase Modular SDK and React Typescript
This article demonstrates building a to-do-list application with authentication. The application will also integrate an avatar image upload using Firebase storage. To get started, create a new react app using the command below.
|
1 |
npx create-react-app firebase9_react –template typescript |
After creating the React app, you will need to add a few files to the app before continuing. When finished, you should have the files and folders listed below.
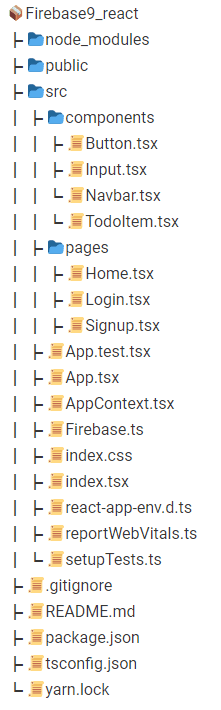
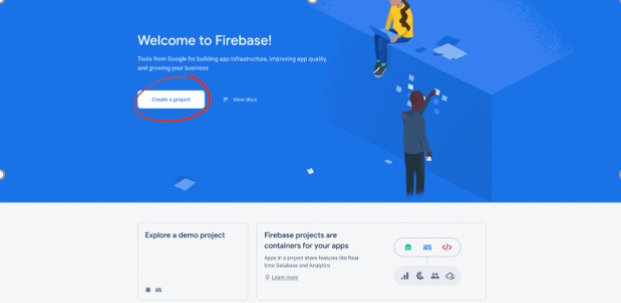
There are two folders and two new files inside the src folder. Start with the 📜Firebase.ts file. The Firebase.ts file is where you will initialize the Firebase configuration. To set up Firebase, you need to create a new project on the Firebase platform; Head over to https://Firebase.google.com/ and click on the Get Started button. Once on the new page, click on Create Project.
Enter the project name and click continue. On the next page, you will choose a Google Analytics account and then click on Create project; this will take a few seconds to build your project.

Once the project build completes, click Continue, and on the new page, select web; choose web since you are building a web application. If it were to be an Android or iOS app, you would need to select one of the other options.

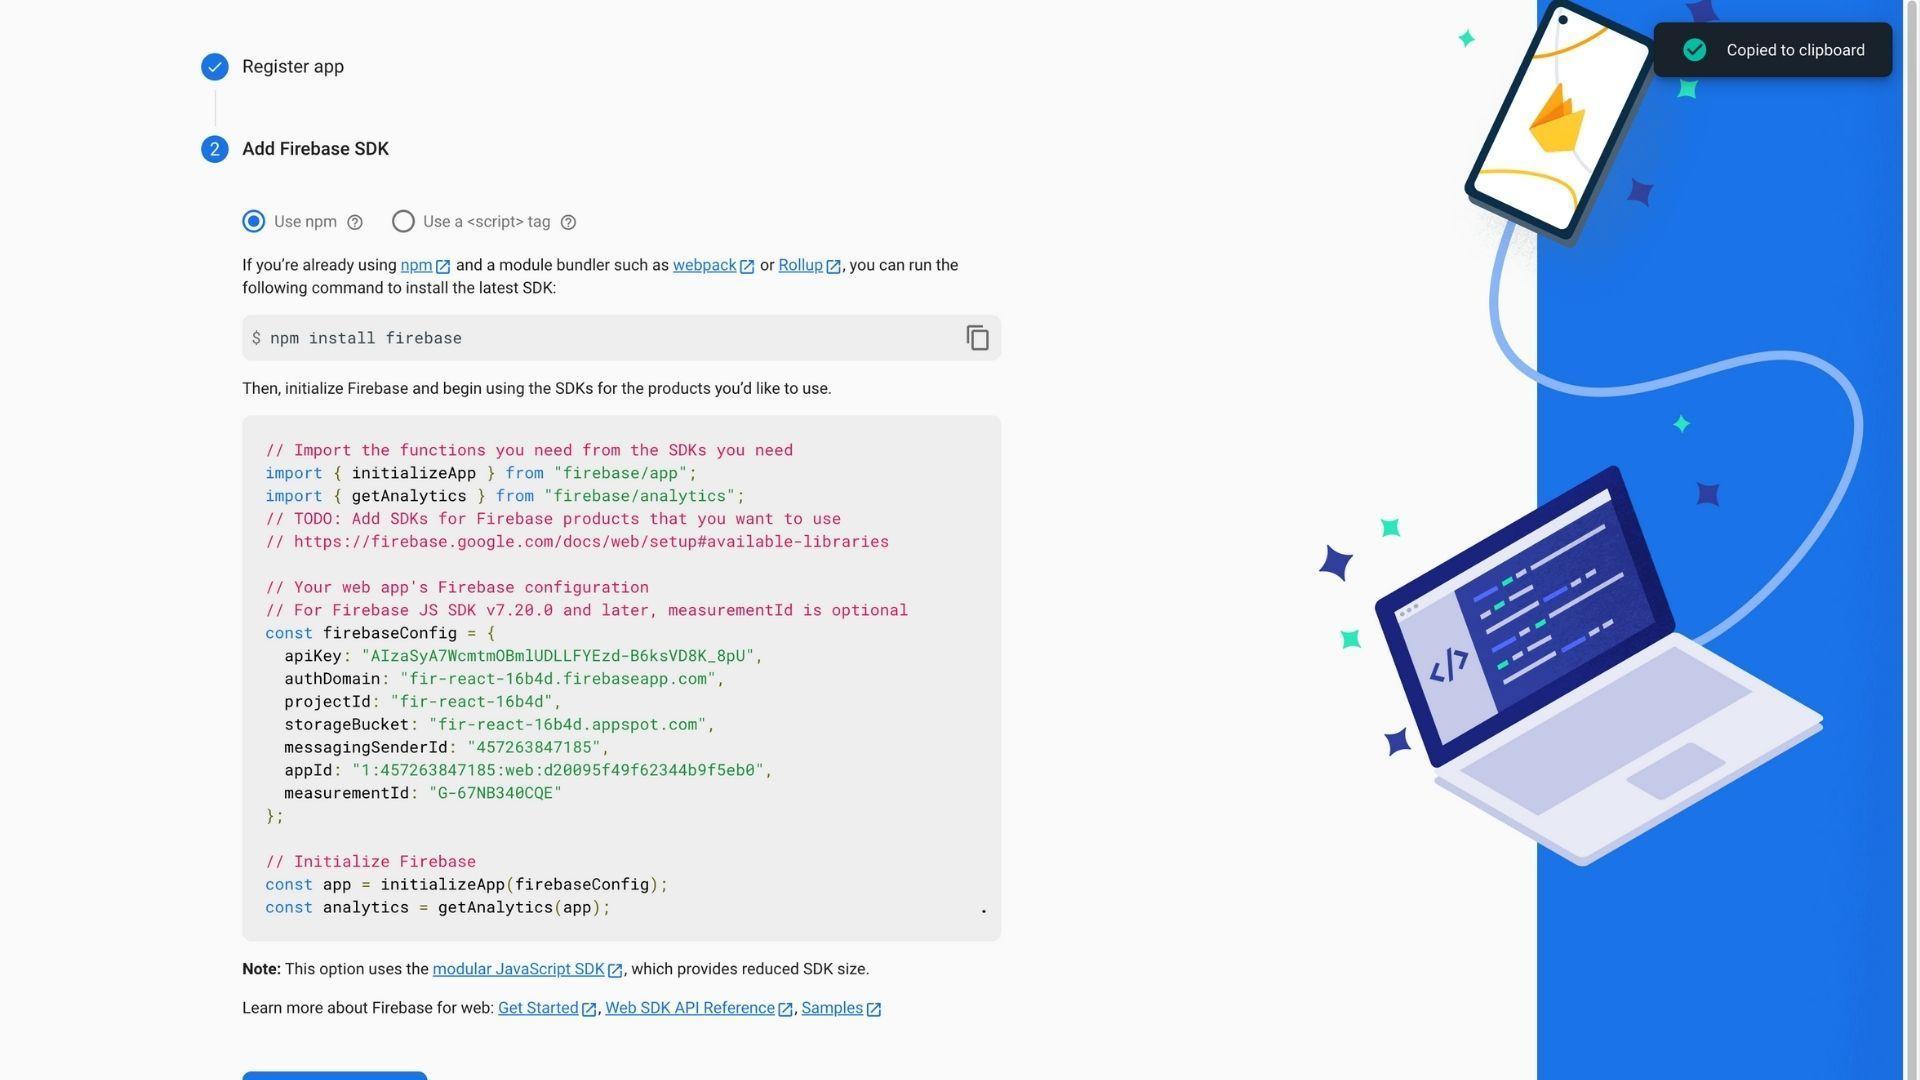
On the next page, fill in the details for the app. You will be required to enter the application name. Then click on the register; this will take you to the next page with the code block in the image below. The config code block is helpful to initialize Firebase in the react app.
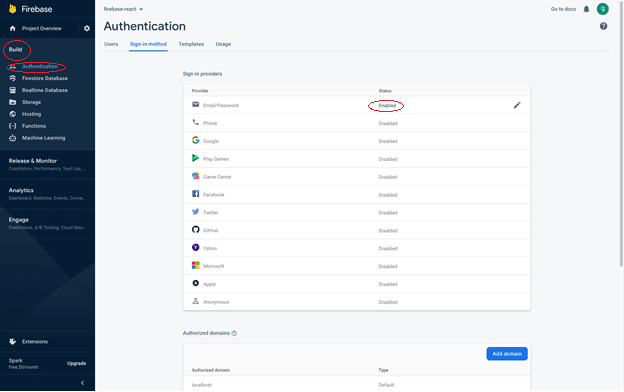
Now that the application is set up, you will need to enable authentication and Firestore for the application. On the sidebar, click on Build to expand the menu; select Authentication and enable email and password. If enabling Email/Password is not immediately available, click the Get Started button to display this option.
Then head over to Firestore Database and click on get started; a modal will pop up, asking you to choose the mode you want to begin in. For this article, select test mode.
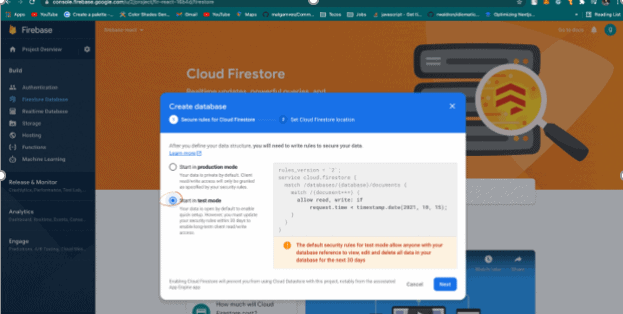
Then click next, select location and voila! Your Firestore is created! You can now get back to the code.
Initializing Firebase
Having set up everything on the Firebase platform, the next course of action will be to install all the dependencies needed for the project. You will need four additional libraries;
Firebase: This will give access to the modules needed to access the Firebase API.
UUID: This will help generate a unique id for each to-do item
styled-components: the styling library
react-router-dom.
Before installing the dependencies, specify the post-install script so that typescript knows to install types for the packages. In the package.json file at the end of the scripts block, add the post-install script.
|
1 2 3 4 5 6 |
... "scripts": { ... "postinstall": "npx typesync" }, ... |
Once this is in place, you can install the packages required.
|
1 |
yarn add firebase styled-components uuid react-router-dom |
After installing the dependencies, head over to the Firebase.ts file and add the configuration from Firebase with a slight adjustment to the code to suit what’s needed.
|
1 2 3 4 5 6 7 8 9 10 11 12 13 14 15 16 17 18 19 20 21 22 |
// Import the functions you need from the SDKs you need import { initializeApp } from "@Firebase/app";<br>import { getAuth } from "@Firebase/auth"; import { getFirestore } from "@Firebase/firestore"; import { getStorage } from "@Firebase/storage"; // TODO: Add SDKs for Firebase products that you want to use // https://Firebase.google.com/docs/web/setup#available-libraries // Your web app's Firebase configuration // For Firebase JS SDK v7.20.0 and later, measurementId is optional const FirebaseConfig = { apiKey: "AIzaSyA7WcmtmOBmlUDLLFYEzd-B6ksVD8K_8pU", authDomain: "fir-react-16b4d.Firebaseapp.com", projectId: "fir-react-16b4d", storageBucket: "fir-react-16b4d.appspot.com", messagingSenderId: "457263847185", appId: "1:457263847185:web:d20095f49f62344b9f5eb0", measurementId: "G-67NB340CQE", }; // Initialize Firebase const app = initializeApp(FirebaseConfig); export const auth = getAuth(app); export const db = getFirestore(app); export const storage = getStorage(app); |
The code on line 20 initializes the Firebase app with the configuration file from the Firebase platform; this serves as an identifier for the project and allows access to Firebase services. Due to the modular SDK update, Firebase made it import each Firebase service as a stand-alone sub-package. On line 21, the code assigns the authentication subpackage to the auth variable and subsequent action for the rest of the services used for this article.
Setting up the context for managing authentication
In this section, you will set up the context API for state management. In the AppContext.tsx file, set up all Firebase functionalities for the application.
|
1 2 3 4 5 6 7 8 9 10 11 12 13 14 15 16 17 18 19 20 21 22 23 24 25 26 27 28 29 30 31 32 33 34 35 36 37 38 39 40 |
import React, { ReactElement } from "react"; import { createUserWithEmailAndPassword, onAuthStateChanged, signInWithEmailAndPassword, signOut, updateProfile, } from "@Firebase/auth"; import { ref, uploadBytes, getDownloadURL } from "@Firebase/storage"; import { query, where, collection, getDocs, doc, setDoc, deleteDoc, updateDoc } from "@Firebase/firestore"; import { auth, db, storage } from "./Firebase"; import { v4 as uuid } from "uuid"; ... export const AppContext = React.createContext<contextTypes>(contextDefaultVal); export default function AppContextProvider({ children }: Props): ReactElement { const [currentUser, setCurrentUser] = React.useState<userTypes | null>(null); const [loading, setLoading] = React.useState(false); const [todoItems, setTodoItems] = React.useState<todoItemInterface[]>([]); ... return ( <AppContext.Provider value={{ loading, currentUser, todoItems, logInUser, registerUser, handleAuthChange, updateAvatar, addTodoItem, getTodoItems, updateTodoItem, deleteTodoItem, signOutUser, }} > {children} </AppContext.Provider> ); } |
Application Functionalities
The following sections cover the AppContext in bits. If you look at the value object passed to the provider, you see the loading state for Login and registering a user, the to-do items, and other functions for authentications and CRUD operation. These are the functions that you’ll use in the React application.
Authentication with Firebase auth
The application has a register page and login page; the design of the registration page looks like this:
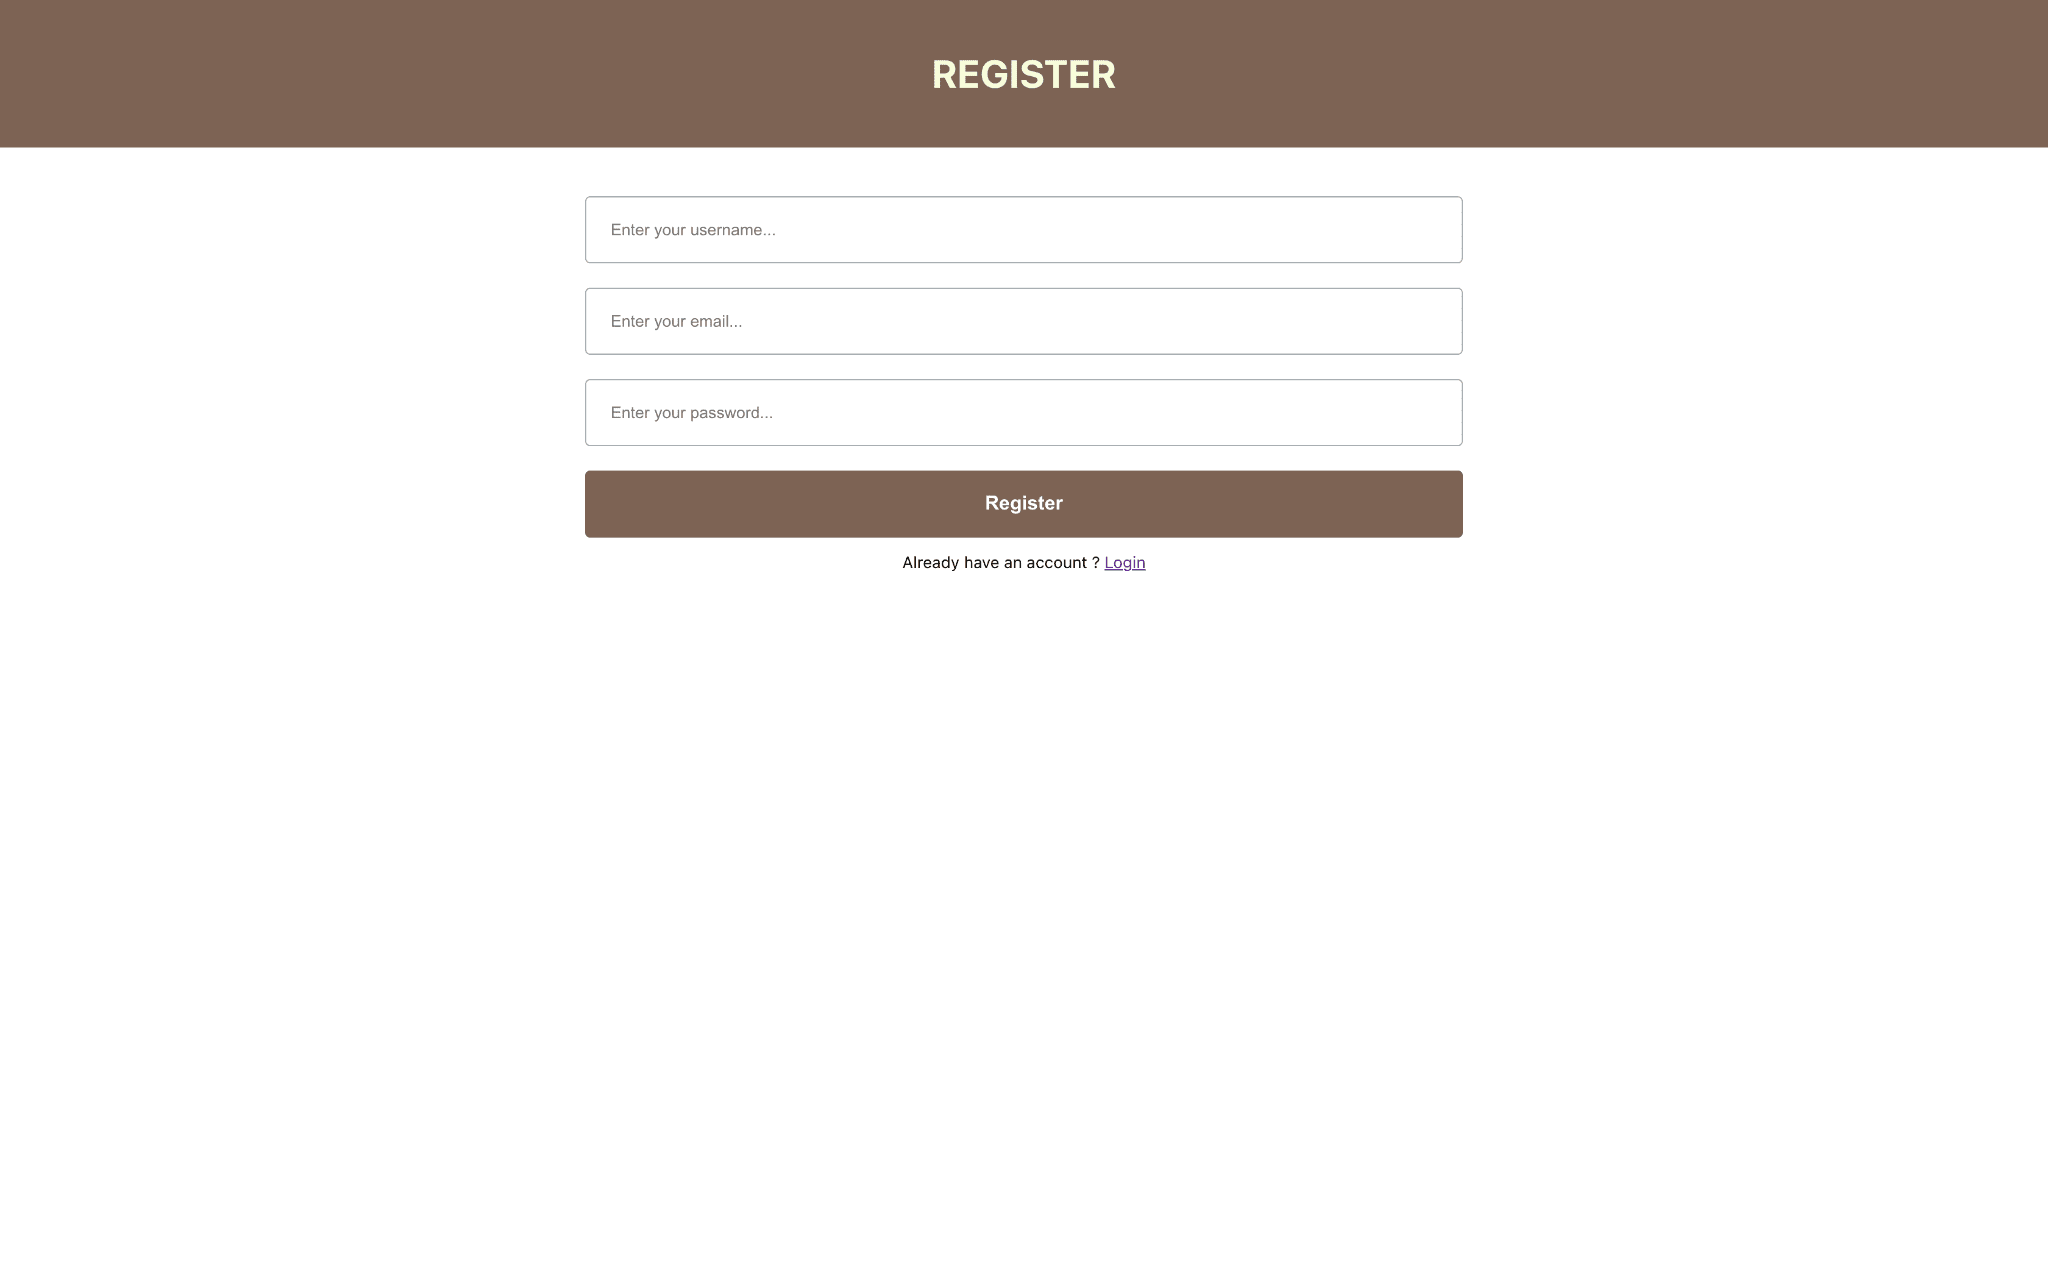
Three inputs are required to successfully register on the application. The values from the input fields will be passed into the registerUser function below:
|
1 2 3 4 5 6 7 8 9 10 11 12 13 14 15 16 17 18 19 20 21 22 |
... interface registrationTypes { displayName: string; email: string; password: string; } ... const registerUser = async (data: registrationTypes) => { setLoading(true); try { await createUserWithEmailAndPassword(auth, data.email, data.password).then(async ({ user }) => { await updateProfile(user, { displayName: data.displayName, }); }); } catch (error) { alert(error); } finally { setLoading(false); } }; ... |
The function above accepts three values: the displayName, email and password. In line 11, the code creates a new user using the createUserWithEmailAndPassword function from Firebase; this function takes in three values: the Firebase auth identifier created in the Firebase.ts file, the email, and password of the new user. Once a user is registered, it updates the displayName with the value passed into the function. Next up, you will be handling the Login for created users. Similar to the Registration page, there is a form with two inputs for email and address. The values from these input fields will be passed to the loginUser function on submit.
|
1 2 3 4 5 6 7 8 9 10 11 12 |
... const logInUser = async (email: string, password: string) => { setLoading(true); try { await signInWithEmailAndPassword(auth, email, password); } catch (error) { alert(error); } finally { setLoading(false); } }; ... |
The logInUser function will pass the email and password to the signInWithEmailAndPassword function provided by Firebase.
Handling profile image upload
Once authenticated, a user will have access to the home page, where they can preview all their to-do items and profile information. The Home.tsx code has an input tag for handling file upload.
|
1 2 3 4 5 6 7 8 9 10 11 12 13 14 15 16 17 18 19 20 |
... export default function Home(): ReactElement { const history = useHistory(); const [value, setValue] = React.useState<string>(""); const { addTodoItem, getTodoItems, todoItems, currentUser, handleAuthChange, signOutUser, updateAvatar } = React.useContext(AppContext); ... const handleImageChange = async (e: React.ChangeEvent<HTMLInputElement>) => { if (e.target.files !== null && e.target.files.length > 0) { const rawImage = e.target.files[0]; // fetches the extension name of the image // gets the last index of the '.' and adds 1 to it // returns a substring of all character to the left after this index const ext = rawImage.name.substr(rawImage.name.lastIndexOf(".") + 1); const image = new Blob([rawImage], { type: "image" }); updateAvatar({ image, ext }); } }; ... } |
The handleImageChange controls the onChange event for the file input. A substring of the file name from the last “.” in the string is in line 14; thus, it only extracts the extension name from the string. Then the rawImage is converted to a Blob and the image Blob and extension name are passed to the updateAvatar function.
|
1 2 3 4 5 6 7 8 9 10 11 12 13 14 15 16 17 18 19 20 21 22 |
... const updateAvatar = async (file: { image: Blob; ext: string }) => { try { if (auth.currentUser !== null) { //File reference const uploadRef = ref(storage, `profileImages/${auth.currentUser.uid}-${uuid()}.${file.ext}`); const avatarRef = await uploadBytes(uploadRef, file.image); // get the file url from Firebase stoprage const image = await getDownloadURL(avatarRef.ref); // Update users photoURL await updateProfile(auth.currentUser, { photoURL: image, }); alert("Profile image updated"); // Reload the current user to fetch new profileUrl await auth.currentUser.reload(); } } catch (error) { alert(error); } }; ... |
The updateAvatar function takes the Firebase storage identifier declared in the Firebase configuration file and a reference for the file to upload. Once the upload request completes, the code calls the getDownloadURL function with the uploaded file ref. The getDownloadURL function converts the file ref to a URL that will access the image uploaded. Finally, the URL is passed to the photoURL key on the user object. Once complete, the user details are reloaded [Line 16] to reflect the changes made to the user object.
Creating a new to-do item
To create a new to-do item, you need to pass in the value of the new item. The addTodoItem function accepts this new value, and creates a new document on Firestore.
|
1 2 3 4 5 6 7 8 9 10 11 12 13 14 15 16 17 18 19 20 21 22 |
... const addTodoItem = async (value: string) => { try { // document reference to be added const docRef = doc( db, "todo", uuid() /*unique id for new document, Note that firestore can do this for you if you leave the third parameter empty*/ ); const userId = auth.currentUser; if (userId !== null) { await setDoc(docRef, { userId: userId.uid, value, }); alert(`Item ${value} added!`); } } catch (error) { alert(error); } }; ... |
The addTodoItem creates a ref for the document to be uploaded using the doc function. The first parameter needs to be the identifier for Firestore declared in the Firebase configuration file. You pass in the collection for the document, and finally, the document id. Firebase, by default, generates a unique id for the document, but I’ve decided to use uuid to create the document id. To conclude the document creation, you need to call the setDoc function provided by Firebase and pass in the docRef and the new document object as a second parameter.
Reading to-do items from Firestore
Next up is reading the documents on Firestore. To accomplish this, you will be using the getDocs function from Firebase. The getDocs function accepts a query of the document/documents needed. To get only one document, use the getDoc. In the getTodoItems function, you will get all documents where the userId matches the user’s uid of the user currently logged in and assign it to the querySnapshot variable.
|
1 2 3 4 5 6 7 8 9 10 11 12 13 14 15 16 17 18 19 20 21 22 23 24 25 26 27 |
... const getTodoItems = async () => { try { if (auth.currentUser !== null) { const userId = auth.currentUser.uid; // query to get only the documents that matches logged in user id const q = query(collection(db, "todo"), where("userId", "==", userId)); const querySnapshot = await getDocs(q); // reset the todo items value setTodoItems([]); // map through the query result and assign the value to the todoItems state querySnapshot.forEach((doc) => { const data = doc.data(); setTodoItems((prev) => [ ...prev, { itemId: doc.id, value: data.value, }, ]); }); } } catch (error) { alert(error); } }; ... |
When the request to fetch the data concludes, you map through the documents and set each document’s value and document id to todoItems state.
Updating already existing to-do item
This is similar to creating a document except that you pass in a query and the value to update. The document matching the reference passed in will be mutated. The updateDoc function from Firebase updates records/documents.
|
1 2 3 4 5 6 7 8 9 10 11 12 13 14 15 |
... const updateTodoItem = async (params: { newValue: string; id: string }) => { try { // reference to the document to update const docRef = doc(db, "todo", params.id); // Update the value of the todo item await updateDoc(docRef, { value: params.newValue, }); alert(`Item updated!`); } catch (error) { alert(error); } }; ... |
The updateTodoItem function accepts two parameters, the new value and the document id, to update. The document reference receives the id, and updateDoc accepts the value as a second parameter.
Deleting a to-do item
To complete a CRUD operation, you need to delete a to-do item; this is a straightforward action. You need to create a reference to the document you want to delete and pass this reference into the deleteDoc function from Firestore. This action will trigger a delete on the document matching the reference.
|
1 2 3 4 5 6 7 8 9 10 11 12 |
... const deleteTodoItem = async (id: string) => { try { // reference to the document to delete const docRef = doc(db, "todo", id); await deleteDoc(docRef); alert(`item: ${id} deleted!`); } catch (error) { alert(error); } }; ... |
Subsequently, you will look at one more function from Firebase; this is the onAuthStateChanged function. The onAuthStateChanged is an event listener that checks if a user is authenticated. It accepts two parameters: the auth identifier and a call back function with the user object as a parameter. If the user object is null, there is no user in session/currently logged in; otherwise, it will return the user object.
Deploying the application
To deploy your application, you can run yarn build and deploy your built application on any platform of your choice. You can also deploy and host your application with Firebase. You can learn all about that here.
Conclusion
This article covered how to handle authentication, use the storage, and perform crud operation on the Firestore using the Firebase Modular SDK. For additional information on the extensive use of Firebase, you can check out the official documentation.
This document contains proprietary information and is protected by copyright law.
Copyright © 2026 Red Gate Software Limited. All rights reserved


Load comments