
Like many .NET developers, I find Reflector an invaluable tool. I use it almost every day, especially when exploring new parts of .NET or even 3rd party assemblies. So when I set out to write a Prism tutorial, I thought it might be pretty cool to use Reflector as my sample and build a WPF/Prism UI for it.
Prism in a Nutshell
Prism (or Composite WPF) is a framework provided by Microsoft to help build composite WPF and Silverlight applications. It has mechanisms for UI composition, module management and dependency injection. Prism itself is modular, so you can pick and choose the parts of it that are relevant to your application. Below is a brief description of the components we will use to build Reflectoron. Later on we will see how we use each of them in greater detail.
For more information about Prism see http://compositewpf.codeplex.com/.
Unity Container (Dependency Injection)
Dependency Injection (DI) is a technique that allows us to create loosely-coupled components that interact with each other. Unity Container is how DI is implemented in Prism. The container has three essential parts:
- Interface to concrete type dictionary: You can use the dictionary to map interfaces to their implementation. This is important if you want your components to know each other contractually. It also helps making your code much more unit-testable.
- Dependency resolver: When you create objects using the container, it automatically attempts to resolve any dependencies (expressed as constructor parameters).
- Object lifetime manager: Allows you to decide how objects are managed in the container (e.g. define an object as singleton).
Event Aggregator
In a composite application it is quite common for components to communicate with each other. In .NET we usually use events to publish and subscribe to notifications. The disadvantage of .NET events is that they increase coupling and add garbage collection dependencies. With Event Aggregator we can avoid both.
Region Manager
Regions allow you to define named placeholders in your main view (the “Shell”). When you initialize your module, you can inject views (e.g. user controls) into these placeholders by specifying their name. This helps separate the application layout from specific views, and allows injecting other views at run time (such as add-ins).
Model-View-View Model (MVVM)
If you’ve been using WPF for a while, you’ve probably done MVVM, even if you haven’t heard of the pattern by name. That’s because its concepts that are at the heart of any WPF application: data binding, templates and commands.
MVVM is a UI architectural pattern that is derived from MVC (and other similar patterns). All of these patterns have a common goal: to separate the UI (the “View”) from its underlying data (the “Model”) and also from how we control the UI. In MVVM we use the View Model as an interim object that bridges the model and the view. As its name suggests – it serves the view. We expose whatever data we need from the model using properties. We can add our business logic, calculations and other operations that are specific to the UI in this layer.
WPF provides unique mechanisms to hook the view up to the view model - bindings and commands. Prism adds to these by providing Delegate Commands (which can delegate the command execution to the view model).
For more information about data binding in WPF, see http://msdn.microsoft.com/en-us/library/ms750612.aspx.
For more information about commands, see http://msdn.microsoft.com/en-us/library/ms752308.aspx.
Building Reflectoron
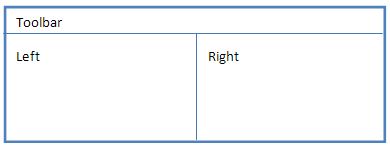
Reflectoron attempts to mimic the original Reflector UI. It is composed of the following parts:
- Toolbar
- Assembly Browser
- Source Code Viewer
Getting Started
We start with a new WPF application. Then we:
- Add references to Prism assemblies (Microsoft.Practices.*).
- Add a reference to the Reflector assembly (Reflector.exe).
- Create a Prism bootstrapper:
- Create a new class that inherits from
UnityBootstrapper.
- Override the
CreateShell() method and create an instance of the main window. Override the GetModuleCatalog() method. Note that modularity is another part of Prism that we do not fully utilize in Reflector. For more information see http://msdn.microsoft.com/en-us/library/ff648404.aspx. Override the ConfigureContainer() method. Here we will define any interface mappings we may have.
Creating the Shell
The shell simply defines the layout of the application and its regions.
To declare a region in XAML, we use an attached property. First, we define the Prism namespace:
|
1 2 3 4 5 |
<Window x:Class="Reflectoron.Shell" xmlns="http://schemas.microsoft.com/winfx/2006/xaml/presentation" xmlns:x=http://schemas.microsoft.com/winfx/2006/xaml xmlns:loc="clr-namespace:Reflectoron" xmlns:cal="http://www.codeplex.com/CompositeWPF" /> |
And then we can add our regions, such as:
|
1 |
<ItemsControl cal:RegionManager.RegionName="{x:Static loc:RegionNames.LeftRegion}" /> |
Prism contains adapters for all kinds of WPF controls. Using an Items Control allows the region to contain as many views as we wish. We use the Static markup extension to reference constants defined in a class called RegionNames.
Creating the Reflector Service
Reflector exposes public APIs which are normally used to create add-ins. We will use these APIs to access Reflector as a service in our app.
Services in Prism are non-UI components that are shared throughout the application and provide common functionality required by multiple views. We have wrapped Reflector in such a service. Let’s examine its interface to see what it exposes:
|
1 2 3 4 5 6 7 8 9 |
public interface IReflectorService { ILanguageWriter CreateWriter(IFormatter formatter); IAssemblyManager AssemblyManager { get; } ILanguageWriterConfiguration LanguageConfiguration { get; } ILanguageManager LanguageManager { get; } ITranslatorManager TranslatorManager { get; } } |
We can use the Reflector service to examine assemblies and to translate items into code. The service also uses the Event Aggregator to expose the AssemblyAddedEvent, which notifies its subscribers when a new assembly has been loaded to the assembly manager.
To access Reflector’s APIs, we begin by creating an instance of the ApplicationManager class. It is this entry point which allows us to create the other services from Reflector by invoking the GetService() method:
- ILanguageManager is used to create a formatter that pretty-prints code.
- IAssemblyManager is used to control which assemblies are loaded and to navigate through their members.
- ITranslatorManager is used to decompile IL into a language of our choosing (such as C#).
The Source Viewer
Reflector renders code using Microsoft’s Web Browser control and HTML. We will implement the source viewer using a Flow Document, which is native to WPF. For more information about Flow Documents see http://msdn.microsoft.com/en-us/library/aa970909.aspx.
To get Reflector to pretty-print code as a Flow Document, we must implement its IFormatter interface, which contains methods for writing each type of code item (keywords, comments, literals, etc.) With each method call we add Run objects to the Flow Document (a run is the most basic unit of text). In case of references (i.e. links) we add a Hyperlink object. We use the Prism Reflector service (which is injected to the view model by Unity) to create an ITranslator that transforms items (such as methods) into code in the desired language.
The view is entirely managed by the view model; it is simply comprised of XAML with a document reader and a few styles, while the view model subscribes to the AssemblyTreeItemSelectedEvent using the Event Aggregator (which tells it when and what code to render), creates the Flow Document and pushes it to the view. Also, each time a hyperlink is clicked it invokes the NavigateToItemEvent. This event is consumed by the Assembly Browser view.
As you can see, two entirely separate components (the source viewer and the assembly browser) are communicating loosely using Unity and the Event Aggregator.
The Assembly Browser
In Reflector, the assembly browser allows us to navigate through loaded assemblies according to the .NET hierarchy (Assemblies, Modules, Namespaces, Types and Members).
To display hierarchies, WPF’s tree view relies on HierarchicalDataTemplate, which provides a way to binding to an item’s children. Reflector’s API is not well-structured for this kind of binding, so we have built view models for each type of node in the tree. Our base Node class also provides services such as selection tracking, node expansion, icons, children propagation and parent-child relationships.
Let’s have a look at the FieldNode class (some parts omitted for brevity):
|
1 2 3 4 5 6 7 8 9 10 11 12 13 14 15 16 17 18 19 20 21 22 23 24 25 26 27 28 29 30 31 32 33 34 35 36 37 38 39 40 41 42 43 44 45 46 47 48 49 50 51 52 53 |
internal class FieldNode : Node<IFieldDeclaration> { protected override string GetName() { string name; var declaringType = Item.DeclaringType as ITypeDeclaration; if (declaringType != null && declaringType.IsAssignableFrom<Enum>() && Item.Static) { name = Item.Name; } else { name = Item.ToString(); } return name; } protected override int GetIconIndex() { int icon = 0; icon = (int)((Item.Static) ? DeclarationIcon.FieldStatic : DeclarationIcon.Field); switch (Item.Visibility) { case FieldVisibility.Assembly: icon += (int)DeclarationIconModifier.Internal; break; case FieldVisibility.Family: case FieldVisibility.FamilyAndAssembly: icon += (int)DeclarationIconModifier.Protected; break; case FieldVisibility.FamilyOrAssembly: icon += (int)DeclarationIconModifier.ProtectedInternal; break; case FieldVisibility.Private: case FieldVisibility.PrivateScope: icon += (int)DeclarationIconModifier.Private; break; } return icon; } protected override bool GetIsPrivate() { switch (Item.Visibility) { case FieldVisibility.Family: case FieldVisibility.FamilyOrAssembly: case FieldVisibility.Public: return false; } return true; } } |
Now that we have calculated some properties from our model (in this case the model is Reflector’s IFieldDeclaration interface), we can use the view model to control the behavior and style of the view through bindings. For example:
|
1 2 3 4 5 6 7 8 9 10 11 12 13 14 15 16 |
<Style TargetType="TreeViewItem"> <Setter Property="IsSelected" Value="{Binding IsSelected, Mode=TwoWay}" /> <Setter Property="IsExpanded" Value="{Binding IsExpanded, Mode=TwoWay}" /> </Style> <HierarchicalDataTemplate ItemsSource="{Binding Children}"> <DockPanel> <Image Width="20" Height="20" Source="{Binding Icon}" /> <TextBlock Name="text" Text="{Binding Name}" /> </DockPanel> <DataTemplate.Triggers> <DataTrigger Binding="{Binding IsPrivate}" Value="True"> <Setter TargetName="text" Property="Foreground" Value="Gray" /> </DataTrigger> </DataTemplate.Triggers> </HierarchicalDataTemplate> |
This allows us to easily walk through our view model data structure and make changes to the UI without directly interacting with it; MVVM allows for data-driven UIs.
The assembly browser view model also utilizes the Event Aggregator:
- It publishes the AssemblyBrowserItemSelectedEvent whenever a tree item is selected.
- It subscribes to the AssemblyAddedEvent and adds the assembly to the view.
- It subscribes to the NavigateToItemEvent and navigates to the item passed as an argument to the event.
Conclusion
We have seen how to use parts of Prism to build a simple yet well-structured application; even such small applications can benefit from it and especially from the MVVM pattern. We’ve also seen how we can utilize Reflector’s public APIs to browse and decompile assemblies.
In our next installment, we will take Reflectoron to the next level by upgrading it to Prism v4 (which includes MEF), and by adding add-in support to it. Stay tuned.
This document contains proprietary information and is protected by copyright law.
Copyright © 2026 Red Gate Software Limited. All rights reserved
Load comments