
I’m going to be describing how to set up a Data Science Laboratory system that you would be able to use in order to compare, study and experiment with various data storage, processing, retrieval, analysis and visualization methodologies. I apologize for the use of the controversial term ‘Data Science’ but it captures the meaning.
My plan is to set up a system that allows me to install and test various methods of storing, processing and delivering data. These systems range from simple text manipulation to Relational Databases and distributed file and compute environments. Where possible, I plan to install and configure the platforms and code locally. At the start of this process, my goal is to work with the following types of data systems:
- Text Systems
- Interactive Data Tools
- Relational Database Management Systems
- Key/Value Pair
- Document Store Databases
- Graph Databases
- Object-Oriented Databases
- Distributed File and Compute Data Handling Systems
I’ll also use the system to test hybrid data processing systems, both on and off premises.
Platform, Operating Environment and Text-Handling Tools
Many data professionals have tools installed on their local workstation or laptop that assist them in working with their primary platform, but you’ll need a second server-based system to work with data in multiple platforms and in several ways. Your primary workstation or laptop is mostly used to get day-to-day work done, and you might jeopardize its stability by experimentation with data. Also, some data platforms are optimized to work on a Server-based operating system rather than a user-based one.
To adequately test various data handling software, and to preserve the local laptop, it’s best to set up another system for testing and as a laboratory for experimentation. In this series of articles, I’ll show you the system and configuration I’ve chosen to set up for my data science lab.
I’ll start this series with the basics: choosing the platform to run the lab system, setting up the operating system, and various utilities for that environment. In addition, I’ll install a few tools and utilities that allow me to work more effectively with text-based files.
Throughout this series, I’ll explain my choices and the reasons and motivations for each installation and configuration.
Note: The information in this article and the ones that follow is not an endorsement or recommendation to use any particular vendor, software or platform; it is an explanation of the factors that influenced my choices. You can choose any other platform, cloud provider or other software that you like – the only requirement is that it fits your needs. As I always say – use what works for you. You can examine the choices I’ve made here, change the decisions to fit your needs and come up with your own system. The choices here are illustrative only, and not meant to sell you on a software package or vendor.
In the articles that follow, I’ll set up and explain various data storage, processing and retrieval systems, such as Text-Processing Systems, Relational Database Management Systems, Graph Databases, Key/Value Pair processing systems, Document Databases and more. I won’t be focusing in this series on how to use each one of these data mechanisms, I’ll merely explain what they do, why I chose them, and how I installed and configured each. In articles that follow, I’ll use this system to show you what I’ve learned about each of them.
Note: There is a good resource for experimenting with multiple data systems called “Seven Databases in Seven Weeks” by Eric Redmond and Jim R. Wilson and you can find it here: http://pragprog.com/book/rwdata/seven-databases-in-seven-weeks among other locations.
Before I get started, it’s important to note that there are a lot of choices I’ve made that fit my personal requirements for my work. There are multiple options available to you – and no single configuration or system fits all possible situations. Even if you choose another layout, however, the process I describe here might be useful to spark a configuration that you can use for your needs. I intend to repeat this series at a later date and set up the laboratory using only open-source software – this might be more appropriate for certain situations.
Platform
Since I’m not testing performance or hardware, I considered using a Virtual Machine image on a local system for the base platform for my laboratory system. There are many options, from the built-in Hyper-V components on my Windows 8 system to VM-Ware, VirtualBox and others. After evaluating the choices, I decided to use the Hyper-V system in Windows 8 (my desktop workstation operating system) to create my images. It provides good integration with my work system, and has all of the networking, drive, memory requirements and so on that I need for the system. Actually – almost any Hypervisor system does – some handle things better (such as USB local devices, etc.) but the Hyper-V choice has an impact on another decision I made about the platform I want to use – Windows Azure. This will allow me to use the system locally, remotely, or in a hybrid fashion.
Since I travel with a laptop and use a desktop system at my office, I may have to transfer the image back and forth when I travel. It’s also possible to use a “cloud” provider so that I can access the laboratory system from anywhere in the world – and leave it running at all times. I’ll use the Windows Azure platform – and I’ll explain my rationale for this choice, but of course your requirements might dictate a different choice.
Windows Azure has a feature to allow “Infrastructure as a Service” (IaaS) or just Virtual Machines running Windows Server or various distributions of Linux. All of these use the Hyper-V format, so I can simply copy the image from my local system to Windows Azure if I want to use it another way, clone it and so on. This portability is the reason I chose the Hyper-V platform for the Laboratory System.
Windows Azure also has a full “Platform as a Service” (PaaS) environment, so I can write code that runs on one or more machines that I do not have to install and configure or manage as in IaaS. From the data perspective, I can use compute features, including High Performance Computing (HPC) tasks to handle Massively Parallel Computing (MPP) workloads such as job scheduling, MPI, SOA, and parametric sweep applications, and web-based job submission interfaces. Data Storage also supports Binary, Key/Value Pair, Queues, and the HDFS File System (used with Hadoop).
Windows Azure also has a series of functions that allow “Software as a Service” (SaaS). That means the platforms for handling data processing in Hadoop or SQL Server and so on are already built and I can simply use them. In addition, I can use the IaaS, PaaS and SaaS in Azure where I want throughout my experiments. That isn’t a requirement – I can use these features with and from the VM, or even other cloud providers. It’s all about flexibility.
I work here at Microsoft on the Windows Azure team, so I have access to this platform – but you do as well. There are various offers on the platform, and if you have an MSDN subscription, you get time for just such an environment.
If I do move the system to Windows Azure, I use a “Medium” sized image, which has 2 x 1.6GHz CPUs and 3.5GB of RAM, along with a 350GB hard drive reserve. This size also provides 200 Mbps transfer. I have also added a “Data Disk” of 300GB to have more drive letters. Time will tell if this size is adequate for testing – although I don’t plan to do performance testing, I do need to have larger data loads, so this may not be enough.
I was able to set a port redirect from the portal that controls the image so that I can provide the first level of protection for the system. I only opened a port for Remote Desktop – this isn’t a system I’ll access in any other way.
Operating System
I’ve actually set up two laboratory systems. The first uses Windows Server 2012, which I’ll detail here. The second uses CentOS (a Linux distribution) which I’ll describe in another series of articles.
The choice to use a Windows Server operating system follows a similar pattern to choosing Hyper-V and Windows Azure as my platform. There are various other choices I’ve made for my system, such as SQL Server as a Relational Database Management (which I’ll describe in another article) that dictate Windows as the operating system. While there are differences in things like thread management and file systems, I find that almost every modern server operating system is useful as a data science laboratory setup.
Taking the base configuration, I installed all patches and updates that are current as of this writing. I did not enable automatic updates, since I want to control the environment to a very granular level.
I also installed a Virus-scanning program to ensure I stay safe on the system, and set up the TCP/IP port Firewalls to allow only my Remote Desktop software to connect. This provides another level of protection for the system.
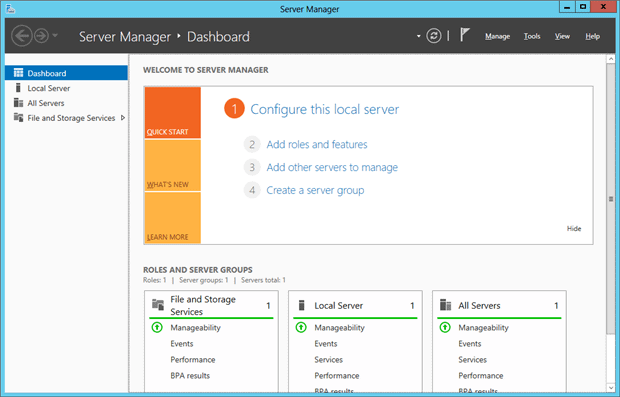
Windows Server allows two primary operating system installation choices. After you install the system, you’re shown the “Server Manager” Dashboard, where you can choose “roles” for the server, and “features”. Roles are software installations that allow the server to perform some function – and features are either additional software or simply changes to the system to allow or prevent some function.
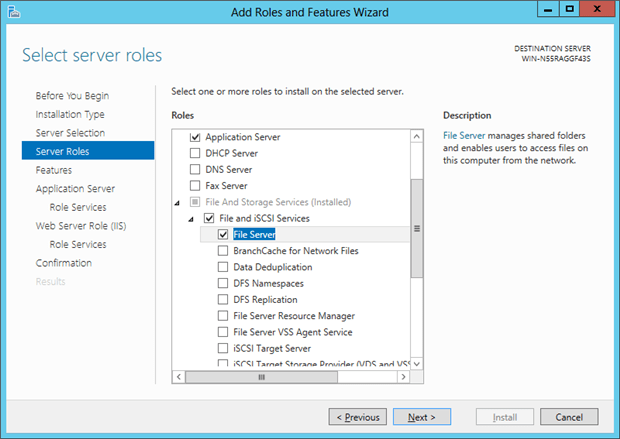
For roles, I enabled only File Server, Web Server and Application Server roles. I need a web server to test various parts of the data systems I will set up (some use a web-based administration console and so on) and others require the Application Server to be enabled.
For the features, along with the default features selected I enabled the Background Intelligent Transfer Service (BITS) for file transfer testing. I also selected Simple TCP/IP Services, Windows Search Service, and Windows Server Backup. These are all primarily for testing of text-searching and of course backup calls.
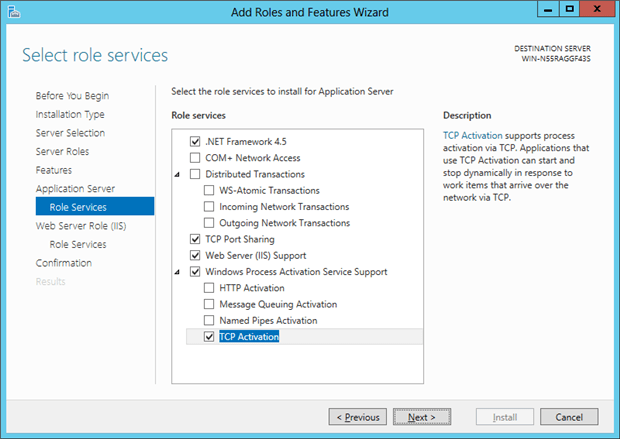
After the feature selection, the system returns to the roles for further configuration. I chose to install .NET 4.5 Framework and the Web Server (IIS) Support, along with the TCP Activation configuration so that I can create web-based services later in my data testing. I don’t plan to do full-scale software development on this system, but I might need these features for testing.
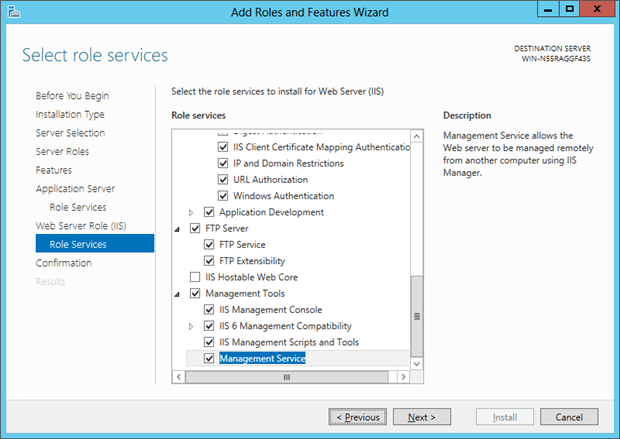
In the panel that follows for the final parts of the server configuration, along with the default selections I chose to enable the FTP Server, since I anticipate testing that type of data transfer. I also included the Management Service of the IIS Management Tools, so that I can manage the system remotely.
After that process completed, I installed all updates and patches. I then installed a Virus-Protection program as well.
Text-Based Data Processing Software
I believe that a data professional should be very familiar with various methods of handling single data files made up of ASCII text. To that end, I use a few tools (in Windows) to deal with text files. To be sure, other kinds of data from binary to other formats are important; but dealing with text files is the place to start.
In addition, no matter how large or complicated the datasets you work with in your data career, you’ll need to look at a text file directly at some point. Having a series of tools at hand to do that is a primary requirement on my laboratory system.
Cygwin
My first installation is from Cygwin (http://cygwin.com/) , which is a collection of Unix-like utilities that run on Windows. While the Windows operating system is my choice for this system, there are utilities that make working with data simpler, specifically utilities that deal with text.
Many of these utilities are available as stand-alone installations, or by simply replacing them with Windows operating system commands or PowerShell. But Cygwin bundles these utilities in a consistent way, and has a bash-shell that I can use. In addition, Cygwin provides several archival utilities such as zoo, tar, and other software that allows me to decompress or compress data found on servers that are Unix-oriented. As I researched data sources, I found many (if not most) use an archival package that is Unix-compatible.
While I won’t show every screen from the installation of Cygwin I performed, I’ll include most of them along with the process I followed as an appendix at the end of this article. I’ll try and maintain idea that throughout this series so that you don’t have to break the flow of the article, but you can follow a similar installation if you choose to by examining my choices.
The text utilities I wanted from the Cygwin package include the following list.
I’ve provided a short description for why I included it and a link describing the utility in the chart below:
(You can also simply type command–help or mancommand in the Cygwin bash shell for most of the information you need – the links provided are merely a supplement)
| Utility | Description | Reference |
| awk | Sorting and grouping utility – I’ve actually installed “gawk”, which is equivalent | http://www.theunixschool.com/2012/06/awk-10-examples-to-group-data-in-csv-or.html |
| cat | Concatenates and/or displays a file’s content | http://www.softpanorama.org/Tools/cat.shtml |
| cksum | Prints the cyclic redundancy check (CRC) checksums and byte counts of a file | http://linux.101hacks.com/unix/cksum/ |
| comm | Compares two sorted files line by line | http://www.unixcl.com/2009/08/linux-comm-command-brief-tutorial.html |
| csplit | Splits a file into sections determined by text patterns in the file and places each section in a separate file | http://stupidunixtricks.blogspot.com/2008/03/csplit-splitting-file-into-multiple.html |
| curl | Interacts with HTTP sources | http://curl.haxx.se/docs/comparison-table.html |
| cut | Removes sections from a line in a file | http://handsonlabs.blogspot.com/2008/01/unix-cut.html |
| expand | Converts tabs in a file to spaces | http://pubs.opengroup.org/onlinepubs/9699919799/utilities/expand.html |
| fmt | Fills and joins lines, making each line roughly the same length | http://www.cs.fsu.edu/~langley/COP4342-2008-Fall/05-shells4.pdf (search for fmt) |
| fold | Breaks lines in a file so that each line is no wider than a specified width | http://www.theunixschool.com/2011/08/fold-files-using-fold-command.html |
| grep | Work with regular expressions on objects, including text and files | http://www.panix.com/~elflord/unix/grep.html |
| head | Displays the first part of a file | http://linux.101hacks.com/unix/head/ |
| join | Joins corresponding lines of two files using a common field – by default the first field | http://www.albany.edu/~ig4895/join.htm (link deprecated) |
| md5sum | Computes and checks the MD5 message digest | http://linux.byexamples.com/archives/198/md5-checksum-how-to/ |
| nl | Numbers each line in a file | http://www.cyberciti.biz/faq/linux-unix-command-to-number-lines-of-files/ |
| od | Displays the contents of a binary file in octal or other formats | http://www.walkernews.net/2007/09/21/using-linux-od-command-to-view-file-in-bit/ |
| paste | Merges corresponding lines of one or more files into vertical columns separated by tabs | https://www.thegeekstuff.com/2009/10/file-manipulation-examples-using-tac-rev-paste-and-join-unix-commands/ |
| pr | Formats a text file for printing | http://www.tutorialspoint.com/unix/unix-basic-utilities.htm |
| ptx | Produces a permuted index of file contents | http://www.panix.com/userdirs/spkemp/examplex/unix/ptx.htm |
| sed | Search a file using regular expressions | http://www.grymoire.com/Unix/Sed.html |
| sort | Sorts the lines of a text file | http://javarevisited.blogspot.com/2011/08/unix-sort-command-example-tutorial.html |
| split | Splits a file into parts | http://kb.iu.edu/data/afar.html |
| sum | Computes and prints a 16-bit checksum for each file and counts the number of 1,024-byte blocks in the file | http://linux.about.com/library/cmd/blcmdl1_sum.htm |
| tac | Displays a file, last line first | https://www.thegeekstuff.com/2009/10/file-manipulation-examples-using-tac-rev-paste-and-join-unix-commands/ |
| tail | Prints the last part of a file | http://linux.101hacks.com/unix/tail/ |
| tr | Translates or deletes characters in a file | http://www.cyberciti.biz/faq/how-to-use-linux-unix-tr-command/ |
| tsort | Performs a topological sort | http://www.ibm.com/developerworks/library/l-tiptex4/index.html |
| unexpand | Converts spaces into tabs | http://www.ibm.com/developerworks/aix/library/au-unixtext/index.html#11.Use%20of%20expand%20/%20unexpand|outline |
| uniq | Removes duplicate lines from a sorted file | http://www.ibm.com/developerworks/aix/library/au-unixtext/index.html#18.Use%20of%20uniq|outline |
| vim | An editor allowing for regular expressions and command-operation | http://www.panix.com/~elflord/vim/ |
| wc | Prints the number of lines, words, and bytes in a file | http://kb.iu.edu/data/adpb.html |
PowerShell
While I do like the Cygwin utilities, I’ve been making more and more use of PowerShell. Unless you specifically de-select it, you’ll have PowerShell installed in almost every modern version of Windows.
I also like Perl as a scripting engine, but PowerShell has several advantages. One is simplicity – I’m able to leverage four simple concepts into a very powerful set of scripting constructs:
Command-lets: These are verb-noun formatted commands. For instance, Get-ChildItem (which is also aliased to DIR and ls among others) displays the child-objects of whatever provider you’re in at the moment.
Providers: Access to some infrastructure of objects. By default, Windows PowerShell includes the File System on Windows, the Windows Registry, and other object areas.
Variables: Variables start with a $ character, and can hold not only a singleton, but arrays, lists, and even objects. Instantiating a new object is as simple as setting it to a variable. These variables can then extend the objects properties and methods, all without having to having to write code in a higher language.
Piping: In PowerShell, as in other scripting languages, you can run a command and send the results to another command over and over. This is similar to a JOIN operation in a Relational Database System where sets of data are passed from left to right – only in this case you can send the output of an object to another command or even another object.
Using only these concepts – and there are many more – I can work with data using not only the tools in Windows, but whatever provider is available for a given software package. SQL Server, Microsoft Exchange and other data stores include a PowerShell provider, so that in a single script all of these objects can be used together to work with data.
You can learn more about PowerShell here: http://technet.microsoft.com/en-us/library/bb978526.aspx
NotepPad++
Notepad++ is a free text editor. I include this tool because it handles both Windows and Unix text files well, and has several plugins that make writing PowerShell, Perl, Python and many other language simple.
I took only the defaults for this tool, and loaded the Python and HTML prettifier add-ins. You can find Notepad++ here: http://notepad-plus-plus.org/
Aside from operating systems and perhaps pizza toppings, the choice of text editor is the most personal and passionate decision you are likely to make as a computer professional (I am only exaggerating a little). I like vim and Notepad++, but feel free to choose and use another that you like best. The key is to spend some time understanding it well.
Data Sets
To experiment on data, I’ll need quite a variety of sizes and content. There are several locations to obtain data – but you do have to be extremely careful that you are allowed to use it. Just because a dataset is available on the Internet doesn’t mean you are allowed to use it for any purpose. Find and read the license and/or terms of service carefully.
You can locate many data sources in your area or country by searching for “Free Data Sources”. In the United States, I found several candidates – I started with two. The first is from http://Data.gov which has multiple types of public data. The set I chose has information on the consumer expenditure survey, which is described as:
“The Consumer Expenditure Survey (CE) program consists of two surveys, the quarterly Interview Survey and the Diary Survey, that provide information on the buying habits of American consumers, including data on their expenditures, income, and consumer unit (families and single consumers) characteristics. The survey data are collected for the Bureau of Labor Statistics by the U.S. Census Bureau. The CE collects information on all spending components including food, housing, apparel and services, transportation, entertainment, and out-of-pocket health care costs including insurance premiums.”
I took this source because it contains not only the raw data, but several other files to be used in conjunction with it that contain descriptors. It also includes a full data dictionary so that I can create meaning from the analysis later. Because it’s actual data, I can rely that it is randomized correctly (which may be not at all) to represent an actual workload. It’s about 14MB in size, so it’s large enough to work with, but not so large as to overwhelm my small system. It’s also a mixture of categorical and numeric values, so that I can do aggregations and other domain operations on it.
The next set of data I pulled down is from http://wiki.dbpedia.org/develop/datasets. This site contains data extracts from http://Wikipedia.org which is a sort of online encyclopedia. I pulled down two datasets – the first is the “Extended Abstracts” in nq format (more about the data structures on the web site) and the “Persondata” nq formatted files. They are 2.7 and 1.3 GB in size, respectively. This will help me simulate larger data loads than will not normally fit in a traditional spreadsheet or small data store.
This latter set of data are categorical and text-based information only, and the Extended Abstracts set contains two key fields, and a large set of data as the value. Having this data available lets me work with text abstractions easier.
Another advantage to this data set is that you can pull down more than one language. Although I selected just the English version, you can get others as well.
You can find this data set here, along with how to use it: http://wiki.dbpedia.org/datasets/dbpedia-version-2016-10
And so that provides the first set of tools I’ll work with for the remainder of this article series. In those that follow, I’ll cover everything from interactive data handling to Relational Database Management Systems, document databases, key-value pair systems, distributed file and processing, and object oriented databases.
Appendix: Cygwin installation
By and large, you can simply start the Cygwin installation and begin choosing packages to install. However, there’s a huge array of tools, utilities and even other packages that you can choose from.
Some of these I will choose later – but not from Cygwin. You can find packages such as the “R” statistical programming environment, the Python scripting/development package and so on. In my case, I’ll install these separately. I want to control the specific things in those environments, so I’ll make some specific selections.
You can get the Cygwin installer from this location: http://cygwin.com/
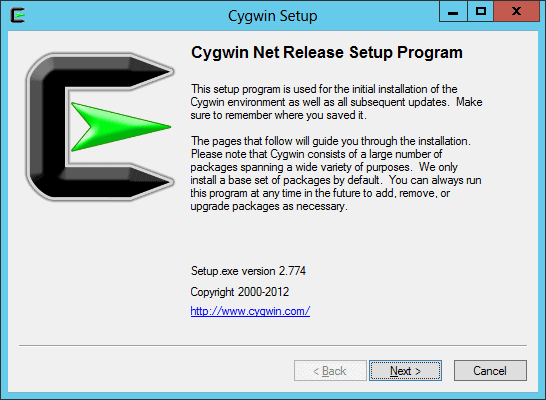
Once you launch the installer, you’re presented with the following screen:
You’re asked where to install the packages from, and then two screens follow. The first deals with where the installation source will be copied:
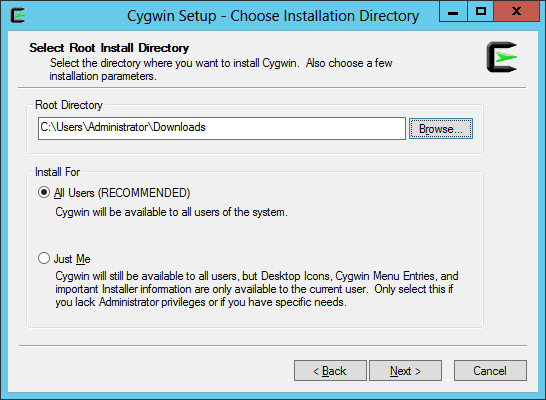
Then you are asked where to install Cygwin when it runs. This is similar to the “Program Files” selection you normally make, but since you’ll be dropped into this directory when you run the bash shell, I would recommend another directory – I take the default:
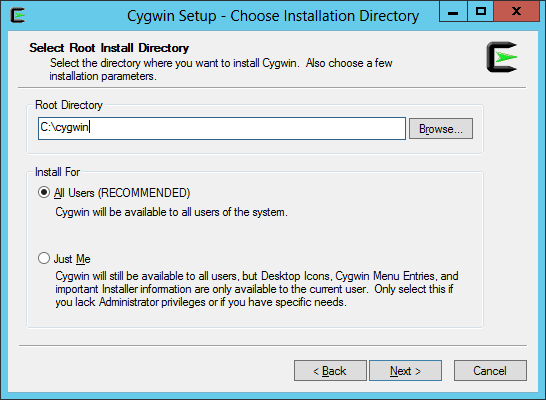
Remember that you’ll be in a very Unix-like environment, with directories like /user, /bin/, /home and so on. Most of the time I work from the /home directory for things like data downloads.
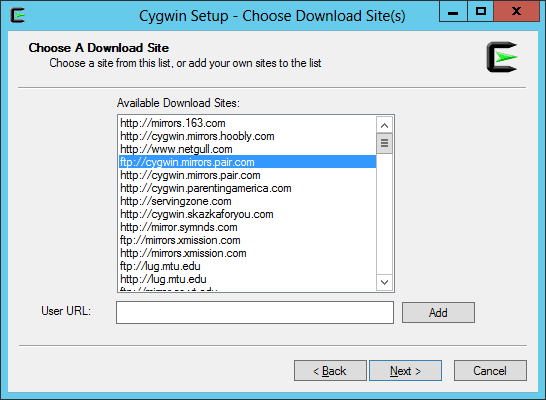
The next choice is which server you want to download Cygwin from on the Internet. Either click a selection or type one you know.
Next you’ll be asked to select “packages”, which are groups of software utilities.
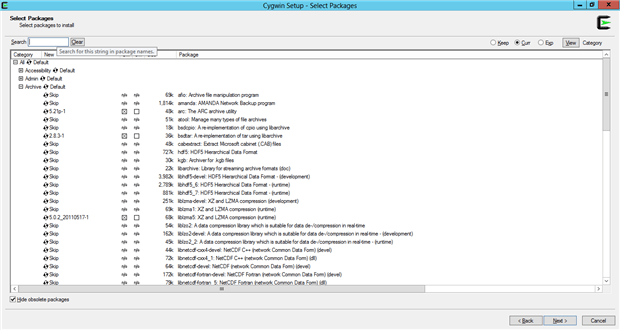
For the packages, I made the following utility selections in addition to the “Default” selection:
- Under Archive: zoo, p7zip, bstar, and arc
- Under Base (all) I selected sed, gawk, grep
- I selected all of the Text: area
- From Editors: vim and gvim
- Under Web: I selected curl
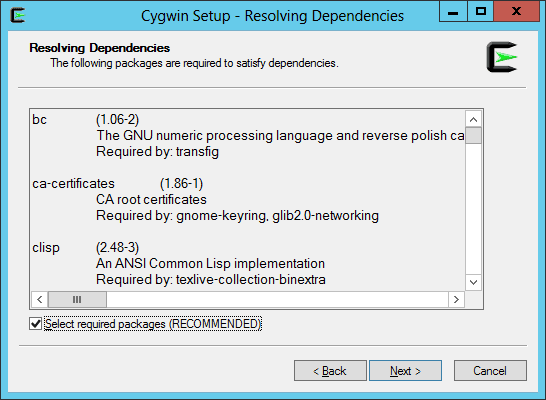
From there you’re asked whether you want to include the pre-requisites for each selection, and that’s normally a requirement.
Once the installation completes, you can open and configure the bash shell environment.
If you need further help from this location, see the main Cygwin site for further documentation.
This document contains proprietary information and is protected by copyright law.
Copyright © 2026 Red Gate Software Limited. All rights reserved
Load comments