
Continuing our series on Microsoft Azure for DBAs, we come now to a second very important component: networking. Most DBAs have a cursory understanding of how networking functions; we might know how subnetting works, what kinds of firewall rules are required for SQL Server to function properly, or perhaps have some understanding of load balancing, especially if we have experience with solutions that integrate with that technology, such as scale-out deployments of SQL Server Reporting Services. There are certainly similarities between a typical on-premise network and Azure: However there are also key differences, some of which have direct impact on the way that we must configure our SQL Server environment.
To start out, we need to go over a few core concepts and components.
VNets and Subnets
The backbone of all Azure networking is the VNet, or Virtual Network. A VNet is basically a segmented block of IP addresses, from which smaller sets are carved out and allocated into Subnets. VNets must be configured with a contiguous block of addresses; you can’t, for example, have a VNet that includes both “10.x.x.x” addresses as well as “172.x.x.x” ones. On the other hand, you could have a VNet that includes the entire “10.0.x.x” range, since it is a single block.
Looking at the lab environment we provisioned in my first article of the series, we can see that we have a single VNet, which all three of our virtual machines are connected to. (This screen is accessed by locating the virtual network resource in the Azure Portal.)
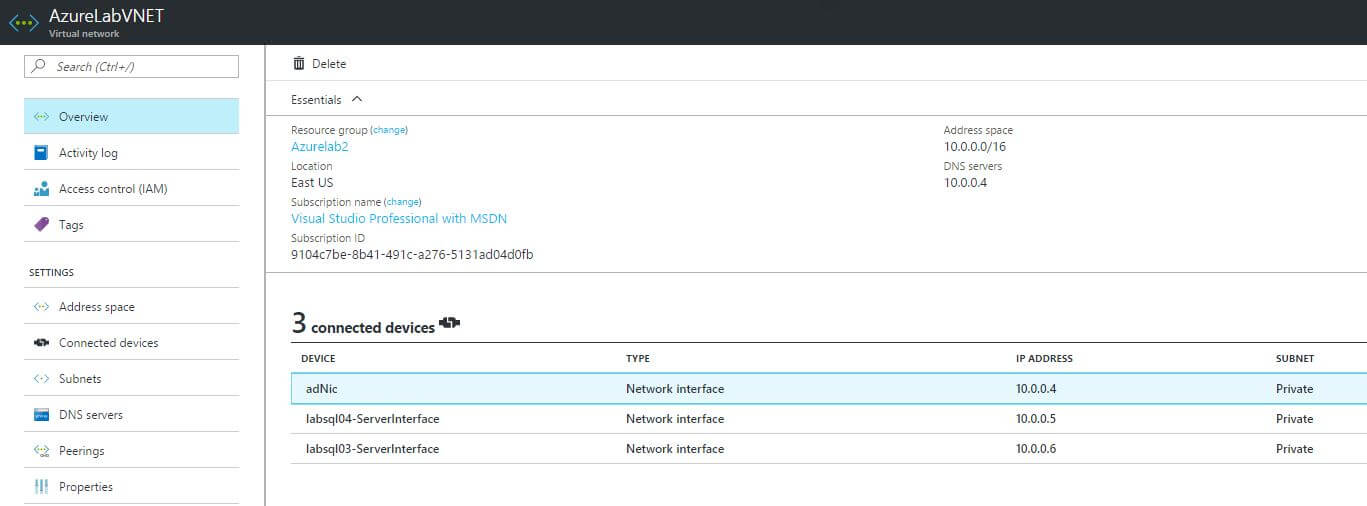
Note that the virtual machines themselves are not listed; instead we see the network interfaces themselves, which are each associated with a particular virtual machine. When we provision a virtual machine in Azure, we must (assuming it needs any network connectivity at all, including for remote access) also provision and attach a virtual network interface, and connect it to a VNet.
VNets are associated with a particular geographic region within Azure. You can see in the graphic above that in my case, this VNet is located in the Eastern United States, which is where my lab environment is provisioned. It’s somewhat obvious, but to be explicit I’ll point out that virtual machines can only be connected to VNets in the same geographic region that they themselves reside in.
TIP: If you’re not familiar with standard CIDR notation for describing network ranges, you’ll need to brush up on it, as Azure uses it heavily.
You can also see the particular address space that I have assigned to the virtual network, namely the “10.0.x.x” range. Within that block of addresses, I can allocate smaller chunks into Subnets. Usually it’s best to segment Subnets in Azure much as you would in a traditional on-premise environment. For example, you might have a subnet for Internet-facing servers, a middle tier subnet, and finally a “core” subnet for services such as domain controllers and SQL.
Clicking on the ‘Subnets’ tab, we’ll see that in this case there is only a single subnet, assigned the “10.0.0.x” range of IP addresses, and named simply “Private”.

If we wanted to create another subnet, we would click on the “+ Subnet” button and then fill in the appropriate fields. Here is what we might do, for example, to create a second subnet for our Internet facing servers.

As you can see, I entered a different block of addresses (10.0.1.x), and gave the subnet a simple yet meaningful name. You’ll notice one field here that is left blank, namely the “Network Security Group”. We’ll get to Network Security Groups soon enough, but for now it is enough to know that they are how we define what traffic is (and conversely is not) allowed to flow throughout our virtual networks.
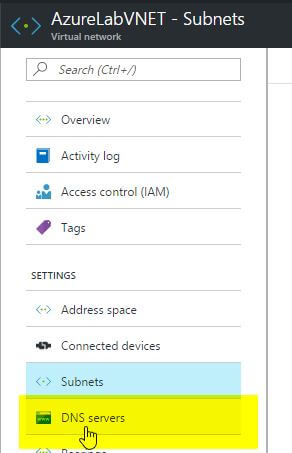
VNets also allow you to define what DNS servers are assigned to connected virtual machines. By default, Azure’s own DNS servers are used, but you can modify this by clicking on the “DNS Servers” tab.
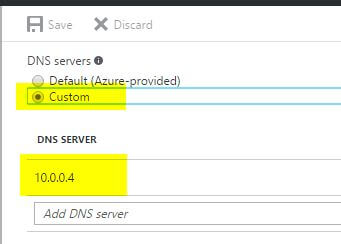
In this screen you can either select to use the default Azure DNS servers, or assign your own. When might you want to do the latter? The biggest example to me is when you have built an Active Directory domain in your Azure environment, and you want your virtual machines to use your domain controller(s) as their DNS server. If you are using my lab setup, you will in fact see this is set up, with the static IP address configured as the singular DNS server.
The final tab on the VNet screen is the “Peerings” tab. If you have multiple VNets within a single Azure subscription and region, then you can easily connect them together here. That’s a more advanced configuration than we’ll get to in this article, but nonetheless it’s good to understand the language.
Now let’s talk about how virtual machines connect to VNets.
Virtual Network Interfaces
The connecting thread between an Azure virtual machine and a virtual network is a Virtual Network Interface Card, or VNic for short. These are resources that are separate and distinct from the virtual machine and network itself, which can be assigned to a given virtual machine.
If you go to the “All Resources” screen and sort by the “Type” column, you will find a number of network interface resources.
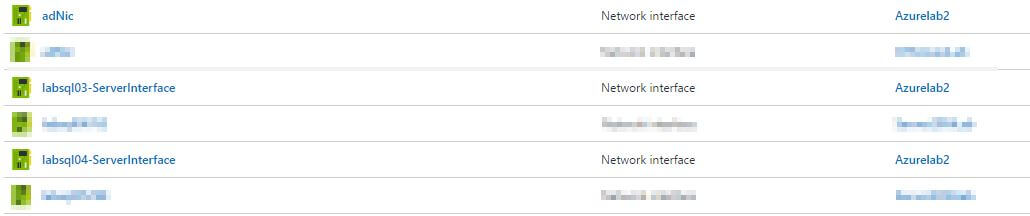
We will now click on one of these so we can take a closer look.
On the Overview screen, we can see a number of properties. The most important ones are located on the right side of screen.
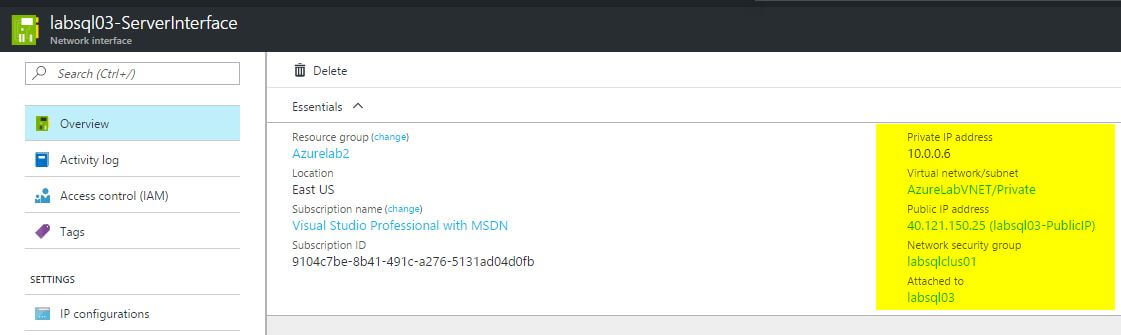
Here’s what each of those mean.
|
Name |
Description |
|
Private IP address |
The private (within VNet) IP address that is assigned to the virtual NIC. |
|
Virtual Network / Subnet |
The VNet and subnet that the NIC is assigned to. |
|
Public IP Address |
If one is assigned, this is the public facing IP address attached to the NIC. We’ll talk more about public IP addresses later. |
|
Network Security Group |
The Network Security Group that the NIC is assigned to. We’ll address this later as well. |
|
Attached to |
The virtual machine that the NIC is attached to. |
Other things you can set on this screen include:
- The DNS servers used by the virtual NIC (this would override the VNet level setting discussed earlier).
If you click on the ‘IP Configurations’ screen, you’ll see information about the IP addresses that are consumed by the NIC. Now is a good time to introduce a second, very important difference between Azure and most on-premise environments: in Azure, all IP address allocation is done via DHCP; never, ever attempt to manually assign an IP address or otherwise modify NIC settings, lest you lose connectivity to your virtual machine.
Note, this does not mean that all IP addresses are assigned dynamically. Rather, it simply means that all address allocation must be done through the Azure platform, rather than from within the environment itself. Here’s how, for example, we might give a virtual NIC a statically assigned IP address.
- From the NIC settings screen, select ‘IP Configurations’.
- Click on one of the configurations listed.

- Click on the ‘Static’ selector. You may then either enter an IP address, or simply leave the address that was originally assigned dynamically.
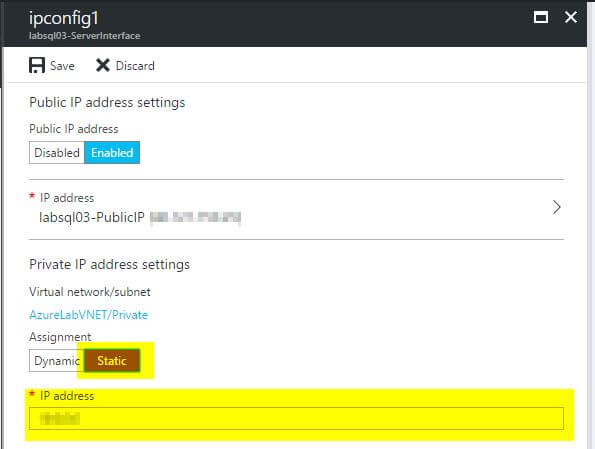
- Click ‘Save’.
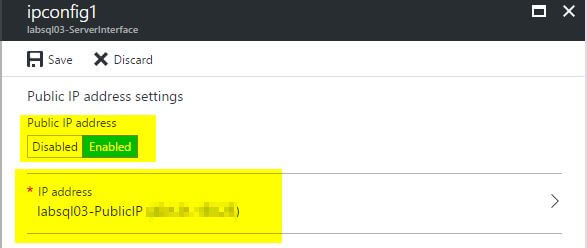
Note that this screen is also where you would add, change, or remove the public facing IP address assigned to the NIC.
A few items to note before we move on:
- While virtual machines can (potentially, depending on their size) have multiple virtual NICs assigned to them, this can only be set at the time the machine is provisioned. Once the VM has been created, you cannot add additional NICs to it.
- If virtual machines are part of an availability set, they must all have the same number of virtual NICs.
- This is a key one: virtual machines are only accessible via the IP addresses that they are assigned by the Azure DHCP server. For example, when working with failover clustering, virtual machines are not accesible via any of the cluster-assigned IP addresses, except through the use of Azure load balancers (which we’ll get to in a later article).
Network Security Groups
In a traditional on-premise environment, network security is usually handled by means of a firewall (whether a software appliance or a piece of hardware). Devices are put into groups, and then rules are created that allow or block communication between groups (or individual devices). Usually, the default rule (at least in most properly secured environments) is to deny any traffic that does not match a defined rule.
In Azure, network security is handled via resources known as Network Security Groups. These groups define what traffic is, or is not, allowed to come from, or come to, the virtual machines that are part of them.
There are two ways that a virtual machine can be part of a network security group:
- The virtual machine’s network interface card is a member of the group.
- The subnet to which the virtual machine’s network interface card is assigned, has been attached to the group.
It’s possible that both of these conditions are true; that is to say, a virtual machine is both
- part of a network security group that its virtual NIC is assigned to
- part of a subnet that is attached to a (possibly different) network security group.
Here’s how Network Security Groups function, in terms of how traffic is evaluated and either allowed or blocked:
When traffic is received (either inbound or outbound), for each rule in the security group, evaluate whether the rule matches (port, source, destination, etc).
- If yes, does the rule allow the traffic? If so, let it through. If it denies it, block it.
- If no, move on to the next rule.
- Repeat above steps until all rules are evaluated.
Just as there are two ways to associate a network security group with a virtual machine, so rules are evaluated at both the NIC and subnet level (assuming that there is a NSG assigned in both places). For inbound traffic, first the subnet level rules are evaluated, then any NIC level rules; for outbound, the reverse occurs.
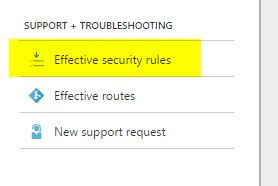
Recently, Microsoft released a useful enhancement to the Azure portal, which lets you view the “effective rules” for a given virtual network card. You can view this by selecting the NIC in the portal, then clicking on the “Effective security rules” option under the “Support + Troubleshooting” section of the left hand navigation bar.
In addition to rules you create, there are a number of default (normally hidden) rules:
- All incoming traffic from other Azure virtual networks is allowed, including any connected ones from outside the current one.
- All incoming traffic from Azure load balancers is allowed.
- All other incoming traffic is denied. (This prevents traffic from the internet from reaching the VM, for example.)
- All outbound traffic to other Azure virtual networks is allowed, including any connected ones from outside the current one.
- All outbound traffic destined for the internet is allowed.
- All other outbound traffic is denied.
Of these, I think the most important ones to consider are items 1 and 2. In most environments (at least those that are well managed), networks are locked down by default, and only that traffic which is truly required is allowed through. In contrast, in Azure, most traffic is allowed by default. This means that if we are going to properly secure our database servers, we need to include the addition of a few rules as part of our standards.
Just as with on-premise networks, it helps to segment different tiers of work into different subnets within the virtual network. For example, in a typical three tier setup, you might have something like this:
- Internet DMZ, for all public facing web servers: 10.0.0.0/24
- Middle tier, for application servers: 10.0.1.0/24
- Database and domain tier, for secured servers such as domain controllers and database servers: 10.0.2.0/24
Each subnet would have its own network security group, with rules as follows:
For the DMZ –
- Inbound
- Allow traffic from the internet on ports 443 and 80
- Deny all other inbound traffic from the internet
- Outbound
- Allow all outbound traffic, regardless of the destination
For the middle tier –
- Inbound
- Allow traffic from the DMZ on port 443 (this assumes the middle tier serves web services)
- Allow inbound traffic from the domain zone
- Block all other inbound traffic
- Outbound
- Block outbound traffic to the internet, except for a few select exceptions
For the database / domain tier –
- Inbound
- Allow traffic from the middle tier on the ports required for domain services and SQL Server
- Block all other inbound traffic
- Outbound
- Block all outbound traffic to the internet
Keep in mind that we can always attach separate network security groups to the virtual machines themselves if we want more granular control. For example, we might want to further filter traffic to the SQL Server VMs, such as only allowing inbound traffic from specific VMs in the middle tier based on usage. Let’s say we have three SQL Server VMs, each with a single related application server in the middle tier, like this:
- SQLVM1 – APP1
- SQLVM2 – APP2
- SQLVM3 – APP3
We want APP1 to be able to communicate with SQLVM1, but not APP2 or APP3. To accomplish this, we could attach the network interface of SQLVM1 to another network security group, and add a rules like this:
- Allow traffic on port 1433 from APP1’s private IP address
- Allow traffic on port 1433 from the database / domain tier’s IP range
- Block all other traffic on port 1433
We would then repeat the same exercise for the other two SQL Server VMs. In this way it’s possible to get extremely specific about how traffic can and can’t flow between resources on your Azure VNet.
Connecting VNets and on-premise networks
Finally, we’ll discuss the principles of connecting different VNets together, including how to connect on-premise networks. This is largely outside the responsibilities of a database administrator in most roles, but it’s still useful to have a basic understanding of the concepts. For example, if you’re going to set up a geographically distributed AlwaysOn Availability Group, you’ll need to understand how the two VNets would connect.
There are two main ways of connecting two or more VNets together: VNet peering and Site-to-Site VPNs.
VNet peering is useful when you have multiple VNets within the same Azure geographic region. For example, if you need to have highly segmented networking, but need some level of connectivity between the VNets, you could utilise VNet peering for the connections. The benefits to this setup include:
- Low network latency, since all traffic is flowing directly over the Azure backbone.
- No cost for the VNet pairing, though there is still a nominal fee for the traffic flowing across the VNet pair.
On the other hand, if you need to connect VNets that are in different geographic regions you must utilize Azure VPN Gateways. These allow secured IPSec tunnels between locations, including both other Azure VNets and on-premise networks. For example, you could establish a connection between your local network and Azure, thereby allowing you to easily connect systems in both environments (in an upcoming article I’ll talk about this, as it’s an excellent way to get your feet wet in the cloud while serving the valuable need of disaster recovery). There are multiple levels of VPN Gateways available; make sure you choose the one that meets your needs in terms of bandwidth and number of connections.
It’s worth noting that, while these built-in options exist, there’s nothing to stop you from deploying other solutions, based on things like virtual appliances. The Azure marketplace is full of such options from many mainstream providers, such as Barracuda and Imperva. There are many possibilities; as usual, it all depends on your requirements (and what your network team can support of course).
Conclusion
We talked about the fundamentals of Azure networking in this article, and particularly about the building blocks of networks in Azure, such as VNets and Subnets. We then mentioned how Virtual Machines are connected to Azure VNets using the virtual Network Interface Card resource. Because the task of securing our database servers is a crucial part of our job, I felt it was important to explain how we use Network Security Groups to either allow or block traffic flowing within our Azure networks. Finally, we discussed, very briefly, how to make connections between virtual networks by using VNet peering and VPN gateways. As I said, this is only scratching the surface of the possibilities when it comes to Azure networking. As with other technologies (storage, Active Directory, etc), even if we as DBAs don’t become experts, it behooves us to understand the language and the basics of how things operate, so we can properly advocate for what we need to keep our SQL Servers running smoothly.
Note: There was one notable omission from this article: Azure load balancers. This is because these deserve their own separate treatment, because as you’ll soon see they are integral to making many SQL Server based solutions function. Thus, we’ll deal with these in great detail in the next installment.
This document contains proprietary information and is protected by copyright law.
Copyright © 2026 Red Gate Software Limited. All rights reserved
Load comments