
Move objects on Azure is not simple. Move between Tenants is extremely difficult or not possible. I faced the challenge to move a virtual machine and disks between tenants recently and found the solution.
Some Years ago, I wrote an article about the Azure Resource Mover when it was still being created. Today the resource mover is integrated with the entire azure portal, although there are already many limitations in relation to moving resources. Anyway, this will not affect us on this blog post.
Moving Process
The process is based on moving the disks and creating the VM again on the other tenant.
These steps are for a Virtual Machine with managed disks:
- Create a snapshot from each disk
- From each snapshot, export it to VHD in a storage account.
- Use AZCOPY to copy the VHDs to a storage on the different tenant
- On the marketplace, create a new managed disk and select the option to create it from the VHD
- Repeat the step 4 for each VHD
- Open the managed disk which contains the operating system
- Use the option to create a virtual machine from the disk
- Attach the additional managed disks
It may appear to be something simple, but this process hides some details which most people don’t know:
- A snapshot is managed. Copy a snapshot as a VHD requires a special command
- It would be trivial if we could download the VHD and upload on the correct place. But we are talking about disks of 1Tb or more. These disks don’t fit our local environment, we need to transfer directly from one storage to another. AZCOPY has the capability to use a Server-to-Server API to make the transfer, the data doesn’t pass by your local machine.
- We can create a Virtual Machine from an existing OS disk if we start the creating from the managed OS disk.
Let’s follow the steps and discover the hidden tricks in the way
Create a snapshot from the disk
- Open the managed disk.
- Using the top menu on the managed disk window, click Create Snapshot button
- On the Name textbox, provide a name to the disk snapshot.
You also can choose the resource group for the disk snapshot. Besides that, the additional properties are only important if you are following some standard from your company, such as security standards.
I will not get into the security details on this blog.
Export the snapshot to a VHD
The copy process needs to be done by script. Either Azure CLI or Powershell. I have a personal choice for Powershell.
The script needs to execute three steps:
- Use the Grant-AzSnapshotAccess cmdlet to get access to the snapshot, allowing the copy to happen
- Use the New-AzStorageContext cmdlet to get a context to the destination storage
- Use Start-AzStorageBlobCopy with the result from the two previous commands to execute the copy
Let’s consider the following information to start:
- Resource Group name: devMaltaStation_group
- Snapshot Name: disksnapshotbackup
- Destination Storage account name: devmaltasnapshotexport
- Destination container name: snapshots
Step-by-Step Process
We need to retrieve a key to the destination storage to complete the copy process.
- Access the storage account
- Click the menu item Access Keys on the left side of the window
- Click the Show button besides the textbox Key. It can either be for Key 1 or Key 2
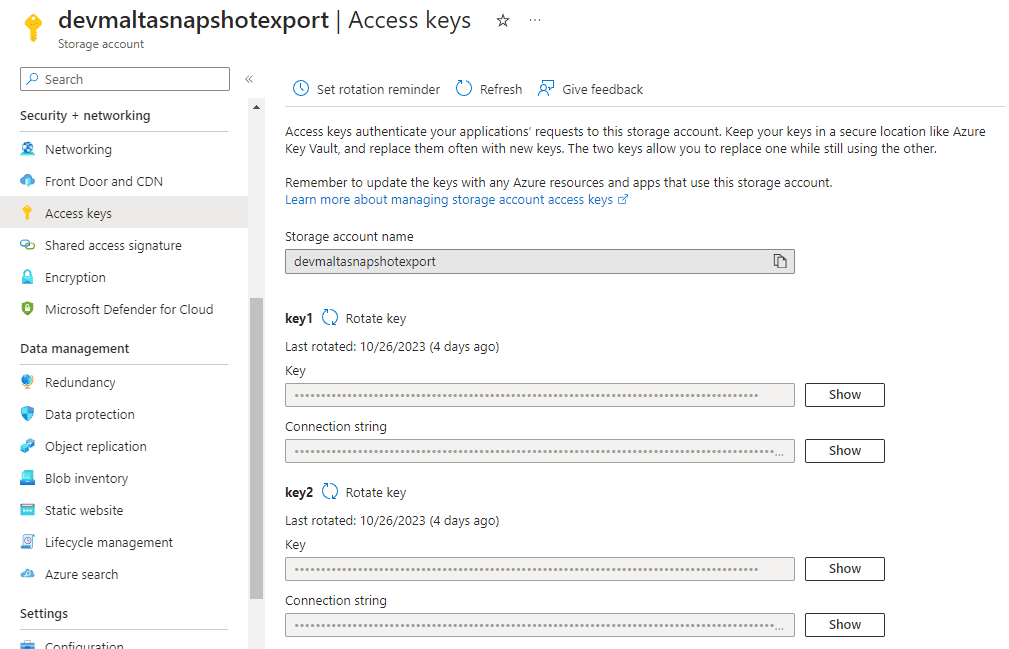
- Click the Copy button besides the key which will be displayed. Save this key, you will need it later.
- Open the cloud shell using the button on the top of the window. I provided additional details about the cloud shell in a previous blog (https://www.red-gate.com/simple-talk/blogs/start-stopping-virtual-machines-resource-group/ )
![]()
- Execute the code below to retrieve an object to access the snapshot
$sas=Grant-AzSnapshotAccess -ResourceGroupname 'devMaltaStation_group' -SnapshotName 'disksnapshotbackup' -DurationInSecond 600 -Access Read
You need to be careful with the DurationInSecond parameter. This is the amount of time the access will be allowed. The copy of the file needs to be completed before this amount of time.
- Execute the following statement to retrieve a context for the target storage:
$destinationContext= New-AzStorageContext -StorageAccountName 'devmaltasnapshotexport' -StorageAccountKey '<< the key you saved >>'
On this example, we are using a storage key retrieved on the steps 4 to 7. This could be in different ways, using a SAS key or using a connection string. You can check different options on (https://learn.microsoft.com/en-us/powershell/module/az.storage/new-azstoragecontext?view=azps-10.4.1 ). Different options would change the steps from 4 to 7.
- Execute the statement below to make the copy of the snapshot to the storage account:
Start-AzStorageBlobCopy -AbsoluteUri $sas.AccessSAS -DestContainer 'snapshots' -DestContext $destinationContext -DestBlob 'Disk01.vhd'
- Repeat the steps 6 to 8 for each snapshot you have, changing the name of the destination file on the step 8.
Use AZCOPY to transfer the snapshot
AZCOPY uses storage account SAS keys to access the source and destination storage. Because that, it doesn’t matter if the storage accounts are in the same tenant or not.
The best of it is the fact it uses server API’s for the transfer. In this way the data goes from server to server, without involving your client machine and avoiding a bottleneck.
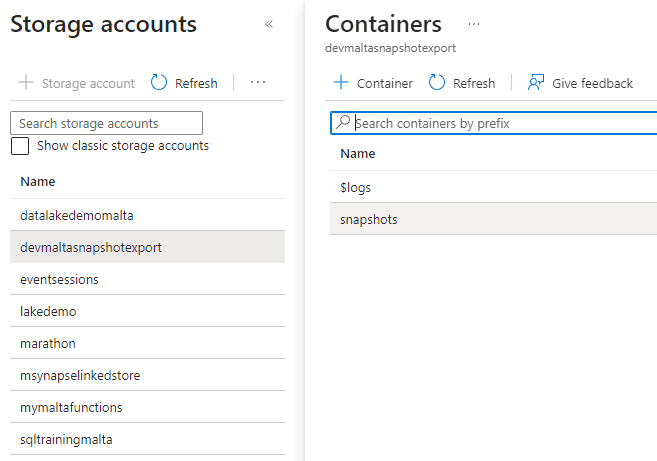
Retrieving the address and key from the source:
- Access the source storage account
- Access the container and locate the file
- Besides the file, open the expand menu (…) and click Generate SAS menu option
On the new window, the permission and the expiration are the two most important properties you need to handle. The source only needs Read permission, but the expiration needs to be enough for the copy
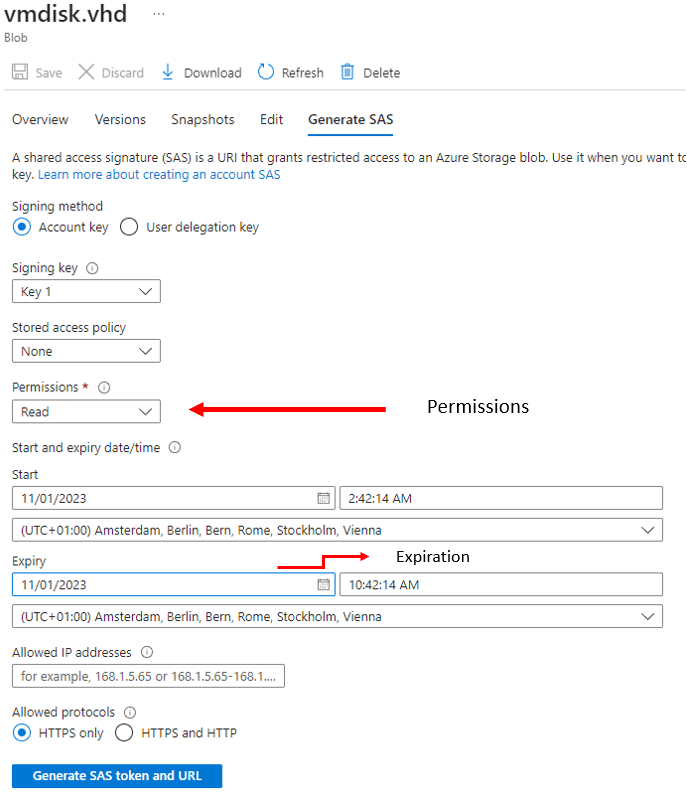
- Click the Generate SAS token and URL button
- On the box Blob SAS URL, click the Copy button
This will copy the URL and SAS key together and you will need to use them to build the AZCOPY statement

Retrieving the URL from the target is basically repeating the steps from 13 to 17, with only a few differences:
- You will point to a container or folder where the file will be saved
- The permission will need to be more than Read.
- Build the AZCOPY statement as the format below:
|
1 |
azcopy cp <span style="background-color: #fff0f0">"https://[srcaccount].blob.core.windows.net/[container]/[path/to/blob]?[SAS]"</span> https<span style="color: #ff0000;background-color: #ffaaaa">:</span>//<span style="color: #003366;font-weight: bold">[destaccount]</span>.blob.core.windows.net/<span style="color: #003366;font-weight: bold">[container]</span>/[path/to/blob]?<span style="color: #003366;font-weight: bold">[SAS]</span> |
Use the URLs you retrieved from the source and destination to build this statements
- Execute the AZCOPY on the cloud shell
Create a new Managed Disk
- Access the target resource group
- Click the Create button to access the marketplace
![]()
- On the marketplace, search for Managed Disk
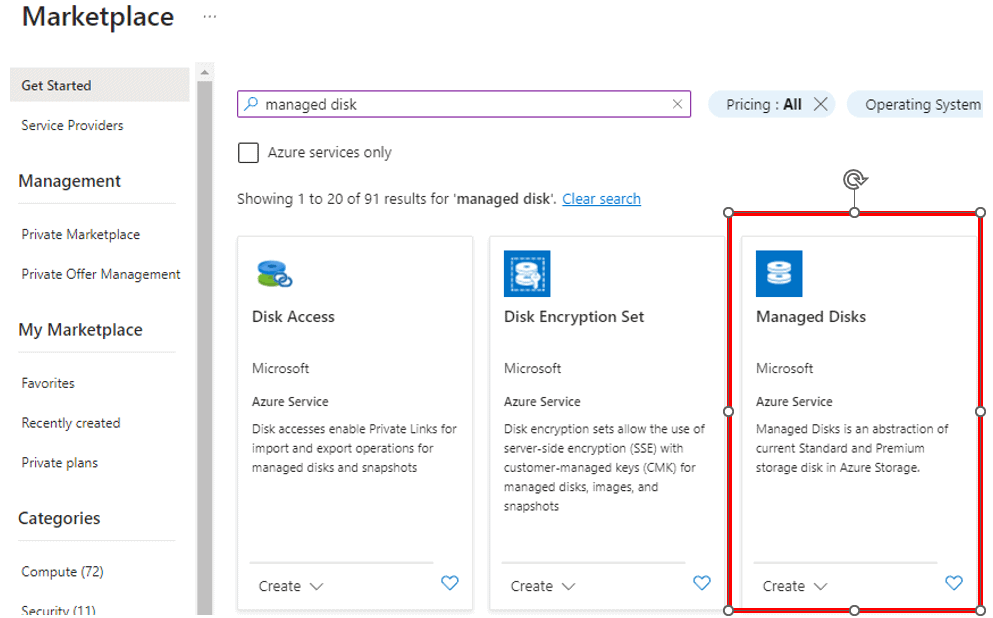
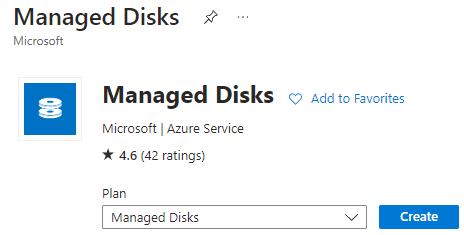
- Click the Create button
- On the box Source Type, select Storage Blob
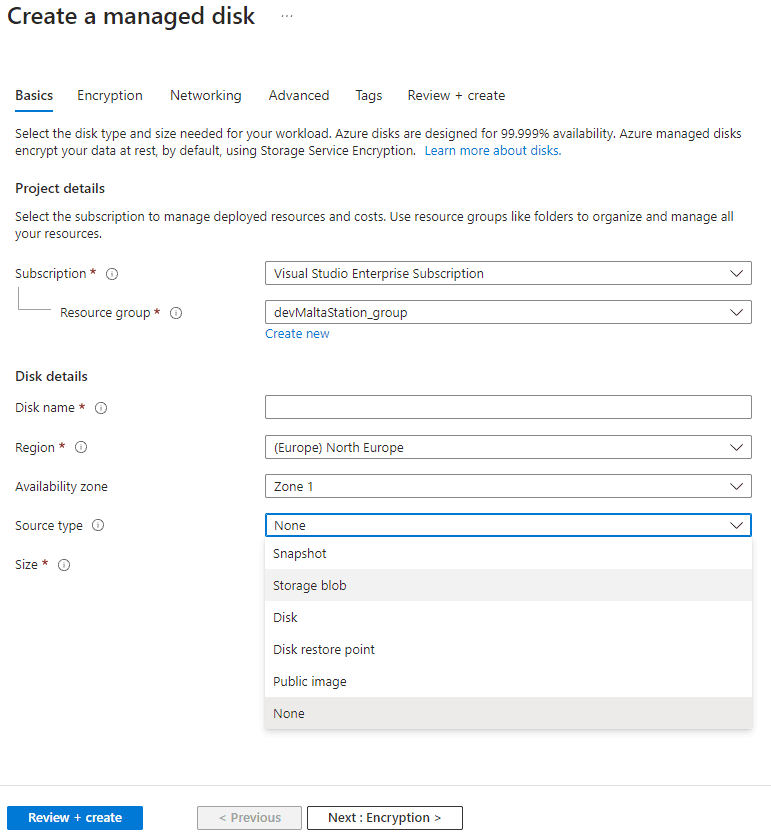
- On the box Source Blob, click Browse to locate the VHD file

- On the following windows, point to the storage account, container and file
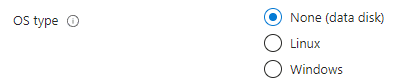
- On the OS Type options, select the operating system the disk contains. Otherwise, you can only use it as a data disk.
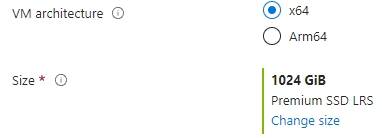
- Select the VM architecture and disk size. This needs to be according to the original disk, otherwise the process will fail.
- Select the disk name, region and availability zone according to how you would like to create the new disk

Create a new Virtual Machine
Once the disks are created, it’s time to create the Virtual Machine. The start of the process is simple: You open the OS disk and click the button to create a virtual machine.

From this point, it’s almost a regular process of VM creation, but with the OS disk already selected. You can attach additional data disks as needed.
Summary
This process was very useful for me recently, avoiding making a completely new installation of a virtual machine. It may seem simple, but it’s full of tricks.
This document contains proprietary information and is protected by copyright law.
Copyright © 2026 Red Gate Software Limited. All rights reserved


Load comments