
Some tasks on azure are easier if we automate them. The Azure Portal provides us the cloud shell, which we can use for this kind of automation.
I was making some experiences with SQL Server Always On, so I created three VMs inside a resouce group. Every time I want to start some experiment I need to start all three VMs and, in the end, stop all three again.
Creating a Powershell script
This is not a complex task, but it’s not something we would like to type every time. Using Azure CLI, we have the following instructions available:
az account set: Choose the default subscription. If you have more than a single subscription, you would like
az vm list : List all VM’s and it’s possible to filter by resource group
az vm start/stop: Start or stop the vm
In order to start or stop the VMs, we can combine the CLI statements using powershell. They will be like this:
|
1 2 3 |
az vm start --ids $(az vm list --resource-group sqlagpreview --query "[].id" -o tsv) az vm stop --ids $(az vm list --resource-group sqlagpreview --query "[].id" -o tsv) |
On these examples we are using the AZ VM LIST to retrieve the list of Ids of the VMs and use this list to start or stop the VMs.
–query extracts only the .id from the JSON object returned by the LIST statement
-o tsv specifies the format, tab separated values, for the Ids
We can prepare the script to receive two parameters, the operation we will execute (start/stop) and the name of the resource group. The first line of the script will be like this:
|
1 |
param($activity='start',[Parameter(Mandatory)]$resourceGroup) |
The $activity parameter has a default value, while the $resourceGroup is required.
The final powershell script will be this:
|
1 2 3 4 5 6 7 8 9 10 11 |
param($activity='start',[Parameter(Mandatory)]$resourceGroup) az account set --subscription "MCT subscription" if ($activity='start') { az vm start --ids $(az vm list --resource-group $resourceGroup --query "[].id" -o tsv) } else { az vm stop --ids $(az vm list --resource-group $resourceGroup --query "[].id" -o tsv) } |
Using the script on Azure
The Azure Portal has a feature called cloud shell, which we can use to run powershell commands and Azure CLI statements. However, how can we keep our script file available to be used in cloud shell?
The secret is on the first time you access the cloud shell. This tool creates a blob storage specially for it, so you can store many scripts and files and become able to execute automated tasks very easily.
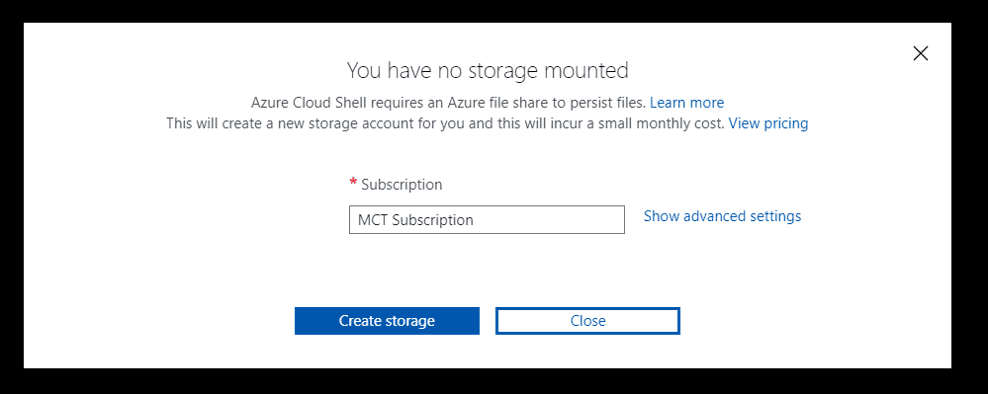
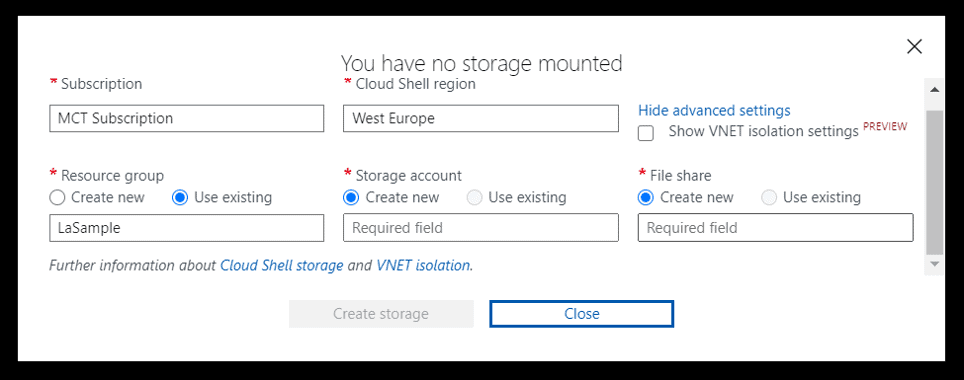
The first time you start the cloud shell, it will ask you about the blob storage creation. You can accept the basic automatic settings or use the advanced option to customize everything.
 |
 |
In my case I need to choose the correct subscription using AZ ACCOUNT SET. You can remove this line if you don’t need it or you can create a third parameter for the subscription to make the script more flexible.
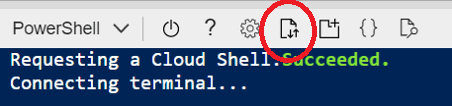
Once we create the file locally, we can upload it using the cloud shell. The image bellow shows the upload button.
In the cloud shell we are connected to our user space. Inside it, we have a folder called CloudDrive which is linked to the cloud shell storage.

We can create folders and save files inside the clouddrive folder or outside the clouddrive folder. Only what we create inside will be kept in our cloud shell storage. Anything created outside will be temporary and can disappear at any time.
When uploading, the content will always be uploaded to our home folder (in my example, /home/dennes ). We will need to move the script file to the clouddrive folder using the following statement:
Move StartStop.ps1 clouddrive
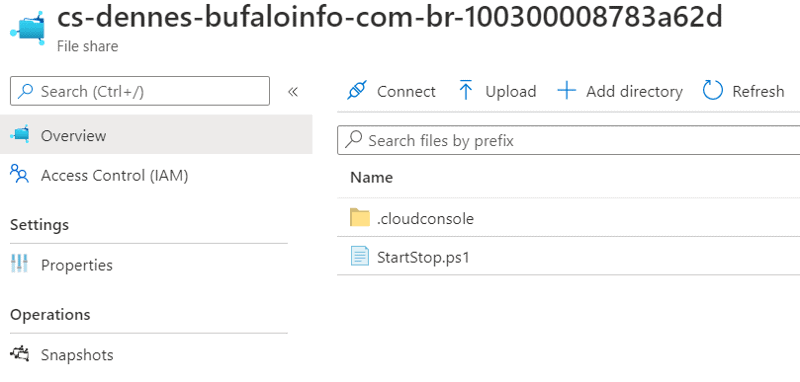
If you would like to upload more than a simple file, probably is better to use directly the file share created by the cloud shell. You need to find the cloud storage using the Azure UI, locate the file share and use the UI to upload the files you need to the correct location.
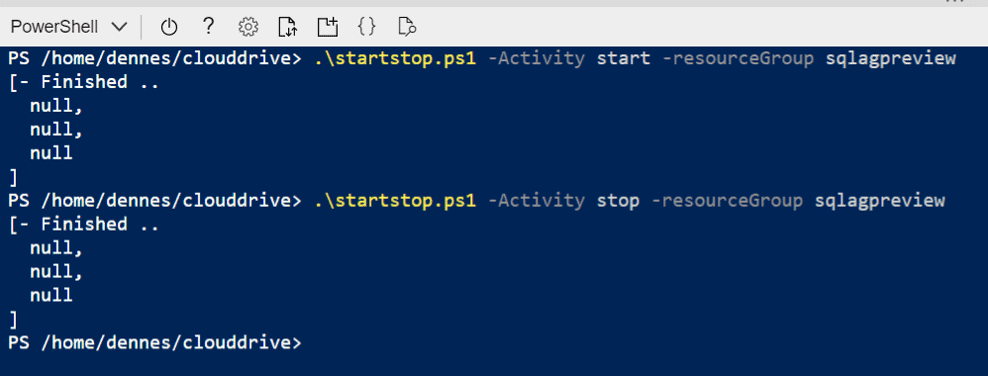
After we have the file in the correct location, we can use the powershell script to help us. Once it’s located in the cloud shell storage it will be always there, available to help us with our work.
Conclusion
We can create many powershell scripts to help us with our activities on Azure. I created a repository to keep these scripts, at the moment it has only this script, but more will come. You can find the repository on https://github.com/DennesTorres/powershellAzureScripts
This document contains proprietary information and is protected by copyright law.
Copyright © 2026 Red Gate Software Limited. All rights reserved


Load comments