
Many different situations may create the need to move Azure resources or objects from one region to another:
- A company may move to a different country
- New regulations may create the need to move data
- A company may need to transfer one server to another branch
- Or there is a need to move to a region with AZs for added resiliency
If you include the need to copy a resource or set of resources, instead of only moving, the list expands a lot.
Azure already offers the resources to do this: ARM templates, automated deployments, Data Sync, Recovery Services Vault, VM replication and so on. The problem is that sometimes, to move a set of objects together, you may need to use many of these services and understand how to use them.
The solution is a new free service, still in preview, called Azure Resource Mover. This service reduces the complexity of moving resources, minimizing the number of decisions needed on how the resources will be moved. More than that, the last step, deleting the source of the move, is optional, as you will see in detail later. You can use this feature, not only to move resources, but also to copy and distribute them across many regions. During the move process, only one side (source or destination) will be active, but once you finish the move, if you decide not to delete the source, you have in fact a new deployment of the solution.
Set up the VMs
This article demonstrates two step-by-step moves to explain how the new Azure Resource Mover works displaying a complete test of the features. I start with two virtual machines, in two different regions, and both will move to North Europe.
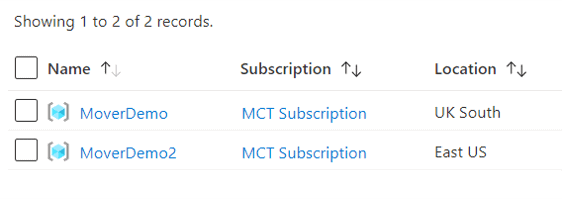
I created two resource groups as a starting point: MoverDemo and MoverDemo2, in different regions, UK South and East US.
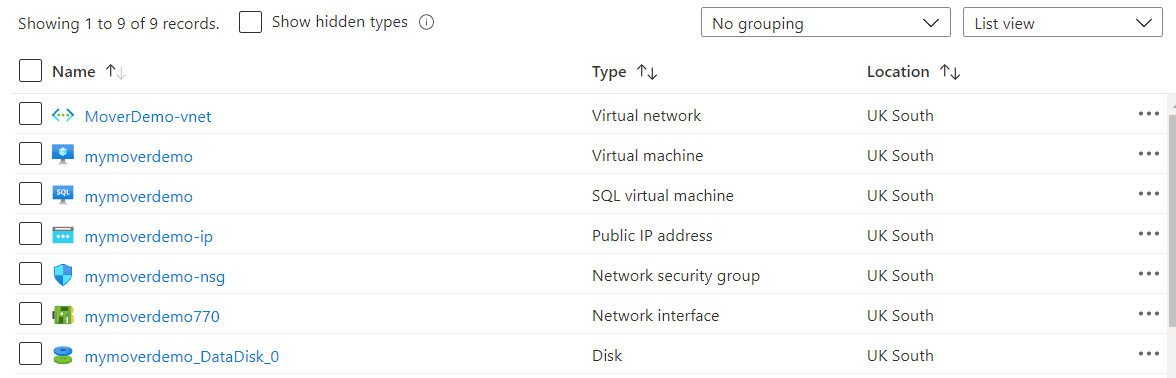
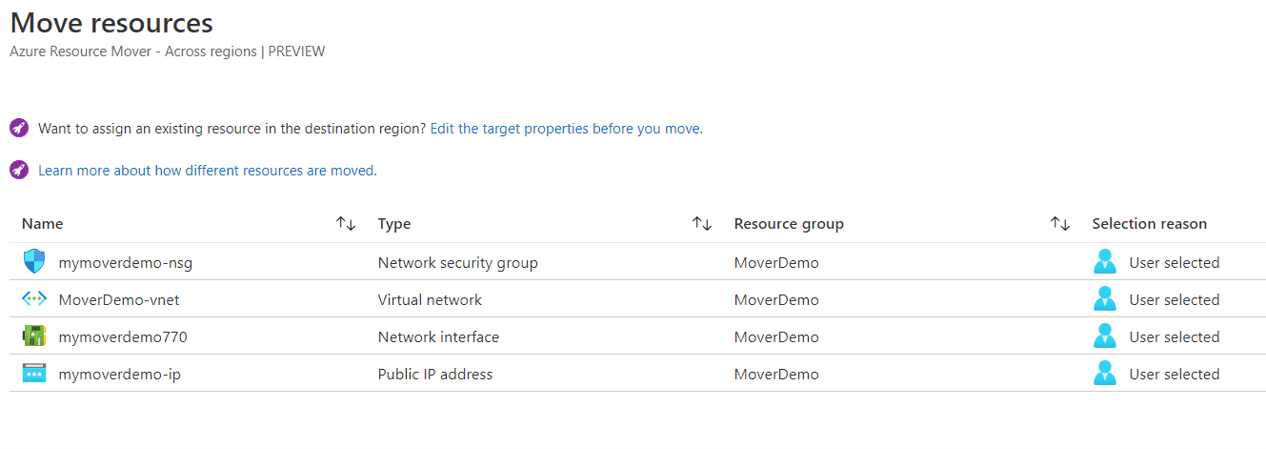
In each resource group, I created a virtual machine and the objects that follow it, shown in the image below.
Finding Azure Resource Mover
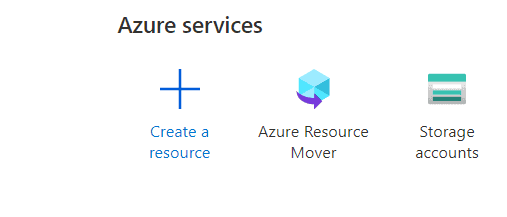
On the Azure Portal, you can use features still in preview, such as Resource Mover. Sometimes the Resource Mover may appear visible as an icon in the middle of the Azure services, but this usually happens when it was already used.
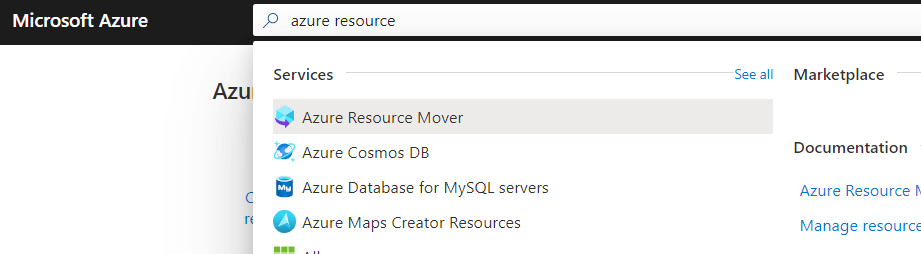
Another option is to use the search box on the site to find Azure Resource Mover, then click on it.
A third option is to use the Move button on top of the resource group screen. Open the resource group and click the Move button. Before Azure Resource Mover preview, there were only two options, move to another resource group and move to another subscription. Resource Mover included a new option: Move to another location.
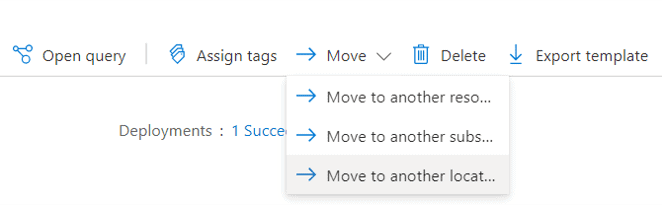
There is a small difference between opening Resource Mover directly or using the move to another location button. When you use the move button, you will directly open the wizard to add new objects to move. However, if you open the Resource Mover by clicking the button on the Home page of the portal, you will see the initial screen shown in the next section.
Starting the Azure Resource Mover wizard
Azure Resource Mover is not a simple Azure object; it is an environment for a wizard execution. The first thing you’ll see, when Overview is selected on the left side, is this guidance. This reflects, almost exactly, the sequence of steps of a move process:
- Select the objects to move
- Validate the objects dependencies
- Make the move
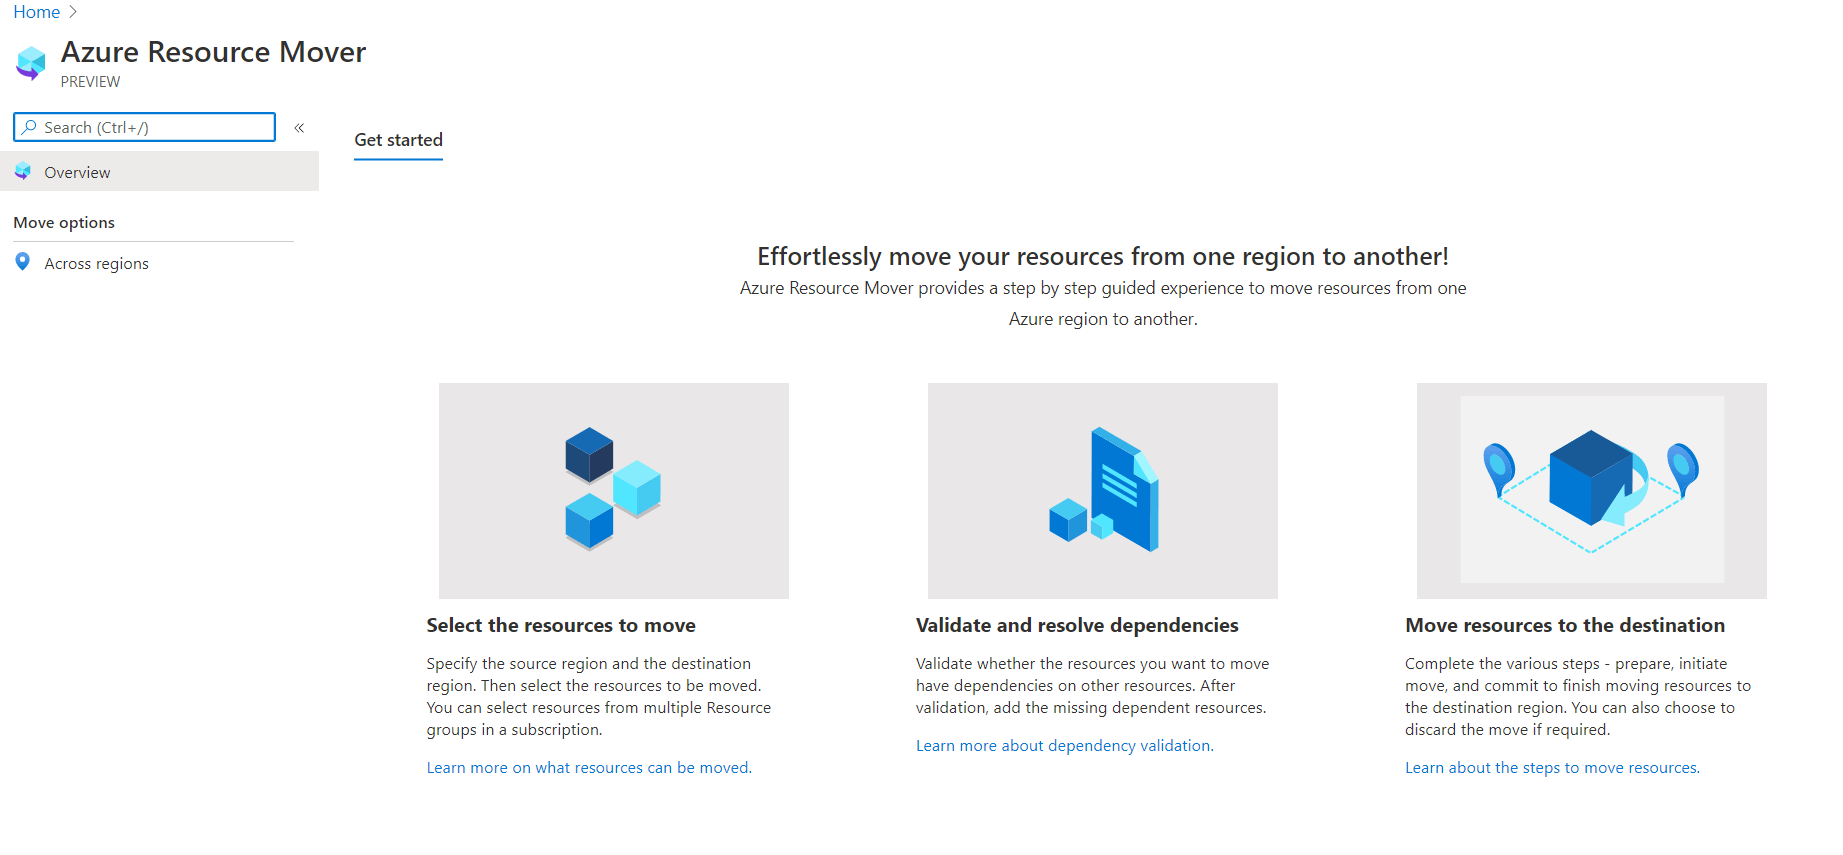
These are the three main steps, but this is not the complete process, as you will discover on further steps.
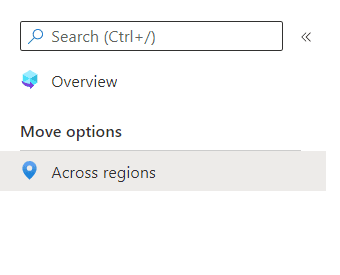
- Click the Across Regions item on the left side of the screen
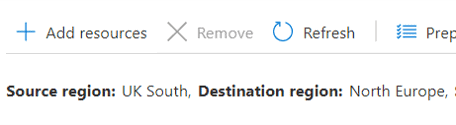
On the middle-top screen, you will notice the information about source and target regions of the move. It may seem a bit strange at first glance, but this is not only information about the move, but a context control. Each set of source and target is a context for the move. You add objects in the context and start the steps for the move operation, being able to do it for each context.
- Click the Change link and change the context a few times to better understand how the different contexts work.

While testing the context, you may have noticed that, once you change to an empty context, you will only be able to return to the previous one if you know the combination of source-destination.
If one employee starts a move in a context, changes the context and does not touch it anymore, no one will know about the existence of that move. In this situation, you may need to use CLI to find the existing contexts/move collections objects. You can open cloud shell from the top of the Azure Portal window and execute the following statement:
|
1 |
az resource list --resource-type Microsoft.Migrate/moveCollections |

The main properties you may notice are the type (moveCollection), id, and resourceGroup . These properties identify the existence of the moveCollection and the source and target of the move. Mind that you will only see this result after adding objects to a context because this will generate the moveCollection object. The product group is working on the creation of an overview section to list all the existing Move Collections, solving the problem above.
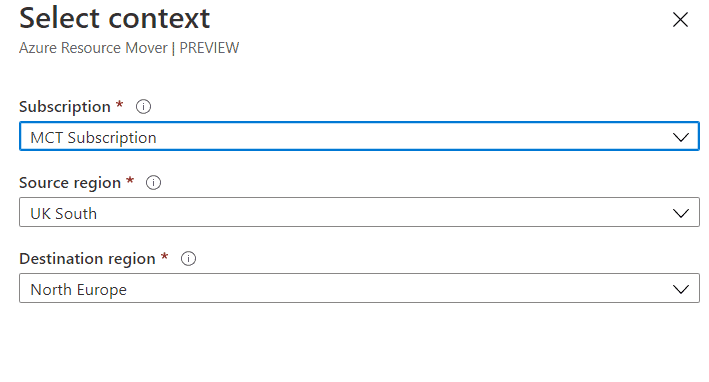
- Click the Add Resources button to include resources in the move context. Start with the move from UK South to North Europe.
- When you click Add resources, a wizard will appear asking the source and destination of the move as shown in the figure below.
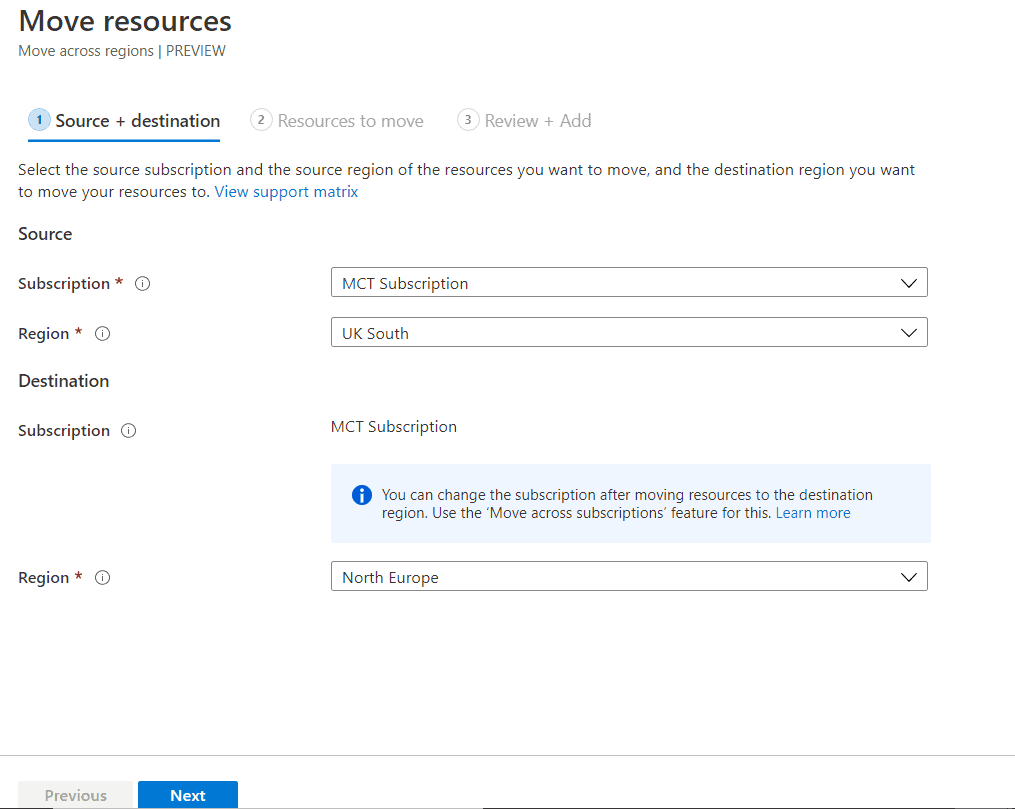
- Click Next
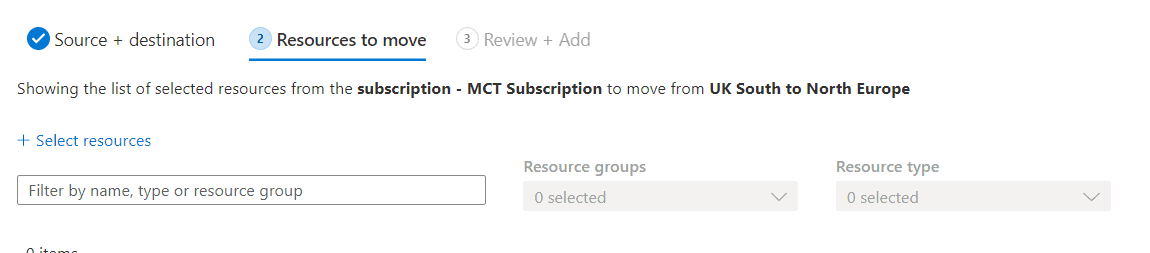
- Click the Select resources link
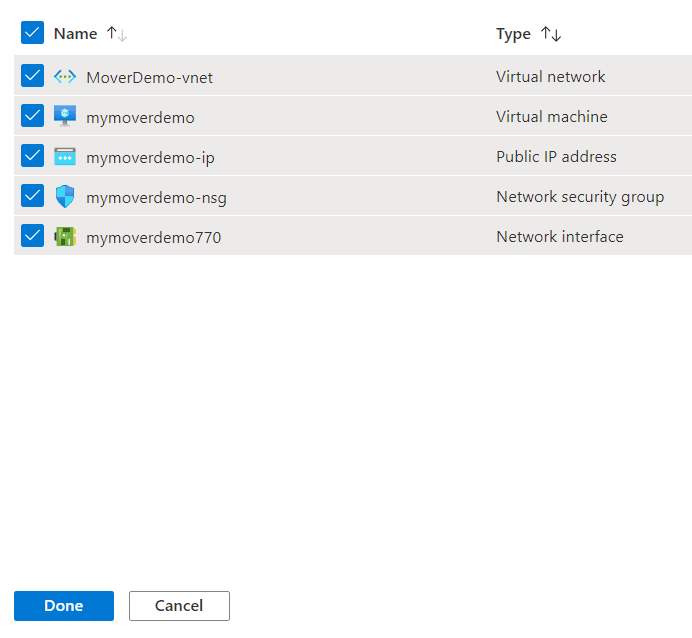
- Locate the resources you would like to move. In this example, I will move the resource group MoverDemo.
One good way to do this is filtering by resource group. You may notice the selection windows only show the resource groups that have at least one resource in the source region.
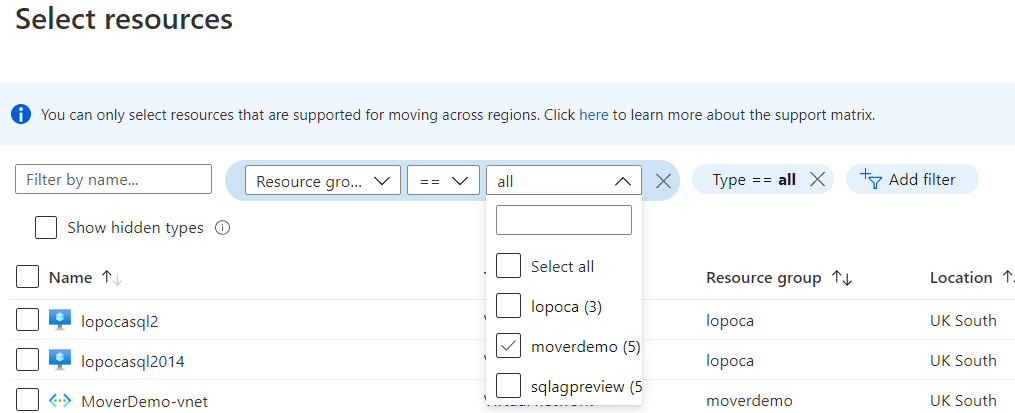
- After selecting the resources, click the Done button
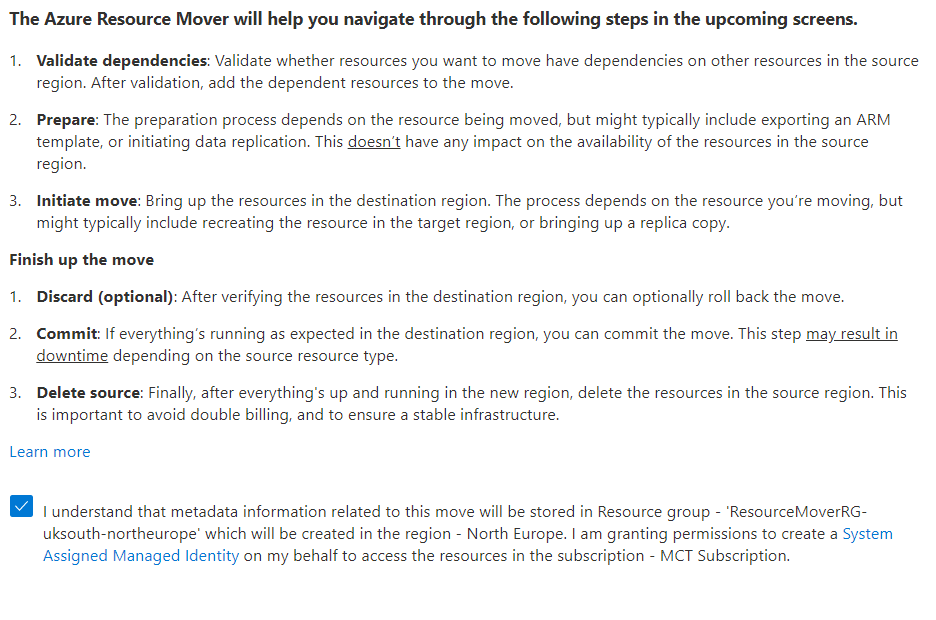
A screen will appear explaining the steps of the wizard. This screen also advises you that a new resource group will be created to keep metadata information and about the creation of a system managed identity which will receive permission to make the move. You need to mark the checkbox, agreeing with these steps, before clicking the button and moving forward.
- Change the context to East US-North Europe and repeat the steps in this section for the resource group MoverDemo2.
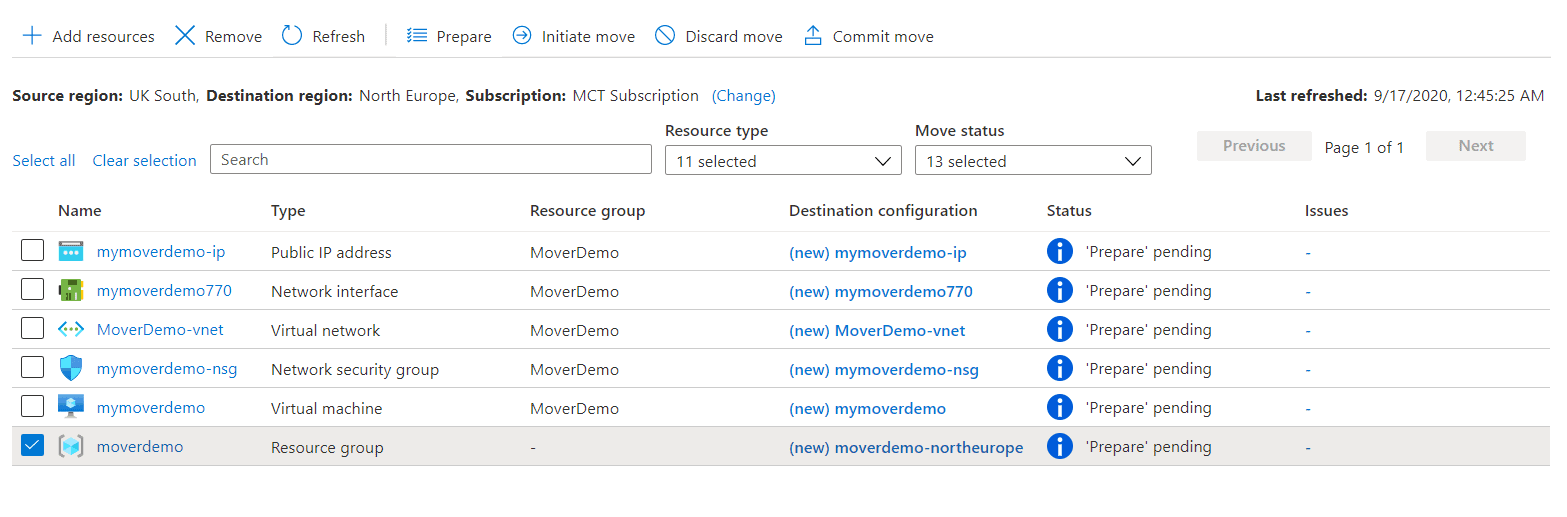
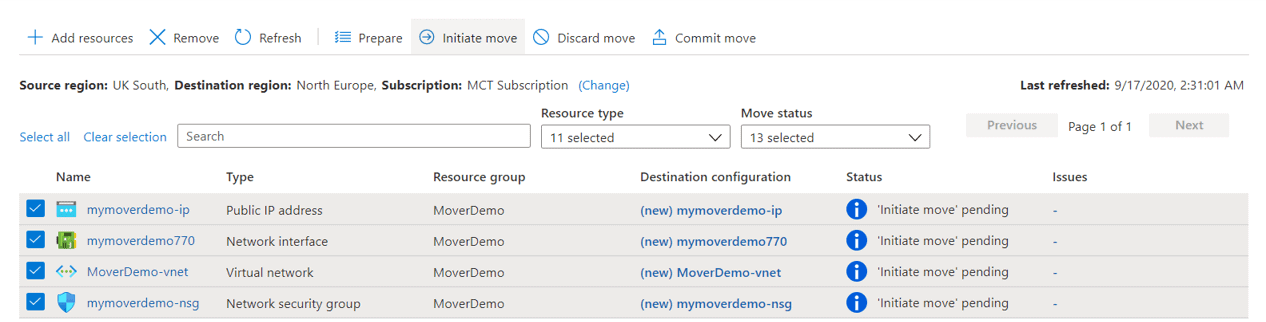
- Change the context back to UK South-North Europe. You will see the objects included as the following image:

The Status column shows in which step each object is. The Issues column alerts about any pending problem. At this point, you can already identify all the steps in the move process, although the sequence may not always be so clear:
Add Objects: Add in the context the objects to be moved. This step is completed.
Validate Dependencies: The objects included may depend on other objects. You need to execute a dependency validation for all of them.
Prepare: All the objects need preparation, and these preparations can be different for each object. It may involve cache, for example, additional metadata in the metadata resource group, and so on.
Initiate Move: The move task itself. This step creates the object in the destination region
Commit Move: This step works as a confirmation that we would like to keep the objects on the destination region.
Delete Source: This last step is optional. You can choose to delete the source objects or not. This makes Resource Mover way more powerful since it can be used to duplicate objects.
How do the steps work?
These steps, such as prepare, move, and commit, may appear as a black box for anyone who is using them. Here is a more in-depth explanation.
The service was made to work for many objects, and more and more objects will be included. These steps may have different meanings depending on the object. The main difference is related to stateless and stateful objects.
Stateless: Objects which don’t contain data, only definition and metadata, such as IP addresses and virtual networks.
Stateful: Objects which contain data, such as virtual machines and SQL databases.
The steps apply differently depending on the object:
Prepare: For stateless objects, the prepare step creates the arm template for the object deployment. Stateful objects are more complex. The action may be different for each kind of object, such as replication for VMs, for example, but the prepare step will be just a preparation for the action.
Move: This step will implement the preparation. It can be a simple deployment of the ARM template created or the establishment of a replication, but for stateful objects, the actions may vary.
Commit: This is the confirmation to proceed to the destination object. For stateless objects, this doesn’t mean too much, but for stateful objects, this may mean the replication being broken, for example.
Resolving dependencies
Follow these steps
- Click the button Validate Dependencies
- Change the context to East US-North Europe and Validate Dependencies
- Return the context to UKSouth-North Europe
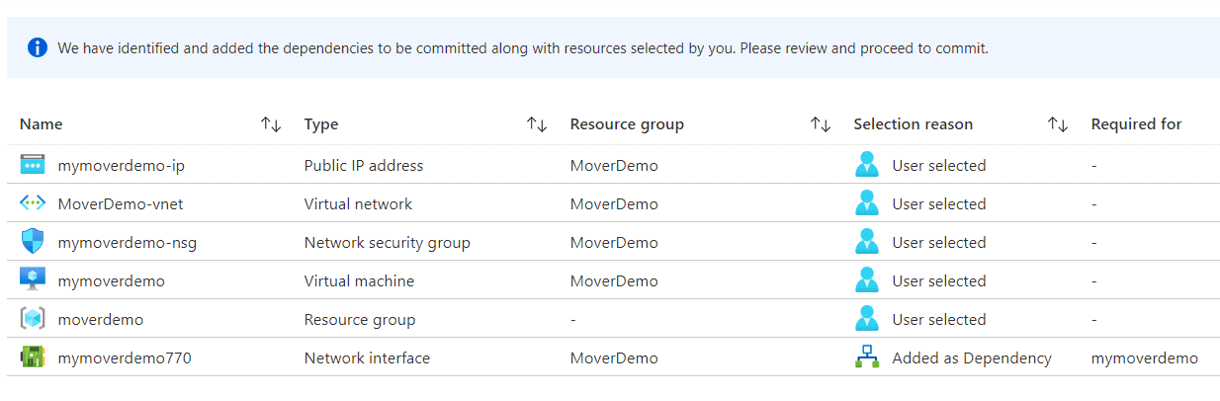
Having the dependency validation finished, a new button will appear on top of the screen, Add dependencies, as in the image below.

- Click the Add dependencies button
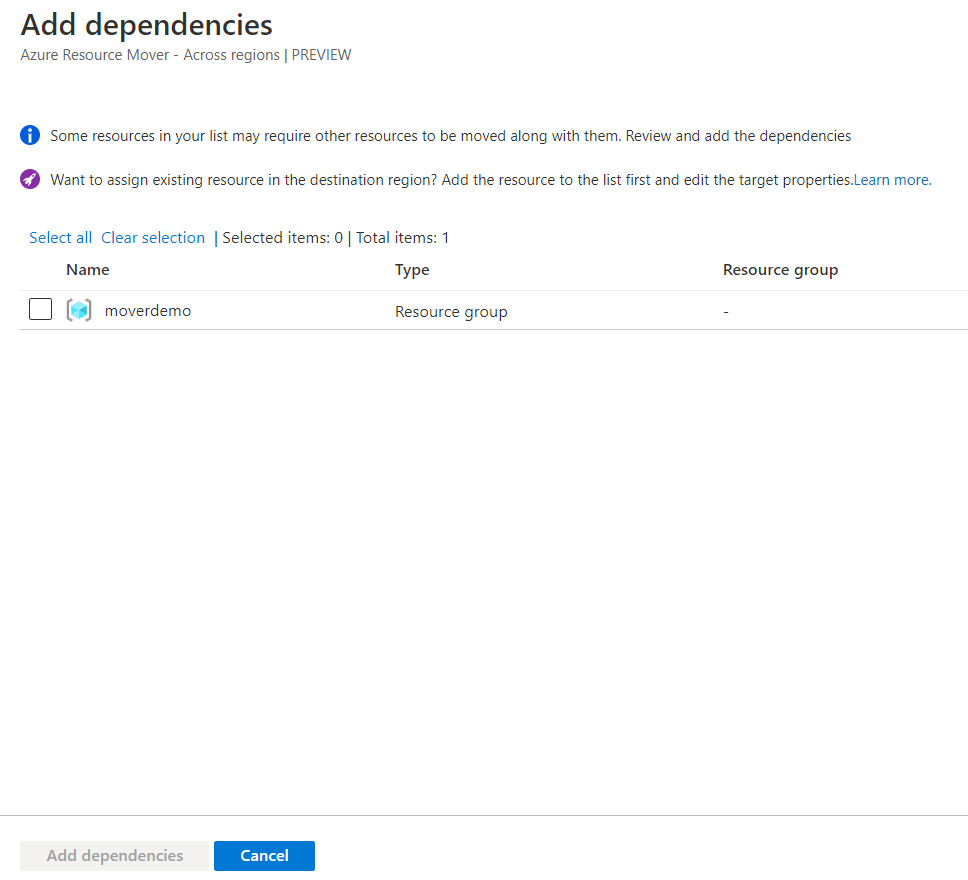
- On the Add Dependencies screen, select the resource group
The resource group also needs to be moved together with the virtual machine. More than that: It needs to be moved first.
- Click the Add dependencies button
At this point, you will get back to the same screen listing the resources to move, the only difference is the presence of the resource group.
- Click Validate Dependencies button

After including the missing dependencies, you need to validate again to ensure there is no additional dependency missing. After the 2nd round of validation, the screen will look like the image below: No issues pending, no blue alerts, but the Status column telling what the next step is.
- Change the context to East US-North Europe and repeat the steps in this section.
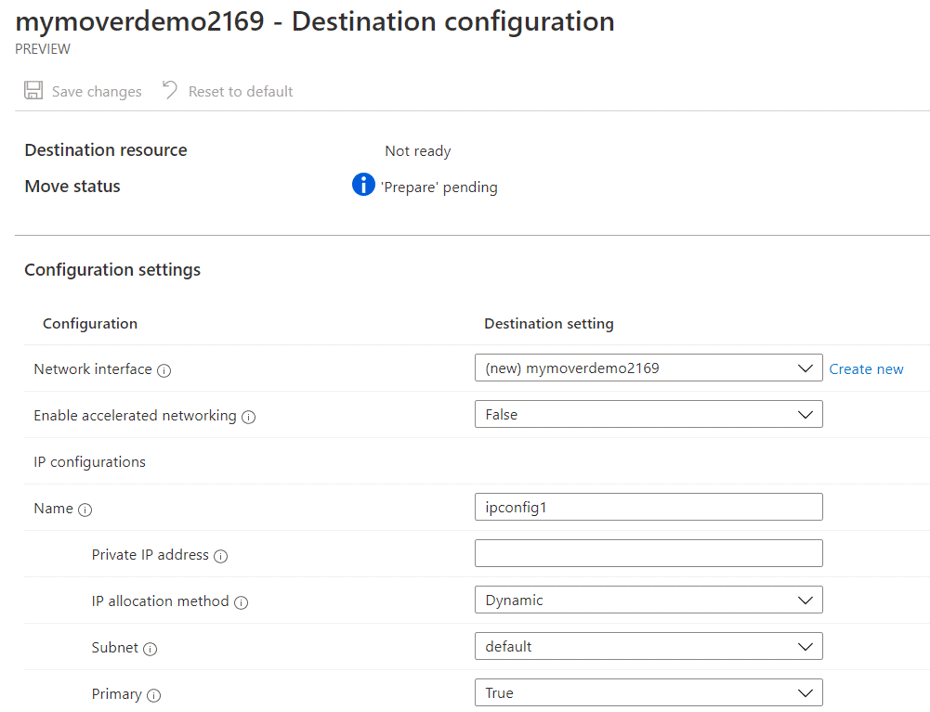
Modifying the destination configuration
At this point, when the Status column shows the next step is the Prepare, you can customize the destination configuration for each object.
The column Destination Configuration has the destination name of the object as a link. If you click the link, you will reach a page to customize the object. Each object has different customization options.
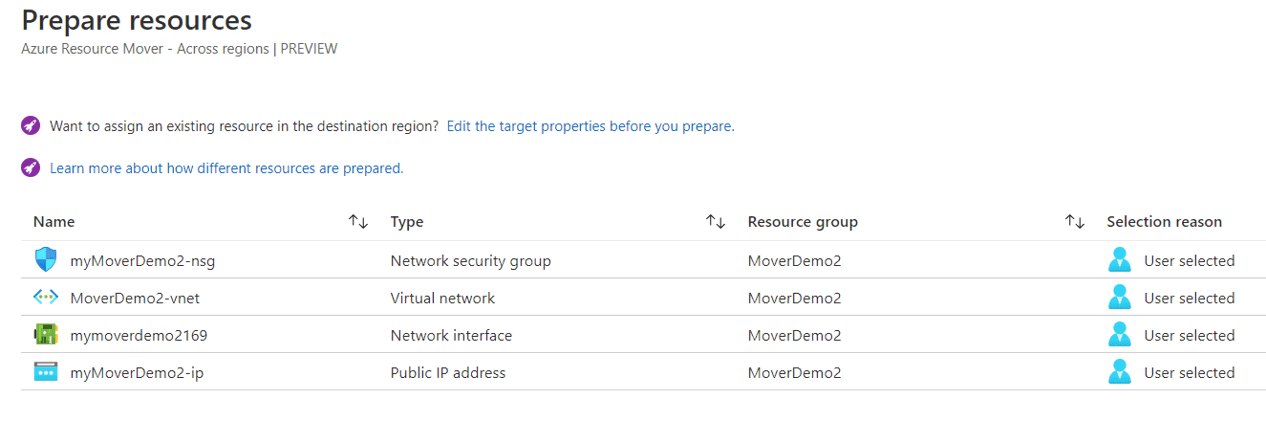
Below you can see the configuration options of a virtual machine and a network interface

Moving the resources
After including the objects into the context, you don’t need to execute the steps for all the objects together. In fact, it’s exactly the opposite: In some situations, the objects will require that a dependency is moved first before even the prepare step, while in other situations you will have stateless and stateful objects mixed.
One stateful object can even take days to be moved (databases or virtual machines). You will want to ensure all stateless are moved first and only after that move the stateful objects within an acceptable window in the production environment.
During the following steps, you will move each context using different sequences, just as an example that this can be done. However, for virtual machines, both contexts have a requirement: The resource group needs to be moved first
- Change the context back to UkSouth-North Europe
- Select the resource group, marking the checkbox
- Having the resource group selected, click the Prepare button
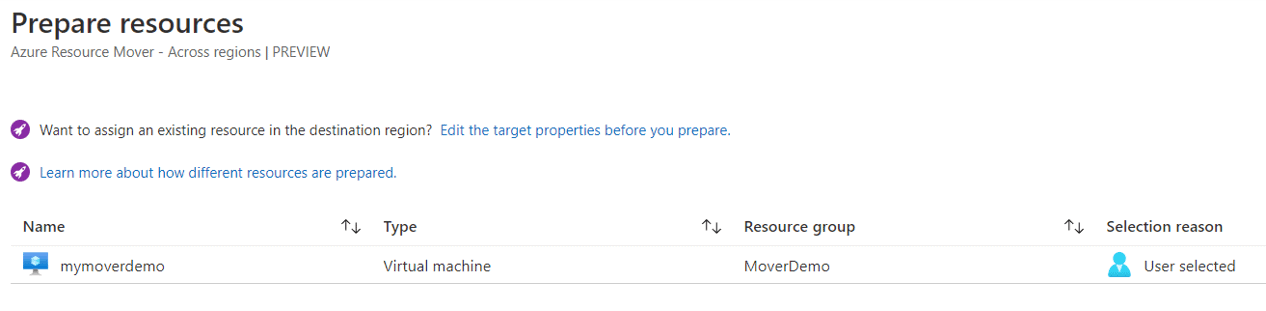
- Click the button to go forward with the preparation process

As you may notice, the Status column changes only for the resource group, displaying the next step
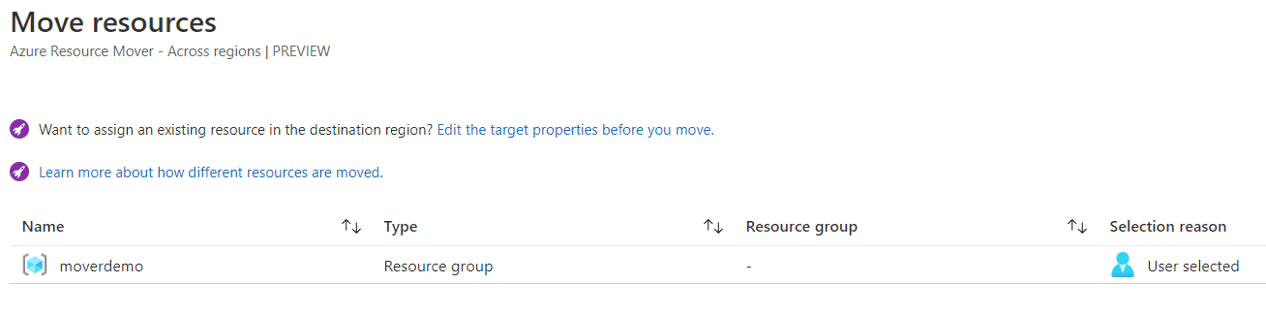
- Select the resource group again and click the Initiate Move button on the top of the screen.

- On the following screen, click the Initiate Move button

- Change the context to East US-North Europe
- Repeat the steps in this section
- Change the context back to UKSouth-North Europe
- Select all the objects, except the resource group
- Click the Prepare button
- Click the button to go forward with the preparation process
- Change the context to East US-North Europe
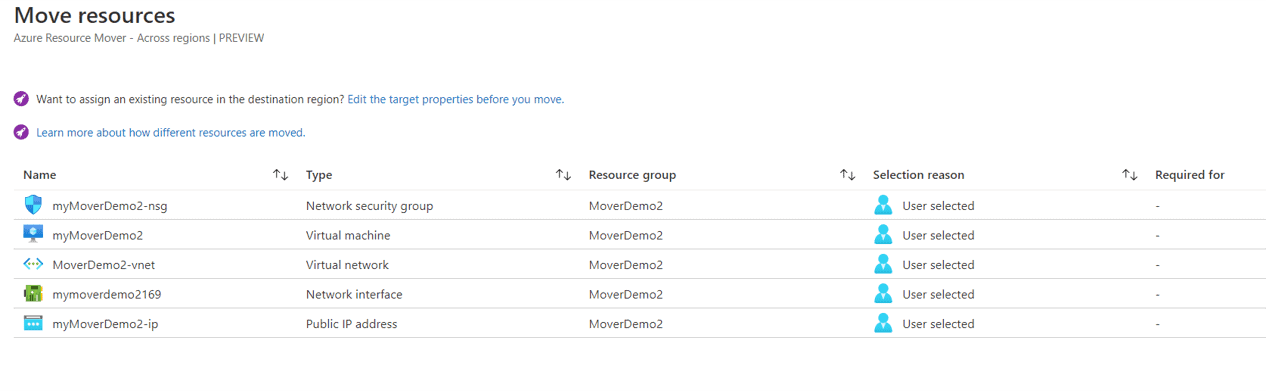
- Select all the stateless objects, all objects except the resource group (already prepared) and the virtual machine (stateful)
- Click the Prepare button
- Click the button to go forward with the preparation process
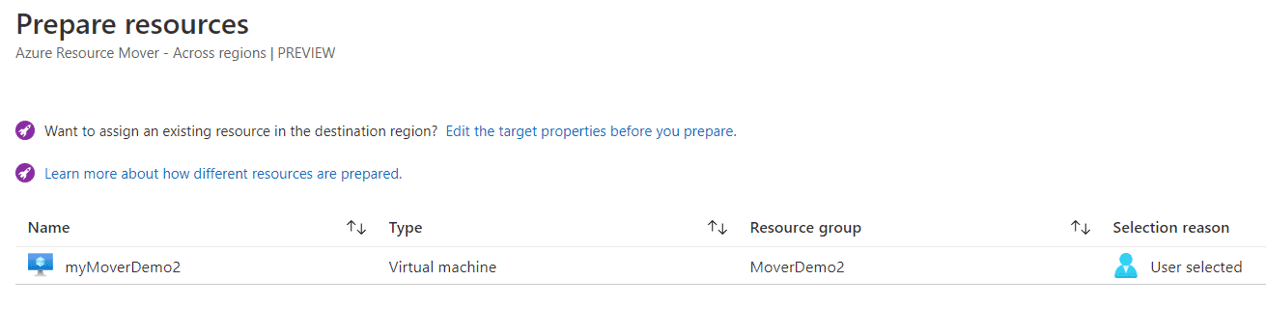
- After the preparation process, select the virtual machine
At this point, you may notice how the objects are advancing in different steps. The resource group was already moved, the stateless objects are already prepared, and the virtual machine will be prepared now.
- After selecting the virtual machine, click the Prepare button
- Click the button to go forward with the preparation process
- Change the context to UKSouth-North Europe
- Select all stateless objects, all objects but the resource group (already moved) and the virtual machine (stateful)
- Click the top Initiate Move button
- Click the Initiate Move button

- Change the context to East US-North Europe
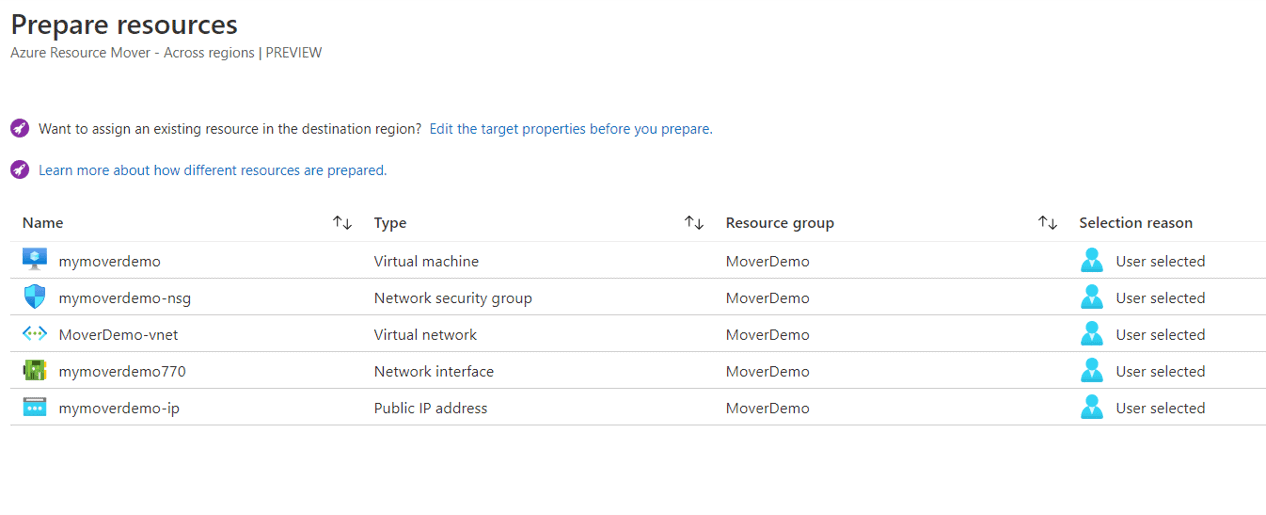
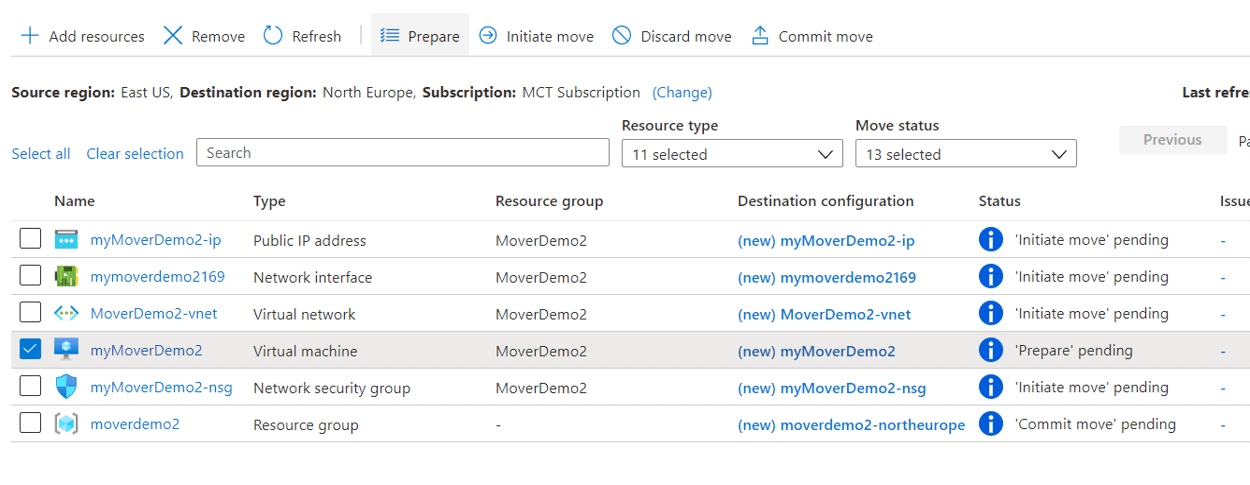
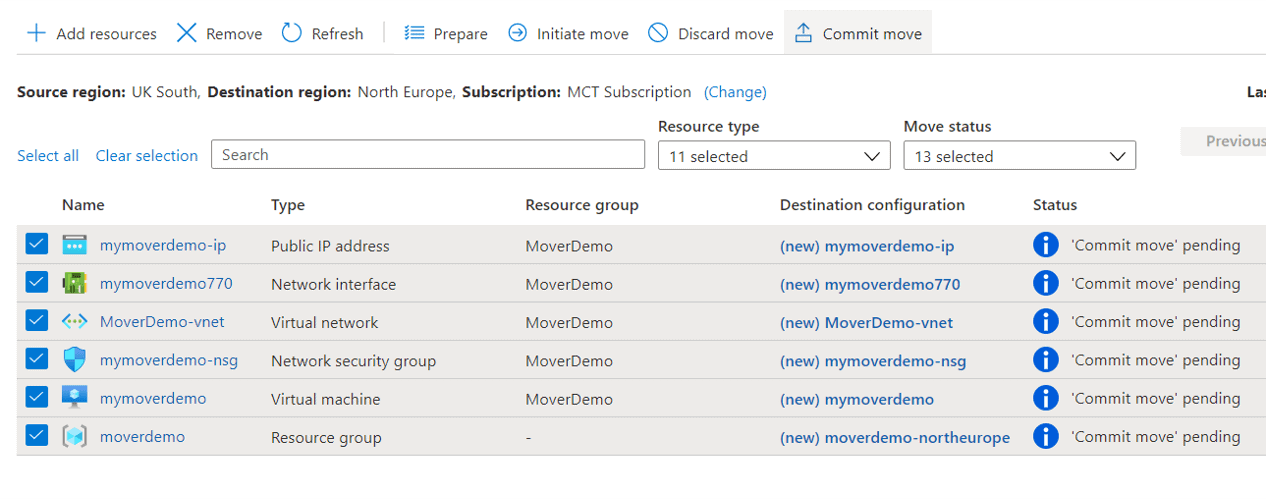
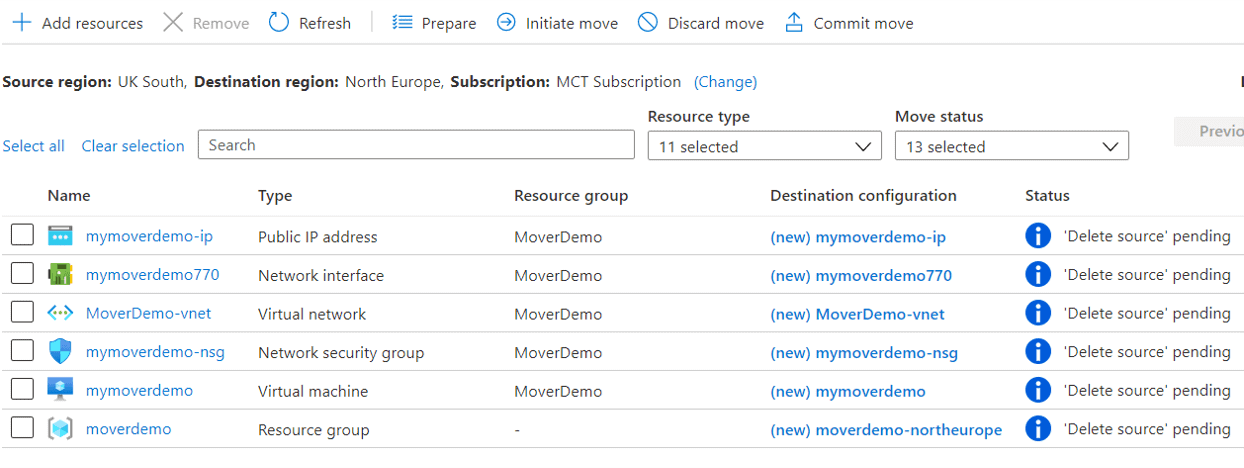
Once the preparation of the virtual machine has completed, you will see the status of the objects like the image below:
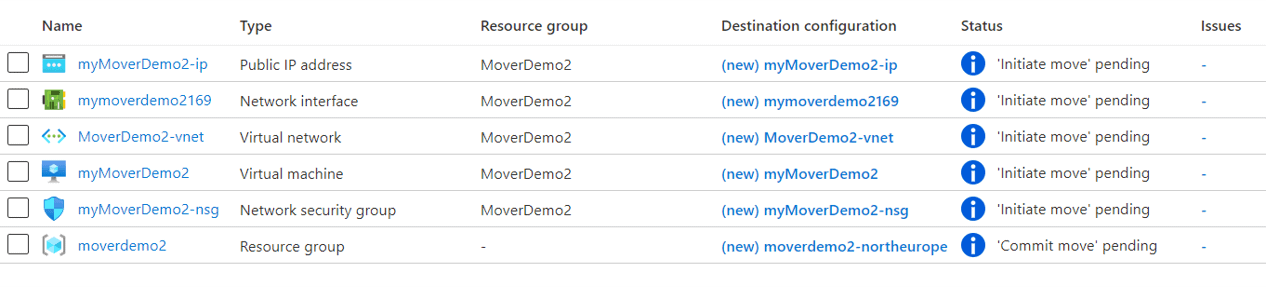
- Select all the objects with status ‘Initiate move’ pending
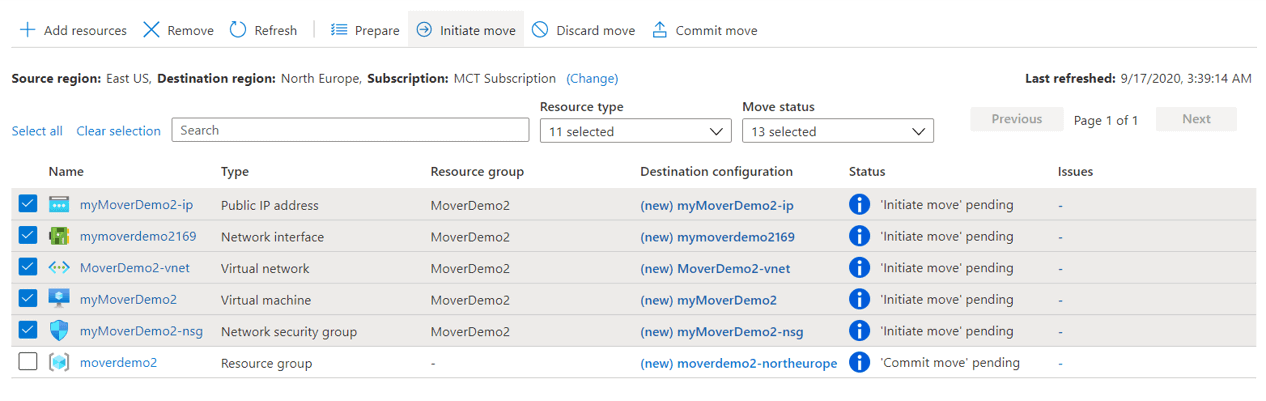
- Click the top button Initiate Move
- Click the button Initiate Move
- Wait for the move to be completed
- Click the Home button to return to the start page of the Azure Portal
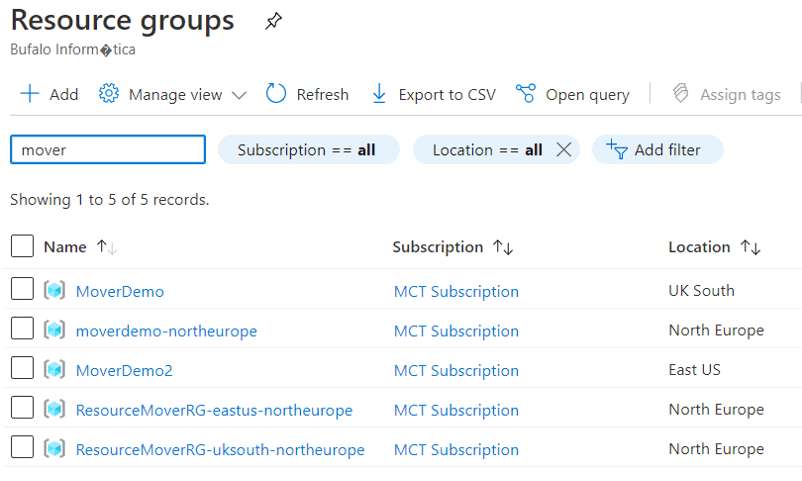
- Locate the Resource Groups option to list all resource groups
- Filter the resource groups typing “mover” on the filter box
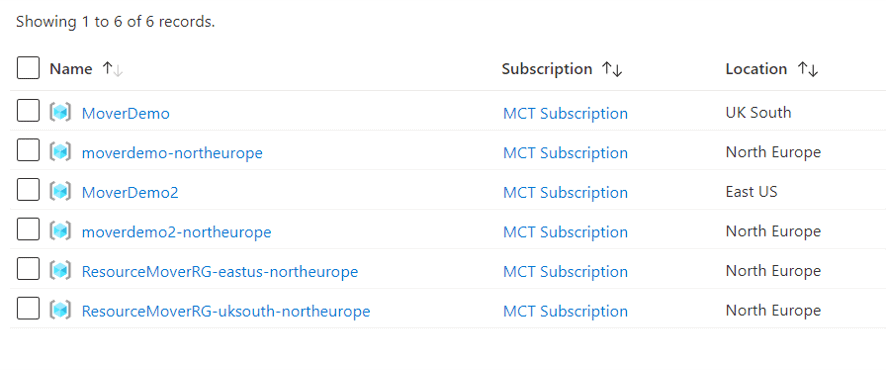
At this point of the execution, these are the resource groups we can find:
- Two sources, you started with these
- Two destinations, same name as the source but with the destination region concatenated
- Two metadata resources, identifying the source and target of the move
- Change the context to UkSouth-North Europe
- Select the virtual machine, the only object still not moved

- Click the top button Initiate Move
- Click the button Initiate Move
- Wait the move to be completed
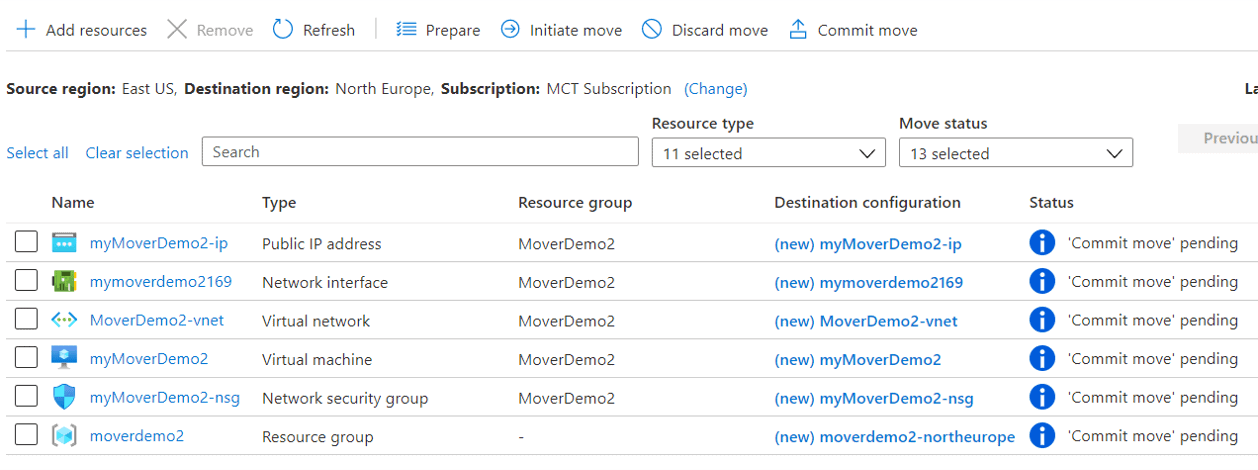
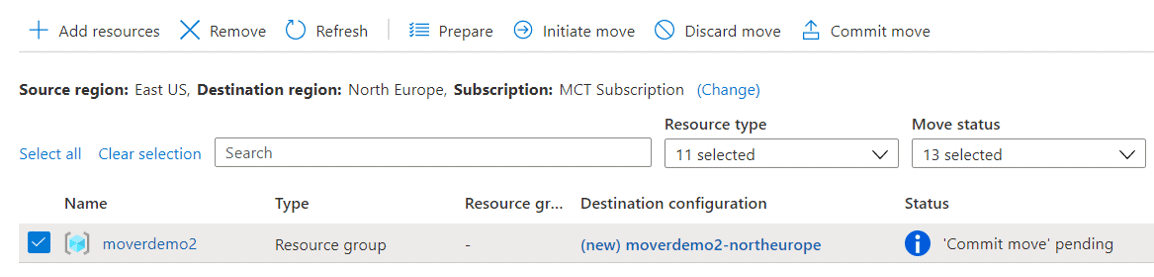
At this stage, you have two move contexts with all the objects on the ‘Commit move’ pending status. Our example will be more complete by committing only one of the contexts and deleting the other.
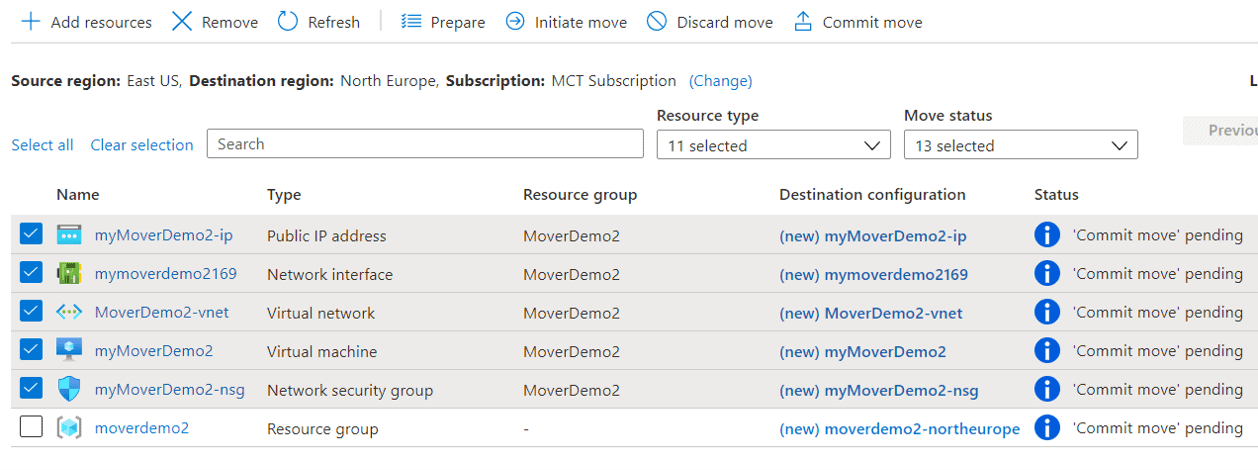
- Select all the objects in the context
- Click the Commit move top button
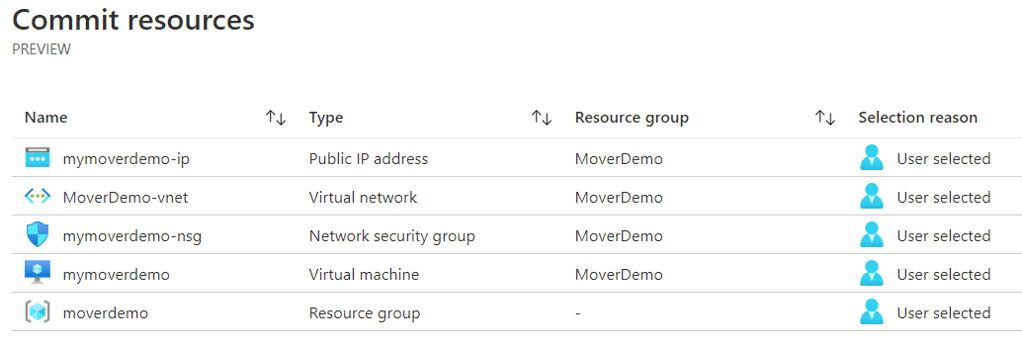
- Click the Commit button at the bottom of the screen
It’s still possible to identify further dependencies not included until this point. On this example, the network interface of the virtual machine is included in the context.
- Click the Commit button on the bottom of the screen again
The commit breaks the relationship between the source and the destination. The last pending step is to delete the source, but this is an optional step, you can choose to delete the source or not, so you would complete a move or have a copy of the objects.
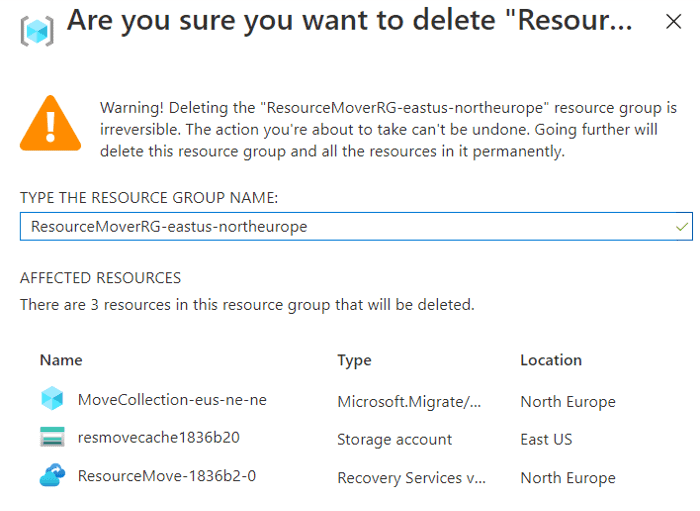
The metadata resource group
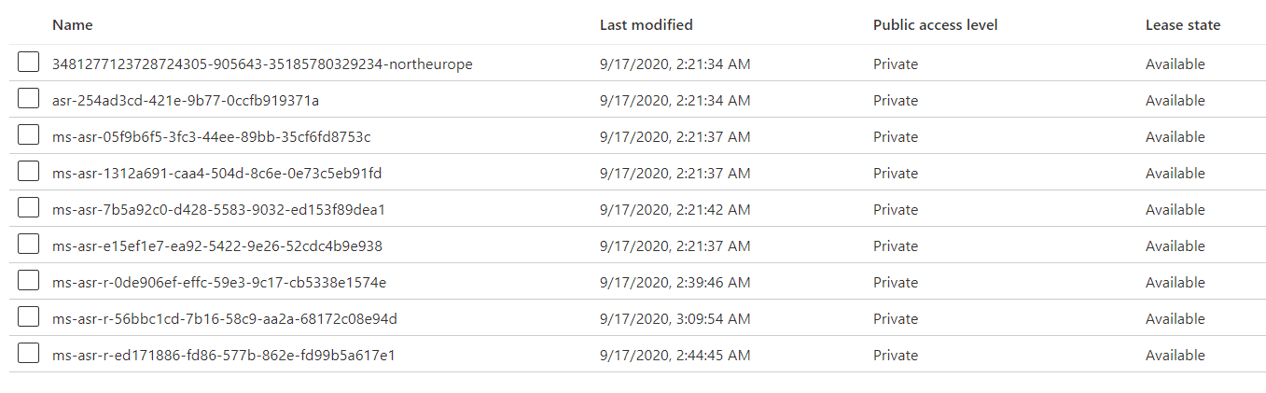
This is an excellent moment to look again at the metadata resource group. The content of the resource group Resourcemoverrg-eastus-northeurope is like the image below:

The recovery Services vault is a service used for virtual machine replication. You can check more details about the Recovery Services Vault on the Microsoft website.
The storage account, for its part, has a container and many files used during the move process
As you noticed before, the steps of the move were applied as deployments over this resource group. Checking the list of deployments, you will find something like the image below:
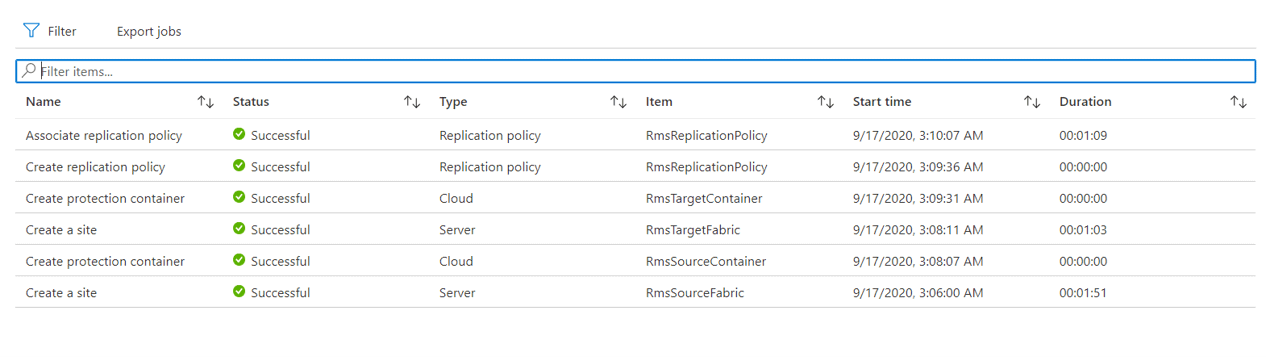
Azure Resource Mover used Replication Policies to replicate the virtual machine. You can read more details about Replication Policies on the Microsoft website.
Discarding a move
The move needs to be done in steps according to the dependency of the objects, the discarding of the move also needs to be done in steps, in reverse, according to the dependencies
- Change the context to East US-North Europe
- Select all the objects except for the resource group.
All the objects depend on the resource group, so the objects need to be removed first, and the resource group will be left for last
- Click the Discard move top button
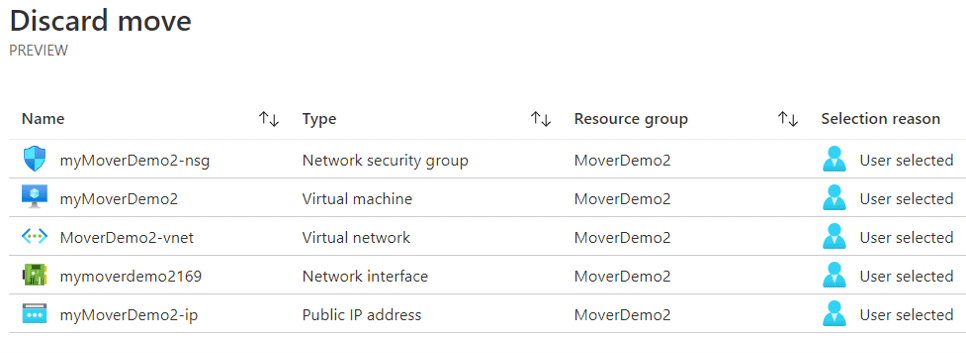
- Click the Discard button on the bottom of the screen

- Wait the discard to be completed
After the discard, the objects return to the status ‘Initiate Move’ pending. They still need to be removed from the context
- Select all the objects but the resource group
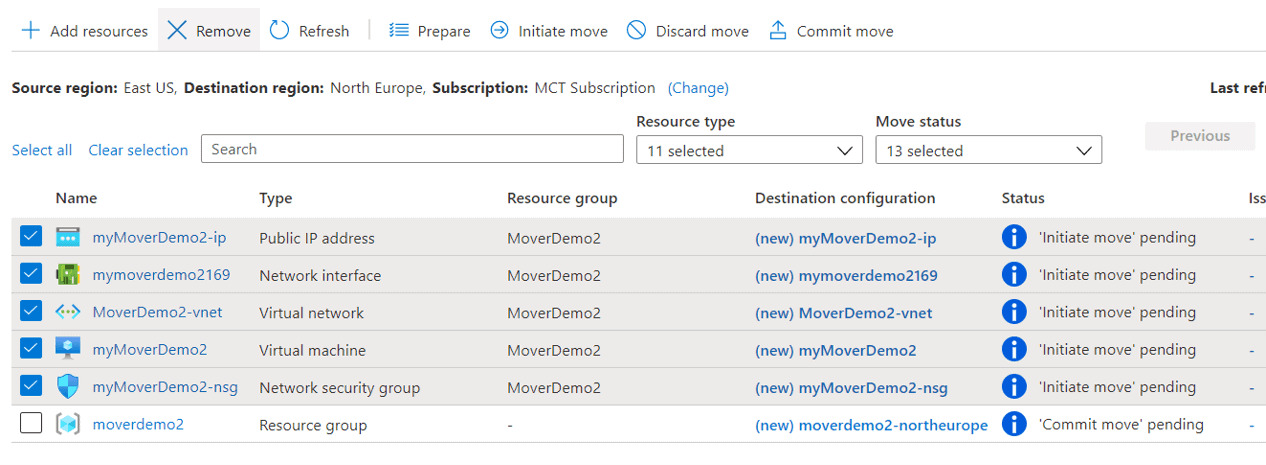
- Click the top Remove button
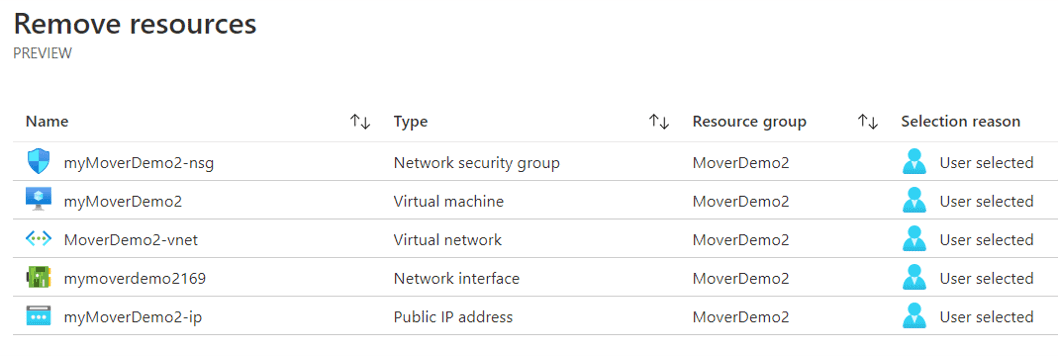
- Click the Remove button on the bottom of the screen

- After the remove is completed, select the resource group
- Click the Discard move top button
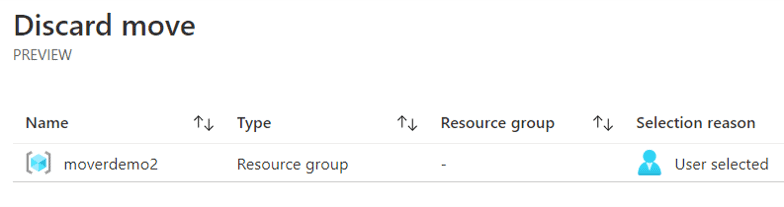
- Click the Discard button on the bottom of the screen
- After the discard, select the resource group again
- Click the top Remove button
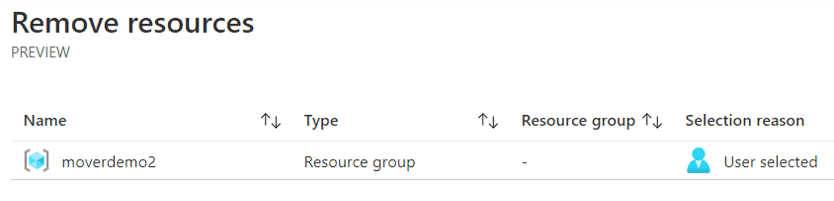
- Click the Remove button on the bottom of the screen
Deleting source objects
The move from UK South to North Europe is completed, committed. The last step is to delete the source objects. However, there is no automated way to do that, deleting the source is up to you.
- Change the context to UKSouth-North Europe
Besides deleting the source, you also need to remove everything from the context, exactly as you did with the other context, East US to North Europe.
Deleting the metadata resource group
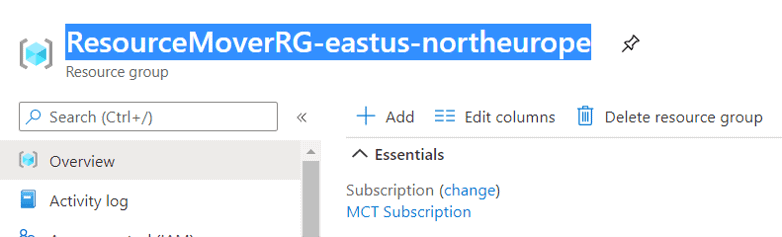
Returning to the home of the Azure Portal and looking for the resource groups, you will notice the destination resource group was removed, but the metadata resource group is still in place.
Azure Resource Mover is an environment for a wizard, leaving many details hidden in background objects. The metadata resource group may appear to be empty, but checking in more details, you will discover the resource group has deployments.


Clicking on the link of the image above, you can see these deployments in more details.

Clicking on the successful deployment on this list, you can see details about the objects deployed.
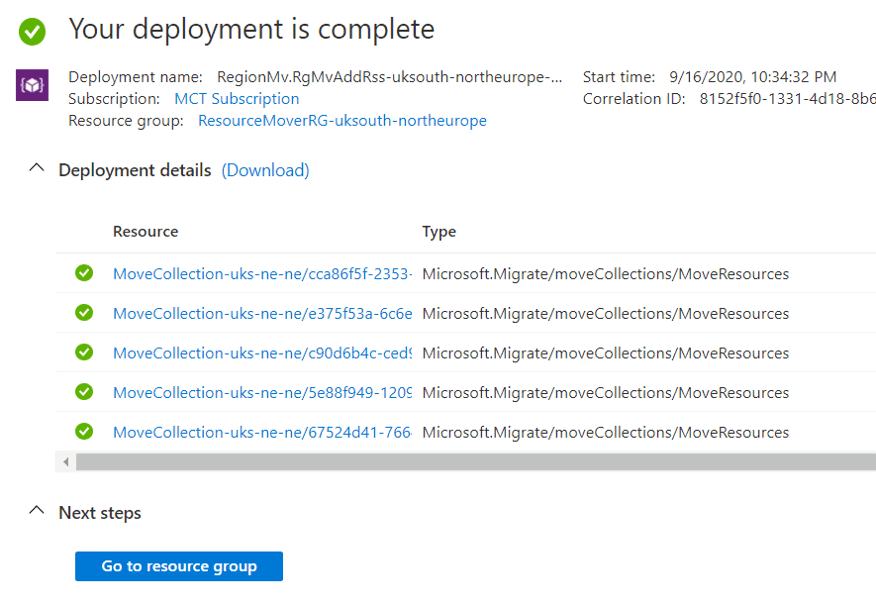
As you may notice on the type column, the objects deployed are MoveResources, deployed inside a MoveCollection. Each object included in the move context generates a MoveResource.
The move collection is still in place, although it doesn’t have any move resources. You can open cloud shell and execute the following statement to check:
|
1 |
((az resource list --resource-type Microsoft.Migrate/moveCollections --output table) | wc -l) -1 |
The result, count of move collections, is still 2, both move collections are still present. You can drop the metadata resource group, but the group has a lock. You need to delete the lock first, as you may notice on the image below.

After removing the lock, you can remove the resource group with no further problem
When the removal of the metadata resource group is completed, you can execute the count again, this time we will get only a single move collection.

Conclusion
This is a preview version, probably while reading and testing this article you may have noticed many details which could be improved. You can leave a comment on this article, and let’s talk about what could be improved.
You may also be interested in the following documentation of this new feature:
Support matrix for VM & networking resources
Support matrix for SQL resources
This document contains proprietary information and is protected by copyright law.
Copyright © 2026 Red Gate Software Limited. All rights reserved


Load comments