
There is more to Group Policy Software Installation (GPSI) than meets the eye! In our previous article on software deployment, we walked through the process of extracting, linking and deploying our sample application (7-Zip). But what if you, as an administrator, wanted to do more than a simple installation for one or more computers within the domain? What if you wanted to allow your users to install their own approved applications? Or daisy chain complex upgrades? Without even purchasing a 3rd party product or extension, GPSI can handle nearly any advanced installation task faced by an administrator in installing and upgrading applications to the domain users.
Software on Demand
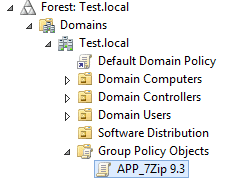
The vast majority of the time, software is assigned to a computer. If you are deploying, let’s say Java, pretty much every user on the computer will use it. Sometimes, certain software will be used by specific users on a computer. Some software might only be used during certain times of a year (or on a special occasion). For software like this, it can be advantageous to allow the user to install the software when it is needed instead of contacting the IT department. As an example, we are going to allow our users to install 7Zip. We will be working in the Group Policy Management Console (GPMC). Our Group Policy Object (GPO) will be APP_7Zip 9.3.
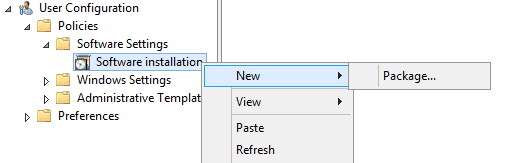
To do this, you will need to deploy the software under User Configuration/Polices/Software Settings/Software Installation.
Publishing or Assigned?
When you deploy an application to the user, you will notice that the Published option is no longer greyed out. And although you can still assign software, you have additional configurations available there as well.
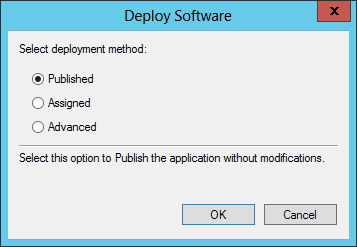
When you publish an application, GPSI will add that application to the list of available network programs within Programs and Features (or Add/Remove Programs). When users need that application, they can install it themselves.
Assigning an application can work in one of two ways. The first way functions in the same manner as an assigned computer-side application; the application is literally installed by the system when the user logs on. You are likely to choose this option for only the smallest and simplest of programs because otherwise you are likely to get complaints if a user has to wait on a 1GB program to install. The second method installs only the applications’ shortcuts (Desktop or Start Menu). When a user clicks on the shortcut, the rest of the application is installed.
A Publishing Walkthrough
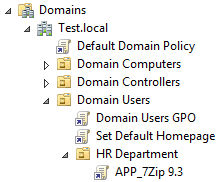
Because publishing is such an underused (but powerful) feature in GPSI, we are going to walk through a sample publishing of 7Zip. At times, we think of software as belonging only to a computer. After all, it is installed in Program Files. When using GPSI, you will normally have your application GPO linked to an organization unit (OU) containing your computer. Because publishing an application takes place under User Configuration, you will need ensure that your application GPO l is inked to an OU containing users. In the picture below, you can see that our GPO is linked to the HR Department OU. This OU is under Domain Users.
In your GPO, navigate to ‘User Configuration/Policies/Software Settings/Software Installation’; add your MSI and select ‘Published’ as the installation method.

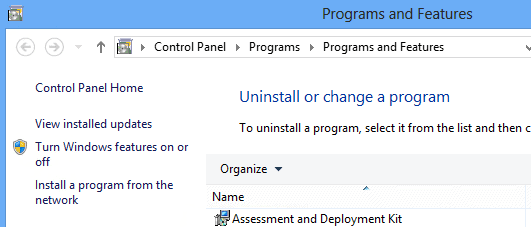
With the MSI added, you will notice that it has a unique icon. Instead of the normal lock (you must have this application) icon, you will have a paper (here – look over this application when you have a chance) icon. After logging out and logging back on a client computer, browse to Control Panel and Programs/Features. On the left side, select Install a program from the network.
Published applications will be retrieved and your user will be presented with a list of available applications.

The user can select the application and press install. The application will install even if the user is a standard user! Publishing can be a great tool for allowing users to engage in self-service application installs (or even uninstalls).
So Many Updates: Upgrading an Application
Have you ever deployed an application only to see that an update was just released? Personally speaking, Flash and Java seem to be the worst about this! Lucky for us, GPSI has an intuitive (but slightly hidden) process of upgrading an existing deployment. Depending on your management style, Microsoft has built in two variations.
Method 1: Existing GPO
After saving your MSI upgrade in your network share, edit your existing deployment GPO. For our examples, the GPO name is APP_7Zip. For a refresher, we will navigate to ‘Computer Configuration/Policies/Software Settings/Software Installation’.

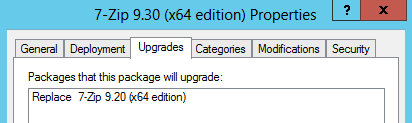
Right click on ‘Software Installation’ and select ‘add a new package’. Browse and select your new MSI. After selecting ‘OK’, set the deployment method to ‘Advanced’ and press ‘OK’. Select the ‘Upgrades’ tab, press ‘Add’, and then ‘Ok’.
From here, you can change the upgrade pattern for your MSI. By default, the upgrade pattern is to uninstall the old package and to install the updated MSI. If your MSI update requires the existing application to stay in place, you will want to select “Package can upgrade over the existing package.” After pressing ‘OK’, you should see the replace package listed under the ‘Upgrades’ tab.
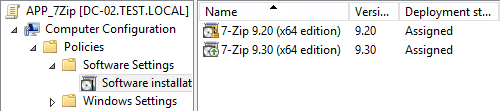
This method places both applications in the same GPO, as seen in the screenshot below. We know that the second package is an upgrade because of the green icon arrow pointing up to the 9.20 package.
The downside to this method is that, once the upgrade is added to this GPO, machines will begin to download the updated policy. If they are rebooted, they will install the application. This single-switch method, where an application is suddenly available for the entire deployment scope, can make testing a little harder and can lead an administrator to deploy an application sooner than intended. This brings us to the second variation.
Method 2: Separate GPO
Some IT administrators prefer to split out application upgrades into separate GPOs. Separate GPOs enable you to limit the scope of an application or an upgrade.
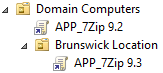
In the example picture above, every computer under the OU Domain Computers will receive 7Zip 9.2. The computers under the Brunswick Location OU will receive 7Zip 9.3.
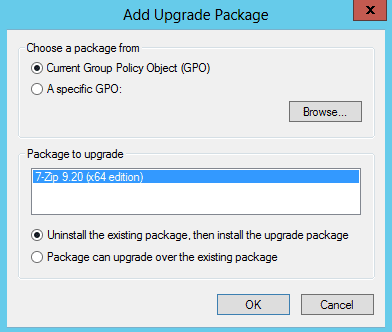
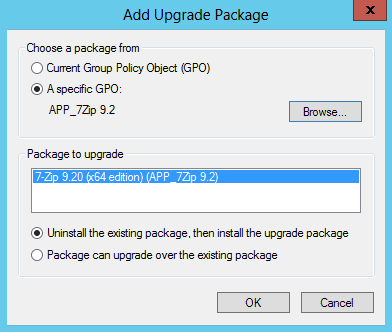
To link two separate GPOs together this way, we have to change one step from Method 1. On the ‘Add Upgrade Package’ screen, select ‘browse’and select the older application GPO (APP_7Zip 9.2)

You should now see your older MSI listed under the ‘Packages to upgrade section’. From here, you can change the upgrade pattern if needed.
There are a couple of downsides to this method. First, you will end up with a lot of GPOs! While you will probably never reach the 1,000 GPO limited imposed by the GPClient, the increase may cause management issues and GPO sprawl. The second downside is that the GPO names can easily get confusing. This is especially true if you scope your GPOs down to security groups that are named the same as an application. Speaking from personal experience, it is easy to get lazy and to not rename a group or GPO when managing an update.
Picking the Method
Which method do I use? Primarily, I will stick with method 1 and use my existing GPO. I love being able to see the upgrade history of an application in one single place. I also like the reduced number of GPOs and the fact that the MSI ‘self-documents’ the version. I also don’t have to worry about renaming/creating additional GPOs with comments.
When I’m testing an application upgrade, especially system wide upgrades, I will temporarily use method 2. I will create a GPO that is normally named like “TEST_APP_Application Name”. This GPO is then configured with the update and linked at a test OU. As the rollout continues, I can continue linking the GPO to broader OUs. Once I feel completely confident that the upgrade won’t cause any wide spread problems, I will remove my test GPO and add the new MSI to my existing application GPO.
Time for Retirement
There comes a time in the life of every application where it will need to be put out to pasture. With GPSI, you have the option of preventing future installations of your retired software or to uninstall the application on the next reboot.
Simple Uninstalls
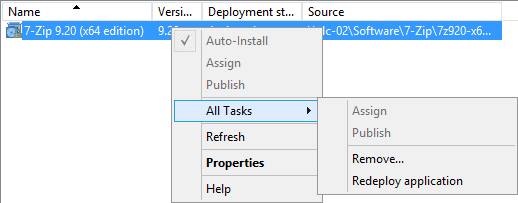
For a single application, retirement is easy. Simply right click on the application, select All Tasks and select Remove.
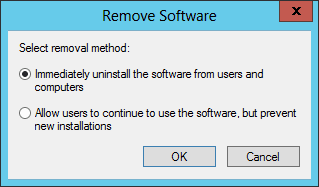
Next, you will need to decide whether to remove the application from all machines or to prevent new installations. Generally, administrators will only use the “Allow users to continue to use the software” option when wanting to limit the scope of a bad upgrade or when an uninstall might break another application. Personally, I find unlinking the GPO more effective for limiting scope.
Contrary to the message above, the application will not be immediately removed as GPSI can only process at certain times. Depending on the install type, it will take a reboot or a GPUpdate before the software is uninstalled or the shortcuts are removed.
Advanced Uninstalls
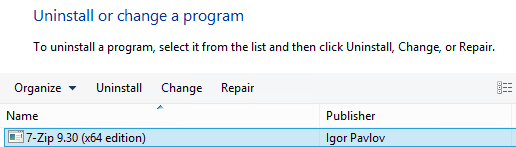
Let’s say that our previous upgrade from 7Zip 9.2 to 9.3 didn’t go as smoothly as expected. We’ve been asked to uninstall 9.3 and roll back to 9.2. To accomplish this, we have to know how our install actually worked. Did 7Zip overwrite the install of 9.2 or does it coexist?
Looking in Programs and Features (within the Control Panel) shows us that 9.3 overwrote 9.2. We could also look in Program Files for this information.
For us to roll back to 9.2, we have to first remove 9.3 and set it to uninstall immediately.
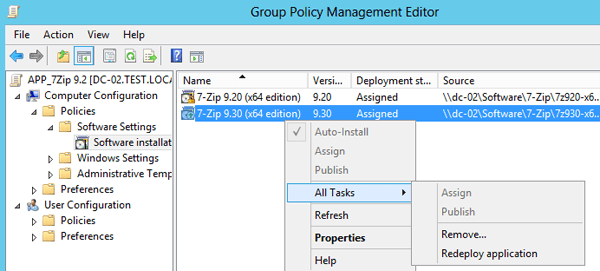
Next, we have to select our 9.2 MSI and set it to redeploy. This is done in nearly the same manner as uninstalling an application. Instead of selecting ‘remove’, just select ‘Redeploy application’ and press ‘ok’. On the next reboot, 9.3 will uninstall and 9.2 will reinstall.
Impressed Yet?
For a free and built-in software management system, GPSI is feature rich! Whether you are installing one or one hundred applications, Group Policy can scale with you.
This document contains proprietary information and is protected by copyright law.
Copyright © 2026 Red Gate Software Limited. All rights reserved
Load comments