
One of the most important challenges that an organization can face is protecting sensitive data, such as documents, spreadsheets and, amongst other things, E-mail messages. With this in mind, Active Directory Rights Management Services (AD RMS) is a powerful information protection tool from Microsoft that works with suitably-enabled applications, such as Exchange Server, to help maintain sensitive data by implementing the rights policy template.
In this article, we will look at the steps needed for a simple AD RMS installation in a very straightforward walk-though style, and then cover how to integrate AD RMS with Microsoft Exchange Server 2010. To finish off, we will also cover Rights Policy Template creation and management through the AD RMS management console and also through windows PowerShell.
If you want to know about more sophisticated Rights Management, then we will cover the IRM (Information Rights Management) features in Exchange Server 2010 in a future article, and the different ways to configure these features.
AD RMS installation:
The AD RMS installation must be performed on a Windows Server 2008 R2 server, and you’ll need to make sure you have met the following prerequisites prior to the installation:
- The machine you are installing the AD RMS role is a member server in a domain
- You have created a domain user account that will be used as the AD RMS Service Account
- You have created a second domain user account that will be used to install the AD RMS Service role. Add this user to the local administrators group and to the AD DS Enterprise Admin group
- You are hosting an Active Directory domain in which the domain controller is running at least Windows Server 2000 with Service Pack 3
For now, let us proceed with the installation by following these steps:
Go to Server Manager and click Add Roles, then select the Active Directory Rights Management Services checkbox and click Next, making sure to click the Add Required Role Services button as shown below.
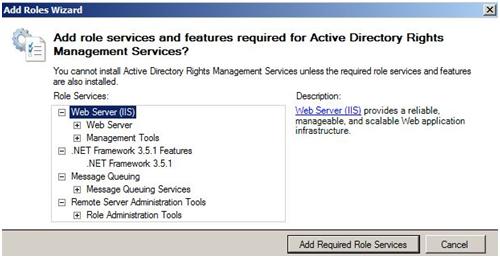
Figure 1.0: Required Role Services
On the ‘Select Server Roles’ page, make sure Active Directory Rights Management Services is selected before clicking Next.
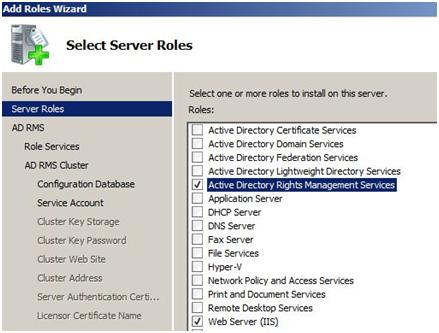
Figure 1.1: AD RMS and Web Server IIS selected
Because it is our first AD RMS in the Active Directory forest, we will also need to create a new AD RMS cluster:
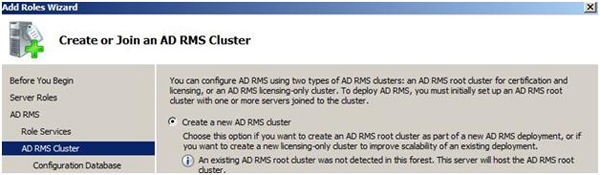
Figure 1.2: Creating a new AD RMS Cluster
Once the AD RMS server is provisioned, it becomes an AD RMS cluster. We can differentiate two types of cluster:
- A root cluster that handles all certification and licensing requests. The first AD RMS in an Active Directory forest always becomes the root cluster.
- Licensing-only clusters that (unsurprisingly) handle licensing requests.
Both types of clusters cannot coexist in the same load-balancing pool, so that is something to consider when you’re setting up your infrastructure. Next, select to use a different database server, and click on Validate.
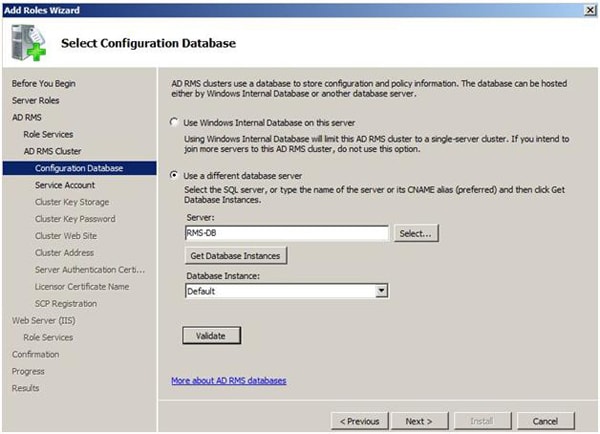
Figure 1.3: Select Configuration Database
Even though you have the option to use the Windows internal database, it is recommended to instead use a separate server to host the AD RMS database. This is because the internal database doesn’t support remote connections, and hence prevents you from adding a second server to the AD RMS cluster. That being said, windows internal database can still be used in your lab environment. If you do elect to use a different database server, make sure that the SQL version is 2005 or later.
Next, on the Service Account page, select the AD RMS Service account:
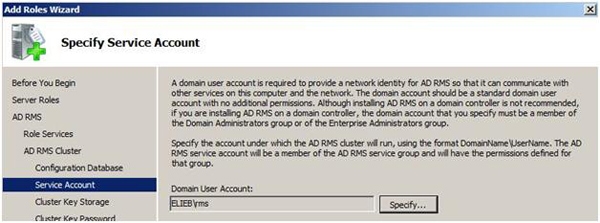
Figure 1.4: Specify AD RMS Service Account
Bear in mind that the AD RMS service account cannot be the same account as the domain account used for AD RMS installation. Next, when setting up the Cluster Key Storage, select Use AD RMS centrally managed key storage, and type in a Cluster Key Password.
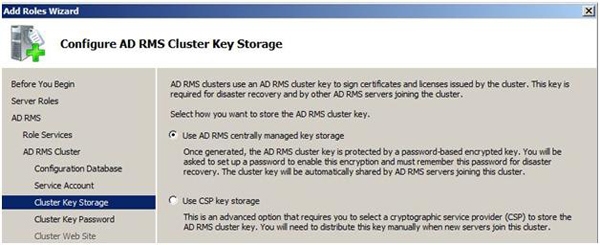
Figure 1.5: Configure AD RMS Cluster Key Storage
On the Cluster Web Site page, you will notice the Default Website is selected; this is fine for a basic initial setup, so go ahead and click Next. On the Cluster Address, opt to use SSL and specify a Fully-Qualified Domain Name (FQDN) for the URL, and then click Validate to verify and preview the URL.
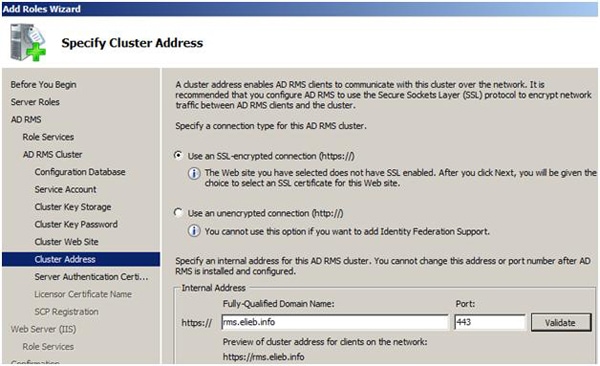
Figure 1.6: Specify Cluster Address
As a best practice, create a custom CNAME record for the AD RMS Cluster URL. This will ensure that the custom URL of the cluster is preserved if the AD RMS server is down, replaced or renamed, by only updating the appropriate record in the DNS.
On the Server Authentication Certificate page, click Choose an existing certificate for SSL encryption and click Import to import the necessary certificate. This could be a private certificate that is trusted within your Active Directory site, or a public certificate purchased from known vendors. You can select to use the self-signed certificate, but it is clearly not recommended to do so for a production environment due to the security implications.
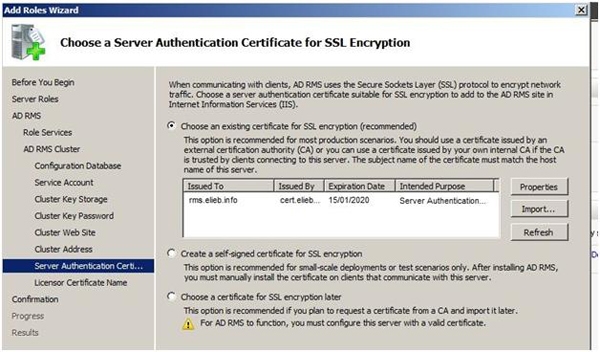
Figure 1.7: Import Certificate
In the next step, keep the default name for the Server Licensor Certificate and click Next, bringing you to the last step for configuring the AD RMS Cluster installation, where you need to should opt to Register the AD RMS service connection point now.
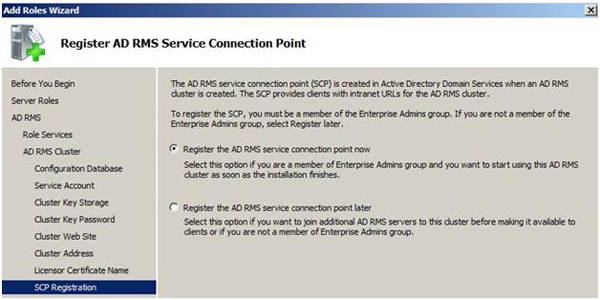
Figure 1.8: Register AD RMS SCP
On the Role services for Web Server (IIS) page which follows, keep the default selected roles and click Next, and once you come to the Confirmation page, click Install. On the results page, make sure that the installation is successfully completed:
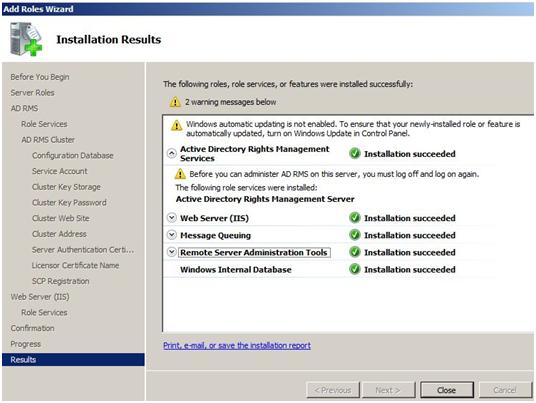
Figure 1.9: Installation Results
As the second warning message states, you must log off and then log on again, and AD RMS Enterprise Administrators Group membership will be automatically added to the your credentials.
Integrate AD RMS with Exchange Server 2010:
One of the great features in Exchange 2010 is the integration of information rights management (IRM) technology, which We will be covering in a future article. In this section, we will go over the steps you’ll need to take to prepare the AD RMS for Exchange Server 2010. These can be broken down into three steps:
1. Register a Service Connection Point
For Exchange Server to discover the AD RMS cluster, we need to first register the Service Connection Point (SCP) in Active Directory Domain Services. This can be performed automatically during the AD RMS Cluster installation as shown in figure 1.9. Alternatively, if you selected to perform the registration later, now is the right time to do so:
- Select the AD RMS cluster in the Management Console and click Properties from the actions pane
- From the SCP tab, select Change SCP, and click Set the SCP to current certification cluster
Once you’ve registered the SCP, you can check the object created in the active directory by browsing through ADSIEDIT to the Configuration tab and following the path shown in the figure below:
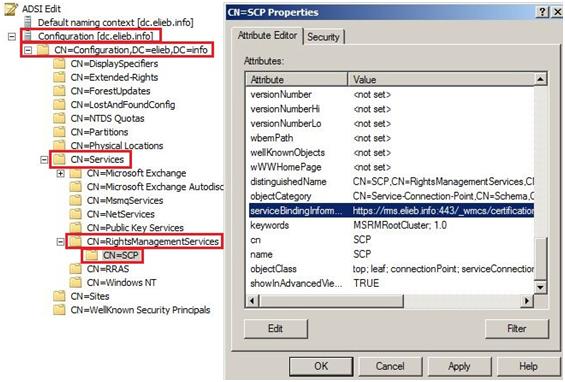
Figure 2.0: SCP view in Active Directory
2. Provide Exchange Server and AD RMS Service With Group Permissions to Access AD RMS:
This step involves granting the Exchange Server computer object and the AD RMS service groups both read and execute permission to the AD RMS server certification. To do this:
- Open the default hard drive and browse to the following location:
Inetpub\wwwroot\_wmcs\Certification - Right click ServerCertification.asmx, click Properties and select the Security tab
- Click to add the Exchange Server computer account and the AD RMS services group
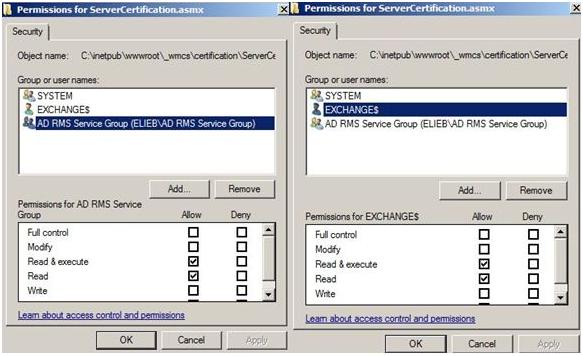
Figure 2.1: Provide permissions to Exchange
- Make sure that Read and Read and Execute permissions are granted for these two objects as shown in figure 2.1
3. Enable the AD RMS Super Users Group:
The name of this special group reflects its role, as it has full control over all rights-protected content. To complete this step:
- Create a Universal Distribution List with email enabled
- Add the Federated Delivery Mailbox user account to the Universal Distribution List you’ve just created. Because the domain account is disabled by default, from the properties of the user account, click on the Member of tab and click to add the Universal Distribution List as shown below:
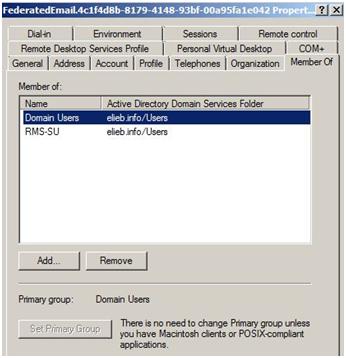
Figure 2.2: Join Federated Email to Super Users group
I’ve made a few assumptions here regarding things like accepted domains and specified users, but these are things I’m sure you’ll take into account. If you’re unsure of anything, I’ve included the relevant resources at the end of this article, and you are welcome to post your questions in the comments below.
- From the AD RMS cluster, expand Security Policies and click Super Users
- Click Enable Super Users, and then Change Super User Group
- Type in the email address of the Distribution List already created.
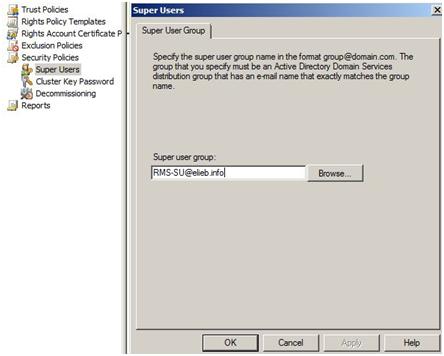
Figure 2.3: Set Super Users group
Working with Rights Policy Templates:
Rights Policy Templates are simply templates we create in the AD RMS cluster to customize special permissions, which can then be applied to a user, a group or anyone in the organization. In Exchange Server 2010, Rights Policy Templates can be applied automatically through transport rules or Outlook protection rules, or manually by selecting the desired template from within OWA or Outlook.
Now that you’ve got AD RMS working with Exchange Server, we will cover some operations that you can perform while working with rights policy template.
To create a Rights Policy Template:
- From the AD RMS console, click Rights Policy Templates
- From the Actions pane, select Create Distributed Rights Policy Template and click Add
- Choose a language, name and description, and click Add
- On the Add User Rights section, click to add a user, a group or selectAanyone. After selecting users, assign rights as appropriate, as seen below:
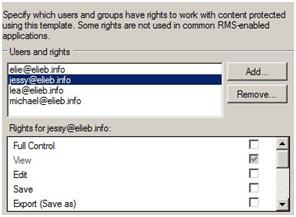
Figure 3.1: Assigning users’ right
- On the Specify Expiration Policy, you can either select Never expires, or you can set the access rights to expire based on a pre-defined duration criteria.
- On the Specify Extended Policy (which you might use to enable users to view protected content via a browser add-on), keep the default for this example and click Next.
- On the Specify Revocation Policy, keep the default as we don’t need the template to be revoked later, and click Finish to finish the template creation wizard. In case you’re not sure on the distinction between Expiration and Revocation:
As opposed to Content expiration, which makes content completely unavailable until it is republished, Revocation actively denies permission to open content based on various factors, such as content ID, users credentials or the requesting applications.
After creating the template, information will be displayed under Distributed Rights Policy Template Information, as shown below:
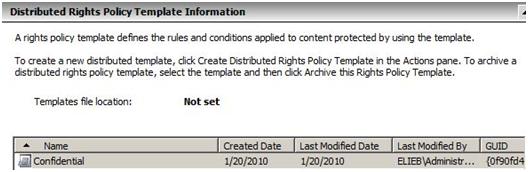
Figure 3.2: List of templates
To edit a Rights Policy Template
This is a totally straightforward process. You just need to right click on the template name, click on Properties, select the tab you wish to edit, and perform the necessary modifications.
For instance, to edit the Name of a rights policy template, click on the Identification Information tab, and click on Edit as shown below:
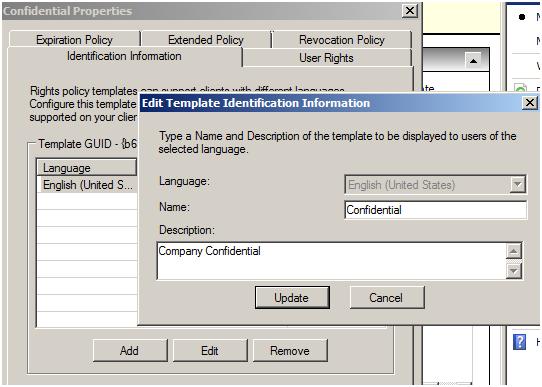
Figure 3.3: Editing Rights Policy Template
To archive a template:
Right click the desired rights policy template and select Archive this Rights Policy Template, clicking Yes to confirm the archive operation.
Once the Rights Policy Template is archived, it won’t be available to client computers after their rights policy template is refreshed. Alternatively, you can delete a Rights Policy Template by simply highlighting it and clicking Delete from the Actions pane. However, as a best practice, I recommend never deleting a Rights Policy Template, but archiving it instead. Doing so will guarantee that content published using that template can continue to be consumed, even though the template itself is no longer available.
For PowerShell Fans
All of the above tasks can be performed through Windows PowerShell, but first we need to run a few preparation cmdlet’s from within PowerShell:
- Import the AD RMS module:
Import-Module AdRmsAdmin - Create a drive that will represent the AD RMS Cluster:
New-PSDrive -Name AdrmsCluster -PSProvider AdRmsAdmin -Root https://localhost - Set the current location to the Rights Policy Templates:
Set-Location AdrmsCluster:\RightsPolicyTemplate
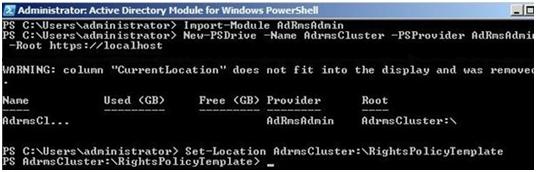
Figure 3.4: The steps needed to manage AD RMS through PowerShell
Now that we’re ready to manage AD RMS Rights Policy Templates using PowerShell, let’s start with creating a new one by running the following cmdlet:
|
1 |
New-Item AdRmsCluster:\RightsPolicyTemplate -LocaleName en-us -DisplayName "Sensitive Data" -Description "Template created through Windows PowerShell" -UserGroup elie@elieb.info -Right ('View','Edit') |
It’s worth noting that, although passing “… -right “view, “edit” ” will work, the way I’ve described above is what Microsoft recommends.
You can check the Rights Policy Template creation from within the AD RMS Cluster console. As you can see in figure 3.6, the template has indeed been created with “Sensitive Data” as the template name, “English (United States)” as the language, and the description and the defined user rights both also as defined in the cmdlet.
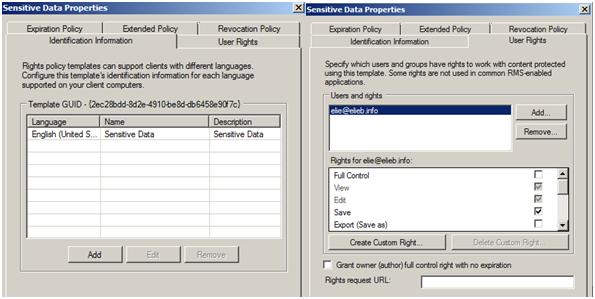
Figure 3.6: Rights Policy Template properties
To modify the User Rights setting for a specific Template, first we need to know the ID of the template, which we can discover by running:
|
1 |
Get-ChildItem -Path AdRmsCluster:\RightsPolicyTemplate |
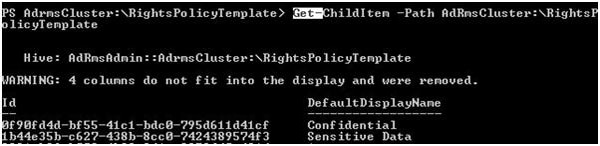
Figure 3.8: Getting Rights Policy Template ID
So, to modify the rights for an existing user, run the following cmdlet:
|
1 |
Set-Item -Path AdRmsCluster:\RightsPolicyTemplate\1b44e35b-c627-438b-8cc0-7424389574f3\UserRight\elie@elieb.info -FullControl |
Alternatively, to make sure that the appropriate rights are applied on a specified email address, run the this cmdlet instead:
|
1 |
Get-Item -Path AdRmsCluster:\RightsPolicyTemplate\1b44e35b-c627-438b-8cc0-7424389574f3\UserRight\elie@elieb.info |
The results of this second action are shown below:
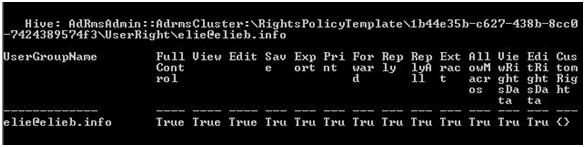
Figure 3.9: Getting users permissions on selected Rights Policy Template
To Archive a Rights Policy Template, run this cmdlet:
|
1 |
Set-Item -Path AdRmsCluster:\RightsPolicyTemplate\1b44e35b-c627-438b-8cc0-7424389574f3 -Name IsDistributed -Value $false |
And lastly, to Delete a Rights Policy Template, run the following:
|
1 |
Remove-Item -Path AdRmsCluster:\RightsPolicyTemplate\1b44e35b-c627-438b-8cc0-7424389574f3 |
Summary:
In this article, we have covered how to install an AD RMS Cluster and integrate it with Exchange Server 2010, as well as how to configure a Rights Policy Template in AD RMS through the management console and Windows PowerShell, respectively.
If you wish to work with Active Directory Rights Management Services, I cannot suggest in strong enough terms that you make sure to start building your test environment first, and start exploring Rights Policy Template creation and management.
To that end, I hope that this article was a good start to getting you familiar with AD RMS, at least until the next article, where we will start working with the IRM feature introduced in Exchange Server 2010.
References:
Active Directory Rights Management Services
http://technet.microsoft.com/en-us/library/cc772403.aspx
Configuring Rights Policy Templates
http://technet.microsoft.com/en-us/library/ee221066(WS.10).aspx
This article was commissioned by Red Gate Software, engineers of ingeniously simple tools for optimizing your Exchange email environment.
Learn more about Exchange Server Archiver and PST Importer.
This document contains proprietary information and is protected by copyright law.
Copyright © 2026 Red Gate Software Limited. All rights reserved
Load comments