
Python is one of the most popular languages for many reasons. Julio Sampaio explains how IronPython allows you to integrate Python with your favorite .NET language.
Have you ever imagined integrating some Python code along with .NET? This idea goes a bit beyond the possibility of creating Python code within Visual Studio, although that’s an important step towards such a goal. IronPython is a way to accomplish this integration. It is an open-source implementation of the Python language to allow closer integration with the .NET Framework.
IronPython works as an extension to the .NET Framework, but it can also be used by .NET projects to take advantage of Python’s scripting power. Other than that, since IronPython is a real implementation of Python itself, there’s no need to learn a new language or extra features if you already know Python.
This article explores the language and teaches how you can benefit from its integration with .NET.
Setup
There are a couple of ways to install it. If you aim to use IronPython standalone in projects other than those in Visual Studio, you can download and install it. Examples in this article use the 2.7.11 release, but the examples should work well with the latest version.
Go to the GitHub download page, and click the MSI installer to download it. I’m assuming you’re following this tutorial from a Windows OS. Visual Studio still has no support for adding Python extensions on macOS, for instance.
Run the installer and follow the steps until the end.
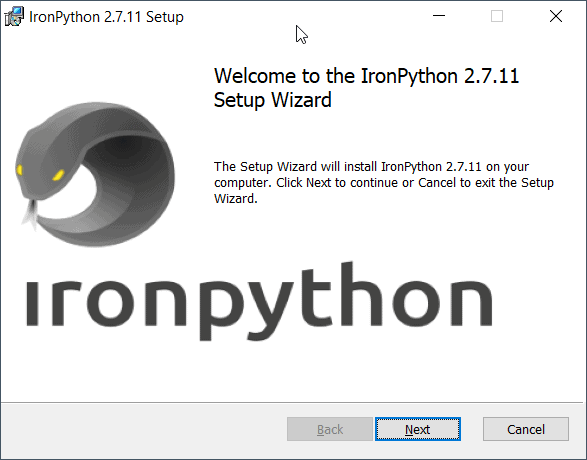
Figure 1. Installing IronPython on Windows.
During the process, you may notice a screen that shows the Python versions being installed (Figure 2). It comes by default with Python’s IronPython language, along with the pip (package manager for Python).
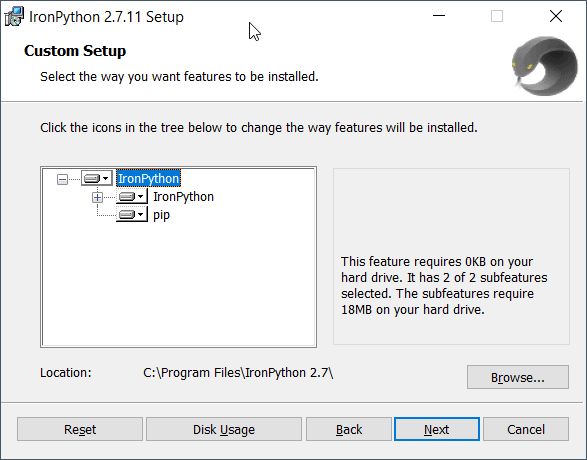
Figure 2. Selecting the IronPython features.
Make sure to browse for the installation location shown in Figure 2 if you won’t use the default one. After the process is done, you can go to the specified folder and run the file ipy.exe. It represents the command line interface from which you may run your IronPython commands.
Run it, and check in Figure 3 how the interface looks.
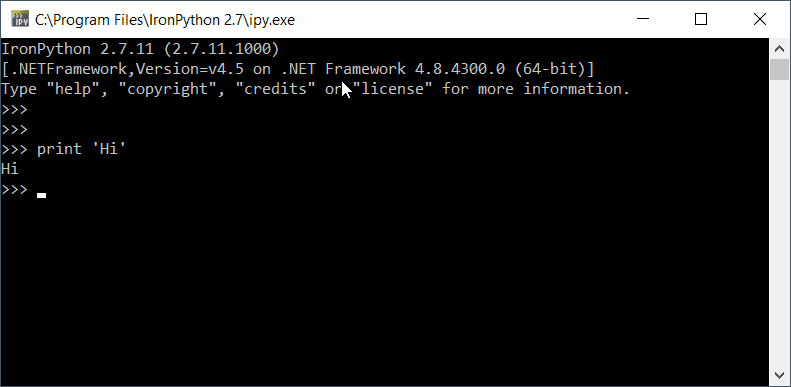
Figure 3. IronPython command-line shell.
It is also a REPL, which allows you to execute interactive Python code to try it out. Do it as you please.
Alternatively, you can also download IronPython binary files, extract them and access the executor via the command line. We’ll stick, however, to the installer-based version which is more concise and straightforward.
WinForms with IronPython
Now that you have the environment set up, it’s time to learn what IronPython is capable of doing. Perhaps one of the best ways to prove its interoperability with .NET is through the construction of some WinForms.
To see this in action, you will create a simple MessageBox to display a message window and two buttons: Yes and No. Figure 4 illustrates how the box is going to look .
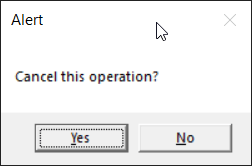
Figure 4. A MessageBox built with IronPython.
Each operation is going to run some Python code to perform different actions. You can find the code for this in Listing 1.
Listing 1. Creating a box with action buttons.
|
1 2 3 4 5 6 7 8 9 10 11 12 13 14 |
import clr clr.AddReference('System') clr.AddReference('System.Windows.Forms') import System import System.Windows.Forms as WinForms message = "Cancel this operation?" caption = "Alert" buttons = WinForms.MessageBoxButtons.YesNo result = WinForms.MessageBox.Show(message, caption, buttons) if result == WinForms.DialogResult.Yes: WinForms.MessageBox.Show("Great, it's canceled!") System.Console.Write("Success!") else: print "Sorry, something went wrong!" |
If you’ve coded with Python and C# before, this code may look weirdly familiar.
The starting point of any mixed code with IronPython starts with its CLR module (the common language runtime). It allows a deep integration between both languages. With it in hand, you can add as many references as you want, such as the System and the Windows Forms.
Take note of how the whole coding experience is Python-based, and only Python. This includes the imports, the variables, the code indentation, the conditional statements, etc.
Once you add the .NET references, you’re allowed to use them throughout the code as real Python objects. The methods, types, parameters, and results also apply, so be careful. Also, pay attention to the body of the if condition. In case the user selects the option “Yes”, another message box is displayed along with a logline coded in C# via System.Console. Otherwise, the negative log is displayed but this time via Python’s print function. Cool, isn’t it?
Save the code to a file called Hello.py into the same folder that IronPython is installed. Then, open a standard command line (cmd), navigate to the IronPython root folder:
|
1 |
cd C:\Program Files\IronPython 2.7 |
Then run the following command:
|
1 |
ipy.exe Hello.py |
The execution triggers the message box shown in Figure 4. Go ahead and test both the buttons. Figure 5 shows what happens after clicking the Yes option.
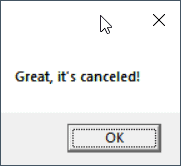
Figure 5. Message box opened after Yes option-click.
The image above will be followed by the message “Success” logged in the console.
Dealing with generics
Generics are an important part of Object-oriented programming, and IronPython allows its usage along with some Python code. Take the classic example of Collections. They represent one of the most traditional uses of generics in C#. Check out the code presented in Listing 2.
Listing 2. Dealing with Generics in IronPython
|
1 2 3 4 5 6 7 |
from System.Collections.Generic import List items = List[str]() items.Add('Item A') items.Add('Item B') items.Add('Item C') for item in items: print item |
Note how array-like this syntax is. Yes, you can provide IronPython with generics just the way you access array indices. If you try to add anything other than strings, like shown below:
|
1 2 |
items = List[str]() items.Add(123) |
A corresponding error will be thrown:
|
1 2 3 |
Traceback (most recent call last): File "Hello.py", line 3, in <module> TypeError: expected str, got int |
Object-oriented programming
OOP is another crucial part when it comes to C# development. Among its many facets, being able to create classes (along with attributes and methods) and instantiate objects is also possible in IronPython. To demonstrate, change the content of your Hello.py file with the code shown in Listing 3.
Listing 3. Example of a C# class in IronPython
|
1 2 3 4 5 6 7 8 9 10 11 12 13 14 15 16 17 18 19 20 21 22 |
class Person: name = 'John Silva' age = 12 email = 'john@email.com' # setters def setName(self, name): self.name = name def setAge(self, age): self.age = age def setEmail(self, email): self.email = email # getters def getName(self): return self.name def getAge(self): return self.age def getEmail(self): return self.email def getInfo(self): print "Hi! I'm ", self.name, ", I'm ", self.age, "years old and this is my email: ", self.email |
Pretty simple. There’s just a couple of attributes and getters/setters for each. To make use of this class, you’d have to import it within another Python file. However, to simplify it, open another command line window and cd into the folder where the Hello.py file is located. Then, execute the command below in order to let ipy notice that specific class:
|
1 |
ipy Hello.py |
Now, it’s time to enter into the interactive mode. Just hit the ipy command for that, and the terminal must change to how it is shown in Figure 6.
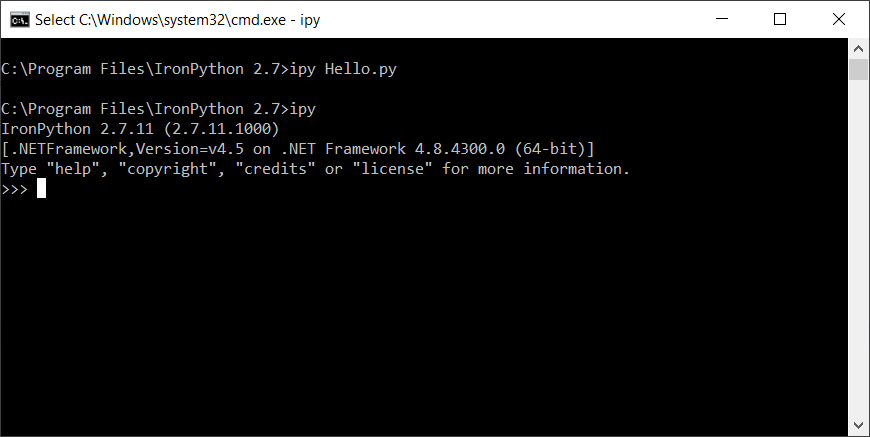
Figure 6. IronPython interactive mode.
Then, you can run some interactive code exploring the Person class previously created. Type the following code lines directly to the new shell window:
|
1 2 3 |
import sys sys.path.append('C:\Program Files\IronPython 2.7') import Hello |
Make sure to change IronPython’s path with yours. Finally, play with it by creating a person object and calling its methods:
|
1 2 3 |
person = Hello.Person() person.getInfo() > Hi! I'm John Silva, I'm 12 years old and this is my email: john@email.com |
Figure 7 shows a bit more of the options you can base at.
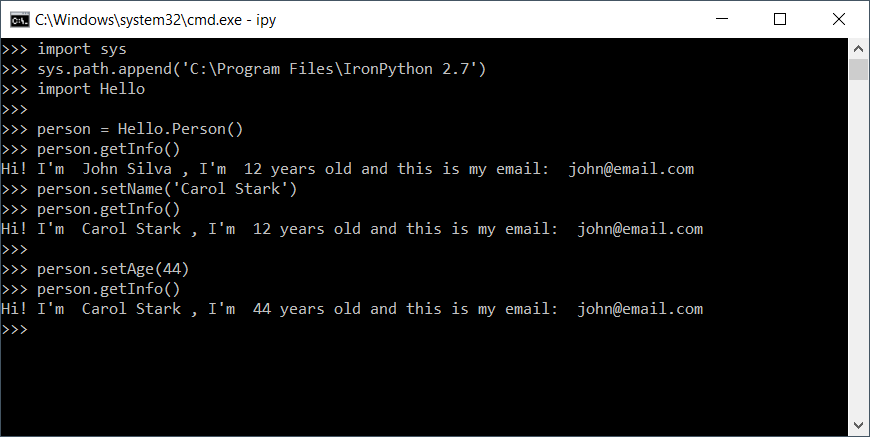
Figure 7. Playing with Person object’s methods in IronPython.
What else can you do with IronPython?
IronPython can work for many of the .NET facets, such as ASP.NET web applications, APIs, data science, etc., but it’s been more widely used for desktop application development.
There used to be an IronPython Studio to integrate with Visual Studio 2008. However, time and maintenance have proved too difficult to keep up with. Today, you can add IronPython’s dependencies to your .NET projects via NuGet, especially if you’re working with Visual Studio.
It’s important to note that IronPython has been around for quite a long time, and still, the team has been working to maintain and update it. The documentation is not complete, but it’s enough to make some grounds when getting started. Additionally, the classic book IronPython in Action is a must-read if you’re willing to understand more about its capability.
Load comments