
Docker containers are ephemeral – data disappears when a container is removed. Docker volumes persist data independently of the container lifecycle. This article covers creating independent volumes, sharing between containers, copying from host, and defining volumes in Dockerfiles. Also: learn about Linux containers on Windows (LCOW).
- First Part – The basics: the basic principles of how container virtualization is implemented in Windows Server 2016 operating system.
- Second part – Up and Running: creating and managing Windows Server Containers using Docker.
- Third part – Into your Stride Working with Windows Containers and Docker
- Fourth part -- Save the Container Data
This is my latest article in this series about Windows Containers and Docker. I began writing this series one year ago, and since then there have been some great improvements. Before going deeper, I just want to describe the different versions of Docker that exist today in case you were not in the Docker ‘sphere’ or if you have just started using Docker. On March 2nd 2017, Docker changed their version format, and also changed the name of the Docker Engine package to either Docker Community Edition or Docker Enterprise Edition.
Installing Docker Community Edition on Windows 10
The first edition is called Docker Community Edition (CE). Docker (CE) is the new name for the free Docker products. Docker CE is compatible with the following OS Platform: Mac OS, Windows 10, Amazon AWS, Azure, CentOS, Debian, Fedora, and Ubuntu. On Top of that, Docker CE comes in two variants, Edge and Stable:
- Edge is for users wanting a drop of the latest and greatest features every month
- Stable is released quarterly and is for users that want an easier-to-maintain release pace
As Docker said, the Community Edition is great for developers and ops teams starting to build container apps. If you want to download this edition, go to the Docker Store. Once the download and installation are completed, you can run the package called Docker For Windows. At the time of writing this article, I installed Docker CE v18.03.
|
1 2 3 4 5 6 |
PS > Enable-WindowsOptionalFeature -Online -FeatureName Microsoft-Hyper-V –All PS > Get-Service *docker* Status Name DisplayName ------ ---- ----------- Running com.docker.service Docker for Windows Service |
Confirm that you can run a simple container:
|
1 2 3 4 5 6 7 8 9 10 11 12 13 14 |
PS > Docker run --rm -v c:/Users:/data alpine ls /data Unable to find image 'alpine:latest' locally latest: Pulling from library/alpine ff3a5c916c92: Pull complete Digest: sha256:7b848083f93822dd21b0a2f14a110bd99f6efb4b838d499df6d04a49d0debf8b Status: Downloaded newer image for alpine:latest All Users Default Default User Nicolas Public defaultuser0 desktop.ini |
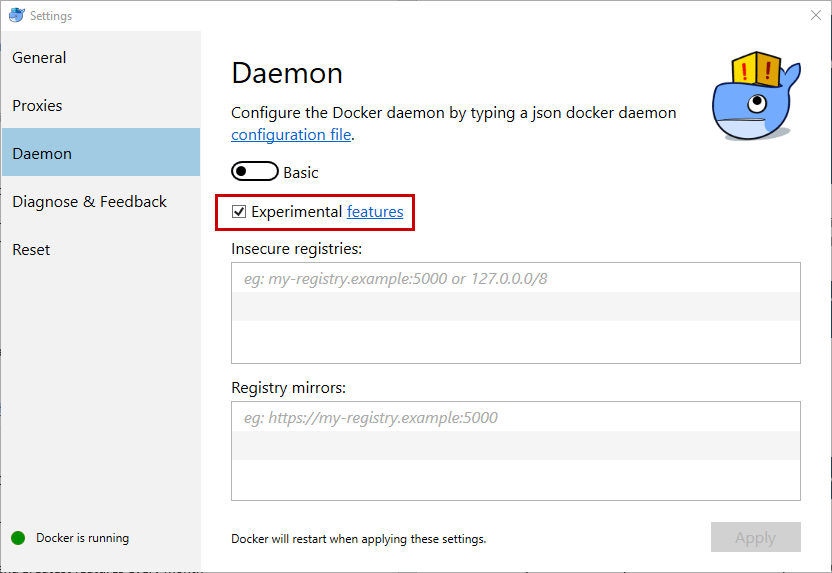
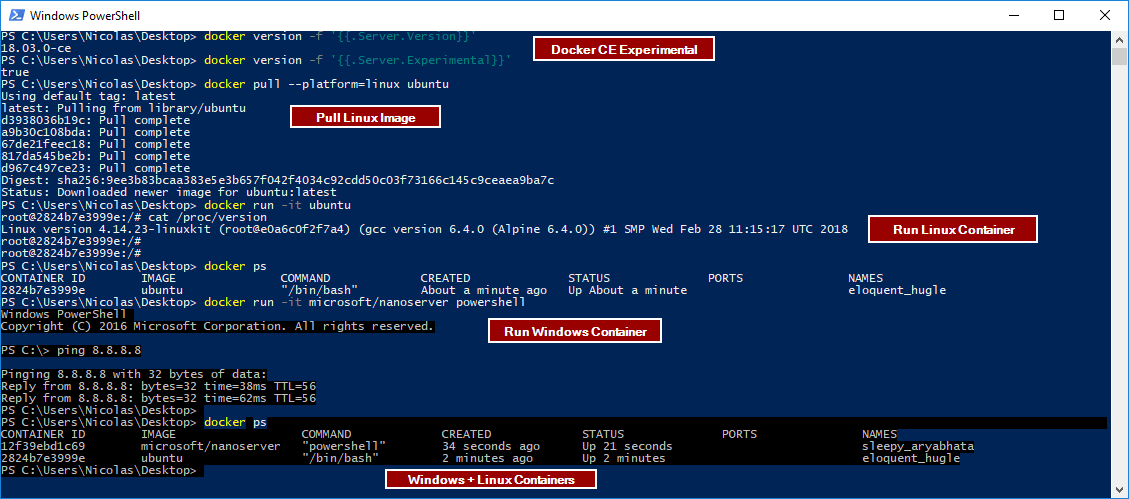
If you work with Docker v18.03, then one of the main features is the ability to run both Windows and Linux images side by side, instead of having to switch Docker from Linux to Windows mode. Let’s confirm you are running the daemon in experimental mode:
|
1 2 3 |
PS > docker version -f '{{.Server.Experimental}}' True |
Or through the GUI:
Now, use the platform=linux parameter in Windows Container mode to run Linux images.
If you work with a previous version of Docker, it will run Linux containers by default. So, you must modify this setting and switch to Windows Container mode using either the Docker tray-menu:
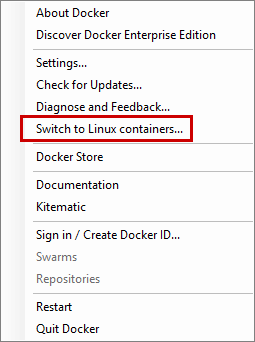
or by running the following command in a PowerShell prompt
|
1 |
& $Env:ProgramFiles\Docker\Docker\DockerCli.exe –SwitchDaemon |
And that’s all. Docker CE is up and running on your Windows 10!
Now, you can go to the Docker Hub to find out which Container Images are available. For instance, you can run a simple Windows Container that contains PowerShell Core:
|
1 2 3 4 5 6 7 8 9 10 11 12 13 14 15 16 17 18 19 20 21 22 23 24 25 26 27 28 29 |
PS > docker pull microsoft/powershell Using default tag: latest latest: Pulling from microsoft/powershell 1be7f2b886e8: Pull complete 6fbc4a21b806: Pull complete […] 74ebbb198c87: Pull complete Digest: sha256:38ac64ecec7e36b1868458b6b49e9d41332de56da2053c14830ef4915d909813 Status: Downloaded newer image for microsoft/powershell:latest PS > docker run --name PSCore -it microsoft/powershell PowerShell v6.0.1 Copyright (c) Microsoft Corporation. All rights reserved. https://aka.ms/pscore6-docs Type 'help' to get help. PS > $PSVersionTable Name Value ---- ----- PSVersion 6.0.1 PSEdition Core GitCommitId v6.0.1 OS Linux 4.9.75-linuxkit-aufs #1 SMP Tue Jan 9 10:58:17 UTC 2018 Platform Unix PSCompatibleVersions {1.0, 2.0, 3.0, 4.0...} PSRemotingProtocolVersion 2.3 SerializationVersion 1.1.0.1 WSManStackVersion 3.0 |
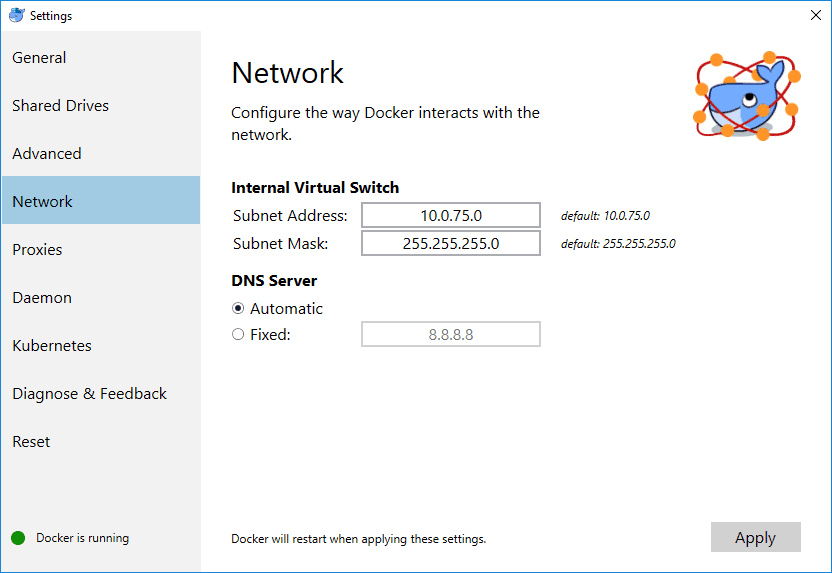
And you can very easily configure your Docker engine using the GUI Docker For Windows:
Installing Docker Enterprise Edition on Windows Server 2016
The second edition is called Docker Enterprise Edition (EE) and is a certified container platform for: CentOS, Red Hat Enterprise Linux (RHEL), Ubuntu, SUSE Linux Enterprise Server (SLES), Oracle Linux, Windows Server 2016, IBM Z, Amazon AWS, and Azure (Docker EE for Azure). Docker EE is available in three tiers: Basic, Standard and Advanced. Standard and Advanced tiers add advanced container management (Docker Datacenter) and Docker Security Scanning. You can find more information on the Docker Store about Docker EE and how to install it on other Operating Systems. In this case, you just need to run the following commands as administrator to install Docker EE on Windows Server 2016:
|
1 2 3 4 5 6 7 8 9 10 |
PS > Install-Module DockerProvider PS > Install-Package Docker -ProviderName DockerProvider -RequiredVersion preview -Force WARNING: A restart is required to enable the one or more features. Please restart your machine. Name Version Source Summary ---- ------- ------ ------- Docker 17.10.0-ee-pr... Docker Docker Enterprise Edition for Windows Server... PS > Restart-Computer |
As you may notice, the –Force parameter is used to install the very latest version of Docker EE. And then a restart of the Windows container Host is performed. This article will demonstrate using Docker EE v17.10 on Windows Server 2016.
Below is the release cycle for Docker in 2017. For example, v17.03 means that this release was released in March 2017.
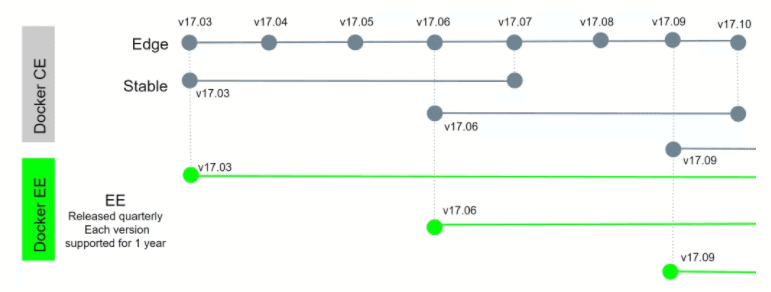
Docker release cycle from the Docker website
To summarize, Docker CE has the same core features as Docker Enterprise Edition, so don’t be afraid, you can use Docker CE instead of Docker EE. Nonetheless, if you want to run Docker in production, I recommend installing at least Docker EE Basic.
Where’s My Data?
Imagine that you run a Windows Container and have some important data inside the container. Yes, containers are ephemeral, but you may want to save this data outside the container for many reasons. Well, you can easily share data between the Container Host and a Windows Container. Furthermore, you can also share data between two Windows Containers if you need to. This feature is very useful for Multi-Container Applications. For instance, applications need to share access to data or persist data after a container is deleted such as for databases or log files. This feature is called ‘Docker Volumes’.
In this section, I will describe how Docker Volumes work and explain four different ways to share data with containers:
- Creating an independent Docker Volume
- Sharing a Docker Volume with multiple containers
- Copying data from the Container Host to a container
- Creating a Docker Volume from a Dockerfile
When using Windows containers, it is still a good idea to use Docker Volumes to keep the data on the container host instead of on the container. You could also create multiple containers that will share the same Docker Volume. A Docker Volume will be visible both on the container host and on the container. The first thing to know is that Docker Volumes are stored in the following hidden path on the container host:

Note: Given that I will switch between the container host and containers, I will add a comment before each command.
Creating an Independent Docker Volume
To create a Docker Volume, type the following command:
|
1 2 3 4 |
#On the container host Docker volume create --name vol01 Vol01 |
To view all the existing Docker Volumes on the container host, type:
|
1 2 3 4 5 |
#On the container host PS > Docker volume ls DRIVER VOLUME NAME local vol01 |
Now you can attach the existing Docker Volume to a new container, iis01, using the –v parameter. The syntax is simple, you must specify the folder on the container host followed by the folder on the container:
|
1 2 |
#On the container host PS > Docker run --name iis01 -it -v C:\ProgramData\Docker\Volumes\Vol01:C:\Vol01 nanoserver/iis PowerShell |
By including the -it switch and specifying PowerShell, the current PowerShell console will be used to connect automatically to your container once it is created. If you want to exit from your container, type Exit and your container will be stopped. To leave the container running in background, use CTRL+P+Q. To open a new PowerShell session running in the container use Docker attach <container name> and press ENTER twice. When in a PowerShell session for an existing container, Exit will just switch back to the host but leave the container running. To start up a container use Docker start <container name>.
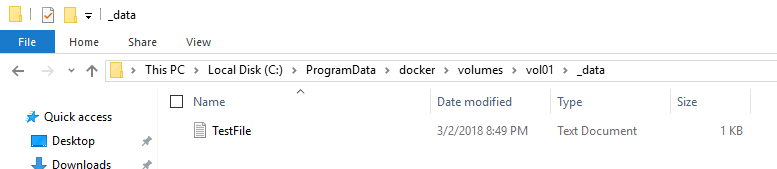
Now, create a simple text file on the container host:
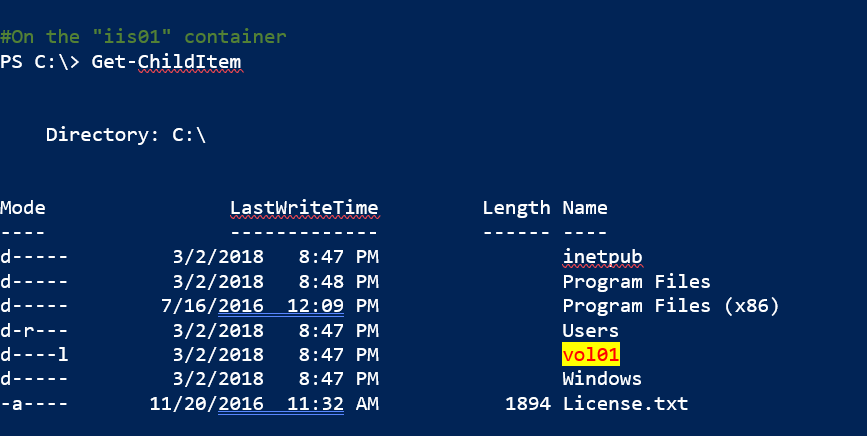
Confirm that the file exists on the Container as well:
|
1 2 3 4 5 6 7 |
#On the iis01 container PS C:\> Get-ChildItem .\vol01\_data Directory: C:\vol01\_data Mode LastWriteTime Length Name ---- ------------- ------ ---- -a---- 3/2/2018 8:49 PM 19 TestFile.txt |
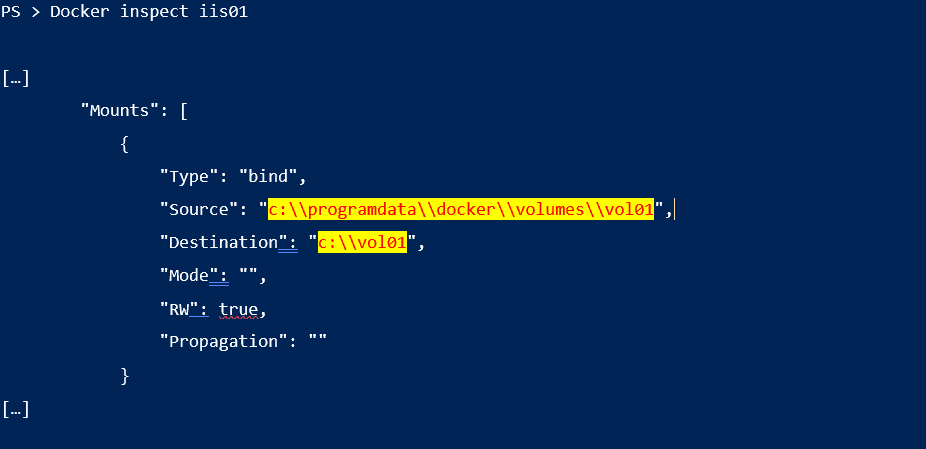
In order to inspect the Container, run the following command and check the Mounts section:
|
1 2 |
#On the container host PS > Docker inspect iis01 |
Some of you are probably wondering if it’s possible to move the storage location? Fortunately, yes! To perform this task, you will need to create a configuration file called daemon.json:
|
1 2 3 4 5 6 7 |
#On the container host PS > New-Item -Type File -Path "C:\ProgramData\Docker\config" -Name daemon.json Directory: C:\ProgramData\Docker\config Mode LastWriteTime Length Name ---- ------------- ------ ---- -a---- 3/2/2018 9:00 PM 0 daemon.json |
Then, provide the new storage location by adding this to the daemon.json file:
|
1 2 3 |
{ "data-root": "D:\\DockerVolumes" } |
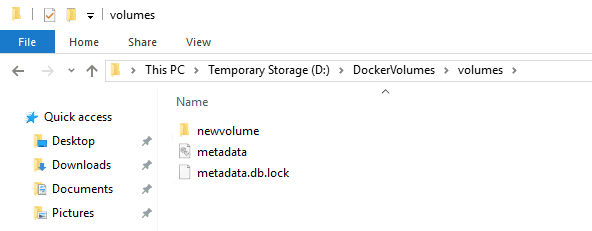
Next, restart the Docker service. Create a new volume to confirm that the volume is created under the new Data Root folder:
|
1 2 3 |
#On the container host PS > Get-Service *Docker* | Restart-Service PS > Docker volume create --name newvolume |
The folder for the new Data Root folder will be created automatically. Be careful, older volumes are not moved automatically and existing containers and volumes will no longer be seen by Docker. Note that you can remove an existing Docker Volume using Docker volume rm <volume name>.
Sharing a Docker Volume with Multiple Containers
Start by creating a new Container called iis02 based on the nanoserver/iis image and attach a volume to it. Note that you don’t need to specify the Data Root folder because Docker will create the directory with a random folder name. Then create a file on the new volume.
|
1 2 3 4 5 6 7 8 9 10 11 12 |
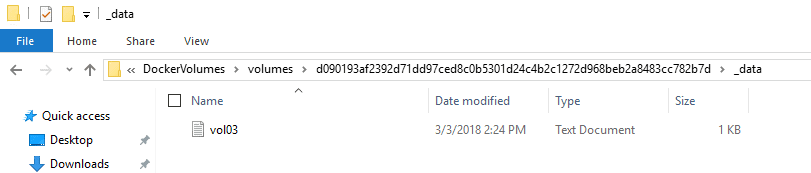
#On the container host PS > Docker run -it --name iis02 --volume c:/vol03 nanoserver/iis powershell #On the "iis02" Container PS > "Welcome vol03" > .\vol03\vol03.txt PS > dir .\vol03 Directory: C:\vol03 Mode LastWriteTime Length Name ---- ------------- ------ ---- -a---- 3/3/2018 2:24 PM 32 vol03.txt |
Confirm that the file exists on the container host:
During the last step, you created a new Container and attached a new Docker Volume. Now, you will create a second Container called iis03 and attach the same Docker Volume C:/vol03 using the –volumes-from parameter:
|
1 2 |
#On the container host PS > docker run -it --name iis03 --volumes-from iis02 nanoserver/iis powershell |
Confirm that the volume is mounted. Create a new text file called vol03-from-iis03.txt:
|
1 2 3 4 5 6 7 8 9 10 11 12 |
#On the iis03 container PS C:\> dir .\vol03 Directory: C:\vol03 Mode LastWriteTime Length Name ---- ------------- ------ ---- -a---- 3/3/2018 2:24 PM 32 vol03.txt #The text file created on iis02 is visible on iis03 thanks to the "--volumes-from" parameter #On the "iis03" Container PS C:\> "Hello" > .\vol03\vol03-from-iis03.txt |
On the container host, both files are visible:

By default, access on a Docker Volume is in Read/Write mode. In some cases, you will need to limit access to the Docker Volume. You can set a volume as Read Only. Create a Container called db01 and attach a volume with Read Only (RO) access:
|
1 2 |
#On the container host PS > Docker run -it --name db01 --volumes-from iis02:ro nanoserver/iis powershell |
Now, try to create a file on this volume, but the task will fail:
|
1 2 3 4 5 6 7 8 9 10 11 12 13 14 15 16 17 |
#On the db01 container PS C:\> dir .\vol03 Directory: C:\vol03 Mode LastWriteTime Length Name ---- ------------- ------ ---- -a---- 3/3/2018 2:36 PM 16 vol03-from-iis03.txt -a---- 3/3/2018 2:24 PM 32 vol03.txt PS C:\> "Welcome" > .\vol03\vol03-from-db01.txt out-file : Access to the path 'C:\vol03\vol03-from-db01.txt' is denied. At line:1 char:1 + "Welcome" > .\vol03\vol03-from-db01.txt + ~~~~~~~~~~~~~~~~~~~~~~~~~~~~~~~~~~~~~~~ + CategoryInfo : OpenError: (:) [Out-File], UnauthorizedAccessException + FullyQualifiedErrorId : FileOpenFailure,Microsoft.PowerShell.Commands.OutFileCommand |
Copying Data from the Container Host to a Container
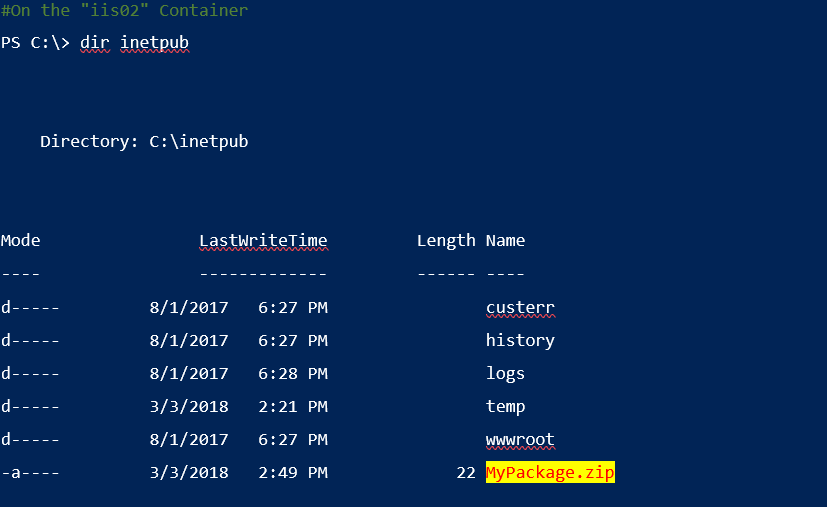
Here is another interesting way to share data between the container host and a Windows Container. The Docker cp utility copies from the container’s file system to the container host or the reverse, from the container host to the Container. Create a new file, MyPackage.zip in the C:\Packages folder. Then copy the Zip file from the container host to the iis02 Container:
|
1 2 3 |
#On the container host PS > Docker cp C:\Packages\MyPackage.zip iis02:/inetpub PS > Docker attach iis02 |
The Docker Attach command will connect to the iis02 Container. Be careful, you must press ENTER twice to connect to your container. Check to see if the package exists in the Container:
Creating a Docker Volume from a DockerFile
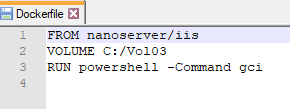
You can mount a Docker Volume using a DockerFile. In the following example, you will create a nanoserver/iis image using the VOLUME keyword to mount a folder. Be sure to create the C:\Volume directory on the host if it doesn’t exist.
|
1 2 3 4 5 |
#On the container host PS > New-Item C:\Volume\Dockerfile -ItemType file PS > Add-Content -Path "C:\Volume\Dockerfile" -Value "FROM nanoserver/iis" PS > Add-Content -Path "C:\Volume\Dockerfile" -Value "VOLUME C:/Vol03" PS > Add-Content -Path "C:\Volume\Dockerfile" -Value "RUN powershell -Command gci" |
Navigate to the directory where this Dockerfile is located and run the following command:
|
1 2 3 4 5 6 7 8 9 10 11 12 13 14 15 16 17 18 19 20 21 22 23 |
#On the container host PS C:\Volume> docker build -t volumeimg . Sending build context to Docker daemon 2.048kB Step 1/3 : FROM nanoserver/iis ---> 234e90a5d146 Step 2/3 : VOLUME C:/Vol03 ---> Using cache ---> 9acd2015fab2 Step 3/3 : RUN powershell -Command gci ---> Running in 98c4a64d54e2 Directory: C:\ Mode LastWriteTime Length Name ---- ------------- ------ ---- d----- 3/3/2018 4:37 PM inetpub d----- 3/3/2018 4:37 PM Program Files d----- 7/16/2016 12:09 PM Program Files (x86) d-r--- 3/3/2018 4:37 PM Users d----l 3/3/2018 4:37 PM vol03 d----- 3/3/2018 4:37 PM Windows -a---- 11/20/2016 11:32 AM 1894 License.txt […] Successfully tagged vol3:latest |
A custom Docker image has been created:

So now, every container created using this image will automatically mount the volume:
|
1 2 3 4 5 6 |
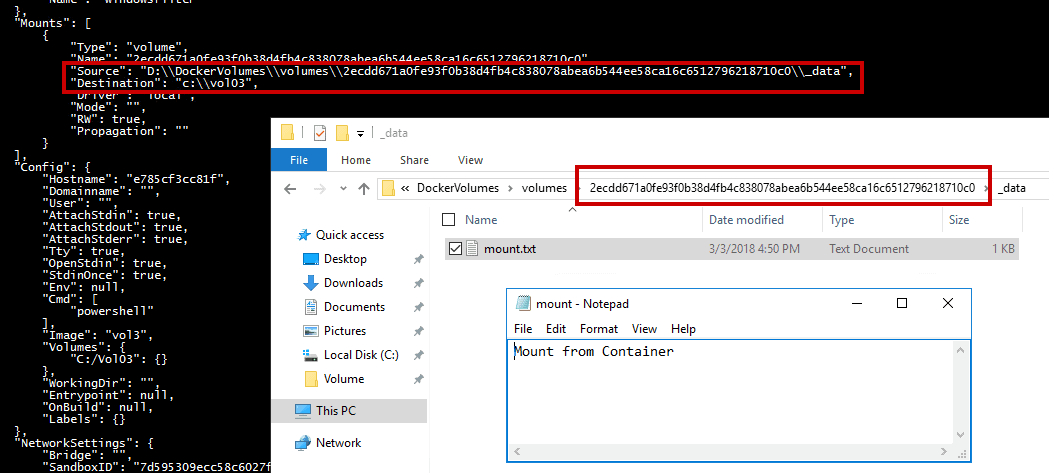
#On the container host PS > docker run --rm -it --name srv01 volumeimg powershell #On the "srv01" Container PS > cd vol03 PS C:\vol03> "Mount from Container" > mount.txt |
A new file called mount.txt has been successfully created on the container host. You can confirm the mount path with Docker inspect:
This method is very useful in DevOps mode or when you want to deploy multiple Windows Containers in bulk mode. The Volume will be mounted automatically during the deployment.
Linux Containers on Windows?
Another great improvement is Linux containers. You can now run Linux containers on a Windows container host. However, it can only be run in a dev/test environment because it is still in experimental version. So, what does it mean? Well, you will be able to deploy your Windows Containers Host, then install the Docker engine, and finally run a Linux container or a Windows container. Thanks to LinuxKit and the Moby Project, you can use Linux containers on Windows using one of the following Windows builds to support the feature:
- Windows 10 Fall Creators Update
- Windows Server 2016 1709 (new core edition)
In order to run Linux containers on Windows, Microsoft uses the Linux Containers on Windows (LCOW) feature. LCOW will use Hyper-V isolation, so you must install Hyper-V before using Linux containers:
|
1 2 |
#On the container host PS > Install-WindowsFeature Hyper-V -IncludeManagementTools -Restart |
Then the Docker daemon runs as a Windows process, and every time you start a Linux container, Docker launches a minimal Virtual Machine with a Linux kernel. However, the ‘VM’ is not user-visible in the Hyper-V console! It is still not possible to run Windows and Linux Docker containers side-by-side. It means that you must enable LCOW to run Linux containers, and disable LCOW to run Windows containers. If you work on Windows 10, please note that LCOW support is only available on the Edge channel.
Start by enabling the LCOW feature with the following commands.
|
1 2 3 |
#On the container host PS > [Environment]::SetEnvironmentVariable("LCOW_SUPPORTED", "1", "Machine") PS > Restart-Service Docker |
The feature has been enabled, so you can create a Linux container based on Ubuntu using the following command:
|
1 2 |
#On the contaner host PS > Docker run –it ubuntu |
At this step, you are running in the Ubuntu container on your Windows Server:
|
1 2 3 4 5 |
root@58e001fba499:/# pwd / root@58e001fba499:/# mkdir /tmp/Linux root@58e001fba499:/# ls /tmp linux |
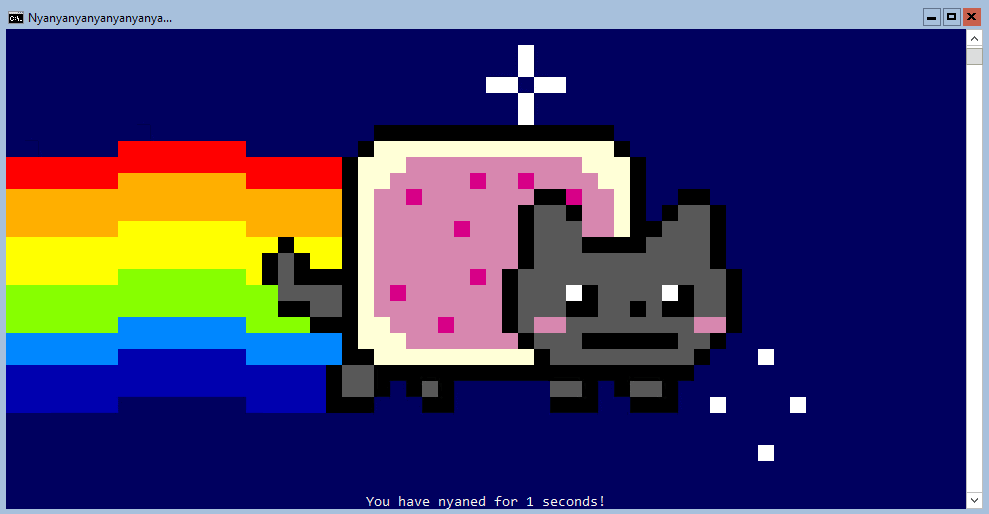
To finish with a funny Linux container, you can run the NyanCat container:
|
1 2 |
#On the container host PS > Docker run -it supertest2014/nyan |
Conclusion
This article of the series discussed the new Docker versions that you can use depending your needs. The first one is Docker CE which is for development and testing environment, and the second one is Docker EE which is for production use. Then you saw:
- How to share data between the container host and a container.
- How to share data between two containers.
And to finish, you ran Linux containers on a Windows container host, which is a great improvement for sysadmin and developers. Currently, LCOW is still in beta and not supported In a production environment so please use it for dev purposes.
In the next article, I will discuss about how to manage and orchestrate our Windows containers with Kubernetes and Swarm.
Simple Talk is brought to you by Redgate Software
FAQs: Working with Windows Containers and Docker: Save the Data
1. How do you persist data in Docker containers on Windows?
Use Docker volumes – storage outside the container filesystem. Create with docker volume create, mount with -v flag. Data persists even after container removal. Share a single volume between multiple containers.
2. Can you share data between Docker containers?
Yes. Create a named volume, mount to multiple containers simultaneously. Each can read/write. Useful for shared config, common data stores, log aggregation.
This document contains proprietary information and is protected by copyright law.
Copyright © 2026 Red Gate Software Limited. All rights reserved
Load comments