
This article discusses how to write a simple console program for Insurance price prediction using ML.NET. This article does not discuss machine learning basics and types of algorithms. The focus of this article is how to use ML.NET for predicting the price of insurance.
Machine Learning in insurance
Machine Learning (ML) is all about programming the unprogrammable. For example, if you want to predict an insurance price, ML helps to predict the price. An insurance price depends on various features such as age, type of coverage, amount of coverage needed, gender, body mass index (BMI), region, and other special factors like smoking to determine the price of the insurance.
Traditionally most insurance companies employ actuaries to calculate the insurance premiums. Actuaries are business professionals who use mathematics and statistics to assess the risk of financial loss and predict the likelihood of an insurance premium and claim, based on the factors/features like age and gender, etc. They typically produce something called an actuarial table provided to an insurance company’s underwriting department, which uses the input to set insurance premiums. The insurance company calculates and writes all the programs, but it becomes much simpler by using Machine Learning.
Machine Learning allows a program to learn from a set of data to figure out particular problem characteristics. The ML program looks at different factors like gender, smoking, the number of children, and region to find the overall highest medical charges and determine the price by using specific algorithms based upon the requirement. Smokers and customers with more children tend to have higher medical costs. Hence premiums will be more for those groups. As ML trains more and more data, the ML program becomes more intelligent and smarter in predicting the exact price. In the end, you have a function/program to call to get the insurance premium for a particular person based upon the input factors provided. You don’t need to write all of these constructs yourself. ML program looks at all the sets of data provided and trains/learns, and it gives a function, and this function is a machine learning model that you can use in your application.
ML models are used for image detection, detecting audio, text-based scenarios, sentiment analysis, sales forecasting, movie recommendation, anomaly detection, and much more.
Machine Learning workflow
There are three key tenants of ML workflow:
- Prepare the data. Load the data from the database or CSV files. Extract/Identify the key features (input and output parameters) relevant to the problem you will solve or predict the outcome.
- Build and train ML model. Here you can evaluate different algorithms, settings and see which model is best for your scenario.
- Once the model is ready, consume the model in your application.

ML.NET Introduction
ML.NET is a Machine Learning framework for .Net Developers for building ML models. ML.NET is an open-source and cross-platform machine learning framework.
Key highlights of ML.NET:
- Built for .Net Developers. .Net developers can use existing C# or F# skills to include ML.NET in any .Net application.
- ML.NET allows custom machine learning models to be created quickly and easily with MODEL Builder and Command Line Interface (CLI) tools. And it uses automated ML as a way to increase the performance of the models that users get.
- The Framework and ecosystem are relatively extensible. You can bring in other popular libraries such as TensorFlow and ONNX. You can build ML Models for various scenarios like Sentiment Analysis, Product Recommendation, Price Prediction, Customer Segmentation (Identify groups of customers with similar profile), Object Detection, Fraud detection, Spike Detection, and Change Point Detection, Image Classification, and Sales Forecasting.
- The Framework is trusted, private and proven at scale. That means Framework runs locally in your app. All the training happens within your app.
ML.NET for predicting insurance price/premium
Price prediction determines the insurance price based on some input data such as age, gender, smoking, body mass index (BMI), number of children, and region. Premium/Price prediction is an example of a Regression Machine Learning task that can predict a number.
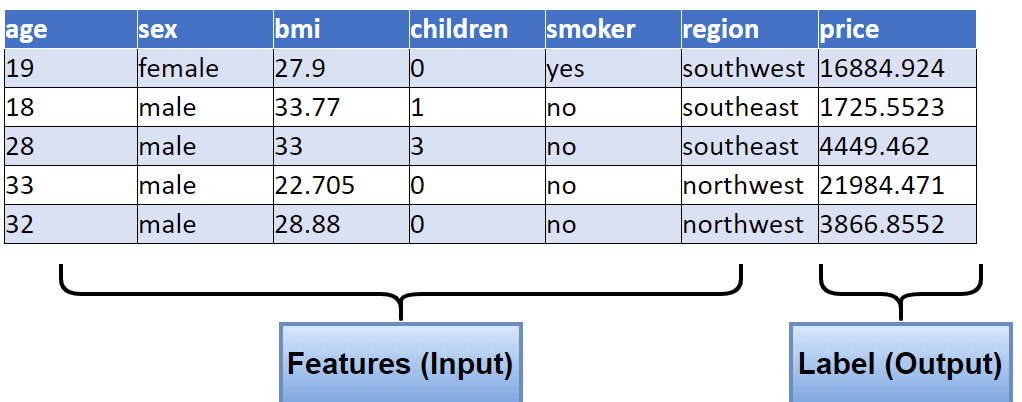
The prediction for Insurance premium works as follows. You have some features/input (age, gender, smoking, etc.) which go into the training process. These features can determine how high or low is the premium amount. For example, the younger people are less likely to need medical care, so their premiums are generally cheaper, and the premium is higher for smokers. The Label/Output is the Premium/Price that you want to predict, which is the outcome of calling the Machine Learning Model.
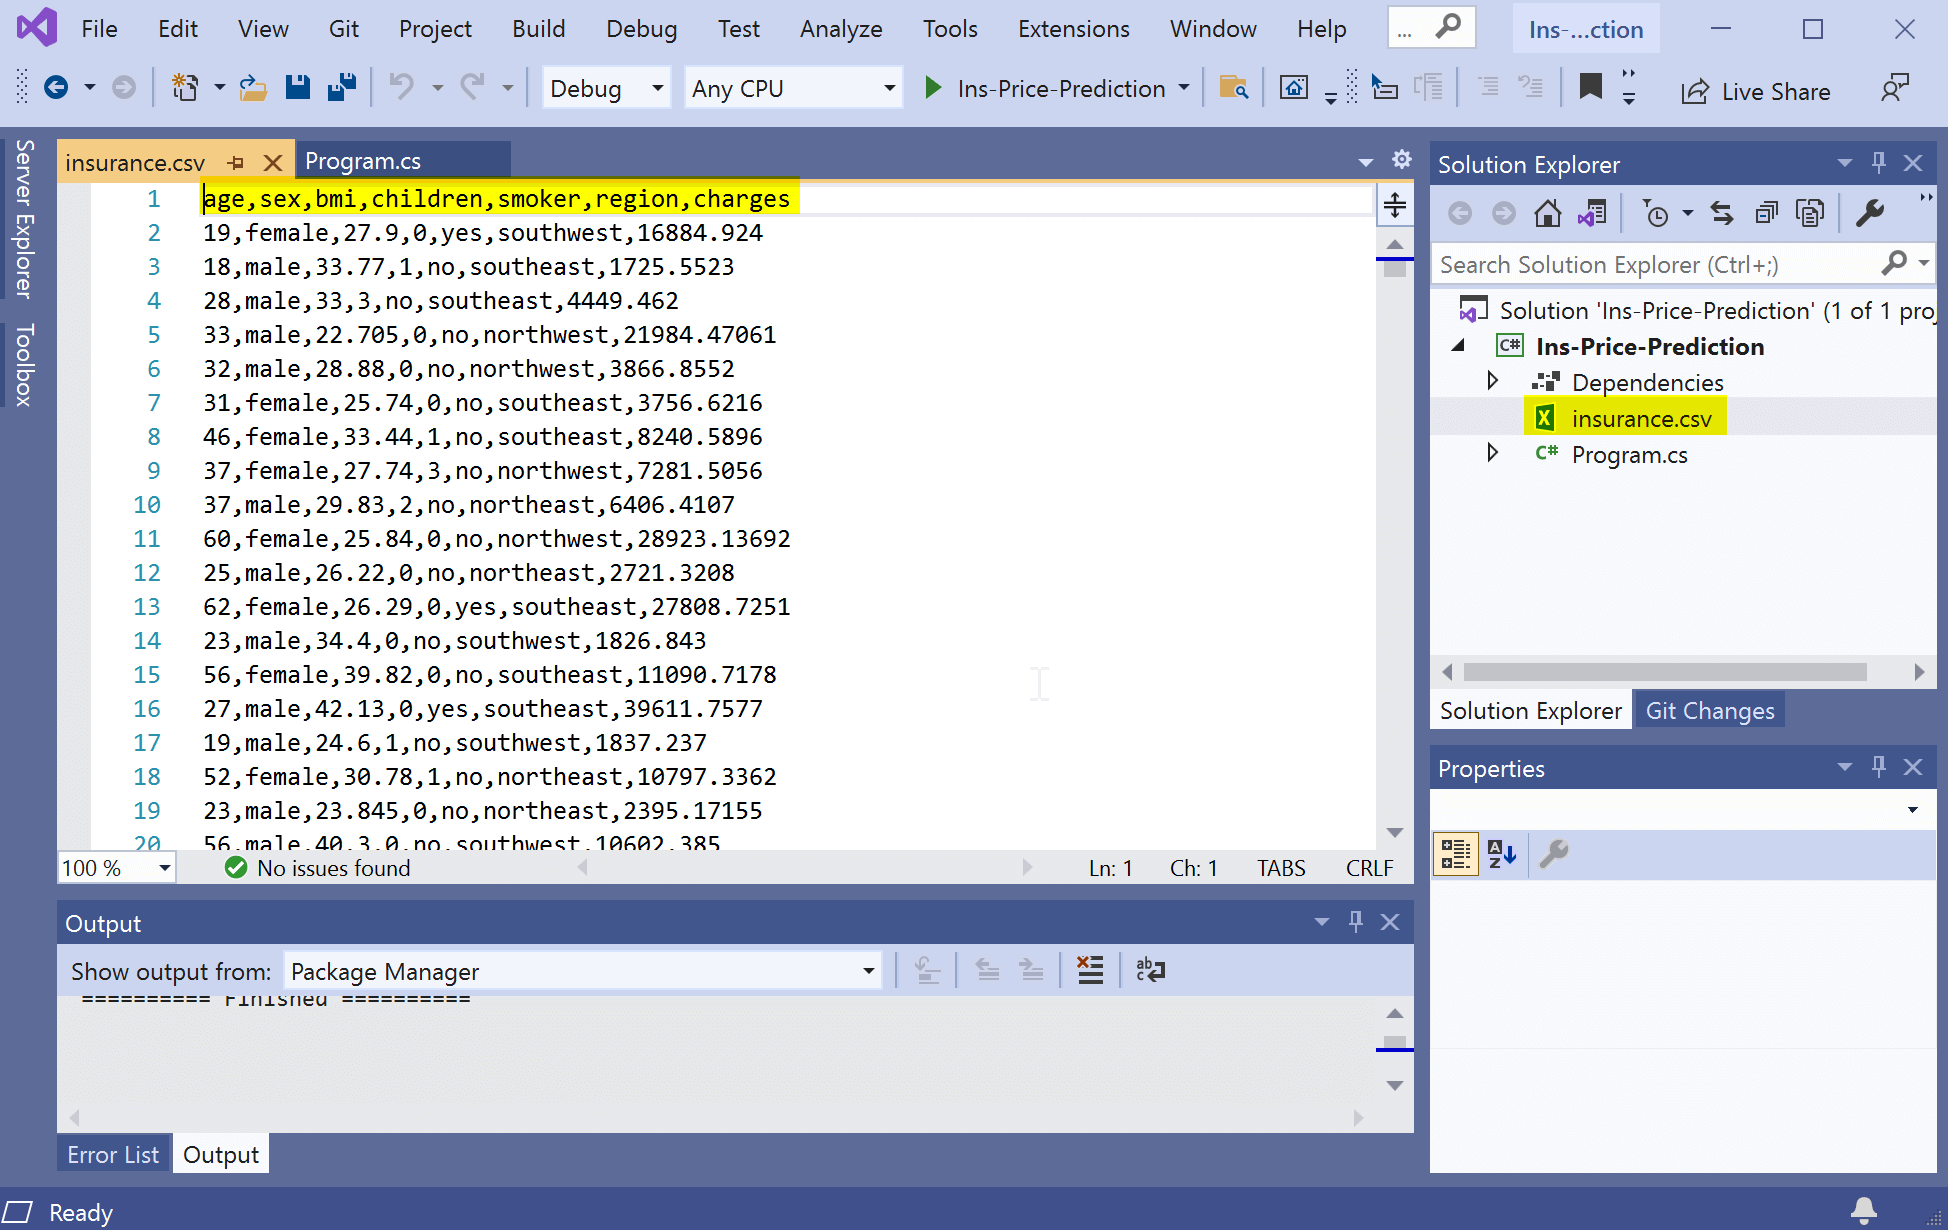
The below image is an example of insurance data which is an input and output to the model:
How to get started with ML.NET
There are three ways to begin with ML.NET
- API Model: You can start ML.NET through a Framework API and write code in C# or F#
- GUI Model: Use ML.NET Model builder in Visual Studio.
- CLI Model: For cross-platform development like Mac and Linux, use ML.NET CLI.
Let’s get started with API Model for predicting the insurance premium using ML.NET Framework.
I’m using Microsoft (MS) Visual Studio 2019 and creating a Console Application. Be sure that you have the latest version of VS and that .NET 5 SDK is installed.
Open MS Visual Studio, create a new project -> Select Console Application for C#.

Provide the name of the project
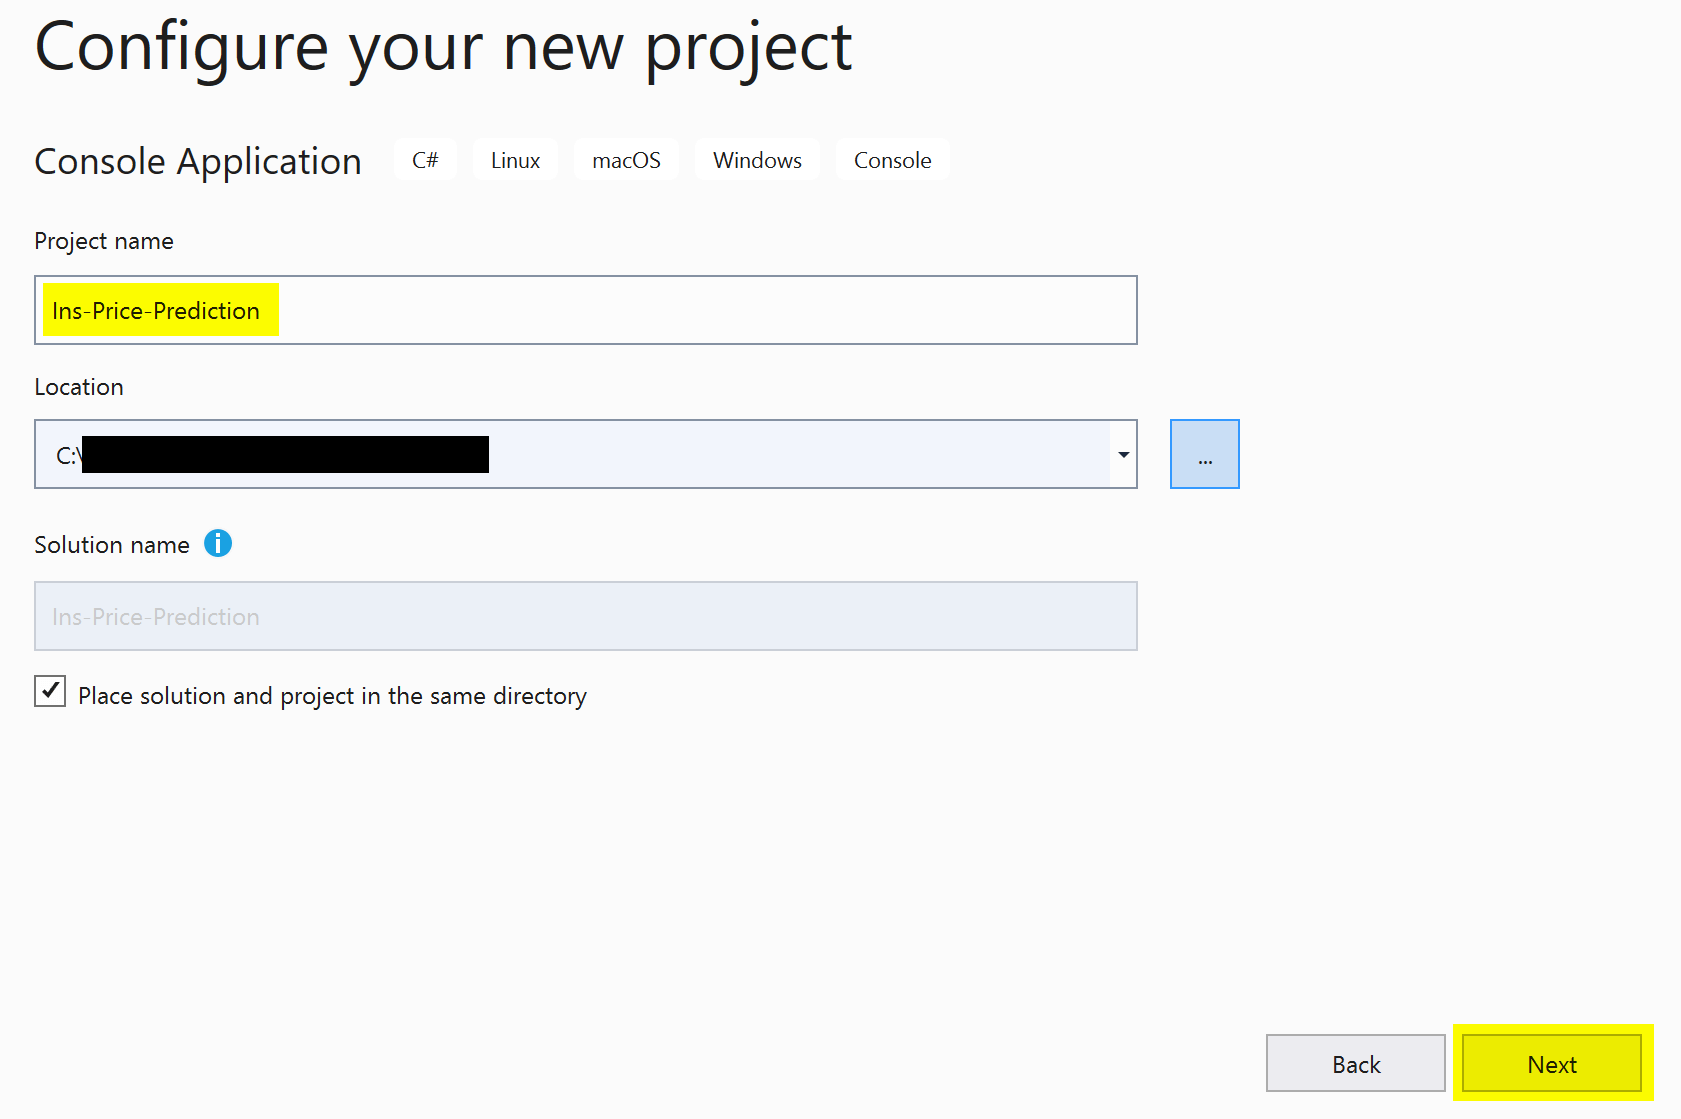
Select the Target Framework from the dropdown and press the Create button.
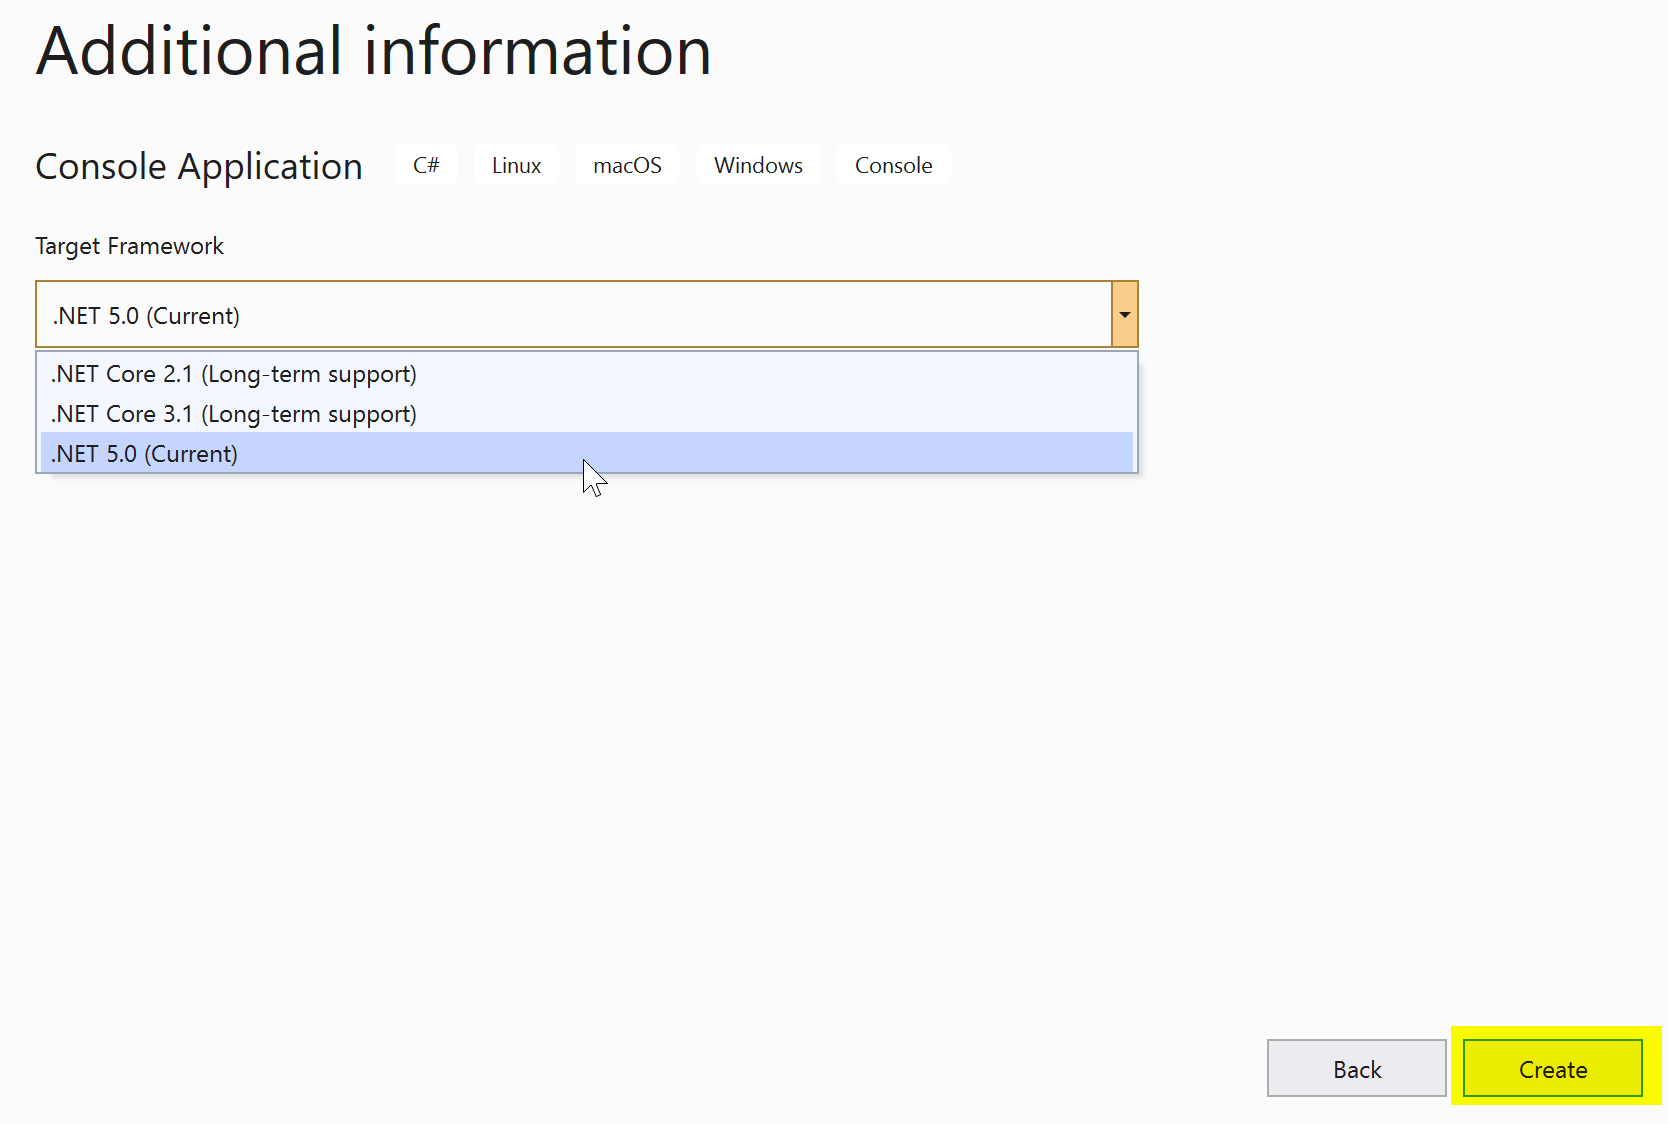
The console application is created.
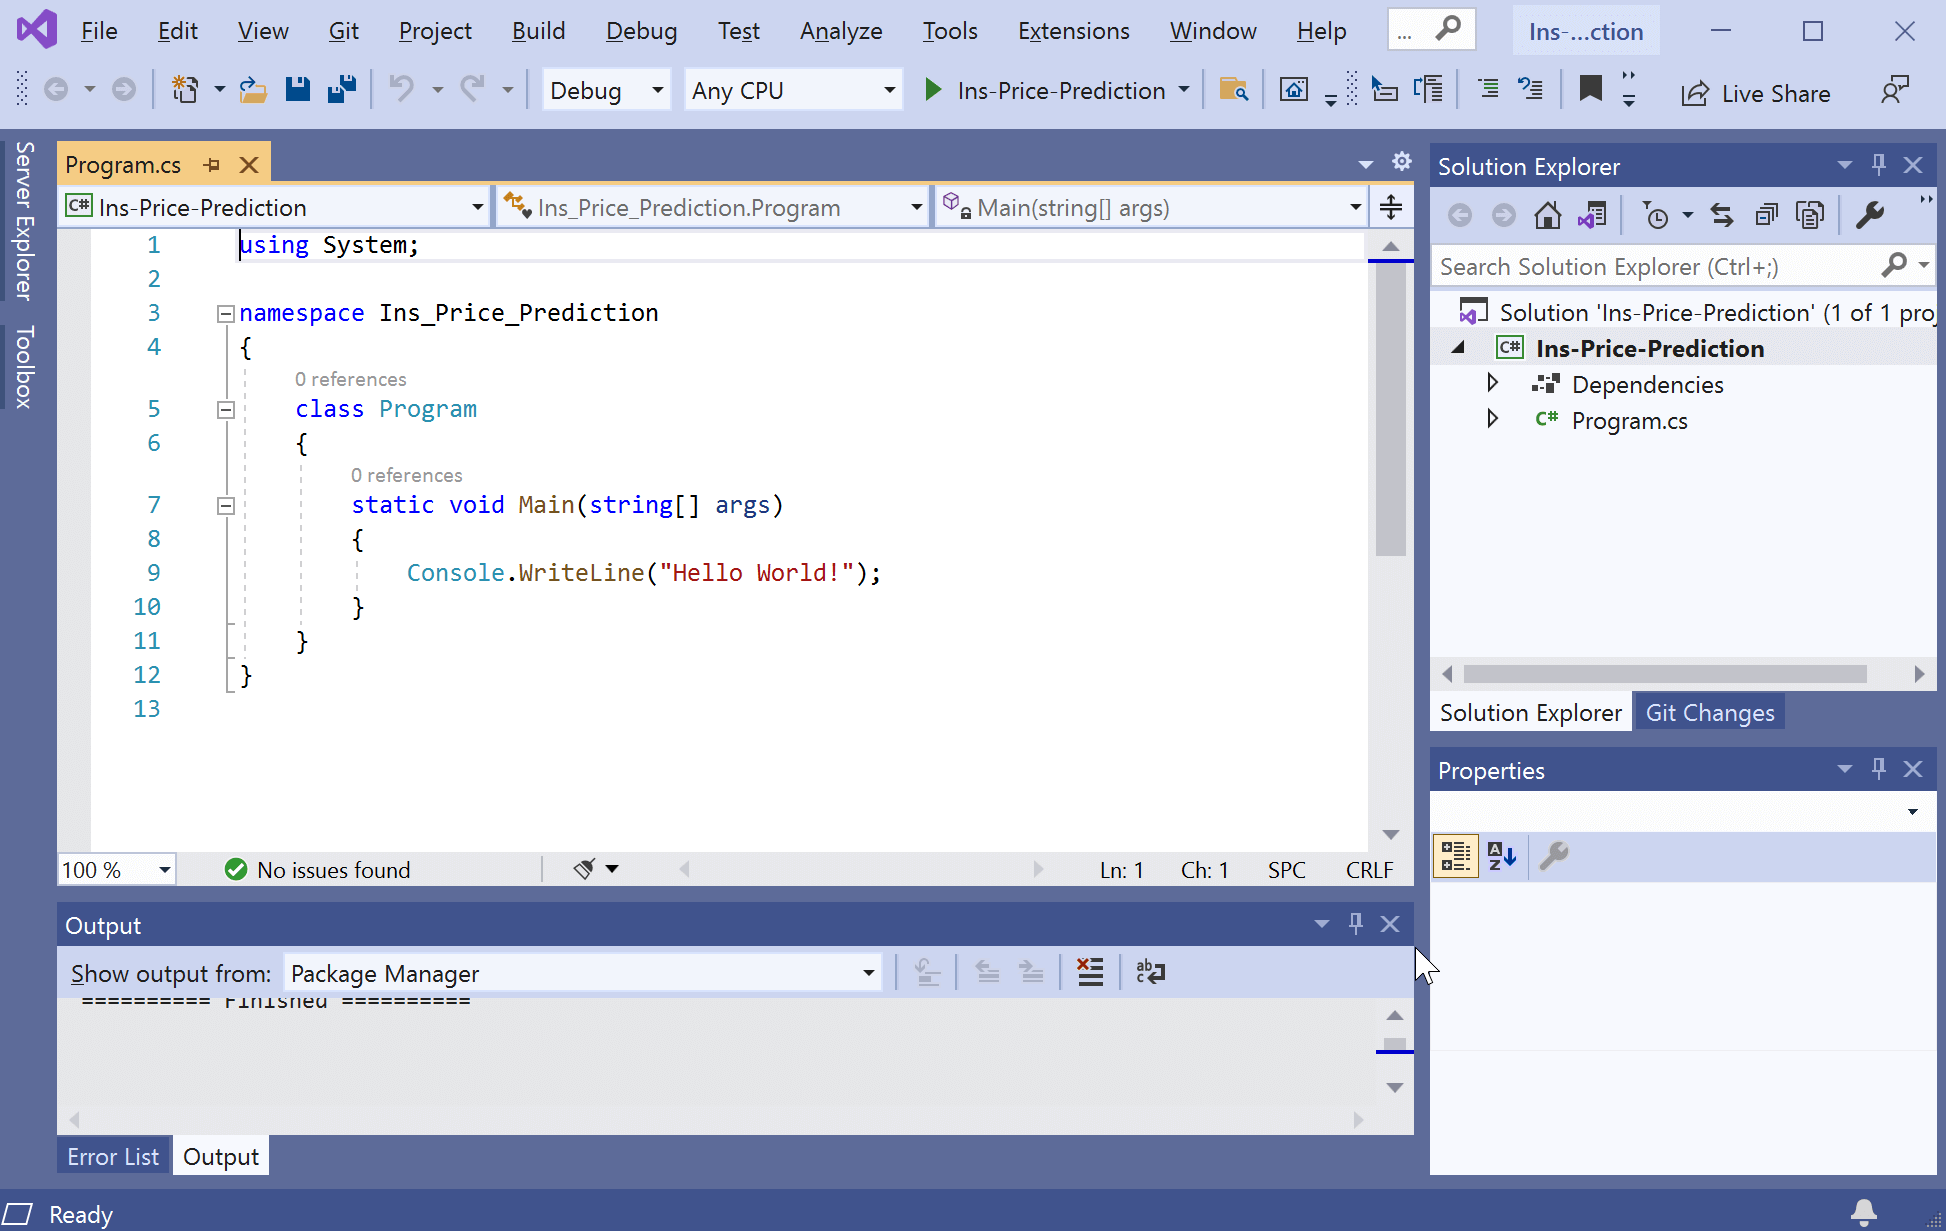
Sample/test insurance data for the ML model is needed. Download the insurance.csv file data from https://www.kaggle.com/mirichoi0218/insurance and copy the file into the console project. You can see the data with a header (age, sex, BMI, etc.) and separate it by comma delimiter when opening the file.
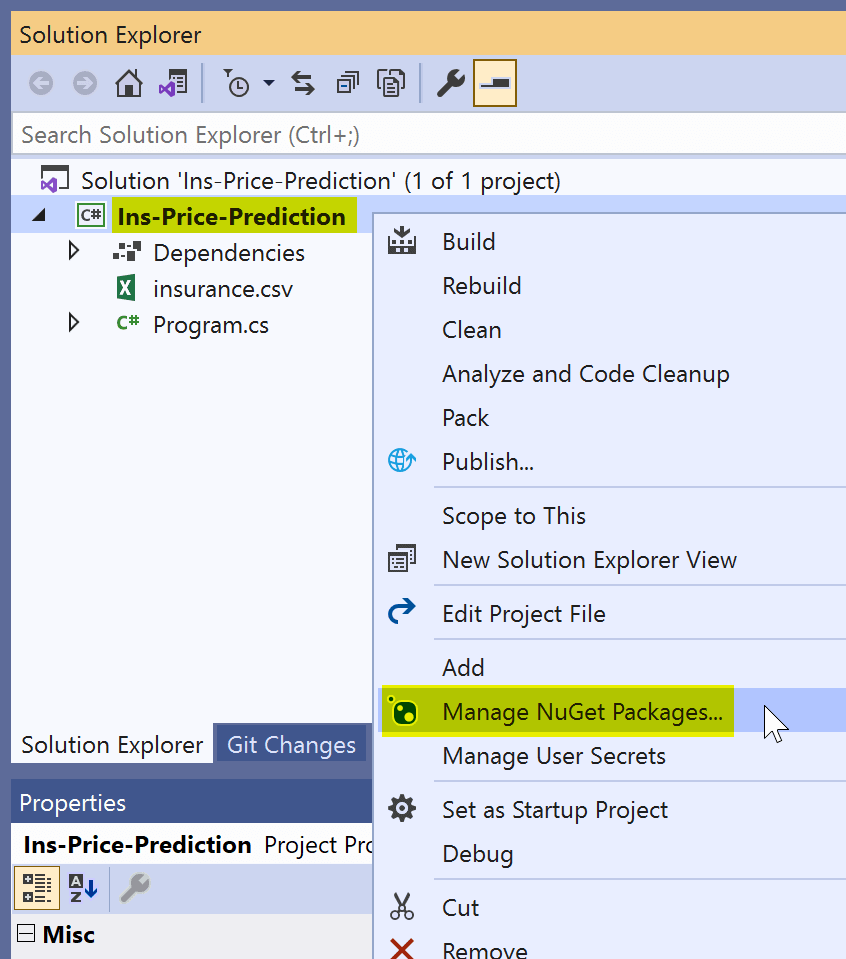
Install required ML packages from NuGet. In the Solution Explorer, Right-click on the project and select “Manage NuGet Packages.”
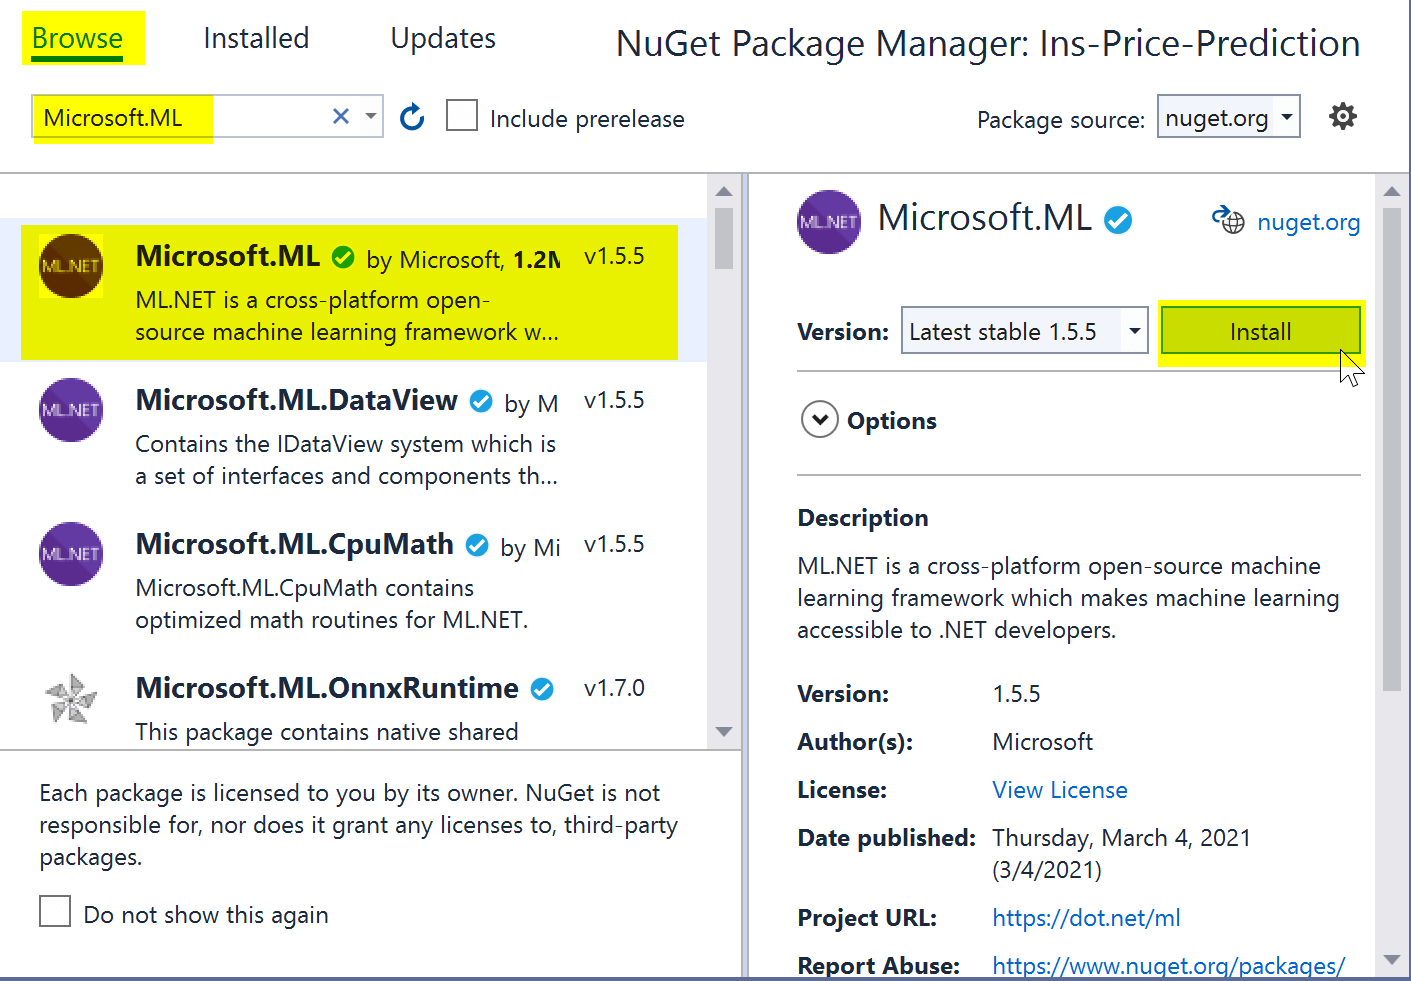
Install the Microsoft.ML package.
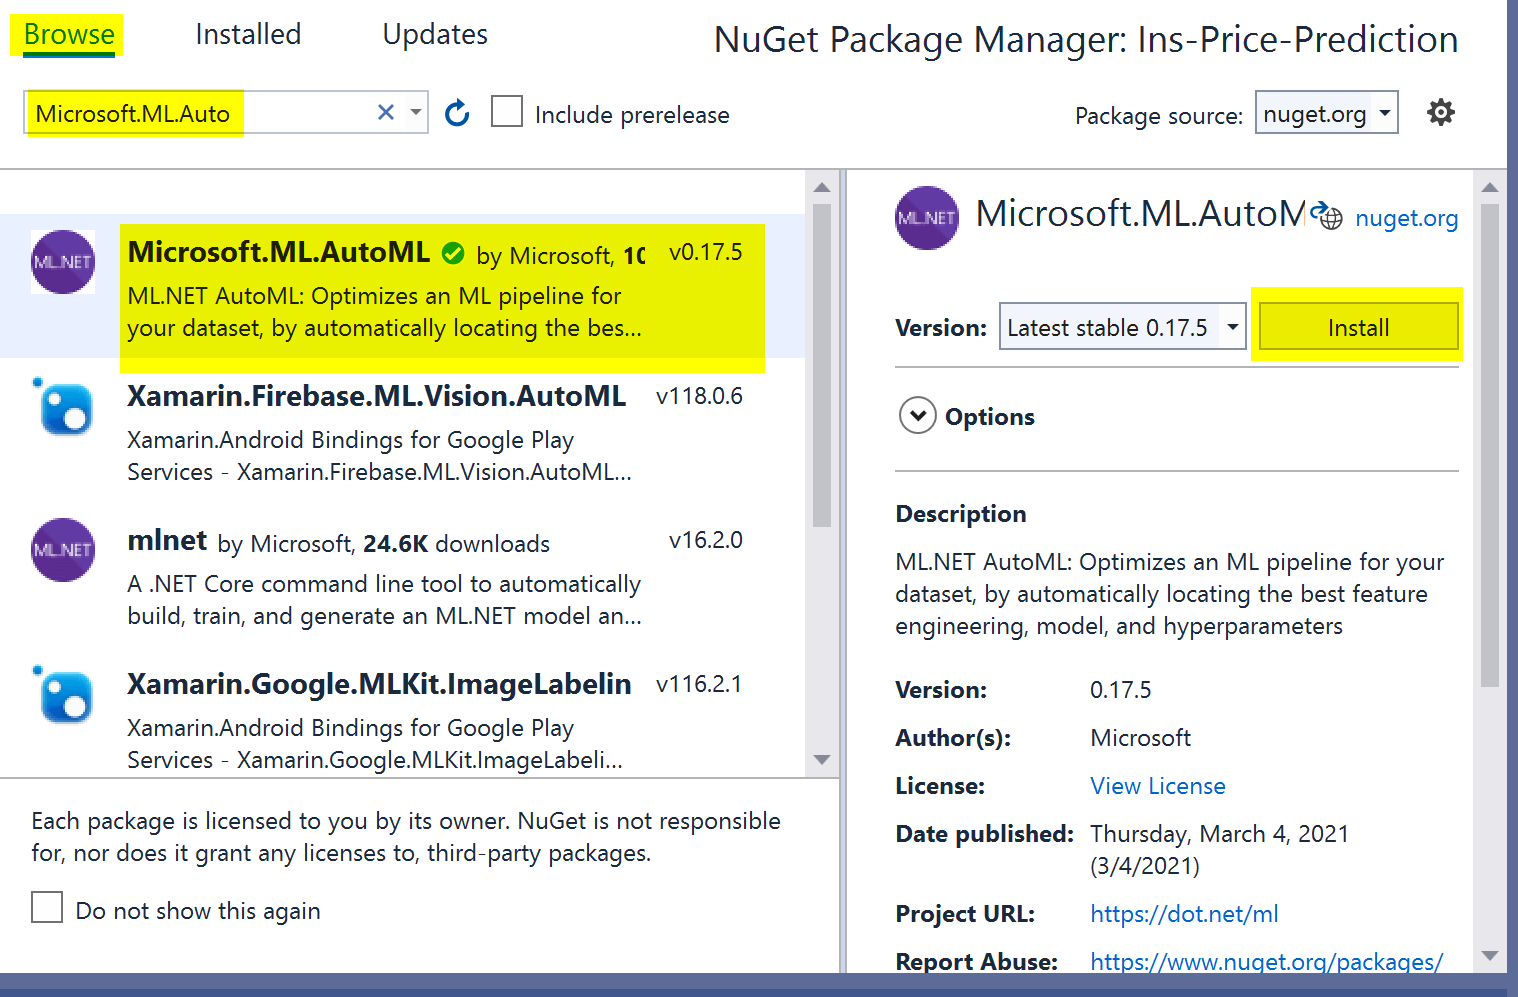
Also install the Microsoft.ML.AutoML package. This package optimizes an ML pipeline for your dataset by automatically locating the best feature engineering, model, and hyperparameters.
Note: I am using this package to figure out the best algorithm for price prediction. If you are familiar with or decided to go with a particular algorithm, this package is not needed.
Adding the code
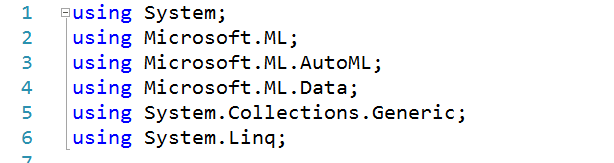
The completed Program.cs file can be found here. First add the required using statements:
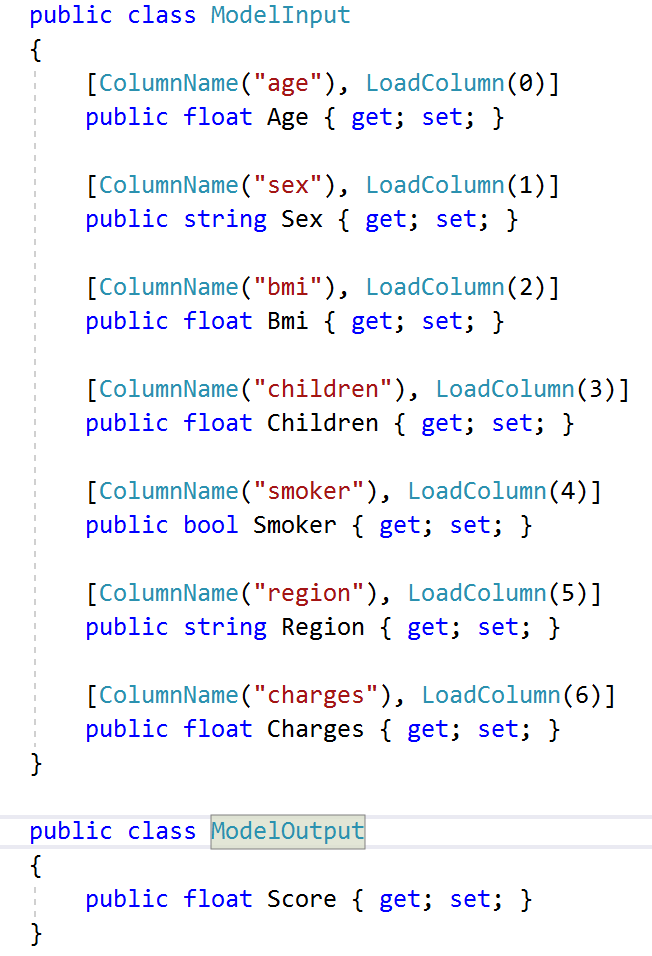
Add ModelInput and ModelOutput classes to Program.cs. The ModelInput class contains the properties to match with the headers in the input data file insurance.csv.
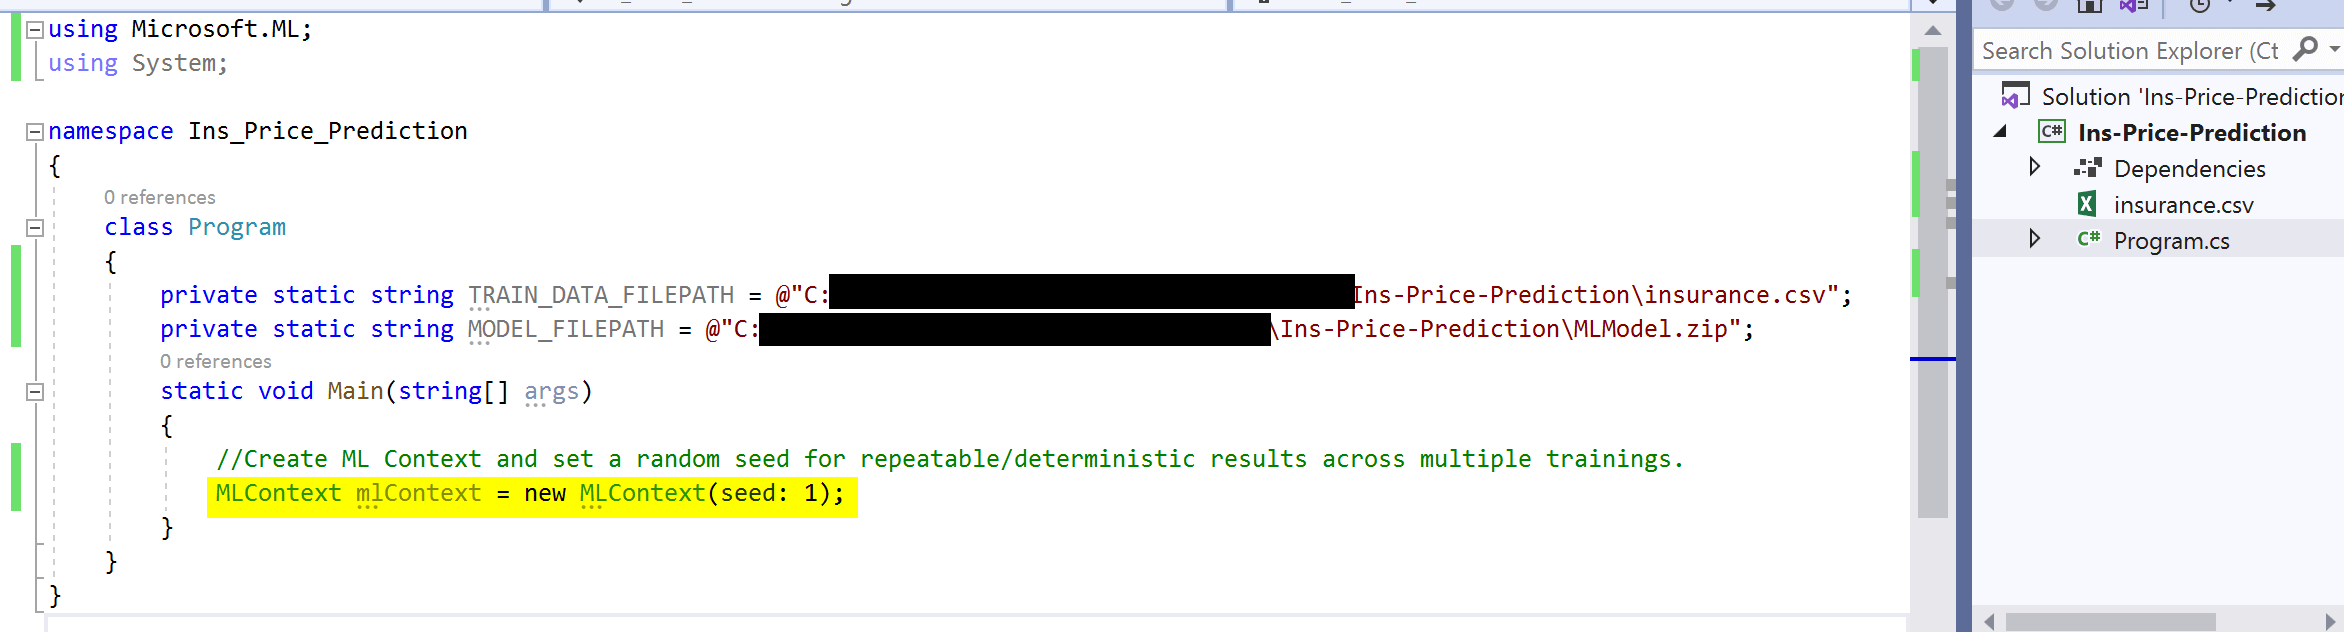
In the Program class, add two constants, TRAIN_DATA_FILEPATH and MODEL_FILEPATH. The first contains the path to the dataset; the latter contains the path to where the model will be saved once training is complete.

Create an MLContext instance. MLContext is a beginner class for all ML.NET operations. It provides all required components to load and prepare data, training, evaluation, and model prediction. MLContext has one optional parameter called a seed. By default, the seed value is null, and MLContext environment is nondeterministic, and the output changes across multiple runs. If you provide a fixed number, then the environment becomes deterministic, and the result is consistent across multiple runs.
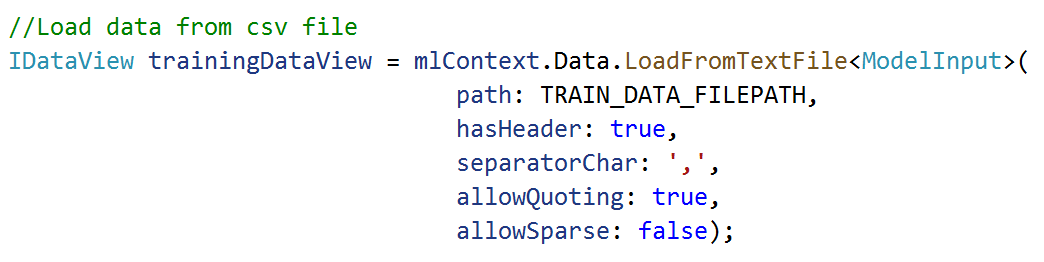
After the MLContext instance is created, you need to load data using DataOperationsCatalog. This class is used to create components that operate on data, load, save, cache, filter, shuffle, and split input data. But this is not part of the model training pipeline.
Load data from CSV file. Provide the required input parameters like whether the CSV file has a header, what delimiter is used to separate the data, etc.
Data is loaded but needs to clean or transform the input data that the model can understand.
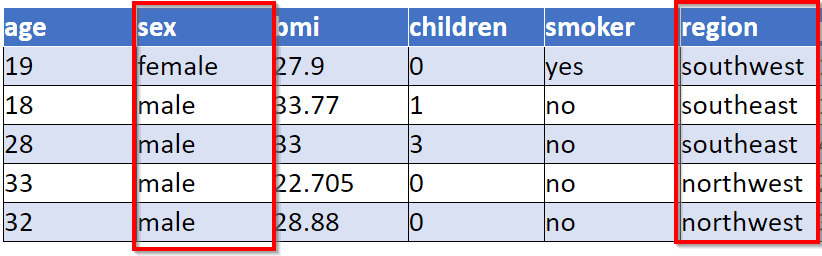
The input data is Categorical data. The categorical data is nothing but variables that contain label values rather than numeric values. The input data ‘sex’ and ‘region’ have label values, and you need to convert them to numerical values, and the number of possible values is often limited to a fixed set. For example, region data have only two values, southwest, and southeast.
Also, the smoker column contains Yes or No, but these data need to transform to True or False.
Below is the code that uses TransformsCatalog to convert smoker column and categorical data columns: sex and region. And finally, concatenate all input columns.

ConversionTransforms: Provides a list of operations to convert data from one type to another.
Ex: Yes to True and No to False
Append: Create a new estimator chain by appending another estimator to the end of this estimator.
CategoricalTransforms: Create instances of categorical data transform components, and you will use them to convert categorical data like sex and region.
ColumnConcatenate: This will concatenate one or more input columns into a new output column.
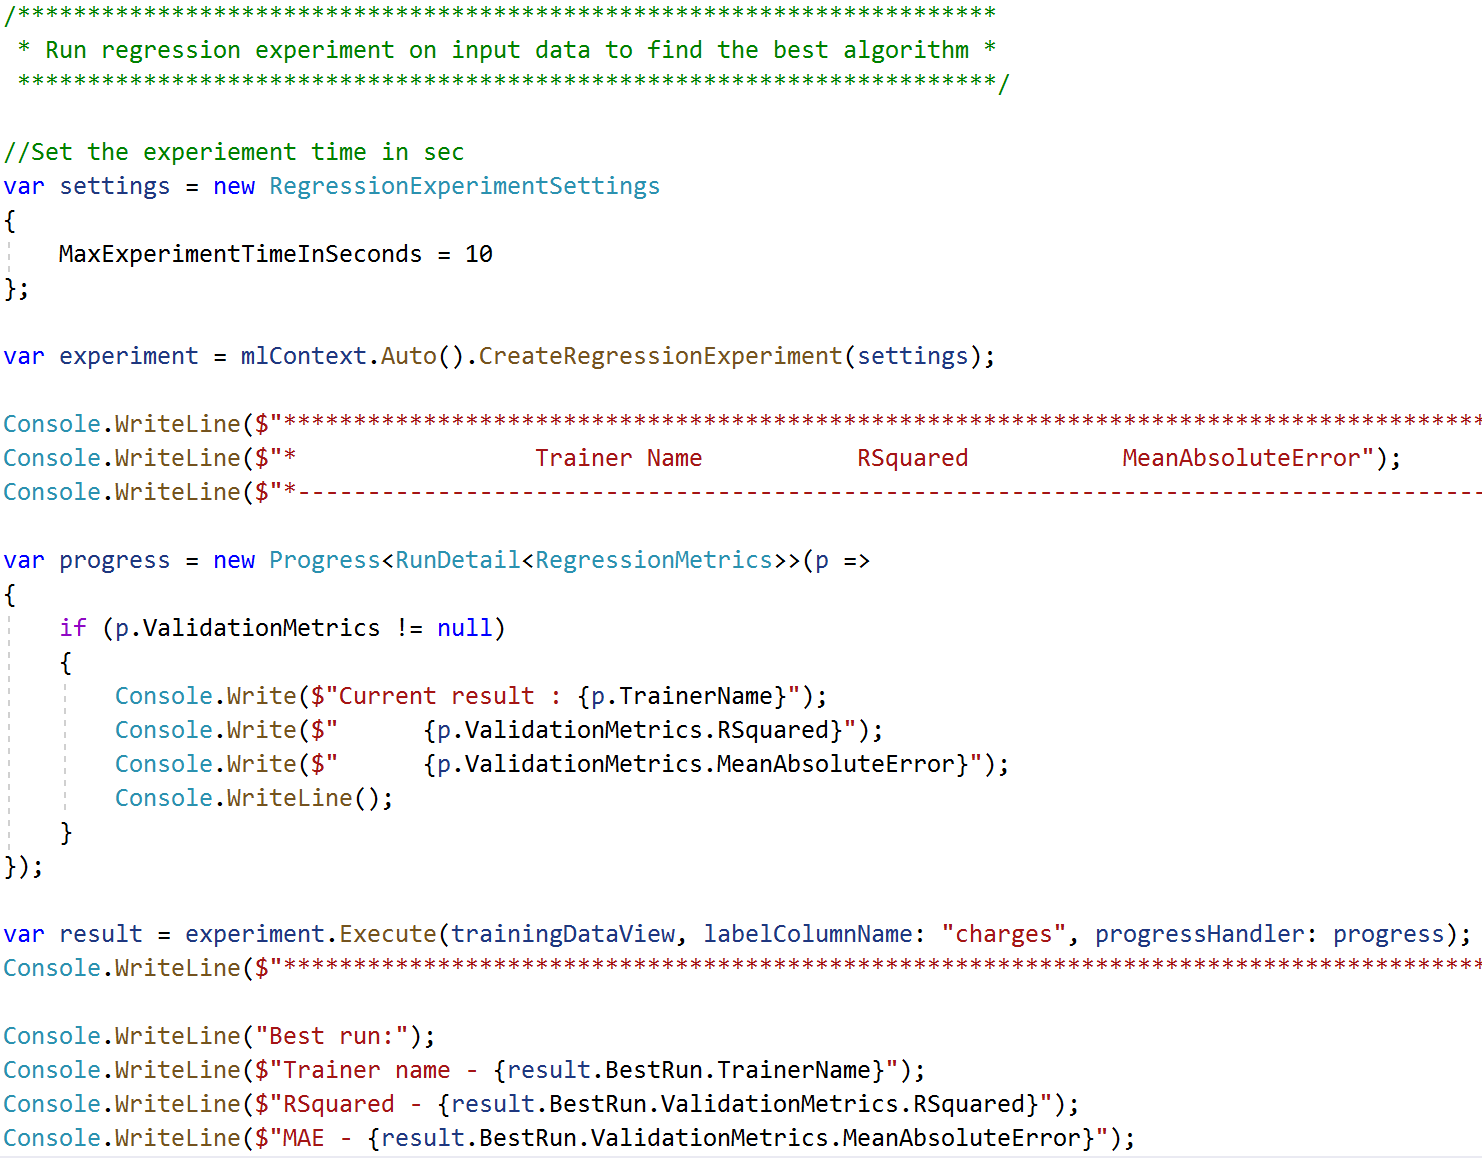
You will need to find the best-performing model with the help of AutoML. Below is the code to explore multiple models. More extended training periods allow AutoML to explore more models and give better accuracy for the machine learning model.
Running the experiment
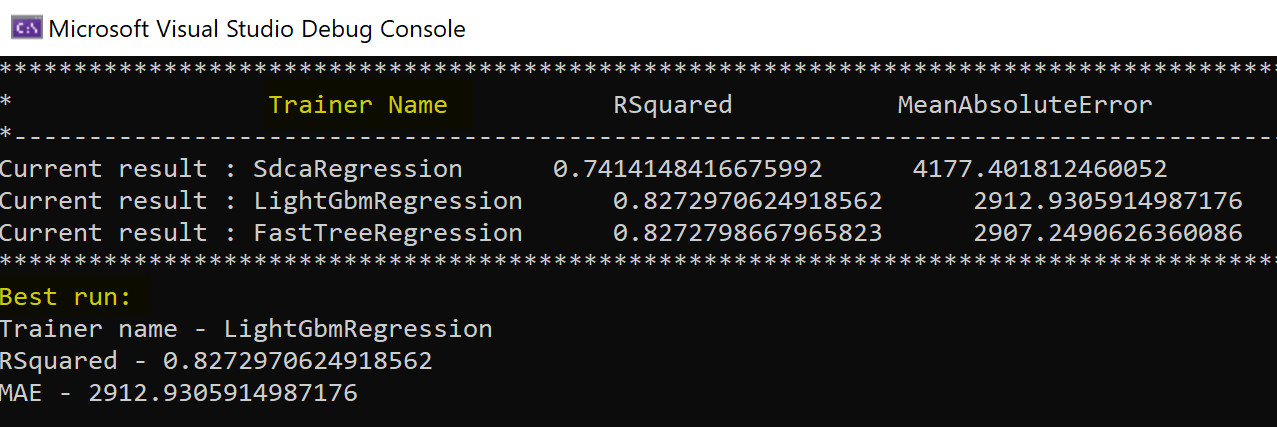
After running the experiment, AutoML explored different training models. Below is the console output window that shows the models evaluated and suggesting the best model: LightGbmRegression for the price prediction based on the input data.
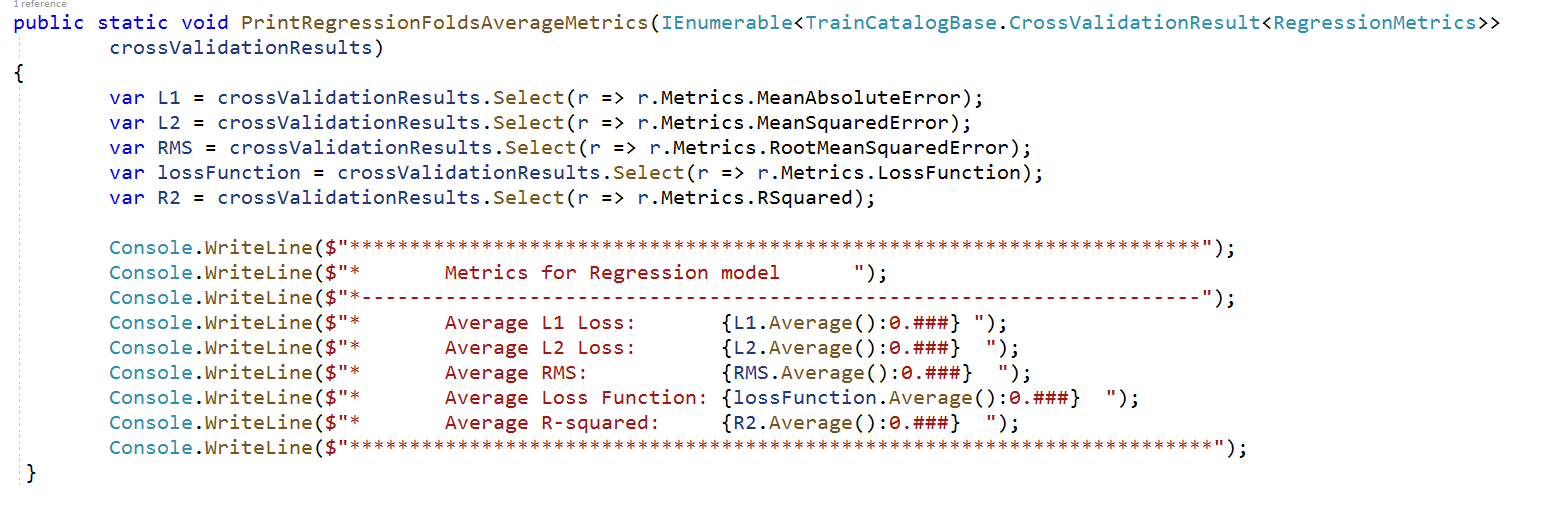
To print the average metrics, add this function:
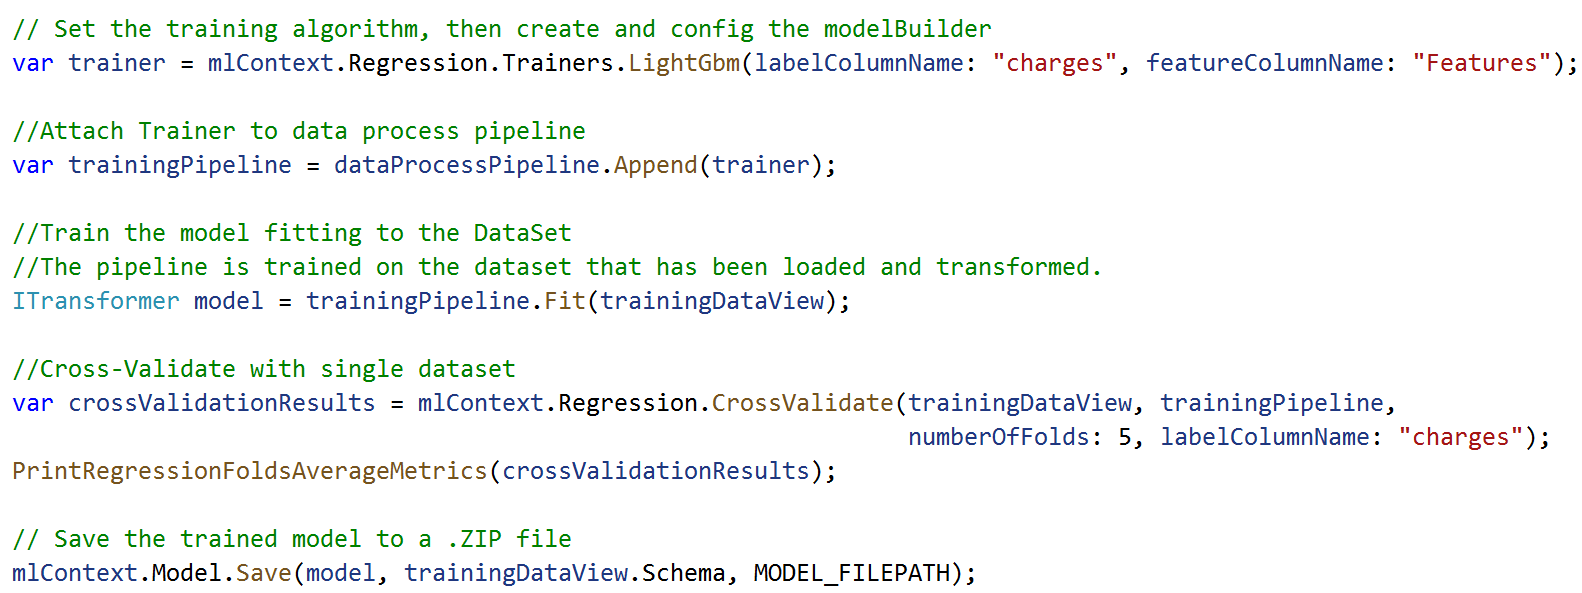
Building the model
Now that I have the best algorithm for price prediction, I will use this algorithm in the code and build the model. Below is the code snippet to create, train, cross-validate, and save a model.
Testing the model
Now the model is created, trained, and saved into a Zip file. Test the trained model by passing sample data. Below is the code snippet to load the model and predict the result using the prediction engine.
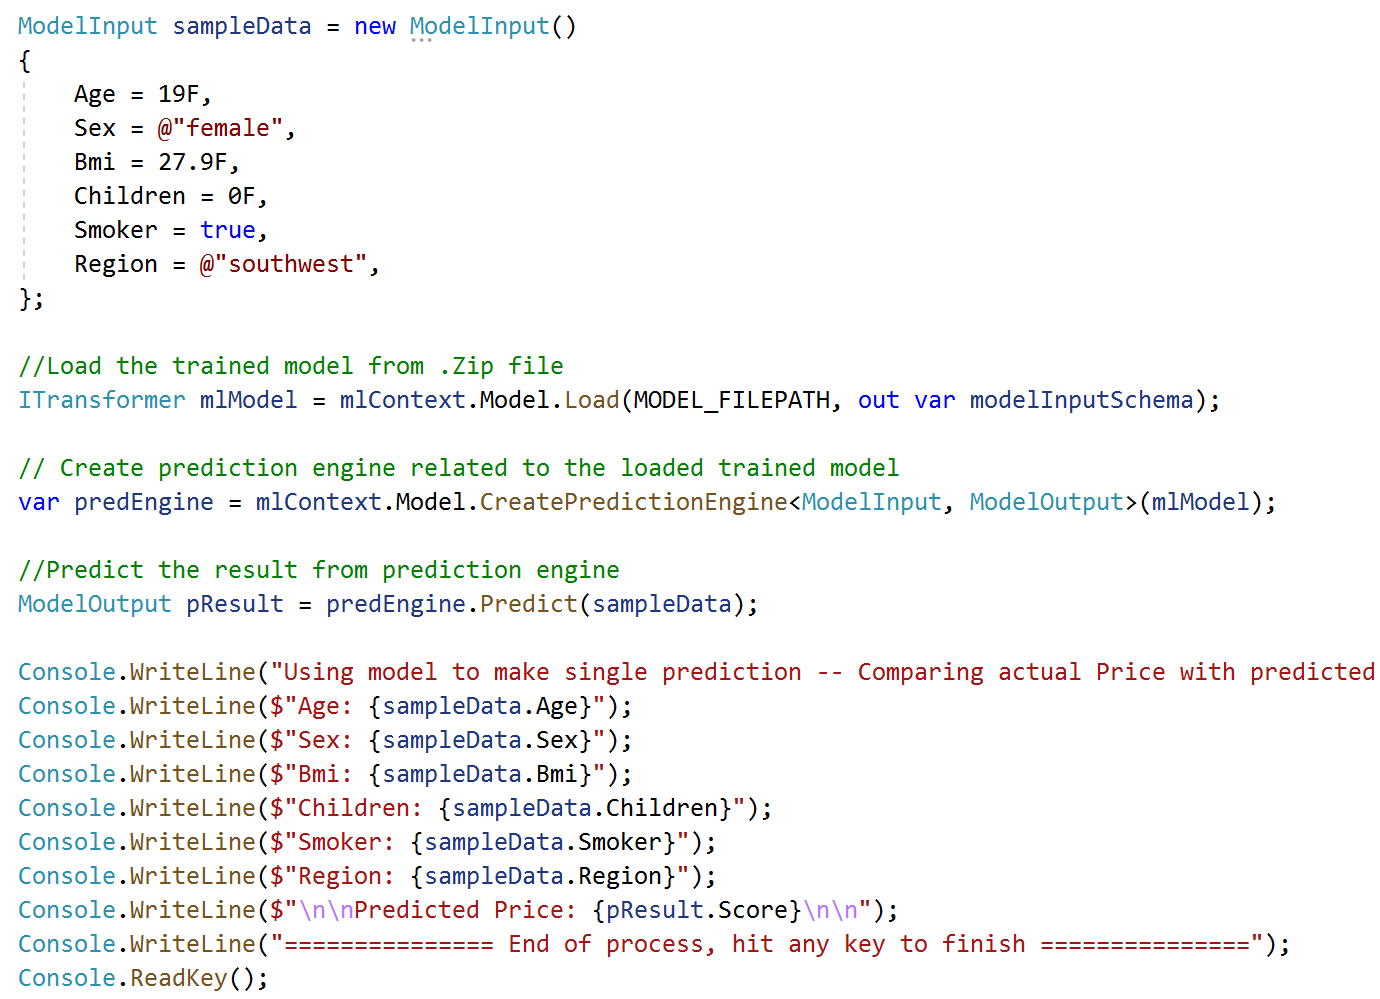
Once you run the model, here is the predicted output on the console window.

Summary
You have seen how easy it is to use ML.NET for price prediction using API Framework. Similarly, you can use the GUI (Model Builder) or CLI model to get the same result.
References
https://dotnet.microsoft.com/apps/machinelearning-ai/ml-dotnet
https://www.kaggle.com/mirichoi0218/insurance
https://www.investopedia.com/ask/answers/09/calculating-premium.asp
https://machinelearningmastery.com/why-one-hot-encode-data-in-machine-learning/
https://github.com/jwood803/MLNetExamples/blob/master/MLNetExamples/AutoML/Program.cs
This document contains proprietary information and is protected by copyright law.
Copyright © 2026 Red Gate Software Limited. All rights reserved
Load comments