

In a typical data warehouse project, data is loaded, transformed and stored into a data store using an ETL (extract – transform – load) process. Recently, there has been a shift to ELT processing, where data is first loaded into a data store (this can be a database, but also a data lake or something similar) and then transformed in-place.
Over the past years, the tool dbt – short for data build tool – has become quite popular in the data engineering world for handling such an ELT process. dbt takes on the role of the “T”, meaning it’s responsible for transforming the data in a certain data store. dbt is not meant for transferring data from one store to another, you’ll need another tool for this, such as Azure Data Factory for example.

dbt is heavily centered around the SQL language and it aims to make the SQL development in an analytics project more efficient, more reusable and in the end better tested and documented. dbt calls people working with their product “analytics engineers”. In this article, you’ll get an introduction to the dbt tool. It will by no means be a complete overview, but you’ll get a good grip of what this tool is supposed to do.
Disclaimer: this article is not endorsed by dbt, nor is the author affiliated in any way with dbt. The author writes from personal experience from having used the tool in data projects.
How to get dbt
dbt comes in two flavors: an open-source and free-to-use, command-line version called dbt core, and a SaaS cloud version called dbt cloud. The cloud version comes with more bells and whistles but has paid plans. However, there’s a free developer license you can use to try the product out.
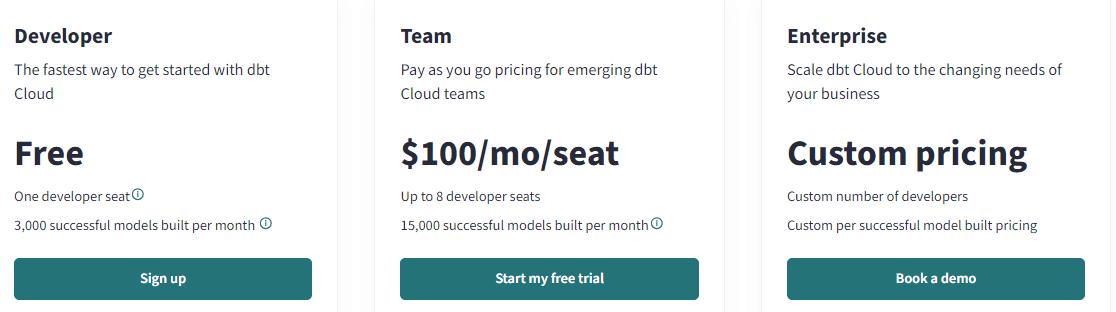
You can find a comparison between the dbt core and cloud versions on here. In this article, I’m using the free dbt cloud license, as it’s easier to use and explain with the user interface.
Create your first project
When you log in for the first time after you’ve created your account, you will be asked to complete the project setup.
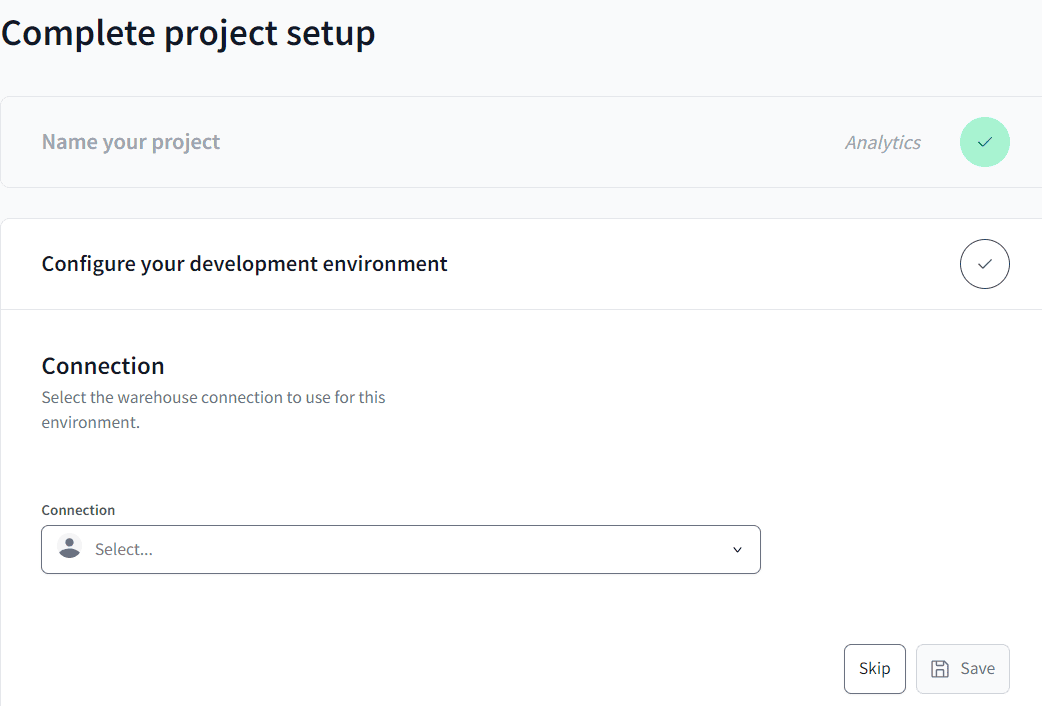
Let’s create a connection to a database. When you want to create a new connection from the dropdown, you will be taken to a new tab where you can define the connection properties. Originally, dbt only supported a couple of databases out-of-the-box, such as Snowflake, Databricks and PostgreSQL, but nowadays there’s a wide range of databases to choose from:
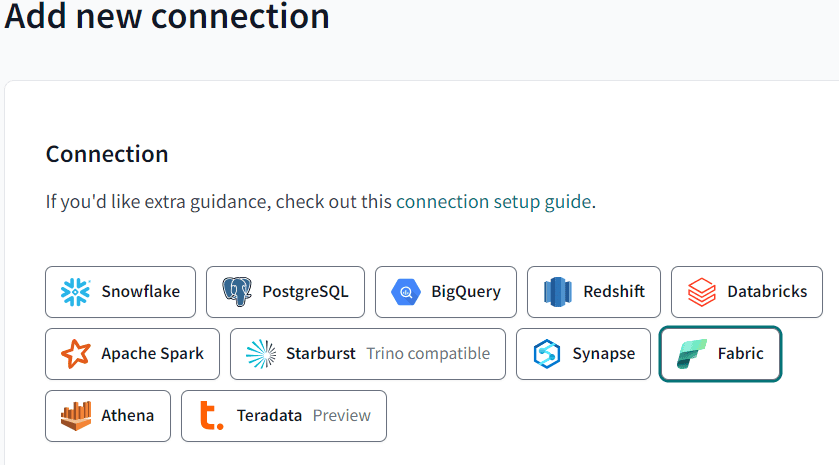
It’s possible to connect other data stores as well (MySQL for example), if there’s an adaptor available. You can find those in the community adaptors. Let’s create a connection to Microsoft Fabric. Since dbt is a SQL-based tool which will create tables and views, you are implicitly restricted to the warehouse. You’ll be asked to specify the server name, which you can find the warehouse settings, and the database name. You can leave the default port as is.

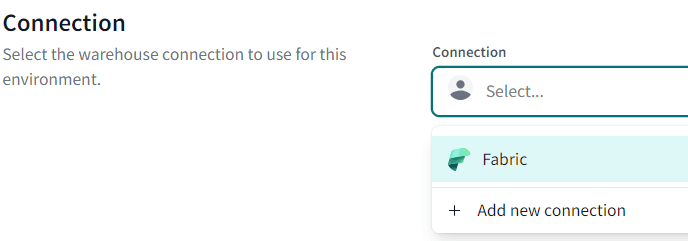
Once the connection is saved, you can select it in the previous screen:
In the next screen, you need to specify the credentials that will be used to authenticate against the Fabric warehouse. You can choose between an Active Directory (Entra ID) account with password (you might want to test out how this works with your Multi-Factor Authentication setup), or a service principal.
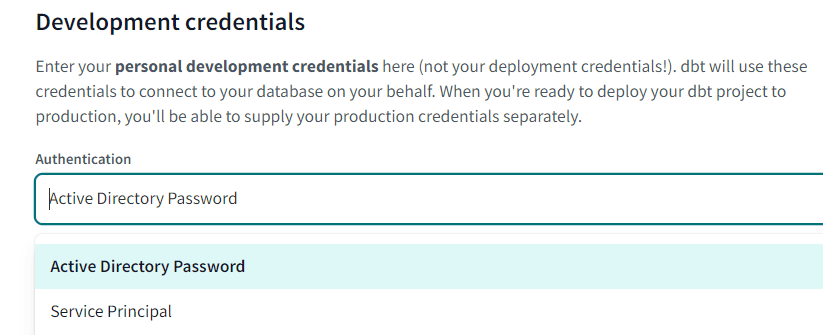
Personally, I went for the user with password. I also changed the schema to the default dbo schema.
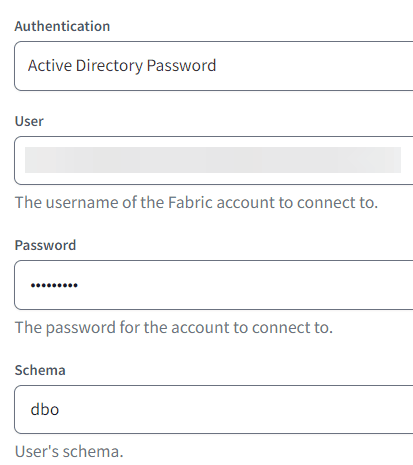
The schema you specify here will be used to contain the objects created by dbt. This might be useful when you work with multiple developers on the same development database. Every developer can specify their own development credentials with their own specific schema. That way, each developer can work on their own schema in the database. Don’t forget to test the connection at the end!

Optionally, you can configure source control for the project. You can connect to one of the git providers or use a managed repository.

And the project is now configured! Now we can get our hands dirty with some SQL. 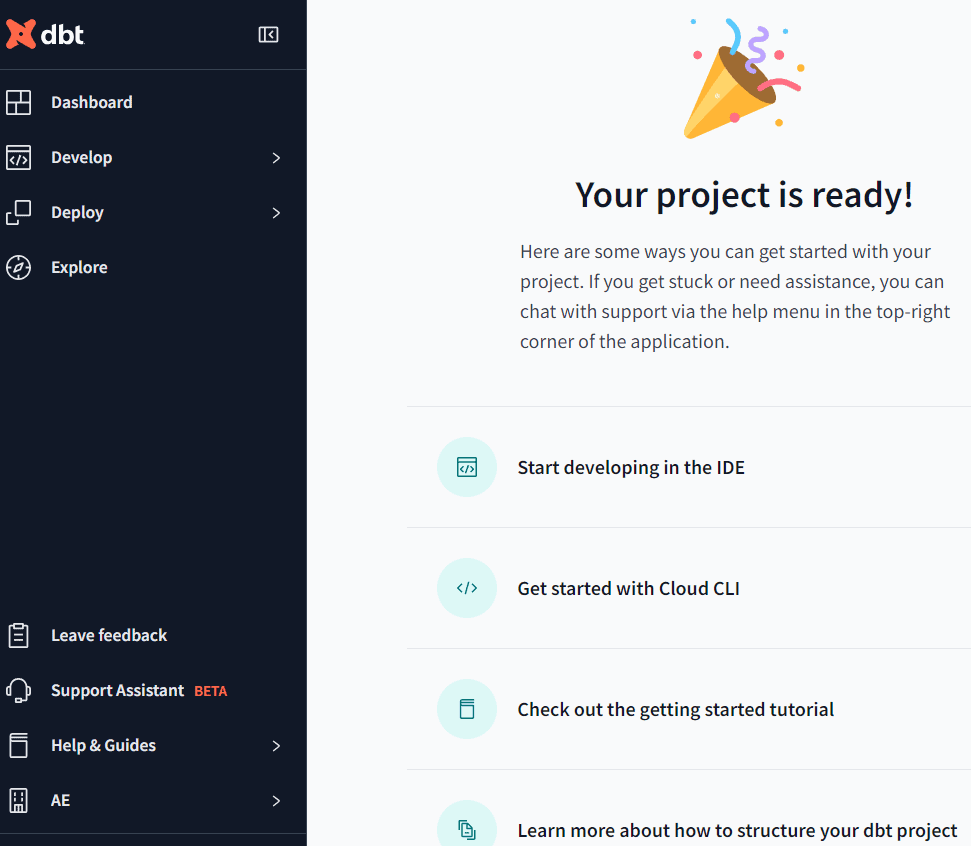
Create your first model
In dbt terminology, a model is typically a SELECT statement. Depending on the properties of the model, the result of that SELECT statement will either be a view, table or ephemeral. The last option basically means the model will not be persisted in some way, but rather will be used as a common table expression (CTE) when referenced by another model.
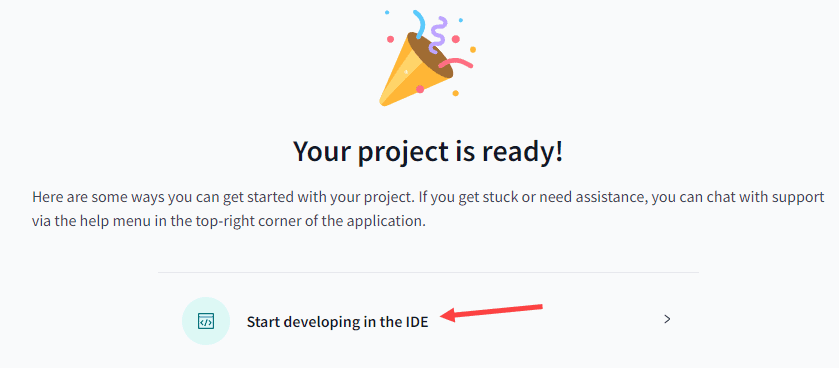
Let’s dive into the code. Go to the IDE to get started.
You will be asked to initialize the project.
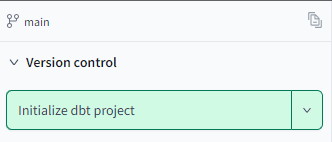
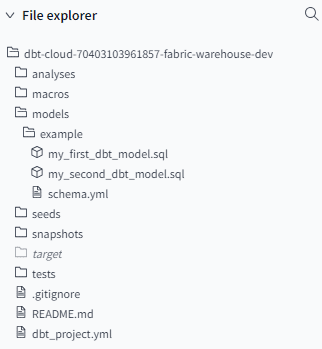
This will create standard configuration files (such as the dbt_project.yml file) and a default folder structure.
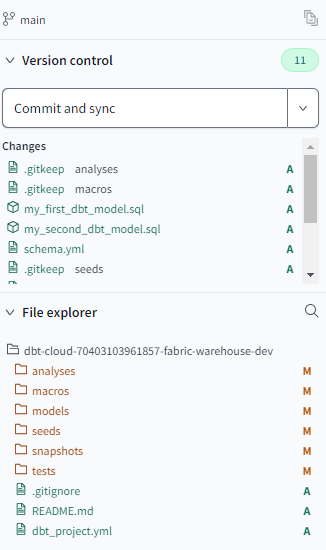
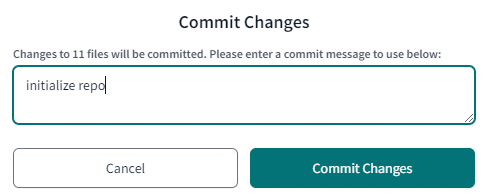
In the changes section of the version control, you get an overview of all the changes tracked by the git repository. In the file explorer you can find the project structure, along with their current git status. By hitting Commit and sync, we can commit all the changes to the git repo. Don’t forget to supply a meaningful commit message.
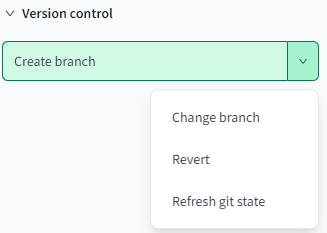
Once the changes are committed, the version control panel will allow you to create a new branch or to change a branch, refresh the git state (useful if you work with multiple developers on the same project), or revert any changes.
In the default file structure, we can find some predefined folders, such as:
- macros: this will hold custom developed macros, which can be reused in the different models. Similar to user-defined functions in SQL Server, but with a sauce of dynamic SQL.
- models: here you will find all the models of the project, which is the core of dbt. You can create subfolders to organize your project. After initiating a project, you can find two example models, along with a schema definition, in the example folder.
- seeds: small reference datasets which you can upload to dbt.
- tests: custom developed tests that can be used across models.
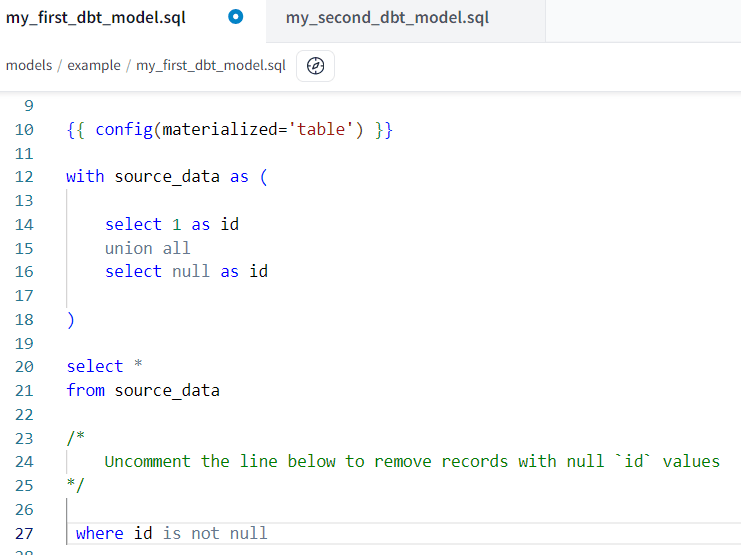
Let’s take a look at those sample models. The first one, my_first_dbt_model.sql, simply creates two records of data.

The configuration line specifies how the model will be materialized. If you want the model to be created as a view, you can change it:
|
1 |
{{ config(materialized='view')}} |
The second model, my_second_dbt_model.sql, simply reads from the first model and applies a filter with a WHERE clause.
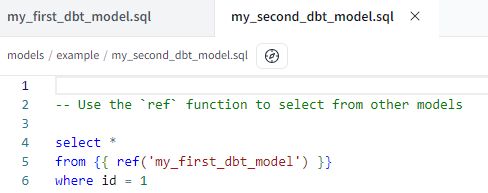
In the FROM clause, you can see the actual table name is not used. Instead, a reference to the fist model is created – using the model name – with Jinja, a Python-esque templating language. This is one of the keys strengths of dbt. Instead of hard-coding object names, references are used instead, which allow dbt to construct a data lineage graph:
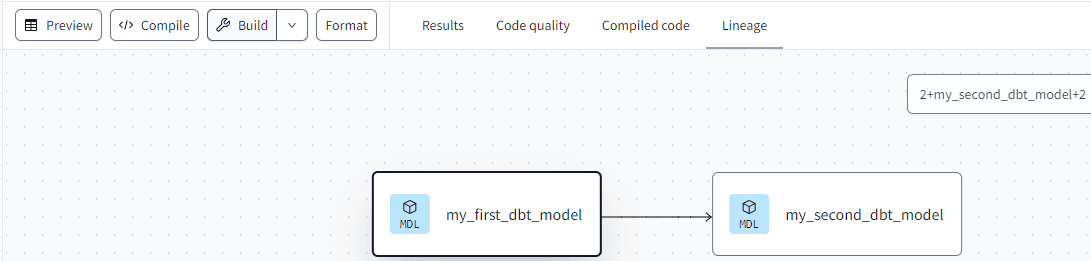
Okay, it doesn’t seem like much when you only have two models, but for larger data warehouse projects it certainly is useful. Suppose a source column changes data type. With the lineage view you can easily determine which models upstream are possibly impacted by this change.
When you schedule jobs in dbt (a dbt cloud feature) to execute the models, dbt can use the lineage to construct a DAG (directed acyclic graph). This DAG can be used to execute the models efficiently. By knowing which dependencies exist, parallelization can be optimized. Or, for example, when you want to reload a single fact table, dbt can determine which dimensions must be loaded first.
There are some other files in the project that are important as well. The schema.yml in the example folder contains a schema definition for the two sample models.

For each model, you can specify a description and its corresponding columns. A column can have a description as well, and you can associate “tests” with it. All these descriptions can be useful when you want to generate documentation. In this example, each column has two tests: a unique and a not_null test. These are built-in tests, and in an RDBMS like SQL Server they would be implemented with constraints, such as the unique constraint (which is a unique index) and a NOT NULL constraint.
However, not all databases support those constraints. For example, the Fabric warehouse doesn’t have a unique constraint (it does “support” primary key and foreign keys, but they are not enforced. See the documentation for more information.). You can also create your own custom tests which are more complex than the built-in ones. More on that in a later article. Keep in mind that the language specification for the schema file is YAML, so indentation matters.
Another file is dbt_project.yml. It contains project-specific configurations and most of the time you don’t need to make many changes to this file. However, there’s an interesting feature where you can force certain properties as default for a folder. We find this at the end of the file:
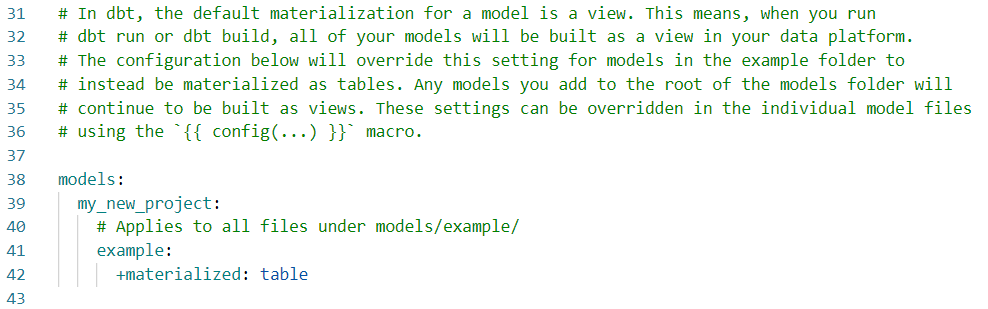
By specifying the following line, we can force the materialization of ‘table’ for all the models within that subfolder:
+materialized: table
You can still overrule this specification by explicitly setting the materialization in the model itself.
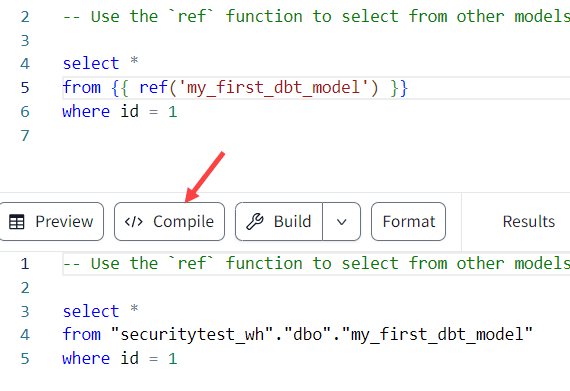
Now it’s time to actually build the models. Let’s go to the second model my_second_dbt_model.sql. At the bottom, you can select compile. This will replace all of the Jinja code with the actual SQL code, so you can see what the final SQL will look like:
When you hit Build, it will try to create the table in the Fabric warehouse, which will fail because the first model doesn’t exist yet.

But we can click on the arrow right next to Build to get all the different Build options:
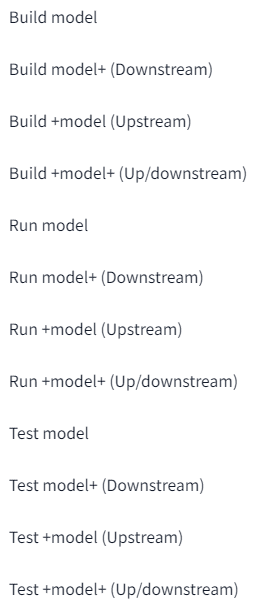
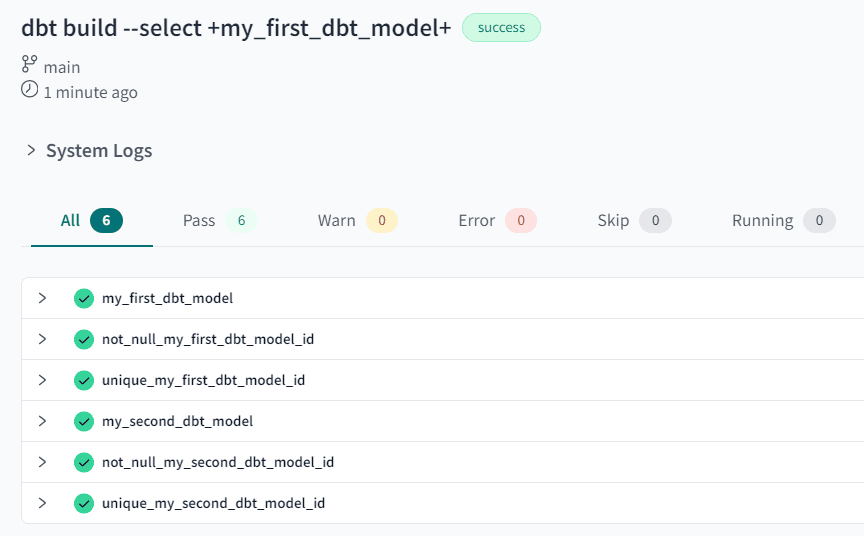
When we choose Build +model (Upstream), dbt will try to create the table, but also all the other tables it might be dependent on. You can also choose to create all tables up- and downstream.
We still get an error though, but this time because dbt tries to create the table, but it fails to do so because the not_null test fails.
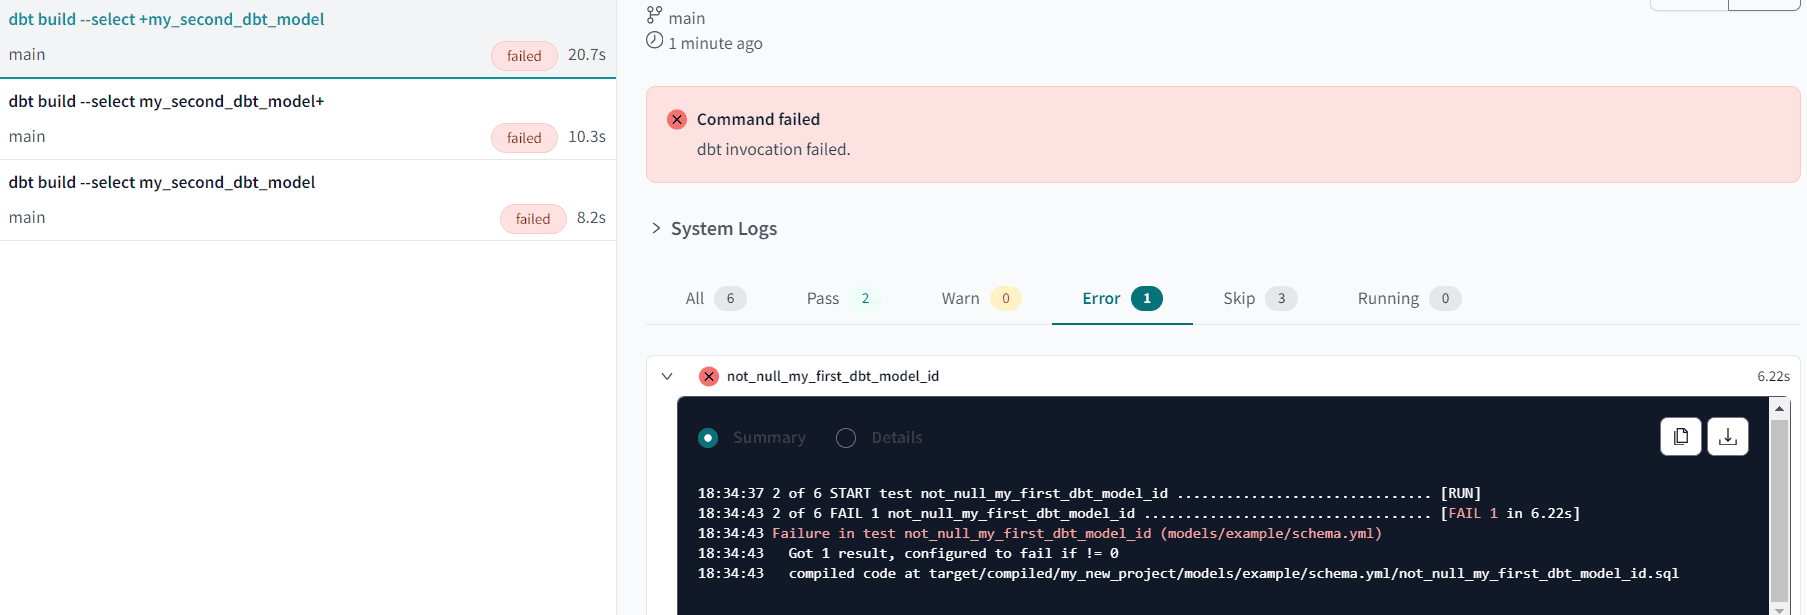
In the left-hand pane you can also see the actual dbt cli commands that were used. In the system logs, you can find all the actual SQL statements dbt issued against the database.
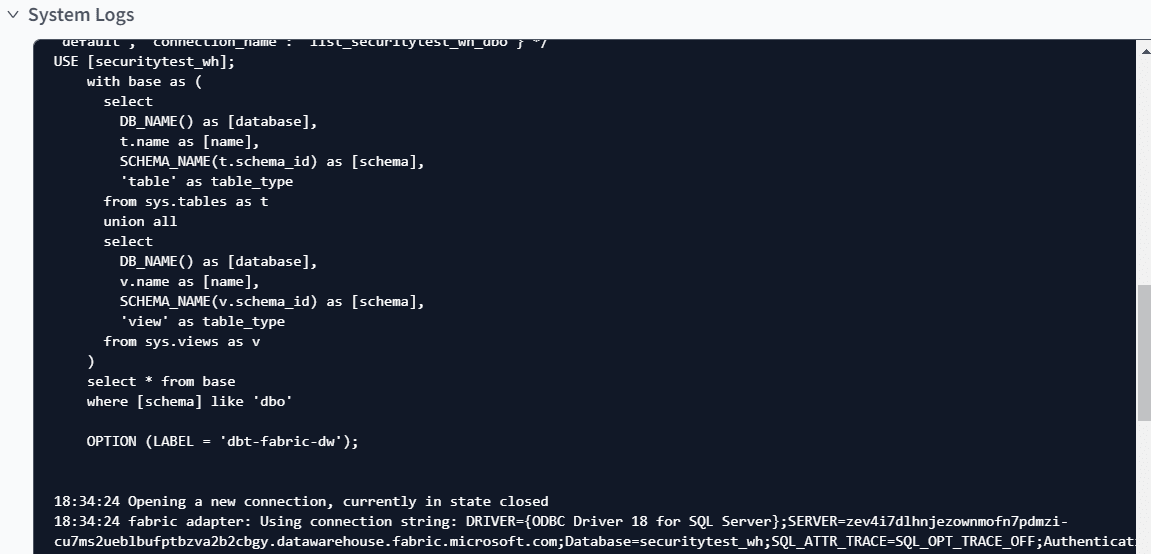
You can also see in the log that dbt successfully created the first table, populated it with data (since tables are created with CTAS statements)

But since a test failed, everything was rolled back. Let’s change the first model to remove the NULL value:
Don’t forget to save the model and build everything again. This time, all the tables will be created, and the tests will succeed.
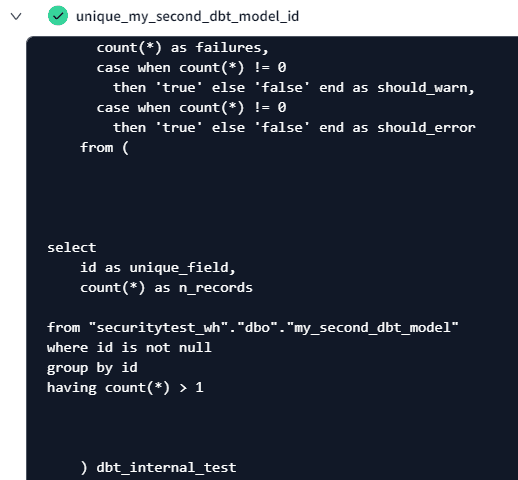
It’s interesting to see how dbt actually does the tests. It will run a SQL statement and when it returns one or more rows, the test will fail. In the case of the unique test, it will do a group by on the unique field and return all rows with HAVING COUNT(*)>1.
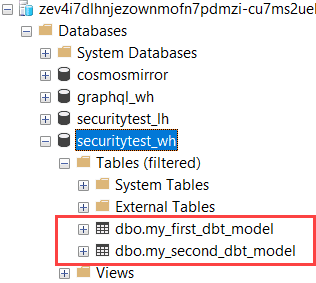
When we look at the Fabric warehouse, we can see the two new tables:
Conclusion
In this article, we give you a short introduction to the dbt tool. This software, which is available as an open-source CLI tool or as a Freemium SaaS cloud service, allows you to do the “T” of “ELT” using a flair of dynamic SQL. It comes with tons of extra features (not all of them were shown in this article for sake of brevity), such as automated testing, git integration, documentation, data lineage, macros for code reuse, and efficient job scheduling using DAGS. You can also extend the tool with packages which can contain more functionality, additional connectivity or pre-defined macros. It’s a bit like how extensions work in your browser, or plugins in Visual Studio.
However, there are some downsides as well. It’s an extra tool in your stack and if you have a larger development team you’ll need to pay for licenses (unless you use the dbt core version). It also means that you need to switch contexts. For example, if you build your pipelines in Fabric, then write your SQL in dbt and then the reports in Power BI, it’s no longer in one centralized environment. It boosts the power of SQL, but since you’re a bit stuck with the CTE and CTAS structure, (very) complex SQL might not be as easily translated to dbt.
For example, I had some issues with a model in a project where I needed to load the table incrementally, but I had to do some checks on the table itself first. This works fine as long as it’s one SQL statement, since you can refer to a model itself (which might not exist yet at compile time) with the Jinja {{this}}. But since the SQL itself was very complex, I needed to split it up in multiple statements and then “circular” logic broke down.
People with quite some SQL experience might get the feeling that they don’t need this tool, they can write the SQL themselves just fine. But dbt comes with extra features as mentioned before, and it can boost the productivity of your development team.
This document contains proprietary information and is protected by copyright law.
Copyright © 2026 Red Gate Software Limited. All rights reserved


Load comments