
The possibility to use Visual Studio Code (or VS Code) to develop your Microsoft Fabric notebooks seems very interesting.
It may bring many benefits for usability and for the SDLC (Software Development lifecycle):
- You may prefer developing on your own machine than on the interface of a portal
- It’s possible to develop and test before deploying to the portal
- The notebooks don’t support direct GIT integration yet, but developing on your own machine, you can include the notebooks in a source control repository
- You can develop Spark Jobs, what is not possible in the portal
The Open in VS Code button is there, on the top menu, attracting all of us. However, the requirements are quite complex and may give you some trouble with the initial configuration.

VS Code Requirements to Build Synapse Notebooks
The result we need to achieve from all these requirements is the following:
- We will be able to access workspaces and lakehouses from VS Code
- A new runtime kernel will be available on VS Code. This new kernel will allow the notebook execution using the online servers
You need to install and configure the following pre-requisites in this order:
- OpenJDK8
- Conda – in my example I installed miniconda and it worked well
- Create an environment variable called JAVA_HOME and point it to the JAVA 1.8 installation. On my machine, it was located on C:\Program Files\Java\jre1.8.0_202 . This may be a good start point to look for.
- Add the %JAVA_HOME%/bin to the PATH environment variable. You can’t use variables on an environment variable, so you need to discover the final value. On my personal example, it was C:\Program Files\Java\jre1.8.0_202/bin
- Add the CONDABIN subfolder to the PATH environment variable. You need to pay attention to the miniconda installation. This was difficult to find. On my environment, it was C:\ProgramData\miniconda3\condabin
After changing the environment variables, you need to boot the machine. If you don’t, VS Code will not recognize the variables value and the process will fail.
These are the requirements for a windows environment. If you are using MAC, the requirements are different and you will need to check more details on https://learn.microsoft.com/en-us/fabric/data-engineering/setup-vs-code-extension
Updating the Environment Variables
If you are not used to managing environment variables on windows, you can follow these steps:
- Open File Explorer
- Right-click on This PC
- Click on Properties on the context menu
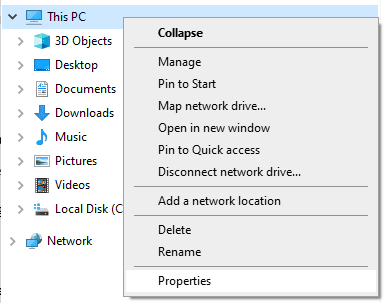
- On the settings window, click on Advanced System Settings on the right side of the screen, under Related settings
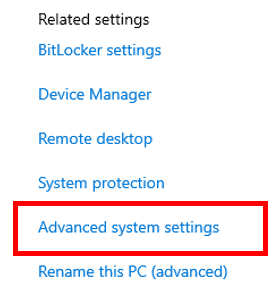
- On the System Properties window, click on the Environment Variables button
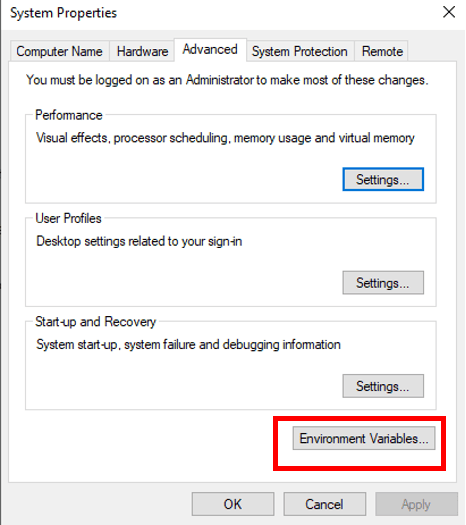
The Environment Variables window is where you will need to work. You will need the New button to add the JAVA_HOME variable and the Edit button to change the PATH variable.
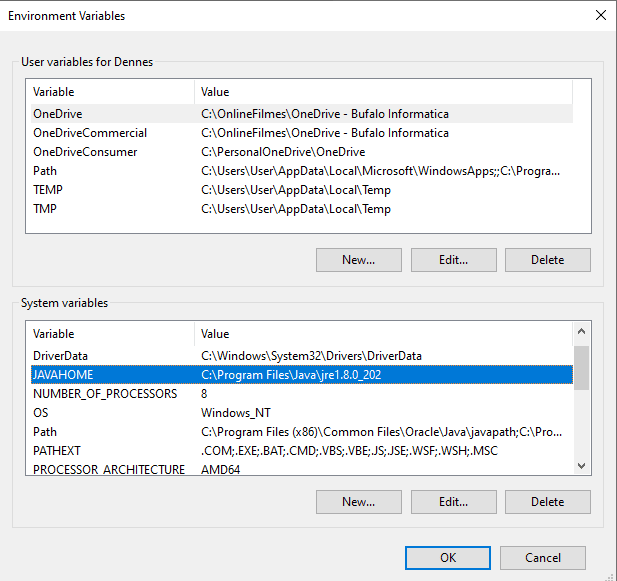
The PATH variable is a multi-valued variable. It has a special window for editing, allowing you to add, remove or edit individual values.
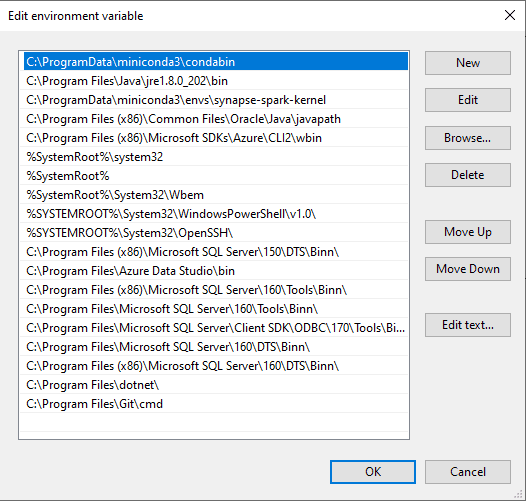
You may notice that the two new paths are included as the first ones. The third path is also important.
It may happen to work on the first attempts without this configuration, but you may miss some features.
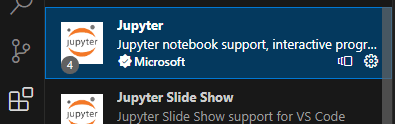
Installing the VS Code Extensions
It’s not over yet: You still need to install 2 extensions to VS Code before you can start working with notebooks on your machine.
Starting the work using VS Code
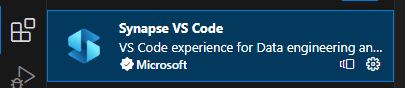
The Synapse extension installed a new button on the left menu called Synapse.

This button opens a special Synapse window where you can connect to Microsoft Fabric.
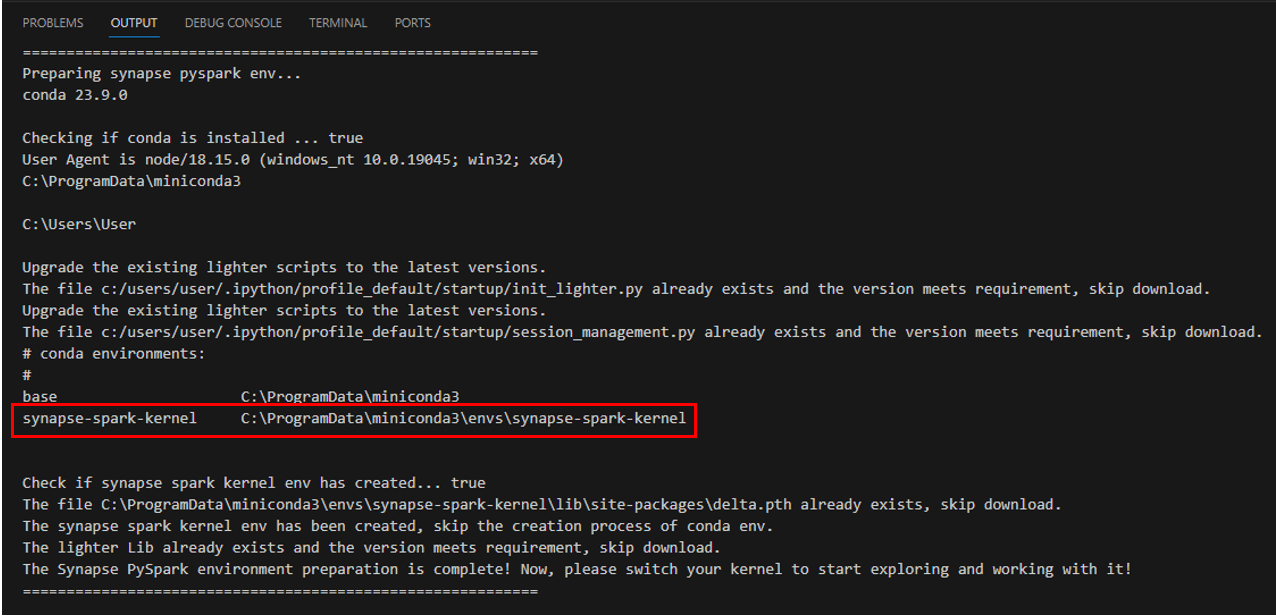
Once the Synapse window opens, the OUTPUT describes the pySpark and Conda initialization. It’s important to check if there is no error message during the initialization. It’s also important to confirm the Synapse Kernel was correctly installed.
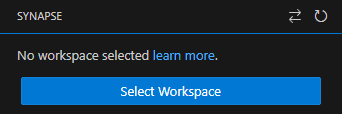
When you click the button Select Workspace on the Synapse window you are required to select a local working folder.
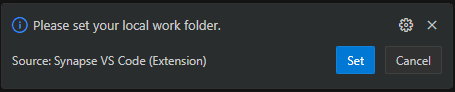
This happens because the existing notebooks on the portal will be downloaded to this local folder. You will have the control to download them, change and update the server. Of course, you can change, give up and discard the changes, updating from the server again. An entire process between the portal and the local folder you choose will be available and this choice is made only once.
However, you haven’t selected the workspace yet. How could you select a local folder if you don’t know the workspace you will work with?
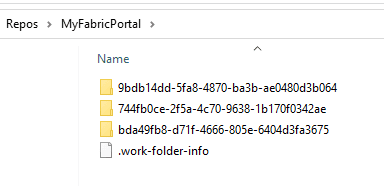
The folder you choose will be working on the portal level. For each different workspace you deal with, a different subfolder will be created using the workspace Id as the folder name. Unfortunately, is the workspace Id, that GUID no one can identify, instead of the workspace name. Anyway, it’s an interesting architecture.
The image below shows how your local folder will look like, after you switched to many different workspaces and downloaded notebooks from them.
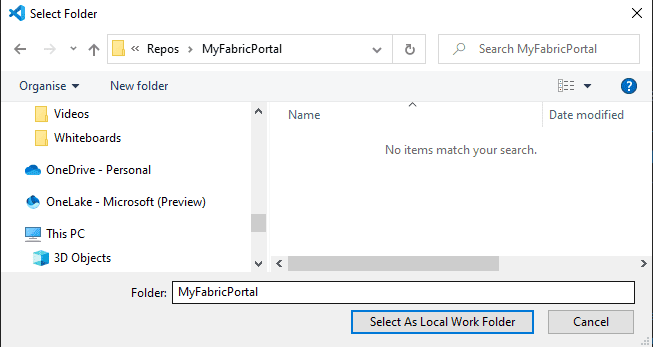
On this example, after clicking on Set, I will choose MyFabricPortal as the local work folder.
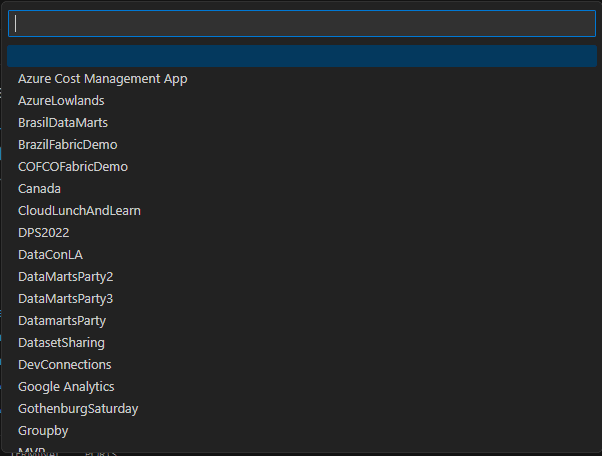
Once we select the local folder, we can click the Select Workspace button on the Synapse window. This will open the list of workspaces we have in Microsoft Fabric portal, and we can select one.
Of course, at some point in the middle of this process you will be requested to login with your Power BI account. On my example I was already logged in.
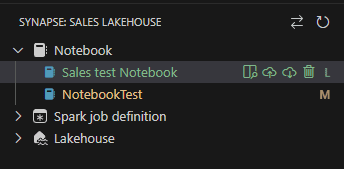
Checking The Notebooks on the server
After selecting the workspace, you will be able to see the notebooks on the Synapse window, as in the image below.

- If you see the Download button, the notebook is only remote, it’s not available locally.
- You can remove the notebook, even remotely.
- Status is especially important. It tells us how the notebook is in relation to the local and remote work.
The possible status letters are the following:
- M: The notebook is modified locally and need to be updated remotely
- R: The notebook is only remote, it’s not in the local folder
- L: The notebook exists locally, but it was not modified.
- C: The notebook was modified on both, the local folder and remotely, and it has a conflict
The image below illustrates two of the status:
Managing Notebooks Locally
Once we download a notebook, the buttons beside the notebook change.
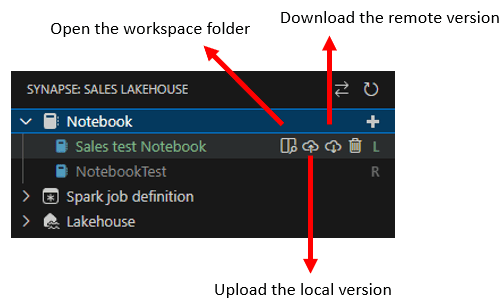
After the notebook exists on both, remotely and locally, we have the buttons to update one side or another. Besides that, we also can open the workspace folder.
The workspace folder is the folder created for the workspace inside the local folder we selected at the very beginning of the process.
Visual Studio Code can open a project folder, allowing us to manage the folder. If you click this button, you will jump to the VS Code Explorer window, where you will be able to see the local notebook files.
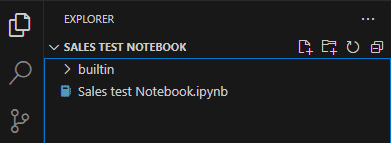
We can’t open the notebook directly from the Synapse window, we need to open it from the Explorer window.
Exploring Lakehouses on the Synapse Window
Once we open the notebook, like on the image below, we can move back to the Synapse window to navigate on the lakehouse

As you may notice, we can investigate either the tables or the files area of the lakehouse. We can preview table data or download lakehouse files (on the image below, the download buttons are hidden).
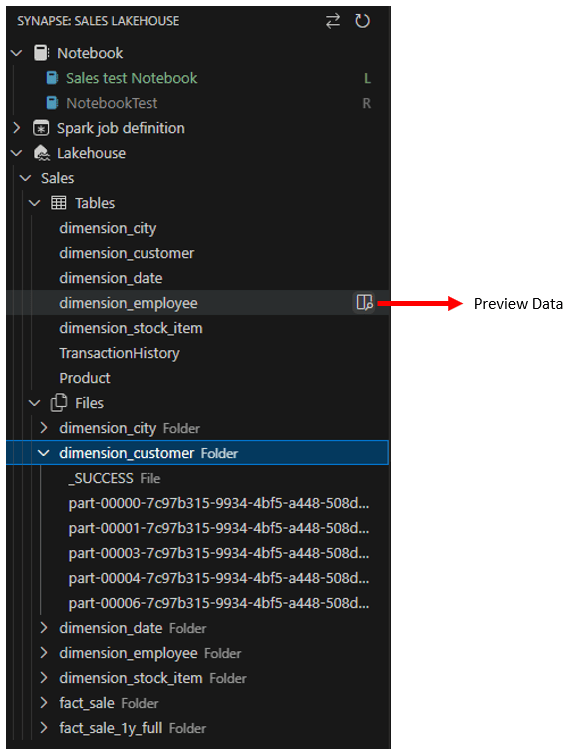
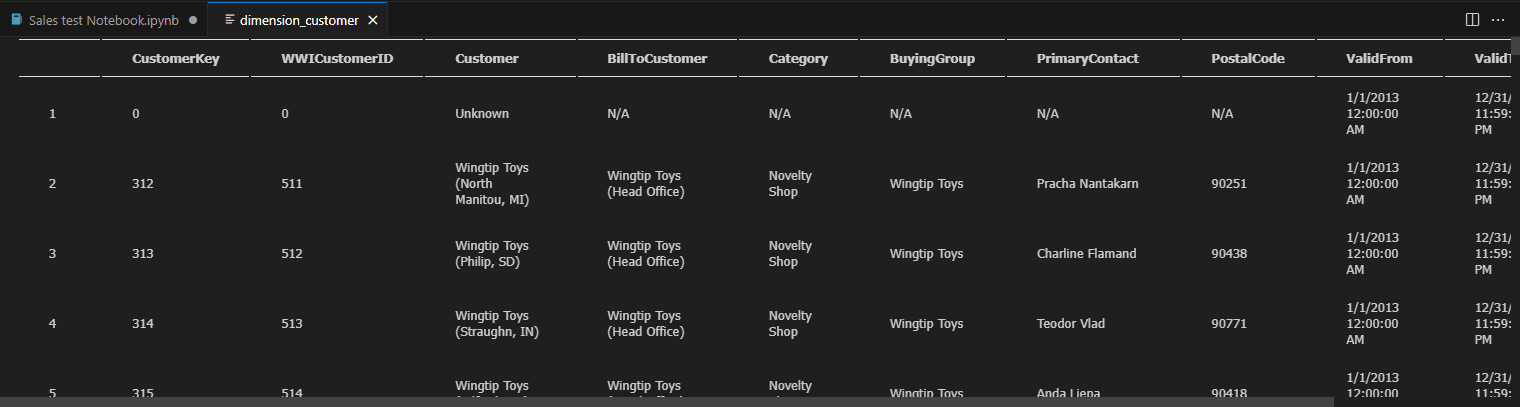
The image below shows the result of the Preview Data option.
Executing the Notebook
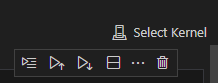
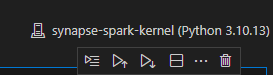
We need to ensure the Synapse-Spark-Kernel is selected before the execution. If this kernel is not already selected on the top right of the notebook, you will need to select it.
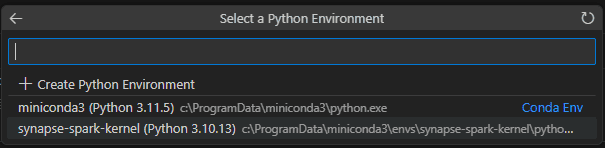
- Click the Select Kernel on the top right of the notebook
- On the pallet, select the option Python Environments…

- Select the Synapse-Spark-Kernel from the list of kernels
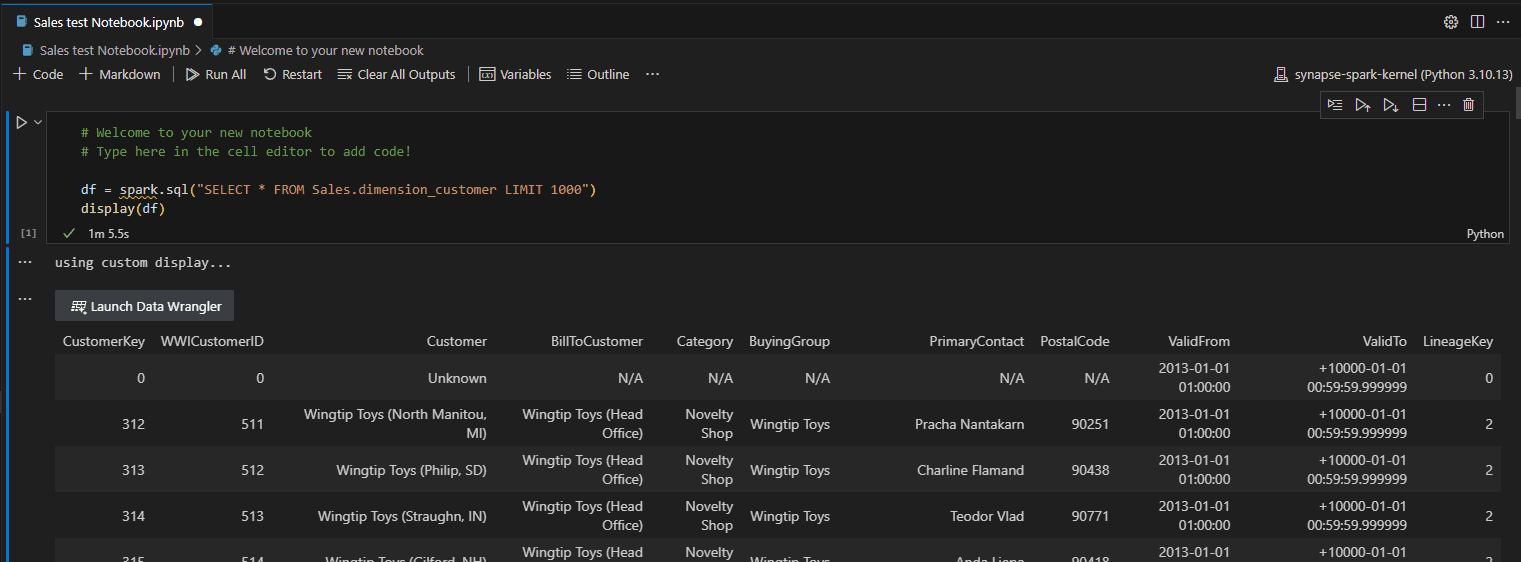
Once the correct kernel is selected, like the image below, we can execute the code block on the notebook. The execution happens on Microsoft Fabric servers, not on your local machine.
An example of the execution result:
Workaround for the Synapse Kernel
A possible problem with the installation of the pre-requisites is the Synapse Kernel not appearing in the list of possible kernels, requiring a workaround.
The secret is the Synapse Kernel is “hidden” inside the miniconda installation. The path is similar to <<miniconda>>\envs\ synapse-spark-kernel . On my personal machine it was on C:\ProgramData\miniconda3\envs\synapse-spark-kernel
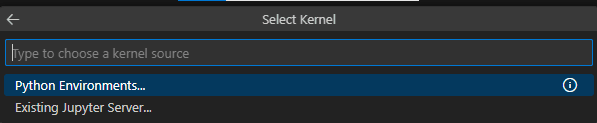
When selecting the kernel, you should select the option Existing Jupyter Server… and insert the path of the Synapse kernel according to the rules above.
The Data Wrangler
You may have noticed, after the execution of the notebook, the button Launch Data Wrangler.
I published a blog post and a video about the Data Wrangler on the Fabric portal, but it’s way more hidden and depends on Pandas.
However, this feature may still have some pending problems, so it’s not possible to advance so much on it. You can check the existing problems on https://community.fabric.microsoft.com/t5/General-Discussion/Data-Wrangler-on-VS-Code/m-p/3515462#M1955
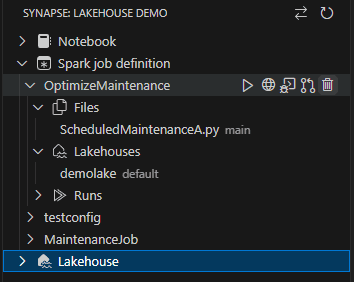
Spark Job Definitions
The Spark Job Definition is the best object available for lakehouse maintenance. It allows us to execute maintenance scripts over multiple lakehouses.
Using VS Code we can also create Spark Jobs Definitions, with one more advantage: We can edit them in our python editor.
It’s not possible to edit a Spark Job Definition on the portal, we can only upload the files, in this case, .py files.
Using VS Code we can create and edit the code and publish to the portal
Limitations
VS Code still enforces the code to be in the same workspace as the lakehouse. This is not a good idea. I published a video about Workspace Organization explaining how it’s better.
This is being considered a bug and may be fixed soon. Some details about the problem: https://community.fabric.microsoft.com/t5/General-Discussion/Notebook-cross-workspace-in-VS-Code/m-p/3517437#M1965
Summary
The possibility to develop on our local environment and insert the developed code in a source control environment such as Azure DevOps is, for sure, a very interesting feature. However, there are a few bugs and limitations to be solved.
Anyway, we are talking about Microsoft Fabric, which is still in preview. These features are improving every day.


Load comments