
Storage Accounts allow you to create blob containers or file shares. These are two different services provided by them, but you probably already know that. The main difference between these services is the protocol used to access them. While blob containers use REST, file shares can use REST and SMB.
This means when we use file shares we can map them directly to our file system and work with them using Windows Explorer, as any other network share.
Of course, this is an oversimplification. There are some tricks when mapping an azure file share to the local machine. If you do it wrong, it can cause a lot of trouble.
File Share Quota
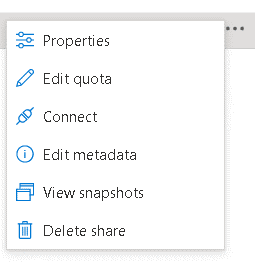
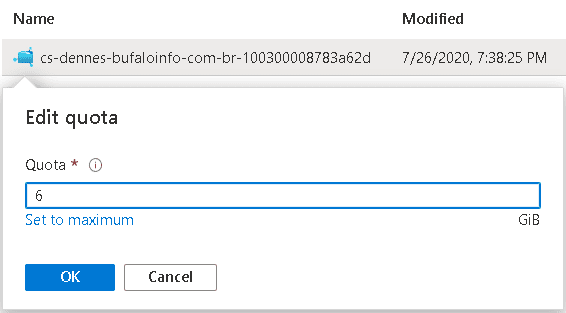
Each file share has a quota. The default quota is 6GB, which is quite small. Using the file share menu you can click the option Edit Quota to change this limit.

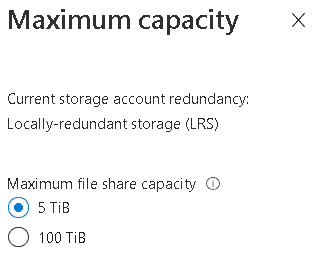
The storage account also has a quota for all the file shares. This quota has only two possible files: 5tb or 100tb.

Creating the Mapping
Create the mapping is very easy. On the file share menu, we can select the option Connect. Azure itself will provide us with a script to create the mapping on Windows, Linux or Mac.
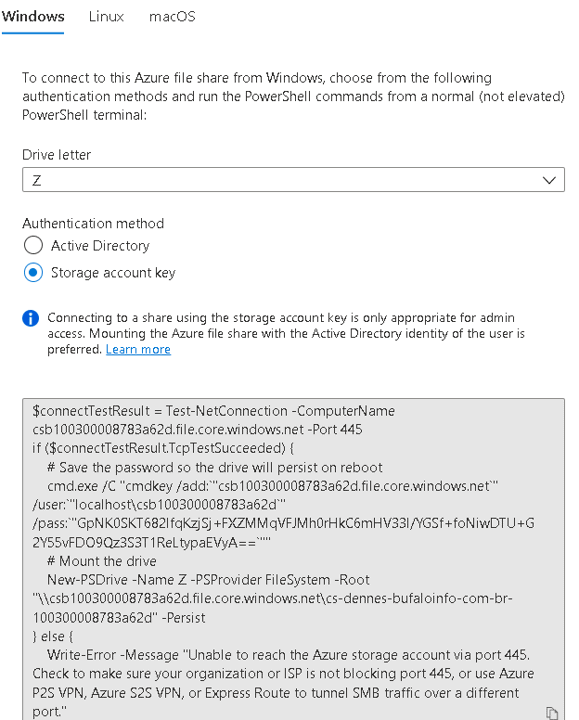
For windows, it’s a powershell script. We can open PowerShell ISE, copy/paste the script from the portal to ISE and execute. We will immediately have a new network mapping pointing to our file share on Azure.
There are two configuration options we can choose. Once we choose these options, the script is changed to use our choices.
Authentication: We can choose if we will use Azure AD authentication or the storage account key. Azure Authentication is way better option than the storage key. However, Azure AD doesn’t work with SMB out-of-the-box. We need to provision an Azure AD Directory Services to use Azure authentication with SMB.
Drive letter: You can choose the drive letter which will be used for the mapping on your machine.
File Share Mapping Internals
There are some interesting internal tricks related to the file share mapping. Let’s analyse this and discover how to avoid some mistakes.
It’s not your regular Network Mapping
This mapping created through the PowerShell code is not your regular network mapping. You can’t managed it using the regular tools for a network mapping. It needs to be managed using Powershell.
These mappings are called Powershell drives. You can discover more about Powershell drives on this link https://docs.microsoft.com/en-us/powershell/scripting/samples/managing-windows-powershell-drives?view=powershell-7.2
It’s specially important to remember you can’t delete or disconnect the mapping using traditional OS tools, you need to use Remove-PSDrive cmdlet in Powershell
It’s not for everyone
The mapping is created for the user who executes the script and only for this user. One example is that if you execute the script with powershell running as administrator, you will not see it in a regular windows explorer window.
Big Mistake – be aware and never do this
What gave me the idea to write this article was exactly the fact I faced a huge error when handling the mappings in a wrong way. I found almost no information about how to fix this, so here it is.
The problem: You should never attempt to delete the mappings using regular OS statements. For example:
NET USE <drive> /DELETE /YES
Is a complete error – don’t do this. I did.
When this is done, the mappings are not removed. The OS, on the other hand, becomes a bit crazy, slow. Windows explorer hangs sometimes, not understanding very well the mappings.
So, it’s just about opening powershell and executing Remove-PSDrive, right?
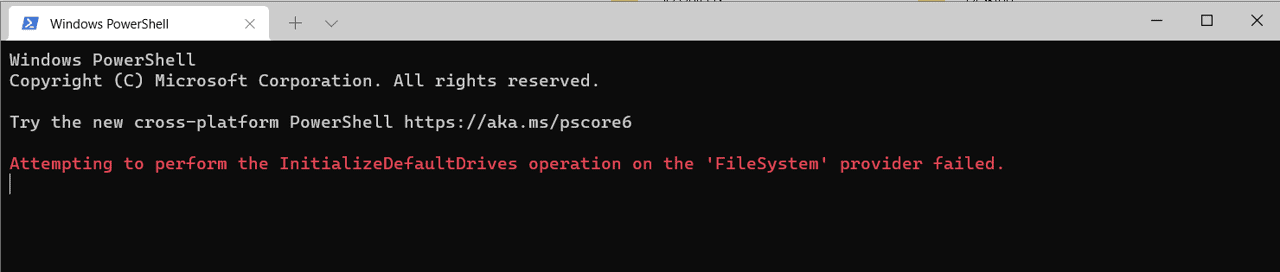
Unfortunately not. Powershell also goes crazy and doesn’t open anymore, showing the error message Attempt to perform the InitializeDefaultDrives operation on the FileSystem’ provider failed.
No work-around:
- Run powershell on the prompt using the -Command parameter doesn’t work, same error
- Windows Termminal doesn’t work, same error
- Execute powershell as administrator or System doesn’t work. The mapping will not be there.
I end up finding the solution in a strange documentation from Microsoft. Strange because it describes a completely different reason for the error, but the solution works.
The Solution
You need to remove the mappings directly in the registry. Using RegEdit, open the following registry key and delete the folders for each mapping: HKEY_CURRENT_USER\Software\Microsoft\Windows\CurrentVersion\Explorer\MountPoints2
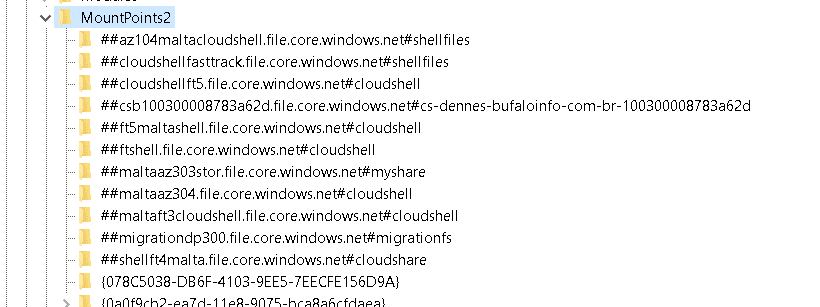
The additional trick on this solution is that you need to immediately restart the machine. If you open windows explorer or powershell again, the deleted folders appear again, they are like cockroaches.
Summary
Mapping a file share on the local machine is a powerful feature, but it has some tricks and if used in a wrong way can cause complex errors
This document contains proprietary information and is protected by copyright law.
Copyright © 2026 Red Gate Software Limited. All rights reserved


Load comments