
Part 3: Remote User Testing Early Access Builds
Changes cost less when made earlier in the development life cycle. Twenty changes in a project, at 32 hours per change and [a minimal] hourly rate of $35, would cost $22,400. Reducing this to 8 hours per change would reduce the cost to $5,600. Savings = $16,800.
Human Factors International, 2001
Introduction
The earlier in the product development cycle that you can get real users to check out your software, the better. If you can do this with the early access builds, then you are far less likely to release a beta product that gets the bird, and you are far more likely to end up with a final product that is right.
Usability testing can be expensive. It used to be done in specially-constructed rooms with two-way mirrors or, more recently, video, so as to make it easy to record the sessions and observe without distracting the user. Sessions normally have to be controlled and scripted.
… although early
access testing can
highlight painful
truths, it’s almost
always interesting
Even if we could have afforded this, it would have been useless for our early access builds of a new version of ANTS Profiler 4.0. Our users had to test them on their workstations in their development environments. That would have meant that we’d have to travel to the workplace of each of our users to do the testing. This wasn’t practical and I’m sure many of you reading this now would also find yourself in a similar predicament.
We chose instead to do remote User Testing. To do this, we arranged for users to try out the software for the first time in a remote testing session while we watched from the comfort and convenience of our own meeting room. Contrary to popular belief, this process can be done cheaply; and although early access testing can highlight painful truths, it’s almost always interesting…
Getting Started:
To get started, you will need the following
- 1/ A Microphone
- A cheap microphone will do the job nicely (we use any one of the three below)
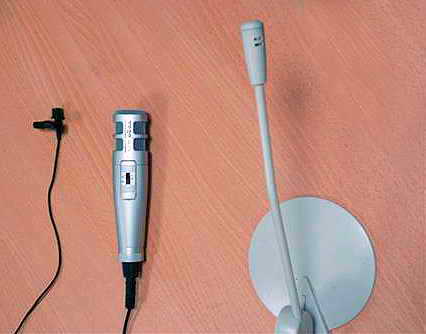
Figure 1. Cheap microphones: The good, the bad, and the very ugly - 2/ A Location
- A computer and a quiet place to conduct the session
- 3/ Remote Control
- A way of allowing the user to easily share their screen with you or vice versa (we simply reuse our technical support service provided by (NTRsupport) which works well in this situation as it’s designed to bypass possible problems with company firewalls etc… There are a number of these remote support services such as LogMeIn (LogMeIn) and WebEx (WebEx) although I’ve never used their services so cannot vouch for their reliability. Again, if budget is a big factor then shop around for the best service you will gladly pay for. There may even be some free alternatives out there.
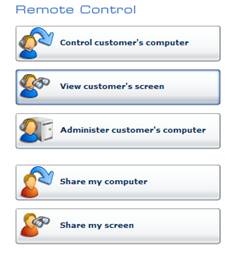
Figure 2. Share your screen or see your participant’s screen with remote conn-ection software - 4/ Screen Capture
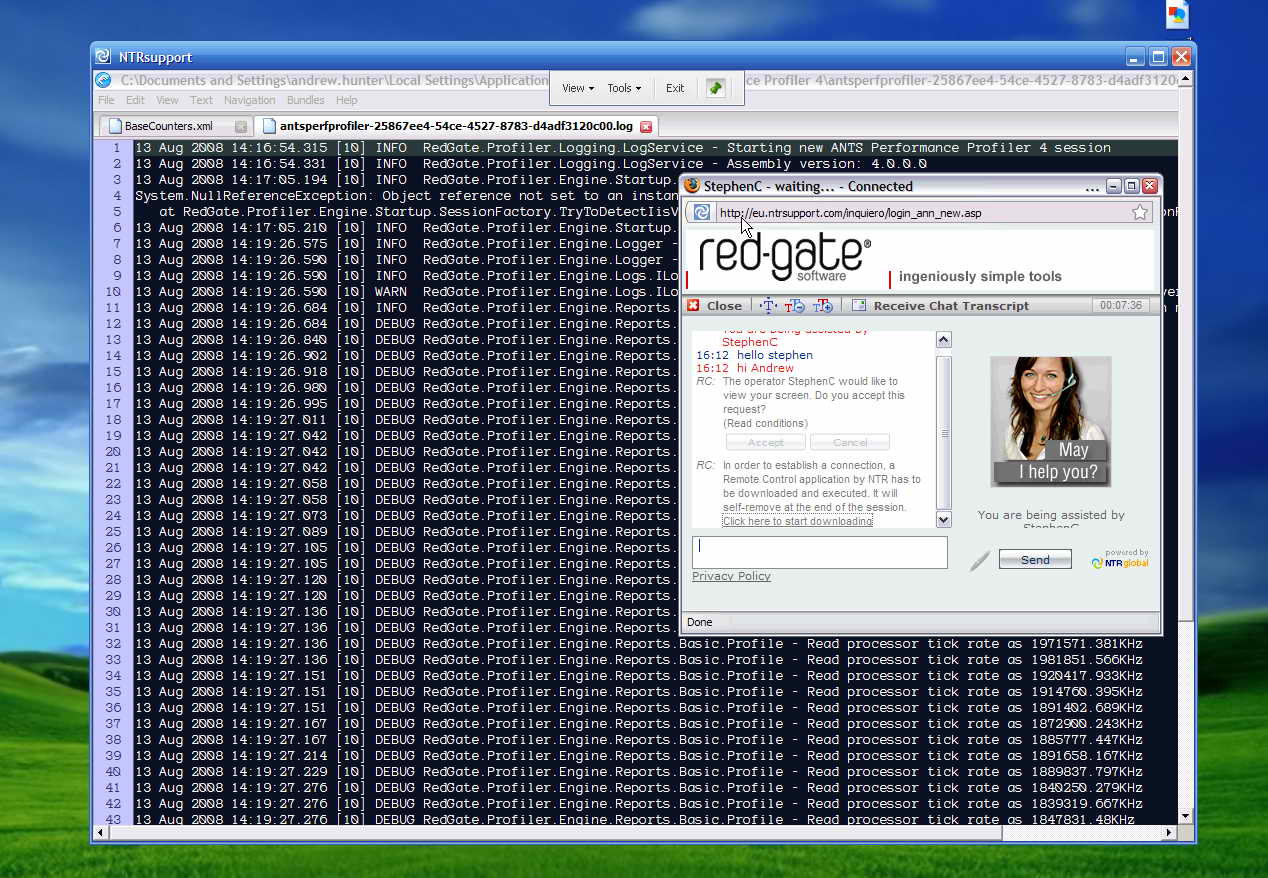
- Screen capture software to record what the user is doing and saying (options typically range from $30 to $350 depending on your needs). These will usually produce an AVI file so you can analyse it later in more depth or to demonstrate the issues identified to your team.
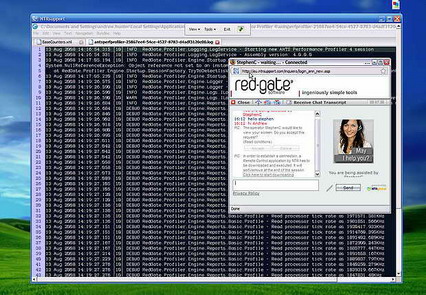
Figure 3. My desktop in the background with the user’s computer screen in the main window as clear as day. Click here to see the screen full-size - 5/ Speakerphone
- A telephone with speakerphone capability so you can easily take notes without having to hold a phone and to allow the audio to be recorded easily with your microphone
That’s all you need, not including someone to actually participate of course. Three of the above points you probably already have. There are a wide variety of options for points 3 and 4 which range in their cost but can be implemented very cheaply if you shop around.

Figure 4. The simple setup is complete and you are ready to run a remote test
There you have it – a mini usability lab ready to go. You simply phone the participant, enable the speakerphone, connect to their machine and hit record on your screen capture software to record the video and audio for the session.
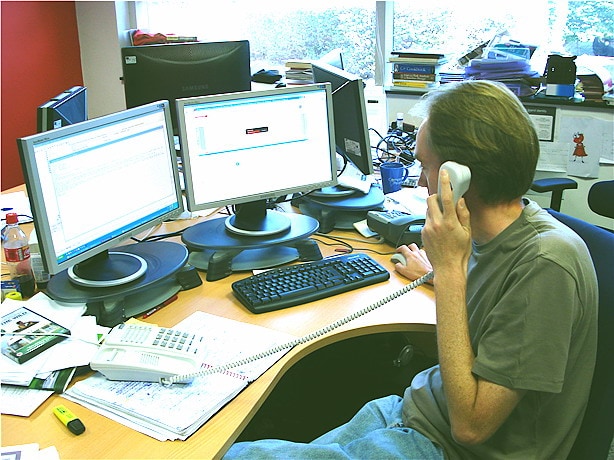
Figure 5. Meanwhile somewhere on the other side of the world… an eager developer is trying your application for the very first time while you watch and listen in real time.
Getting participants
Users are far more willing to participate in usability trials if you can do it quickly while they are at their workstation. Although we offered Amazon vouchers in gratitude for their help, we were contacted by people who knew nothing of the vouchers but who wanted to try the new version and would have done it for free!
You will need a mix of
- people who have never tried your product before but would be the type of person who would use it
- People who are familiar with your products.
- People who have previously tried the product but rejected it.
In our case, we advertised far and wide to get users. We posted requests in our own forums and community forums, used the Simple-Talk newsletter, and emailed friends to pass the word on to any interested parties.
It is a good idea to have a dedicated email address which people can use to register their interest in taking part. This stops your email address getting bombarded with spam
It is makes sense to provide a webpage which explains what is involved, so users can find out more about taking part before making any decision. Keep this landing page clean and simple.
Have a system in place that screens the volunteers to make sure that you are getting the right type of participant. When you email them, ask them to fill in a simple five-question form and if they meet the criteria you want then you can organise the session. Adjust this screening system if you find that it’s not doing its job properly.
Running a session on the day
So, with the user selected and fully briefed on the general plan for the hour-long session, and a day and time arranged for you to phone, you can get underway. The participant should be made aware that they will be sharing their screen or be sharing your screen and that the session is being recorded. You can add non disclosure agreements to the deal if it helps them take part or you wish to protect your own product. Introduce the team and don’t be afraid to break the ice with some general chit chat.
Step 1:
If it is possible, you should have two or more people in the room, including the person running the session and a member of the development team who will be an observer and take notes of things which are of interest to them or wish to ask the user about later in the session.
Step 2:
Explain to the participant that they are not being tested, and that it’s simply a test of the current design. Encourage them to give their opinions no matter what they may be, and to think-aloud while they use the product. This doesn’t mean saying “I’m now clicking on a button, I’m now moving my mouse to another button…”. Instead they should be describing what they are thinking in terms of what they are trying to achieve and mentioning things which are causing confusion or that they don’t like. Make sure they know the difference, and mention to them that you will prompt them should they go quiet during the session. Also explain to them that you will remain quiet during most of the session and that will only step in if you feel they are never going to complete the task successfully. You may have to provide a hint from time to time if they are going around in circles. Sometimes, you’ll need to intervene to cancel the current task should you feel they wouldn’t complete it in time, but you nonetheless feel confident that you know what caused the problem.
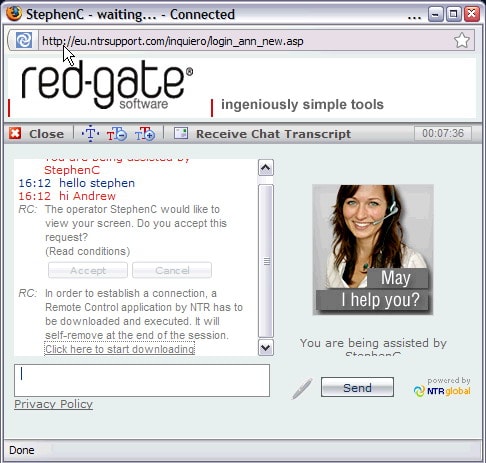
Figure 6 Stephen takes on a radical new virtual persona
Step 3:
If you have a number of specific things that you wish to find out, then explain to the participant that you will ask them to complete a number of small tasks with the software. This allows for emerging patterns to be easily identified when more participants take part. When the participant is clear about the task, then have them start and remember they must keep thinking out loud. It’s also important not to help them with the task. Sit back and let them work on the task. If they ask you a question, then simply say that you cannot help at the moment, and they should continue trying to complete the task.
Step 4:
When the task has been completed, then have a debriefing session in which you can cover any points that you wish to clarify. You may need to get the participant to explain, in more detail, any comments they made during the session. These comments are valuable and interesting, but users often feel compelled to try and give some constructive feedback by asking for certain extra features to improve your product. These need to be treated with some caution. I’ve seen people complete a task flawlessly, yet still feel compelled to suggest more options and features which would simply have involved a large number of unnecessary changes to the overall design
The advantages of remote testing early access builds
With early remote testing, you get their very first reaction to the application and you can observe and record how they used the application. If, instead, you rely on a report of how they used it, you run the risk of using notoriously inaccurate recollections.
You can validate the workflow of your application by watching someone complete tasks using it. You can also identify when people deviate from your intentions. By testing feature-incomplete versions of your application, you can validate features which haven’t yet been implemented but which you have already planned. We found that a participant would often suggest something that would be very useful, and you can smile in the knowledge that it is already in hand. Additionally you occasionally get a suggestion from a participant that is both easy to implement and is genuinely worthwhile or useful.
If you test multiple releases, you can judge the impact of changes that are made from one release to another. This can guide the direction that your product develops in, and lead to measurable improvements.
Sometimes a design change, like a code change, has unexpected consequences. For example, when we added the events bar in our application its potential was immediately jumped upon by users in the following sessions with requests to extend its functionality by being able to click on the events and jump to the function which caused the event to be added in the first place. With a number of users requesting this feature one after the other it was obvious this had some intrinsic value to more than just one user (an important bench mark). It turned out that they were only really interested in the time line events which were flagged as errors (or exceptions) as it had some inherent debugging value as well as just a speed profiler. The value of such a feature was much greater than we had anticipated and immediately led to a change in how users would make use of the tool and extend its value to anyone who tried it.
Your whole team can sit in on the session from the comfort of the office. As it is recorded, you can discuss the session at a more convenient time with your whole team, and you have a permanent record to fall back on in future debates on what a user really wanted.
The pitfalls of remote testing early access builds
Early access builds and Alpha builds are, by their nature, unfinished and potentially unstable, so it can be very difficult to run a session smoothly. For example in our own session one of the key components suddenly went from this:

Figure 7a. One minute everything is running as it should be and then…
To this:

Figure 7b. Kaboom! The time line suddenly decides it doesn’t want to play any more and the session comes to a grinding halt.
Don’t panic, as these things will happen. Instead, make the best of a bad situation – get the user there to send you the log file for the incident, you already have it on video so you know what was going on in the UI when it happened.
You will undoubtedly also come across quite a few error messages of varying sizes and descriptions. I had one user rather amusingly say when an error message appeared “are you getting this okay? Here let me also send you an email of the error”. Yes, thanks for that…
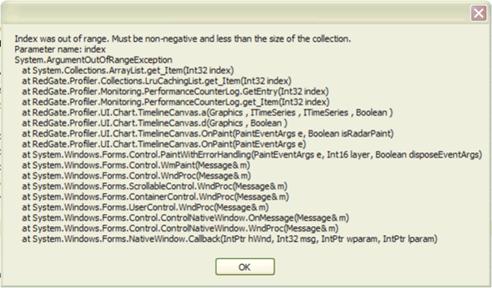
Figure 8. You best get used to seeing error messages if early access build testing
There will also be the completely bizarre which will also make the session incredibly difficult to run, especially when it impacts on a major component. The example below for example comes from a tree view where the remaining nodes simply said <SIMPLIFIED>() instead of showing their data. “Ummm… is it meant to do that??” is also a phrase you will undoubtedly get used to hearing. I have found that users are very understanding of early access builds and readily forgive any odd behaviour and crashing (as long as it doesn’t cause their own systems any harm!). We are lucky in the sense that our target audience are developers and know that it’s an iterative process to bring a piece of software to the market that is robust and reliable.
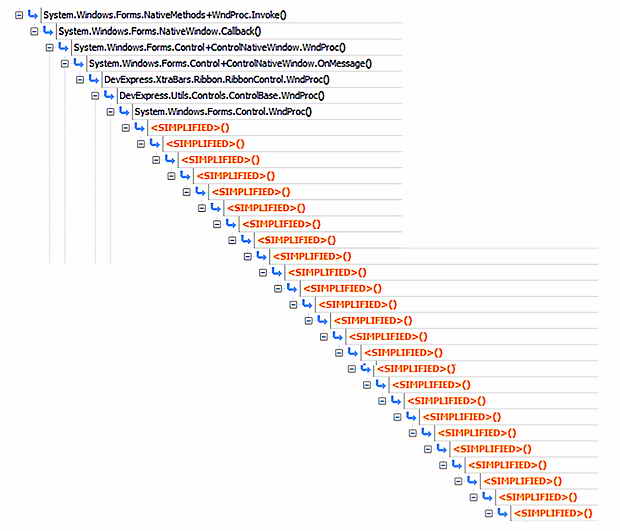
Figure 9. We like our tools simple but maybe this was going too far…
Alternatives to remote user testing
There are other alternatives to remote user testing. You can, for example, organize webcasts of the product in its early stages to a selected audience to get their feedback and reactions. We did that once and got a universal thumbs down about a particular feature. We almost dropped it until we did some tests with users who had a very different reaction when actually using the feature and manipulating it. It felt responsive to them, easily controllable and of obvious benefit in their work. It still needed tweaking, but the difference in opinions was striking. You could be getting the wrong feedback if you allow your users to sit passively while you demo an application
Conclusion
The advantages of conducting remote user tests far outweigh the disadvantages, especially if you would really struggle to get participants to visit your office for the feedback. Additionally if your budget is small then it’s the perfect balance between cost, time and convenience.
When you have a number of components working together to form a coherent workflow you may be ready to test out what you have so far on users. It provides you with great feedback, and a good yardstick on your progress. When the number of issues identified diminishes, you can be more confident with the ultimate reception of your product. It is cheap and convenient to do, so why not?
Since this article was written, ANTS 4 Performance profiler has now been released and is available for download from here
Load comments