
Creating a High-speed Loop
High-speed loops are vital for any application that needs to be constantly updated as quickly as possible. Generally speaking, you will find this most important if you develop games or other interactive media; but there are many other practical uses for them in applications that require constantly updated data.
In “real” game programming, (i.e. DirectX or OpenGL), a high-speed loop is literally a Do… Loop with a DoEvents() function located inside it, so the user’s computer doesn’t hang. This lets your application run as fast as possible, usually enabling you to call a function or sub-routine every few thousandths of a second, dependant on the CPU and GPU speed.
Needless to say, you must be very careful how you use high-speed loops. For example, you wouldn’t want to run a synchronous SQL query on every function call because:
- It would be very slow, thus negating the point of a high-speed loop.
- You will receive death threats from your database administrator.
To create a high-speed loop in Silverlight, we need a blank Storyboard that calls an associated custom event handler in our code file. Thanks to SilverLight’s ability to make use of multi-core CPUs, this technique can be very fast!
In this article we will advance the “Hello World!” tutorial from my previous ‘Let There Be Silverlight’ article. We will add an Image and a Storyboard after the parent canvas has loaded, rather than before. Then we’ll use the Storyboard to create a high-speed loop.
To demonstrate the loop, we will constantly update and track the Left and Top properties of the image to make it move around the screen and bounce off the edges.
By the end of this article you will know how to:
- Use and create new Image objects at run-time
- Use and create new Storyboard objects at run-time
- Capture and handle events
- Change read-only properties
Ok… I can sense that you’re quivering with anticipation, so let’s get started!
Adding objects at run-time
Adding objects to the parent canvas in Silverlight can be done in two ways:
- Manually adding tags to your XAML file. This method was covered in the previous article and is useful for applications that retain a static design template.
- Adding objects through your code at run-time by creating new resources in memory. This technique is useful if you want to embellish a pre-designed static template with dynamic objects.
Use of method 2 also means your Canvas could even be completely empty when it loads, and then be dynamically populated… which, as a side-note, is how we make “loading screens” in Silverlight.
1. Getting Started
Before we start getting to the main portion of the application, we need to set up a reference to the parent canvas. We can then use this Canvas variable to attach our objects.
So, first of all, open Visual Studio 2008 and create a new Silverlight project.
When that’s done, we need to create a new variable that refers to the parent canvas in our XAML file. We’ll call this cParent.
Open up “Page.xaml.vb” and then add the following highlighted lines of code:
|
1 2 3 4 5 6 7 8 9 10 11 12 13 14 15 |
Partial Public Class Page Inherits Canvas Dim cParent As Canvas Public Sub Page_Loaded(ByVal o As Object, ByVal e As EventArgs) ' Required to initialize variables InitializeComponent() ' set cParent to the canvas with the name "parentCanvas" cParent = FindName("parentCanvas") End Sub End Class |
When we declare the variable, cParent, notice that we don’t use the New keyword because the Canvas already exists. We aren’t actually creating a new Canvas object in memory, just a variable to refer to the one created by the XAML file when the application loads.
When we created the new project, Visual Studio automatically created a new Canvas in our XAML file with the name “parentCanvas“. You can call it whatever you like, as long as you also remember to change appropriately the name referenced in the FindName method.
Silverlight will now know which Canvas to use whenever we refer to cParent later on in our code. You can have multiple Canvases, (or is that Canvi?), just as long as they have different names, and so can be located using FindName.
2. Creating an Image object at run-time
Images are relatively basic objects that simply display an image from a URL; or URI as it’s known in Silverlight (and in the rest of this article to avoid confusion). The image file you want to display must be stored on the same server as the application requesting it. This is to prevent you from blatantly hijacking another person’s bandwidth by directly referring to images on their server.
In order to create a basic Image object at run-time, all we really need to do is specify a URI to our source image. Here’s one we can use for this example:
The Lamborghini Countach. My personal all-time favourite car
I tend to keep my bitmap images in a “/images” sub-folder, but it’s entirely up to you where you store them. Just make sure they are easy to reference in the URI.
The first thing we need to do is create a new Image object, called imgSprite, in memory:
|
1 |
Dim imgSprite As New Image |
Notice that we’re using the New keyword because our Image object doesn’t exist yet. Our XAML file still only contains a Canvas.
Now we have our object, let’s write a function that sets its Source property to the URI of the image we want to display, and then adds the object to the Canvas:
|
1 2 3 4 5 6 7 8 9 |
Private Sub attachImage() ' Set up the new Image object imgSprite.Source = New Uri("images/car.jpg", UriKind.Relative) ' Add the Image to the Canvas cParent.Children.Add(imgSprite) End Sub |
The first value in the URI method is simply the address of the image we’re using. The second value tells Silverlight that the address is relative to the address of the code calling it.
Once we have our new Image object ready for creation, we add it to the Canvas’ VisualCollection as a child object. This is achieved using Canvas.Children.Add(), which is similar to manually adding an <Image> tag between the <Canvas> tags, except we now have much more control!
Finally, we need to call our new function once the Canvas loads. Simply add the following highlighted lines to your Page_Loaded() function.
|
1 2 3 4 5 6 7 8 9 10 11 12 |
Public Sub Page_Loaded(ByVal o As Object, ByVal e As EventArgs) ' Required to initialize variables InitializeComponent() ' set cParent to the canvas that called this function cParent = FindName("parentCanvas") ' Create Image attachImage() End Sub |
If you hit F5 now, your application should create, load, and then display the image in the top-left corner of the Canvas, in a staggeringly dull and static fashion.
So, let’s make it do something interesting!
3. Creating a Storyboard at run-time
If you’ve ever done any Flash development in the past, you should hopefully be aware of MovieClips. Basically, a Storyboard is the Presentation Framework’s equivalent to a MovieClip.
If you’re one of the few people in this Universe who haven’t ever used Flash, Storyboards are best described as container timelines that contain object and property information for animations; such as ColorAnimation, ColorAnimationUsingKeyFrames, DoubleAnimation, DoubleAnimationUsingKeyFrames, PointAnimation, PointAnimationUsingKeyFrames, or even another Storyboard. However, for the purposes of this article we won’t be using these. We will simply be creating a completely empty single-frame Storyboard.
To create our Storyboard, we will use a slightly different technique to the one we used to create our Image object. This is because Storyboards are a part of the ResourceDictionary rather than the VisualCollection.
Firstly, we must create a new Storyboard in memory:
|
1 2 |
Dim sbLoop As New Storyboard |
Then we need to write the following function to add the Storyboard to the Canvas:
|
1 2 3 4 5 6 7 8 9 10 11 12 13 14 |
Private Sub attachStoryboard() ' Set up the new Storyboard sbLoop.SetValue(Storyboard.NameProperty, "loop") ' Add the Storyboard to the Canvas cParent.Resources.Add(sbLoop) ' Start playing the Storyboard loop sbLoop.Begin() End Sub |
As you can see, we are using the SetValue method to set the Storyboard’s Name property to “loop”. This is because a Storyboard’s Name property is actually read-only. Using SetValue gets around this.
You’ll also notice that, because Storyboards are resources, we need to use Canvas.Resources.Add() as opposed to Canvas.Children.Add().
The last line, sbLoop.Begin(), starts playing the Storyboard as soon as it has been attached to the canvas. At the moment, it will play through to the end and stop, uneventfully, on the last frame.
Finally, we need to call our new Storyboard attachment function from our Page_Loaded() function. Simply add the two lines of code highlighted below:
|
1 2 3 4 5 6 7 8 9 10 11 12 13 14 15 16 |
Public Sub Page_Loaded(ByVal o As Object, ByVal e As EventArgs) ' Required to initialize variables InitializeComponent() ' set rootCanvas to the canvas that called this function cParent = FindName("parentCanvas") ' Create Image attachImage() ' Create Storyboard attachStoryboard() End Sub |
If you run the application now, you won’t notice any visible difference at all. You’ll still see the same static image patiently waiting to be told to do something, but the Storyboard is definitely there.
Now we need to make the Storyboard call a new function at the end of every loop.
4. Creating Your High-Speed Loop
We will create a high-speed loop that will move our Image object around the Canvas, by incrementing and/or decrementing its LeftProperty and TopProperty values. Both of these properties are read-only, so we will have to use our trusty SetValue() function to alter them.
We start by creating two Booleans that will allow us to keep track of whether our Image is going left, right, up, or down.
|
1 |
Dim movingLeft, movingUp As Boolean |
Now we have those, let’s create two Integers to keep track of the Image object’s current position.
|
1 |
Dim intX, intY As Integer |
I figured it would be best to have these two Integers available throughout our class, for speed purposes. We could Dim new ones and then get the current Left and Top properties for the Image object on every frame, but that seems unnecessarily wasteful considering we’re aiming for top-speed here, plus we should be very careful about how we use memory in such a fast loop.
Next, we create our main function for the loop. This is where the meat of our application makes the two previously written vegetables, (the Image and the Storyboard), work together.
|
1 2 3 4 5 6 7 8 9 10 11 12 13 14 15 16 17 18 19 20 21 22 23 24 25 26 27 28 29 30 31 32 33 34 35 36 37 38 39 40 41 42 43 44 45 46 47 48 49 |
Private Sub loop_Completed(ByVal sender As Object, ByVal e As EventArgs) ' Y-Axis logic If movingUp Then intY -= 1 ' update Y If intY < 0 Then ' bounce movingUp = Not movingUp End If Else intY += 1 ' update Y If intY > (cParent.Height - imgSprite.Height) Then ' bounce movingUp = Not movingUp End If End If ' X-Axis logic If movingLeft Then intX -= 2 ' update X If intX < 0 Then ' bounce movingLeft = Not movingLeft End If Else intX += 2 ' update X If intX > (cParent.Width - imgSprite.Width) Then ' bounce movingLeft = Not movingLeft End If End If ' Update the Image object's position imgSprite.SetValue(Canvas.LeftProperty, intX) imgSprite.SetValue(Canvas.TopProperty, intY) ' Restart the Storyboard sbLoop.Begin() End Sub |
Hopefully, the first and second sections of code should be fairly self-explanatory. They simply increment or decrement intY and intX depending on the values of movingUp and movingLeft.
The third section updates both the Left and Top properties of our Image object using the imgSprite variable we created earlier. Again, they are read-only properties so we use SetValue().
The final part of the function tells our Storyboard, which will currently be sitting on the last frame, to start again. Without it – we have no loop.
Excellent! With that done, all we need to do now is create an event handler to point to our loop function every time the Storyboard gets to the last frame. This is actually very simple as we just need to add the following highlighted line of code to our Storyboard attachment function.
|
1 2 3 4 5 6 7 8 9 10 11 12 13 14 15 |
Private Sub attachStoryBoard() ' set up the new Storyboard sbLoop.SetValue(Storyboard.NameProperty, "loop") ' Add the Storyboard to the Canvas cParent.Resources.Add(sbLoop) AddHandler sbLoop.Completed, AddressOf loop_Completed ' Start playing the Storyboard loop sbLoop.Begin() End Sub |
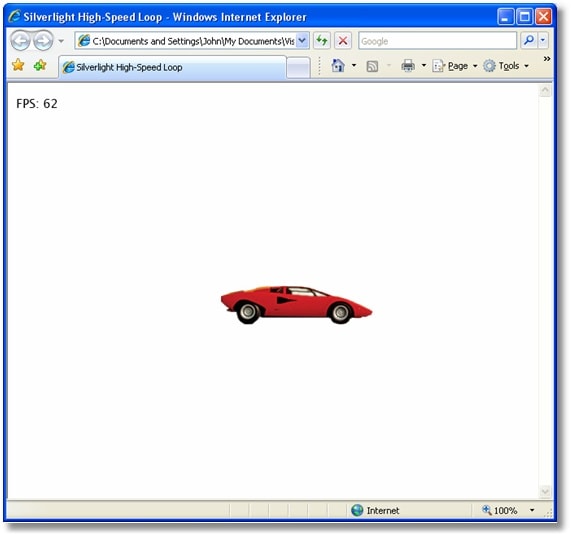
Now, hit F5, sit back, and watch your image bounce around the screen like an early 80’s video game! Give yourself a vigorous pat on the back!
Feel free to mess about with the code, because you will get some satisfying visual feedback.
Extending your application: Frames per second (without JavaScript)
Now we have a really fast application, wouldn’t it be nice to know exactly how fast it’s running?
There’s good news, and bad news.
The good news is, we can find out via a handy JavaScript property in our embedded object, called enableFrameRateCounter. If this is set to “true” then the current frame rate is displayed in the status bar.
The bad news is that it only works in Internet Explorer, which automatically makes me dislike it. Not that I’m against IE, but simply because I prefer wider browser compatibility. The second bit of bad news is it means yet another file to edit in order to make our application work properly.
It’s up to you if you use the JavaScript method, but I’m a fanatic of doing things in the simplest way possible, and so I’m going to share my own personal technique.
It may not be the fastest or most accurate method, but at least we get a good idea of the current frame rate; plus this way we can stay completely within Silverlight, which makes our application development easier to manage.
Firstly, we need a TextBlock to display the frame rate. So let’s start by creating a new TextBlock object called txtFPS:
Firstly, we need a TextBlock to display the frame rate. So let’s start by creating a new TextBlock object called txtFPS:
|
1 2 |
Dim txtFPS As New TextBlock |
Then we will need an integer called FrameRate to increment on each frame, and another called LastTime to keep track of the number of milliseconds:
|
1 2 |
Dim FrameRate, LastTime As Integer |
With that done, let’s create a new function that attaches the TextBlock to our Canvas:
|
1 2 3 4 5 6 7 8 |
Private Sub attachFPSText() ' Add the TextBlock to the Canvas cParent.Children.Add(txtFPS) End Sub |
Award yourself a pat on the back if you saw the Canvas.Children.Add method and immediately, and correctly, inferred that TextBlocks are part of the VisualCollection.
We now need to update our Page_Loaded() function with a call to our new TextBlock attachment function:
|
1 2 3 4 5 6 7 8 9 10 11 12 13 14 15 16 17 18 |
Public Sub Page_Loaded(ByVal o As Object, ByVal e As EventArgs) ' Required to initialize variables InitializeComponent() ' set rootCanvas to the canvas that called this function cParent = FindName("parentCanvas") ' Create Image attachImage() ' Create FPS TextBlock attachFPSText() ' Create Storyboard attachStoryboard() End Sub |
Now we need to create the function that updates our FrameRate Integer. For this we will use Date.Now.Millisecond.
|
1 2 3 4 5 6 7 8 9 10 11 12 13 |
Private Sub updateFPS() If LastTime > Date.Now.Millisecond Then txtFPS.Text = "FPS: " & FrameRate FrameRate = 0 LastTime = Date.Now.Millisecond Else LastTime = Date.Now.Millisecond FrameRate += 1 End If End Sub |
Every time this function is called, one frame has elapsed; so we need to increment our FrameRate Integer. Also, on each frame we update the LastTime integer with the value of Date.Now.Millisecond. If Date.Now.Millisecond is less than the value of LastTime, then roughly one second has elapsed and the value of FrameRate is the number of frames that have been displayed during that period.
Simple, eh? At least it saves us from messing about with any JavaScript files.
Finally, we need to call this function in our main loop; so add the following highlighted lines to our loop_Completed() function:
|
1 2 3 4 5 6 7 8 9 10 11 12 13 14 15 16 17 18 19 20 21 22 23 24 25 26 27 28 29 30 31 32 33 34 35 36 37 38 39 40 41 42 43 44 45 46 47 48 49 50 51 52 53 |
Private Sub loop_Completed(ByVal sender As Object, ByVal e As EventArgs) ' Update frame rate updateFPS() ' Y-Axis logic If movingUp Then intY -= 1 ' update Y If intY < 0 Then ' bounce movingUp = Not movingUp End If Else intY += 1 ' update Y If intY > (cParent.Height - imgSprite.Height) Then ' bounce movingUp = Not movingUp End If End If ' X-Axis logic If movingLeft Then intX -= 2 ' update X If intX < 0 Then ' bounce movingLeft = Not movingLeft End If Else intX += 2 ' update X If intX > (cParent.Width - imgSprite.Width) Then ' bounce movingLeft = Not movingLeft End If End If ' Update the Image object's position imgSprite.SetValue(Canvas.LeftProperty, intX) imgSprite.SetValue(Canvas.TopProperty, intY) ' Restart the Storyboard sbLoop.Begin() End Sub |
When you run the application now, you should have a shiny new TextBlock in the top-left corner of the Canvas telling you how fast your application is running.
Summary
Not only are you now fully equipped to create objects at run-time, but you can also use a Storyboard to continuously call a function that updates your objects’ properties at great speed. This puts you in good stead for being able to control and keep track of the download progress for all assets within your Silverlight applications.
For anyone who is inclined towards making games in Silverlight, the only thing you need to focus on now is translating user input to influence the property changes your application makes.
I’ll be interested to see what you can do using these techniques.
In the next article, (as part of the mammoth request by TK/JEE), we will examine the potentials of a “skinnable” User Interface by using Expression Blend 2 to create UI elements, and then altering their appearance at run-time from information stored in a Cookie on the user’s computer.
Load comments