
Why Automated Error-Reporting?
Automated error reporting is essential, especially if you’re close to your customers. Bugs in applications will always happen – but the way that you deal with them can make a big difference to you and your users. It is not enough to just display an error message and hope it will get reported. What incentive is there for your users to report it? You’ve already demonstrated that you don’t care by letting the error though. You’ll only find out that it’s really critical when then they call up and scream down the phone at you.
Automatically reporting it is much better – at the very least you can monitor trends and prioritise effort. If you’re really proactive, you can get errors going straight into your error tracking system. But to really impress your users you can call them; preferably before they call you.
So, having chosen to automate your error reports, what should you capture? There is no end to the useful information that can be attached to an error report: The essential items are application version and OS version; then there are log files, event logs, loaded assemblies and lists of the other running processes. The one that I have always found very useful, though, is a screenshot.
How to capture screenshots
As the cliché goes, a picture is worth a thousand words. This is especially true when those words are being written by a non-technical user who has plenty of their own problems to sort out. I’ve found all sorts of answers in a screenshot: un-escaped characters in a text box (later inserted, insecurely, into a SQL query); strange visual artefacts caused by low GDI memory; and of course dozens of other open applications that happen to coincide with an “out of memory” error.
Grabbing the bitmap of the screen
A quick search in Google quickly reveals a dozen ways to grab an image of the screen the screen. The basics are as follows.
1. To start you’ll need to get a handle to the desktop window. The easiest way (in fact the only way I’ve found) is to call the Windows API.
|
1 |
System.IntPtr hWnd = GetDesktopWindow(); |
2. Now, having got a handle we need to find the rectangle (so we can dimension the bitmap onto which we’ll draw the desktop). Again, we must resort to the API.
|
1 2 3 |
var rectStruct = new RECT(); GetWindowRect(_windowHandle, ref rectStruct); var rectangle = System.Drawing.Rectangle(rectStruct .Left, rectStruct.Top, rectStruct.Right - rectStruct.Left - 1, rectStruct.Bottom - rectStruct.Top - 1); |
3. Now, we can create the bitmap for the image:
|
1 |
var screenshot = new System.Drawing.Bitmap(rectangle .Width, rectangle.Height, System.Drawing.Imaging.PixelFormat.Format32bppArgb); |
4. Finally, we can grab the image:
|
1 2 3 4 |
using(var screenshotGraphics = System.Drawing.Graphics.FromImage(screenshot)) { screenshotGraphics.CopyFromScreen(0, 0, 0, 0, new System.Drawing.Size(desktopRectangle.Width, desktopRectangle.Height)); } |
And there you go, screenshot now contains your image.
Including the mouse pointer in an image
Getting the mouse cursor on there is a little harder, but well worth it since it’s very handy to know where they were clicking. The following lines must follow immediately from the line containing “CopyFromScreen” in step 4 above.
1. To get the system cursor we’ll need to go the Windows again:
|
1 2 |
System.IntPtr handle = GetCursor(); var cursor = new System.Windows.Forms.Cursor(handle); |
2. The we need to work out where to put the image:
|
1 2 |
var mousePosition = System.Windows.Forms.Cursor.Position; var cursorRectangle = new System.Drawing.Rectangle(new System.Drawing.Point(mousePosition.X - cursor.HotSpot.X,mousePosition.Y - cursor.HotSpot.Y), cursor.Size); |
3. Finally we need to render the cursor onto our screenshot.
|
1 |
cursor.Draw(screenshotGraphics, cursorRectangle); |
That’s fairly easy really.
Adding the image to an error-report
How about attaching the image to your error report? That isn’t always easy. The simplest way is to convert it to a string – base-64 encoding will ensure it can be passed through HTTP or stuck in an XML document without causing problems.
|
1 2 3 4 5 6 7 8 |
public static string BitmapToString(System.Drawing.Bitmap bitmap) { using(var memoryStream = new System.IO.MemoryStream()) { bitmap.Save(memoryStream, System.Drawing.Imaging.ImageFormat.Bmp); return System.Convert.ToBase64String(memoryStream.GetBuffer()); } } |
At the other end the following will convert it back:
|
1 2 3 4 5 |
publicstatic System.Drawing.Bitmap StringToBitmap(string buffer) { var memoryStream = new System.IO.MemoryStream(System.Convert.FromBase64String(buffer)); return (System.Drawing.Bitmap) System.Drawing.Image.FromStream(memoryStream); } |
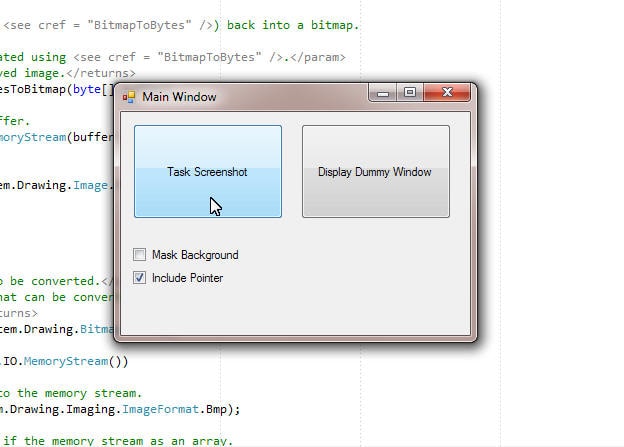
And the result :…
Including just the relevant parts of the screen
But hang on! As a customer I’m not sure I want my software supplier to see everything I was working on when their flaky application crashed. I want them only to see the windows belong to their application. How do we do that? Regions. These are “shapes” that can be manipulated and combined using a variety of operators to create a mask. In this case I’m going to create a big blank and then knock out holes for the windows by “excluding” their rectangles.
1. Let’s start by creating the bitmap onto which to paint the results.
|
1 |
var maskedScreenshot = (System.Drawing.Bitmap) screenshot.Clone(); |
2. Now, the region that will mask the paint operation:
|
1 2 3 |
var screen = new System.Drawing.Rectangle(0, 0, maskedScreenshot.Width, maskedScreenshot.Height); var mask = new System.Drawing.Region(screen); mask.Intersect(screen); |
3. Let’s mask all the windows owned by this application:
|
1 2 |
foreach(System.Windows.Forms.Form form in System.Windows.Forms.Application.OpenForms) mask.Exclude(form.DesktopBounds); |
4. Finally, paint using the mask to leave our windows unaffected:
|
1 2 3 4 5 6 7 |
using(var graphics = System.Drawing.Graphics.FromImage(maskedScreenshot)) { using(var brush = new System.Drawing.Drawing2D.HatchBrush(System.Drawing.Drawing2D.HatchStyle.Percent90, maskColor, maskColor)) { graphics.FillRegion(brush, mask); } } |
That leaves maskedScreenshot with the masked image. Now your results will look more like this:
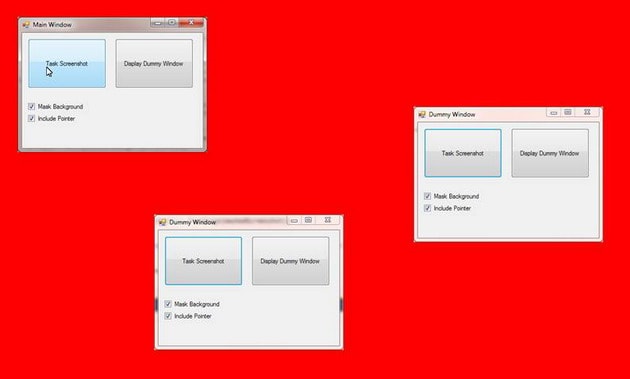
No secrets revealed.
Wrapping it up
The attached code shows how this can all be packaged and used to report with screenshots using SmartAssembly. I’ve placed most of the code above in a WindowInfo class that can be used a bit more naturally in code and allows screenshots of individual windows to be collected.
A couple of points you might want to consider…
1. The solution provided does not take into account other windows obscuring yours (in which case you might capture portions of sensitive information);
2. Capturing the cursor after the mask has been applied (which will allow the position of the cursor to be seen even if it is outside of your windows at the time);
3. Some windows (for example file dialogues) will not appear in the System.Windows.Forms.Application.OpenForms collection, and so will be missed.
Points 1 and 3 above can be solved by enumerating windows using Windows API methods.
Load comments