
Rust is a systems programming language that has gained mainstream adoption for web services because of its performance (near-C speeds), memory safety (no garbage collector, no null pointer exceptions, no data races), and growing ecosystem of production-grade web libraries. This article builds a complete REST API in Rust using two cornerstone libraries – Actix-web, and Diesel.
There are many packages and tools that you can use to facilitate your API development with Rust. Rust has a rich third-party ecosystem of crates for building APIs, including web packages like Actix and Rocket and ORMs like Diesel and SeaORM.
This article delves into using Actix and Diesel to build web applications. You’ll learn by building a CRUD API with persistence through Diesel on a Sqlite database.
Actix is a high-performance web framework that runs on the actor model. It is great at handling concurrent requests with lightweight actors that communicate asynchronously. Actix’s architecture promotes scalability and responsiveness, which is ideal for building performant web apps.
For data persistence, Diesel is a mature ORM that flexibly acts as a bridge between Rust data types and database tables. You’ll write native Rust programs, and Diesel will create statements and queries to execute on your preferred DBMS.
Setting up the API Development Environment
Setting up a development environment for building REST APIs in Rust is relatively simple. You must download and install a recent version of Rust on your computer to get started.
Run this command on your terminal to verify that you’ve successfully installed Rust and Cargo (Rust’s package management tool).
|
1 2 |
rustc --version cargo --version |
Next, Run these commands on your terminal to create and initialize a new Rust project on your computer:
|
1 2 3 |
mkdir rusting-actix-diesel && cd rusting-actix-diesel cargo init rusting-actix-diesel |
The cargo init command initializes a new Rust project in the specified working directory. The command also creates a cargo.toml file in the directory for managing your project’s dependencies.
You’ll need some form of persistence for your database. In this tutorial, you’ll learn how to use Diesel and an SQL database for persistence for your API. Diesel supports a variety of SQL databases, including Sqlite, MySQL, and PostgreSQL. Install your preferred database management system, and you’re good to go.
Setting Up the Database for Persistence
You have to add the diesel and dotenv crates as project dependencies in the dependencies section of your cargo.toml file.
|
1 2 3 |
[dependencies] diesel = { version = "2.1.0", features = ["sqlite"] } dotenv = "0.15.0" |
Once you’ve added these crates as dependencies, you must install the diesel_cli tool to interact with Diesel over the command line for migrations and schema generation.
Run this command to install the diesel_cli tool:
|
1 |
cargo install diesel_cli |
You can run the diesel_cli tool diesel_cli command after installing the tool.
Next, create an environment variables file and specify your database URL with the DATABASE_URL field. Run this command to create and insert the database URL for an in-memory Sqlite database.
|
1 |
echo DATABASE_URL=database.db > .env |
Next, run the setup command for Diesel to set up a database for your project:
|
1 |
diesel setup |
The setup command creates a migrations directory, the database specified in the DATABASE_URL, and runs existing migrations.
After you’ve set up your database with Diesel, you’ll use the migration generate command to generate SQL migration files. You’ll add the name of the migration as an argument to the migration generate command:
|
1 |
diesel migration generate create_humans |
The command generates two SQL files in the migrations directory: up.sql and down.sql.
Write SQL for your database table definitions in the up.sql file as thus:
|
1 2 3 4 5 6 7 8 9 10 |
-- up.sql -- Your SQL goes here CREATE TABLE "human" ( "id" INTEGER NOT NULL PRIMARY KEY AUTOINCREMENT, "first_name" TEXT NOT NULL, "last_name" TEXT NOT NULL, "age" INTEGER NOT NULL ); |
Then, write the SQL code to drop database tables in the down.sql file:
|
1 2 3 4 |
-- down.sql -- This file should undo anything in `up.sql` DROP TABLE "human" |
After writing the SQL files, run the migration run command to apply pending migrations.
|
1 |
diesel migration run |
After a successful process, you can use the print-schema command to print the schema. The command prints the contents of the schema.rs file.
diesel print-schema
The output of the print_schema command is Rust code that matches your SQL schema.
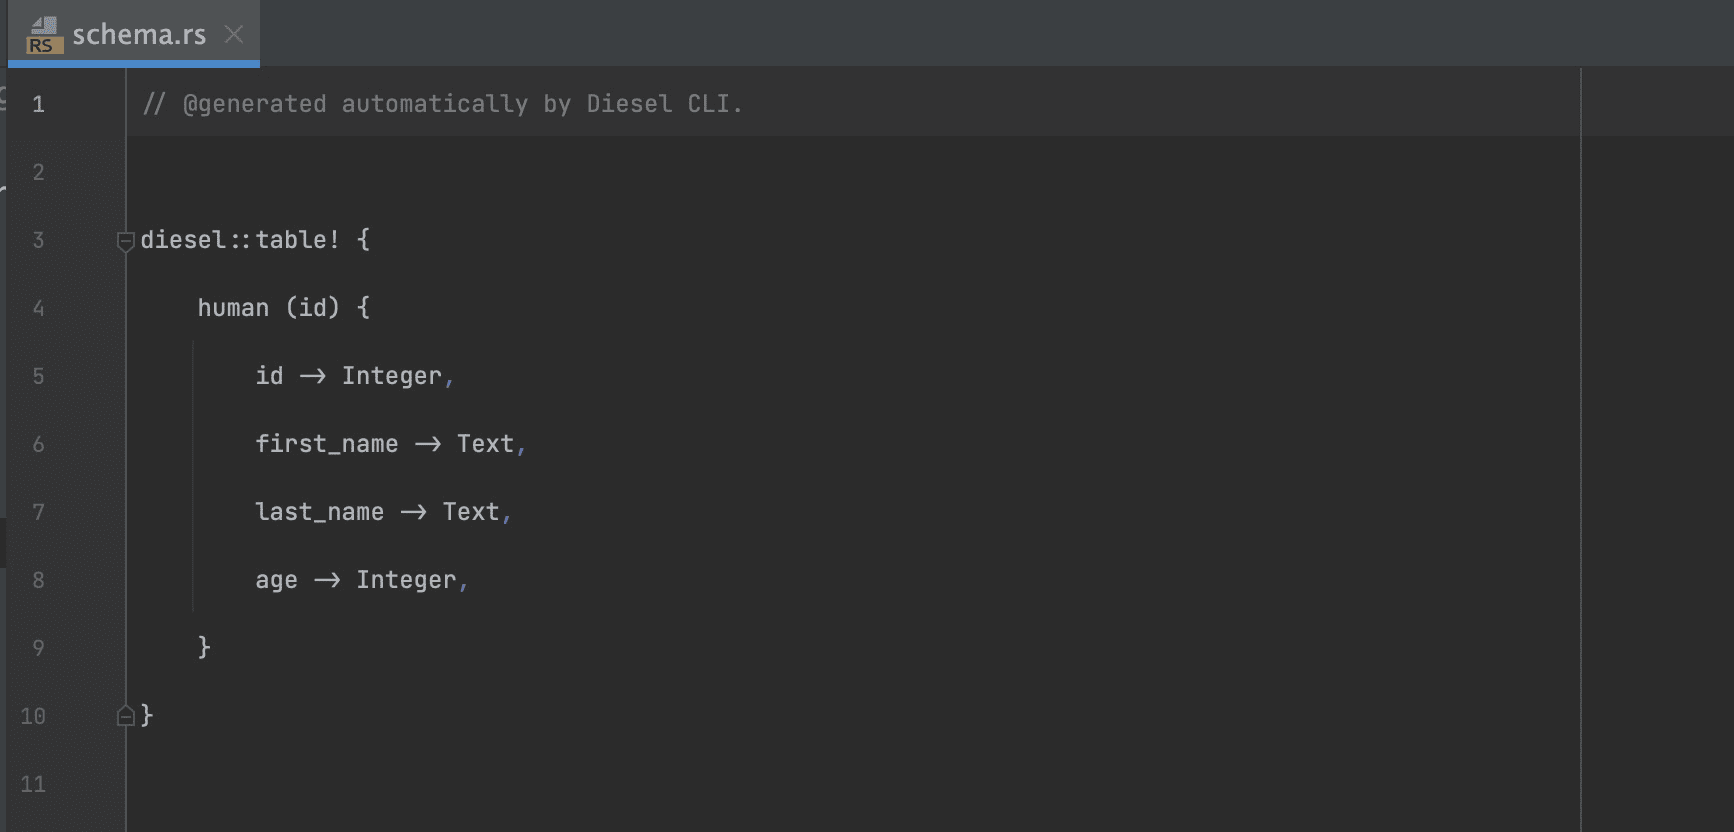
Attach the schema.rs file to your main.rs file with the mod schema directive to use the contents of the schema.rs file in the main.rs file and other parts of your package.
You must declare structs for data serialization, migrations, and deserialization operations. You can create a models.rs file and add struct definitions to match your database schema.
Here are the structs for the CRUD operations:
|
1 2 3 4 5 6 7 8 9 10 11 12 13 14 15 16 17 18 19 20 21 22 23 24 25 |
// models.rs use diesel::prelude::*; use serde::{Deserialize, Serialize}; use crate::schema::human; #[derive(Queryable, Serialize)] pub struct Human { pub id: i32, pub first_name: String, pub last_name: String, pub age: i32, } #[derive(Queryable, Insertable, Serialize, Deserialize)] #[table_name = "human"] pub struct NewHuman { pub first_name: String, pub last_name: String, pub age: i32, } #[derive(Deserialize, AsChangeset)] #[table_name = "human"] pub struct UpdateHuman { first_name: Option<String>, last_name: Option<String>, age: Option<i32>, } |
The request handler functions returns the Student struct. You can use the NewStudent for data migration and the UpdateStudent struct for PUT requests.
Simple Talk is brought to you by Redgate Software
Connecting to Your SQL Database With Diesel
You’ll use the env and Connection to connect your SQL database with Diesel.
Here’s how you can connect to an SQLite database with a function and return a connection instance:
|
1 2 3 4 5 6 7 8 9 10 11 12 13 |
// src/model.rs use std::env; use diesel::prelude::*; use dotenv::dotenv; pub fn establish_connection() -> SqliteConnection { dotenv().ok(); let database_url = env::var("DATABASE_URL").expect( "DATABASE_URL must be set"); SqliteConnection::establish(&database_url) .unwrap_or_else(|_| panic! ("Error connecting to the database: {}", database_url)) } |
The establish_connection function returns the connection instance struct (SqliteConnection). The establish_connection loads the environment variables with the ok function accesses the database URL with the var function, and establishes a connection with the database via the URL with the establish function.
Setting Up Actix-web for Routing and Server Operations
After setting up the database for persistence, you can set up a server with Actix with routes for your handler functions.
Here are the contents of the [main.rs] file containing the main function that handles the routing and starts the server:
|
1 2 3 4 5 6 7 8 9 10 11 12 13 14 15 16 17 18 19 20 21 22 23 24 |
// main.rs // attaches the files in the package to the `main.rs` file mod database; mod model; mod schema; mod handlers; // import the functionality for starting the server use actix_web::{web, App, HttpServer}; // import the handler function use crate::handlers::{create_human, delete_human, get_humans, update_human}; #[actix_web::main] async fn main() -> std::io::Result<()> { HttpServer::new(|| { App::new() .route("/human", web::post().to(create_human)) .route("/humans", web::get().to(get_humans)) // changed this route path .route("/human/{id}", web::put().to(update_human)) .route("/human/{id}", web::delete().to(delete_human)) }) .bind("127.0.0.1:8080")? .run() .await } |
The main function is an asynchronous function that starts the server with the HttpServer::new function that takes in the App::new function, which handles the routes. The bind function binds the routes to the specified host, and the run function runs the server.
After setting up the server, you can import these functions in your [handlers.rs](<http://handlers.rs>) file, where you’ll specify the handler functions for the API.
|
1 2 3 4 5 6 7 8 9 |
// handlers.rs // import the database connection function use crate::database::establish_connection; // import necessary actix functionality use actix_web::{web, App, HttpResponse, HttpServer, Result}; // import necessary diesel functionality use diesel::{prelude::*, sqlite::SqliteConnection}; // import the structs from model.rs use crate::model::{Human, NewHuman, UpdateHuman}; |
Once you’ve imported the necessary functions and types, you can start writing the handler functions that run when users make API requests to the server.
The POST Request Handler Function
The create_human function is the POST request handler function. The create_human function will retrieve the JSON payload from the request and return a JSON payload containing a success message to the client.
|
1 2 3 4 5 6 7 8 9 10 11 |
pub async fn create_human(new_human: web::Json<NewHuman>) -> Result<HttpResponse> { use crate::schema::human::dsl::*; let mut connection = establish_connection(); diesel::insert_into(human) .values(&new_human.into_inner()) .execute(&mut connection) .expect("Error inserting new human"); Ok(HttpResponse::Ok().json( "data inserted into the database")) } |
The create_human handler function connects to the database with the establish_connection function, inserts the new_human data from the JSON payload inton the database with the insert_into function, and uses the HttpResponse::Ok function to return a JSON payload after a successful request.
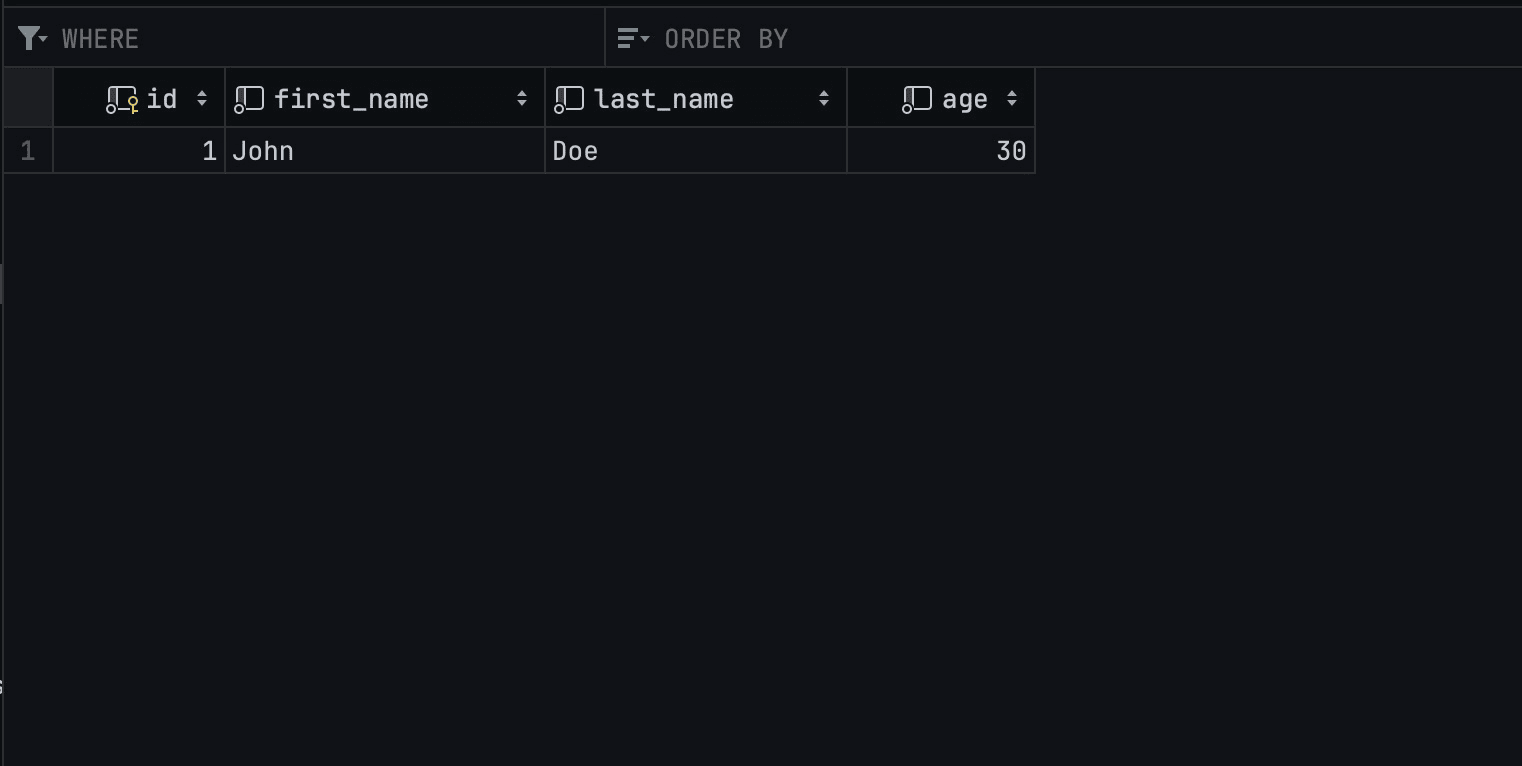
Here’s a CURL request that you can use to test the create_human handler function.
|
1 2 3 |
curl -X POST http://127.0.0.1:8080/humans -H "Content-Type: application/json" -d '{"first_name": "John", "last_name": "Doe", "age": 30}' |
Here’s the result of a successful data insertion operation on the database:
The GET Request Handler Function
The get_humans function is a GET request handler function that retrieves all the entries in the database and returns them to the client.
|
1 2 3 4 5 6 7 8 9 |
// READ ALL pub async fn get_humans() -> Result<HttpResponse> { use crate::schema::human::dsl::*; let mut connection = establish_connection(); let humans = human .load::<Human>(&mut connection) .expect("Error loading humans"); Ok(HttpResponse::Ok().json(humans)) } |
After connecting to the database, the get_humans handler function uses the load function to load all the Human entries in the database.
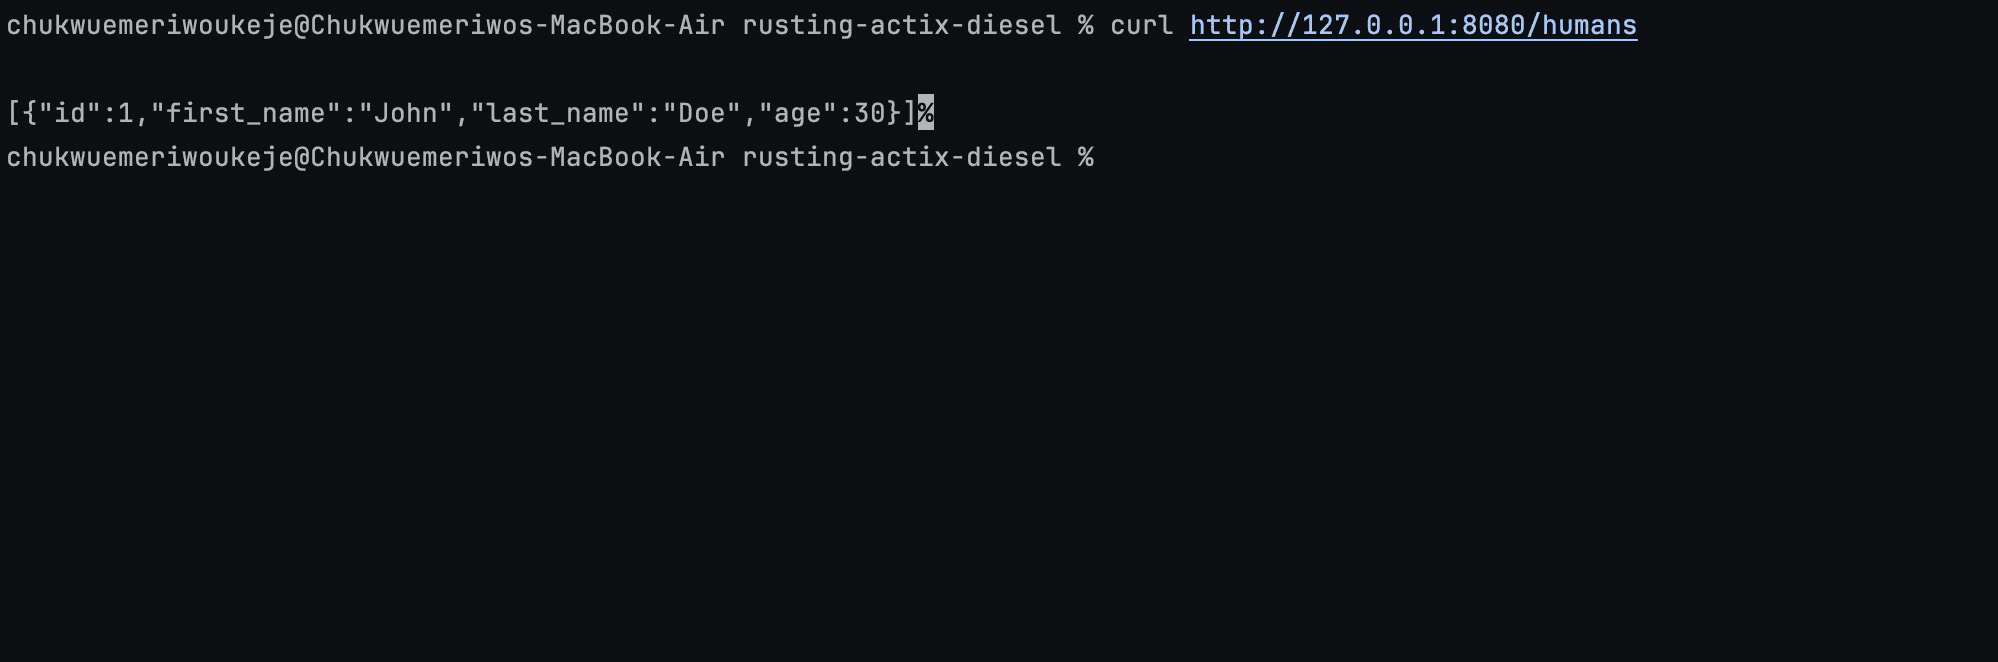
Here’s a CURL request that makes a call to trigger the functionality of the get_humans handler function:
|
1 |
curl http://127.0.0.1:8080/humans |
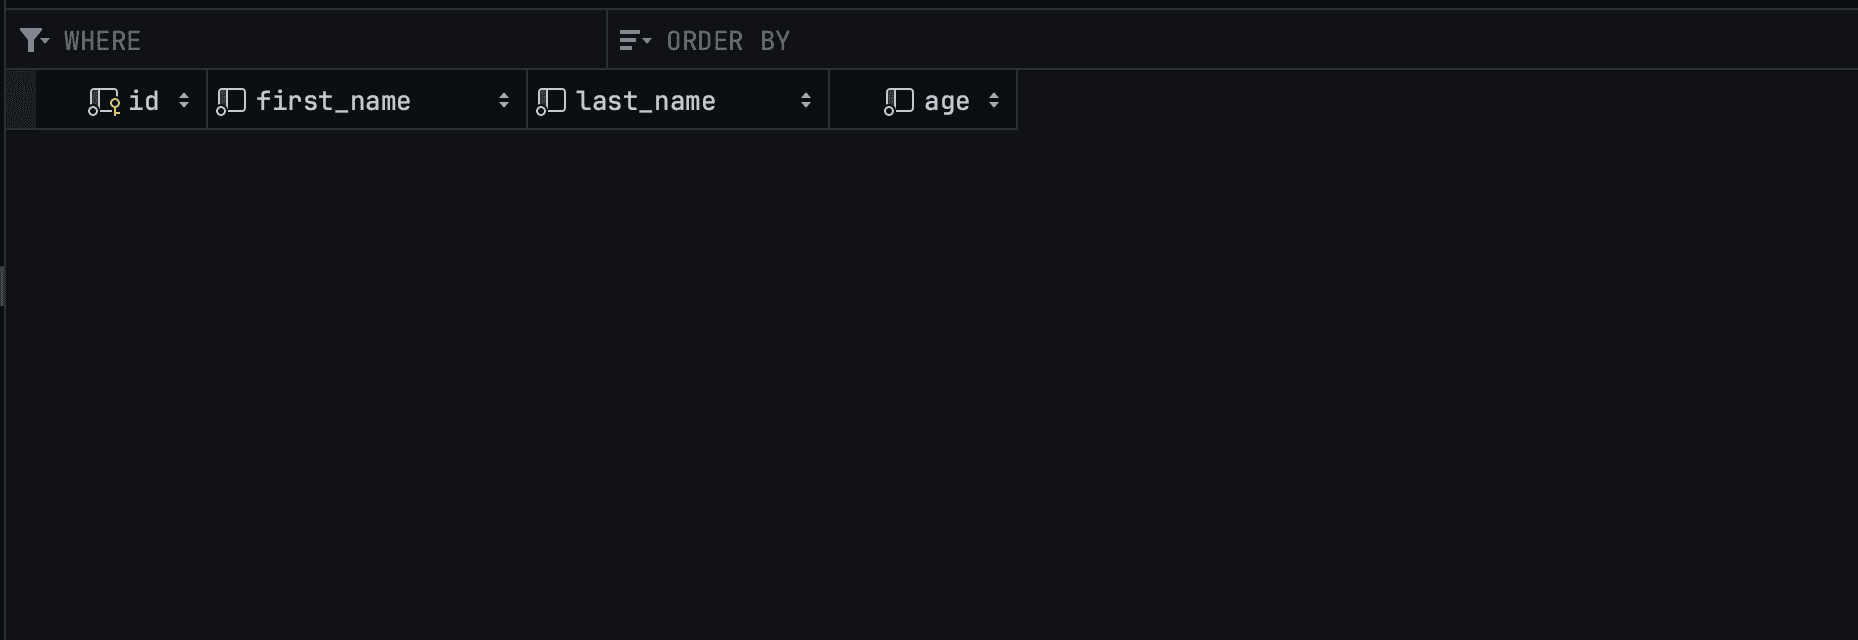
On sending a GET request to the API via CURL you should expect to retrieve the entries in the database as such:
The PUT Request Handler Function
The update_human function is an asynchronous function that takes the id and a JSON payload from the client’s request and returns the data from the payload after updating the database entry.
|
1 2 3 4 5 6 7 8 9 10 11 12 13 14 15 |
// UPDATE pub async fn update_human( id: web::Path<i32>, human_update: web::Json<UpdateHuman>, ) -> Result<HttpResponse> { use crate::schema::human::dsl::*; let mut connection = establish_connection(); // Use the `update` method of the Diesel ORM //to update the student's record let updated_human = diesel::update(human.find(id)) .set(&human_update.into_inner()) .execute(&mut connection) .expect("Failed to update student"); Ok(HttpResponse::Ok().json(updated_human)) } |
The update_human handler function uses the update function to update the entry after confirming that the id exists with the find function.
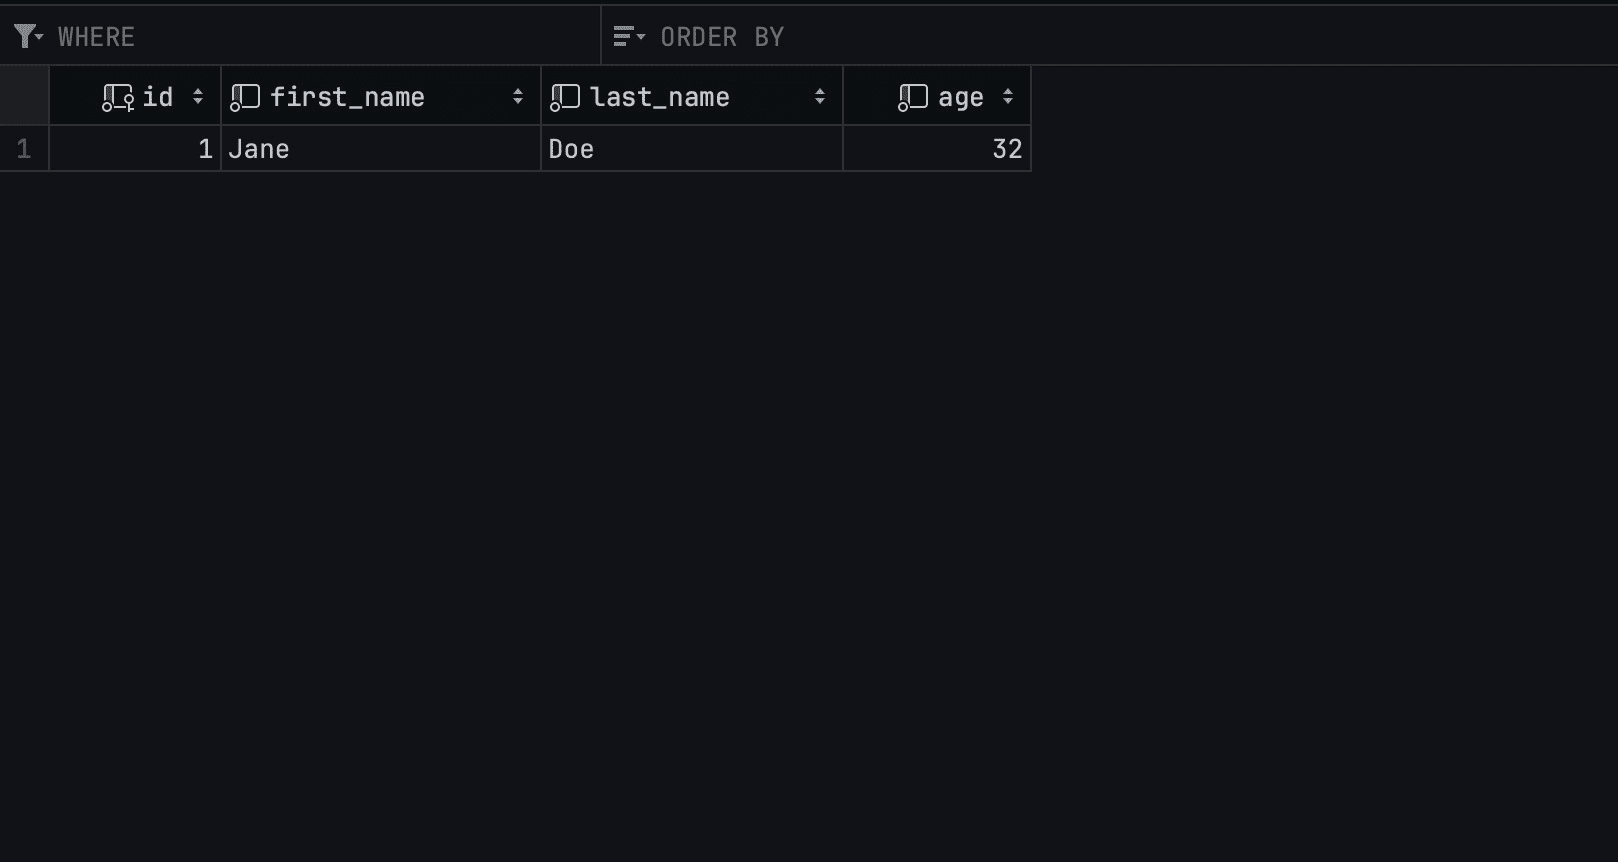
Here’s a CURL request that sends a PUT request to the database and triggers the update_human function.
|
1 2 3 |
curl -X PUT http://127.0.0.1:8080/humans/{id} -H "Content-Type: application/json" -d '{"first_name": "Jane", "last_name": "Doe", "age": 32}' |
On sending the CURL request, here’s the result of the update operation:
The DELETE Request Handler Function
The DELETE request handler function will retrieve the id from the request and delete the row with the id from the database.
|
1 2 3 4 5 6 7 8 9 |
// DELETE pub async fn delete_human(id: web::Path<i32>) -> Result<HttpResponse> { use crate::schema::human::dsl::*; let mut connection = establish_connection(); diesel::delete(human.find(id)) .execute(&mut connection) .expect(&format!("Unable to find student {:?}", id)); Ok(HttpResponse::Ok().json("Deleted successfully")) } |
The delete_human handler function deletes the entry with the id from the database with Diesel’s delete function and returns a string response to confirm the operation’s success.
Here’s a CURL request that seeks to delete the entry having the id field of 1 from the database:
|
1 |
curl -X DELETE http://127.0.0.1:8080/humans/{id} |
The result from a successful DELETE request to the database should have this form:
Conclusion
This guide explored setting up a RESTful API in Rust using Actix, Diesel, and SQLite. You have learned to define CRUD operations and used CURL commands to demonstrate how the API responds to different requests. Rust’s flexibility, combined with Actix’s speed and Diesel’s versatility, makes this stack a powerful choice for backend development.
As you progress with Rust, you’ll find many more libraries and tools in the Rust ecosystem that you can use to extend and improve your API. You can take the functionality of this API a step further by adding authentication and authorization mechanisms to secure your API and implement logging and error handling to make debugging easier.
Enjoying this article? Subscribe to the Simple Talk newsletter
This document contains proprietary information and is protected by copyright law.
Copyright © 2026 Red Gate Software Limited. All rights reserved
Load comments