
If you’ve been using MySQL for a while and want to learn how to orchestrate MySQL containers, you’ve come to the right place. And while using Docker on its own to manage a single MySQL instance or multiple instances has certain drawbacks, such as lacking the ability to orchestrate multiple instances, scale, and provide services for external clients, in this blog we’ll explore how Kubernetes addresses these limitations and what to do when you’re facing problems.
To begin, visit the Docker Hub, find a Docker image called “mysql” (it can be utilized to generate a Docker container with a MySQL database instance on Kubernetes), and let’s begin.
Prerequisites
To follow along with this tutorial, you need the following:
- Minikube and VirtualBox installed locally – This tutorial uses Minikube v1.25.2 and VirtualBox 6.1.
- Basic knowledge of Kubernetes
- Basic knowledge of MySQL
Setting up minikube
Minikube is a popular tool used in the development of Kubernetes-based applications. It allows developers to create a local Kubernetes cluster for testing, debugging, and experimenting with Kubernetes features and applications. To use Minikube, a virtualization driver is needed. The driver creates and manages a virtual machine that hosts the Kubernetes cluster. This tutorial uses VirtualBox as the driver, which is free and open-source virtualization software that allows users to run multiple operating systems on a single machine.
To create a Kubernetes cluster with Minikube and VirtualBox, you need to run the command:
|
1 |
minikube start --driver=virtualbox |
This command will initiate MiniKube with VirtualBox as its driver. At present, VirtualBox is the most stable driver available for Minikube.
Set up MySQL on Kubernetes
Now we will set up MySQL – we will use a version of MySQL available on Docker Hub, authenticate it with credentials we’ll help you set up, and then create a pod. We will also create a PersistentVolume (PV) and PersistentVolumeClaim (PVC) to work with storage inside your Kubernetes Cluster. PV sets aside storage resources in the cluster for MySQL, while PVC requests storage from the PV.
To get started, you need to create a folder for all the Kubernetes YAML files. You will create the YAML file (my-storage.yaml) for storage first, which will include data for the PV and PVC, then paste the following code in it:
|
1 2 3 4 5 6 7 8 9 10 11 12 13 14 15 16 17 18 19 20 21 22 |
apiVersion: v1 kind: PersistentVolume metadata: name: mysql-pv spec: capacity: storage: 250Mi accessModes: - ReadWriteOnce hostPath: path: "/var/lib/mysql" --- apiVersion: v1 kind: PersistentVolumeClaim metadata: name: mysql-pv-claim spec: accessModes: - ReadWriteOnce resources: requests: storage: 250Mi |
The PersistentVolume resource, named mysql-pv, defines a storage volume with a capacity of 250Mi (250 megabytes) and is using the hostPath volume plugin, which allows the volume to be mounted from a file or directory on the host system. In this case, the volume is being mounted from the /var/lib/mysql directory on the host system, but make sure to change the path if you’ve set a different directory for your MySQL data files.
The PersistentVolumeClaim resource, named mysql-pv-claim, defines a request for a persistent volume with a capacity of 250Mi that can be mounted with read-write access by a single node at a time. This claim can then be used by other Kubernetes resources, such as a Deployment, to request storage resources.
Now send the above configuration to Kubernetes with the following command:
|
1 |
kubectl apply -f my-storage.yaml |
After you’ve applied the configuration to Kubernetes, it’s time to move on to the deployment and the service.
Starting the Deployment and Service
Now, we’ll create the deployment and the service for MySQL. Kubernetes will pull the Docker image mysql:latest from Docker Hub and use it to create a container that will run on Kubernetes. In Kubernetes, a Service provides a stable IP address for a set of Pods, allowing other parts of the application to easily access the Pods without needing to know their specific IP addresses or ports and since your MySQL image will require the values of the variables named MYSQL_ROOT_PASSWORD, MYSQL_DATABASE, MYSQL_USER and MYSQL_PASSWORD, we will need to create those secret values before deployment.
You can create these values by running the following commands (replace put-database-name, put-root-password, put-username, and put-user-password with values relevant to your database.) Also keep in mind that in Kubernetes, a secret may also contain more than one key/value pair:
|
1 2 3 4 5 |
kubectl create secret generic mysql-db --from-literal=database=put-database-name kubectl create secret generic mysql-root-pass --from-literal=password=put-root-password kubectl create secret generic mysql-user-pass --from-literal=username=putusername --from-literal=password=put-user-password |
Here, the Kubernetes manifest creates a Service resource named “mysql” that exposes a port (3306) on the nodes in the cluster via a NodePort. The selector specified in the manifest ensures that the Service routes traffic to pods with the label app: mysql.
To get the deployment and Service going, create a new manifest file (mysql.yaml) and paste in the following code.
|
1 2 3 4 5 6 7 8 9 10 11 12 13 14 15 16 17 18 19 20 21 22 23 24 25 26 27 28 29 30 31 32 33 34 35 36 37 38 39 40 41 42 43 44 45 46 47 48 49 50 51 52 53 54 55 56 57 58 59 60 61 62 63 |
apiVersion: v1 kind: Service metadata: name: mysql spec: type: NodePort selector: app: mysql ports: - port: 3306 targetPort: 3306 nodePort: 30007 --- apiVersion: apps/v1 kind: Deployment metadata: name: mysql-deployment labels: app: mysql spec: replicas: 1 selector: matchLabels: app: mysql template: metadata: labels: app: mysql spec: volumes: - name: mysql-pv persistentVolumeClaim: claimName: mysql-pv-claim containers: - name: mysql image: mysql:latest env: - name: MYSQL_ROOT_PASSWORD valueFrom: secretKeyRef: name: mysql-root-pass key: password - name: MYSQL_DATABASE valueFrom: secretKeyRef: name: mysql-db key: database - name: MYSQL_USER valueFrom: secretKeyRef: name: mysql-user-pass key: username - name: MYSQL_PASSWORD valueFrom: secretKeyRef: name: mysql-user-pass key: password volumeMounts: - name: mysql-pv mountPath: /var/lib/mysql ports: - containerPort: 3306 name: mysql |
Explanation of the code above:
Here’s what you need to know about the code block you’ve just reviewed:
spec: This section contains the specifications for the Kubernetes resource, such as the type of Service or the number of replicas for the Deployment.selector: This section specifies the label selector for the Service or Deployment. In this case, the Service will match pods with theapp=mysqllabel and the Deployment will select pods with theapp=mysqllabel.type: This section specifies the type of Service being created. In this case, the type isNodePort, which exposes the Service on a static port on each node in the cluster.ports: This section specifies the ports that the Service will listen on. In this case, the Service will listen on port 3306 and forward traffic to port 3306 on the pods.volumes: This section specifies the volumes that will be used by the container. In this case, there is one volume namedmysql-pv, which is created by aPersistentVolume.containers: This section specifies the containers that will be run by the Deployment. In this case, there is one container namedmysql, which is using themysql:latestDocker image.env: This section specifies the environment variables that will be set for the container. In this case, there are four environment variables being set using secrets created from Kubernetes Secret resources. This was set earlier.volumeMounts: This section specifies the mount points for the volumes that will be used by the container. In this case, there is one volume namedmysql-pv, which is mounted to the container’s/var/lib/mysqldirectory.containerPort: This section specifies the port that the container will listen on. In this case, the container will listen on port 3306.
Now, apply your configuration by running the command below:
|
1 |
kubectl apply -f mysql.yaml |
This command applies a configuration to a resource from a given file. Let Kubernetes do its thing and after 5-10 minutes, run the following command to check if your pod is running the following command. Take note of the pod name – you will need it to interact with your database later on.
|
1 |
kubectl get pods |
If your pod is running, you should see something like the image below:

In this section, we have been able to create a pod where the MySQL server will run. We will need this is the next sections to work on the server.
Interacting with the Database
Now, we will start an interactive shell to interact with our MySQL database. The interactive shell will enable us to interact with MySQL through the CLI. Start the interactive shell by running the following command (replace paste-pod-name with the name of the pod you’ve just taken note of):
|
1 |
kubectl exec --stdin --tty paste-pod-name -- /bin/bash |
Within the interactive shell, run the following command to start the MySQL CLI as the root user (username you created earlier). You will be prompted to provide the password. Provide the password you used in this command:
|
1 |
kubectl create secret generic mysql-root-pass --from-literal=password=put-root-password |
This command was used to store the root password.
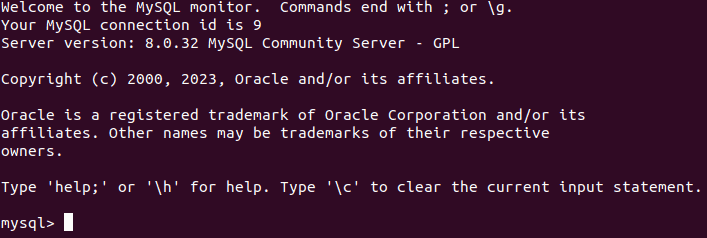
Now, log in to your MySQL instance – provide a username and a password:
|
1 |
mysql –u [putusername] –p |
Your result should look like the image below.
Now run the following command to create a new database:
|
1 |
CREATE DATABASE catalog_database; |
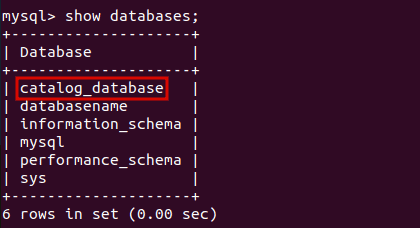
Now run the following MySQL command to list the databases available, and you should see all your databases including the one you just created.
|
1 |
show databases; |
Now navigate into any of your databases with the following command:
|
1 |
use catalog_database; |
Next, create a database table called Catalog with the following SQL statement.
|
1 2 3 4 5 6 7 8 |
CREATE TABLE Catalog( CatalogId INTEGER PRIMARY KEY, Journal VARCHAR(25), Publisher VARCHAR(25), Edition VARCHAR(25), Title VARCHAR(45), Author VARCHAR(25) ); |
Add a row of data to the Catalog table with the following SQL statement.
|
1 2 3 |
INSERT INTO Catalog VALUES('1','Muscle Magazine','Jude Mag', 'June 2013', 'How to grow muscles','Muhammed Ali'); |
The Catalog table gets created and a row of data gets added. You can checkout your data with the following statement:
|
1 2 |
SELECT * FROM Catalog; |

Conclusion
In this article, we learned how to orchestrate the MySQL database using Kubernetes. We started with specifying the storage specification for the database, then moved to creating the deployment that runs the MySQL container. We also created a Kubernetes service so that the database can be accessed. Furthermore, we went further to interact with the database running in Kubernetes.
Now, in the unlikely event of a database failure, a new instance will automatically be generated for you, ensuring that all your data remains intact and persistent.
This document contains proprietary information and is protected by copyright law.
Copyright © 2026 Red Gate Software Limited. All rights reserved
Load comments