
This article is really a review of the alternative ways to get started with setting up a database-driven Azure site. I’ll start by using SQL Azure Management Portal and SQL Server Management Studio. Then, I’ll use Visual Studio to create a SQL Azure database (Web edition, 1 GB). I’m going to add a single Customer table and I’m going to see if I can deploy a LightSwitch application using that database.
SQL Azure is NOT SQL Server
Yes, SQL Azure is NOT SQL Server. I’ve wanted to say that for weeks – now I’ve said it. I keep hearing from so many sources that SQL Azure is SQL Server in the Cloud and to a degree that is correct. SQL Azure is a relational database system with many similarities to SQL Server; after all, both are Microsoft products. Beyond that many things from the developer’s perspective take a divergent direction.
Taking a broad look, it takes planning to create any application that uses a database to store information. Let’s assume that you have elected to use SQL Azure as your database system. Now you need to do two things to get started;
A. Name and generate a database.
B. Build tables for that database.
For me, the choice with SQL Server has always been simple; use SQL Server Management Studio. This is largely because it has some useful built-in wizards. I’ve never been put in the position of having to use scripts to do these things but with SQL Azure and SSMS you are stuck with scripts.
There is a way of avoiding the use of scripts, however, since SQL Azure offers a management tool of its own much like SSMS, and Visual Studio 11 has some terrific tools available. We’re therefore going to explore these options for creating a database and the table using the tools that are currently available. I think you’ll be pleasantly surprised (or at least surprised) so sit back and enjoy the ride.
Creating a database
Many things about SQL Azure are covered ad nauseam in dozens of places. For my initial foray here I want to talk about two things.
A. Creating a database with the tools we all know and
B. Creating tables in the new database.
The tools we will use are the SQL Azure Management portal, SQL Server Management Studio and Visual Studio 2010. So let’s look first at creating a database.
SQL Azure Management Portal
I’m going to assume that you’re already created a SQL Azure server and taken note of its name, url, administrator name and password because you will need these. Note that you cannot log in to a SQL Azure instance with Windows Authentication. You must use a user name and password. Here’s a sample of what you might see.
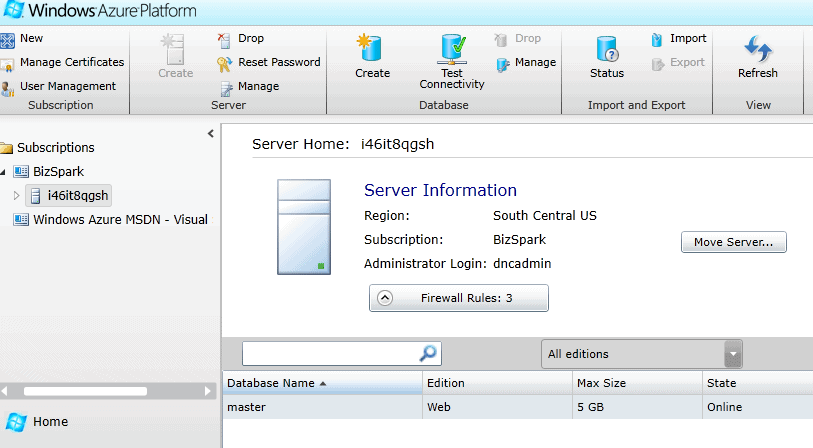
When logging in, your user name will take the form (using the information above) of dncadmin@i46it8qgsh. Note that you cannot use admin, administrator or any of several other short, easily-remembered, names for your Administrator Login name. Actually all of the rules that Microsoft employs make perfect sense because you will certainly want your database as secure as possible.
Create a database using the Portal
From the above screen, use the ribbon Database Create button in the ribbon to create your SQL Azure database. My suggestion is that you always use the Portal to create your databases. The Create button presents the following screen:
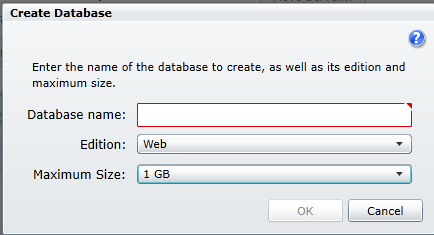
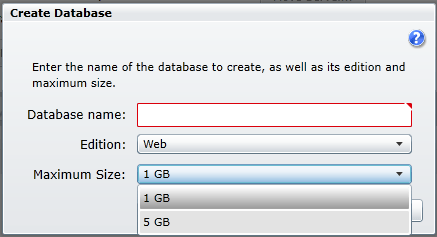
SQL Azure has a concept you won’t see in an on-premise SQL. That concept is size. The size is determined from this screen. The Web Edition offers 2 sizes:
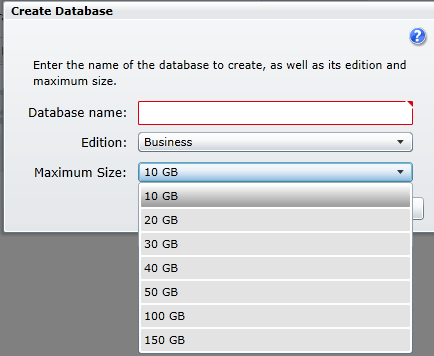
The business edition started out with 10, 20, 30, 40 and 50 GB sizes. That has now been increased to 7 sizes as shown here:
For this discussion I chose a Web Edition with a size of 1GB.
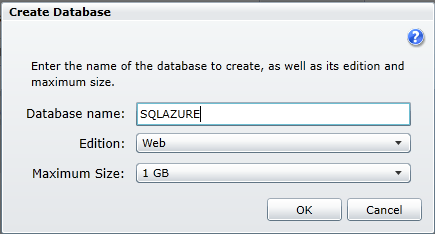
And now we have a new database. The point is that the SQL Azure Portal makes the creation of a database a simple selection of two options, Edition and Maximum Size, and the entry of a name.

You can do a number of things now such as Test Connectivity.
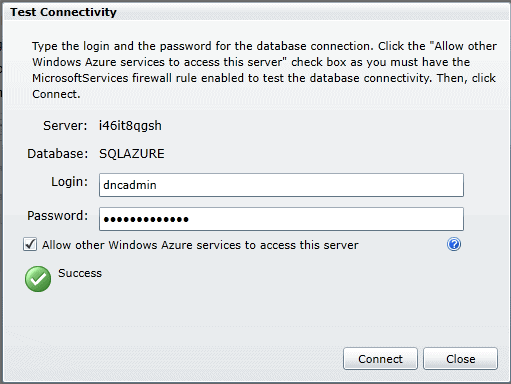
You can also Create another database, Drop the database or Manage the database. So let’s explore Manage for a minute.
Manage your database using the portal
First, you will need your Administrator Login from the properties and your password to open the Manage operation. Note that this is a Silverlight application. Click the Manage button in the ribbon to get the Logon screen.
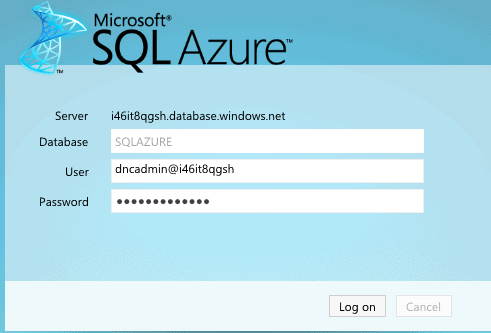
SQL Manager fills in the Server and Database information. Note that the User name is the Administrator Logon name with @ and the unique part of the server name appended. Once you’re logged on you get a very busy screen with a bunch of selections. We’re going to explore the design part for this discussion but you can always explore on your own if you like.
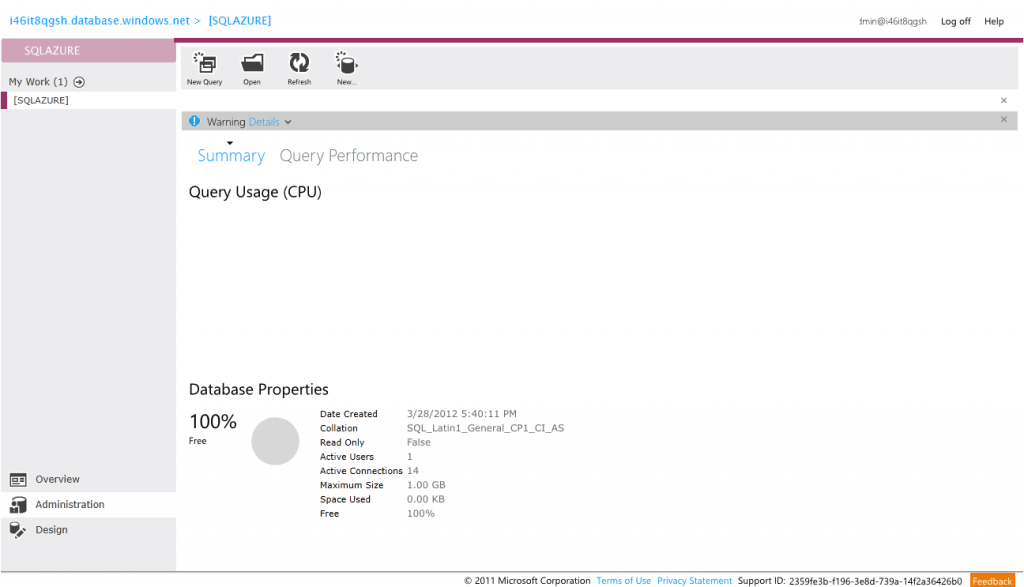
In the lower left you will see Overview, Administrator, and Design. For now click the Design button to get the following screen.
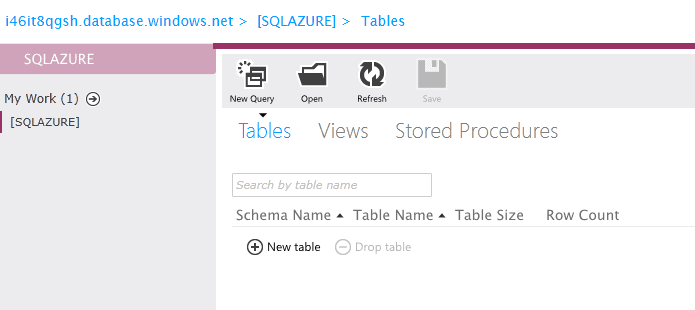
And suddenly we’re back to something most of us are familiar with:
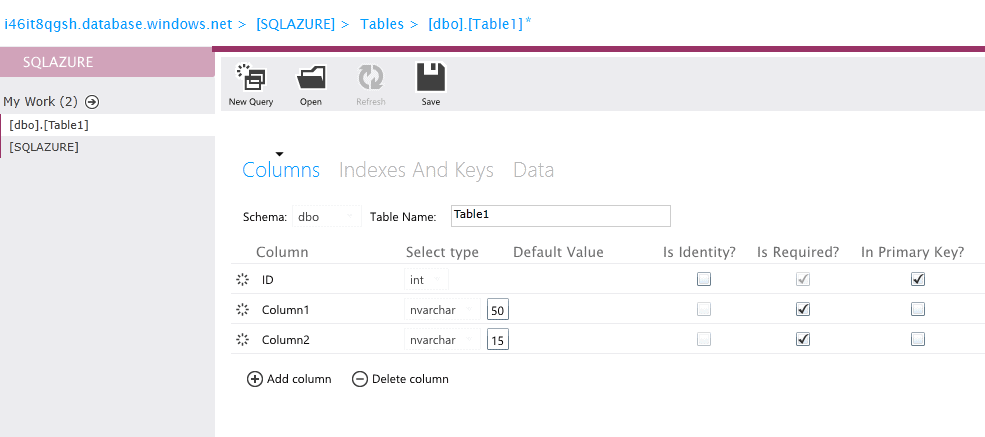
You can change the table name and begin designing your new table. Interestingly there are 36 data types, very similar to plain old SQL Server:
bigint, binary, bit, char, date, datetime, datetime2, datetimeoffset, decimal, float, geography, geometry, hierarchyid, image, int, money, nchar, ntext, numeric, nvarchar, nvarchar(max), real, smalldatetime, smallint, smallmoney, sql_variant, sysname, text, time, timestamp, tinyint, uniqueidentifier, varbinary(max), varchar, varchar(max) and xml
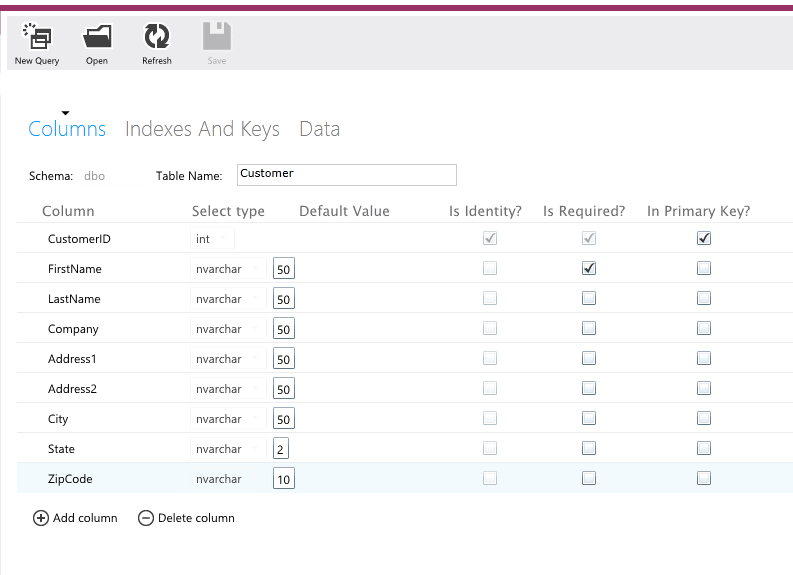
Obviously you’ll be familiar with many of these types but we’ll get into the meaning of all of these another time. Here’s a sample Customer table filled in. Again this is all very familiar territory with Wizards used for easing the work.
SQL Server Management Studio
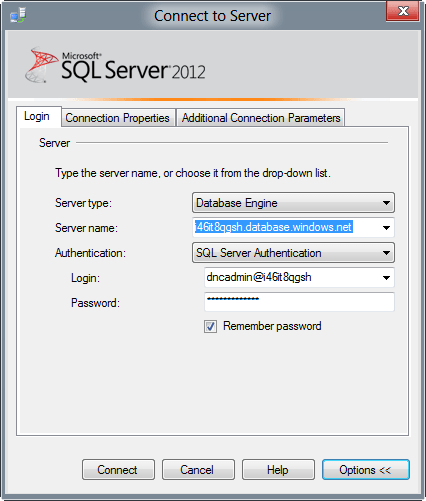
Now let’s explore the very different experience using SQL Server Management Studio. For this example I’m using SQL Server 2012 Management Studio just to ensure we have the latest updates.
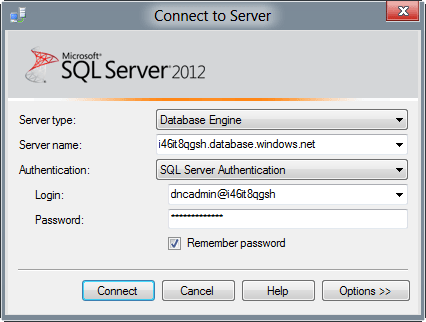
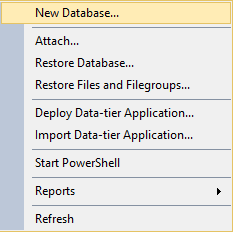
Things start out quite normally except that Windows Authentication is not allowed. The Server Name is the full name from your Azure portal and the Login name follows the Administrator Login name followed by the @ symbol and the unique part of the server name. But before we go any further let’s explore what we have when logging on to a local SQL Server instance. Right clicking Databases brings up this dialog with a plethora of options.
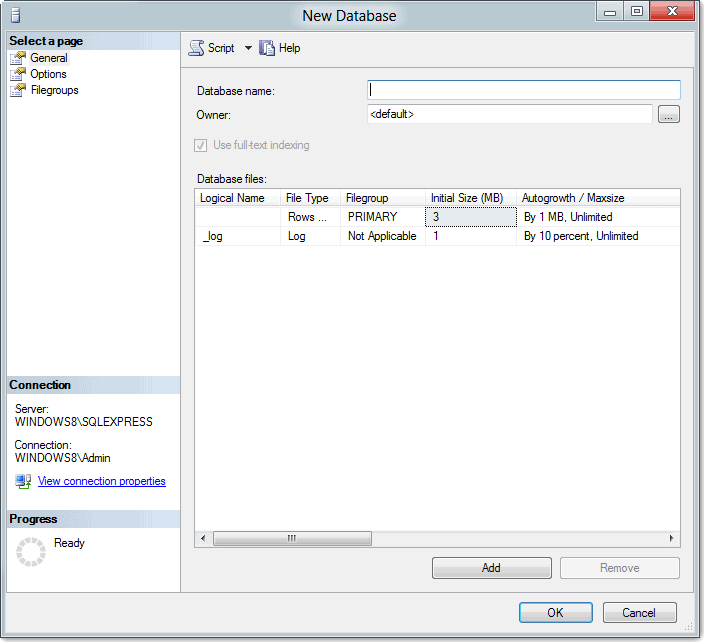
Selecting New Database… brings up the following wizard. You set various things in a Wizard fashion and Voila! you have a new database.
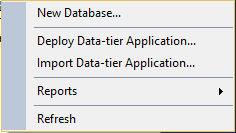
On the other hand connecting to a SQL Azure instance using SSMS gives you the following options when right clicking Databases:
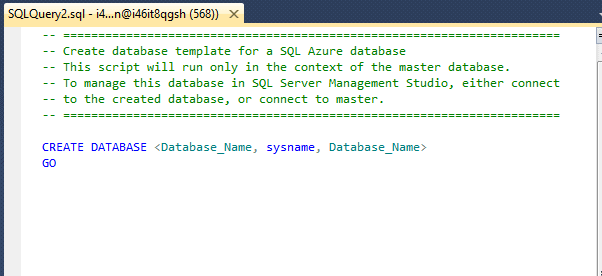
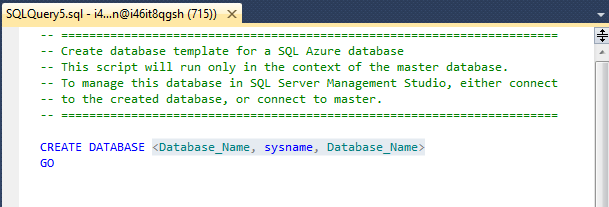
So you get an extremely truncated group of options. Making things worse, if you select New Database… you get whoops!!! A SQL Script instance:
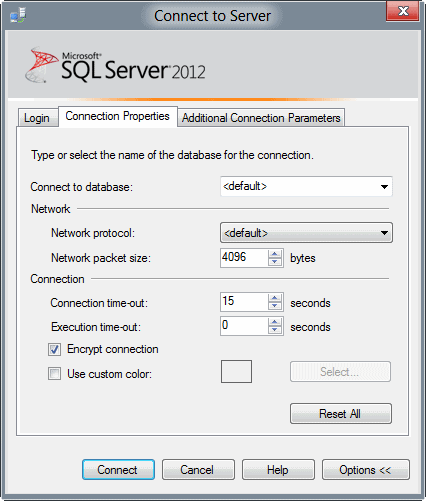
But let’s back up a minute and do some additional things. When you log in to SSMS you need to add some parameters. When a SQL Azure instance is built that instance includes a MASTER database. When you log on you need to log on in the master context so click the Options button on the log on screen. You will get the following:
Select the Connection Properties tab for this:
On the dropdown to the right of Connect to database select <Browse Server…>. After a few seconds you will get this:

Highlight master to get the following screen and also check Encrypt connection. Now click the Connect button to proceed.
Creating a database using SSMS
When you are connected to the master database, you can create new databases on the server and modify or drop existing databases. The steps below describe how to accomplish several common database management tasks through SSMS. They assume that you are connected to the master database with the server-level principal login that you created when you set up your server.
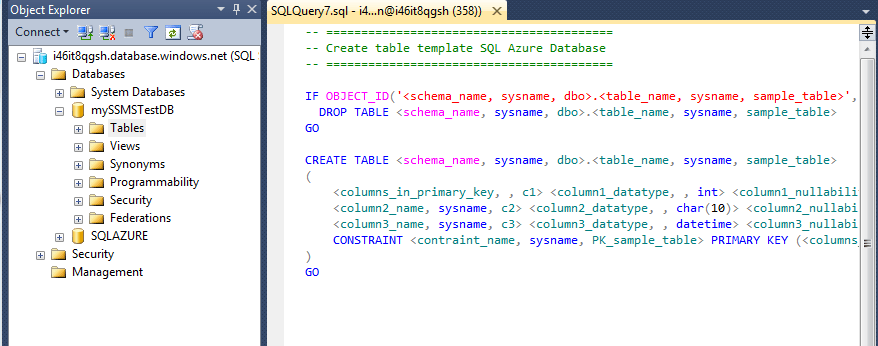
When you right click on databases you get the following script:
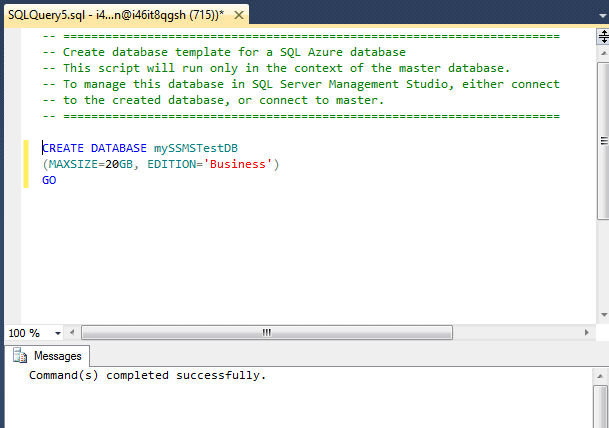
You can use the CREATE DATABASE statement to create a new database. The statement below creates a new database named mySSMSTestDB, and specifies that it is a Business Edition database with a maximum size of 20 GB.
|
1 2 |
CREATE DATABASE mySSMSTestDB (MAXSIZE=20GB, EDITION='Business') |
You can then use the ALTER DATABASE statement to modify that database, for example if you want to change the name, maximum size, or edition (business or web) of the database. The statement below modifies the database you created in the previous step to change the maximum size to 5 GB and change the edition to web.
|
1 2 3 |
ALTER DATABASE mySSMSTestDB MODIFY (MAXSIZE=5GB, Edition='Web') |
You could finally use the DROP DATABASE statement to delete the database. The statement below deletes the mySSMSTestDB database.
|
1 |
DROP DATABASE mySSMSTestDB |
The master database has the sys.databases view that can be used to view the details of all databases. To view all existing databases, use the following statement.
|
1 |
SELECT * FROM sys.databases |
In SQL Azure the USE statement is not supported. You need to establish a connection directly to the relevant database. Also Transact-SQL statements that create or modify databases must be run within their own batch and cannot be grouped.
Aside from the fact that you create and alter databases using script – it’s not too bad but I personally still prefer the wizards. The problem is it doesn’t get better.
NOTE: I did notice one oddity. Sometimes 'Web' and 'Business' work and sometimes they work without the quotes. Your mileage may vary but if it fails one way, try it the other.
Creating tables using SSMS
If you select the new database and expand it, then right click Tables you will get the following and I’m quitting here. For you dyed-in-the-wool scripting fans this will probably work but I lost it at this point.
Creating databases using Visual Studio 11
My tool of choice when working with local SQL instances has always been SQL Server Management Studio. I generate databases and tables using that tool and then deploy them using Visual Studio. I always knew that VS provided some good database tools – I just didn’t use them. Now, I’m going to go a little crazy. I will stick to one small SQL Azure database (Web edition, 1 GB). I’m going to add a single Customer table and I’m going to see if I can deploy a LightSwitch application using that database. I am NOT going to get fancy. If this works I’ll be proud and we will both have learned something (I hope). To duplicate this you will need the Visual Studio 11 Beta.
Creating the database
I’m going to connect to my SQL Azure SQL instance and create a single database that I’m calling MyLightSwitchDB, so let’s fire up Visual Studio 11 and get started. The interface is likely to surprise you if you haven’t used it before. It comes in two flavors, dark or light. I’m using the light interface. Gone are the pretty icons. Instead most are very austere and functional.

Clicking the icon that looks like an American wall-socket plug with a + sign (3rd from the left) will bring up the Add Connection dialog.
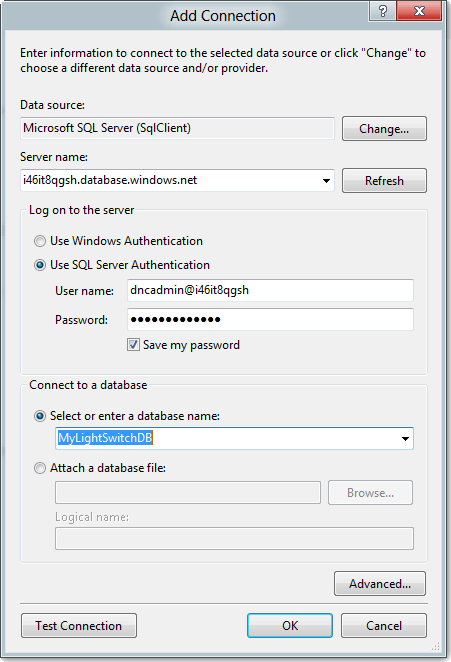
Once filled out just click OK. Because the database does not exist you will get the following:
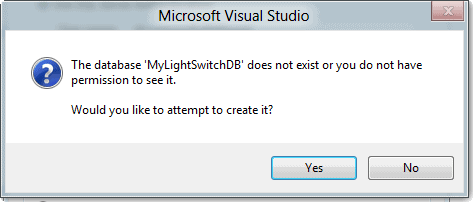
Again click Yes and the system will create your database in SQL Azure. You can verify this by going to the Azure portal and checking the database section. You should see a new Web edition DB with 1GB size.
In Visual Studio 11 SERVER EXPLORER if you right click the database name you can shift to SQL SERVER OBJECT EXPLORER which shows the following view.
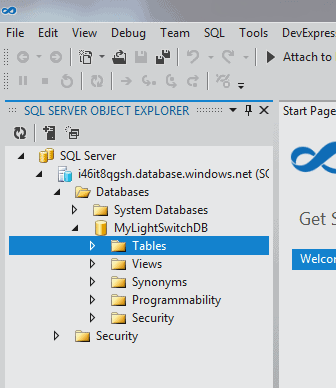
At this point you can right click Tables and elect to Add New Table….
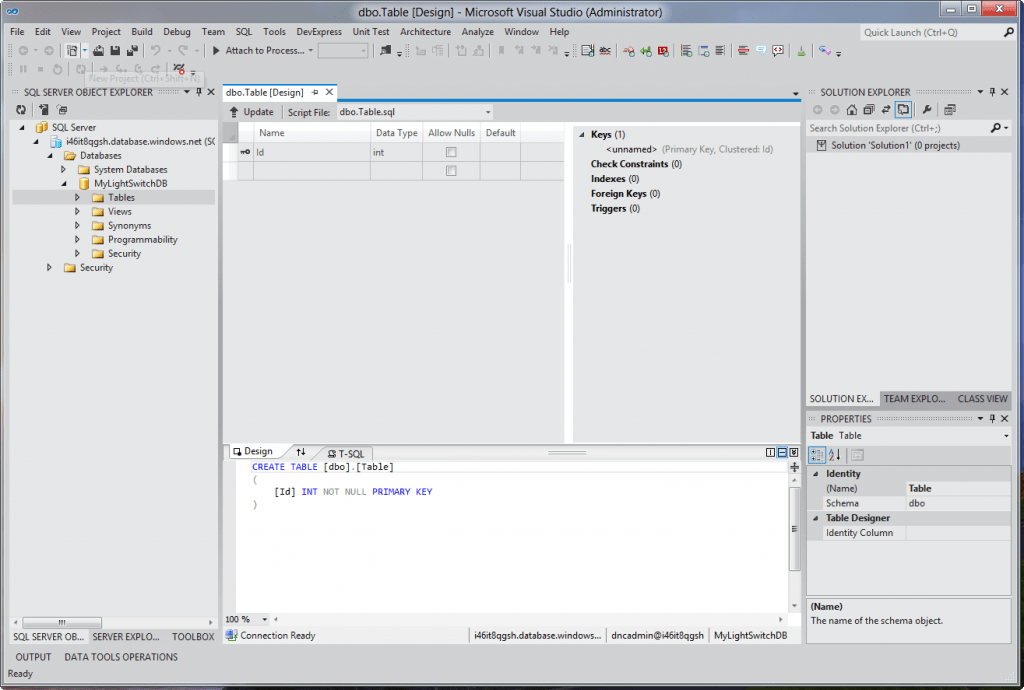
Now you have all of the goodness of SQL Server Management Studio with the addition of on the fly script generation. Start by changing [Table] in the script view to [Customers]. Also change the primary key name to CustomerID. Truthfully, I struggled for a bit finding where to set the identity specification but it’s in the PROPERTIES windows. That window has little right pointing arrows in the bar at the left of the window. Clicking that arrow expands the choices thusly:
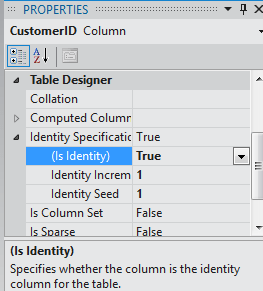
Setting (Is Identity) to True fills in the Increment and Seed values with suggested values of 1 which is fine here. It also changes the script being generated to an appropriate value.
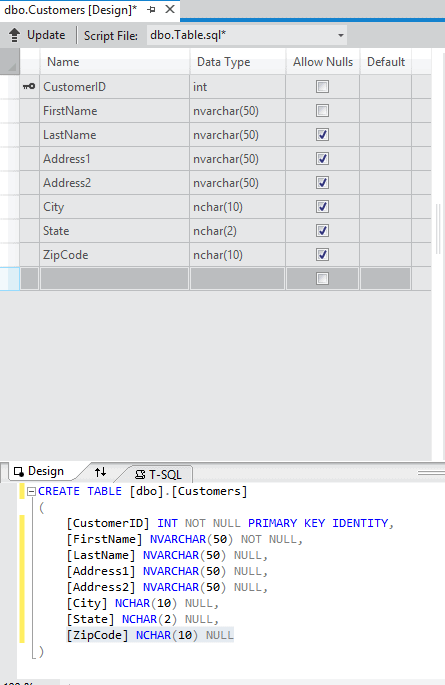
Now fill in the additional values and click the Update arrow at the top of the screen.
You have the option of generating and executing an update script or simply updating the database. Once you’ve updated the SQL Azure database you can move on by opening a LightSwitch application.
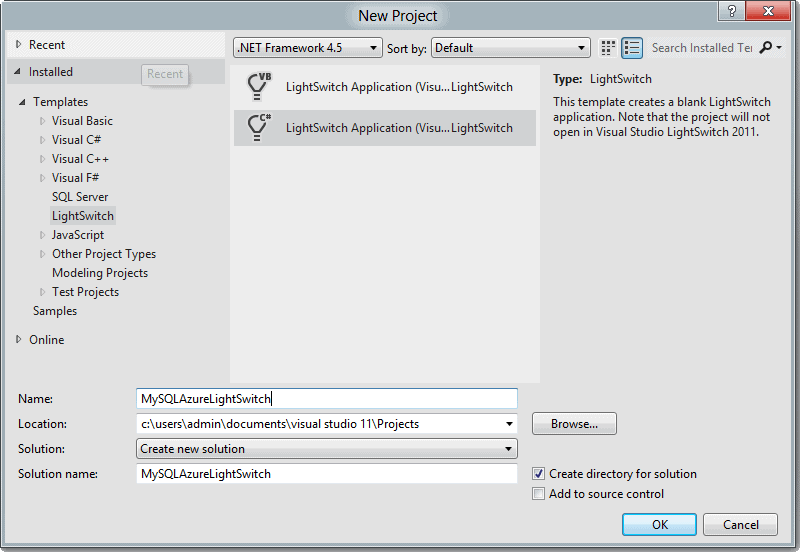
Once the application is created select the Attach to External Data Source option.
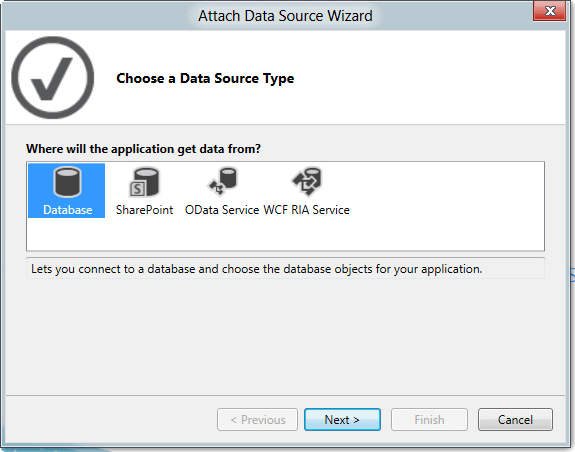
Highlight Database as shown and click Next.
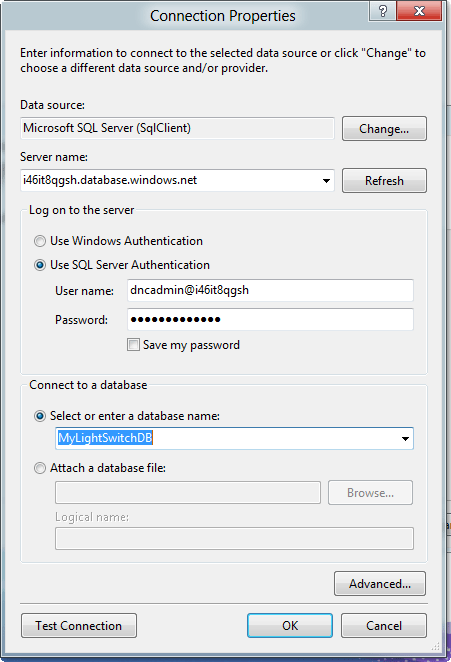
You will need to fill in the Server name and credentials. The Connect to a database dropdown will at that point offer MyLightSwitchDB as selection. On clicking OK you will get a new dialog that will take a little time to populate.
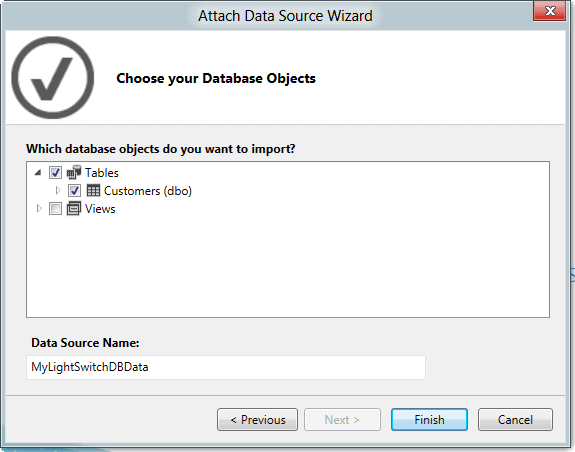
Once populated, make the selections shown above and click finish. You should see the following screen indicating that things have gone as expected.

With the problems I’ve had over the last few weeks with both Azure and LightSwitch this exercise has made me feel very good about future prospects. At this point I would suggest making a Detail Screen and an Editable Grid Screen so you can explore LightSwitch connected to SQL Azure in more detail.
This article has been mostly about the creation of SQL Azure databases and the generation of tables using several available tools. At this point using the Azure Management Portal probably offers the best options overall. Visual Studio 11 has made some large strides into the management of SQL Azure as we’ve shown above. My favorite tool to this point, SQL Server Management Studio, can be used but the Wizards are not available at this point even with the SQL 2012 version. It’s possible this will change but for me it has now become a choice of the Azure portal or Visual Studio 11.
Load comments