
mysqldump is one of the most popular database backup tools in the MySQL world.
The tool is prevalent partly because it’s very basic and quite powerful – mysqldump database backup tool is command line-based, very simple and very straightforward to use. As far as MySQL or its flavors (MariaDB and Percona Server) are concerned, this command line-based tool is one of the top choices for junior and senior database engineers across the world alike.
What is mysqldump and How Does It Work?
On a high level, mysqldump is a CLI-based database backup utility that is widely used to take logical backups. A logical backup creates a “logical copy” of the database by creating SQL statements that can be used to recreate the database structure, indexes, partitions, and data inside of tables within the database.
The utility can be invoked by typing mysqldump inside of the command line once we’re logged into MySQL and in most use cases, the usage of the tool looks something like this (all as one command on one line, separated for formatting purposes).
|
1 2 3 |
mysqldump -u[username] -p[password] [one_or_more_of_the_available_options] [database_name] [table_name] > output.sql |
In this code block:
username -depicts your username that has access to do the backup.password -is the password of that user.one_or_more_of_the_available_options– lets us define the options needed for a specific dump of the data (we will get into that a little later.) You can also define adatabase_namefrom where they want their data to be dumped.
You can also elect to define a table_name inside of the database as well to only dump one table.
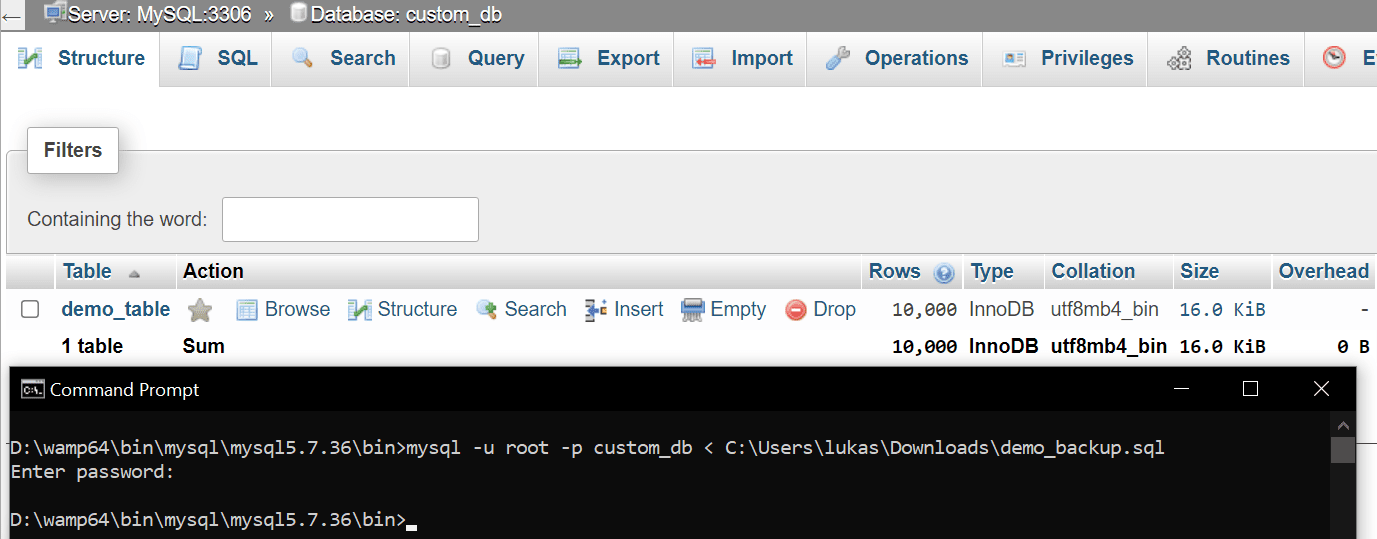
The mysqldump command is also usually finalized by specifying a file to write the output to – an arrow towards the right (“>”) with a file name after it will tell MySQL where to write the output of the command (the file can have any legal filename.) Without it, mysqldump will print all results to the screen. Users can also make the arrow face towards the left to import their data dumps into MySQL using the CLI like so:
mysql -uroot -p db_name < backup.sql
Bear in mind that, like most command line tools, it’s not advisable to use mysql or mysqldump by supplying a password in clear text. There are many reasons for this, but the main one is that might be possible for another person to log in and see the last issued commands, which include the provided username and password. It’s best to provide a username and password in the my.cnf file and avoid providing the password in the command line by doing something like this (also, choose a stronger password than the one provided here):
|
1 2 3 |
[mysqldump] user=secret password=useastrongpasswordhere |
Then, our query would look the same, just without the -p[password] option due to the password already being provided in my.cnf: provide a username in the same fashion and you can get rid of the -u[username] option as well.
The output of mysqldump is usually a file with a .sql extension: if the name of the file is specified, MySQL creates the specified file, but if not, the name of the file will consist of the name of the database or the table that is being backed up (the following command would back up all tables inside of a demo_database into a file called demodb_backup.sql):
mysqldump -uroot -p demo_database > demodb_backup.sql
Options Provided by mysqldump
Now that we have covered the basics of how mysqldump works, let’s look at the options of mysqldump. Some of the commonly used options are as follows (all options should be provided after the username and the password, in the [one_or_more_of_the_available_options] position as indicated in the previous section.) All of the options can also be used in conjunction with other options as well:
| Option | What Does it Do? |
--all-databases |
Can be used to take a backup of all databases in a database instance. |
--add-drop-[table|database] |
Adds a DROP [TABLE|DATABASE] statement before creating tables or databases. Useful if we’re migrating updated data back to the server where the old pieces of the data reside. |
--fields-terminated-by |
Adds a character at the end of one column and at the start of another (data will look like “column1|column2” if the “|” termination denominator is used, etc.) Very frequently used together with LOAD DATA INFILE | LOAD DATA INTO OUTFILE statements. |
--force |
Using this setting, the database dump continues even if any errors are encountered. Useful in a demo environment. Think of this setting as a brother to the --ignore command when loading a dump into the database – it essentially ignores all of the non-critical errors encountered by MySQL (such as duplicate value errors) letting the backup process continue until it’s finished no matter what. |
--no–data |
Tells MySQL to avoid dumping the data existing inside tables (i.e. MySQL will dump only the database and table structure, so the dumps will be considerably faster if we have a lot of data.) |
--where |
Only dumps data matching a specified WHERE clause. |
--lock-tables |
Allows us to lock all of the tables before taking a copy of them so that no operations could interfere with our backup – in such a case, data will not be inserted, updated, deleted, or otherwise modified. All locks last until the backup operation is finalized. |
The table above should allow you to realize how powerful mysqldump can be if used properly; keep in mind that the table above doesn’t provide a complete list of the available options (you can find all options in the MySQL documentation); but it should be a decent starting point to gain a basic understanding of what mysqldump can do.
mysqldump Use Cases
Beyond simple backups, mysqldump can also be used to assist when we find ourselves dealing with “corner-case” usage cases as well: for example, the tool can provide tab-delimited output that can be exceptionally useful if we want to work with data in “big data” text viewers such as EmEditor or work with our data using Microsoft Excel: we simply specify the --tab option as part of the options and mysqldump will do all of the work for us. Should we want to test if the database object definitions are loaded into the database properly, all we have to do is dump our data by using a combination of four options provided one after another:
- The
--all-databasesoption would dump all databases. - The
--no-dataoption would refrain from copying data. - The
--routinesoption would dump procedures and functions inside of our database. - The
--eventsoption would dump the existing scheduled events.
When we use mysqldump in such a fashion, a dump (backup) file will be created, but it won’t have any data. However, loading the file back into a database server, though, will allow us to test for any weird, odd-looking warnings, or spot other noteworthy errors.
mysqldump can also be used together with other client-line programs such as mysql, mysqlimport or in a manual fashion using LOAD DATA INFILE: all we have to do is have the file taken by mysqldump at hand, then issue a statement like so (the following statement would import a file named demo.txt into a database named database_name):
|
1 2 |
mysqlimport --fields-terminated-by=: --lines-terminated-by=\n database_name demo.txt |
We can also use LOAD DATA INFILE in the same fashion: if our data is delimited by, say, the “,” sign, we could make use of a query like this and load our data existing in demo.txt into a table called demo_table:
|
1 2 |
LOAD DATA INFILE 'demo.txt' INTO TABLE demo_table FIELDS TERMINATED BY ','; |
Combining Options with mysqldump
Now let’s rewind a little. Throughout this article, we’ve kept mentioning that other options can be used together with mysqldump to do complex things with the tool. For some, here’s where the depths of mysqldump become a little complex but bear with us and we will explain everything you need to know.
First off, bear in mind that all components of MySQL (including, but not limited to mysqldump) usually have a couple of additional options can be specified and those options vary according to the component that we work with. Combining options is simple:
- Choose the component you need to work with (in our case, we’re looking at mysqldump.)
- Visit the documentation and familiarize yourself with the available options regarding that component (the complete list of options can be found in the documentation of the component you’ve chosen – the options for mysqldump can be found here.)
- Evaluate the issue that you’re having. How does the option you’re looking at help solve it? Will the results be satisfactory?
- Choose one or multiple options from those available.
Once you have chosen an option, remember that the output of any issued command is directly dependant on additional options. In other words, any option that is specified modifies the functionality of the command you’ve chosen. All options need to be specified by writing their name as part of a command after “–“, like so:
|
1 |
mysqldump --no-data |
The above statement would make mysqldump work with a command named “no-data” (as explained above, the command wouldn’t dump any data, and it would only dump the structure of the database.) Combining --add-drop-table to tell MySQL to make sure the table of the same name doesn’t exist before creating any other tables. Some people may also want to specify an absolute path to the file in order to ensure that the file is going to be stored in a directory of their choice (doing so may be a necessity if the –secure-file-priv option is enabled: the option limits the ability for users to export or import data to or from the database – in that case, data could only be exported into a directory specified in the variable.)
Coming back to mysqldump, though, one of the most frequent usage scenarios consist of dumping all databases and including a DROP TABLE statement before any table is created – doing so will ensure that even if the backup is loaded into a database that has the exact same table names, they will be dropped and created anew.:
|
1 |
mysqldump -uroot --all-databases --add-drop-table > backup.sql |
As we have covered – mysqldump will dump the data inside of MySQL, but the specifics of what it will do are directly dependent on the options you specify when executing it. All options have a specific use, and once we choose what options we are going to combine the command with, we need to keep in mind the fact that it affects the output that we receive.
The complete list of available options exclusive to mysqldump can be found over at the documentation. When you’re done dumping, test the backup as well: load it into your MySQL database instance through phpMyAdmin or simply specify the name of the file through the CLI like so (note that the database must be created before importing the data into it):
|
1 |
mysql demo < backup.sql |
The above command will import a backup into your database called “demo.” Do note this command assumes that you have your username and password specified in my.cnf in the same way you did for mysqlbackup (see example above) – if the username and password are not specified in your my.cnf file, you will still have to provide a username and a password like in the example below.
Then, inspect your database – does the data in it represent the data you expect to be in the instance?
With that being said, we will now leave the gates towards the depths of mysqldump open for you to explore; the advice contained in this blog post should be a decent starting point for those who are interested in how the CLI-based database dumping tool works and why does it work in the way that it does, and the MySQL documentation will act as a guide for people who are interested in the tool on a deeper level. Nothing beats your own experience though – do experiment with mysqldump on local servers, make sure to learn from the mistakes other developers made in the past as well, and until next time!
This document contains proprietary information and is protected by copyright law.
Copyright © 2026 Red Gate Software Limited. All rights reserved


Load comments