
To deploy a Dockerized application to Kubernetes using Jenkins, you create a Jenkins CI/CD pipeline that builds a Docker image, pushes it to Docker Hub, and then uses kubectl to deploy it to a Kubernetes cluster. This tutorial walks through the complete workflow using a Jenkinsfile with stages for building, pushing, pulling, and deploying a containerized application to a Minikube cluster. You will install the Docker Pipeline and Kubernetes plugins in Jenkins, configure credentials, and write a multi-stage pipeline that automates the entire deployment process.
Introduction
Jenkins serves as an open-source automation server with widespread application in the realm of software development, primarily focusing on continuous integration (CI) and continuous delivery (CD).
Its core purpose revolves around streamlining the management and automation of diverse tasks associated with software project development, including building, testing, and deployment.
Jenkins effectively empowers development teams to mechanize the process of incorporating code changes from numerous contributors, executing automated tests, and deploying applications to diverse environments. It ensures the software is always up to date and the end user enjoys the new releases.
In this tutorial, you will learn how to deploy a Dockerized application to the Kubernetes cluster using Jenkins. You will use Jenkins CI/CD Pipeline with multiple stages to deploy the Dockerized application to Kubernetes.
Key Features of Jenkins
In this section I will cover a few of the important features of Jenkins that are important for getting started.
- Continuous Integration (CI) – Jenkins can be set up to automatically build and test code whenever changes are pushed to a version control repository. This helps catch integration issues early in the development process.
- Continuous Delivery/Deployment (CD) – Jenkins can facilitate the automated deployment of applications to various environments, such as development, staging, and production. This ensures that the application deployment process is consistent and repeatable.
- Extensibility – Jenkins has a vast ecosystem of plugins that extend its functionality. These plugins can integrate with various tools and services, allowing you to customize and tailor your CI/CD pipelines to your specific needs.
- Pipeline Automation – Jenkins introduced the concept of “Pipeline as Code,” allowing you to define your build, test, and deployment processes using a script-like syntax. This provides a more structured and maintainable way to define complex workflows.
- Distributed Build – Jenkins can distribute build and test jobs across multiple nodes, allowing for faster build and test times and reducing resource bottlenecks on a single machine.
- Monitoring and Reporting – Jenkins provides dashboards and reporting tools that give insight into the status and health of your CI/CD pipelines, making it easier to identify and address issues.
- Ease of Use – Jenkins offers a user-friendly web interface that allows users to configure and manage their automation workflows without needing extensive technical expertise.
Jenkins has gained widespread adoption in the software development community due to its flexibility, extensibility, and strong community support. It has paved the way for the broader adoption of CI/CD practices, enabling development teams to deliver higher-quality software more efficiently and reliably.
How to use Jenkins to Deploy an Application to Kubernetes Cluster
Jenkins implements the development workflows using CI/CD pipelines. A Jenkins pipeline has multiple stages and steps for implementing the CI/CD workflow. In Jenkins, you use a Jenkinsfile to define and declare all the stages for your Jenkins CI/CD Pipeline. Jenkinsfile is popularly known as “pipeline as code” since you write your CI/CD pipeline as executable code. Jenkins will execute the Jenkinsfile and implement the pipeline. The pipeline will automate the stages defined in the Jenkinsfile.
In this tutorial, the Jenkinsfile will have multiple stages. The stages will be for:
- Building a Docker image
- Pushing the Docker image to Docker Hub.
- Pulling the Docker image from the Docker Hub repository
- Creating a Dockerized application.
- Deploy the Dockerized application to the Kubernetes cluster.
Jenkins also uses plugins that enable developers to integrate different third-party software with Jenkins. Plugins help in implementing continuous integration/delivery and deployment. In this tutorial, we will install the Docker and Kubernetes plugins in the Jenkins platform.
When you are using Jenkins, you have to connect it to your Source Code Management (SCM) Git repository. The repository will host your Jenkinsfile and other application files. Jenkins will use the files in the GitHub repository to deploy the applications to the Kubernetes cluster.
Read also:
Deploying Infrastructure as Code with GitOps
Hardening Kubernetes and cloud security
Orchestrating containers with Kubernetes on AWS
Prerequisites
This tutorial assumes you have knowledge on Jenkins and you have run some Jenkins CI/CD pipeline before. Also, before you start working on this project, you need to have the following:
- Docker Desktop – We will use Docker to build and run Jenkins as a Docker Container.
- GitHub account – You will use GitHub as your Source Code Management (SCM) Git repository. You will push your Jenkinsfile, application, and deployment files to your GitHub repository.
- Kubernetes Cluster – A Kubernetes cluster is a collection of interconnected computing resources, often consisting of multiple physical or virtual machines, that are orchestrated and managed collectively by the Kubernetes platform.
Kubernetes is an open-source container orchestration system that automates the deployment, scaling, management, and operation of containerized applications.
A cluster provides an environment where containers, which encapsulate application code and dependencies, can be efficiently managed and orchestrated for optimal performance, reliability, and scalability.
In this tutorial, we will use the Minikube Kubernetes Cluster. It is the most popular local Kubernetes cluster. We will use Minikube since it’s free to use and easy to set up on your computer.
- Kubectl – It is the command line tool interface for Kubernetes. It allows DevOps practitioners to run commands and deploy Kubernetes objects to the Kubernetes cluster.
- Docker Hub account – Jenkins CI/CD Pipeline will build the Docker image and push it to your Docker Hub repository. It will also pull the Docker image from the Docker Hub registry and create a containerized application.
Steps for Deploying a Dockerized Application to Kubernetes Cluster using Jenkins
To deploy a Dockerized Application to Kubernetes Cluster using Jenkins, you will follow these steps:
- Run Jenkins as a Docker Container on Windows, Linux and macOS
- Install Docker Pipeline Plugin
- Install Kubernetes Plugin
- Add Credentials to Jenkins Credentials Manager
- Start Minikube
- Create a new GitHub Repository
- Create a Simple React.js application
- Create a Dockerfile
- Create a Kubernetes Deployment YAML file
- Create a Kubernetes Service Deployment YAML file
- Create a Jenkinsfile
- Push the files to your GitHub repository
- Create a Multi-branch Pipeline
- Configure the Multi-branch Pipeline
- Build the Multi-branch Pipeline
- Accessing the Deployed Dockerized application
Let’s start working on these steps.
Step 1: Run Jenkins as a Docker Container on Windows, Linux and macOS
Let’s start by covering how to run Jenkins as a Docker Container on Windows
On Windows
To run Jenkins as as a Docker container on Windows, follow the steps below:
- Open up your terminal window
- Create a bridge network in Docker using the following code
|
1 |
docker network create jenkins |
- Run a docker:dind Docker image using the following code:
|
1 2 3 4 5 6 7 |
docker run --name jenkins-docker --rm --detach ^ --privileged --network jenkins --network-alias docker ^ --env DOCKER_TLS_CERTDIR=/certs ^ --volume jenkins-docker-certs:/certs/client ^ --volume jenkins-data:/var/jenkins_home ^ --publish 2376:2376 ^ docker:dind |
- Customize the official Jenkins Docker image, by executing the following two steps:
i. Create a Dockerfile in a directory for your project with the following content:
|
1 2 3 4 5 6 7 8 9 10 11 12 |
FROM jenkins/jenkins:2.414.2-jdk17 USER root RUN apt-get update && apt-get install -y lsb-release RUN curl -fsSLo /usr/share/keyrings/docker-archive-keyring.asc \ https://download.docker.com/linux/debian/gpg RUN echo "deb [arch=$(dpkg --print-architecture) \ signed-by=/usr/share/keyrings/docker-archive-keyring.asc] \ https://download.docker.com/linux/debian \ $(lsb_release -cs) stable" > /etc/apt/sources.list.d/docker.list RUN apt-get update && apt-get install -y docker-ce-cli USER jenkins RUN jenkins-plugin-cli --plugins "blueocean docker-workflow" |
ii. Build a new docker image from this Dockerfile and assign the image a meaningful name, e.g. “jenkins-latest”. Mind the period at the end!
|
1 |
docker build -t jenkins-latest . |
NOTE: The above process automatically downloads the official and latest Jenkins Docker image.
- Run your own jenkins-latest image as a container in Docker using the following docker run command:
|
1 2 3 4 5 6 |
docker run --name jenkins-latest --restart=on-failure --detach ^ --network jenkins --env DOCKER_HOST=tcp://docker:2376 ^ --env DOCKER_CERT_PATH=/certs/client --env DOCKER_TLS_VERIFY=1 ^ --volume jenkins-data:/var/jenkins_home ^ --volume jenkins-docker-certs:/certs/client:ro ^ --publish 8080:8080 --publish 50000:50000 jenkins-latest |
- Proceed to the Post-installation setup wizard.
After building and running the Jenkins Docker container the next steps are to proceed to the post-installation setup wizard and unlock Jenkins.
Before we proceed to the post-installation setup wizard and unlock Jenkins, lets cover how to download and run Jenkins in Docker on Linux and macOs
Linux and macOs
To run Jenkins as as a Docker container on Linux and macOs, follow the steps below:
- Open up a terminal window.
- Create a bridge network in Docker using the following docker network create command:
|
1 |
docker network create jenkins |
- In order to execute Docker commands inside Jenkins nodes, download and run the docker:dind Docker image using the following docker run command:
|
1 2 3 4 5 6 7 8 9 10 11 12 13 |
docker run \ --name jenkins-docker \ --rm \ --detach \ --privileged \ --network jenkins \ --network-alias docker \ --env DOCKER_TLS_CERTDIR=/certs \ --volume jenkins-docker-certs:/certs/client \ --volume jenkins-data:/var/jenkins_home \ --publish 2376:2376 \ docker:dind \ --storage-driver overlay2 |
4. Customize the official Jenkins Docker image, by executing the following two steps:
i. Create a Dockerfile in a directory for your project with the following content:
|
1 2 3 4 5 6 7 8 9 10 11 12 |
FROM jenkins/jenkins:2.414.2-jdk17 USER root RUN apt-get update && apt-get install -y lsb-release RUN curl -fsSLo /usr/share/keyrings/docker-archive-keyring.asc \ https://download.docker.com/linux/debian/gpg RUN echo "deb [arch=$(dpkg --print-architecture) \ signed-by=/usr/share/keyrings/docker-archive-keyring.asc] \ https://download.docker.com/linux/debian \ $(lsb_release -cs) stable" > /etc/apt/sources.list.d/docker.list RUN apt-get update && apt-get install -y docker-ce-cli USER jenkins RUN jenkins-plugin-cli --plugins "blueocean docker-workflow" |
ii. Build a new docker image from this Dockerfile, and assign the image a meaningful name, such as “jenkins-latest”:
|
1 |
docker build -t jenkins-latest . |
NOTE: The above process automatically downloads the official and latest Jenkins Docker image.
5. Run your own jenkins-latest image as a container in Docker using the following docker run command:
|
1 2 3 4 5 6 7 8 9 10 11 12 13 |
docker run \ --name jenkins-latest \ --restart=on-failure \ --detach \ --network jenkins \ --env DOCKER_HOST=tcp://docker:2376 \ --env DOCKER_CERT_PATH=/certs/client \ --env DOCKER_TLS_VERIFY=1 \ --publish 8080:8080 \ --publish 50000:50000 \ --volume jenkins-data:/var/jenkins_home \ --volume jenkins-docker-certs:/certs/client:ro \ jenkins-latest |
6. Proceed to the Post-installation setup wizard
Now that we have run Jenkins as a Docker Container on Windows, Linux and macOS, let’s now proceed to the post-installation setup wizard and unlock Jenkins.
Post-installation setup wizard
After downloading, installing and running Jenkins on Windows, macOS and Linux, the post-installation setup wizard begins as follows:
- Open your web browser and type localhost:8080 to access the Jenkins application. Wait until the Unlock Jenkins page appears.
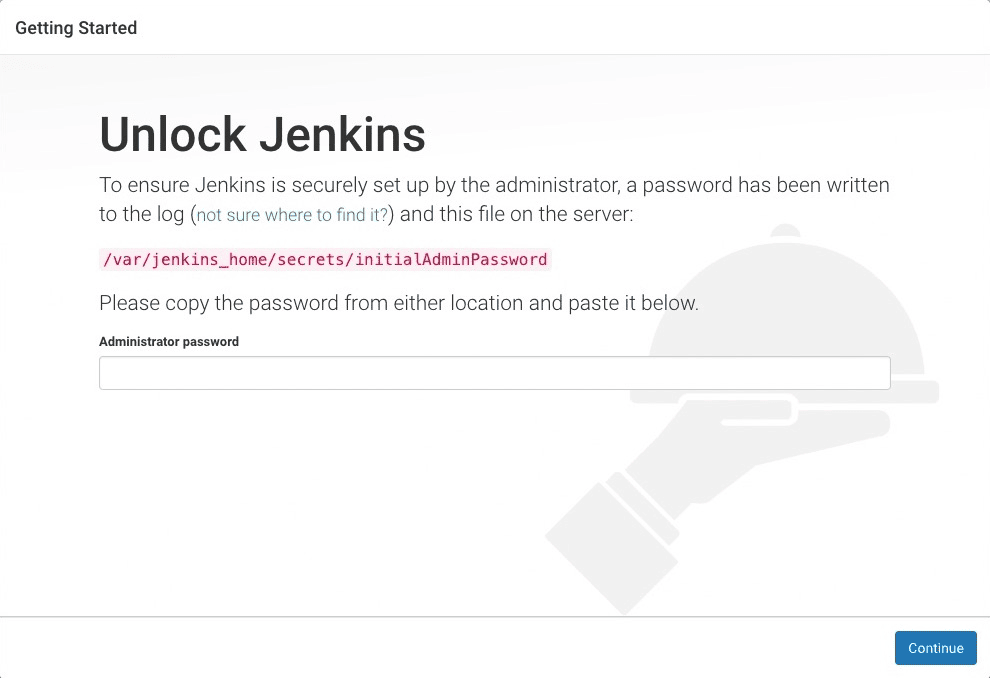
From the image above, the Jenkins container is locked. We will require the administrator password to unlock Jenkins.
- Getting the Administrator Password
To get the initial administrator password for unlocking Jenkins, run the following command:
|
1 |
docker logs jenkins-latest |
After executing the command, the following initial administrator password will be displayed on your terminal:
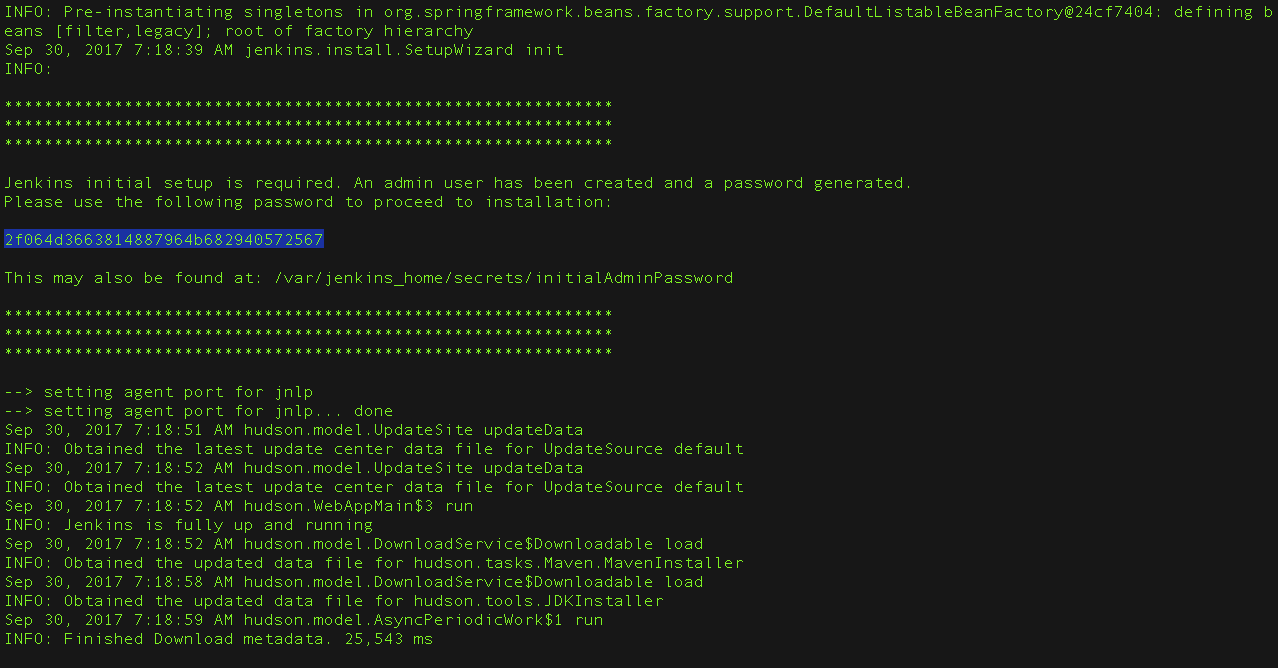
Next, copy the initial administrator password and paste it into the password field. After unlocking Jenkins using the initial administrator password, you will be redirected to another page as shown below:
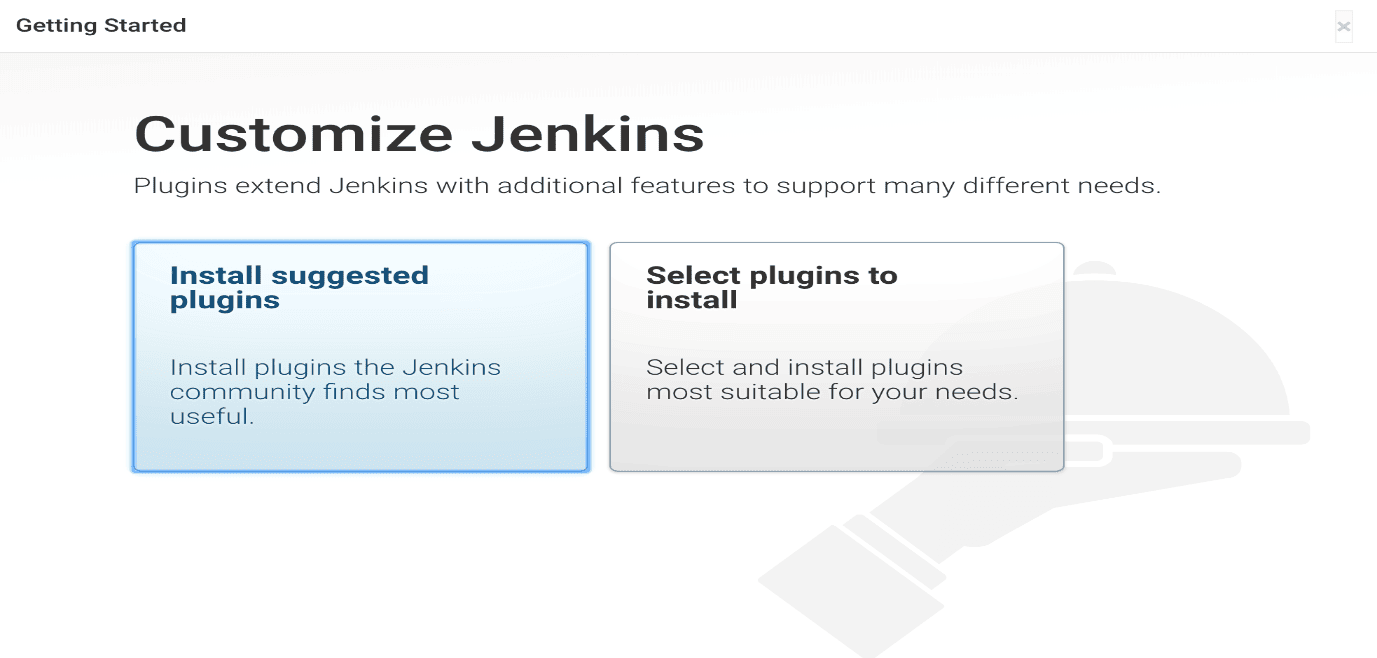
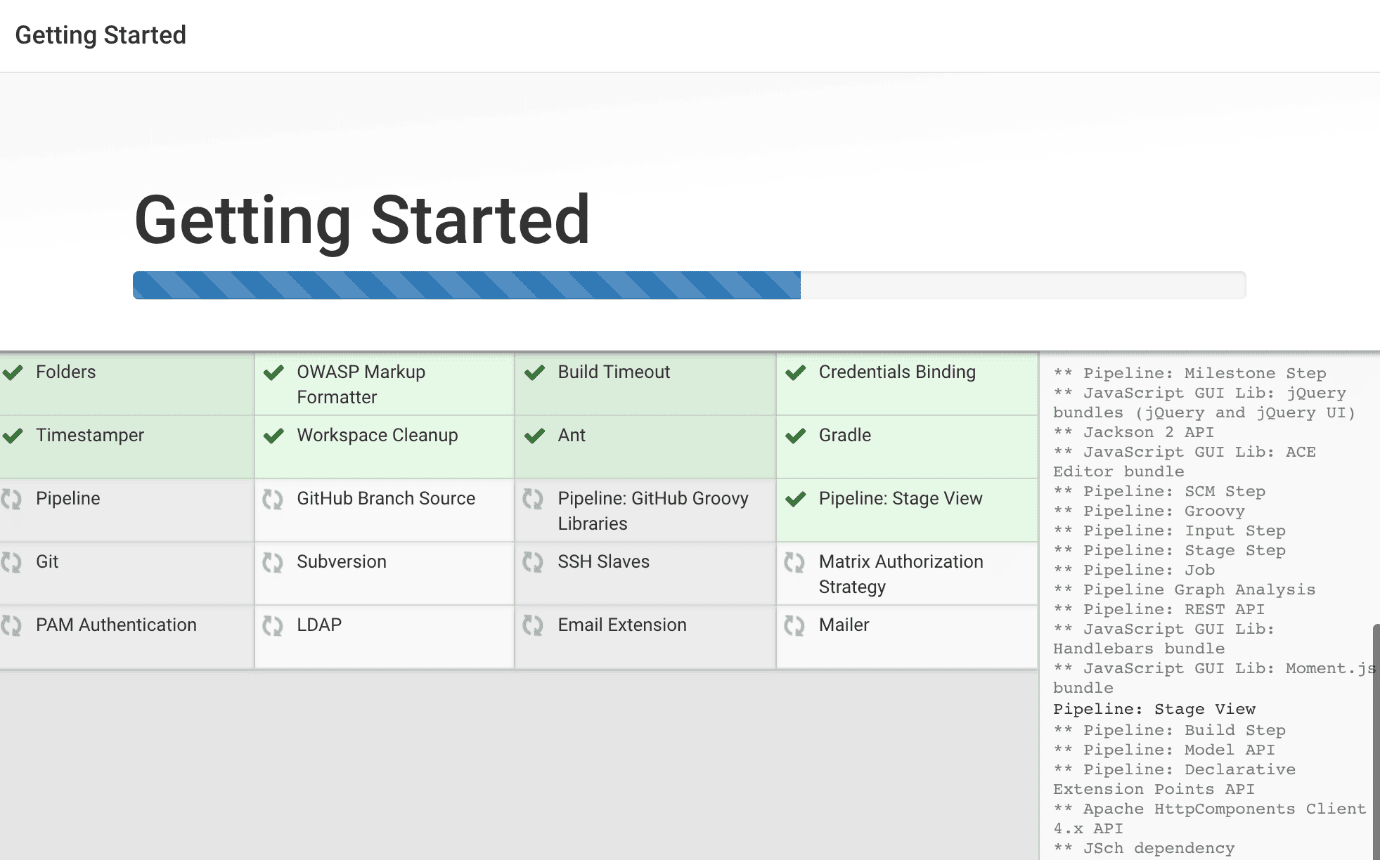
Next, select Install Suggested Plugins to allow the installation of the necessary plugins. These are the basic plugins that Jenkins requires to run. The plugins to be installed are shown in the image below:
- Create First Admin User
After installing all the basic plugins shown above, you will be redirected to another page for you to create your first admin user:
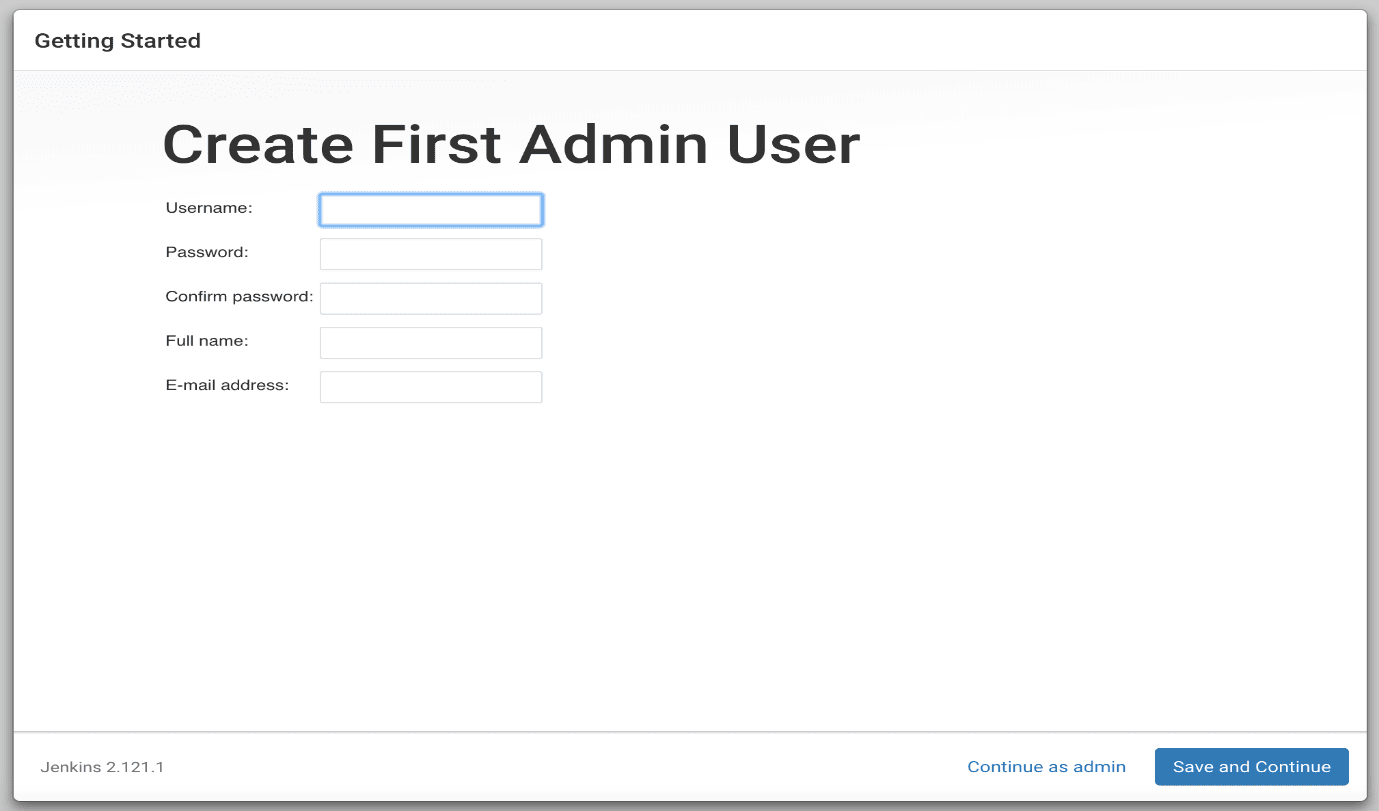
You will fill in all the fields and then click the Save and Continue button. You will then be redirected to another page as shown below:
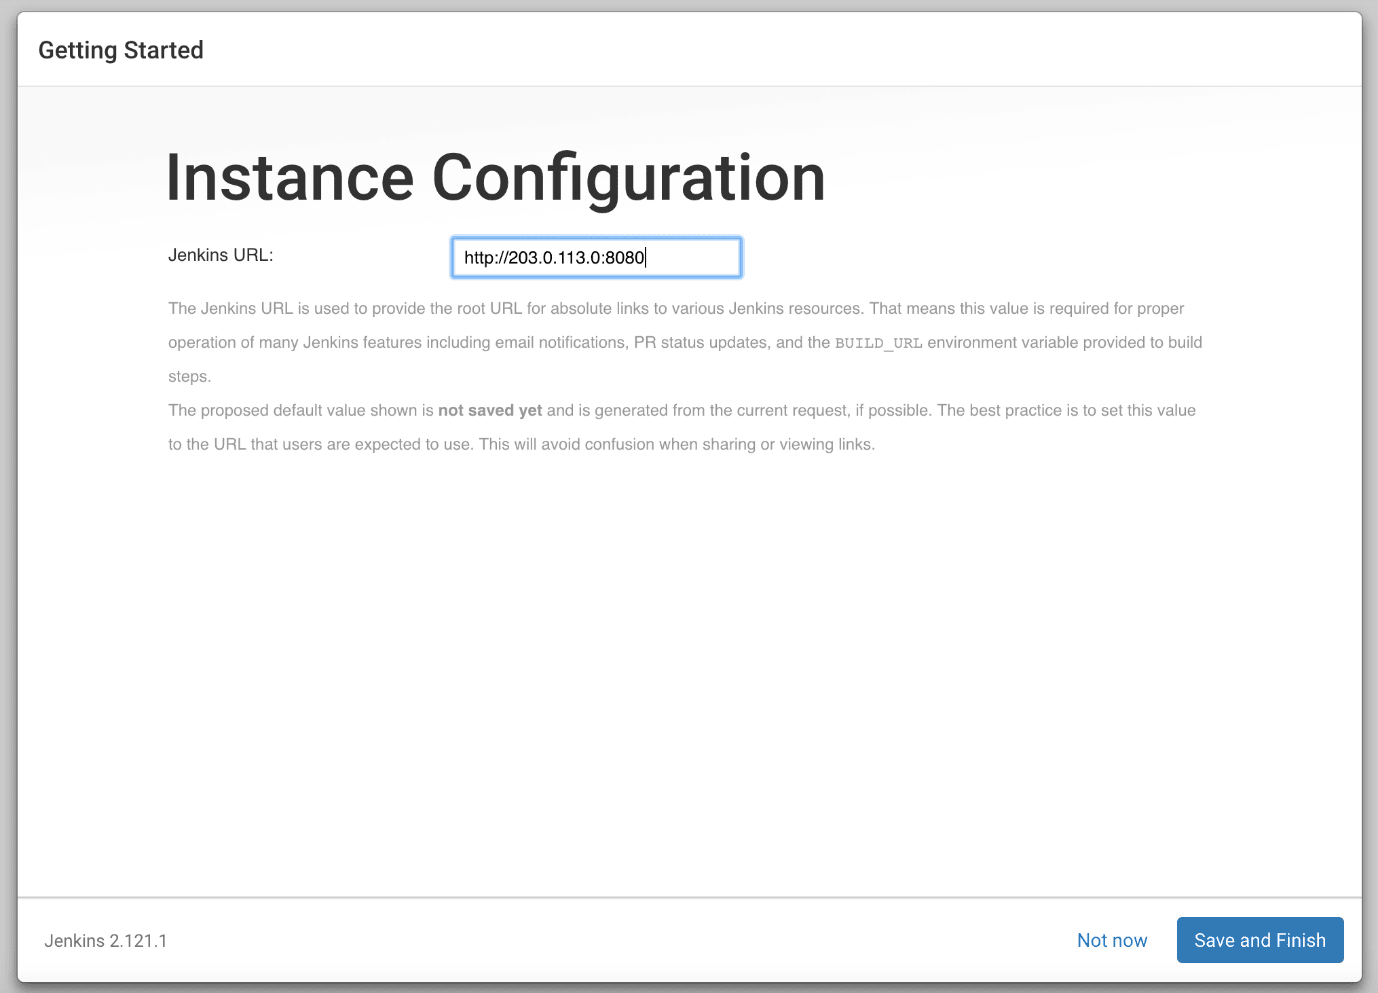
Next, click the Save and Finish and your Jenkins platform will be running and ready to use. You will be redirected to another page as shown below:
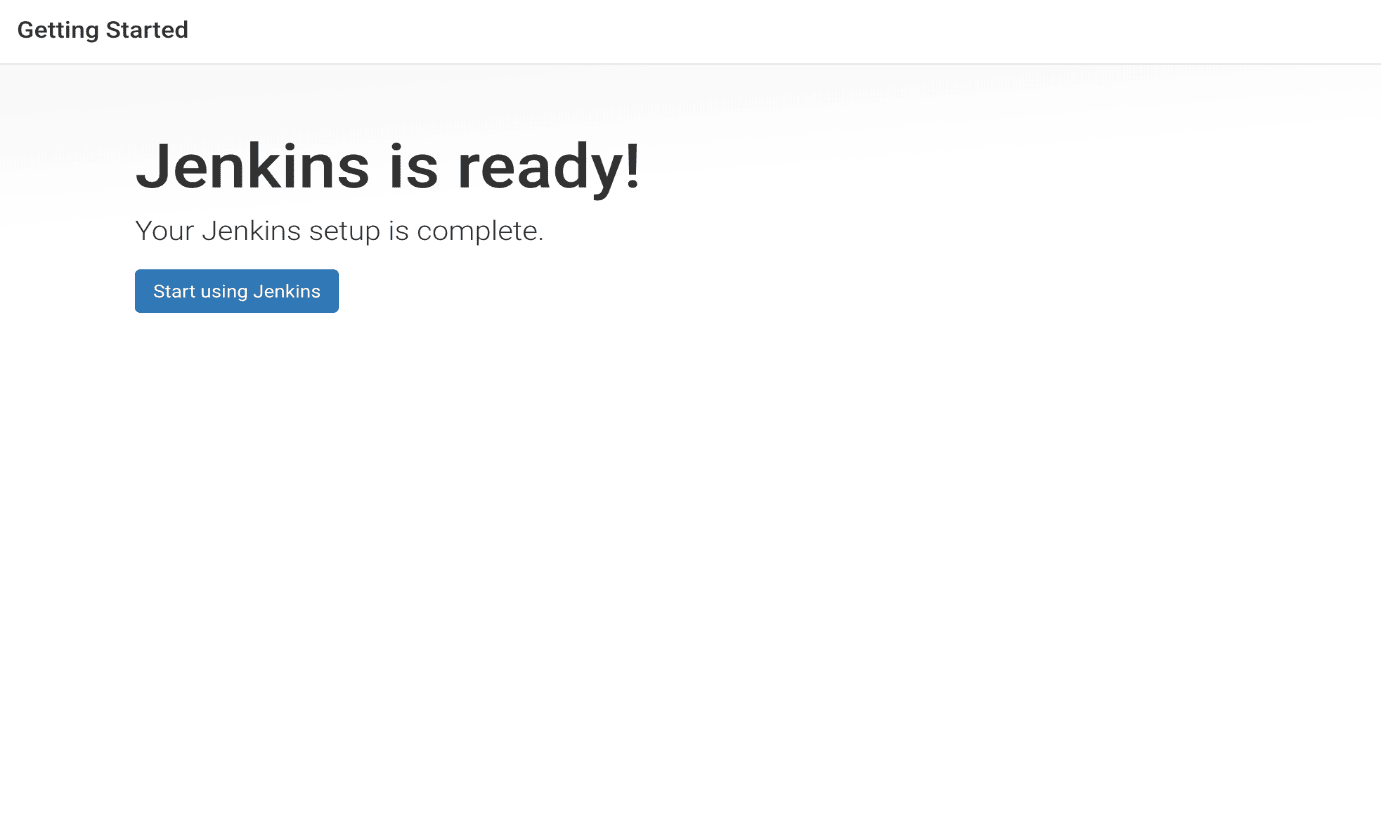
Finally, click the Start using Jenkins button. It will open the Welcome to Jenkins Dashboard:
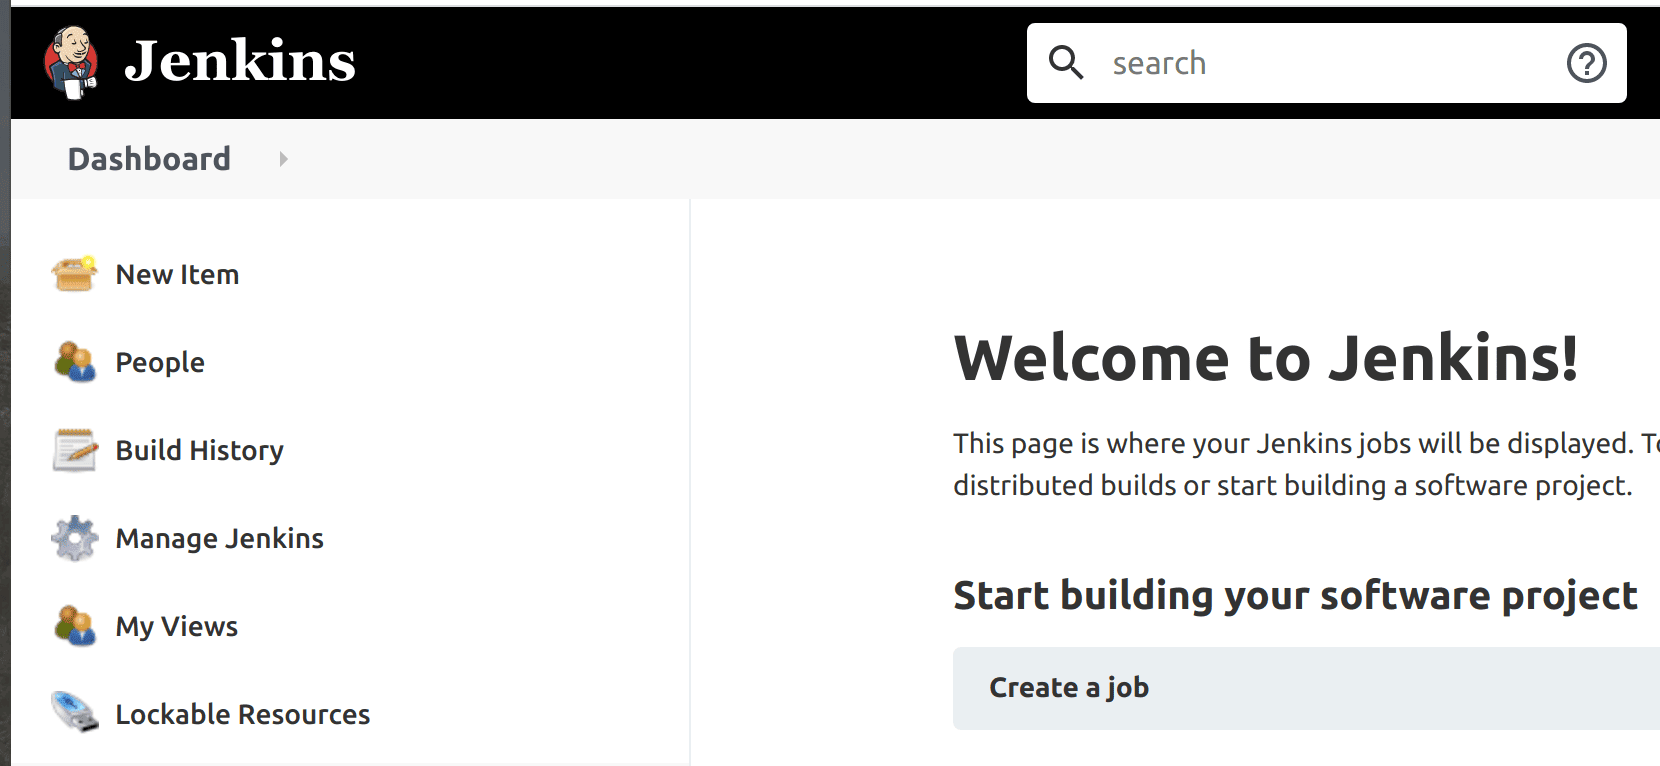
You will interact with the Jenkins Dashboard when managing Jenkins, creating CI/CD pipelines, and making configurations. We have completed the first step.
Step 2: Install Docker Pipeline Plugin
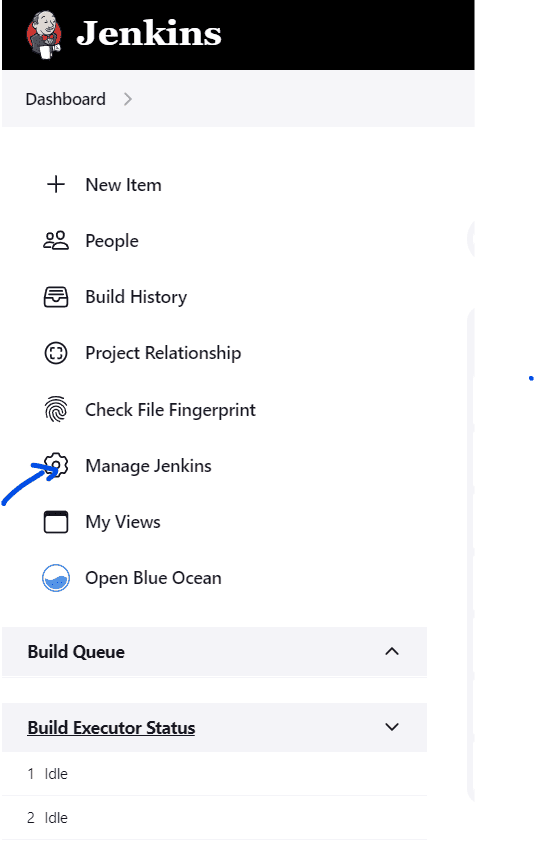
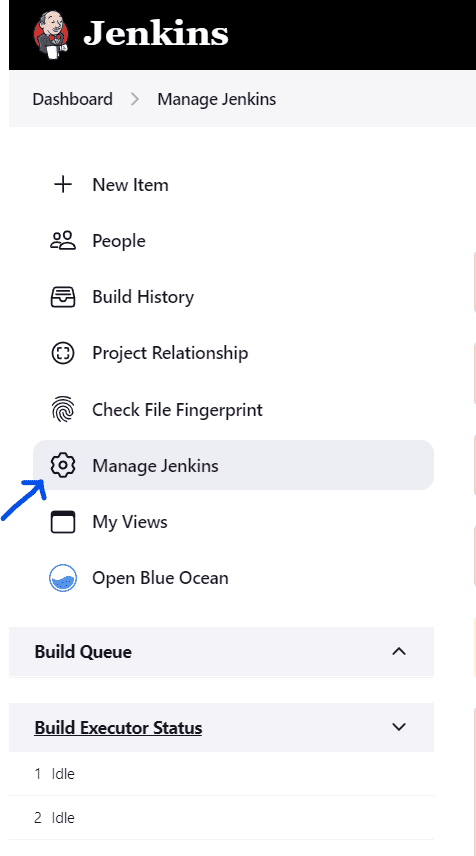
To install Docker Pipeline Plugin, Click Manage Jenkins as shown below:
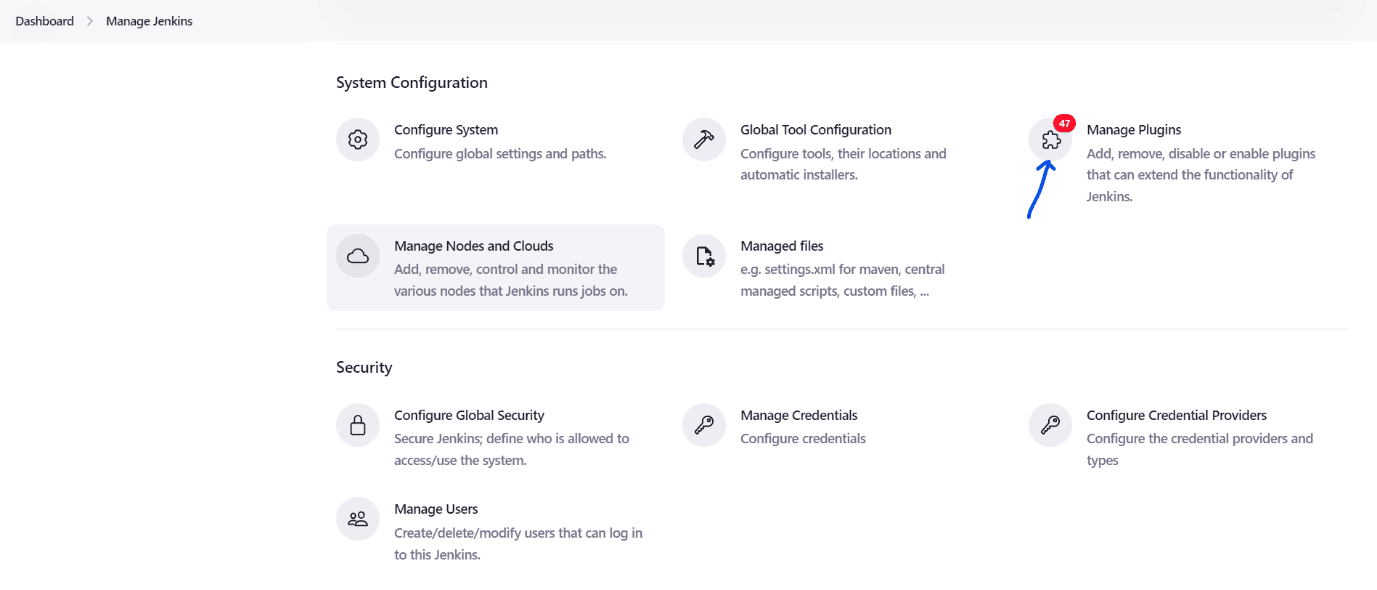
Next, click Manage Plugins as shown below:
Next, search for Docker Pipeline under Available plugins. Then click the Download now and install after restart button: Note: If you are unable to find Docker Pipeline under available plugins, check Installed Plugins and see if it’s already installed.
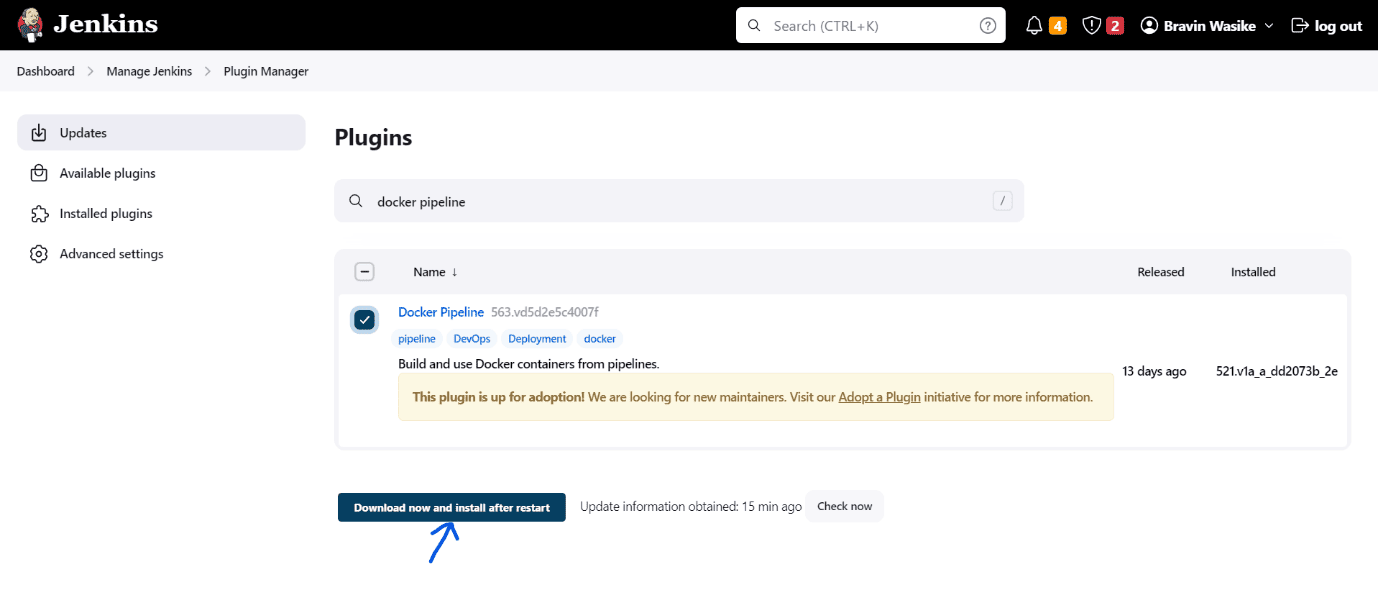
The Docker pipeline will enable you to add Docker commands in your Jenkins CI/CD pipeline scripts. Without this plugin, Jenkins will not recognize and understand Docker commands.
Step 3: Install Kubernetes Plugin
To install the Kubernetes Plugin, you will search for Kubernetes Pipeline. Then click the Download now and install after restart button:

The Docker pipeline will enable you to integrate Kubernetes with Jenkins. With the Kubernetes plugin, you can deploy the containerized application to the Kubernetes cluster using CI/CD Jenkins Pipeline.
Step 4: Add Credentials to Jenkins Credentials Manager
You will add the GitHub and Docker Hub credentials to the Jenkins Credentials manager. Jenkins will use GitHub credentials to authenticate to GitHub and Docker Hub credentials to authenticate to Docker Hub.
Adding the Docker Hub Credentials
To add the Docker Hub credentials:
- Go back to the Jenkins Dashboard and click Manage Jenkins
- Click Manage Credentials
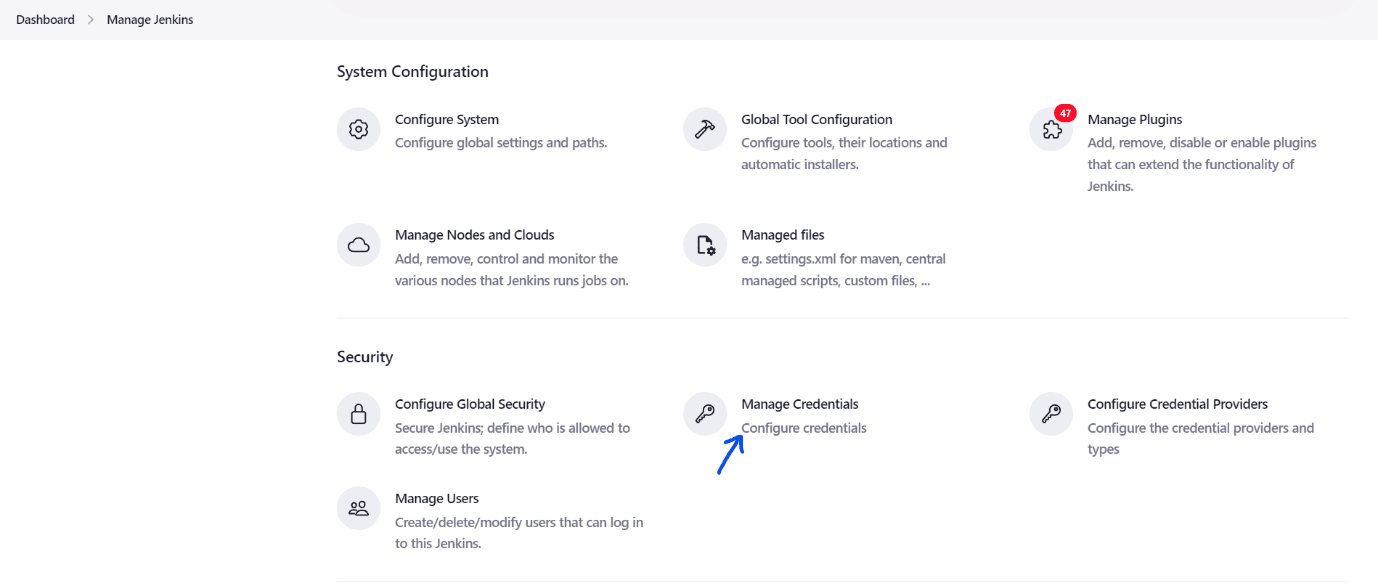
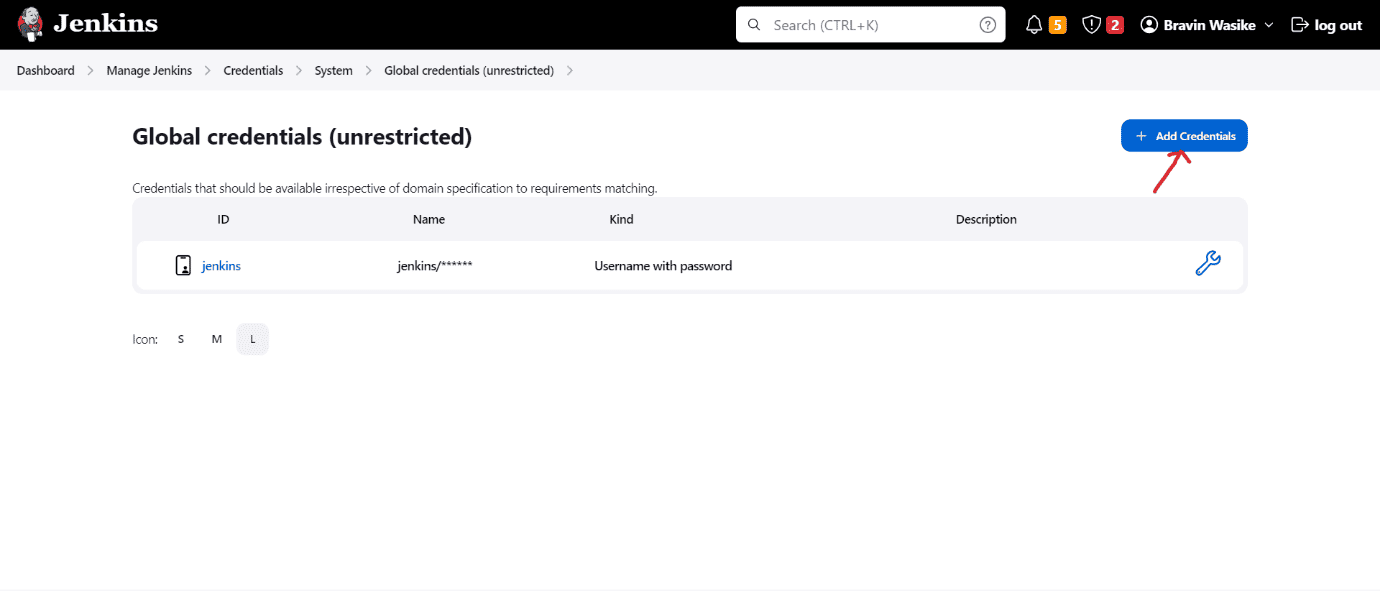
- Click Select System, then Global Credentials (unrestricted) to then Add Credentials
- Add Docker Hub Username and Password
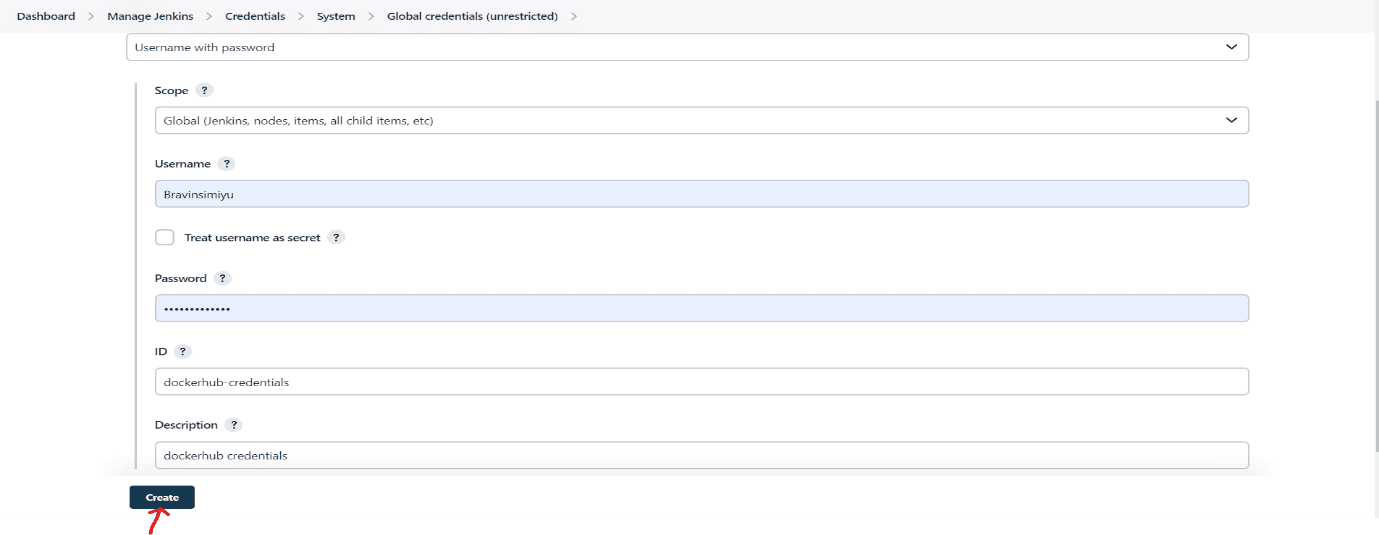
After adding all the information, click the `Create` button.
Adding the GitHub Credentials
You will add your GitHub username and password as shown below:
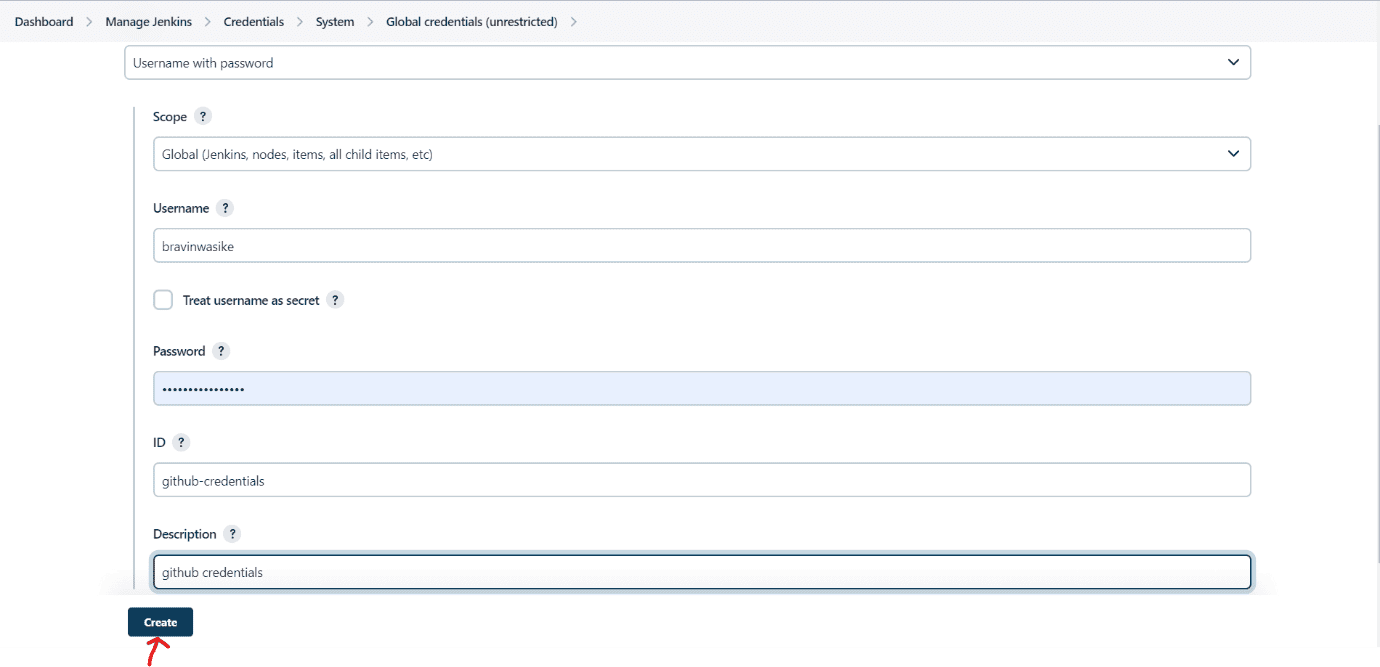
After adding all the information, click the `Create` button. You will have created the two credentials that Jenkins will use for authentication (logging into GitHub and Docker Hub.)
Step 5: Start Minikube
To start Minikube, open your terminal as admin and run the following command:
|
1 |
minikube start |
If your machine gives you an error and says virtualization support is disabled, you can run the following instead:
|
1 |
minikube start —-driver=docker |
It will take a while to start Minikube. After a few minutes, Minikube will start running on your local machine and it is ready for use as shown below:
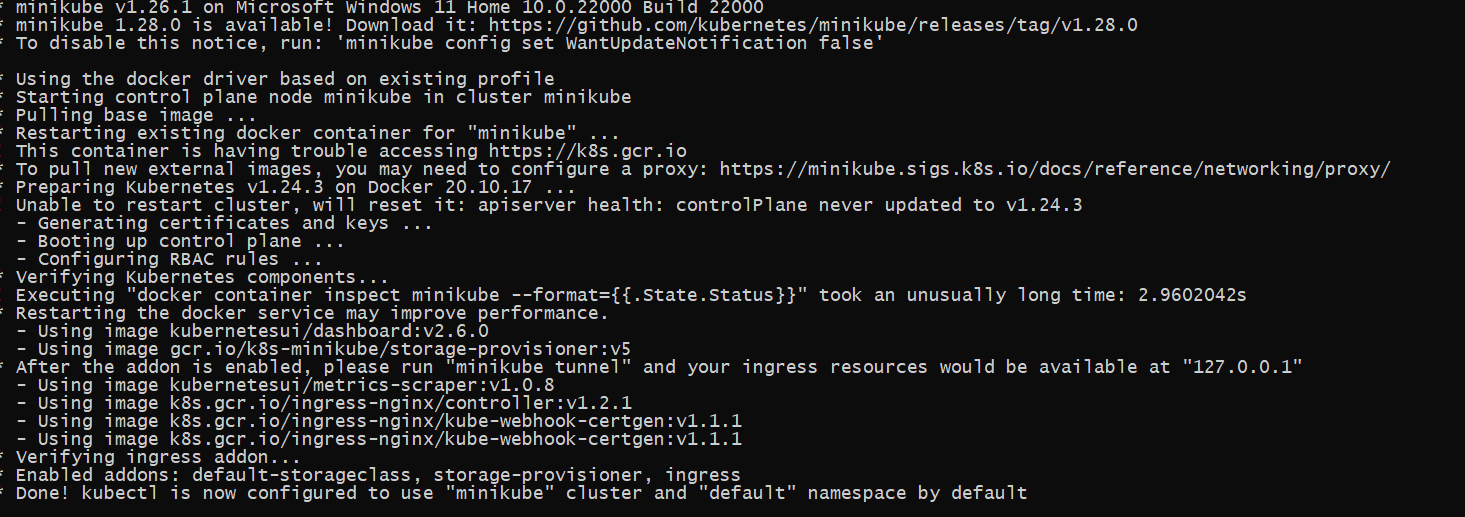
Both our Jenkins and Kubernetes environments are ready. The next step is to create a new GitHub repository.
Step 6: Create a new GitHub Repository
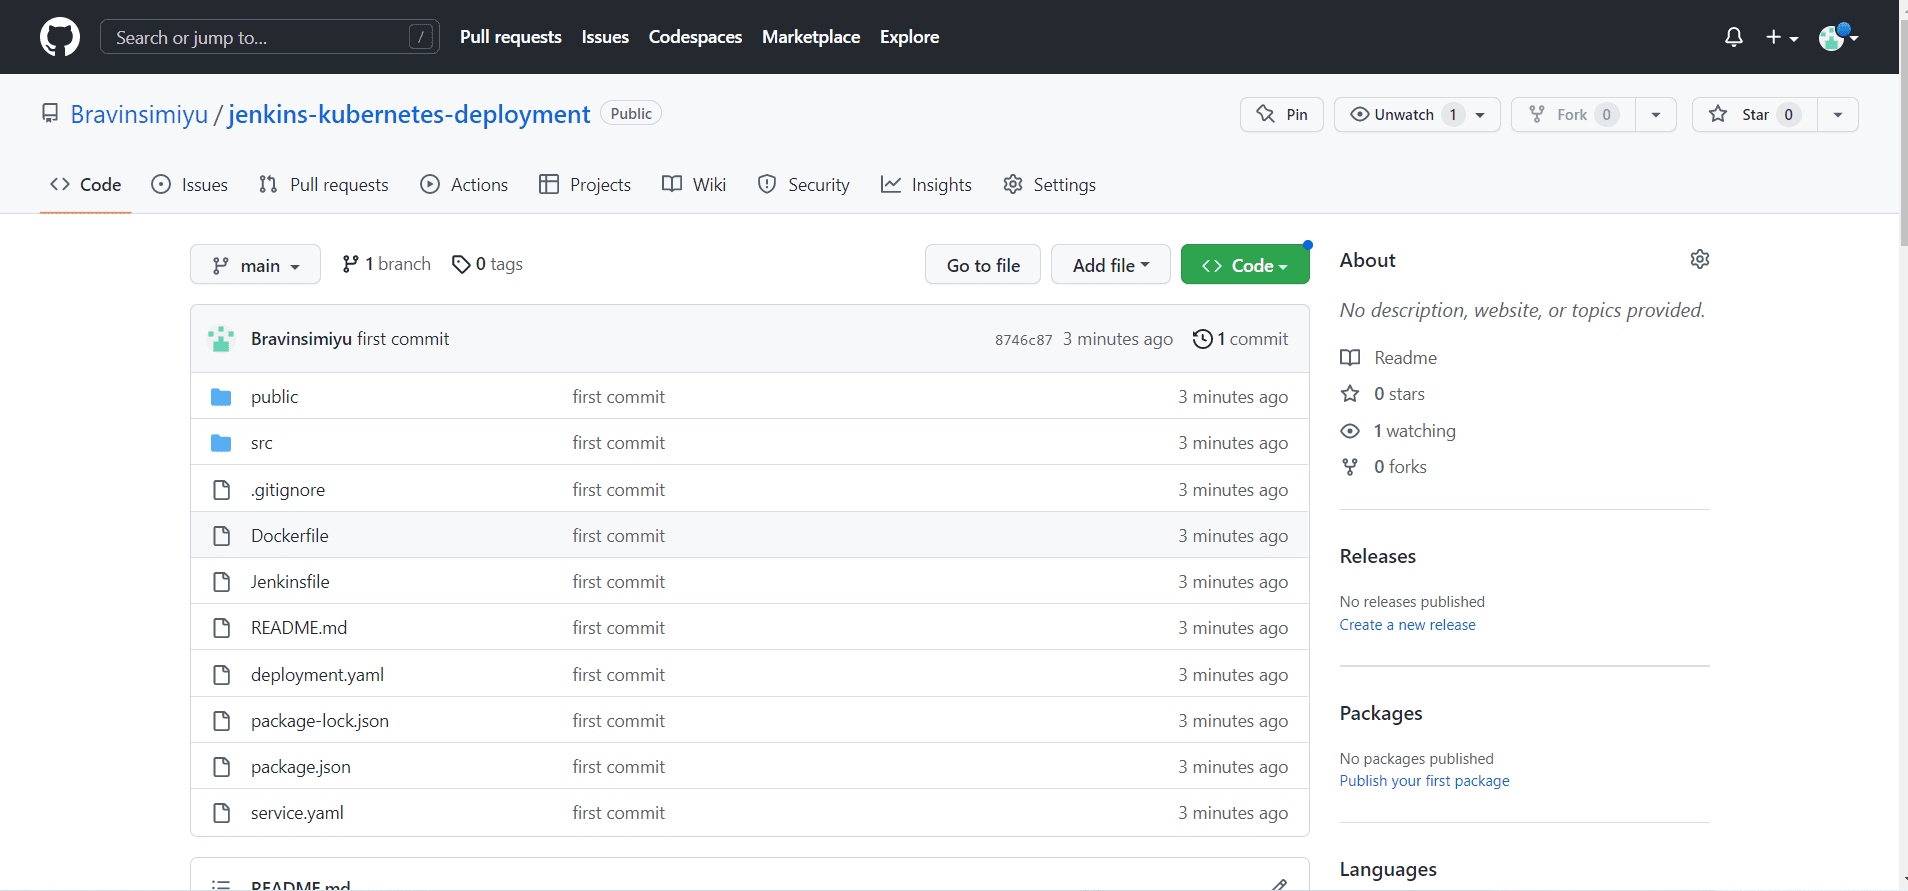
You will be required to login into your personal GitHub account. You will then a new GitHub repository as shown in the image below:
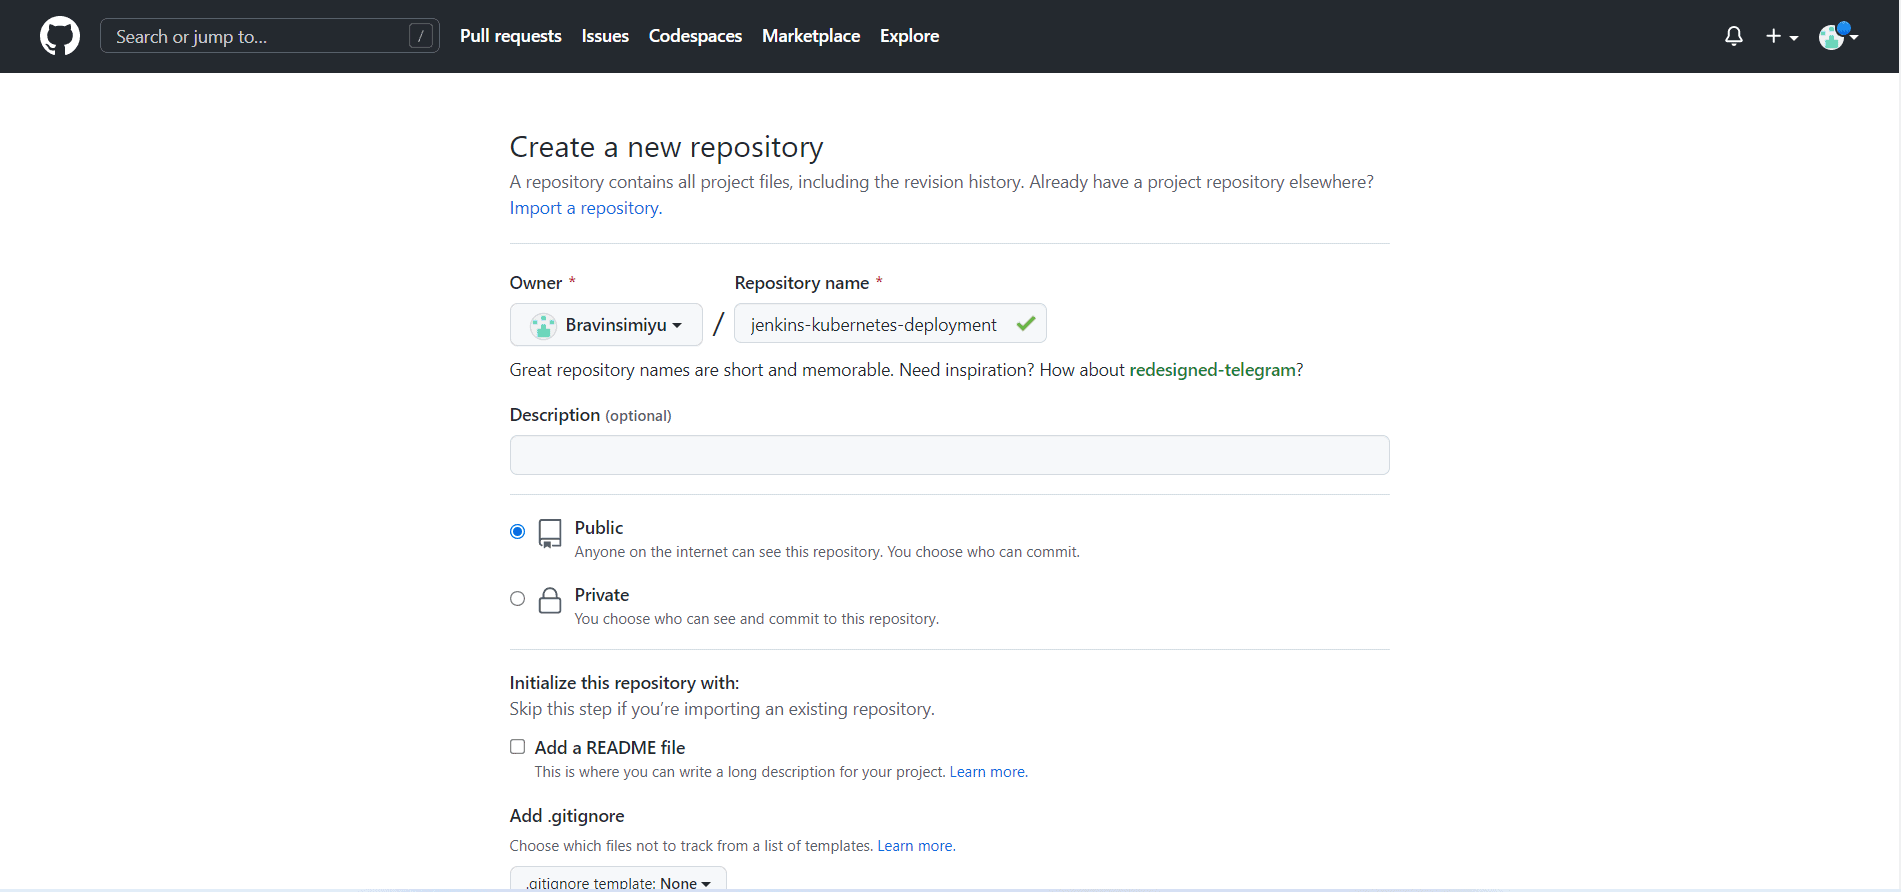
The repository will need to be public for the rest of the tutorial to work properly. You will push your Jenkinsfile, application files, and deployment files to the new GitHub repository. Let’s start working on the application.
Step 7: Create a Simple React.js application
In your computer, create a new folder named jenkins-deploy. In the jenkins-deploy folder, run the following command to create a simple React.js application:
|
1 |
npx create-react-app jenkins-kubernetes-deployment |
The command will create a simple React.js application. It will also generate a new folder named jenkins-kubernetes-deployment inside the jenkins-deploy root folder.
Step 8: Create a Dockerfile
The Dockerfile will contain commands that the Jenkins CI/CD pipeline will use to build the Docker image for the simple React.js application. In the `jenkins-kubernetes-deployment` folder, create a Dockerfile and paste the following Docker snippet:
|
1 2 3 4 5 6 7 8 9 10 11 12 13 14 15 16 17 18 19 20 |
#It will use node:19-alpine3.16 as the parent image for #building the Docker image FROM node:19-alpine3.16 #It will create a working directory for Docker. The Docker #image will be created in this working directory. WORKDIR /react-app #Copy the React.js application dependencies from the #package.json to the react-app working directory. COPY package.json . COPY package-lock.json . #install all the React.js application dependencies RUN npm i <!-- Copy the remaining React.js application folders and files from the `jenkins-kubernetes-deployment` local folder to the Docker react-app working directory --> COPY . . #Expose the React.js application container on port 3000 EXPOSE 3000 #The command to start the React.js application container CMD ["npm", "start"] |
Step 9: Create a Kubernetes Deployment YAML file
A Kubernetes Deployment YAML file creates the pods for the React.js application container in the Kubernetes cluster. The pods will host the application container, and each pod will have the necessary Kubernetes resources. In the `jenkins-kubernetes-deployment` folder, create a `deployment.yaml` file and paste the following YAML snippet:
|
1 2 3 4 5 6 7 8 9 10 11 12 13 14 15 16 17 18 19 20 21 22 23 24 |
apiVersion: apps/v1 kind: Deployment metadata: name: deployment #The name of the Kubernetes #Deployment to be created in the Kubernetes cluster labels: app: react-app spec: replicas: 2 #The number of pods to be created in the #Kubernetes cluster for the React.js application container selector: matchLabels: app: react-app template: metadata: labels: app: react-app spec: containers: - name: react-app #The name of the react.js application container #The Docker image for building the React.js application container image: bravinwasike/react-app:latest ports: - containerPort: 3000 #The port for the React.js application container |
The deployment.yaml file above will create two pods in the Kubernertes application. It will pull bravinwasike/react-app:latest Docker image from the Docker Hub repository and create a containerized application.
Step 10: Create a Kubernetes Service Deployment YAML file
A Kubernetes Service Deployment YAML file will create a Kubernetes Service in the Kubernetes cluster. The Kubernetes Service will expose the pods for the React.js application container outside the Kubernetes cluster. You will use the Kubernetes Service to access the React.js application container from outside the Kubernetes cluster.
In the jenkins-kubernetes-deployment folder, create a service.yaml file and paste the following YAML snippet:
|
1 2 3 4 5 6 7 8 9 10 11 12 13 14 |
apiVersion: v1 kind: Service metadata: #The name of the Kubernetes Service to be created #in the Kubernetes cluster name: service spec: selector: app: react-app type: LoadBalancer #Type of the Kubernetes Service ports: - protocol: TCP port: 3000 #Service port targetPort: 3000 #The port for the React.js application container |
Step 11: Create a Jenkinsfile
The Jenkinsfile will have multiple stages for defining our CI/CD Jenkins Pipeline. In the jenkins-kubernetes-deployment folder, create a Jenkinsfile and paste the following Jenkins pipeline snippet. Remember to update the GitHub link with your username and project!
|
1 2 3 4 5 6 7 8 9 10 11 12 13 14 15 16 17 18 19 20 21 22 23 24 25 26 27 28 29 30 31 32 33 34 35 36 37 38 39 40 41 |
pipeline { environment { dockerimagename = "bravinwasike/react-app" dockerImage = "" } agent any stages { stage('Checkout Source') { steps { git 'https://github.com/YOURUSERNAME/jenkins-kubernetes-deployment.git' } } stage('Build image') { steps{ script { dockerImage = docker.build dockerimagename } } } stage('Pushing Image') { environment { registryCredential = 'dockerhub-credentials' } steps{ script { docker.withRegistry( 'https://registry.hub.docker.com', registryCredential ) { dockerImage.push("latest") } } } } stage('Deploying React.js container to Kubernetes') { steps { script { kubernetesDeploy(configs: "deployment.yaml", "service.yaml") } } } } } |
The Jenkinsfile will create a Jenkins Pipeline with four stages:
- Checkout Source
- Build image
- Pushing Image
- Deploying React.js container to Kubernetes
- Checkout Source Stage
This Jenkins Pipeline stage will use `https://github.com/YOURUSERNAME/jenkins-kubernetes-deployment.git` as the GitHub repository. It will pull and scan all the files in this GitHub repository.
- Build Image Stage
This Jenkins Pipeline stage will use the created Dockerfile to build a Docker image named bravinwasike/react-app.
- Pushing Image Stage
This Jenkins Pipeline stage will push the bravinwasike/react-app Docker image to Docker Hub using the dockerhub-credentials
- Deploying React.js Container to Kubernetes Stage
It will pull bravinwasike/react-app:latest Docker image from the Docker Hub repository and create a containerized application. It will then deploy the React.js container to Kubernetes.
Step 12: Push the Files to your GitHub Repository
To push all the application files to your GitHub repository, run the following Git commands shown below:
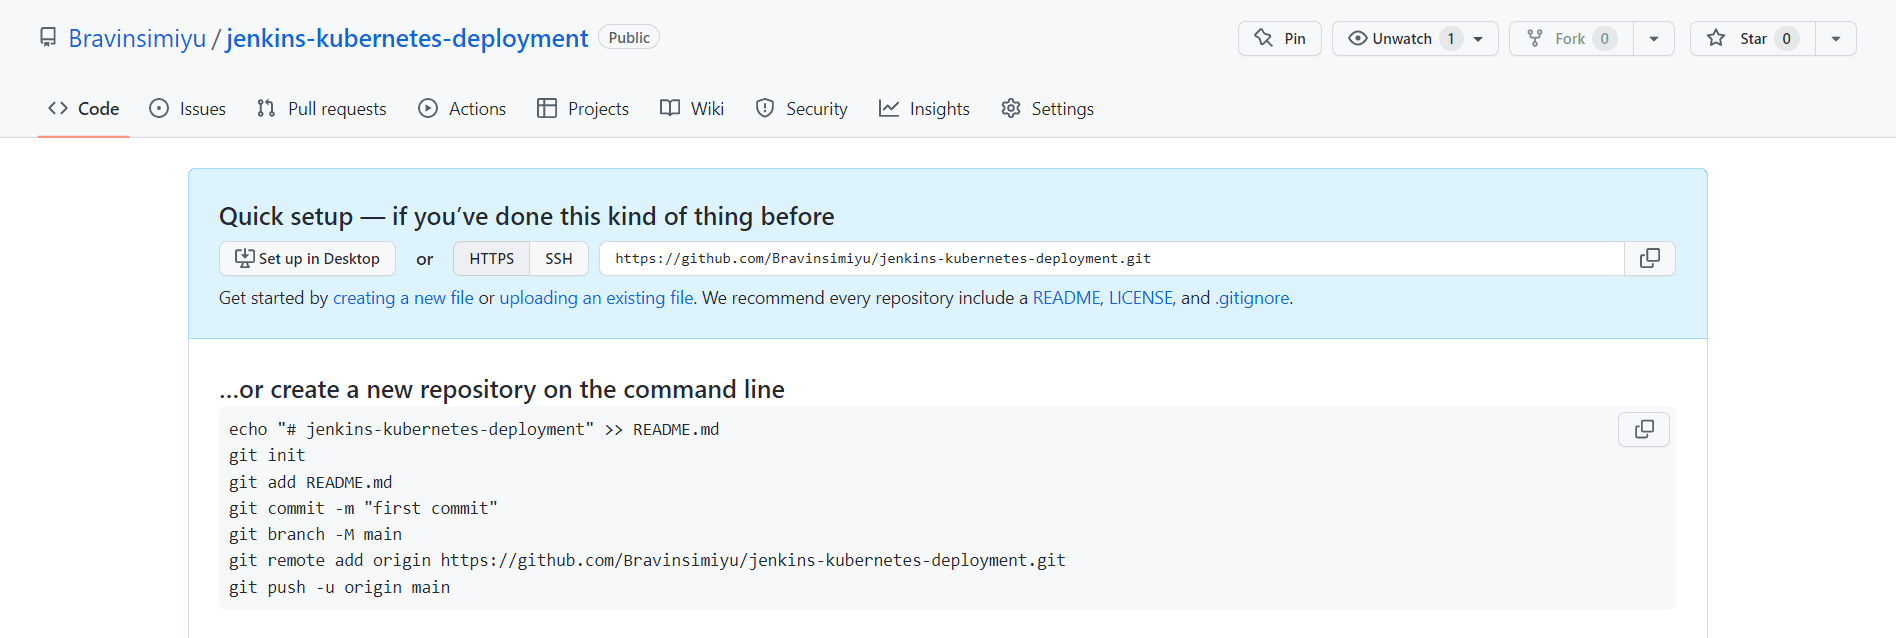
After running the Git commands, you will push all the React.js application files, the Dockerfile, the Jenkinsfile, the deployment.yaml file, and the service.yaml file to your GitHub Repository:
All our files are ready, Let’s create a multi-branch pipeline in the Jenkins platform.
Step 13: Create a Multi-branch Pipeline
To Create a Multi-branch Pipeline, follow the steps below:
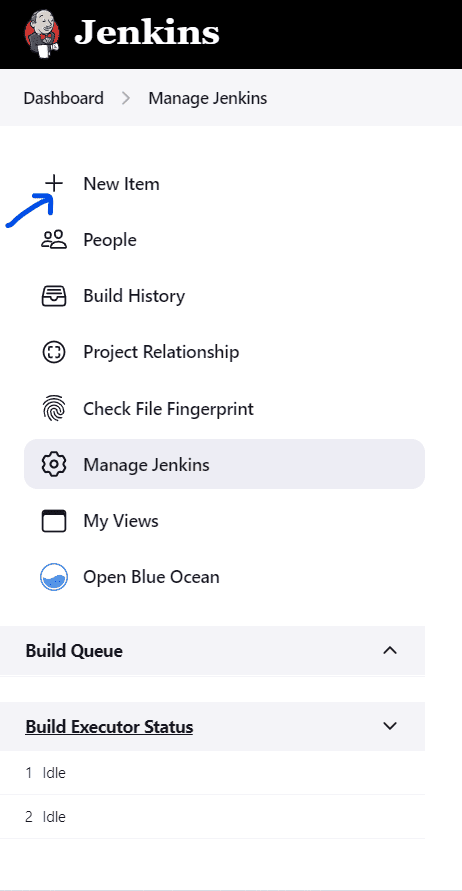
- Open the Jenkins Dashboard and Click New Item
- Enter an item name
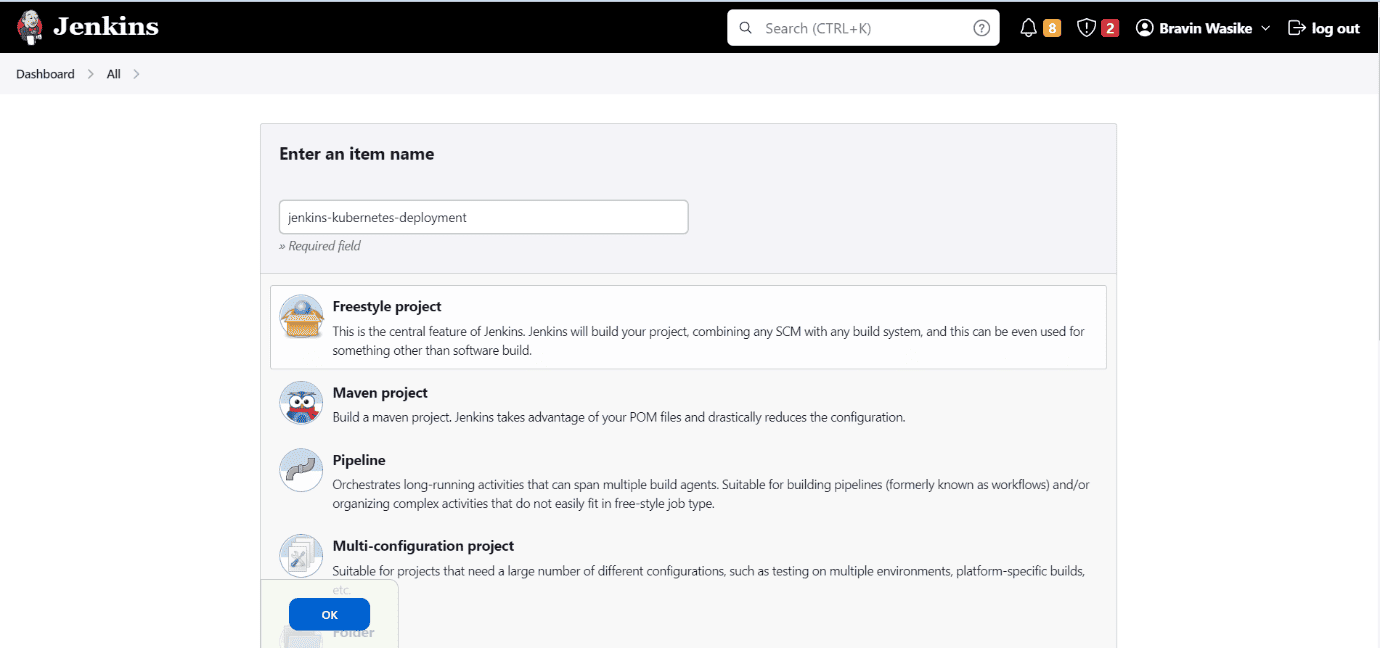
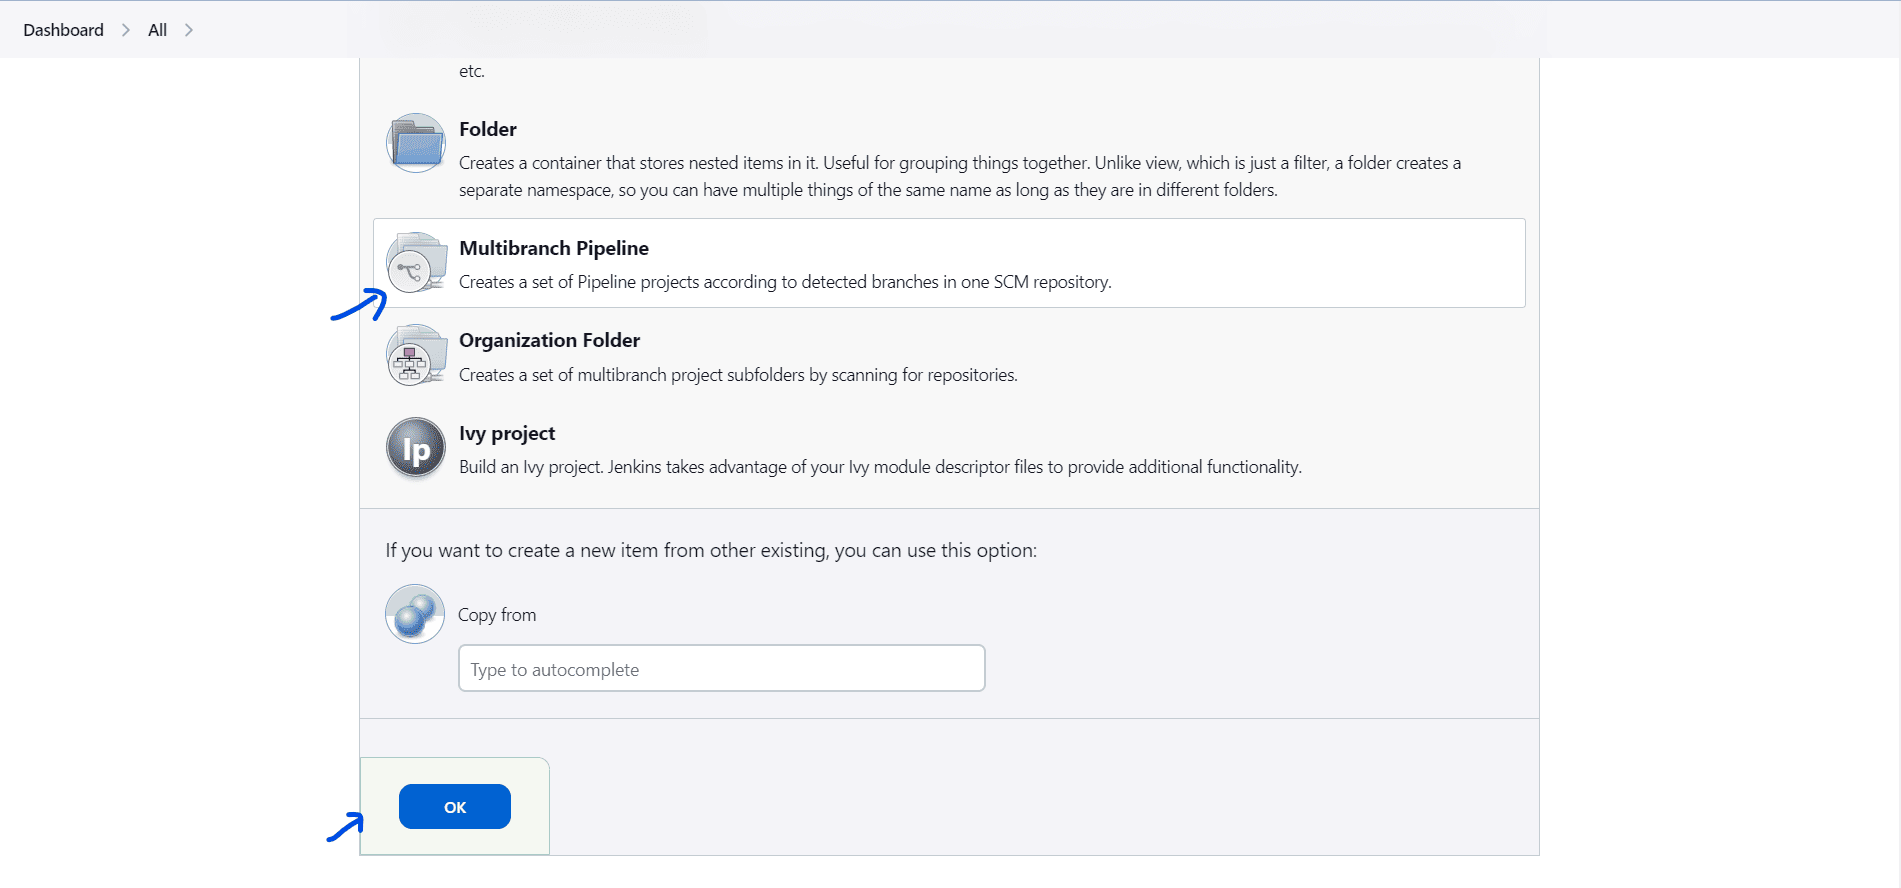
- Scroll down and Select the Multibranch Pipeline. Give it a name (jenkins-kubernetes-deployment will be assumed), then click OK
Step 14: Configure the Multi-branch Pipeline
To configure the Multi-branch Pipeline:
- Click `Branch Sources`:
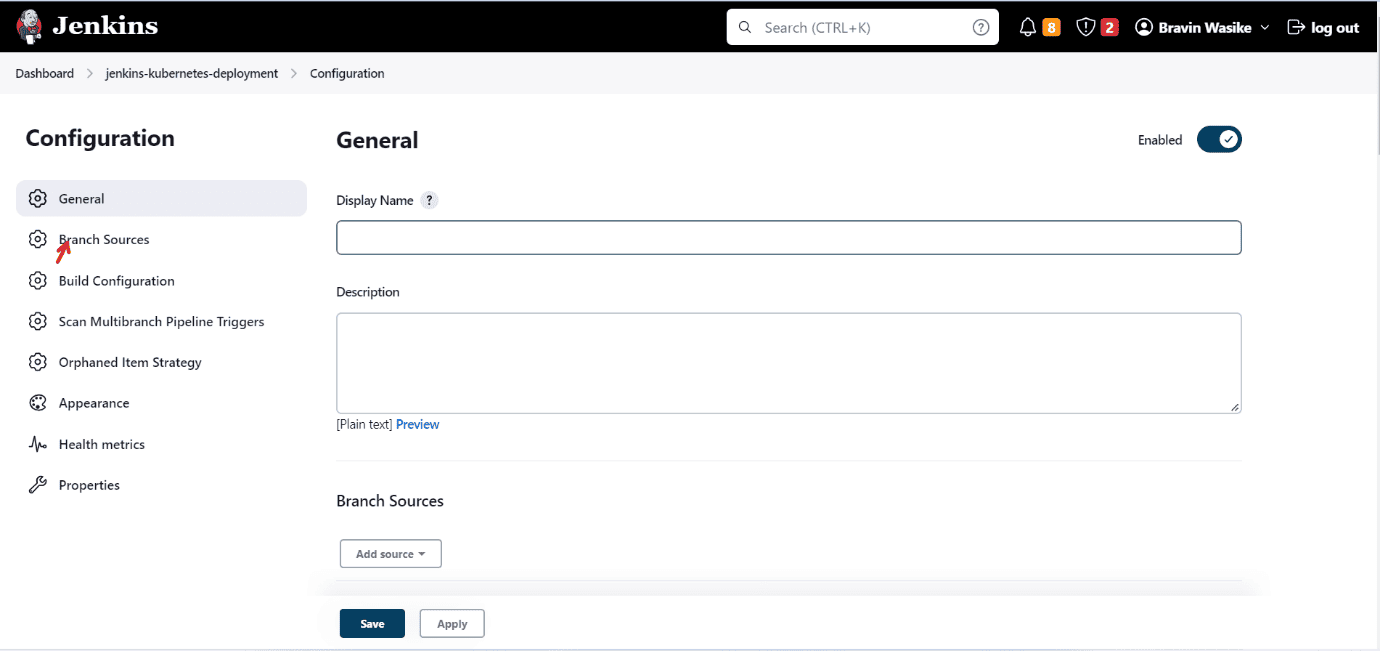
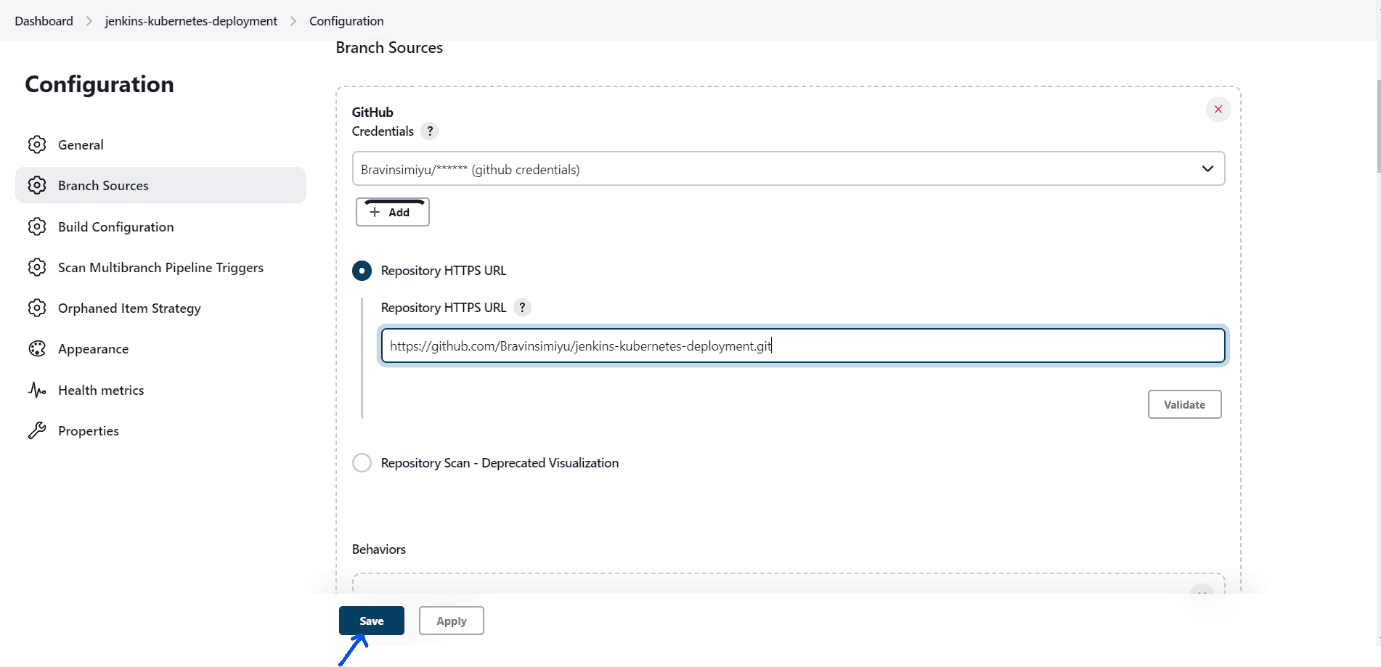
- Select GitHub from the “Add source” dropdown menu

- Add the GitHub credentials ID and the GitHub repository URL
Scan the GitHub Repository
You will click Scan Repository Now to scan the GitHub Repository you have added:
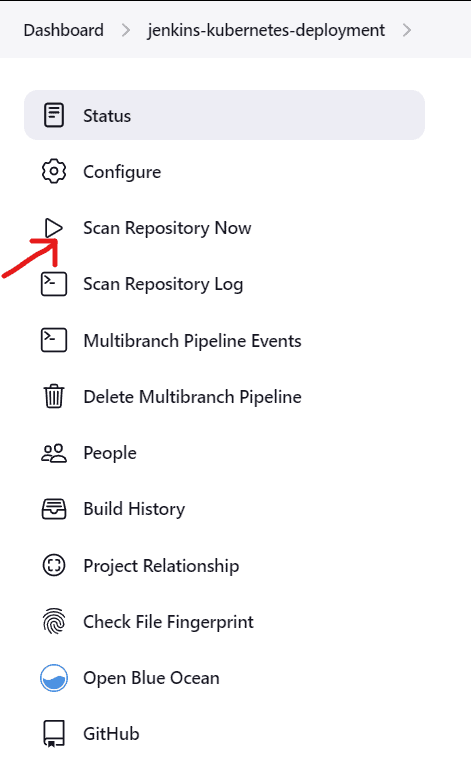
It will scan all the files in this GitHub repository and find the Jenkinsfile. Jenkins will use this file to build the multi-branch pipeline:
Step 15. Build the Multi-branch Pipeline
To build the Multi-branch Pipeline, click Build Now:
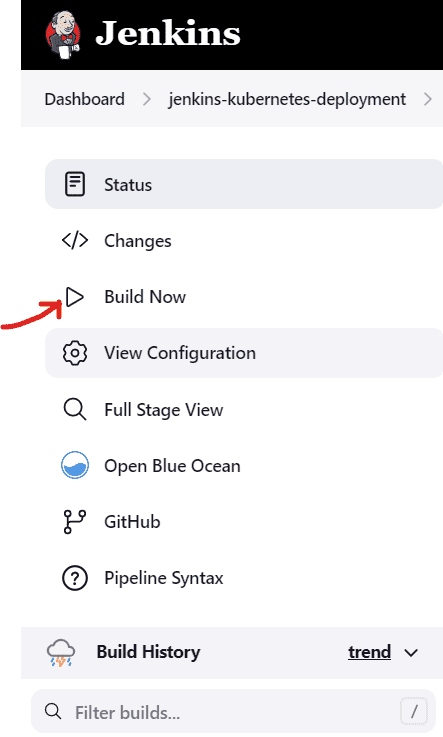
Jenkins will use the Jenkinsfile to build the multi-branch pipeline stages as shown below:
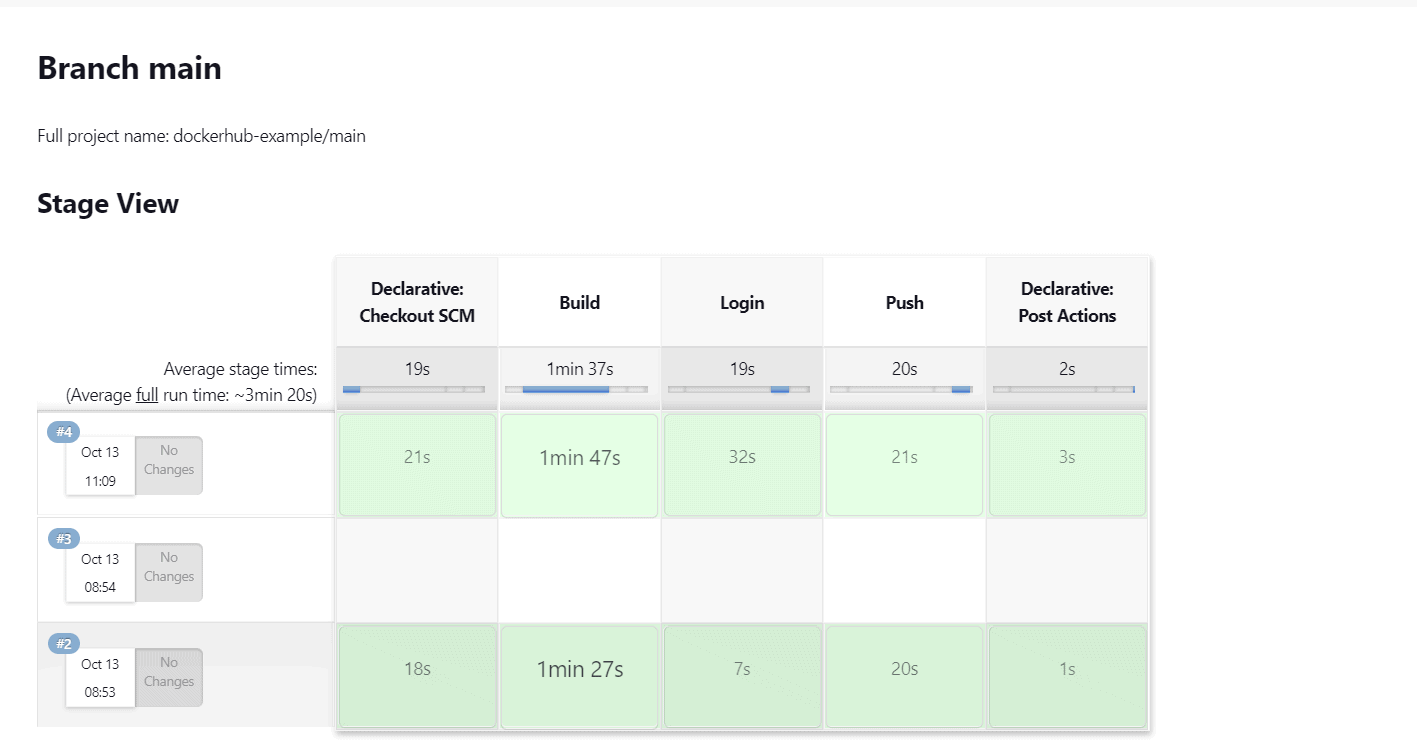
Multi-branch Pipeline Output
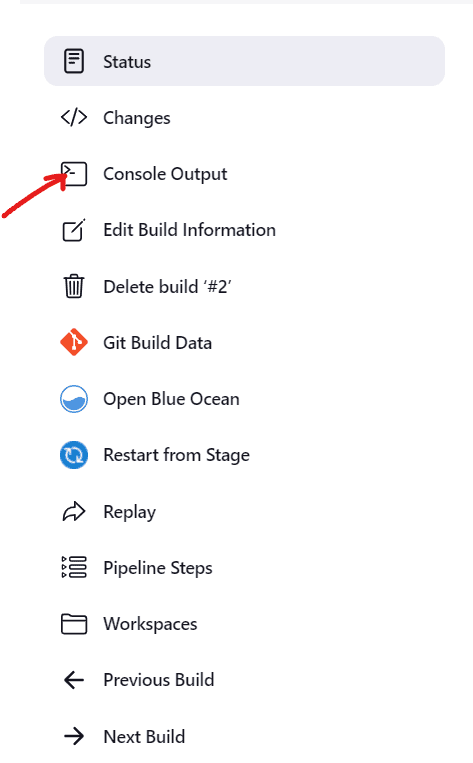
To get the Multi-branch Pipeline output, click Console Output:
It will implement all the stages defined in the Jenkinsfile and produce the following outputs:
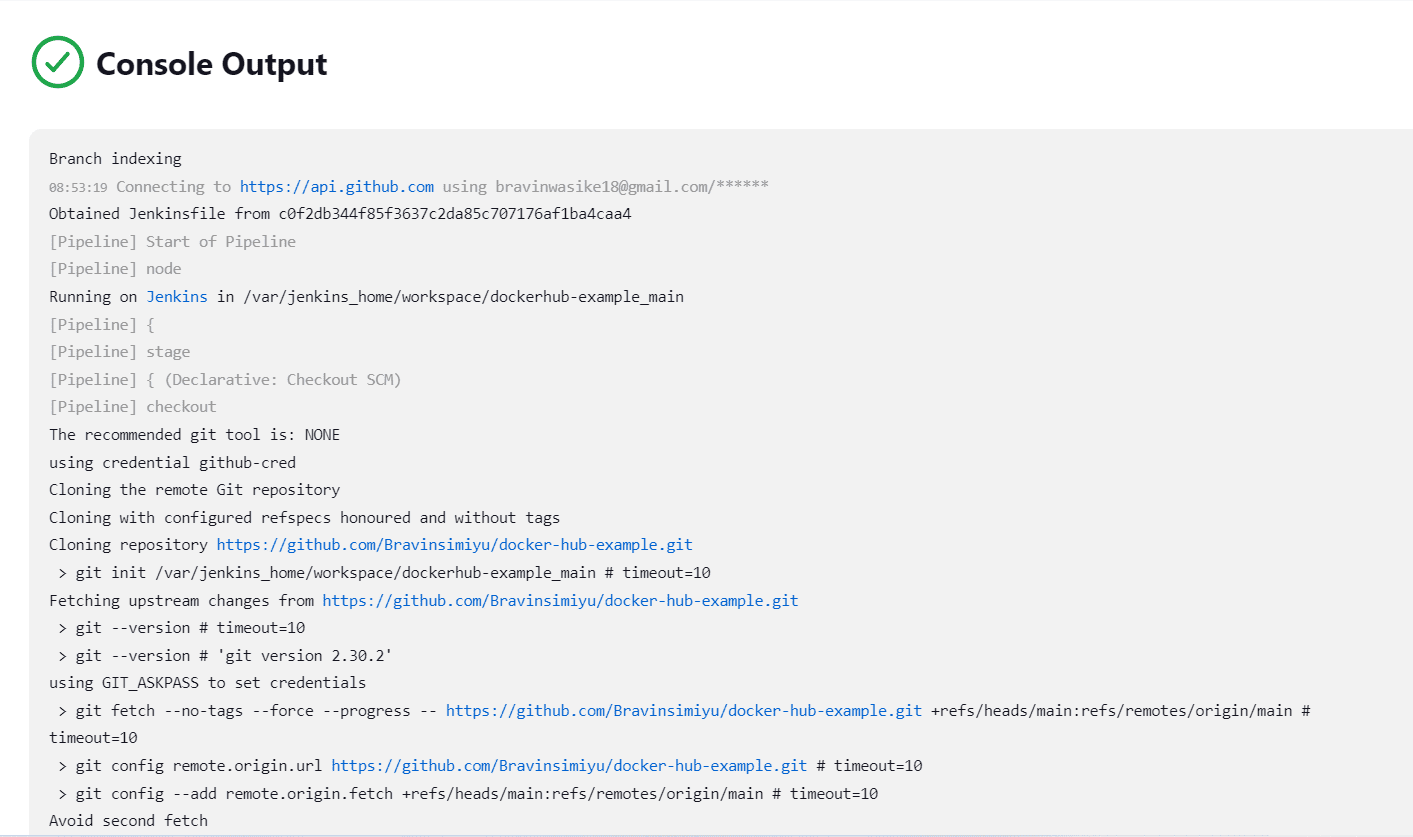
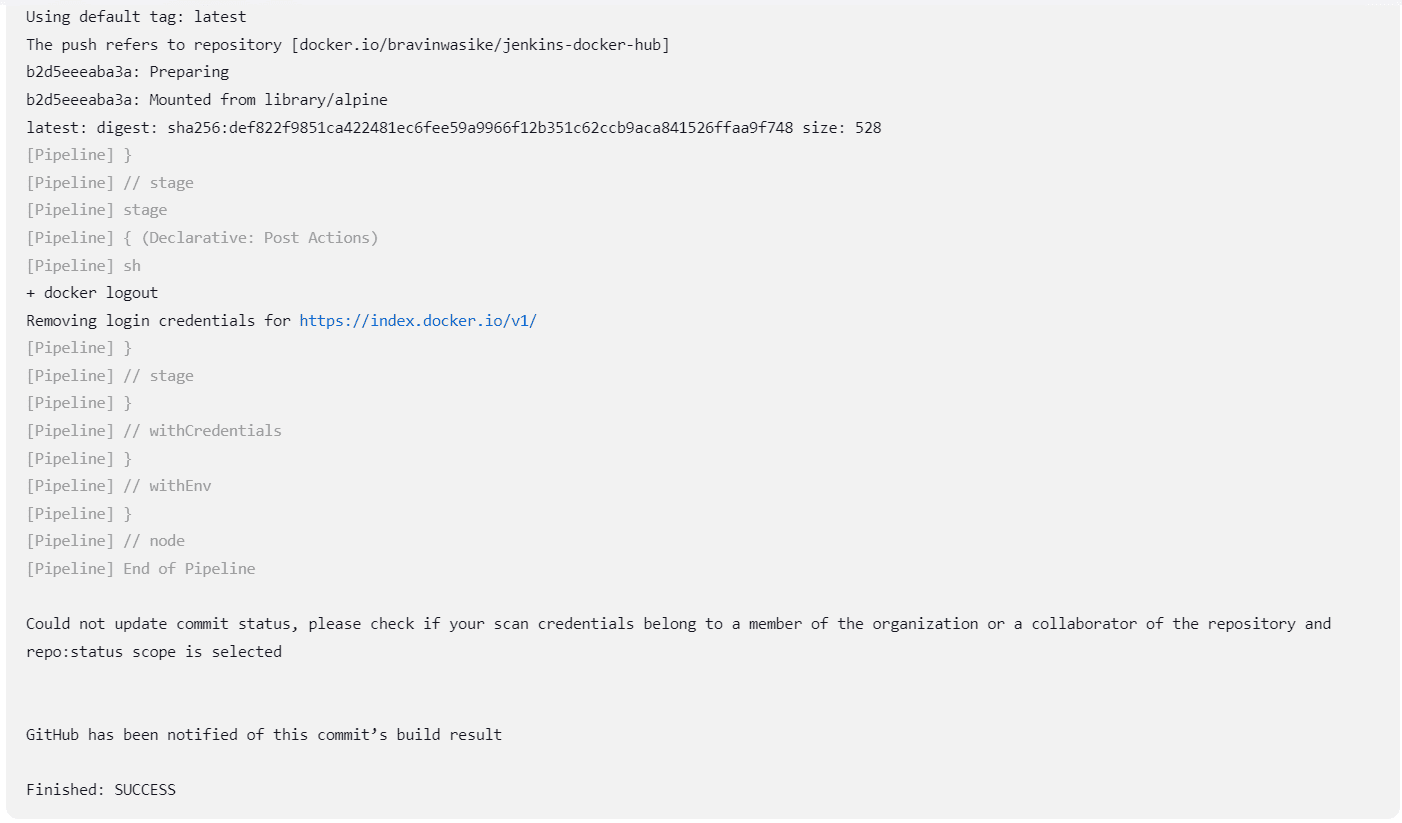
The Jenkins CI/CD pipeline outputs a SUCCESS message. The Jenkins CI/CD pipeline performed the following tasks:
- Build the Docker image.
- Push the Docker image to Docker Hub.
- Pull the Docker image from the Docker Hub repository and create a Dockerized application.
- Deploy the containerized application to the Kubernetes cluster.
Step 16: Accessing the Deployed Dockerized Application
You will use the Kubernetes Service to access the React.js application container from outside the Kubernetes cluster. To get the Kubernetes Service, run this command:
|
1 |
kubectl get service |
The command will output the following Kubernetes Service in your terminal:

You will then run the following command to get the URL:
|
1 |
minikube service react-app-service |
The command will output the following URL:

Copy the URL and paste it into your browser to access the deployed containerized application (React.js application):
You can now access the React.js application that you have deployed using the CI/CD pipeline.
Conclusion
In this tutorial, you have learned how to deploy a Dockerized application to the Kubernetes cluster using Jenkins. This tutorial covers the key features of Jenkins and how to run Jenkins as a Docker Container. After running the Jenkins container, you added credentials to Jenkins Credentials Manager. You then created the React.js application files, the Dockerfile, the Jenkinsfile, the deployment.yaml file, and the service.yaml file.
In the next steps, you pushed the files to the GitHub repository and configured a multi-branch Pipeline. After building the Jenkins CI/CD pipeline using the Jenkinsfile, you accessed the deployed containerized application. You used the Kubernetes Service to access the React.js application. The Jenkins CI/CD pipeline deployed the containerized application to the Kubernetes cluster. Jenkins is the best way of accelerating the development workflows. It can be adopted in any organization.
FAQs: Deploying a Dockerized Application to the Kubernetes Cluster using Jenkins
1. What Jenkins plugins are needed to deploy to Kubernetes?
You need two plugins: the Docker Pipeline plugin (for building and pushing Docker images within Jenkins pipelines) and the Kubernetes plugin (for connecting Jenkins to your Kubernetes cluster and deploying workloads). Install both from the Jenkins Plugin Manager under Manage Jenkins > Plugins > Available plugins.
2. Can I use this Jenkins pipeline with a cloud Kubernetes cluster instead of Minikube?
Yes. The Jenkinsfile pipeline stages (build, push, deploy) work the same way with cloud-hosted clusters like Amazon EKS, Google GKE, or Azure AKS. The main difference is the kubectl configuration – instead of pointing to a local Minikube cluster, you configure your kubeconfig to authenticate with your cloud provider’s cluster endpoint.
3. What is the difference between Jenkins declarative and scripted pipelines for Kubernetes deployment?
Declarative pipelines use a structured Jenkinsfile syntax with predefined stages and are easier to read and maintain. Scripted pipelines use Groovy code and offer more flexibility but are harder to debug. For Kubernetes deployments, declarative pipelines are recommended because the stage-based structure maps cleanly to the build-push-deploy workflow.
This document contains proprietary information and is protected by copyright law.
Copyright © 2026 Red Gate Software Limited. All rights reserved


Load comments