
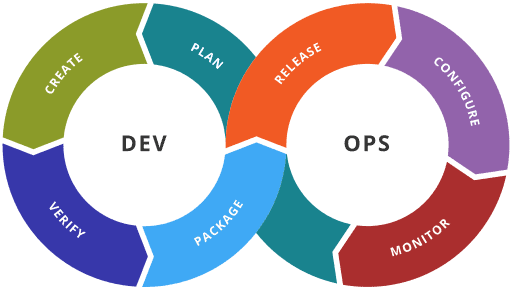
Jenkins is an open-source multi-platform software for continuous integration/continuous delivery and deployment (CI/CD) in DevOps. It is one of the most common CI/CD tools. Jenkins uses CI/CD pipelines to automate the software development and deployment workflows. Jenkins uses plugins to integrate with DevOps tools such as Docker and Kubernetes.
Jenkins plugins can also be used to integrate with cloud providers such as Google Cloud, AWS, and Microsoft Azure. If you want to integrate any DevOps tool with Jenkins, you have to install its plugin in the Jenkins controller platform. In this tutorial, you will learn how to set up Jenkins CI/CD on Kubernetes Cluster using Helm. Helm is one of the easiest ways of installing an application on the Kubernetes Cluster.
Prerequisites
For you to follow this tutorial on how to Setup Jenkins CI/CD on Kubernetes Cluster using Helm, you must:
- Have Docker set up and understand how to use Docker:
- Understand Kubernetes. (There is some free training on the Kubernetes site)
How to Setup Jenkins CI/CD on Kubernetes Cluster using Helm
Helm is an open-source platform that was created by DeisLabs. Helm is used as the package manager for Kubernetes. Many developers use Helm to install any Kubernetes application to the Kubernetes Cluster. Helm automates the process of deploying a Kubernetes application to the Kubernetes Cluster. Helms bundles a Kubernetes application into a single package known as a Helm chart. Developers will then take this Helm chart and install them on the Kubernetes Cluster.
A Helm chart contains all the Kubernetes YAML files for deploying a Kubernetes application. Once you install the Helm chart on the Kubernetes Cluster, it will create the Kubernetes components such as Kubernetes Deployment and Service on the Kubernetes cluster. You can create your Helm chart using Helm or you can reuse other people’s Helm charts.
Helm has an official Helm Chart repository called ArtifactHub] where developers can push and publish their Helm Charts. In this repository, you can easily find Helm charts for any Kubernetes application and reuse them. For complex applications like Jenkins, it is best to use the official Jenkins Helm Chart. Many Developers have contributed to the Jenkins Helm chart and it has all the Kubernetes YAML files. It will save us time in creating our custom Jenkins Helm chart. In this tutorial you will search and download the official Jenkins Helm Chart from ArtifactHub. We will then install the official Jenkins Helm Chart on the Kubernetes Cluster using Helm. Let’s install Helm.
Installing Helm
There are several ways to install Helm which are covered in the official Helm installation guide. You can check out the official Helm installation docs here. In this article, we will cover the online way, but there are other ways to install it.
Helm is a package manager for Kubernetes that makes it easy to install and manage Helm charts. A Helm chart is a collection of Kubernetes resources that can be used to deploy an application or service.
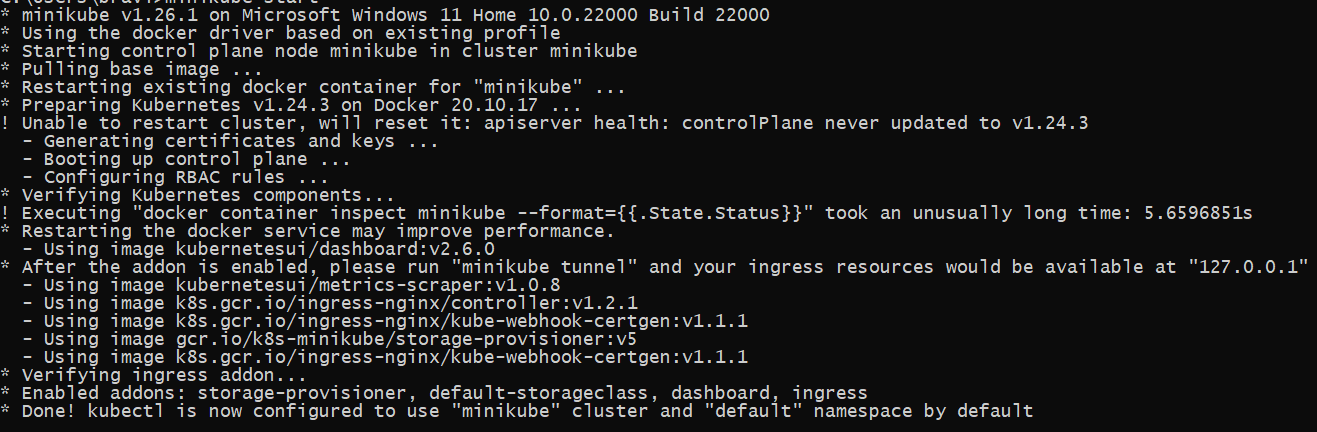
Before you install Helm, you must configure/create a Kubernetes Cluster. We will install Helm on the configured Kubernetes Cluster. There are various Kubernetes Kubernetes Clusters that you can configure. You can check out here the different types of Kubernetes Cluster. Cloud providers like Google Cloud, AWS, and Microsoft Azure have a dedicated Kubernetes Cluster that you can configure and use. In this tutorial, we will not use any of the cloud providers, instead, we will use a local Kubernetes called Minikube that comes with Docker. As long as you have Docker running you can easily configure Minikube. To configure and start Minikube, follow these steps:
Start Docker
Once you have started Docker, it is now easy to start Minikube.
Configure and start Minikube
To configure and start Minikube, run this command in your shell:
|
1 |
minikube start |
The output should be similar to:
Now that we have configured and started our Kubernetes Cluster (Minikube), let’s install Helm. There are different ways of installing Helm on your specific operating system. There are other ways of installing Helm on your machine. In this tutorial I will show you how to install Helm on Linux, macOS, and Windows.
You can go through the official Helm installation guide to see the other ways of installing Helm on your specific machine.
Installing Helm on Linux
To install Helm on Linux, open your Linux terminal and execute this command:
|
1 |
sudo apt-get install helm |
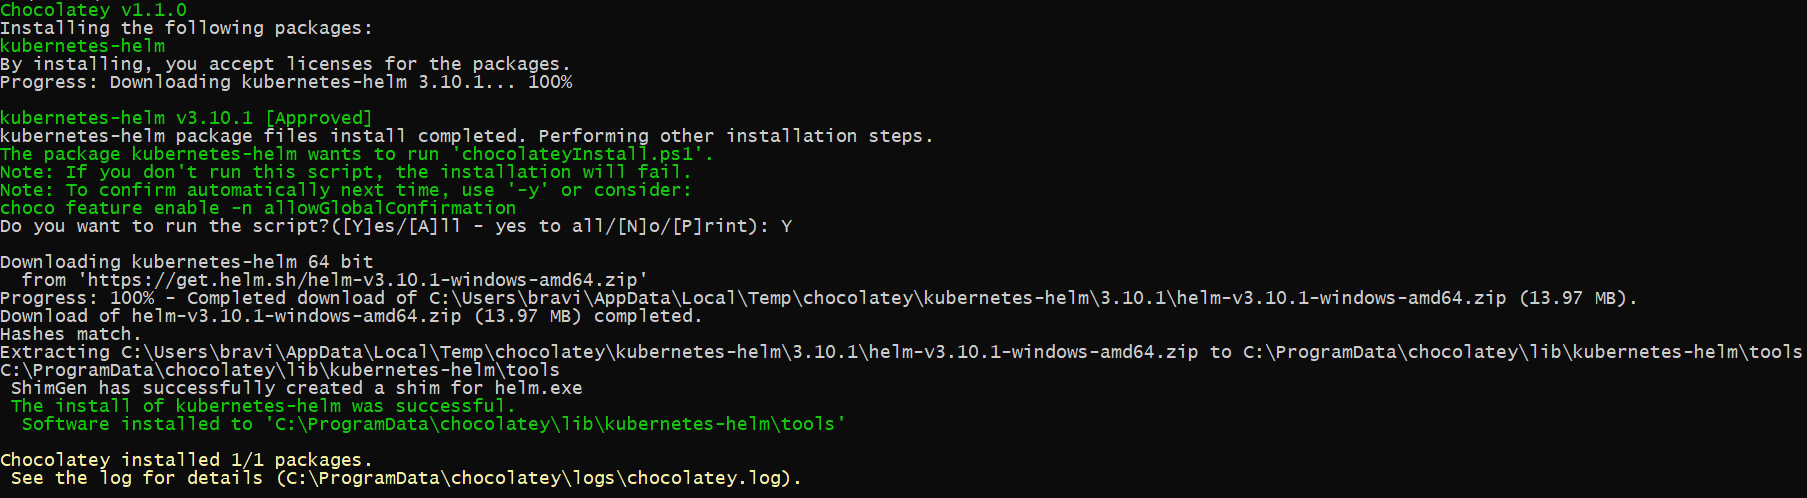
Installing Helm on Windows
To install Helm on Windows, open your Git bash terminal and execute this command:
|
1 |
choco install kubernetes-helm |
Installing Helm on macOs
To install Helm on macOs, open your terminal and execute this command
|
1 |
brew install helm |
Helm Installation Output
I have installed Helm on my Windows operating system as shown in the image below:
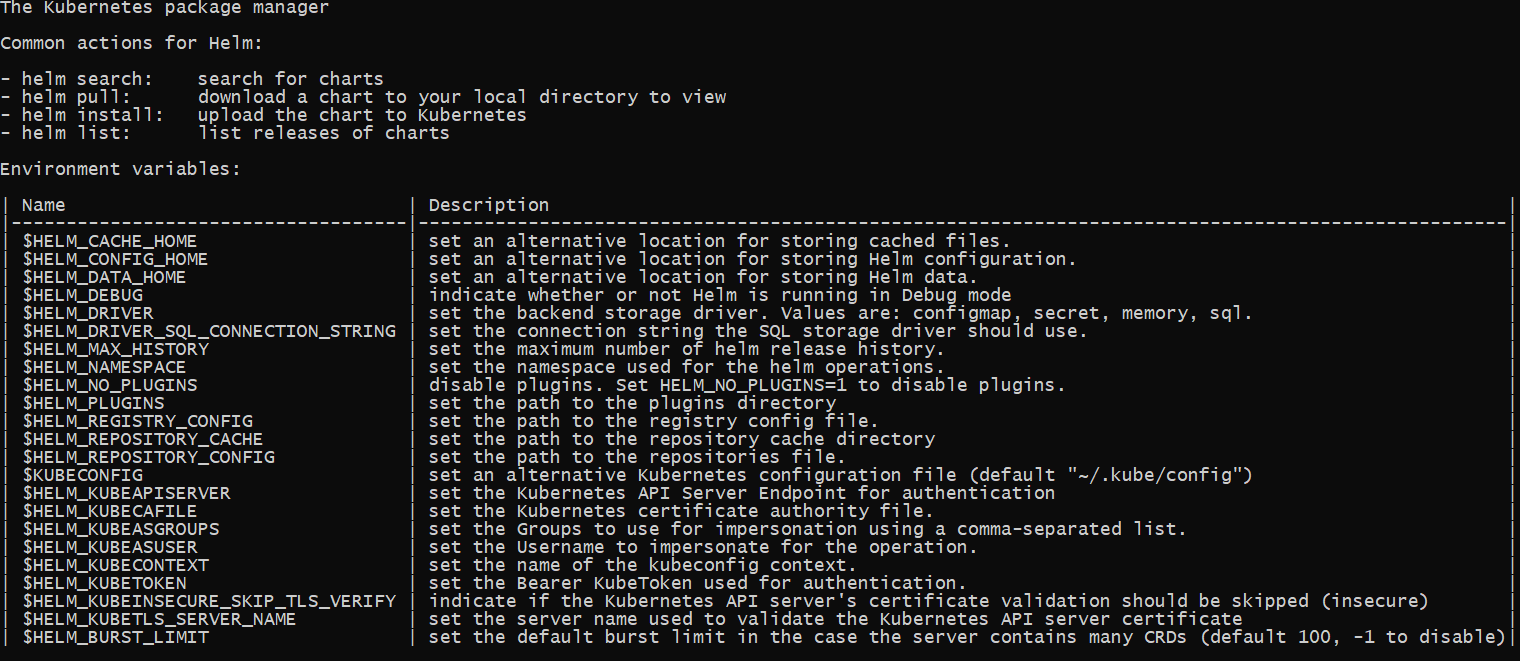
To check if Helm is running in your Kubernetes cluster, run this in your shell in your shell:
|
1 |
helm |
The command should output the following in your terminal:
After you have installed Helm on your specific operating system, the next step is to search for the official Jenkins Helm Chart on the ArtifactHub.
Searching for the Official Jenkins Helm Chart
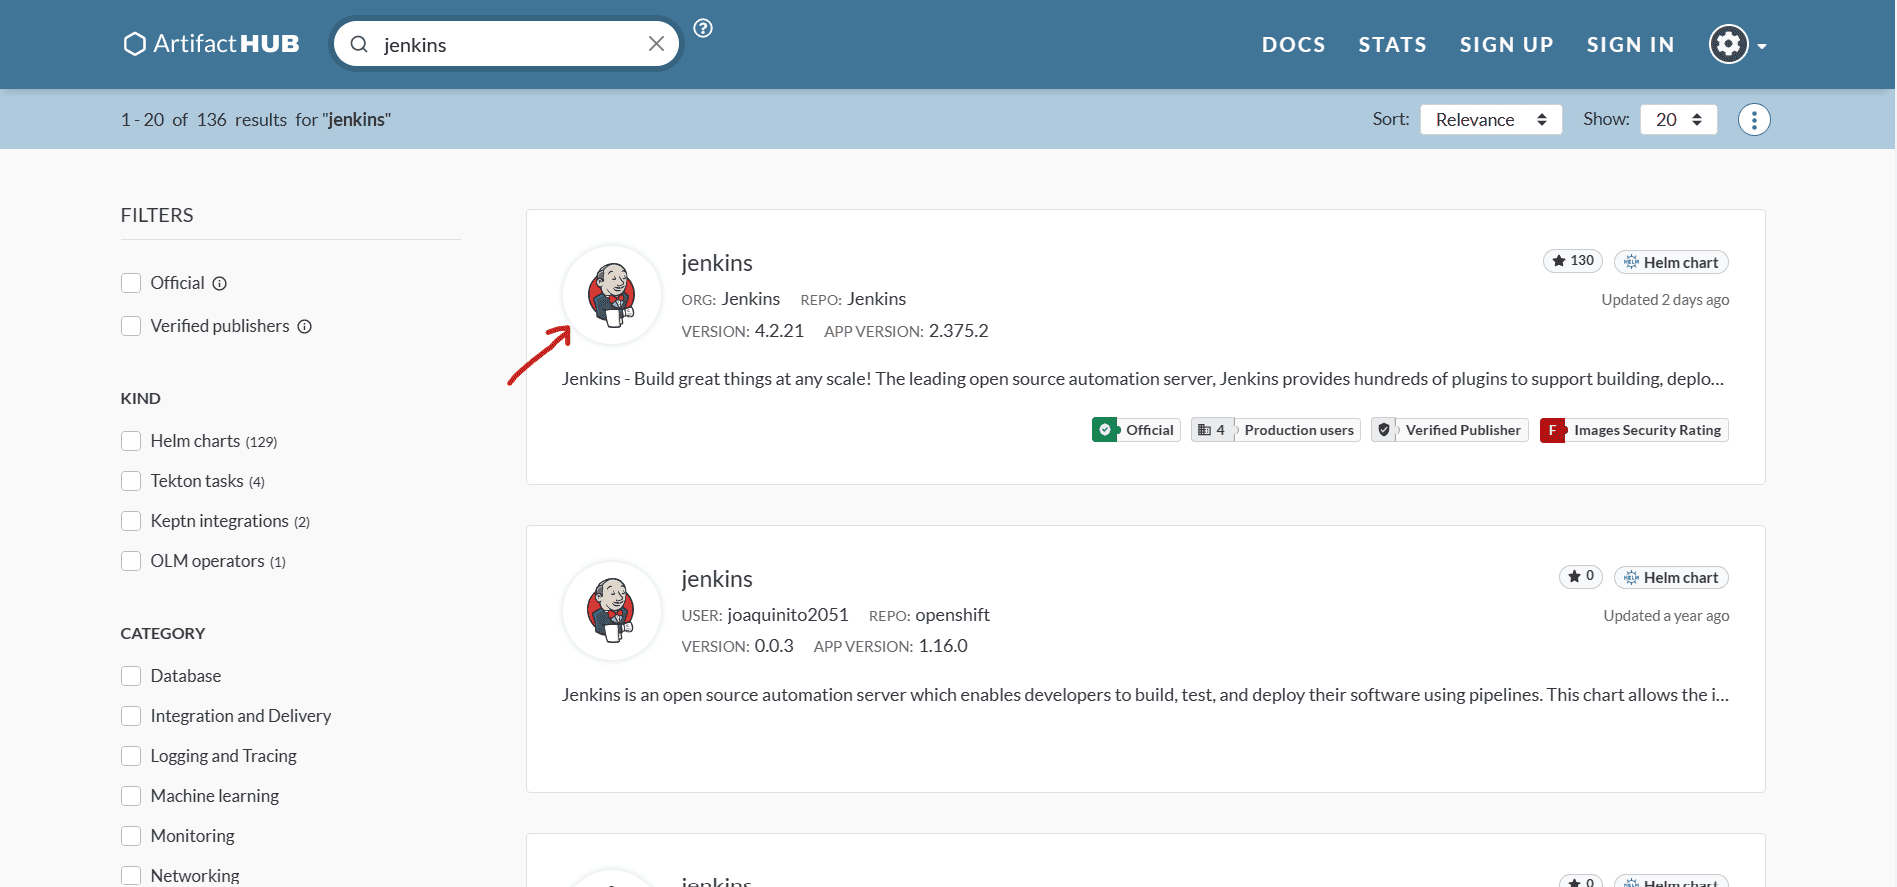
You will search the official Jenkins Helm chart on ArtifactHub. ArtifactHub is a web-based application that enables finding, installing, and publishing Helm charts.
You can click on this link https://artifacthub.io/ to open ArtifactHub.
You can then search for Jenkins Helm Chart as shown below:
After finding the official Jenkins Helm Chart on ArtifactHub, you need to add the Jenkins chart repository on your local machine.
To add the Jenkins chart repository on your local machine, run this command in your shell:
|
1 |
helm repo add jenkins https://charts.jenkins.io |
It will download and add the official Jenkins Helm Chart repository. To update this repository and get the latest version of the Helm Chart, run this command in your terminal:
|
1 |
helm repo update |
This command will get the latest version of Jenkins Helm Chart by default. For more information, go here:
Installing the Official Jenkins Helm Chart on the Kubernetes Cluster using Helm
Step One: Run this command in your shell
|
1 |
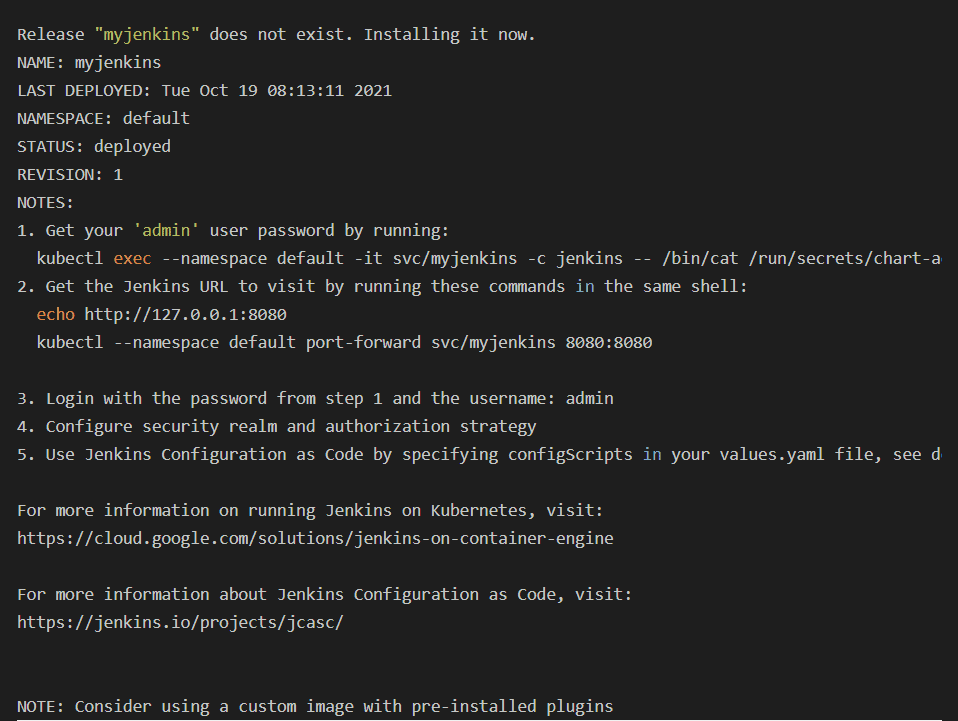
helm install myjenkins jenkins/jenkins |
This command will deploy the Jenkins CI/CD on the Kubernetes cluster. The name of the Jenkins Helm Chart release is myjenkins. There are different versions and releases for the Jenkins Helm chart that you can use. In this article you will use myjenkins since it is the release that has all the configurations for running the CI/CD pipeline.
Helm will use the Kubernetes YAML files in the Helm and create the Kubernetes components (Deployment and Service). We have reused the official Jenkins Helm Chart to set up the Jenkins CI/CD on the Kubernetes Cluster.
Output is shown in the image below:
To start using the Jenkins CI/CD running on the Kubernetes Cluster, follow these steps:
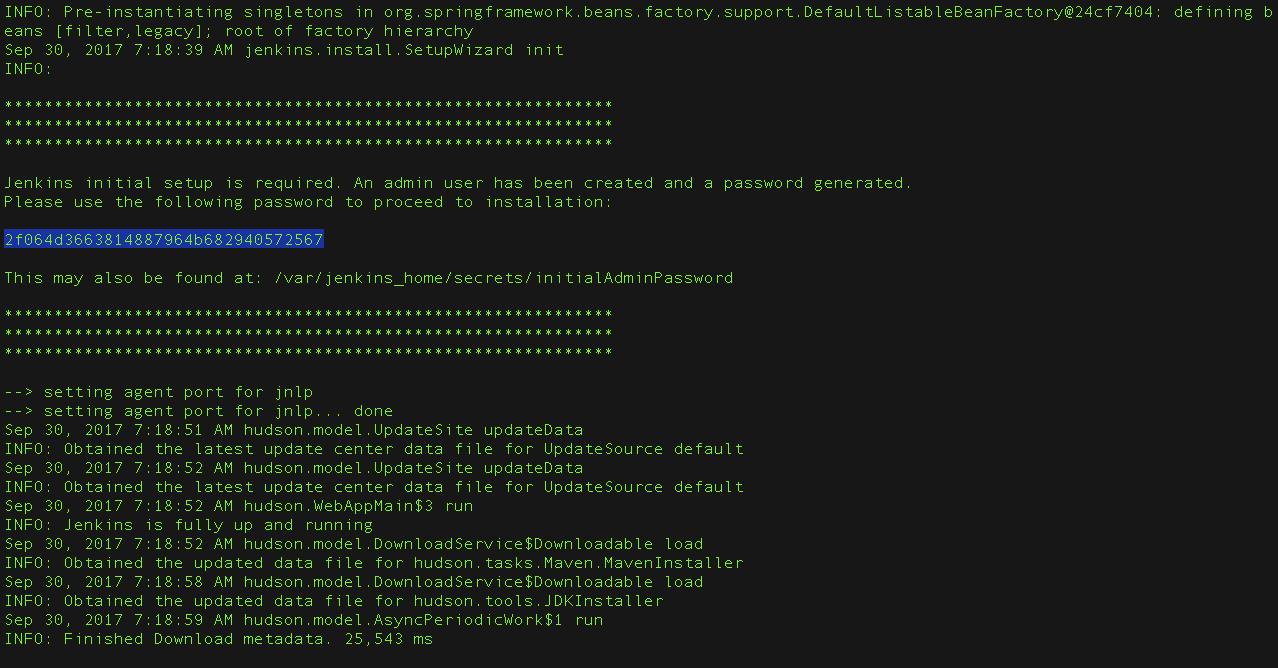
Step Two: Get your ‘admin’ password for Unlocking Jenkins
To get the admin password, run this command in your terminal. You have to execute the first command found in the output above to get the admin password.
|
1 2 |
kubectl exec --namespace default -it svc/myjenkins -c jenkins – /bin/cat /run/secrets/chart-admin-password && echo |
Admin Password Output:
Step Three: Get the Jenkins URL
To get the Jenkins URL, run the following shell command:
|
1 |
kubectl --namespace default port-forward svc/myjenkins 8080:8080 |
Output:

This command will expose the Jenkins container instance on port 8080. You can go to http://127.0.0.1:8080 to access the Jenkins CI/CD
Step Four: Unlock Jenkins with Admin Password
To unlock Jenkins with an admin password, open http://127.0.0.1:8080 in your browser to access your running Jenkins container instance as shown in the image below:
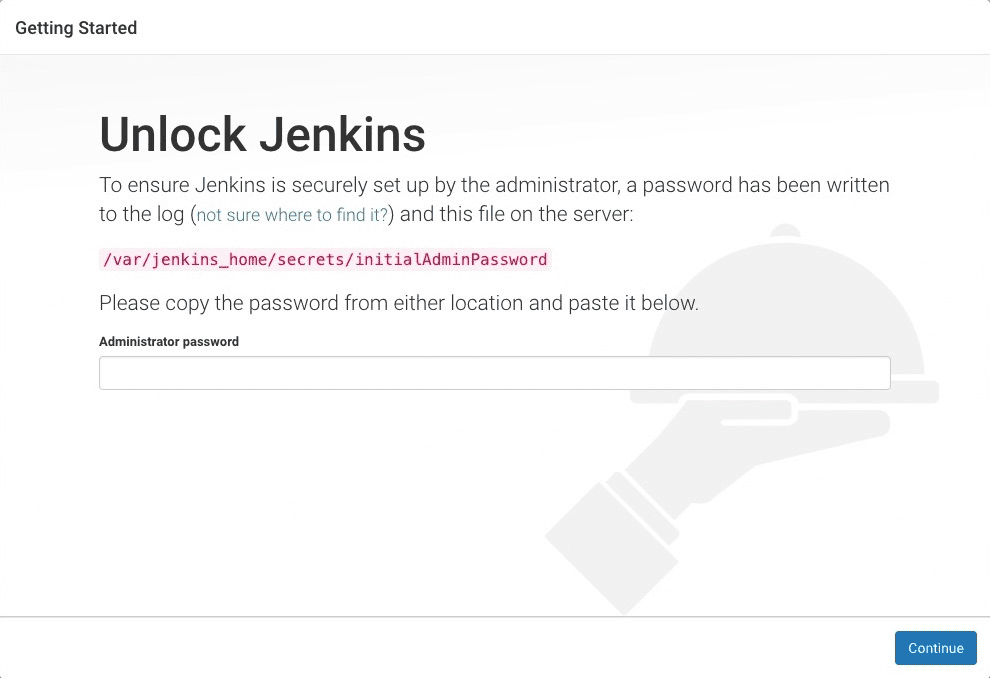
Copy the initial administrator password and paste it into the password field. It will unlock the running Jenkins container instance. You can now finish setting up Jenkins.
Step Five: Finishing setting up Jenkins CI/CD
To finish setting up Jenkins CI/CD follow these steps:
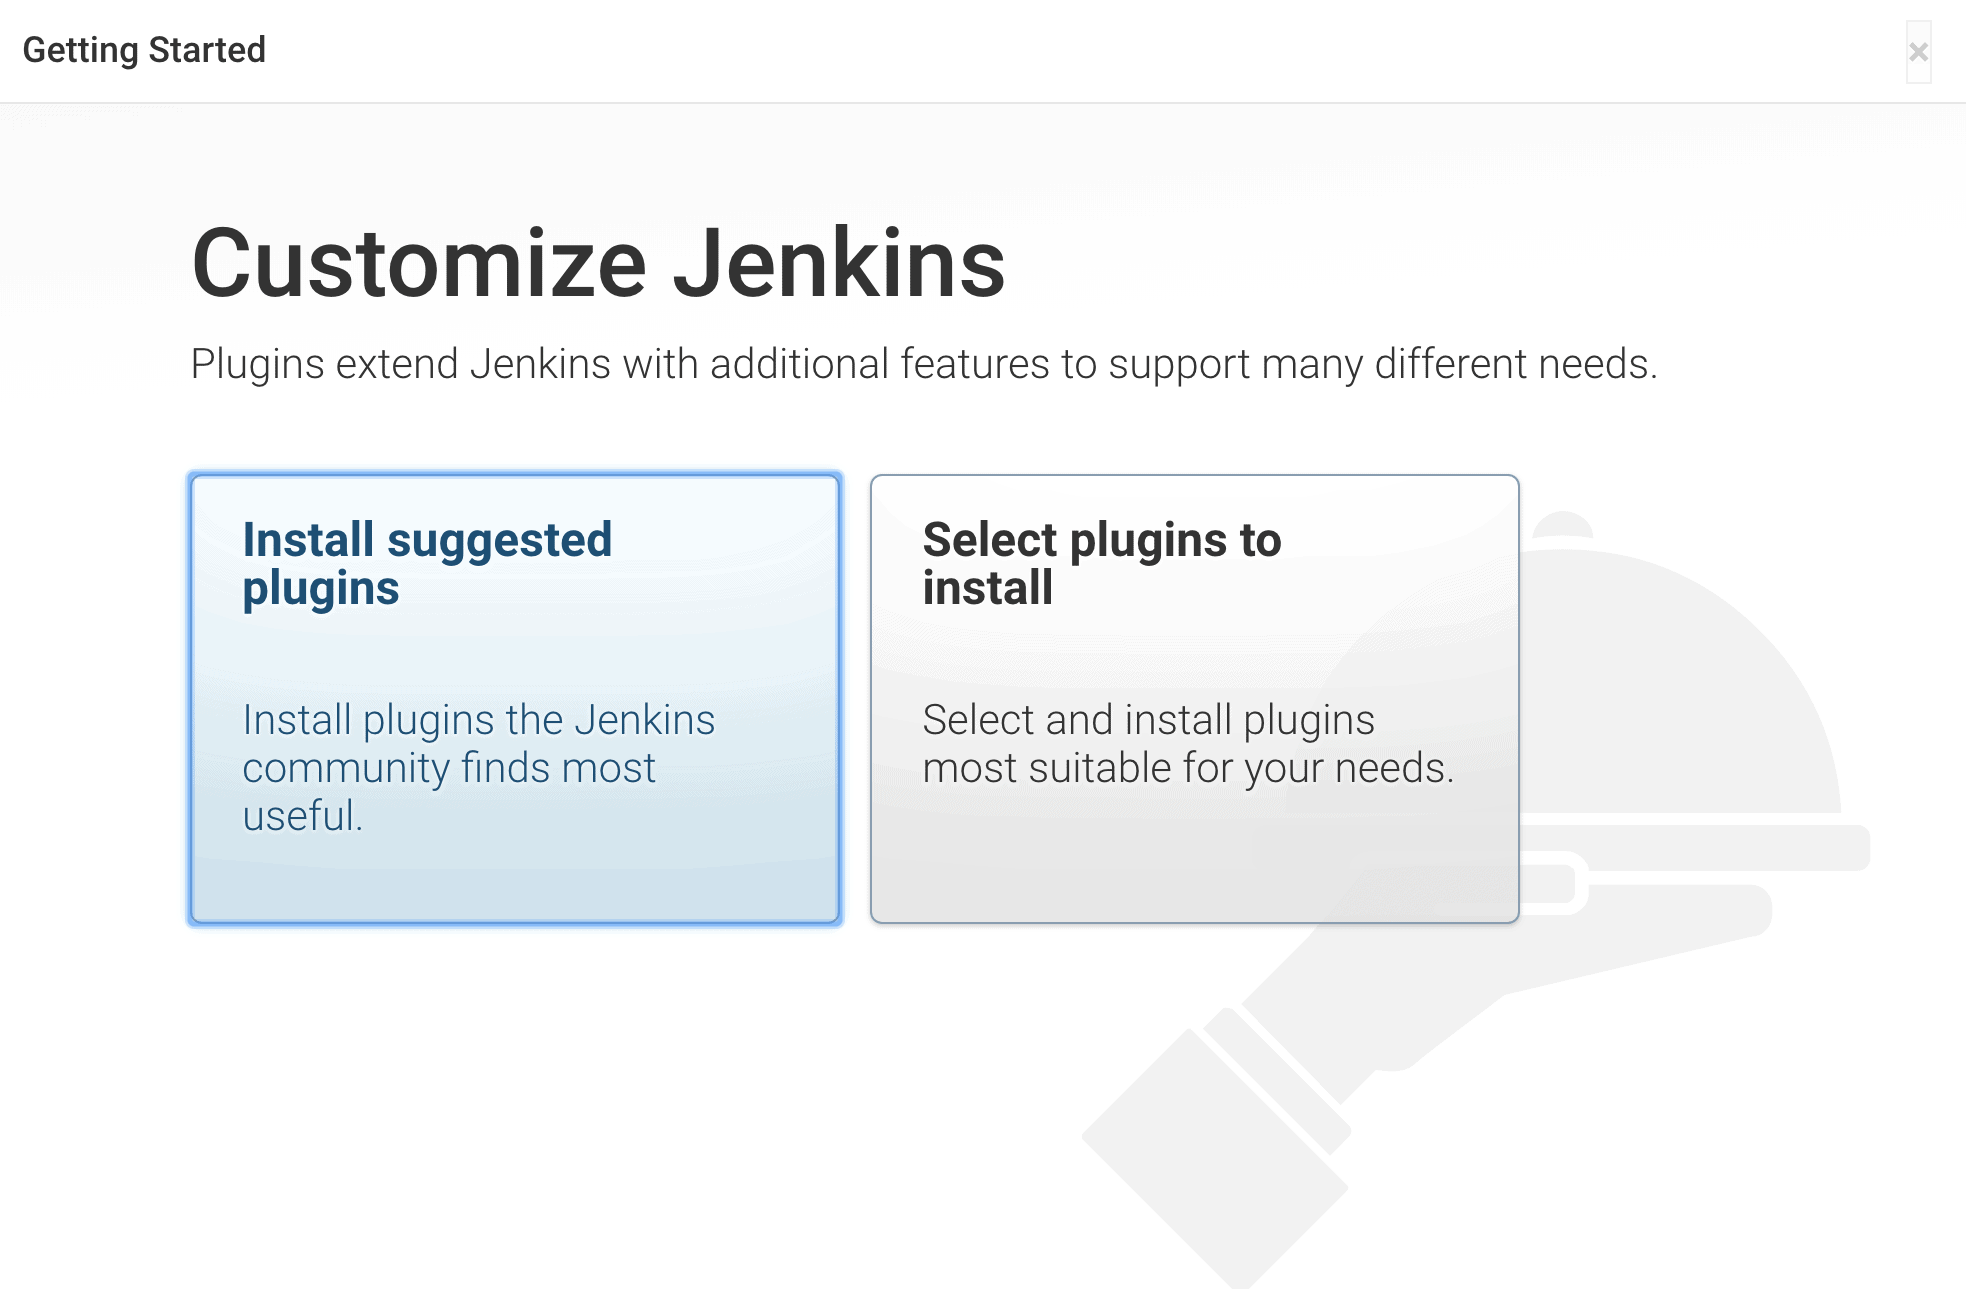
Customize Jenkins
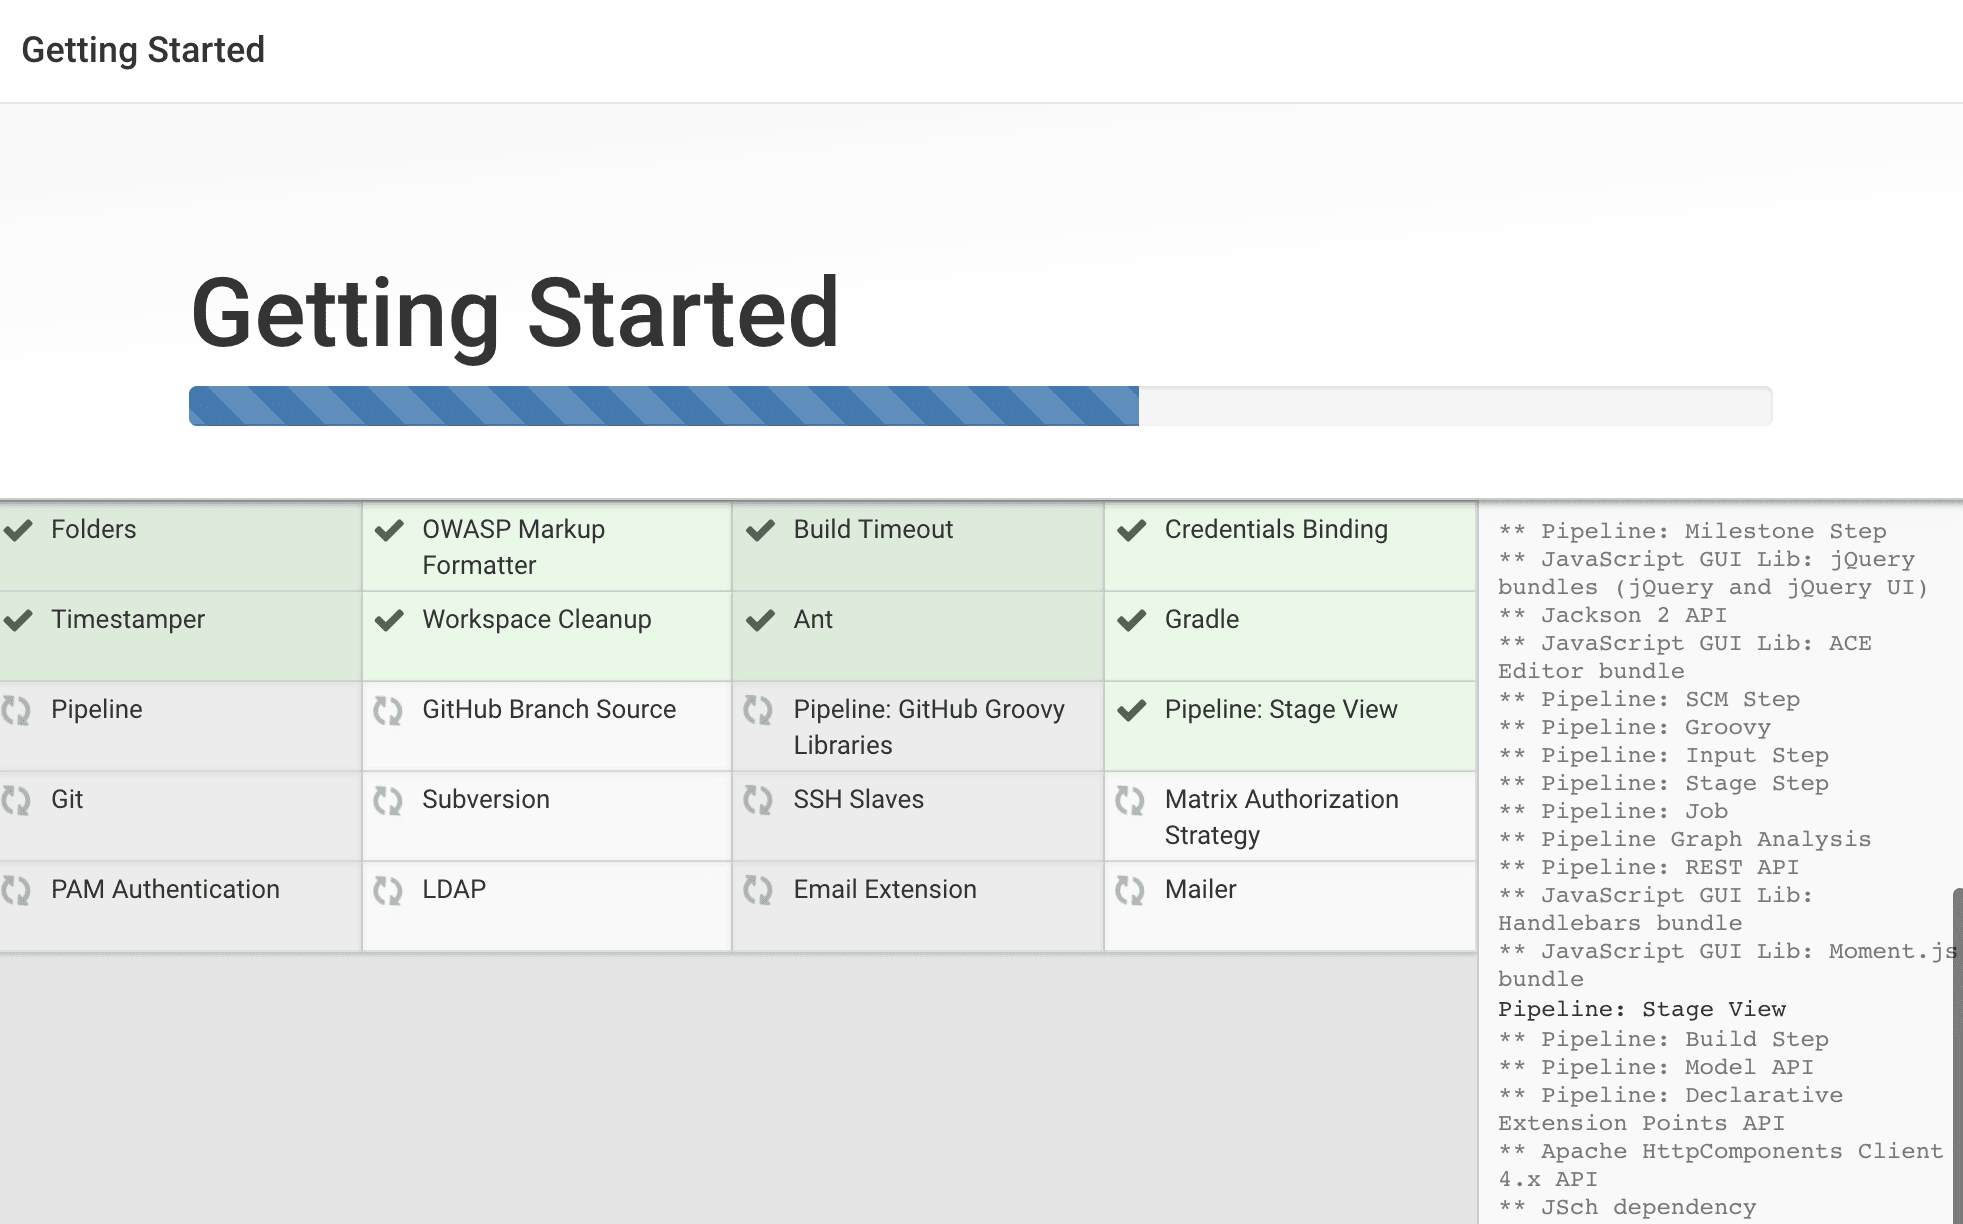
You will install the suggested plugins to customize Jenkins as shown in the image below. Select Install suggested plugins to allow the installation of the necessary plugins. The plugins to be installed are shown in the image below:
After a few minutes (depending on your internet speed), it will install the suggested plugins. This step will install plugins such as:
- Git Plugin
- Blue Ocean
- Simple Theme
- Performance Publisher
- Dashboard View
- Maven Integration
- Folders
- Bootstrapped-multi-test-results-report
- Pipeline Utility Steps
These are the basic plugins that Jenkins requires to run. For more information on the suggested plugins that will be installed, check out this article that explains these plugins in detail.
Jenkins will use the plugins to integrate with other software as shown in the image below.
Creating First Jenkins Admin User
You need to create a first Jenkins Admin user who will have control over the Jenkins platform. The Admin user will perform all actions/tasks in the Jenkins platform like starting CI/CD pipelines and managing Jenkins.
After installing all the basic plugins shown above, you will be redirected to another page for you to create your first admin user. This page is shown in the image below:
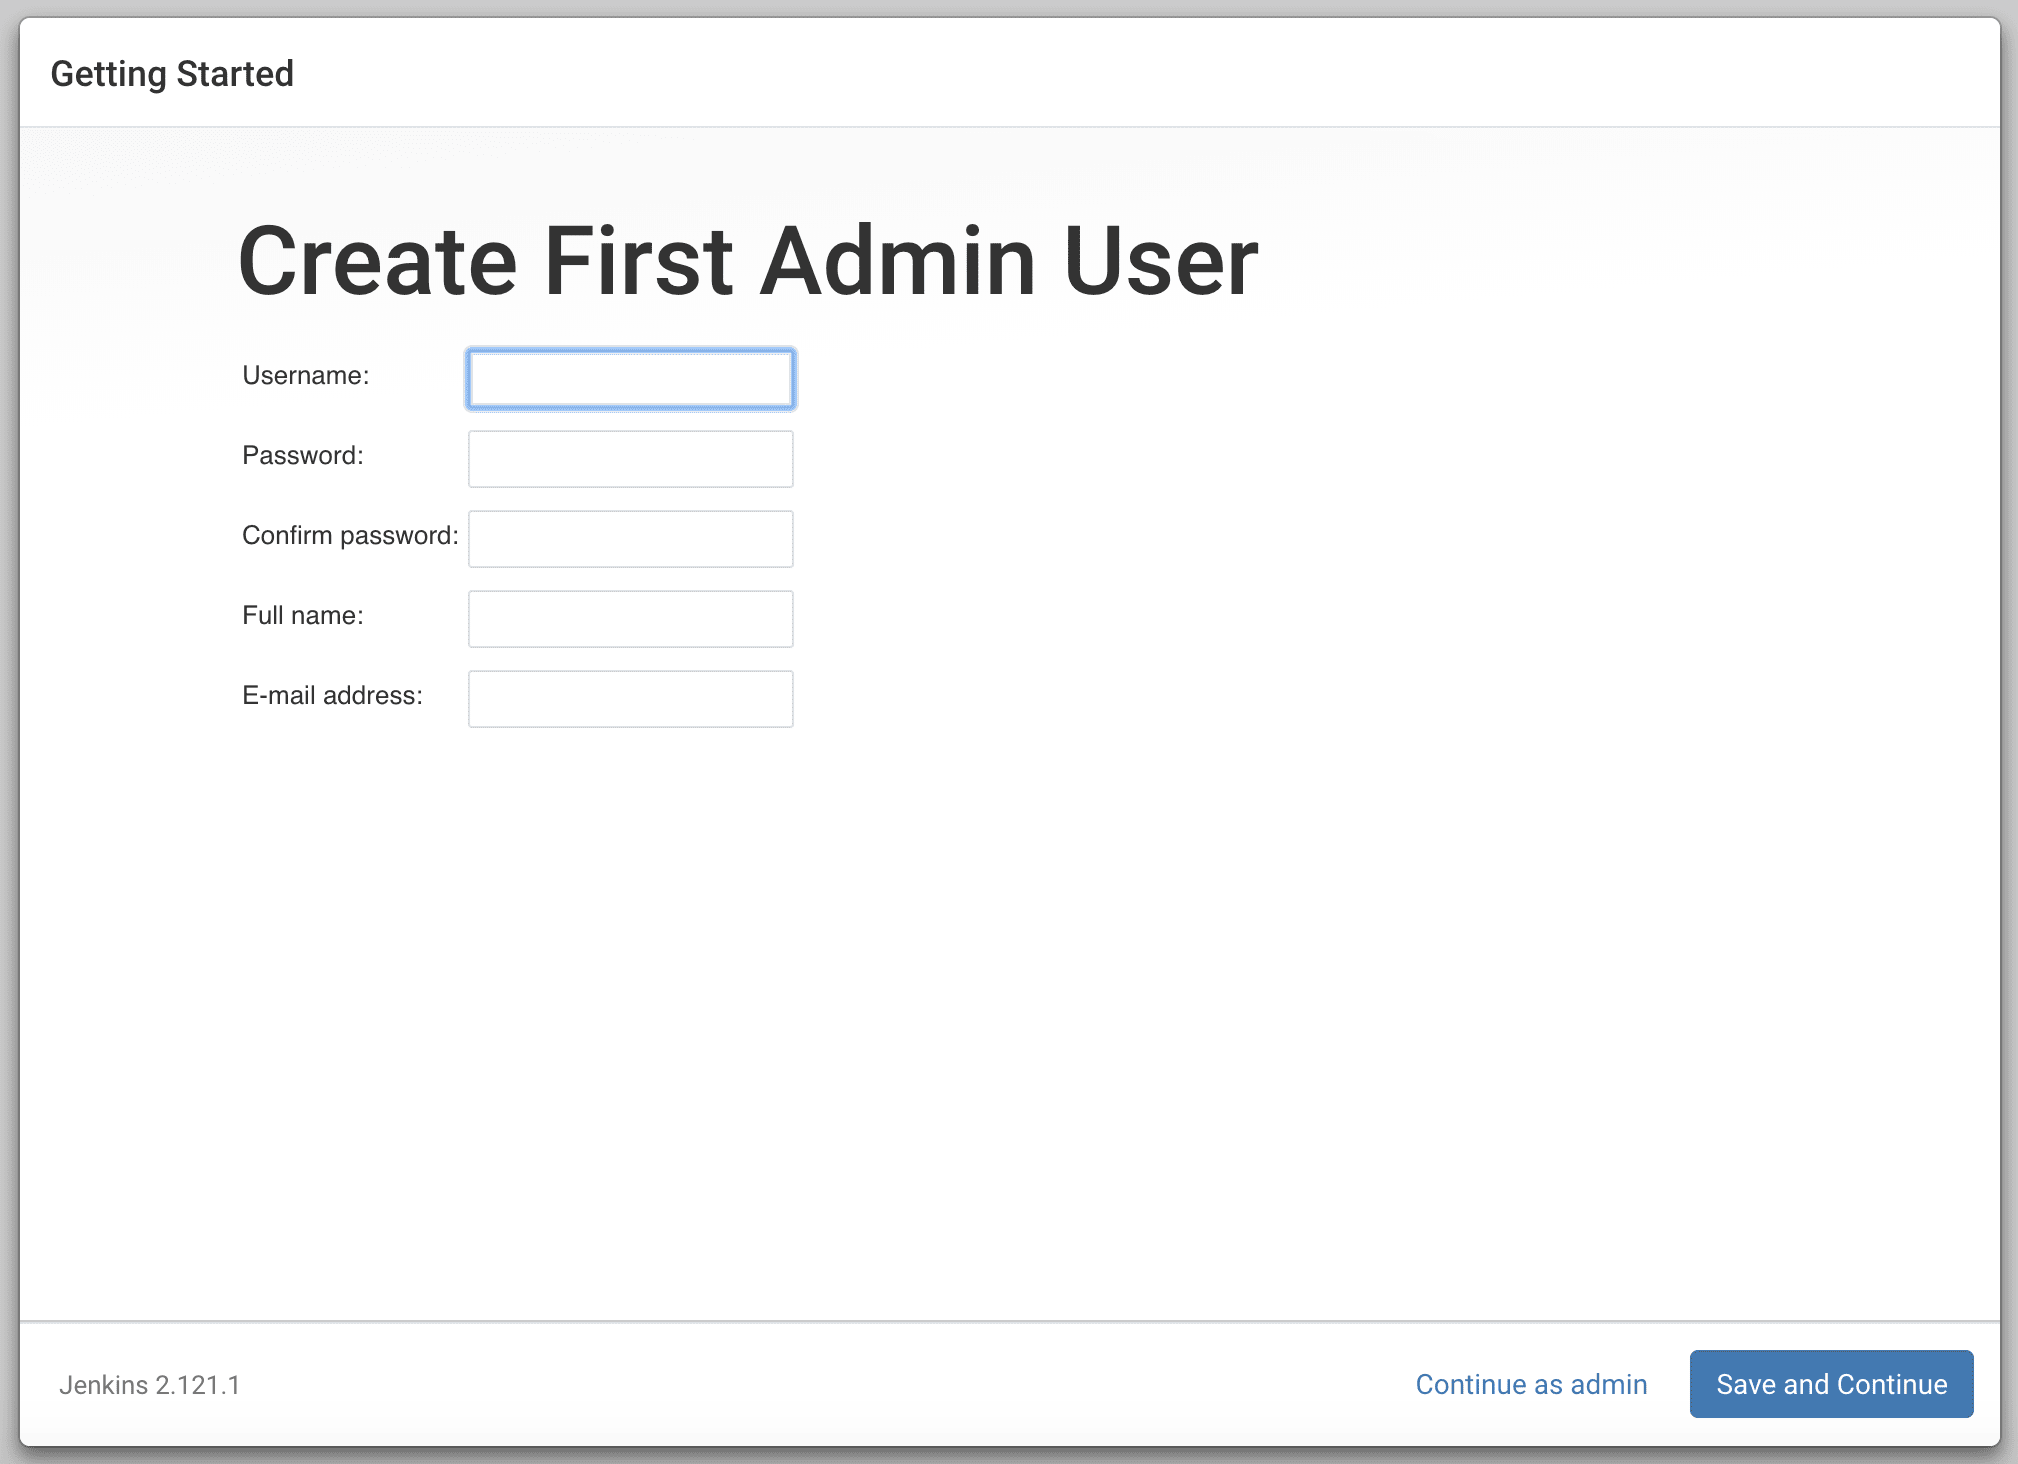
You can input all the admin user details and then click the `Save and Continue` button. You will then be redirected to another page as shown below:
Adding Jenkins URL
You can add the Jenkins URL as shown below. This is the same URL http://127.0.0.1:8080 where Jenkins is running.
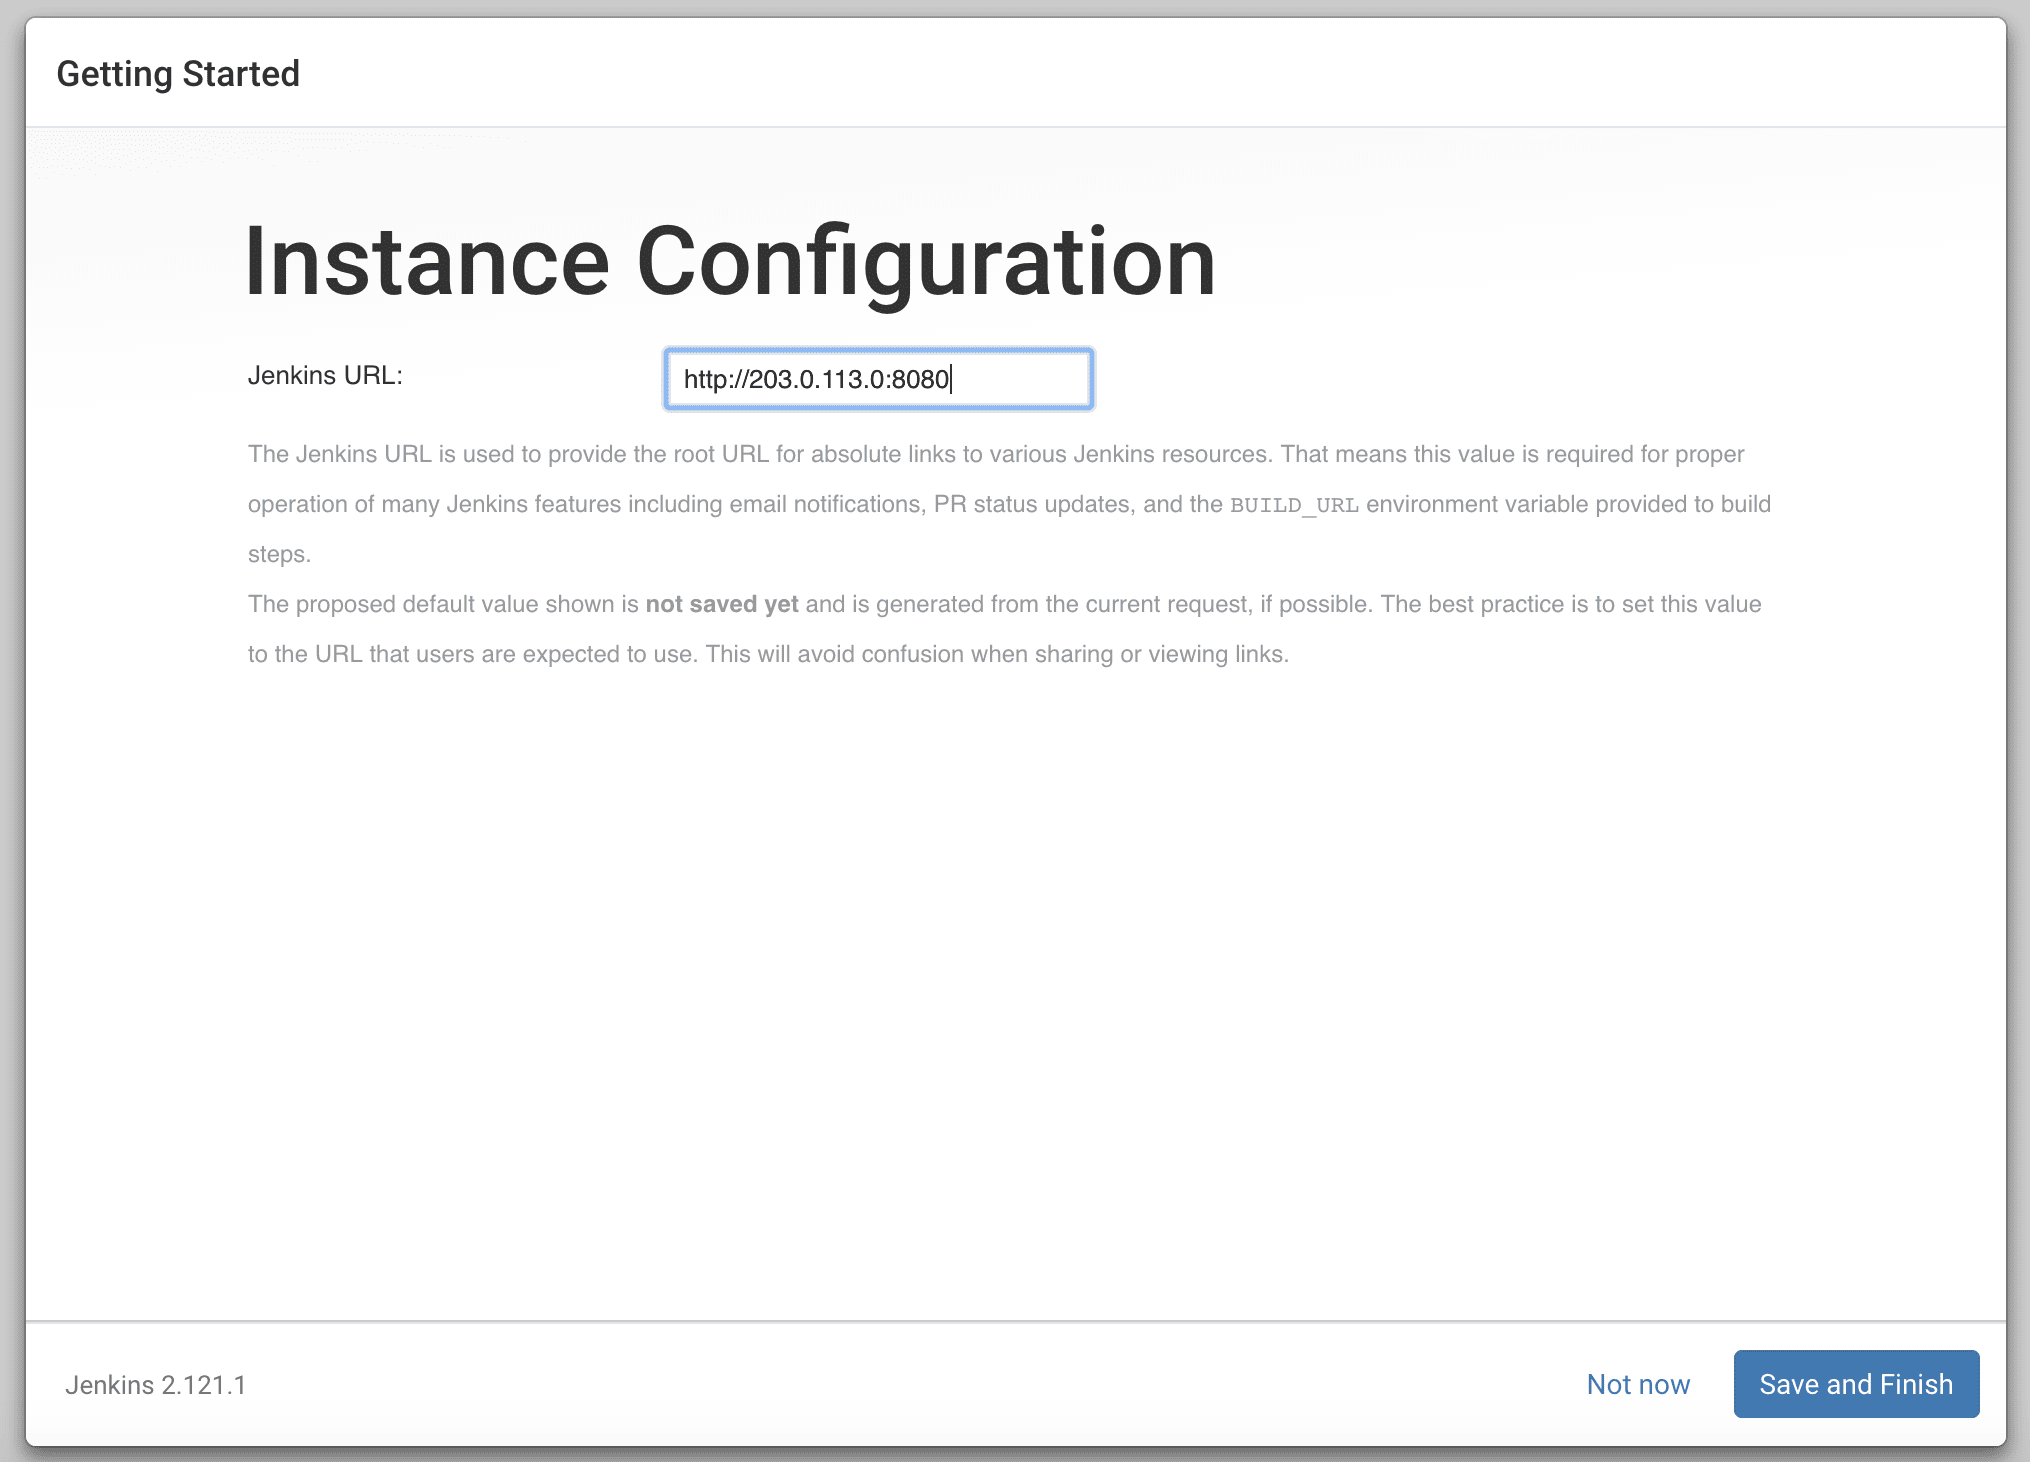
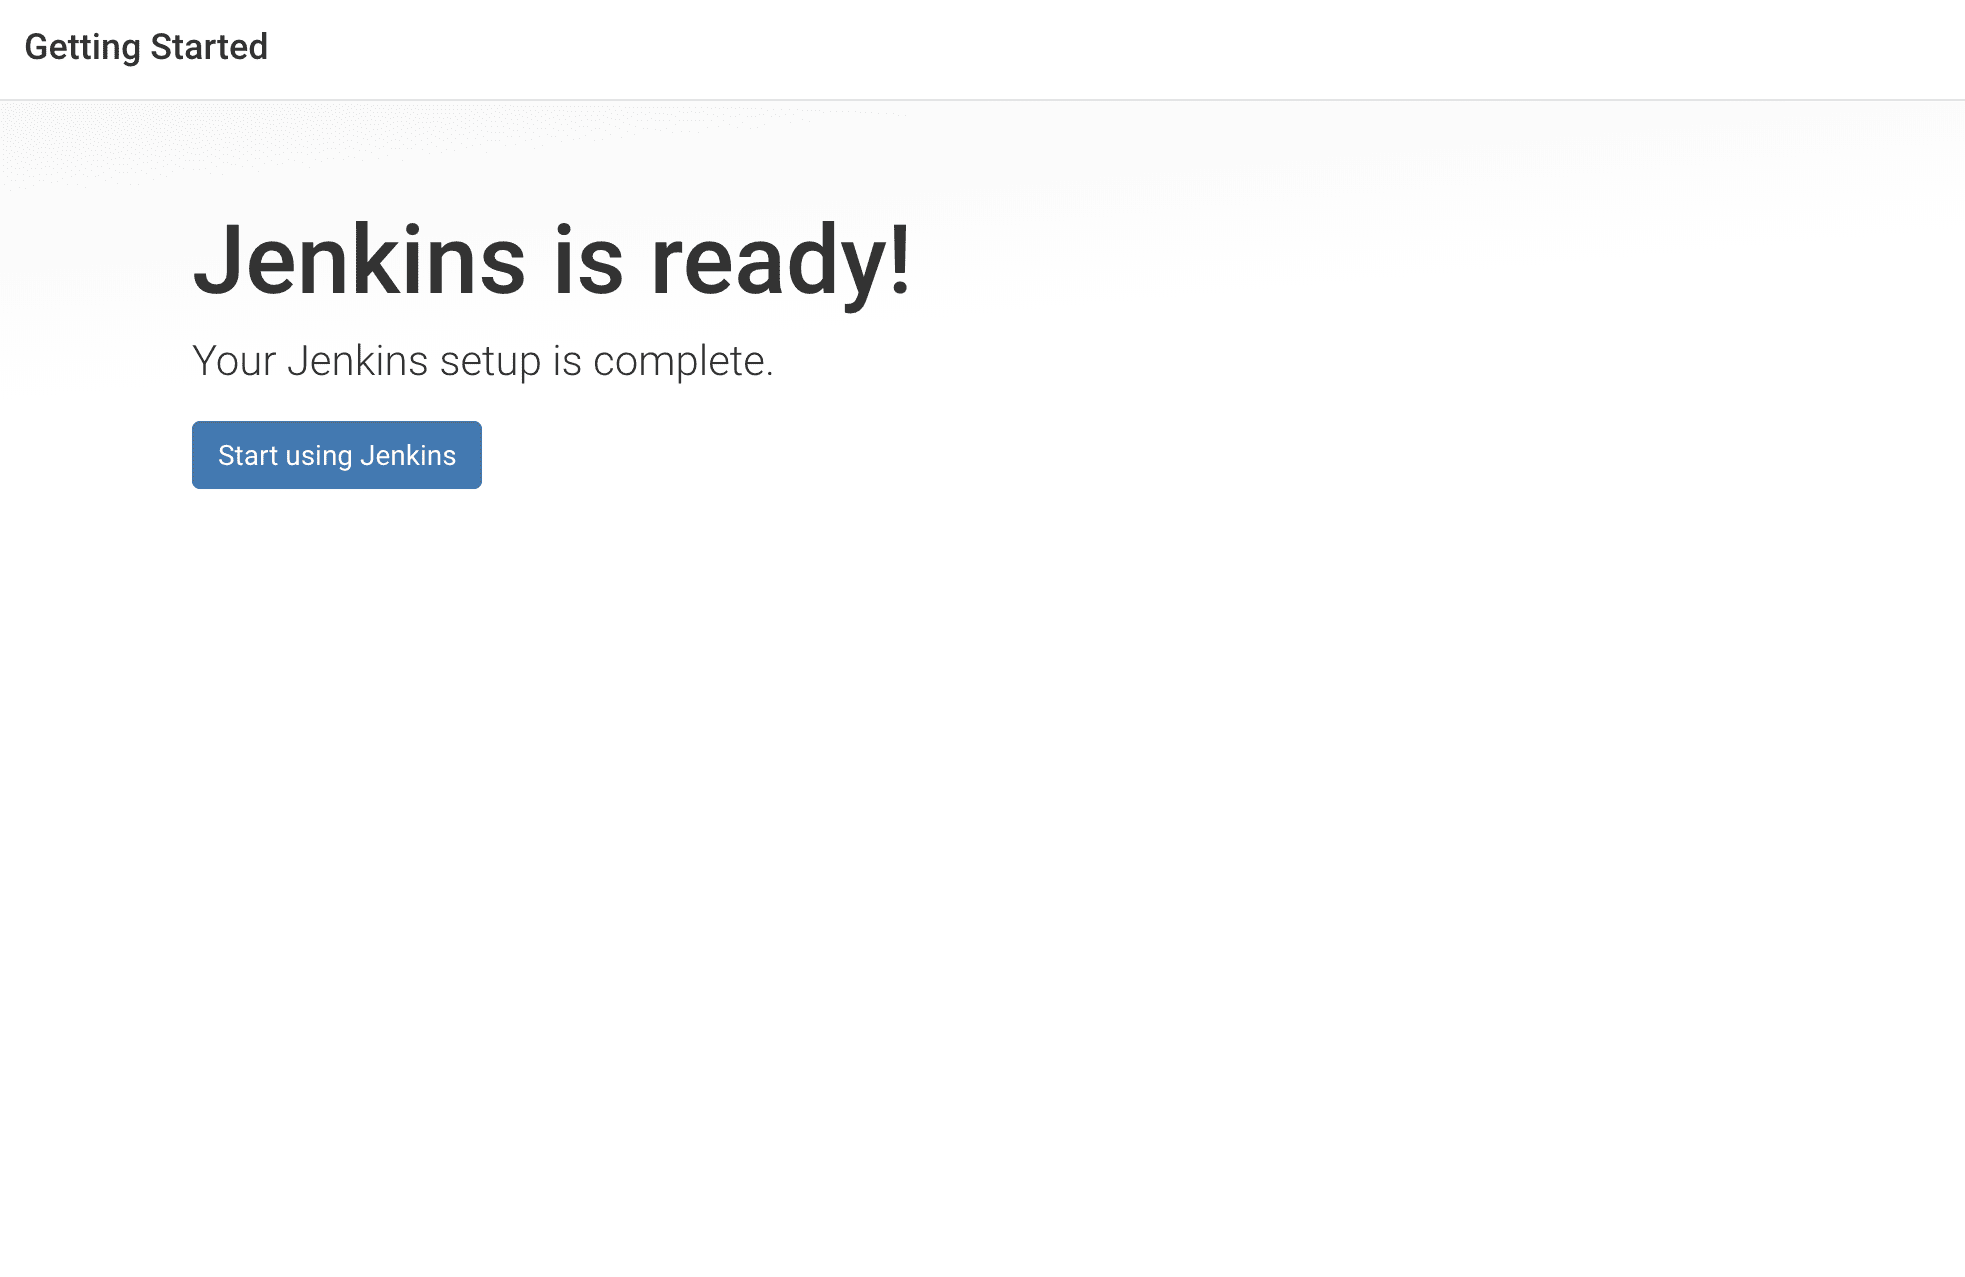
You can click `Save and Finish`. Your Jenkins platform will be running and ready to use. You will be redirected to another page as shown below:
Start using Jenkins
To start using Jenkins click on the `Start using Jenkins` button as shown in the image below:
You can now start using Jenkins to create all your Jenkins CI/CD pipeline for automating the software development and deployment workflows. You will have access to the Jenkins Dashboard as shown below:
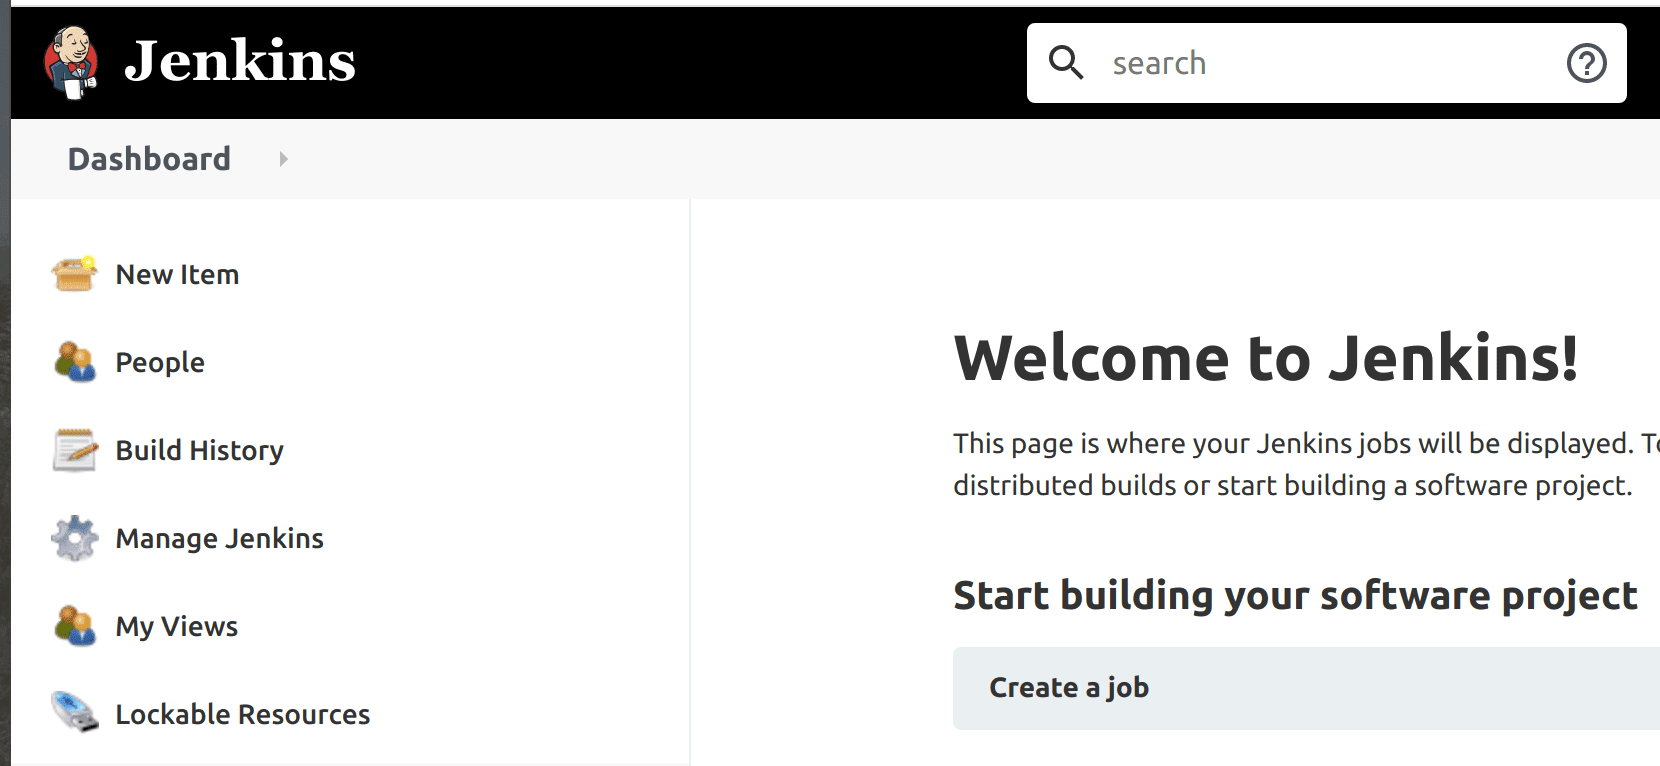
You have successfully set up Jenkins CI/CD on Kubernetes using Helm. You can access the Jenkins Dashboard.
Conclusion
In this tutorial, you have learned how to set up Jenkins CI/CD on Kubernetes Cluster using Helm. We used Helm because it’s one of the easiest ways of installing an application on the Kubernetes Cluster. This tutorial shows you how to install Helm on Linux, macOS, and Windows. It also shows you how to search for the Official Jenkins Helm Chart.
We also installed the official Jenkins Helm Chart on the Kubernetes Cluster using Helm.
Additionally, this tutorial shows you how to get your ‘admin’ password for unlocking Jenkins and how to login into Jenkins. In the end, we finished setting up Jenkins CI/CD on Kubernetes using Helm and accessed the Jenkins Dashboard. Hope this tutorial helps you in getting started with Jenkins.
This document contains proprietary information and is protected by copyright law.
Copyright © 2026 Red Gate Software Limited. All rights reserved


Load comments