
Swagger is a technology-agnostic standard that allows the discovery of REST APIs, providing a way for any software to identify the features of a REST API.
This is more important than it seems: It’s a game changing technology, in the same way that WSDL (Web Service Description Language) has been for web services.
WSDL has been the fundamental technology that made it possible for tools and IDEs such as Visual Studio to understand web services and to create proxy classes. This feature turns the consumption of web services into a high-level task, encapsulating all protocol details.
That’s the importance of Swagger: It’s able to do for REST APIs what WSDL has already done for web services, by allowing the creation of proxies and by making the use of web APIs much easier.
VS 2017 includes support for REST API proxy creation using Swagger protocol. It’s still in an early stage and lacking some features, however this is a great step towards the broader adoption of Swagger.
We’ll create an example of how we can use Swagger with VS 2017 in order to analyze the advantages and the missing features.
As well as VS 2017, we will also need IIS (Internet Information Server) installed in the development machine for our example.
Development Environment
You can enable IIS as a Windows feature or server role depending if you are using a client operating system or a server one.
Starting Application
Before we can use Swagger, we need a demo solution with a web API project. Let’s build this starting solution before we go on to implement Swagger.
- Create an ASP.NET Web API project
- Inside Visual Studio, select ‘File’ -> ‘New Project’ menu
- In the ‘New Project’ dialog box, inside the left side tree view, select ‘Installed’ -> ‘Templates’ -> ‘Visual C#’ -> ‘Web’ tree items.
- In the ‘New Project’ dialog box, in the right side, select ‘ASP.NET Web Application (.NET Framework)’
- In the ‘Name’ textbox, type ‘webDemo’
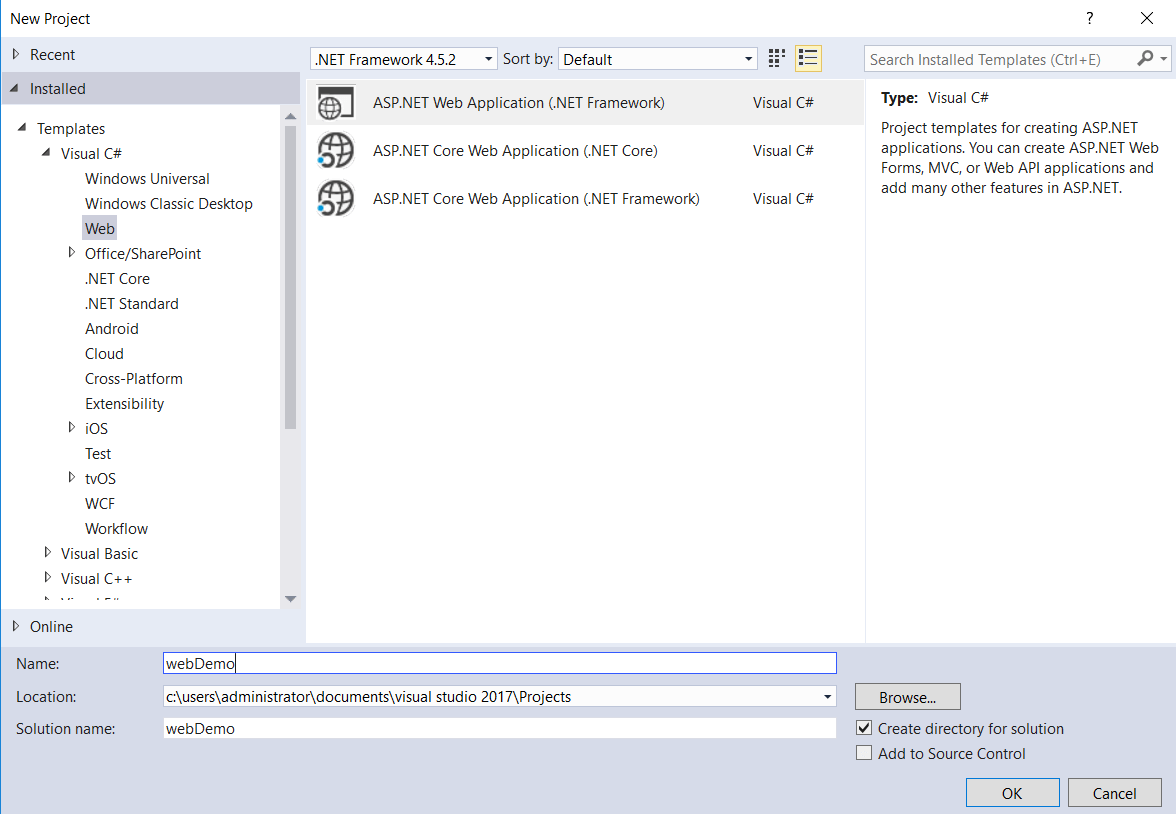
- In the ‘Solution Name’ textbox, type ‘slDemo’ and click the ‘Ok’ button
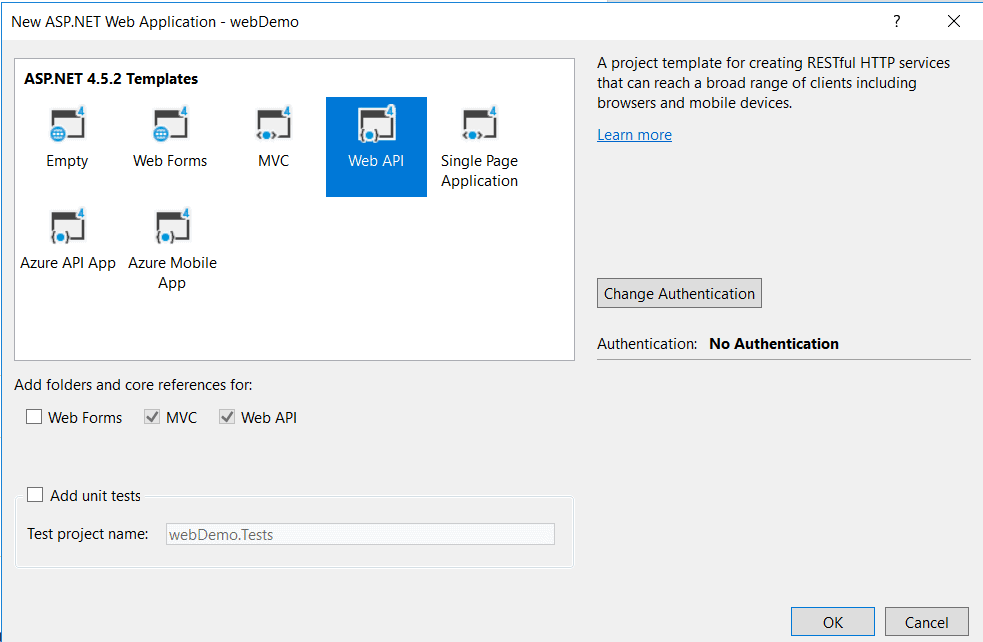
- In the ‘New ASP.NET Web Application’ window, below ‘ASP.NET 4.5.2 Templates’, select ‘Web API’ and click the ‘Ok’ button
- Configure the Web API project to use the local IIS
- In the ‘Solution Explorer’ window, right-click on ‘webDemo’ project and click the ‘Properties’ menu item.
- In the right side of ‘webDemo’ properties window, click ‘Web’ page
- In the combobox below ‘Servers’, select ‘Local IIS’
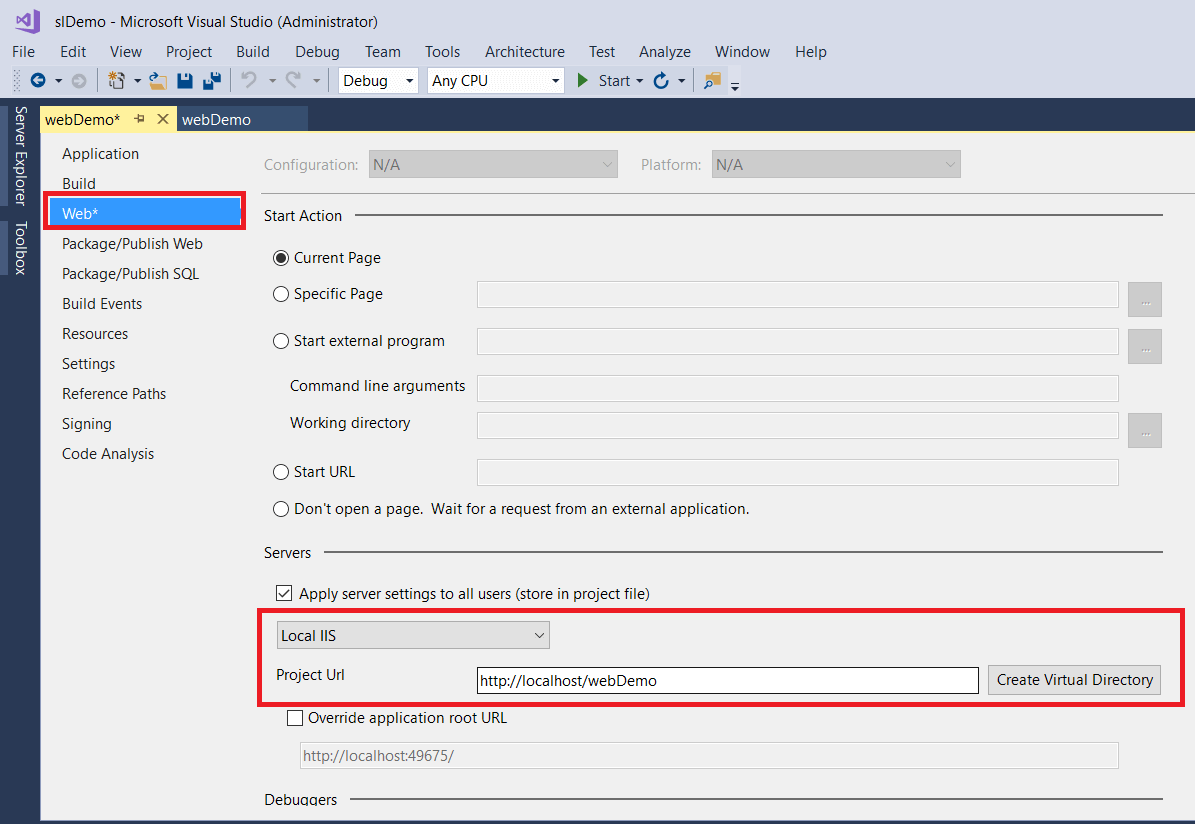
- Click the ‘Create Virtual Directory’ button
- Close the ‘webDemo’ properties page
This project already has a sample web API controller developed, but we need to make some changes. Let’s examine the details of the existing controller and make those changes.
- Analyzing and changing the existing API Controller
- In the ‘Solution Explorer’ window, inside ‘webDemo’ project, open the ‘Controllers’ folder and check the existing controllers.

- Double-click the ‘ValuesController.cs’ file and check the existing actions. This is the only web API controller in the project.
- Change the ‘ValuesController’ class for the code below. We are completing the PUT action and storing the list inside Application memory area.
12345678910111213141516171819202122232425262728293031323334public class ValuesController : ApiController{private string[] lista{get{if (System.Web.HttpContext.Current.Application[<em>"lista"</em>]==null){System.Web.HttpContext.Current.Application[<em>"lista"</em>] =new string[] { <em>"value1"</em>, <em>"value2"</em> };}return(string[])System.Web.HttpContext.Current.Application[<em>"lista"</em>];}}public IEnumerable<string> Get(){return lista;}public string Get(int id){return lista[id];}public void Post([FromBody]string value){}public void Put(int id, [FromBody]string value){lista[id] = value;}public void Delete(int id){}}
- In the ‘Solution Explorer’ window, inside ‘webDemo’ project, open the ‘Controllers’ folder and check the existing controllers.
- Execute the application and analyze the result
-
- Click ‘Start’ button in the toolbar to execute the application
- On the web page just opened, click ‘API’ link in the top menu. You will notice the API operations, basically a CRUD with two GET’s, one POST, PUT and DELETE
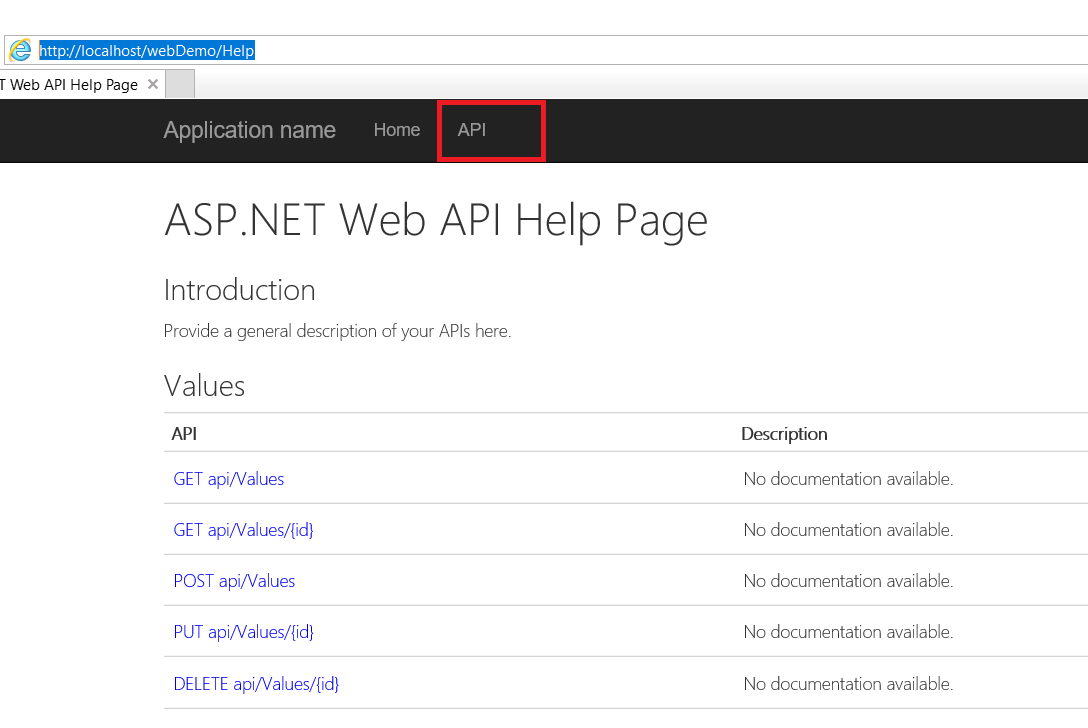
- In the browser navigation bar, type a new URL: http://localhost/webDemo/API/Values . As a result, a JSON file will be downloaded, therefore the web API is working fine.

Including Swagger in our project
Swagger is a technology agnostic protocol. For each technology, we need some tool to implement the protocol. SwashBuckle is the name of the tool for .NET. There is a version for .NET before 4.5 and another version for .NET after 4.5.
Let’s do a step-by-step walkthrough to implement Swagger using SwashBuckle:
- Include SwashBuckle nugget package in the web API project
- In the ‘Solution Explorer’ window, right-click the ‘webDemo’ project and click ‘Manage nuget packet’ menu item.
- In the ‘Nuget Package Manager’ window, select ‘Browse’
- In the textbox inside ‘Nuget Package Manager’ window, type ‘SwashBuckle’.
- In the left side of ‘Nuget Package Manager’ window, select ‘SwashBuckle.Net45’ package
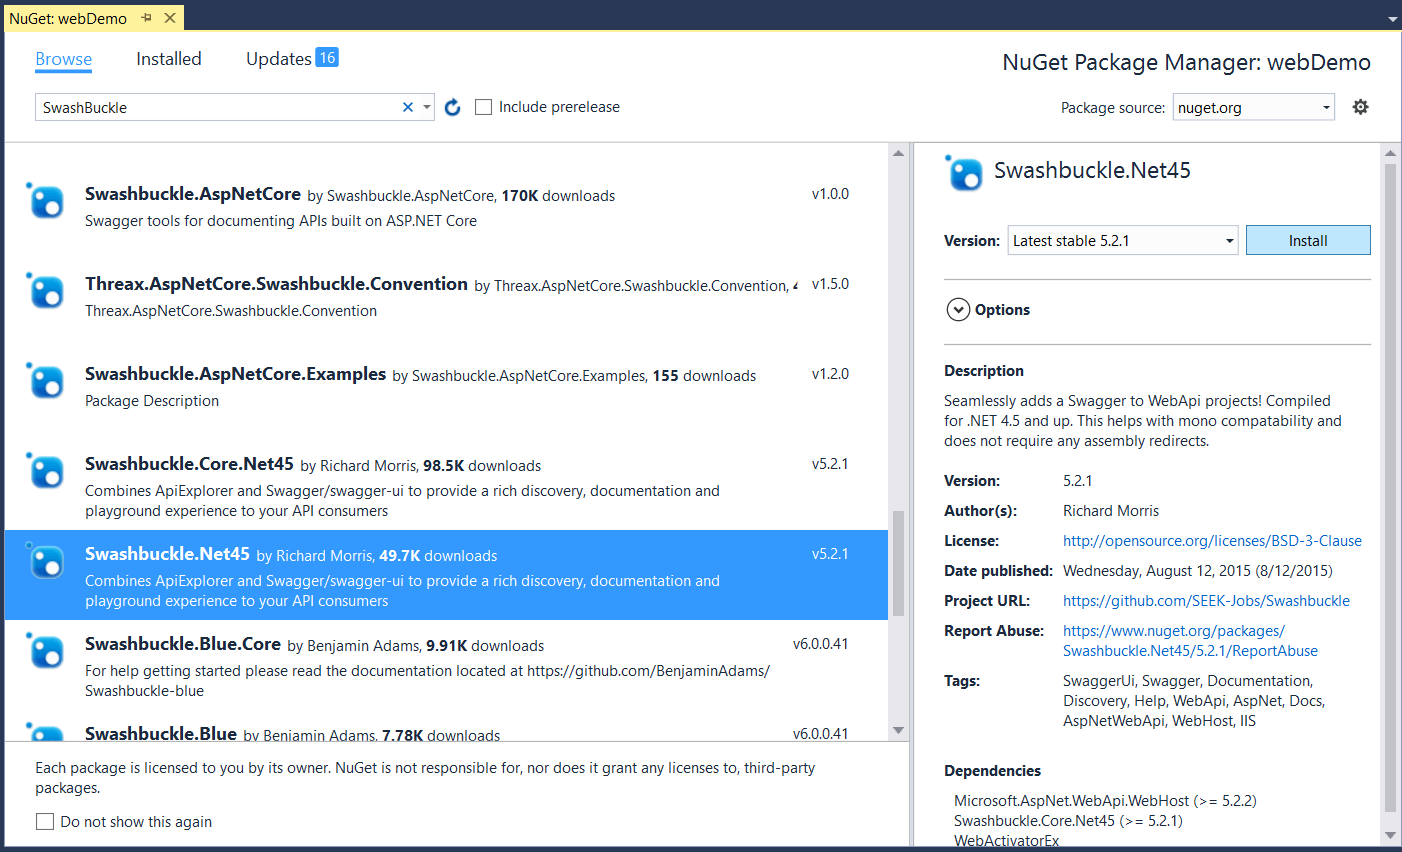
- In the right side of the ‘Nuget Package Manager’ window, click the ‘Install’ button.
- In the ‘Review Changes’ window, click the ‘Ok’ button.
- In the ‘License Acceptance’ window, click ‘I Accept’ button.
- Close the ‘Nuget Package Manager’ window
- Configure the XML documentation. SwashBuckle will use the XML documentation to describe the WEB APIs actions.
- In the ‘Solution Explorer’ window, right-click the ‘webDemo’ project and click the ‘Properties’ menu item.
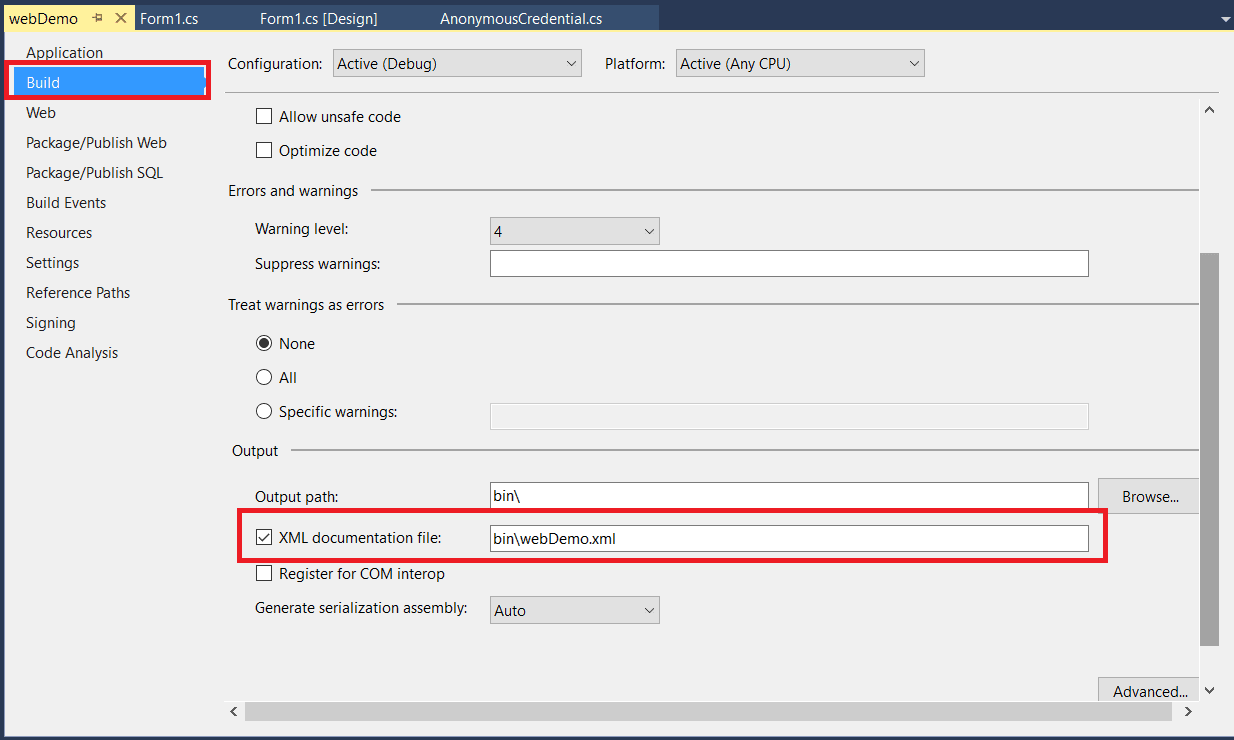
- In the ‘webDemo’ window, click ‘Build’ page
- In the ‘webDemo’ window, below ‘Output’, click ‘Xml Document File’ checkbox. In the textbox at right you will see the path ‘bin\webDemo.xml’.
- In the ‘Solution Explorer’ window, inside ‘webDemo’ project, open the ‘Controllers’ folder and double click ‘ValuesController.cs’ file.
- Let’s create an XML documentation for each action and the controller. Over each action and also over the controller declaration, type ‘///’ and describe the action and the controller.
12345678910111213141516171819202122232425262728293031323334353637383940/// <summary>/// Retrieves the list of values/// </summary>/// <returns></returns>public IEnumerable<string> Get(){return lista;}/// <summary>/// Retrieves one value from the list of values/// </summary>/// <param name=<em>"id"</em>>The id of the item to be retrieved</param>/// <returns></returns>public string Get(int id){return lista[id];}/// <summary>/// Insert a new value in the list/// </summary>/// <param name=<em>"value"</em>>New value to be inserted</param>public void Post([FromBody]string value){}/// <summary>/// Change a single value in the list/// </summary>/// <param name=<em>"id"</em>>The id of the value to be changed</param>/// <param name=<em>"value"</em>>The new value</param>public void Put(int id, [FromBody]string value){lista[id] = value;}/// <summary>/// Delete an item from the list/// </summary>/// <param name=<em>"id"</em>>id of the item to be deleted</param>public void Delete(int id){}
- Configure SwashBuckle. For now, the only configuration we need to do is the path of the XML documentation.
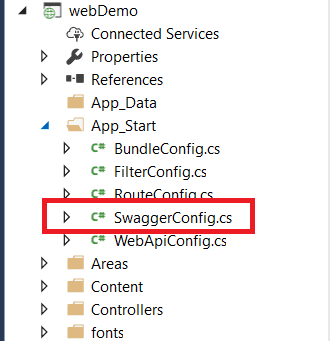
- In the ‘Solution Explorer’ window, inside ‘webDemo’ project, open the ‘App_Start’ folder and double click ‘SwaggerConfig.cs’ file. This file was included in the project by the ‘SwashBuckle.Net45’ nuget package.
The ‘Register’ method of the ‘SwaggerConfig’ class is configured to be executed as a ‘PreApplicationStartMethod’.
- Include the following method inside ‘SwaggerConfig’ class:
12345protected static string GetXmlCommentsPath(){return System.String.Format(@"{0}\bin\webDemo.XML",System.AppDomain.CurrentDomain.BaseDirectory);}
- Uncomment the following block of code inside the “Register” method:
1c.IncludeXmlComments(GetXmlCommentsPath());
- In the ‘Solution Explorer’ window, inside ‘webDemo’ project, open the ‘App_Start’ folder and double click ‘SwaggerConfig.cs’ file. This file was included in the project by the ‘SwashBuckle.Net45’ nuget package.
- Execute and test the application
- Execute the application, click the ‘Start’ button in the toolbar.
- Type the following URL in the browser address bar: http://localhost/webDemo/Swagger/ui/index
- On the Swagger documentation page, click ‘Values’, the name of the controller.
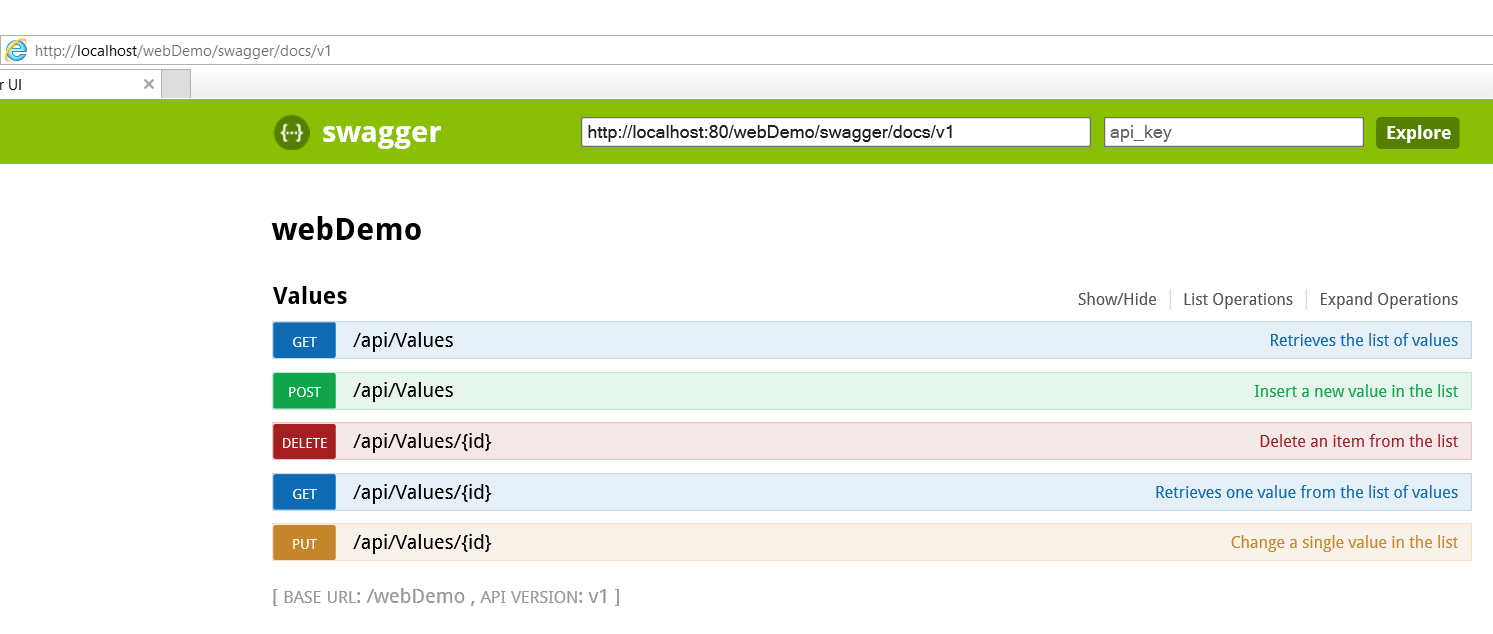
- Click each operation to see the documentation. You may notice that Swagger is using the XML documentation description for each operation.
- Type the following URL in the browser address bar: http://localhost/webDemo/Swagger/docs/v1 . This time we are looking for the JSON document describing the web API, the core result of SwashBuckle
- In the question that will appear, click the ‘Save’ button (I’m using Chrome, this can be a bit different with other browsers)
- In the message that will appear, click ‘Open Folder’ button. (I’m using Chrome, this can be a bit different with other browsers)
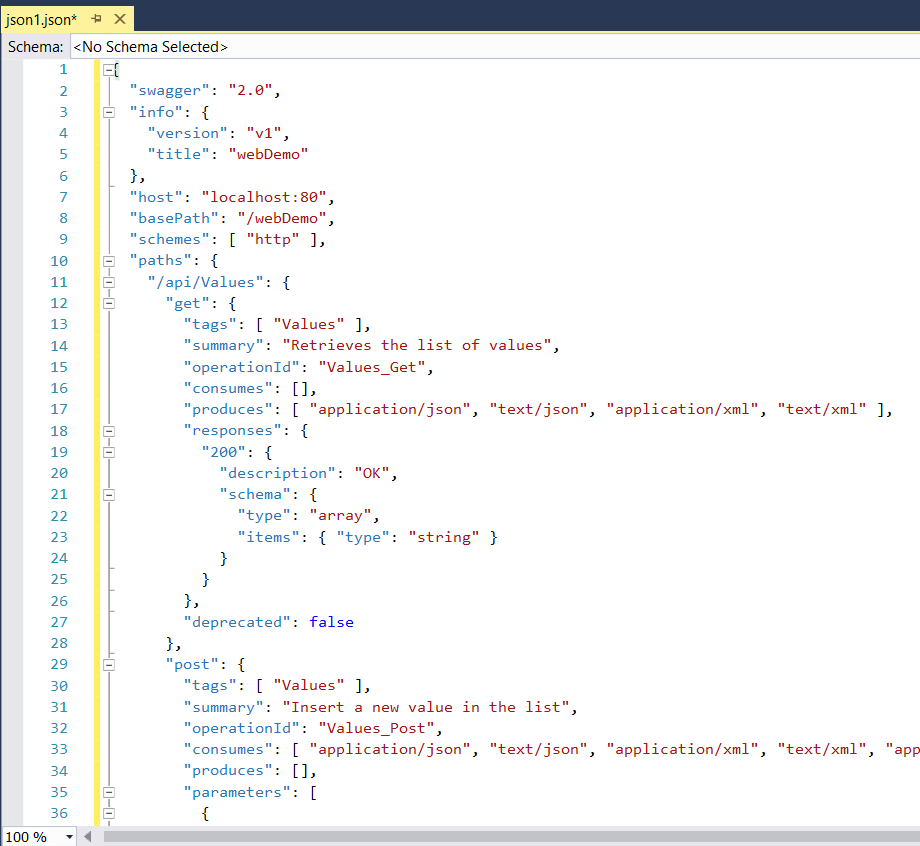
- Open the v1.json file with Notepad. The file won’t be well formatted, the content, however, is a description of the web API, such as you can see in the image below. If you would like so, you can open the file in Visual Studio to see a well-formatted version of the file.
- Stop the execution in Visual Studio
Creating the Client Project
Now it’s time to create a client to consume our web API and illustrate how this consumption will be a lot easier.
- Add a new Windows Desktop project to the solution
- In Visual Studio, click ‘File’ -> ‘Add’ -> ‘New Project’ in the menu
- In the ‘New Project’ dialog box, inside the left side tree view, select ‘Installed’-> ‘Templates’ -> ‘Visual C#’ -> ‘Windows Classic Desktop’ tree items.
- In the ‘New Project’ dialog box, in the right side, select ‘Windows Forms App (.NET Framework)’
- In the ‘Name’ textbox, type ‘winClient’ and click the ‘Ok’ button
- Add a reference to the web API and create the proxy
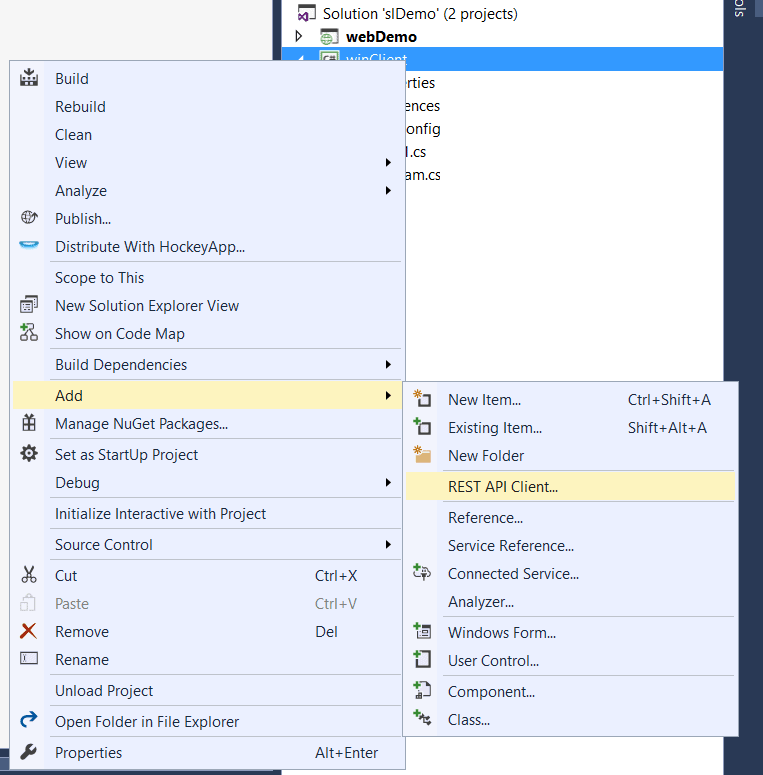
- In the ‘Solution Explorer’ window, right-click the ‘winClient’ project, click ‘Add’ -> ‘REST API Client’ menu item.
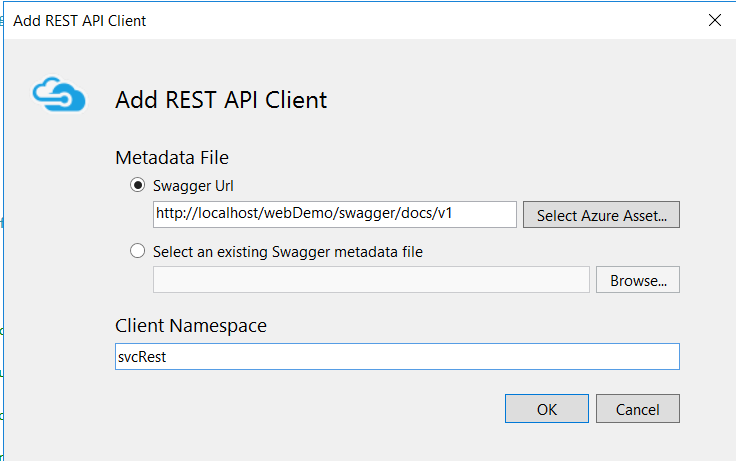
- In the ‘Add REST API Client’ window, ‘Swagger Url’ textbox, type http://localhost/webDemo/Swagger/docs/v1 .
- In the ‘Client Namespace’ textbox, type ‘SvcRest’ and click the ‘Ok’ button.
It seems that nothing happened. Inside ‘Web Publish Activity’ window you will be able to see what happened and an error message: ‘Found operation object with duplicate OperationId ‘Values_Get’. OperationId must be unique among all operations described in the API’.
The client tool doesn’t support a REST API with operation overload, and our demo API has two GET methods. We need to resolve this problem before we proceed.
- In the ‘Solution Explorer’ window, right-click the ‘winClient’ project, click ‘Add’ -> ‘REST API Client’ menu item.
Support for operation overload
This lack of support for operation overload is a big flaw, since even the demo web API application, as you may be noticing, uses operation overloads, it has two GET actions, with and without a parameter.
There are two possible solutions:
- Change the actions name to avoid an overload
- Implement an operation filter that will intercept the JSON file creation and avoid the overload inside the JSON file.
Let’s implement an operation filter in a step-by-step walkthrough:
- Add a new Class Library to the solution
- In the ‘Solution Explorer’ window, right-click the solution, click ‘Add’->‘New Project’ context menu item
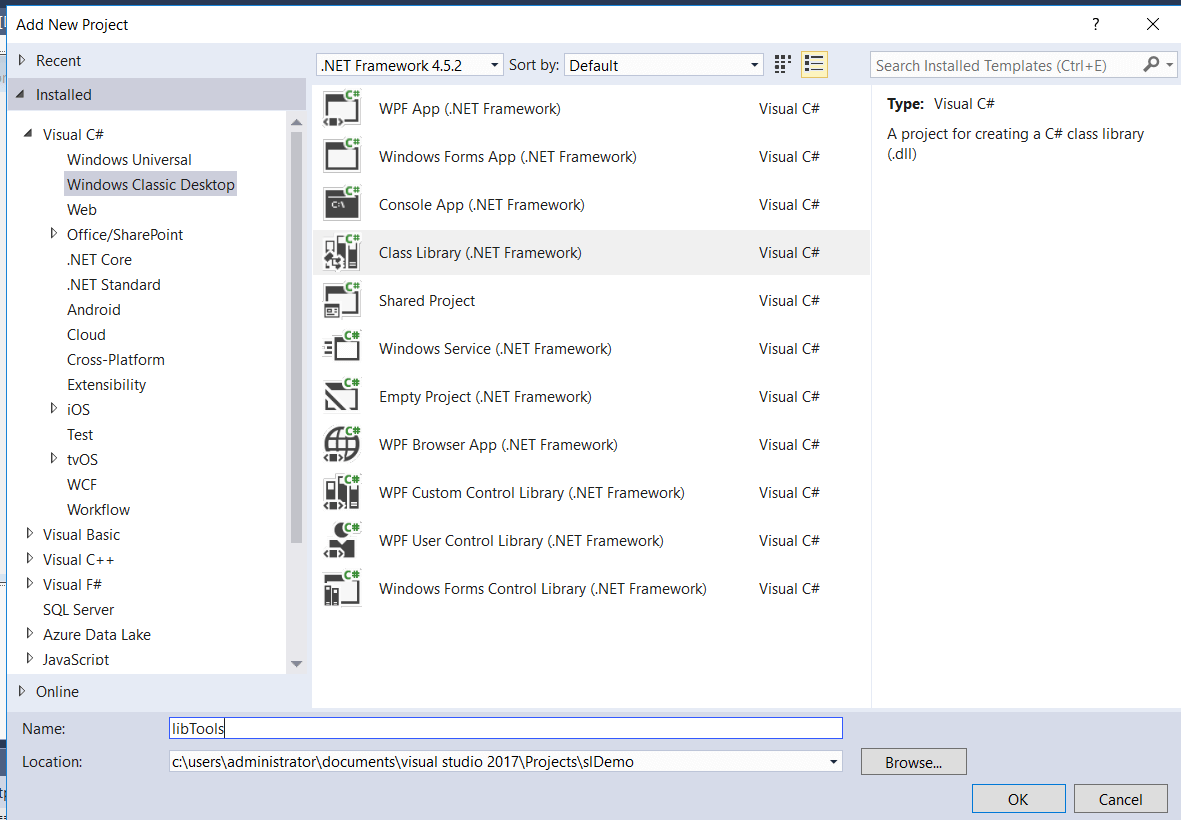
- In the ‘New Project’ dialog box, inside the left side tree view, select ‘Installed’->‘Templates’->‘Visual C#’ ->‘Windows Classic Desktop’ tree items.
- In the ‘New Project’ dialog box, in the right side, select ‘Class Library (.NET Framework)’
- In the ‘Name’ textbox, type ‘libTools’ and click the ‘Ok’ button
- In the ‘Solution Explorer’ window, right-click ‘Class1.cs’ file, below ‘libTools’ project, and click ‘Delete’ menu item.
- Install the package ‘SwashBuckle.Core.Net45’ in the new Class Library project. I’m installing only the core of SwashBuckle, not all the libraries.
- In the ‘Solution Explorer’ window, right-click the ‘libTools’ project and click ‘Manage nuget packet’ menu item.
- In the ‘Nuget Package Manager’ window, select ‘Browse’
- In the textbox inside ‘Nuget Package Manager’ window, type ‘SwashBuckle’.
- In the left side of ‘Nuget Package Manager’ window, select ‘SwashBuckle.Core.Net45’ package
- In the right side of ‘Nuget Package Manager’ window, click ‘Install’ button.
- In the ‘Review Changes’ window, click the ‘Ok’ button.
- In the ‘License Acceptance’ window, click ‘I Accept’ button.
- Implement the operation filter
- In the ‘Solution Explorer’ window, right-click ‘libTools’ project, click ‘Add’-> ‘Class…’ context menu item
- In the ‘Add New Item’ window, type ‘MultipleOperationsWithSameVerbFilter.cs’ in the ‘Name’ textbox.
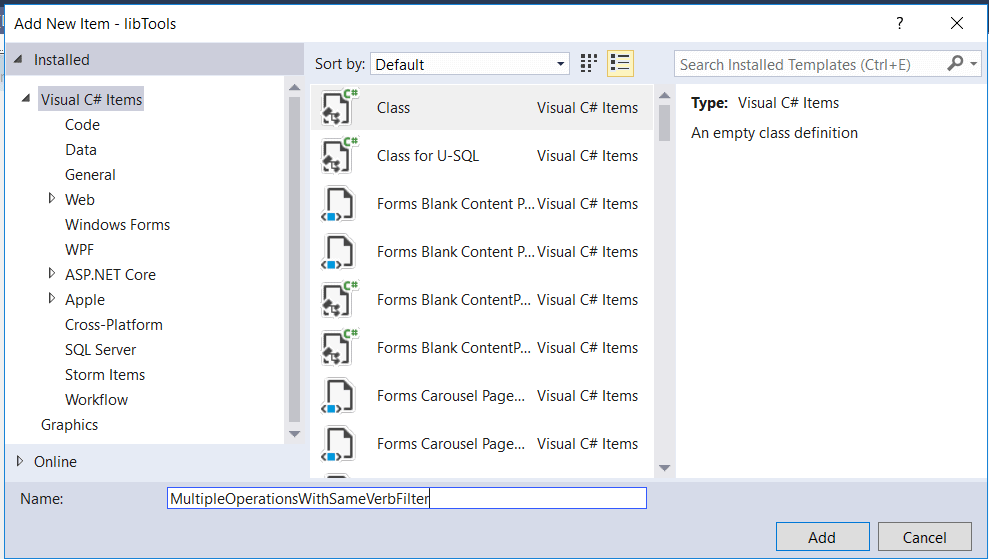
- Copy the code below and paste inside the new file, replacing the empty class:
12345678910111213141516171819using Swashbuckle.Swagger;using System.Web.Http.Description;public class MultipleOperationsWithSameVerbFilter : IOperationFilter{public void Apply(Operation operation,SchemaRegistry schemaRegistry,ApiDescription apiDescription){if (operation.parameters != null){operation.operationId += "By";foreach (var parm in operation.parameters){operation.operationId += string.Format("{0}",parm.name);}}}
- In the ‘webDemo’ project, add a reference to the ‘libTools’ project
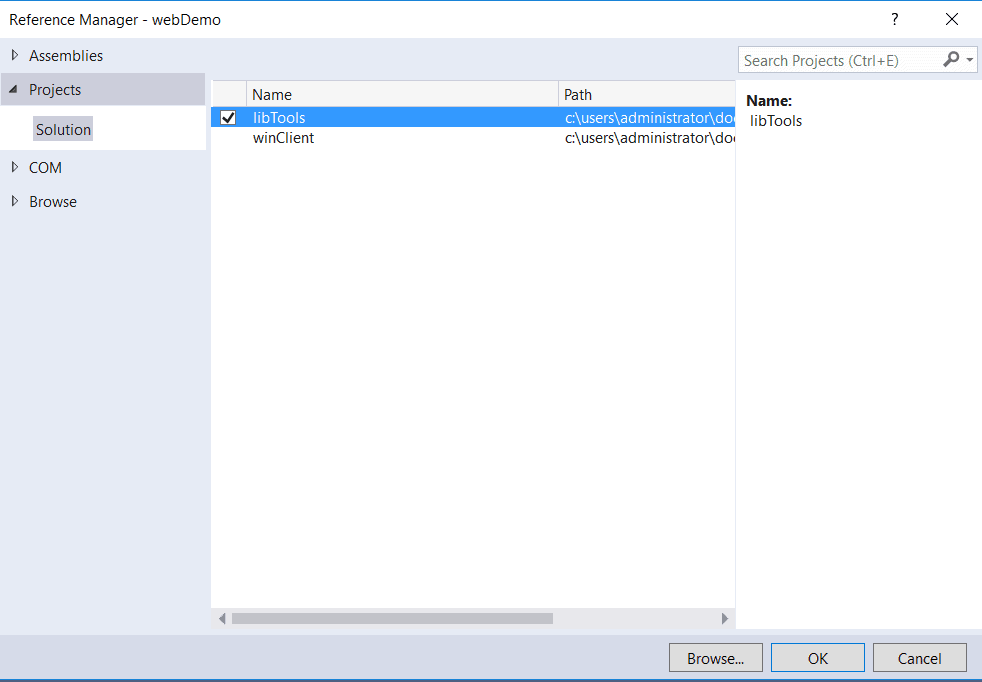
- In ‘Solution Explorer’ window, right-click ‘webDemo’ project, click ‘Add’-> ‘Reference’ context menu item
- Inside ‘Reference Manager’ window, on the left side, select ‘Projects’ -> ‘Solution’ item
- Inside ‘Reference Manager’ window, on the right side, check the box besides ‘libTools’ and click the ‘Ok’ button
- Change Swagger configuration to use the new operation filter
- In the ‘Solution Explorer’ window, inside ‘webDemo’ project, open the ‘App_Start’ folder and double click ‘SwaggerConfig.cs’ file.
- At the top of ‘SwaggerConfig.cs’ file, add the following line:
1using libTools;
- Inside the ‘Register’ method, inside the following block:
123GlobalConfiguration.Configuration.EnableSwagger(c =>{
Add the following line of code:
1c.OperationFilter<MultipleOperationsWithSameVerbFilter>();
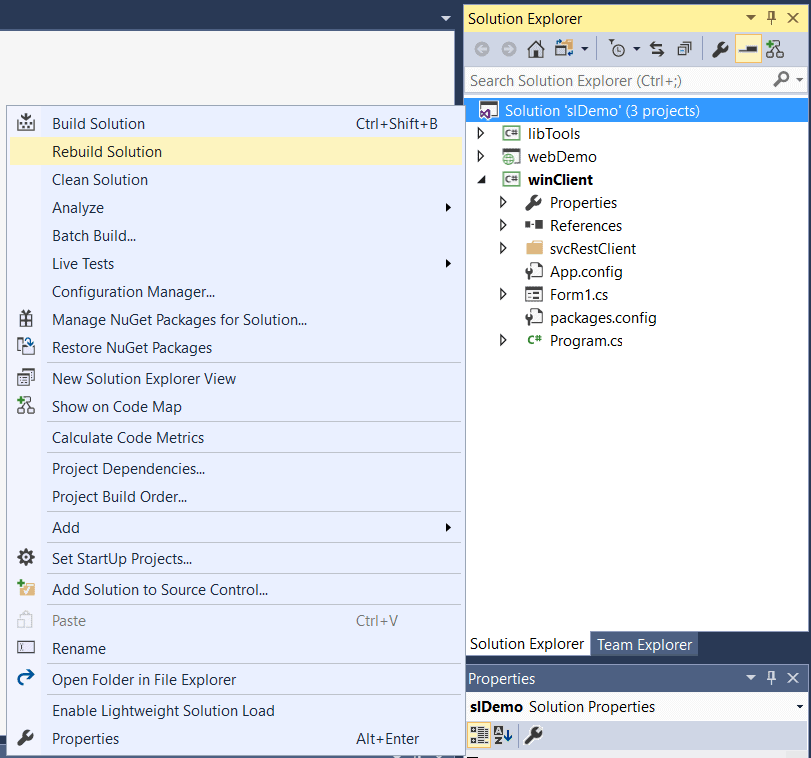
- In the ‘Solution Explorer’ window, right-click the solution and click ‘Rebuild Solution’ menu item
- Repeat the step 2 of the client proxy creation, this time it will work.
Using the proxy in the Client Application
Now the web API proxy is built inside the client project, it’s time to use it to access the web API. However, the proxy needs an additional class to control authentication. Another flaw in this feature is the fact it doesn’t deal well with anonymous authentication, but we can overcome this problem with a quick fix.
- Install the ‘Microsoft.Rest.ClientRuntime’ package in the ‘libTools’ project. This package is needed for our fix.
- In the ‘Solution Explorer’ window, right-click the ‘libTools’ project and click ‘Manage nuget packet’ menu item.
- In the ‘Nuget Package Manager’ window, select ‘Browse’
- In the textbox inside ‘Nuget Package Manager’ window, type ‘Microsoft.Rest.ClientRuntime’.
- In the left side of ‘Nuget Package Manager’ window, select ‘Microsoft.Rest.ClientRuntime’ package
- In the right side of ‘Nuget Package Manager’ window, click ‘Install’ button.
- In the ‘Review Changes’ window, click the ‘Ok’ button.
- In the ‘License Acceptance’ window, click ‘I Accept’ button.
- Implement the AnonymousCredential class. It will sove the anonymous authentication problem.
- In the ‘Solution Explorer’ window, right-click ‘libTools’ project and click ‘Add’-> ‘Class’ context menu item.
- In the ‘Add new item’ dialog box, type ‘AnonymousCredential.cs’ in ‘Name’ textbox and click the ‘Ok’ button
- In the top of the new file, add the following statement:
1using Microsoft.Rest;
- Use the following code for this class. Yes, nothing is needed but the inheritance.
123public class AnonymousCredential : ServiceClientCredentials{}
- 3) Build the client Windows form to access the API
- In the ‘Solution Explorer’ window, below ‘winClient’ project, double-click ‘Form1.cs’ file.
- From the ‘Toolbox’ window, add three buttons inside the form.
- Change the button properties according to the following:
Name: cmdAllValues
Text: All ValuesName: cmdValue
Text: Single ValueName: cmdUpdate
Text: Update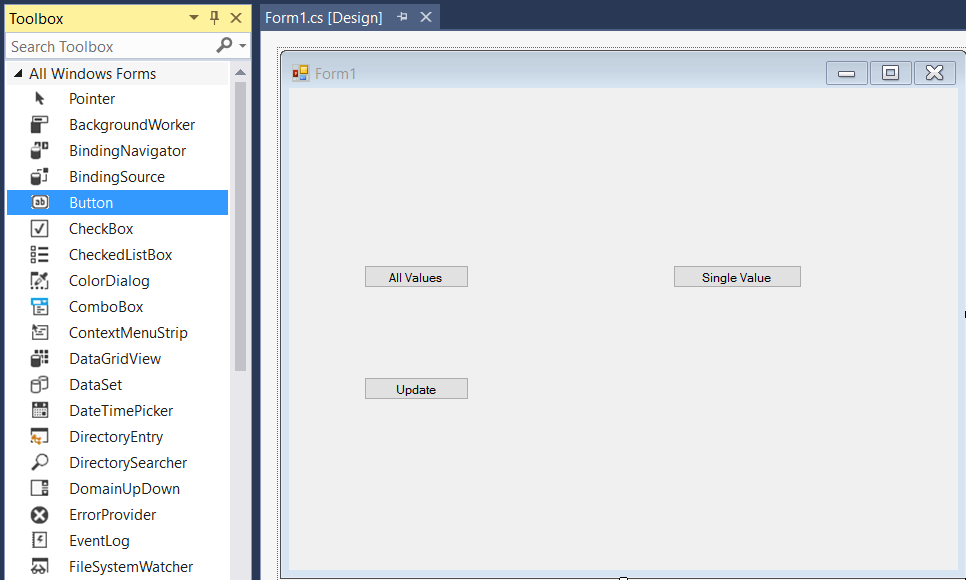
- In the Windows project, add a reference to the ‘libTools’ project
- In the ‘Solution Explorer’ window, right-click ‘winClient’ project, click ‘Add’-> ‘Reference’ context menu item
- Inside ‘Reference Manager’ window, on the left side, select ‘Projects’ -> ‘Solution’ item
- Inside ‘Reference Manager’ window, on the right side, check the box besides ‘libTools’ and click the ‘Ok’ button
- Add the code for the ‘All Values’ button
- Select the ‘Form1.cs (design)’ page
- Double click the ‘All Values’ button, this will create a click event for the button.
- In the top of the ‘Form1.cs’ file (already opened by the previous task), add the following statements:
12using libTools;using svcRest;
- Change the ‘cmdAllValues_Click’ for the following code:
123456789101112private async void cmdAllValues_Click(object sender, EventArgs e){SvcRestClient client =new SvcRestClient(new Uri("http://localhost/webDemo"),new AnonymousCredential());var result = client.Values.Get();foreach(var x in result){MessageBox.Show(x);}}
It’s important to notice the following details:
- There are both, synchronous and asynchronous methods in the proxy. The code is illustrating the synchronous call.
- Most methods are extension methods: due to that, we need the ‘Using svcRest’ statement.
- You don’t need to deal with the protocol details to call the API. That’s the advantage of the proxy. We have this advantage for webservices ever since .NET was created; now we can work in this way also with web APIs.
- Add the code for the ‘Single Value’ button
- Select the ‘Form1.cs (design)’ page
- Double click the ‘Single Value’ button, this will create a click event for the button.
- Change the ‘cmdValue_Click’ for the following code:
12345678private async void cmdValue_Click(object sender, EventArgs e){SvcRestClient client =new SvcRestClient(new Uri("http://localhost/webDemo"),new AnonymousCredential());var result = client.Values.GetByid(1);MessageBox.Show(result);}
- Add the code for the ‘Update’ button
- Select the ‘Form1.cs (design)’ page
- Double click the ‘Update’ button, this will create a click event for the button.
- Change the ‘cmdUpdate_Click’ for the following code:
123456789private async void cmdUpdate_Click(object sender, EventArgs e){SvcRestClient client =new SvcRestClient(new Uri("http://localhost/webDemo"),new AnonymousCredential());client.Values.PutByidvalue(1, "New Value");MessageBox.Show("Change Completed!");}
- Execute and test the application
- In the ‘Solution Explorer’ window, right-click the ‘winClient’ project and click ‘Set as Startup Project’
- Click ‘Start’ button in the toolbox to run the application
- Click the ‘All Values’ button, the ‘Single Value’ button, ‘Update’ button and ‘Single Value’ button again, in sequence and click the ‘Ok’ button when needed, to check the result. The API calls will be working well.
Conclusion
These new features are really game-changing, improving the way that we use web APIs. This is just the beginning, because there are much more about these features that are coming.
You may have noticed some flaws; for example, the client only creates a C# proxy: However, it’s very common nowadays to require a Javascript proxy, particularly for the consumption of web APIs in AngularJS applications. It’s important to remember that the core of this technology is the JSON format that describes the web API. Anyone can build a new Visual Studio Add-In that is capable of reading this JSON description and creating a Javascript proxy. We will, for sure, see improvements in a short while.
Swagger deserves more advanced articles than this, to be sure, but for now I will give you some links for further reading:
- How to customize SwashBuckle documentation interface: https://stackoverflow.com/questions/31647635/replace-swashbuckle-ui-completely
- SwashBuckle documentation, including authentication management, hosting management and several other customizations possible: https://github.com/domaindrivendev/Swashbuckle
This document contains proprietary information and is protected by copyright law.
Copyright © 2026 Red Gate Software Limited. All rights reserved


Load comments